The Big One
-
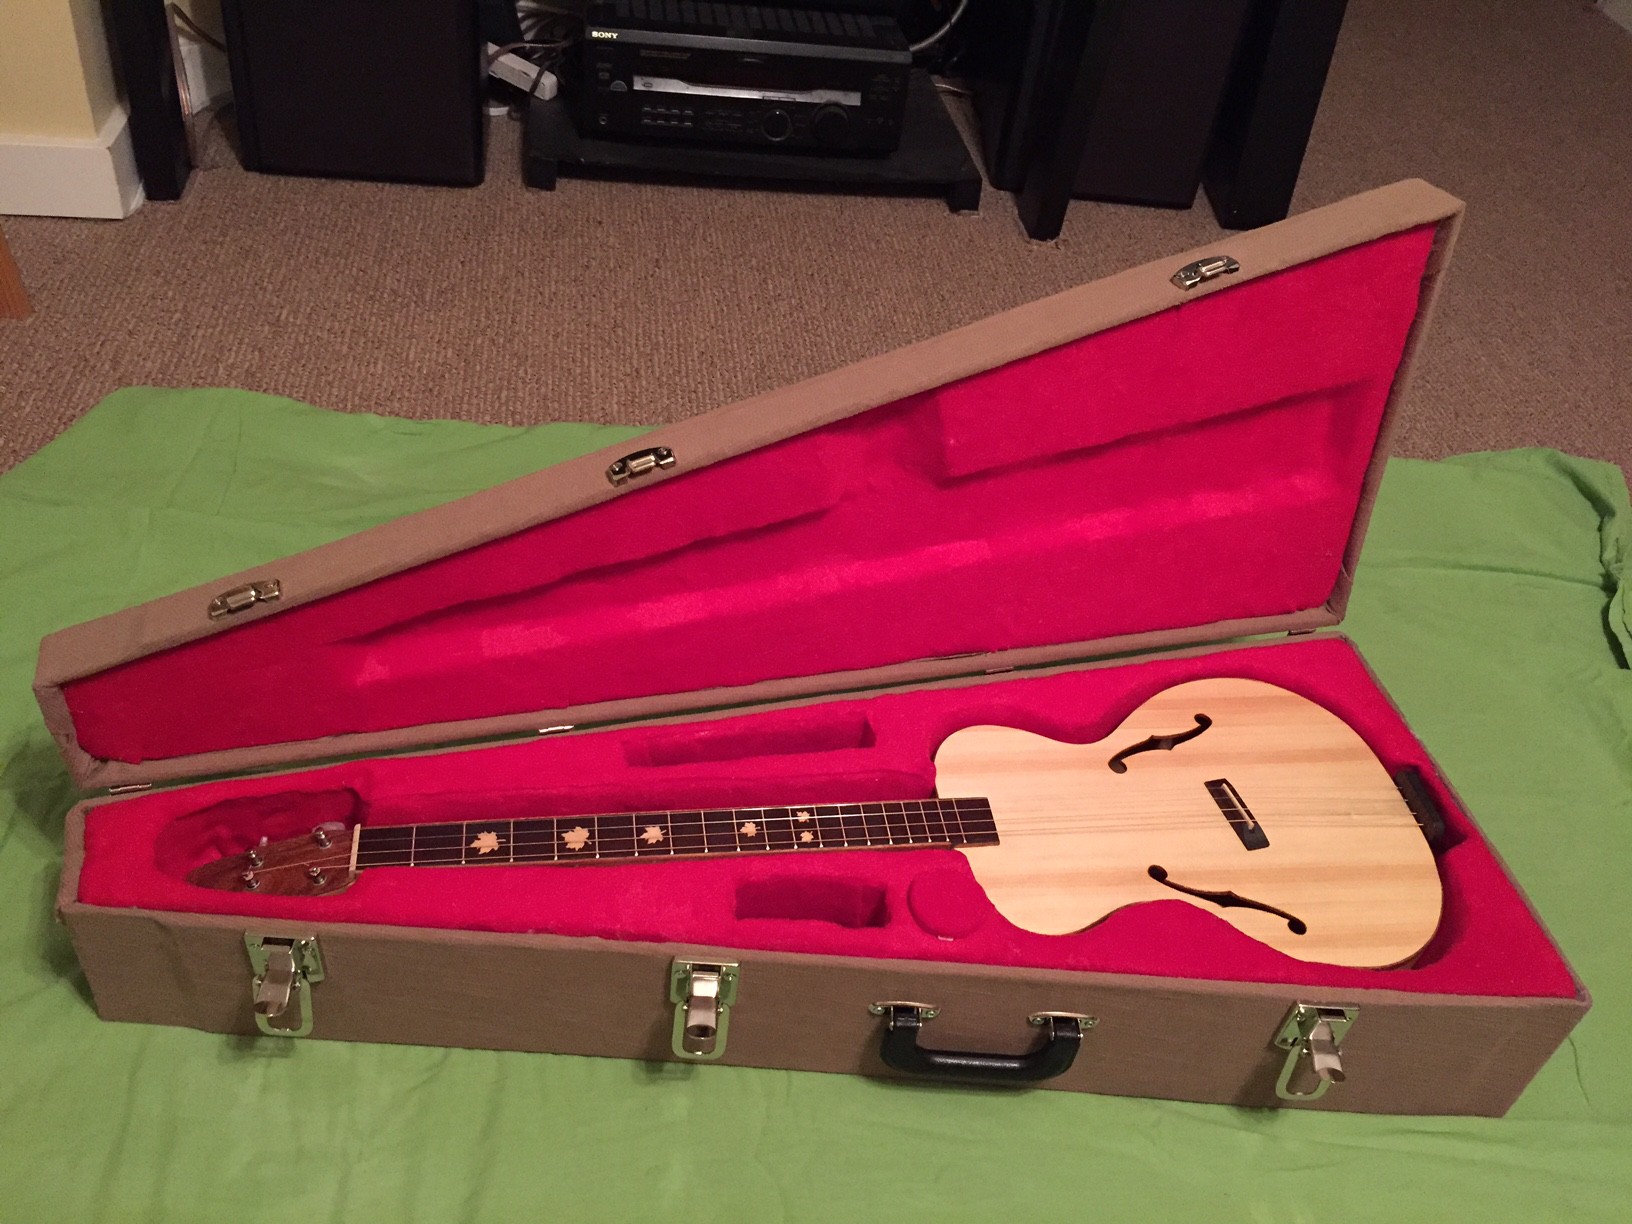
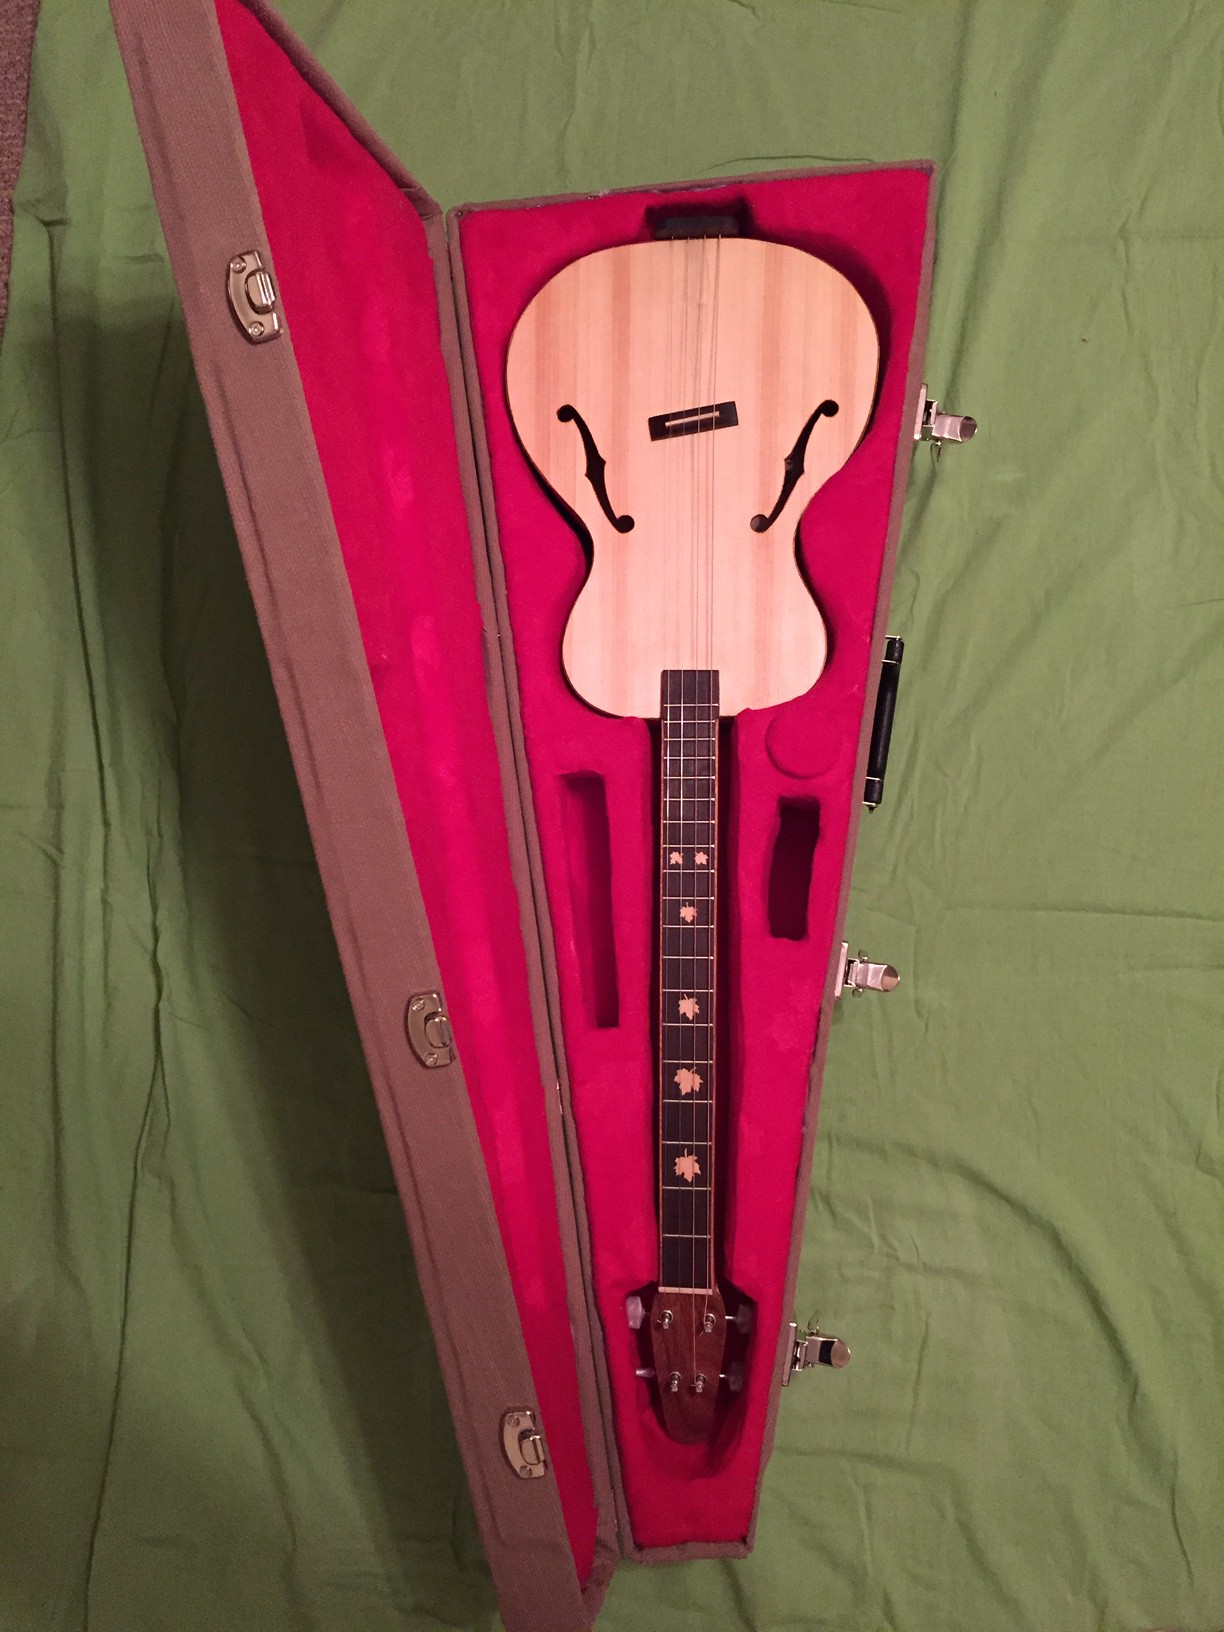
Finished Guitar Case
07/24/2017 at 04:52 • 0 commentsI finished making the case tonight. It didn't turn out quite as well as I had hoped, but it is still OK. The biggest problems I had were getting all the styrofoam layers cut to the same dimensions and getting the hardboard shell in place and fitting.
First, here is the finished product. After that I will walk through the construction process.
![]() ---------- more ----------
---------- more ----------Looking at other cases online, it looks like lots of people make cases for electric guitars, but not many for acoustic. (Or, if they do, at least I couldn't find them). Also, lots of people seem to use plywood for the case; I'm sure that works well from a protection POV, but I didn't want to require a cart to move my guitar. So, instead of building it out of plywood, I used styrofoam with 1/8" hardboard for an outer shell.
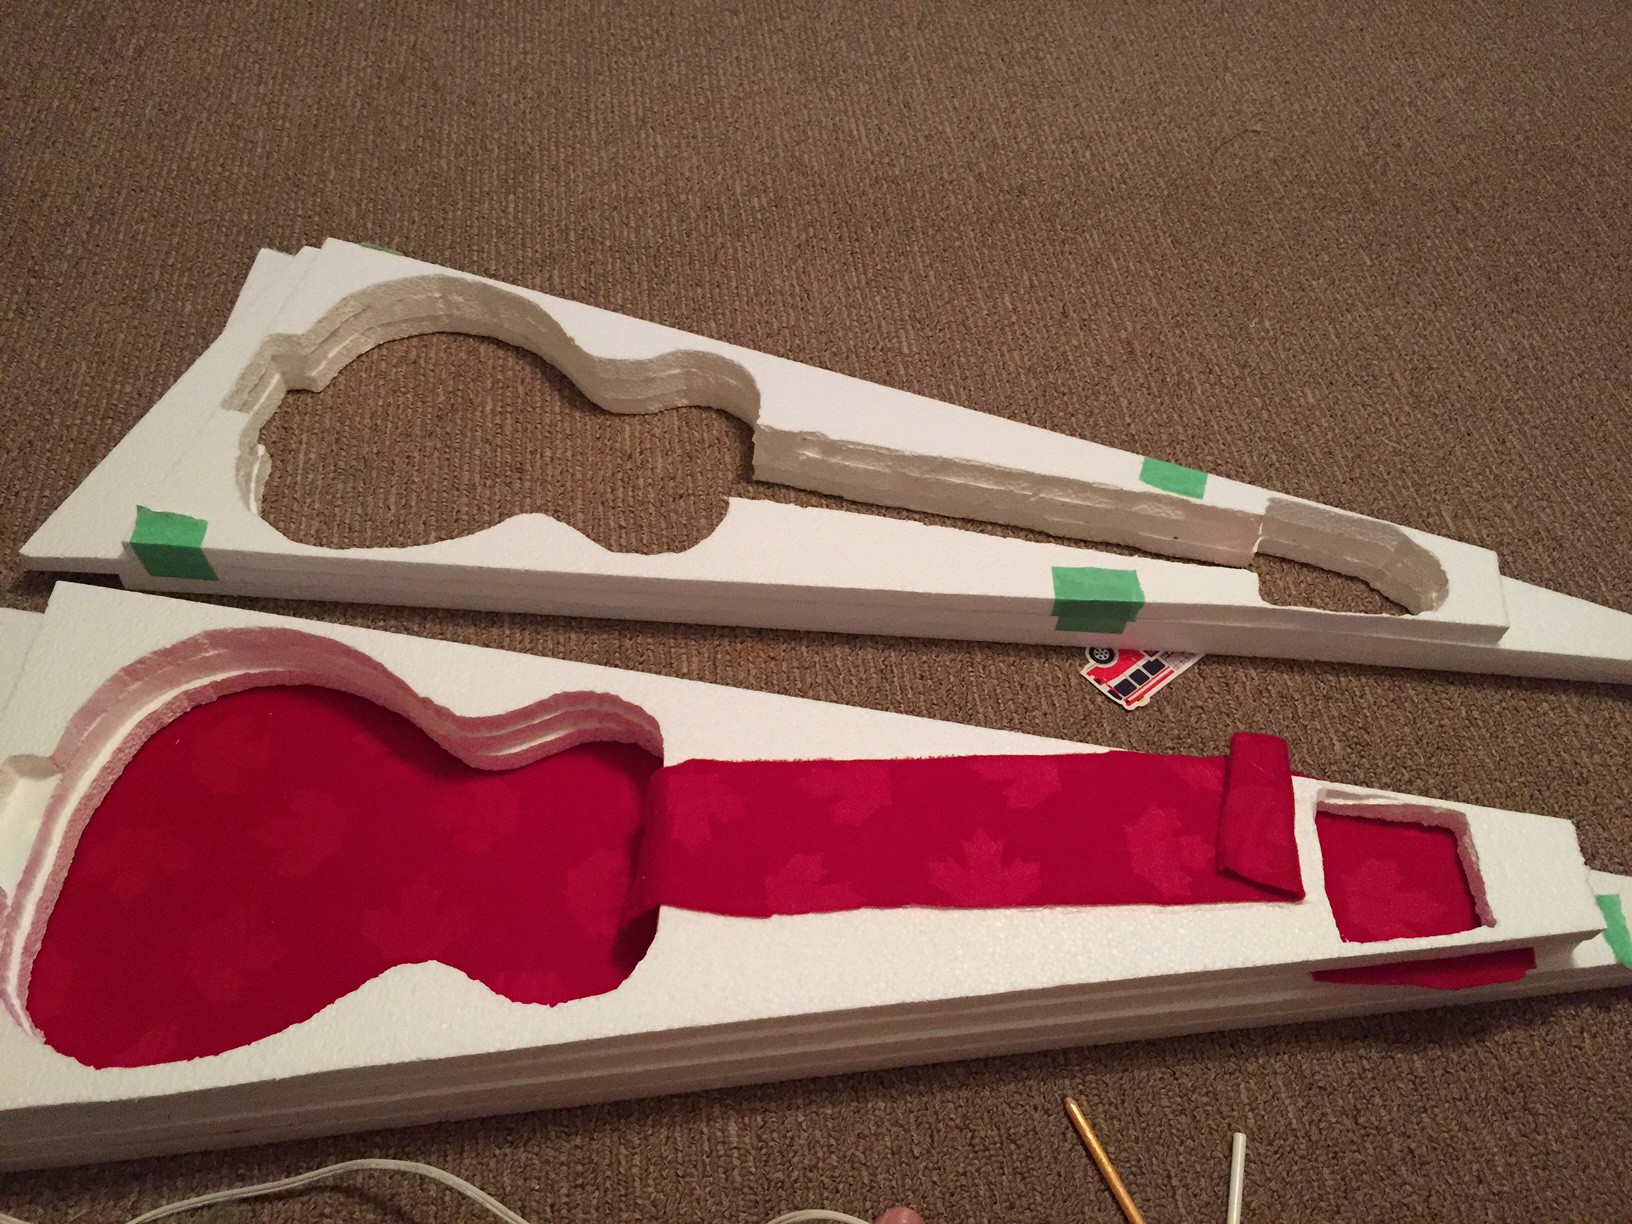
I used some sheets of styrofoam insulation panels, 14.5x48x0.75" in size. These I cut diagonally (as this was large enough to fit my guitar, and would result in much less waste). I then hollowed out the sections as needed, using a blow torch to heat a coat hanger.
![]()
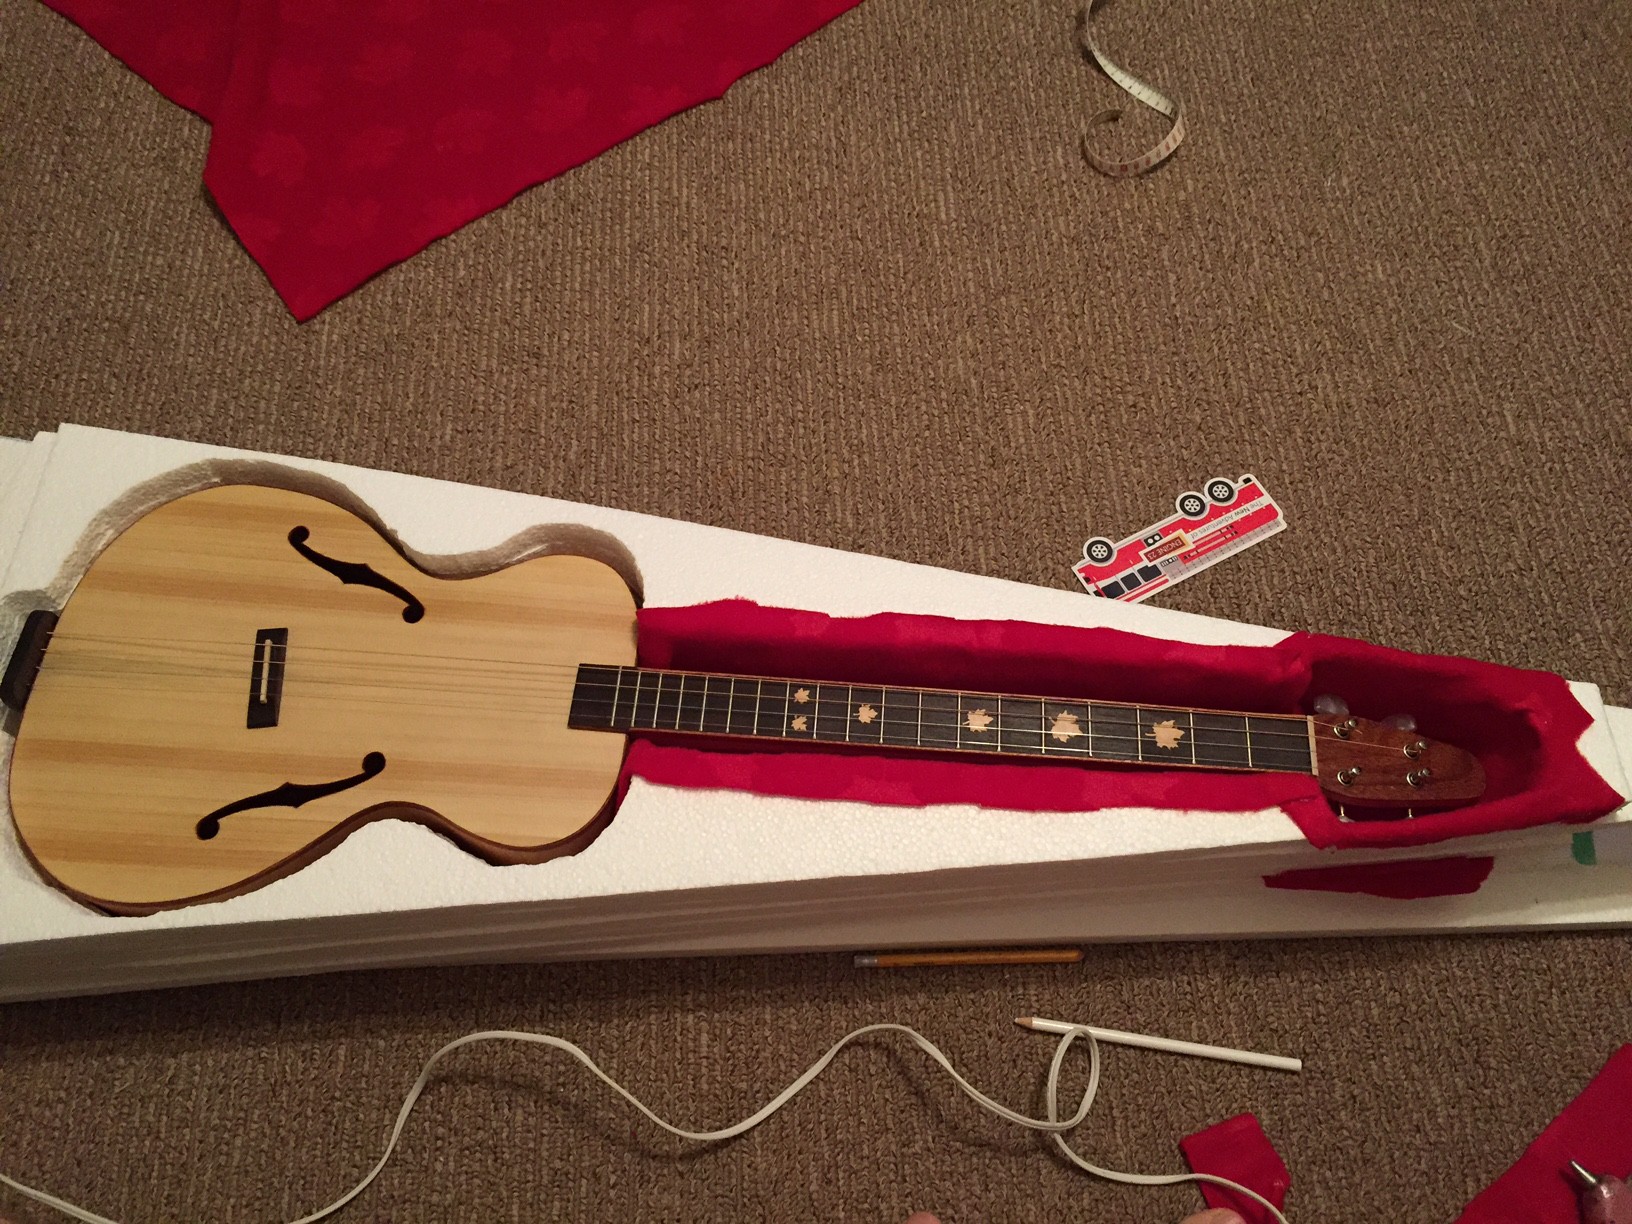
I then glued the layers together one at a time, inserting the inner fabric where it needed to go:
![]()
![]()
![]()
Once the inside foam + cloth was complete and verified to fit the guitar, I cut 1/8" hardboard and glued it on the sides. (I forgot to take pictures of this step).
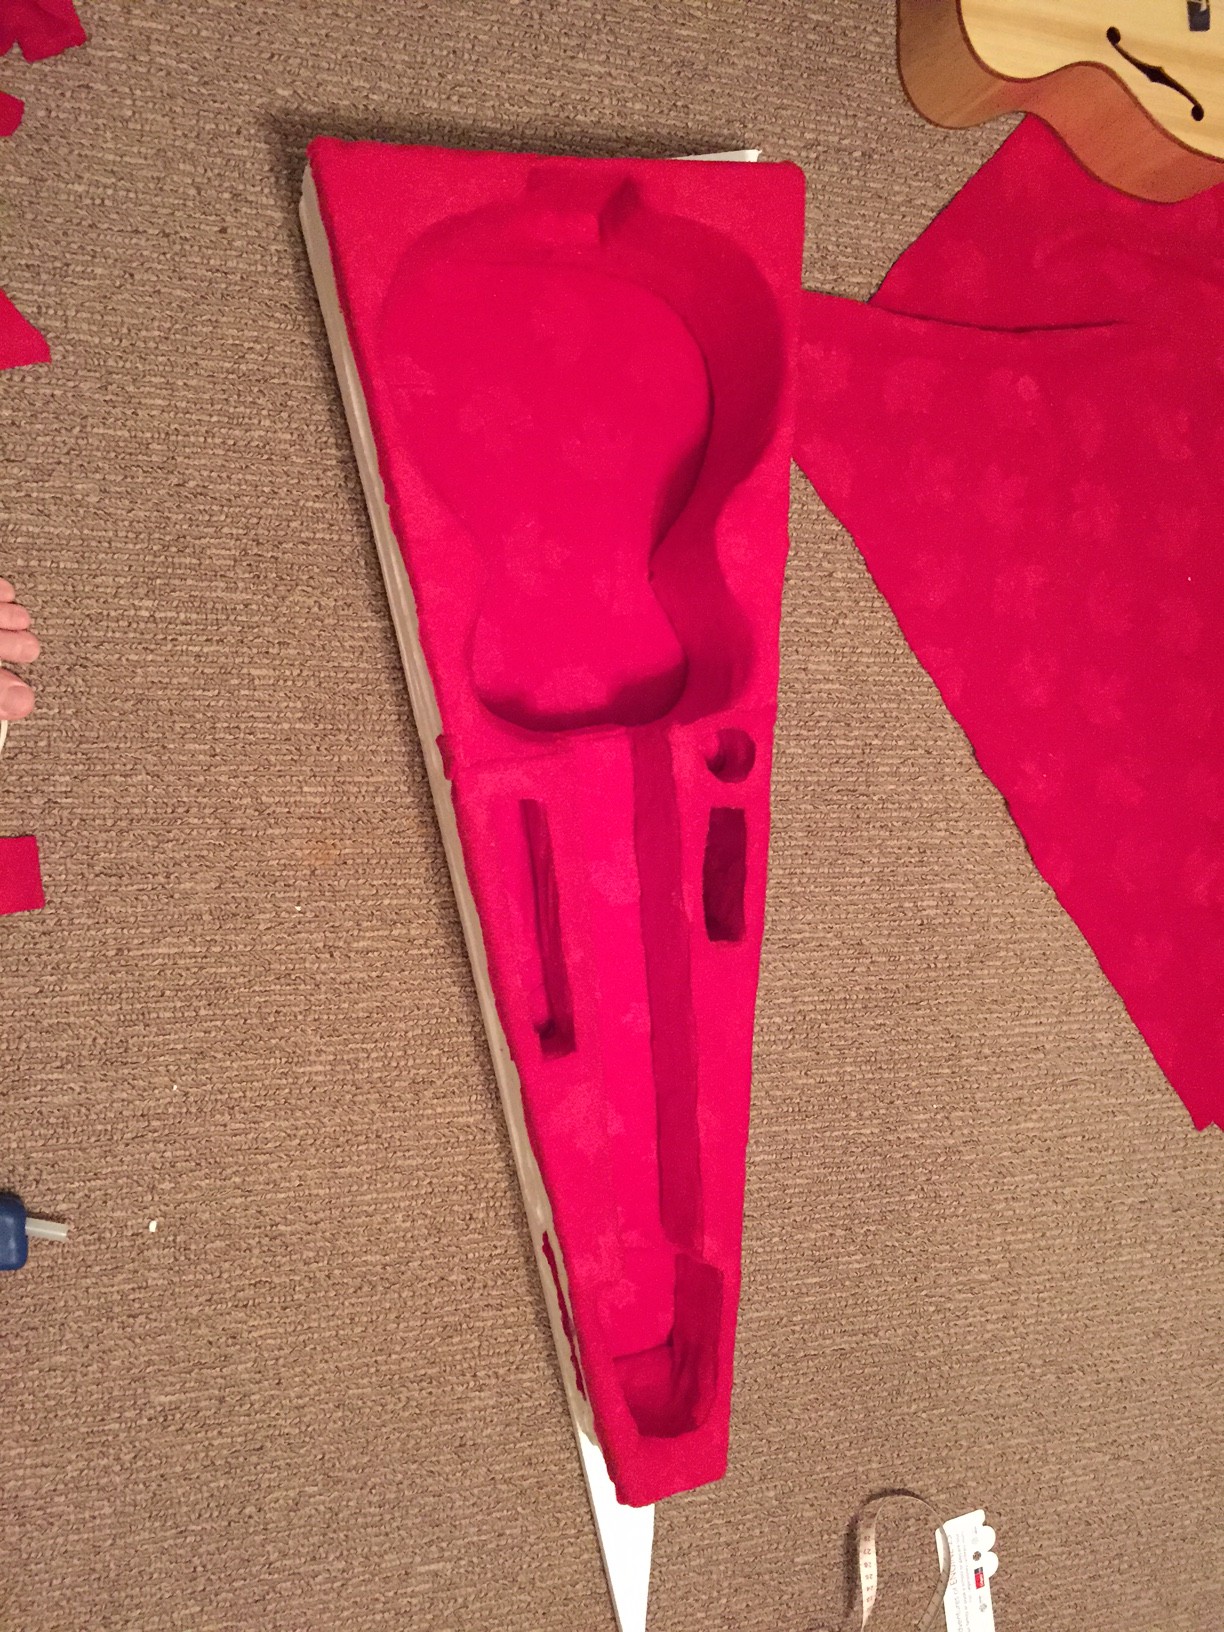
Finally, I used spray adhesive to glue some more fabric on the outside of the case. I tucked the corners into the case (between the hardboard and the styrofoam) for a nice clean look.
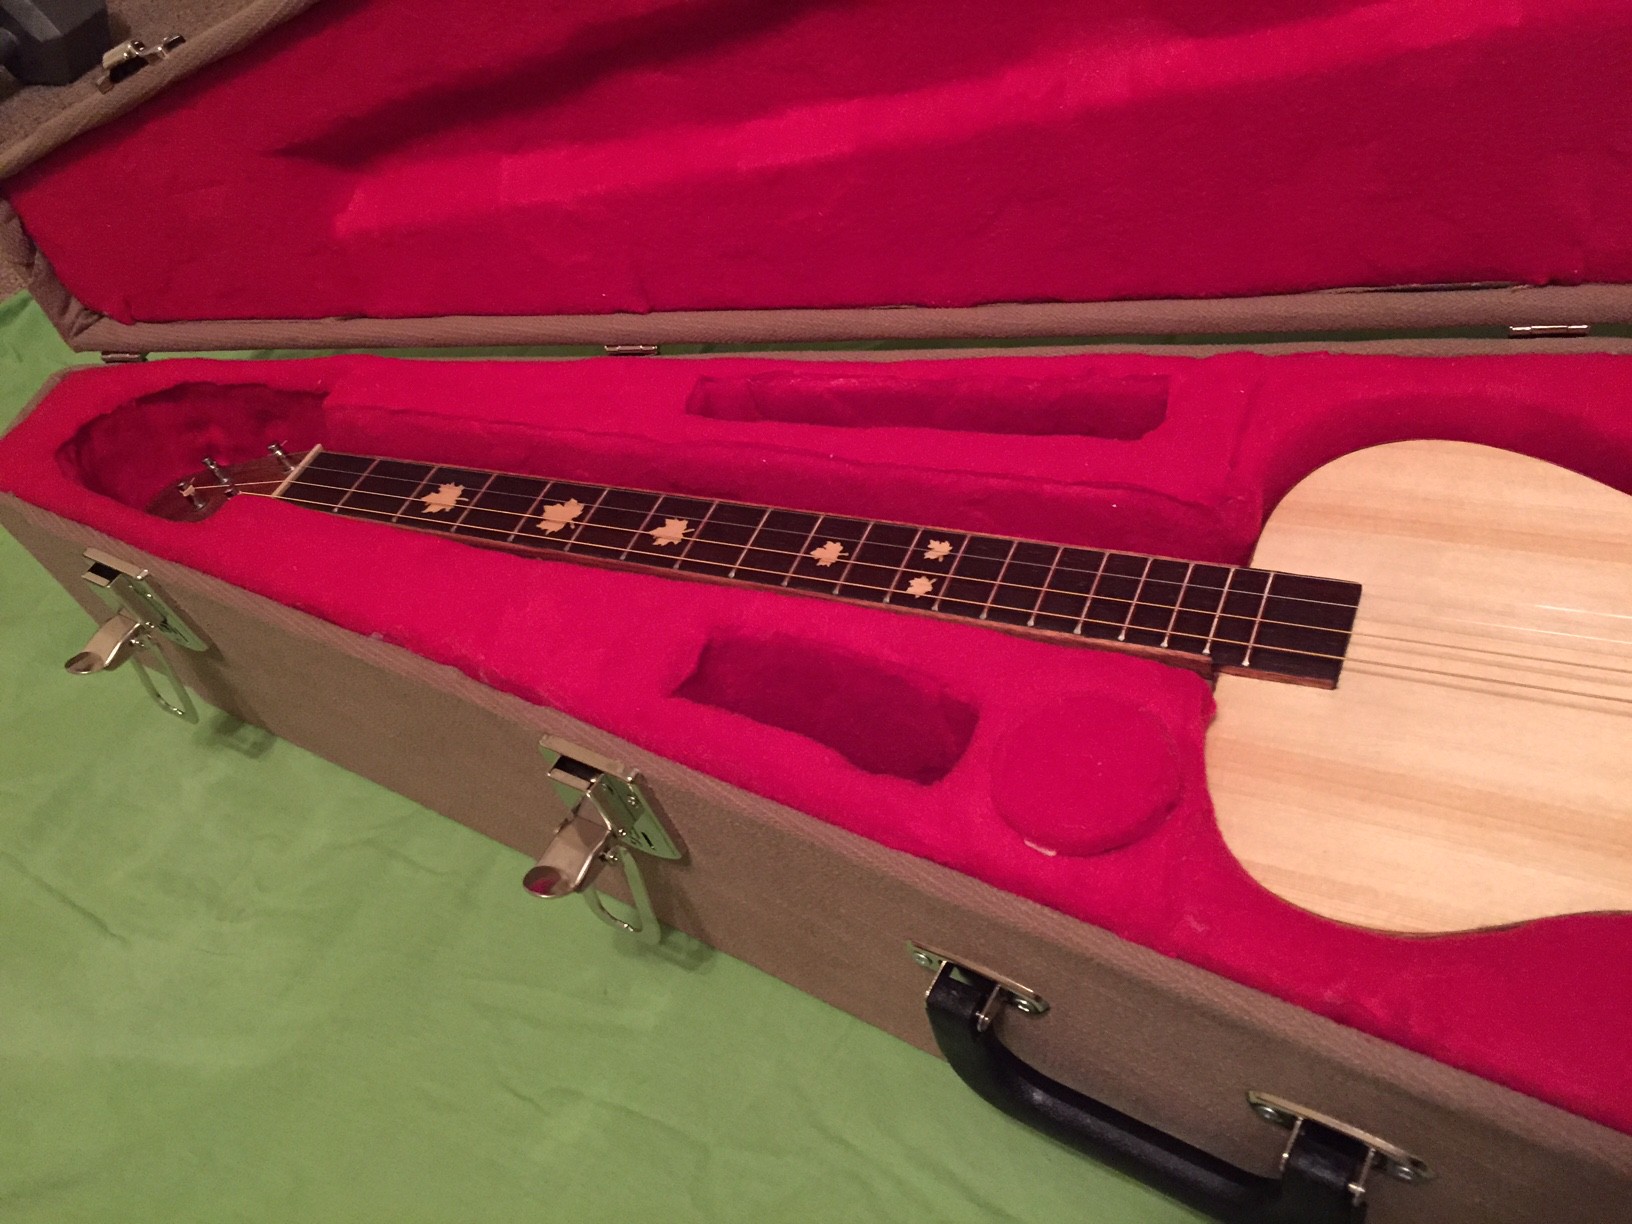
Included in the case are three pockets: one circular one for a humidifier, and two rectangular ones for whatever you want to include (capo, picks, etc)
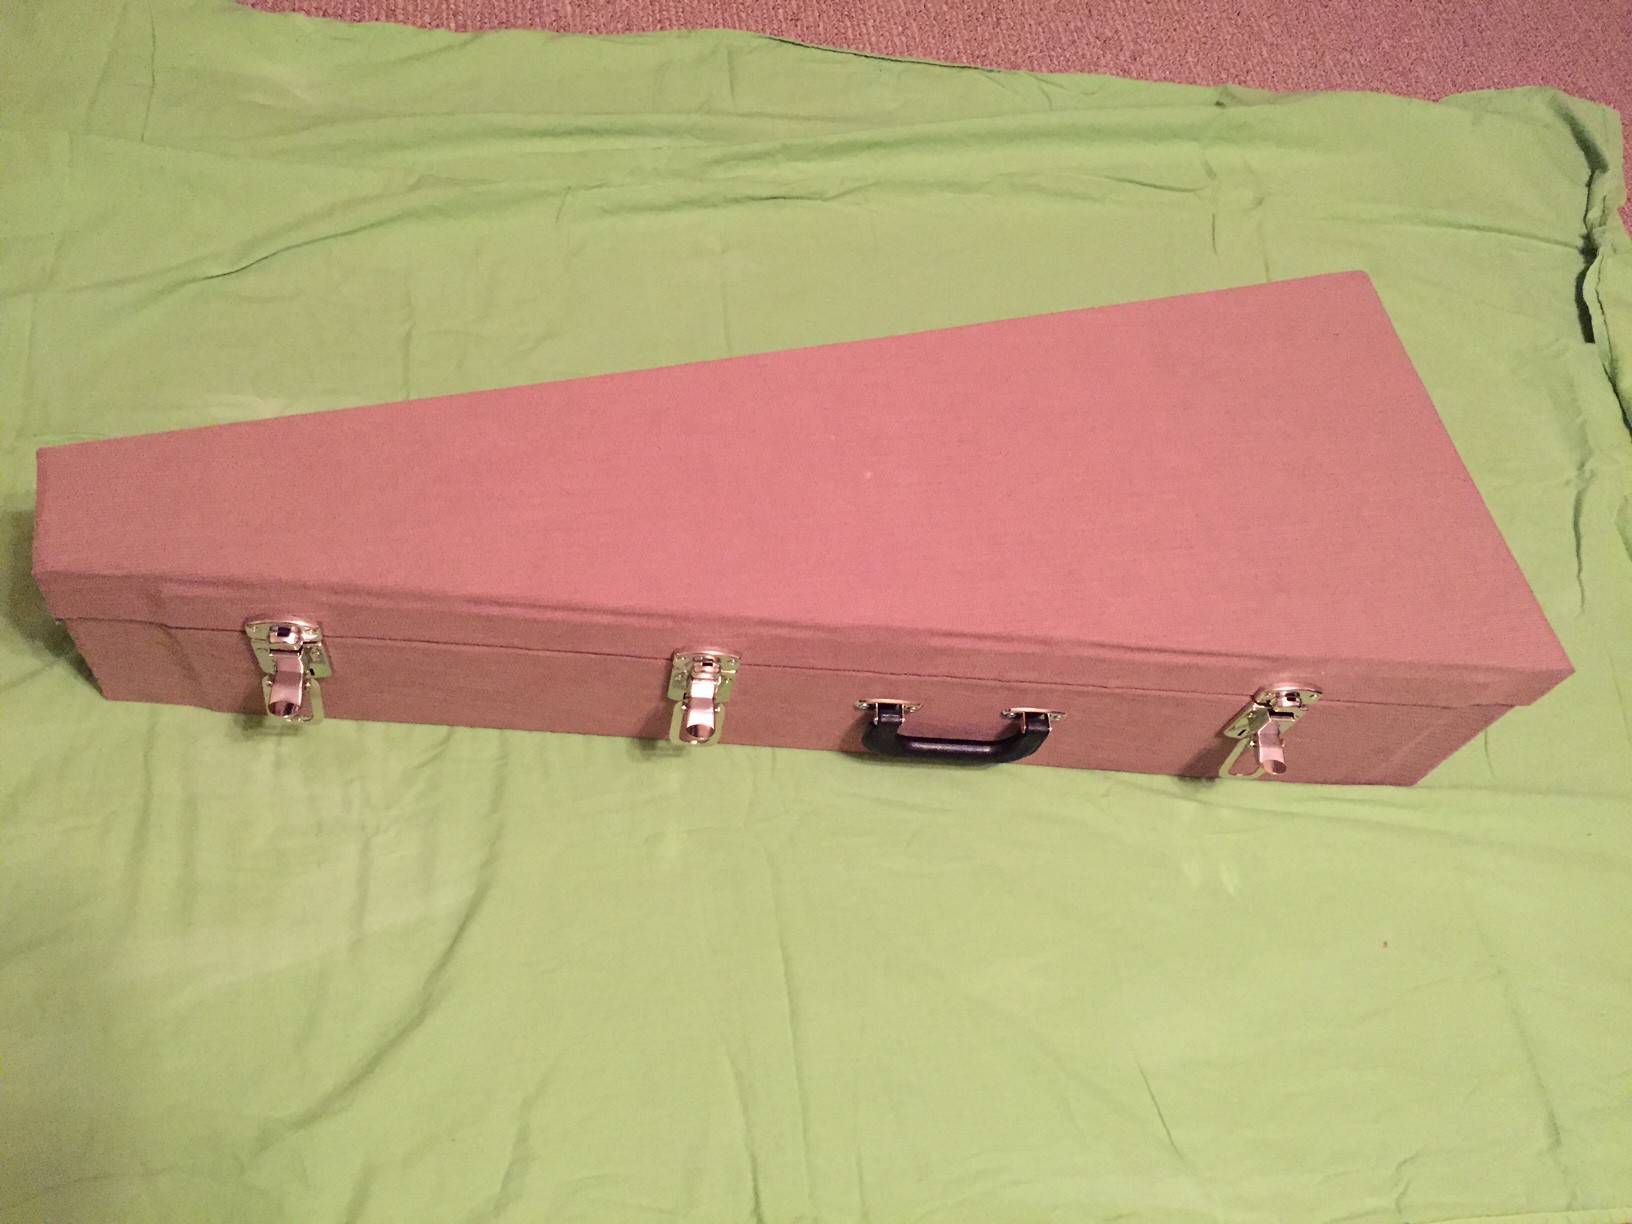
After the outside material was glued on and tucked in, I added hardware - 4 hinges, 3 latches, and a handle. I put the handle at the center of gravity (with the guitar in the case) for easy carrying. The latches and hinges were just added where they looked good. (I had put double thickness hardboard on the places where the hardware would attach, to ensure that it would be strong enough).
The case is the perfect size for the guitar. Looking back, I probably should have made it slightly larger so that it would fit in the case with an attached strap a bit better, but oh well. It *can* fit with a strap, it is just a bit finicky.
Total weight with guitar is just under 15lbs (less than 7kg). It is not going to be as strong as a behemoth made from 1/2" plywood like some of the other ones I have seen online, but as long as you are reasonably careful with it, it should work quite well.
![]()
![]()
![]()
As for the issues with this case, it is hard to see from the pictures, but some of the corners are not quite aligned (due to the problems getting the styrofoam and hardboard in exactly the right places), and there is some hot glue showing on the inside. It is definitely not up to my normal standards, but this is a first time doing something quite like this.
If I were to do it again, I think that I would make the shell first, using 1/4" plywood for the sides and 1/8" hardboard for the top and bottom. Once the shell was made, I would then cut the styrofoam and place it inside. (This is the opposite of what I did here - I started with the foam). Oh well, live and learn.
-
A couple of different tunings
07/22/2017 at 04:07 • 1 commentI am planning on using this guitar in Chicago tuning (DGBE), at least initially, since I already know the chord shapes from the ukulele. I am now playing around with variations on that tuning.
Unfortunately I don't have a bunch of recording gear, so both of these are just recorded with the on-board microphone on the D7000... it's not great, but it seems to have a reasonably clean sound that is fairly close to what it sounds like in person.
First up we have a sample with the basic DGBE tuning:
Next I have the same, but with a low D string (D2 instead of D3). It gives the guitar a bit more body, but I don't think I like it as much... not sure what it is, but it feels a bit 'off' somehow. Perhaps it is due to the large gap between the D and the G string. It also doesn't help that the nut and saddle are not filed wide enough for the larger string, but I don't want to do that until I am ready to commit.
I have also tried (no video, unfortunately), a low G string: so D3, G2, B3, E4. That one felt worse than the low D... it was pretty awkward to have a larger string in the middle. Again, probably just a mental thing on my part, but whatever.
I am currently leaning towards just keeping it in the standard DGBE, at least for now, but if you have any thoughts / comments on it, please let me know!
Cheers
-
Construction Pictures
07/20/2017 at 20:46 • 0 commentsI started out with a design in QCad. I decided on an approximate scale length, shape, and features:
![]() ---------- more ----------
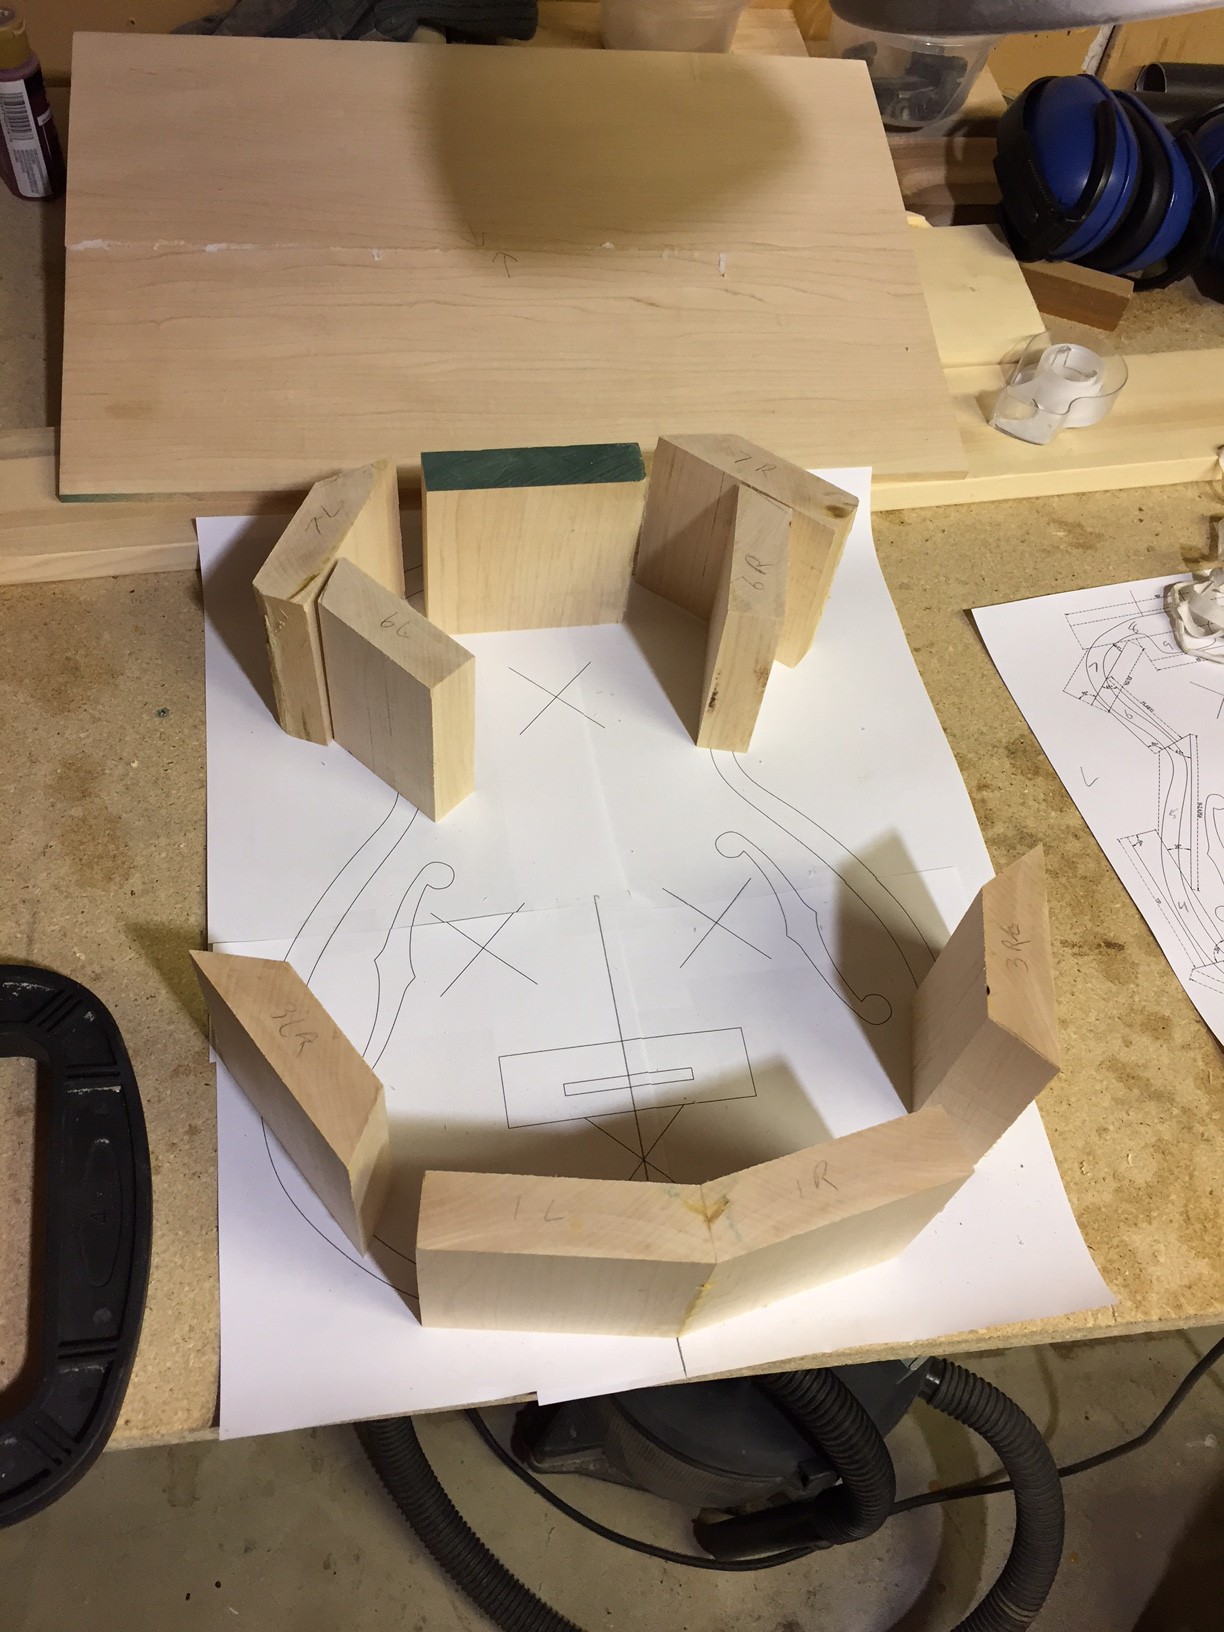
---------- more ----------I then broke up the edge into segments (similar to my drum project)
![]()
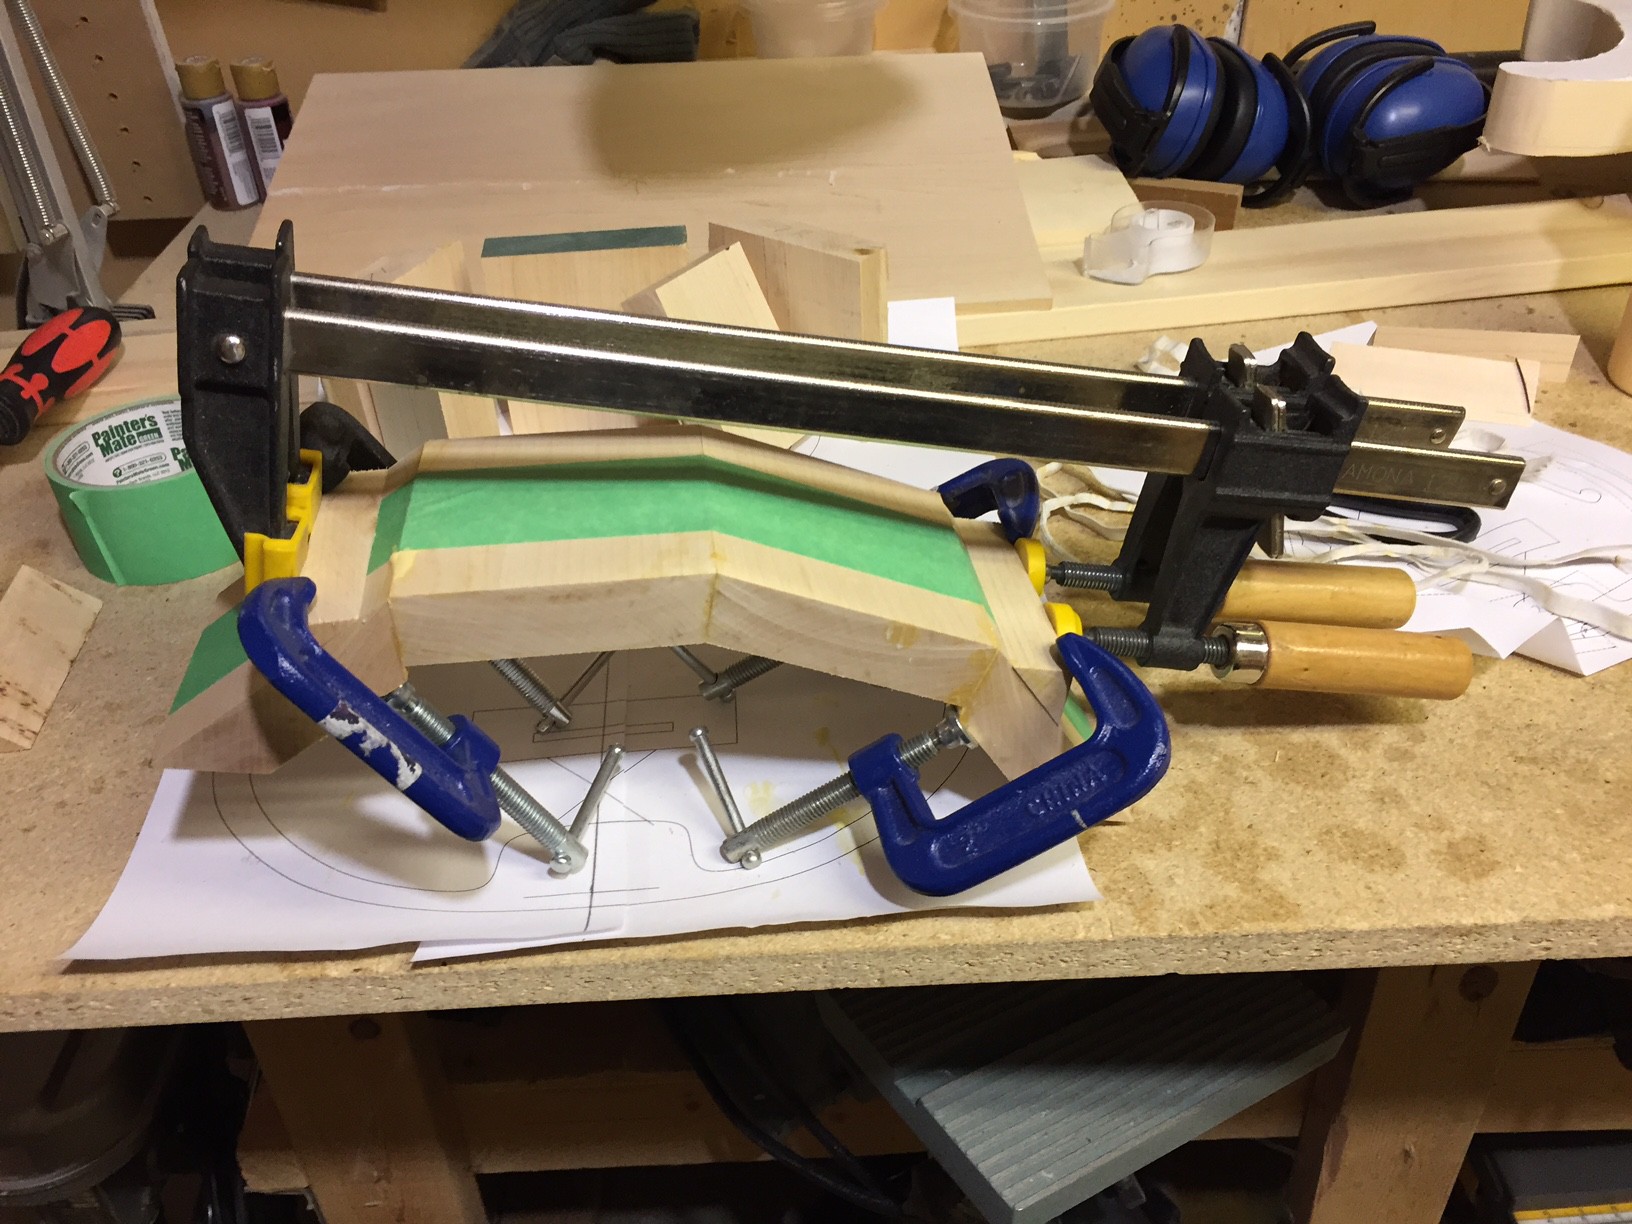
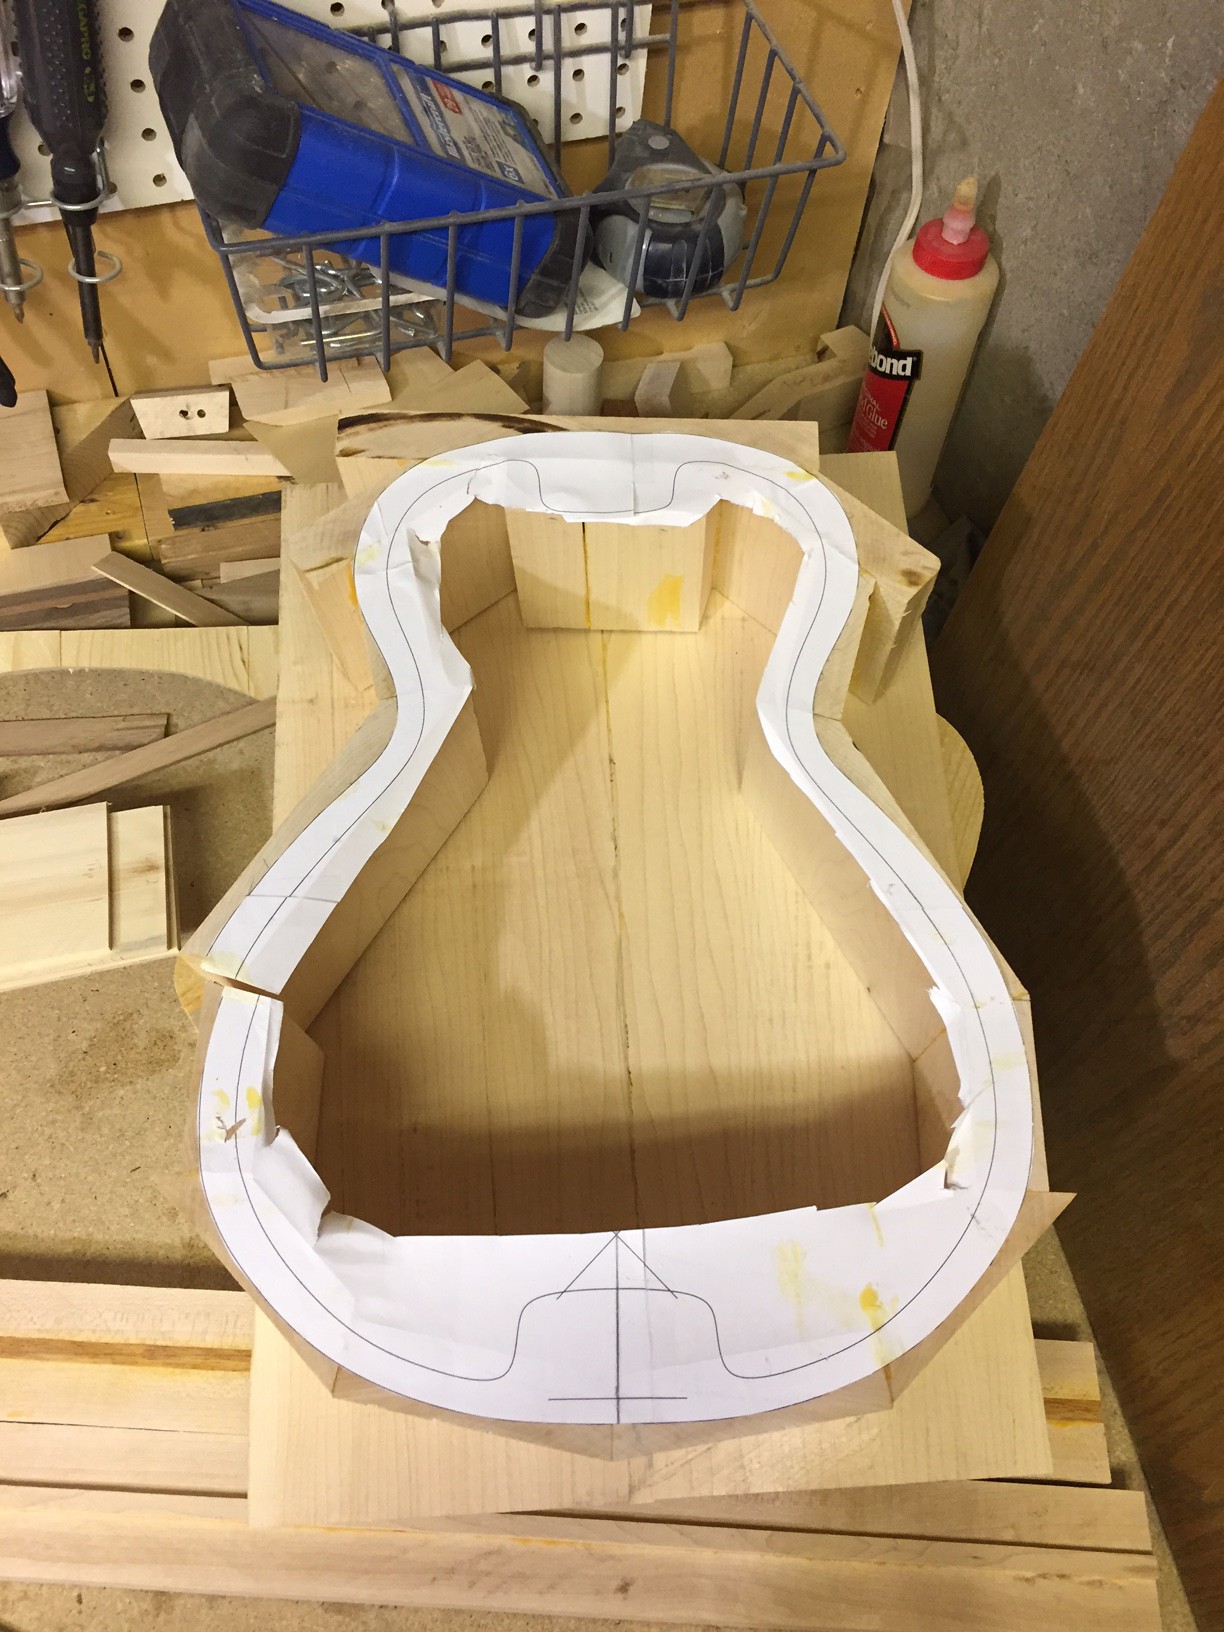
I cut the segments and glued them together (one joint at a time)
![]()
![]()
![]()
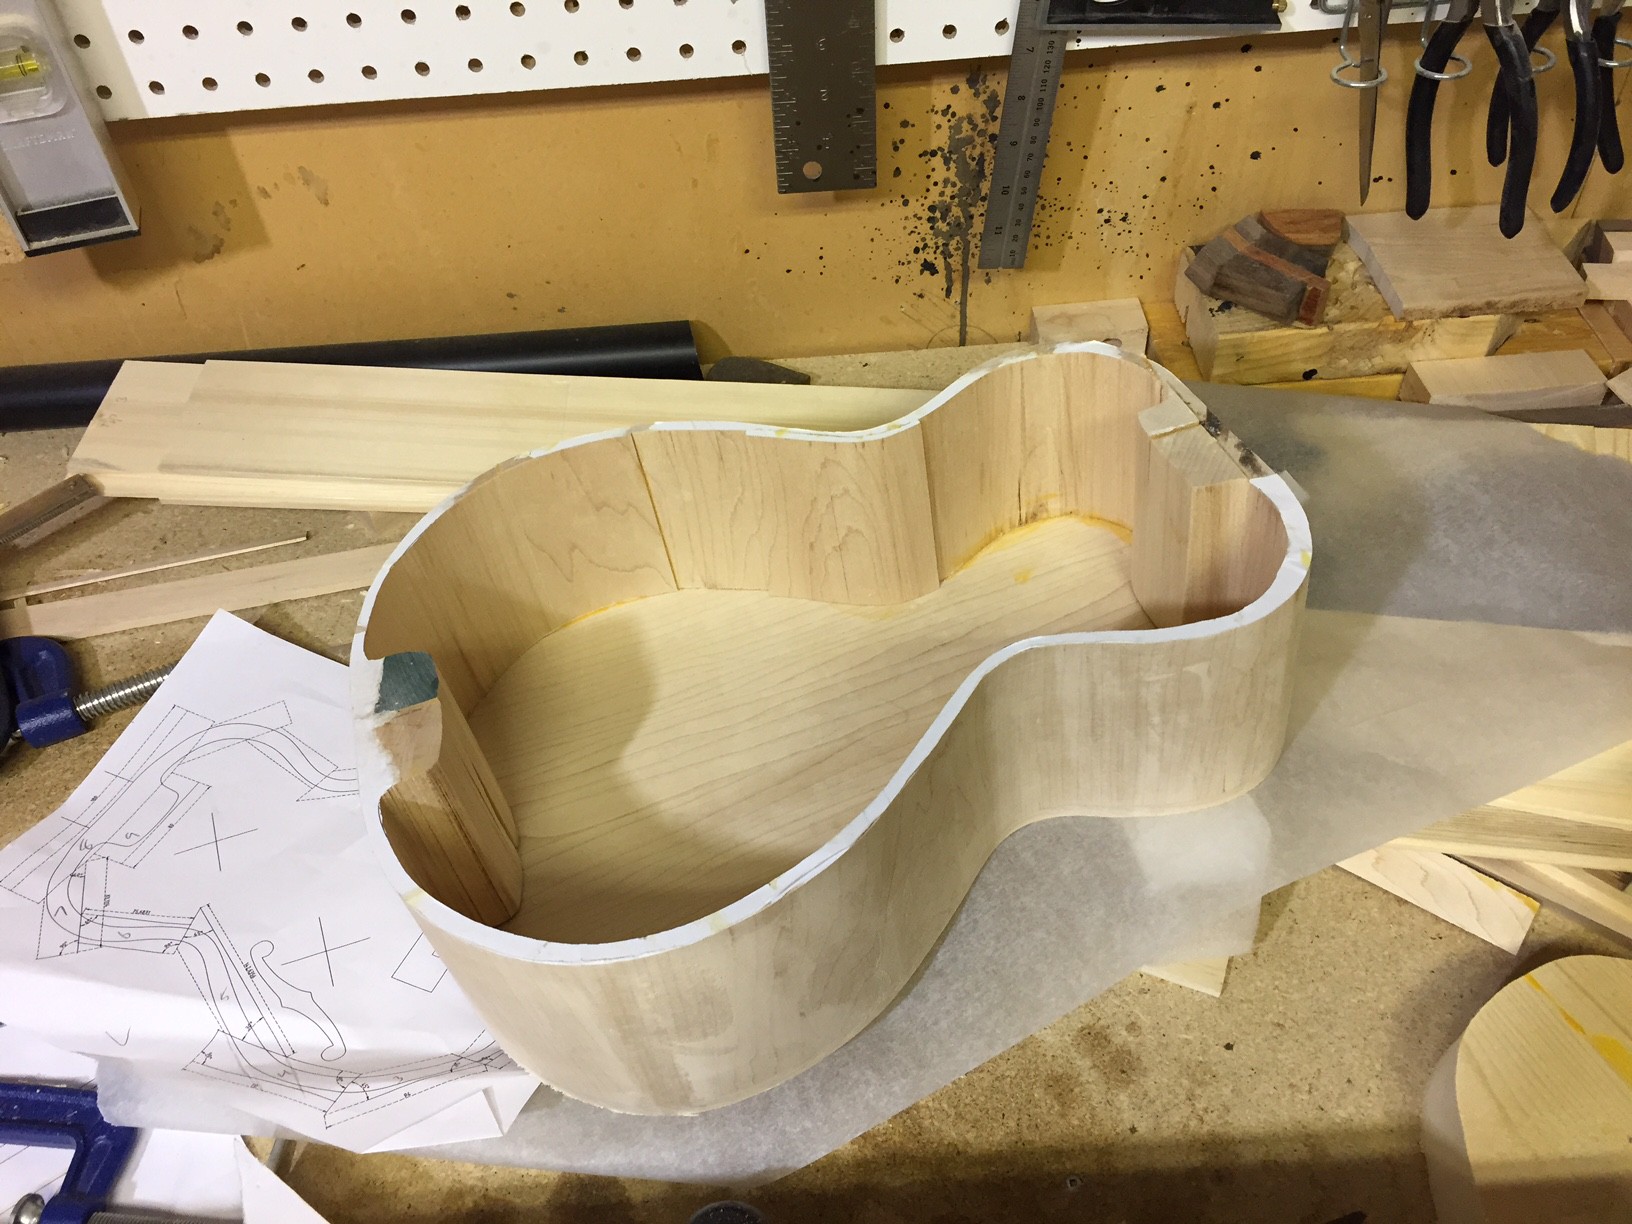
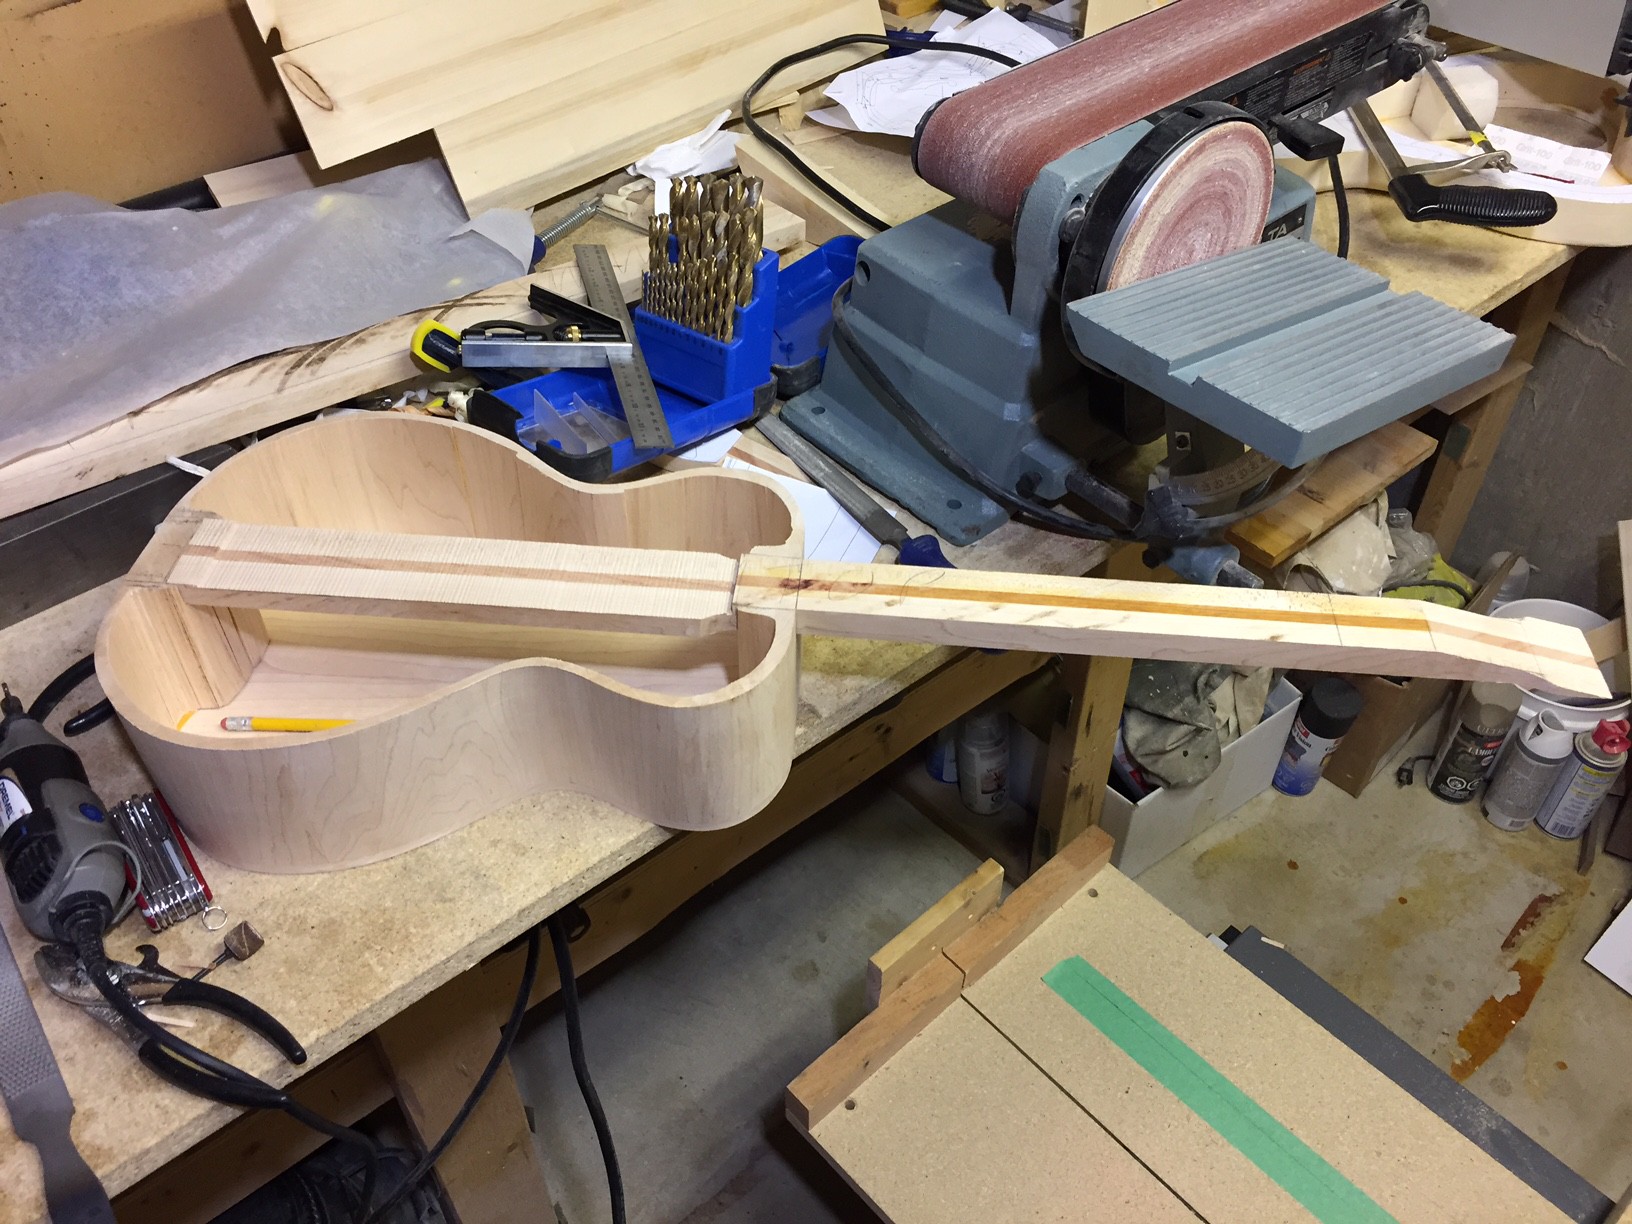
After it was all glued (except for one joint, as seen above), I cut the inside with a bandsaw, and glued the final joint shut:
![]()
Next, I glued the bottom on, and cut around the outside:
![]()
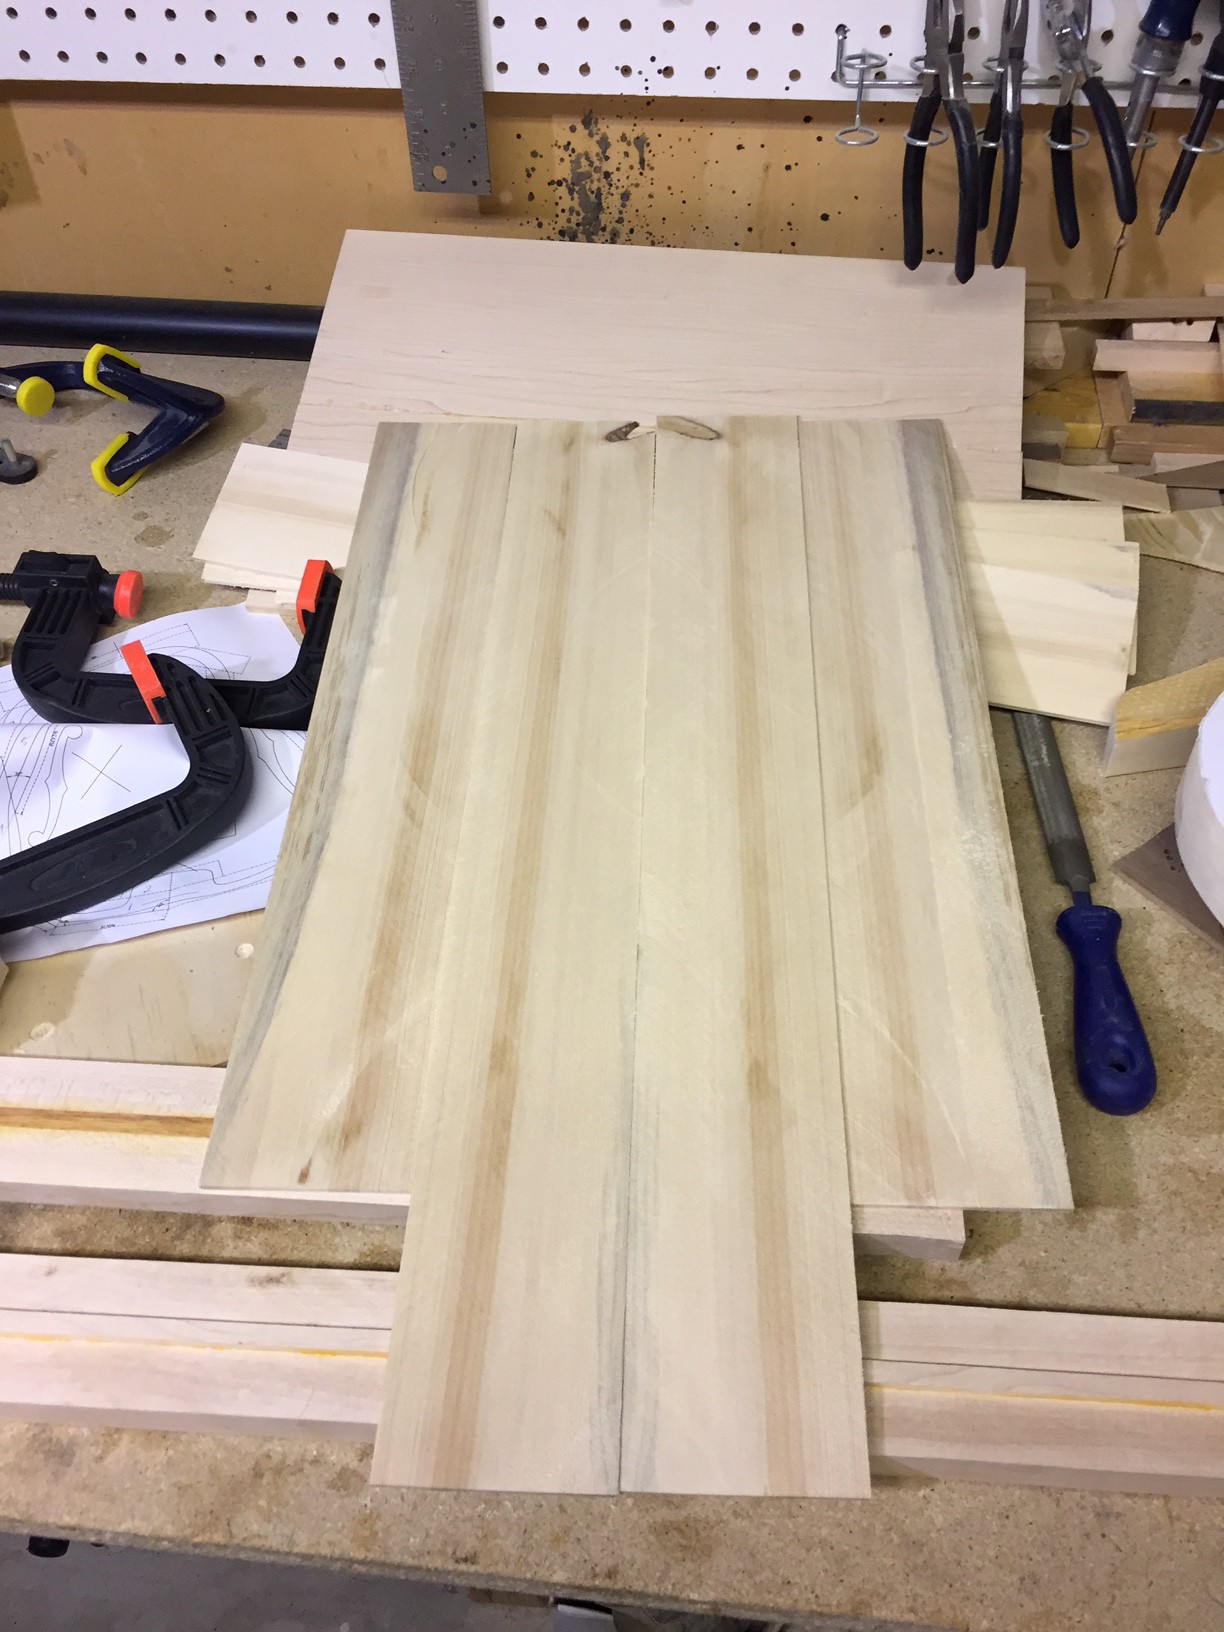
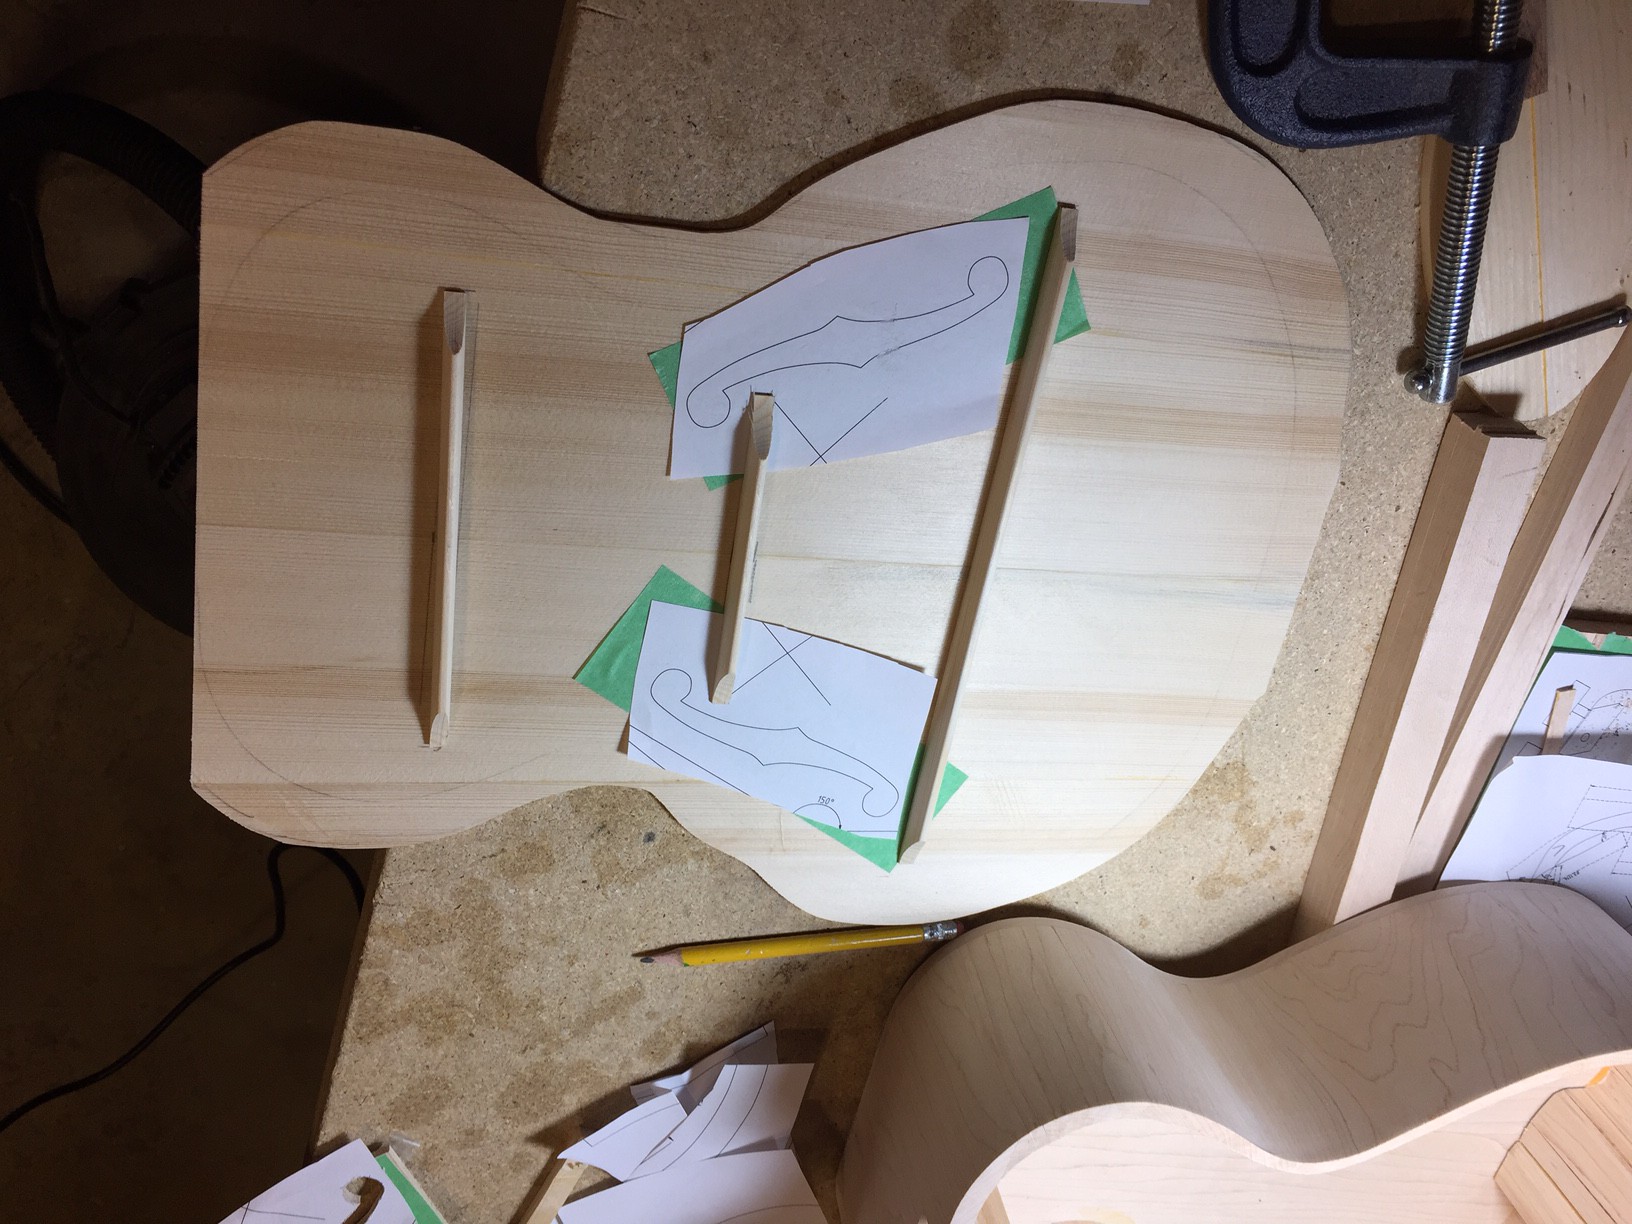
I made the soundboard out of a carefully selected 2x6, ripped to about 3mm thick, and glued together:
![]()
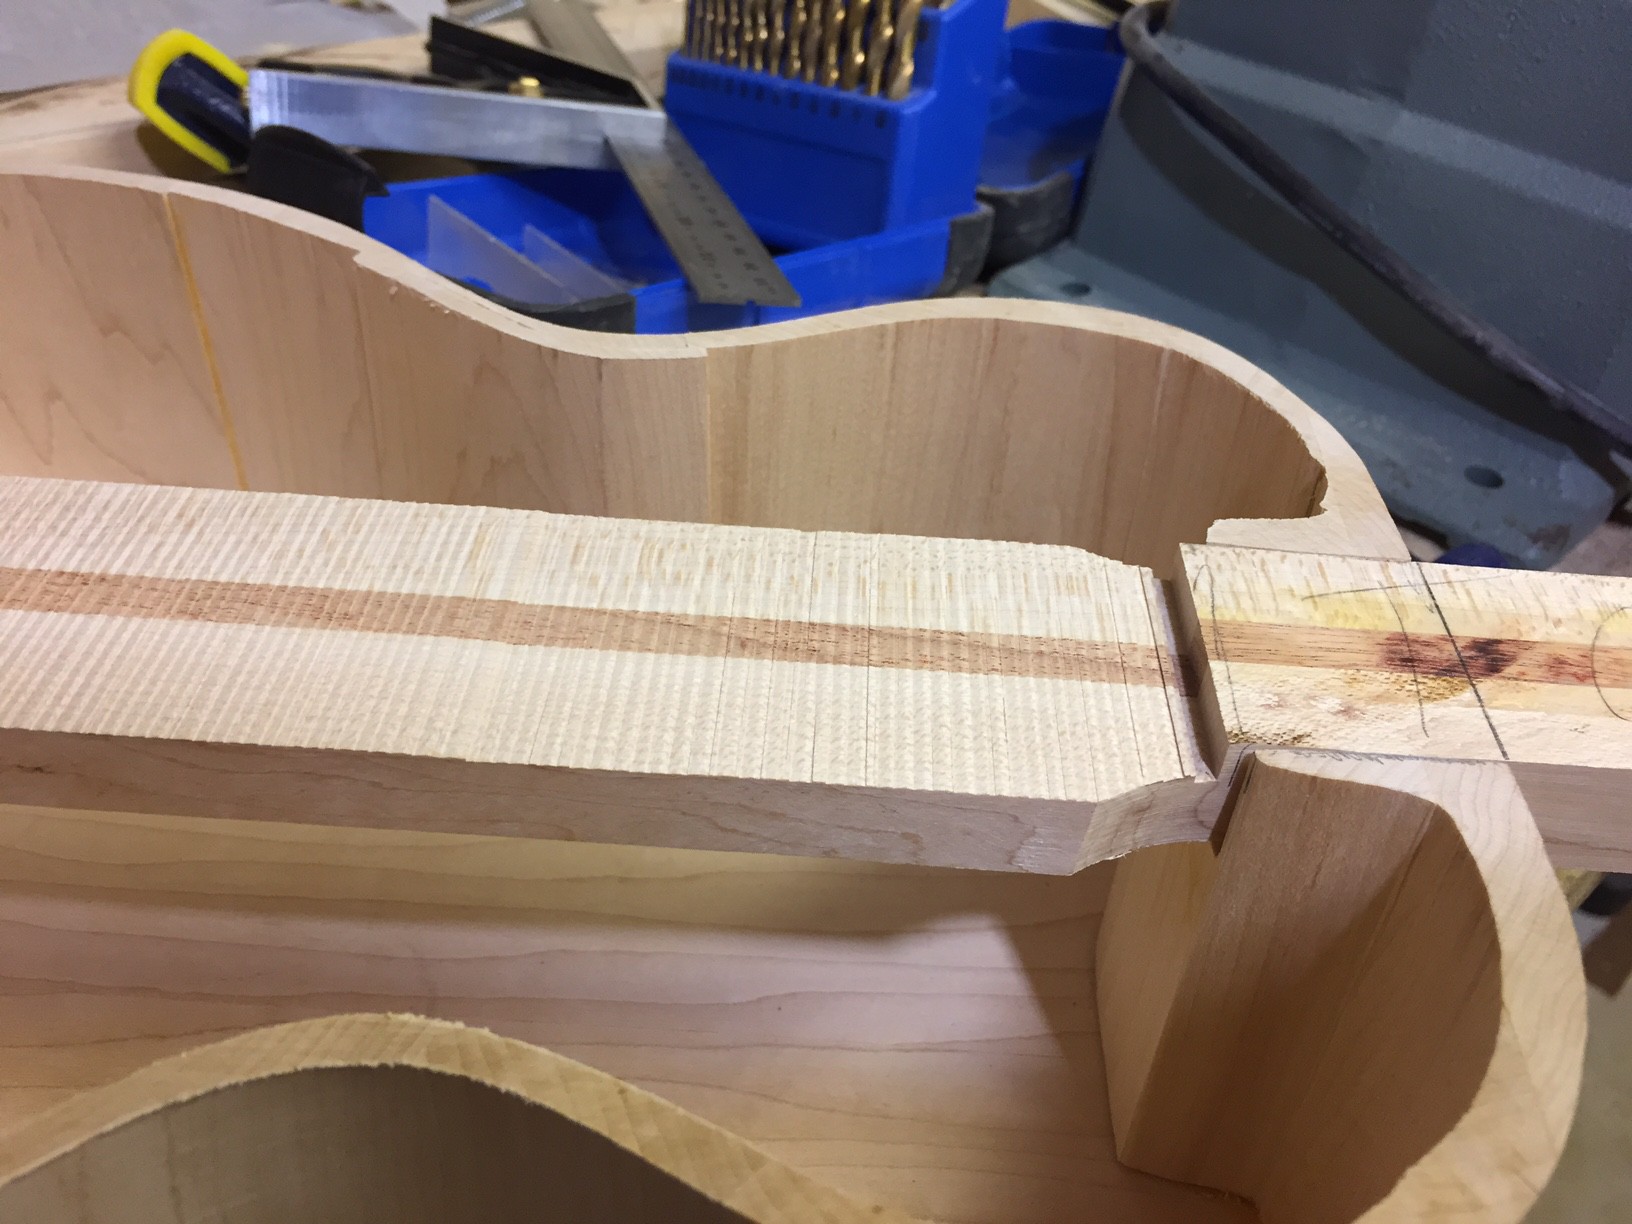
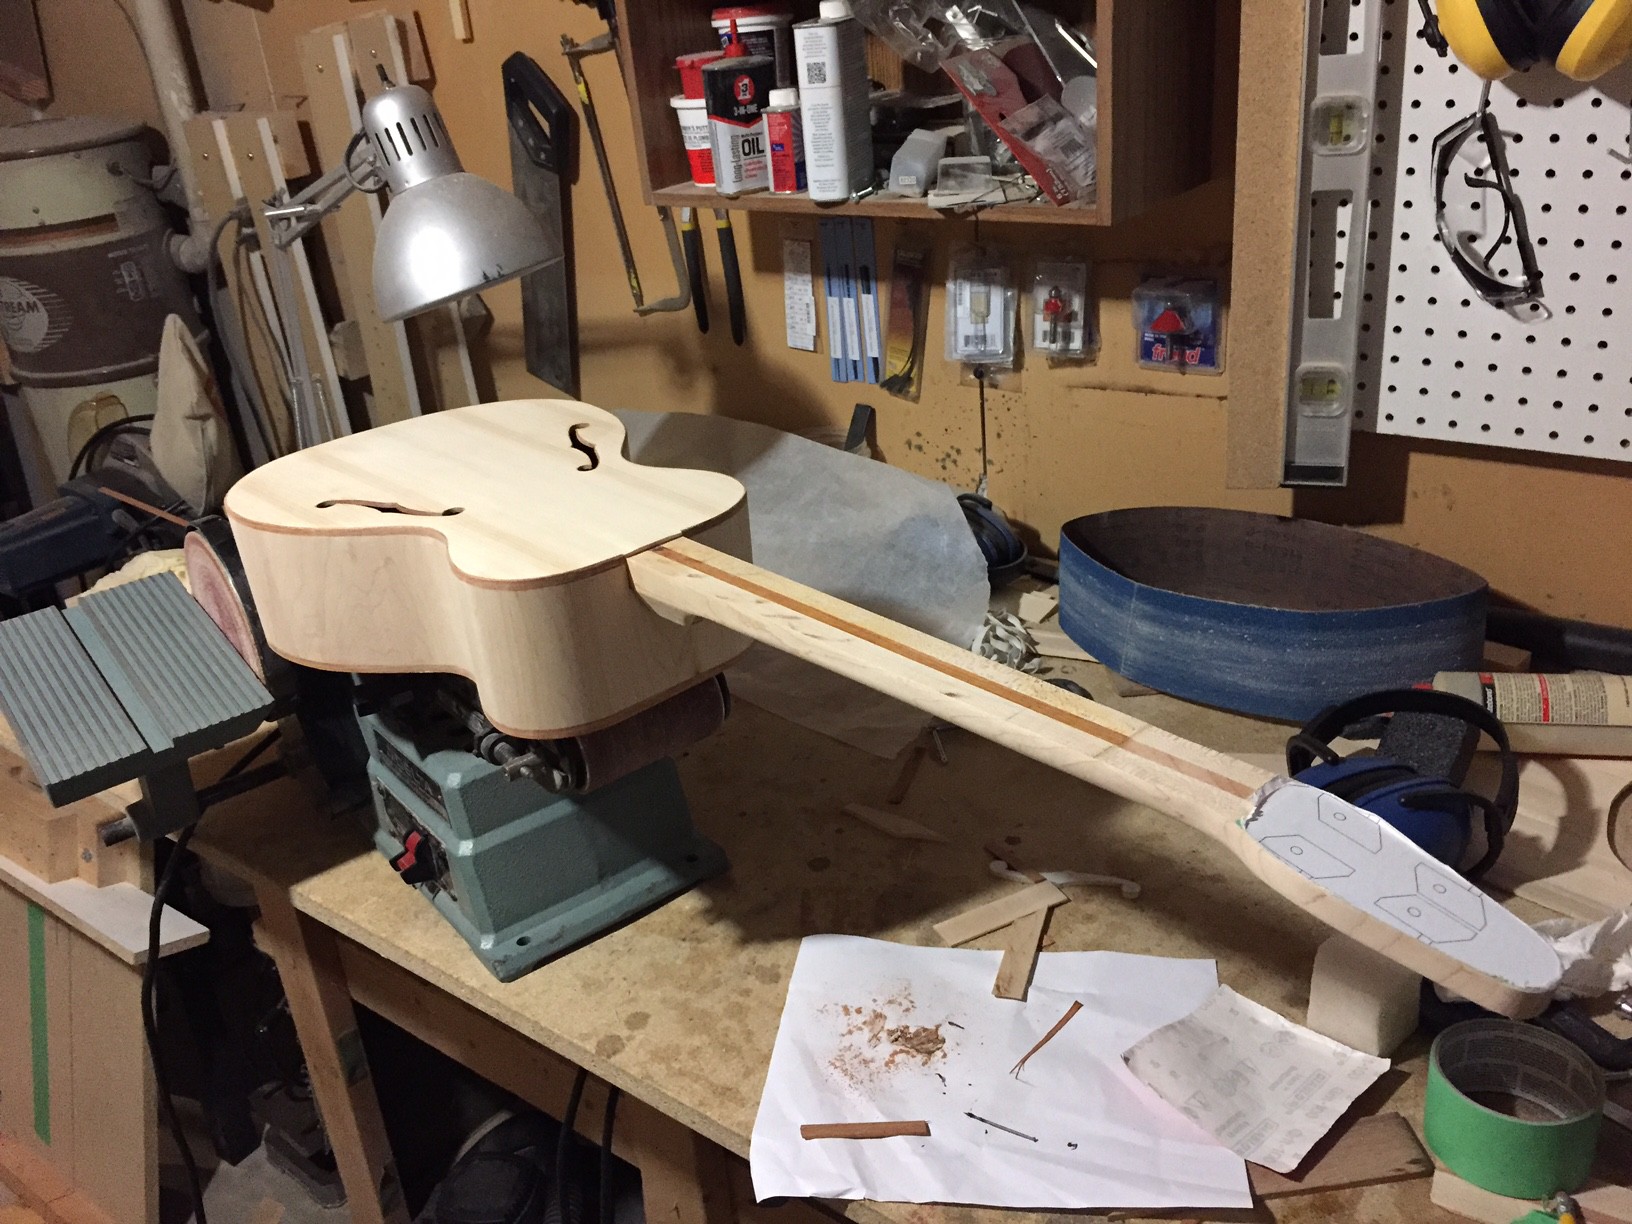
The neck is made from quarter sawn maple with a strip of arariba down the middle. The part in the body is recessed slightly to allow the soundboard to vibrate freely.
![]()
![]()
The soundboard has three ladder-style braces on the inside. Here you can see the planned location of the braces plus f-holes.
![]()
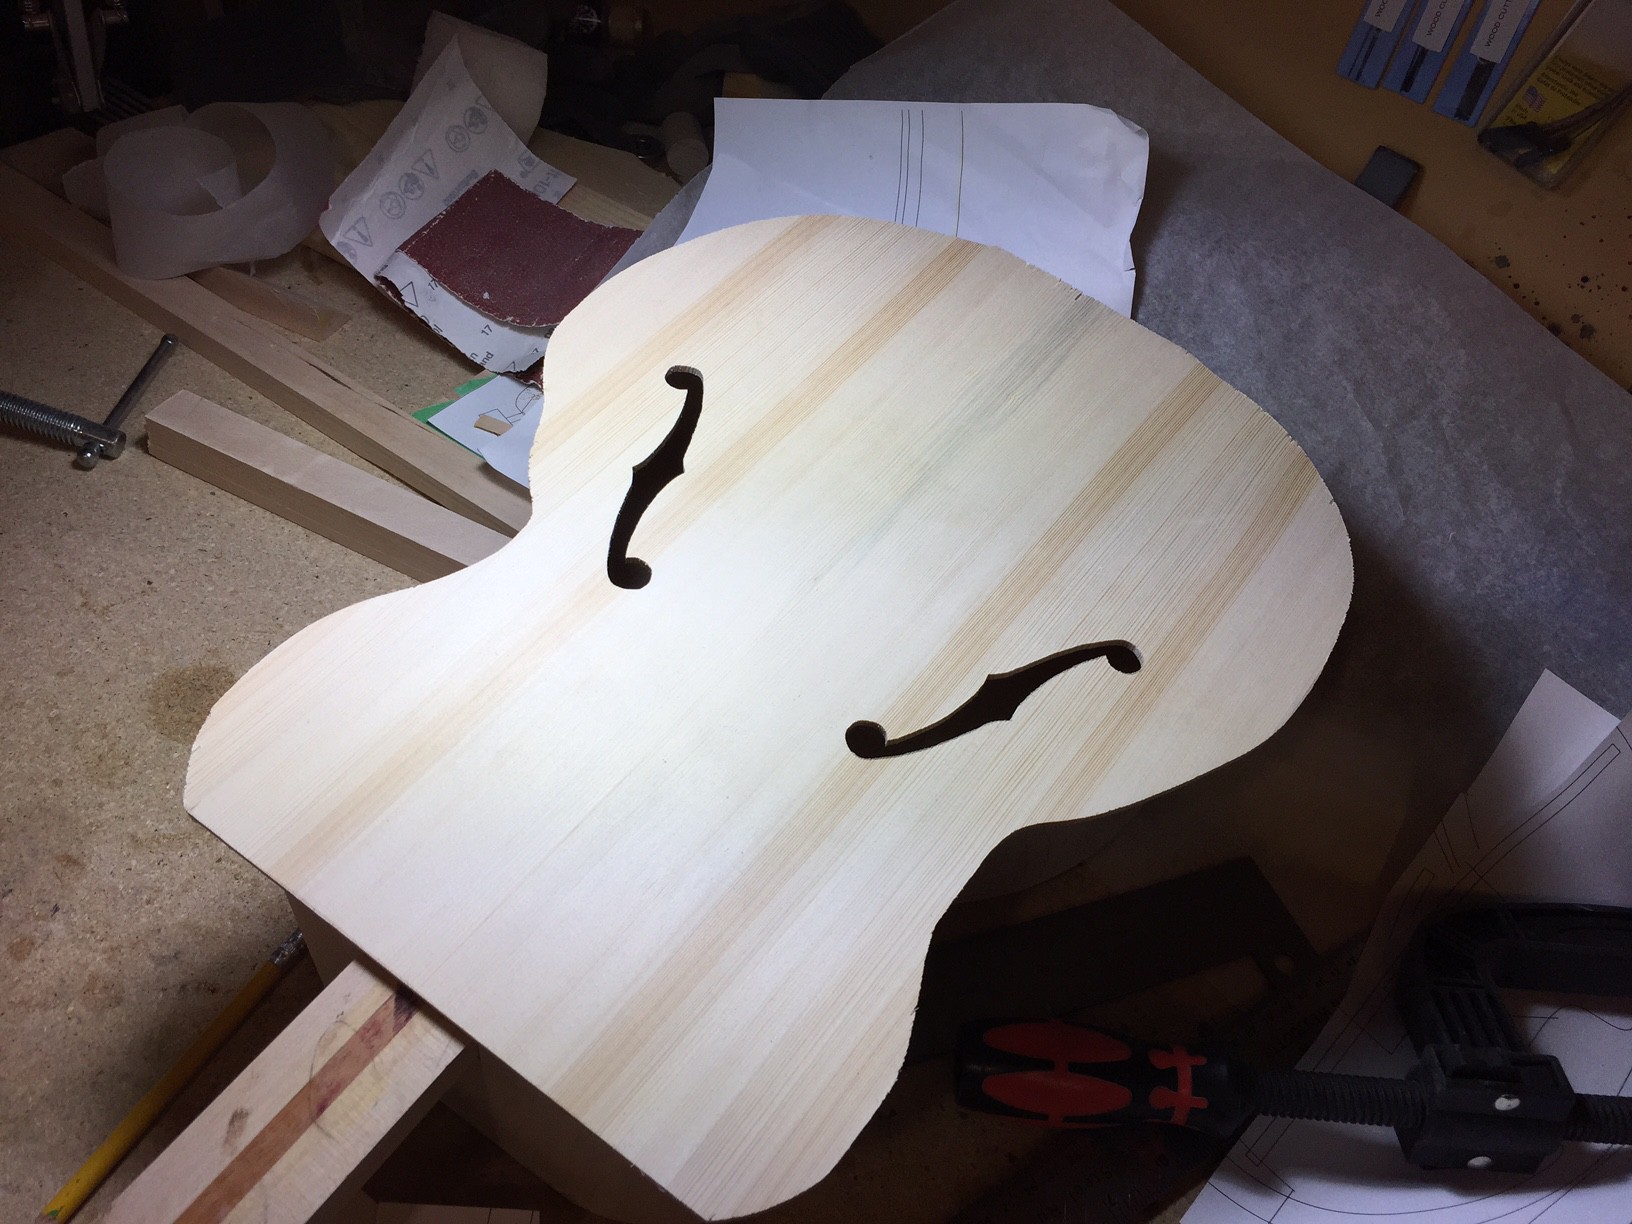
I cut the f-holes on the scroll saw:
![]()
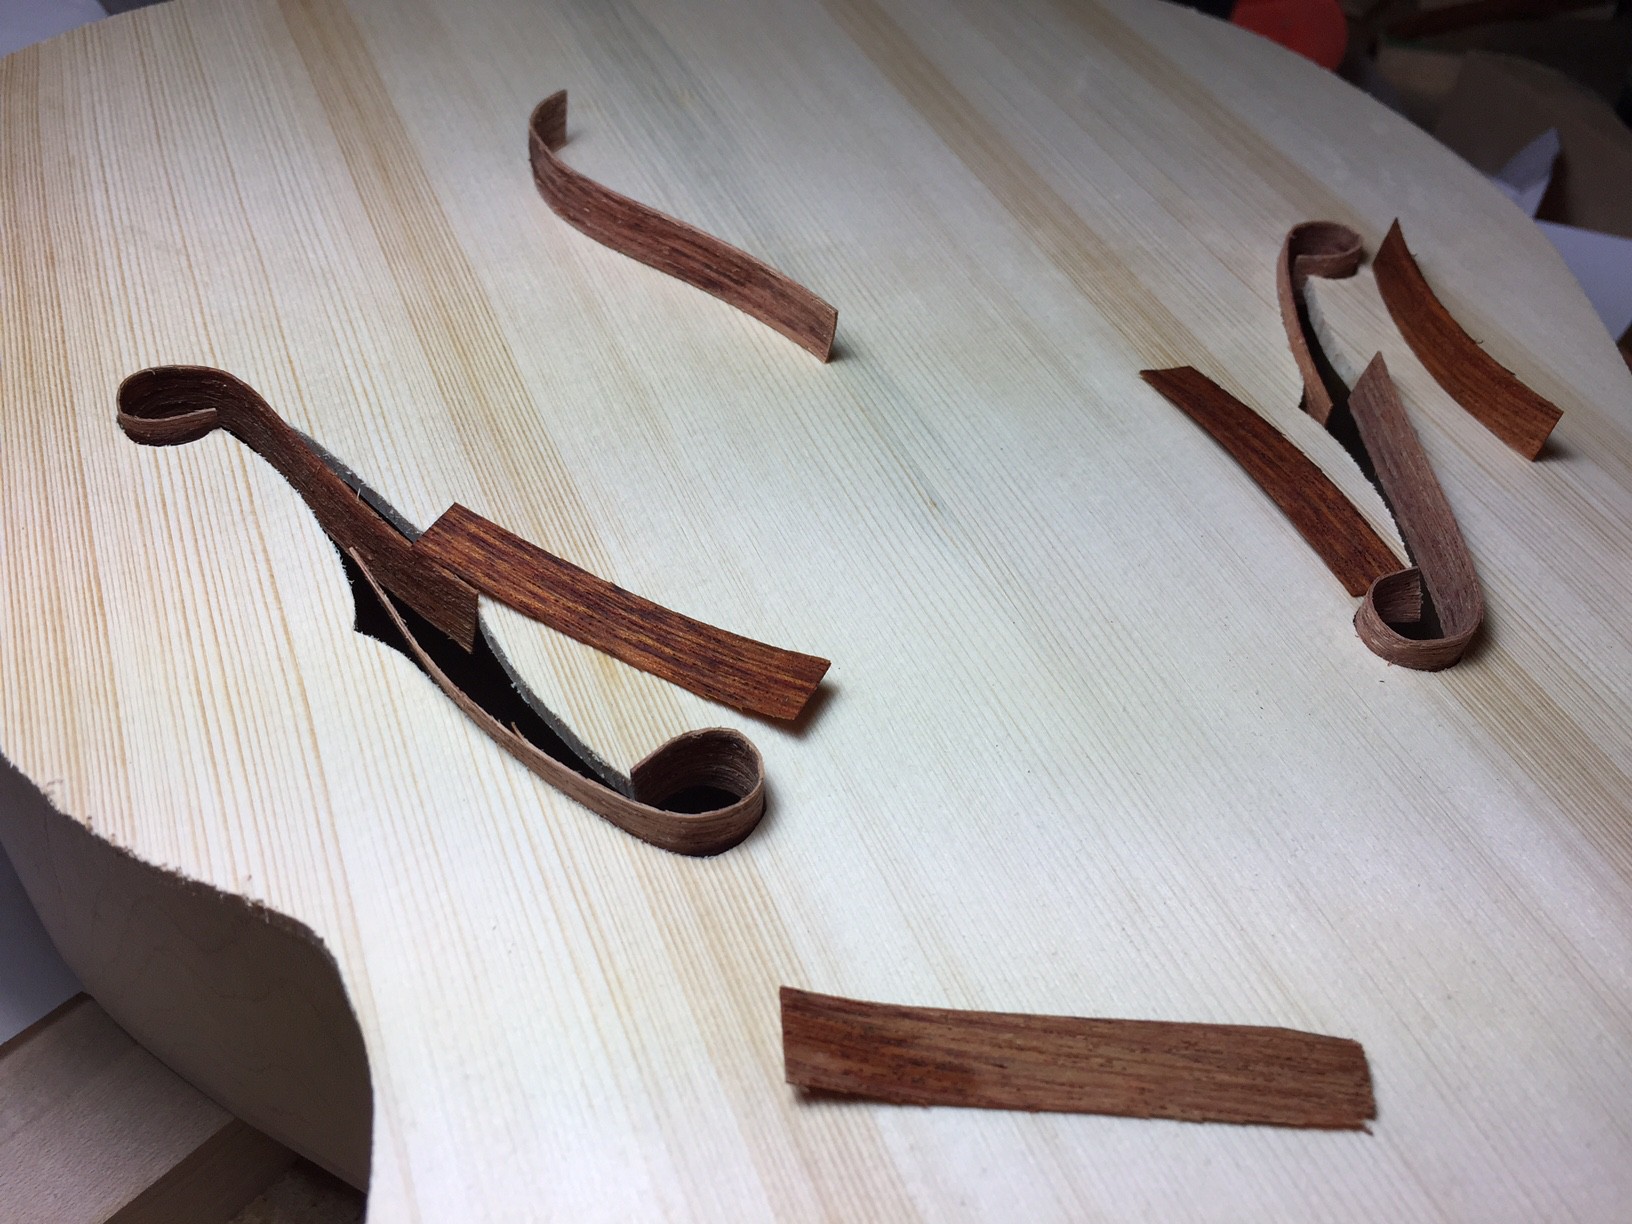
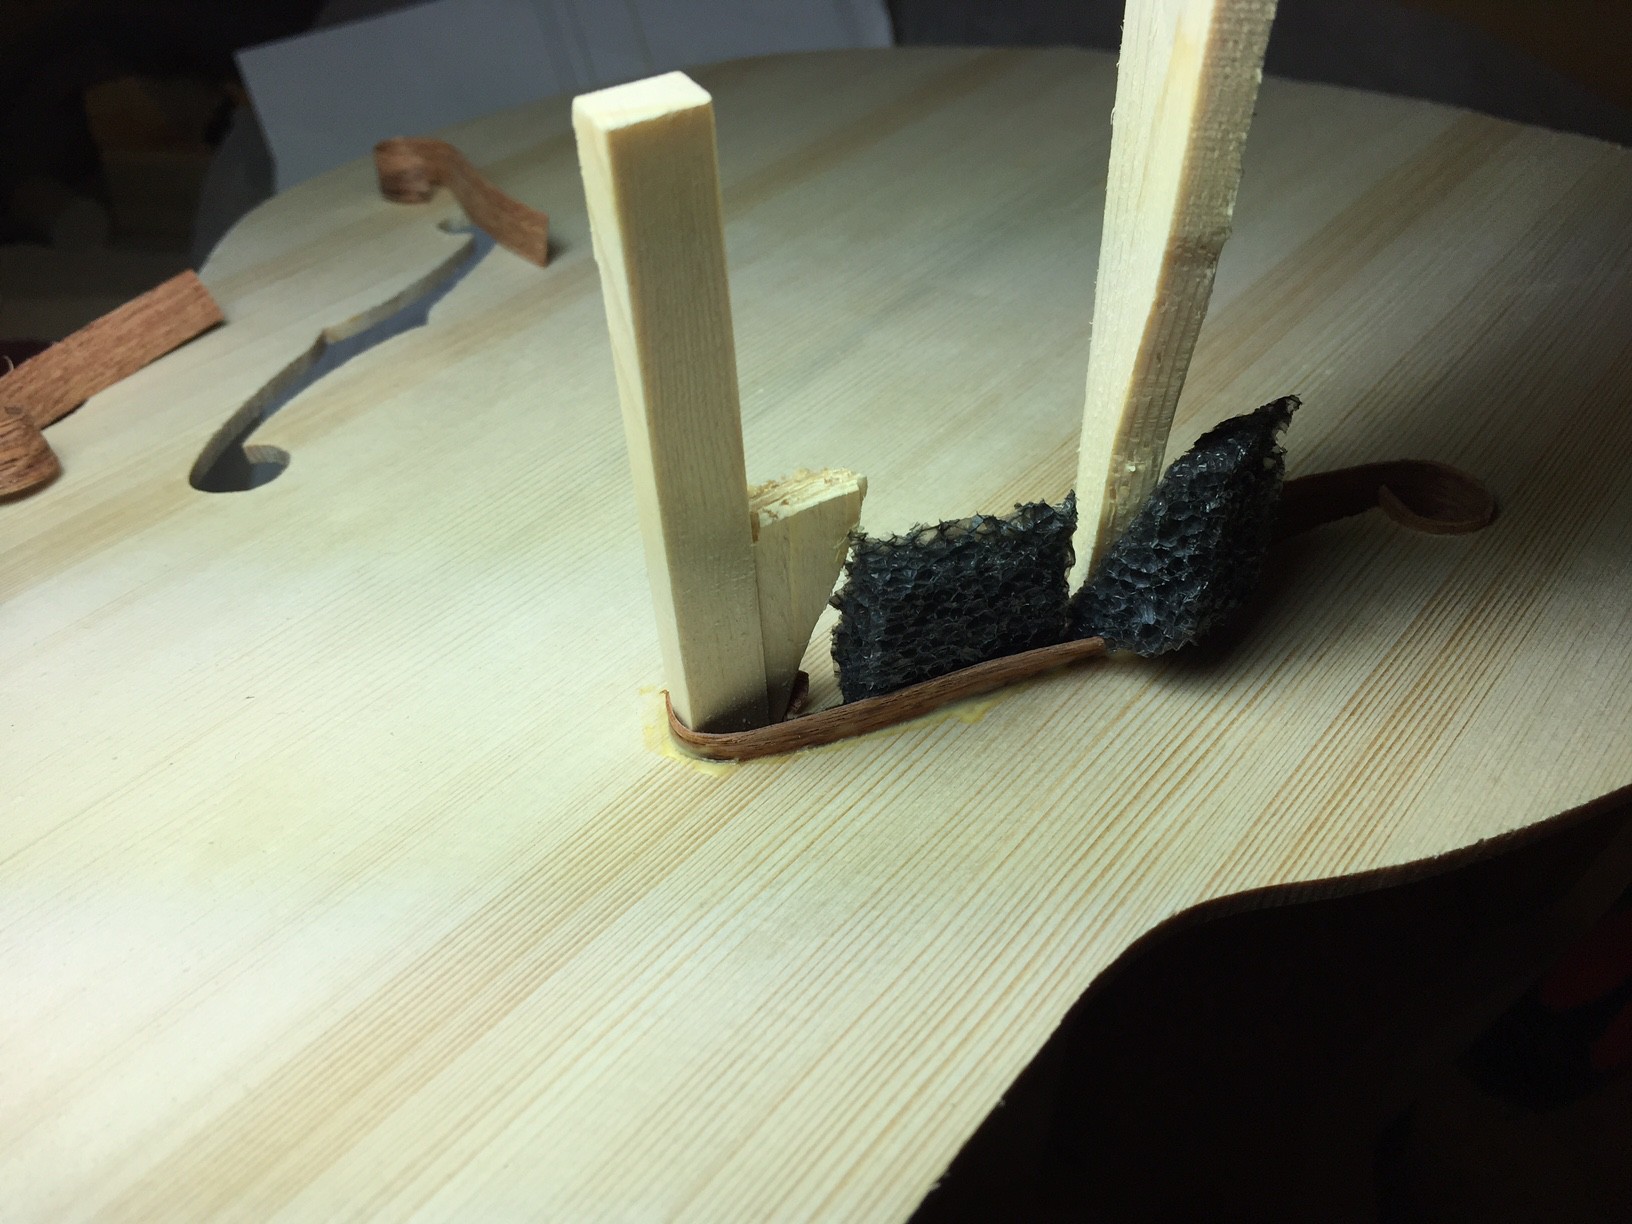
After cutting them, i bound them with arariba wood (for strength as well as cosmetics):
![]()
![]()
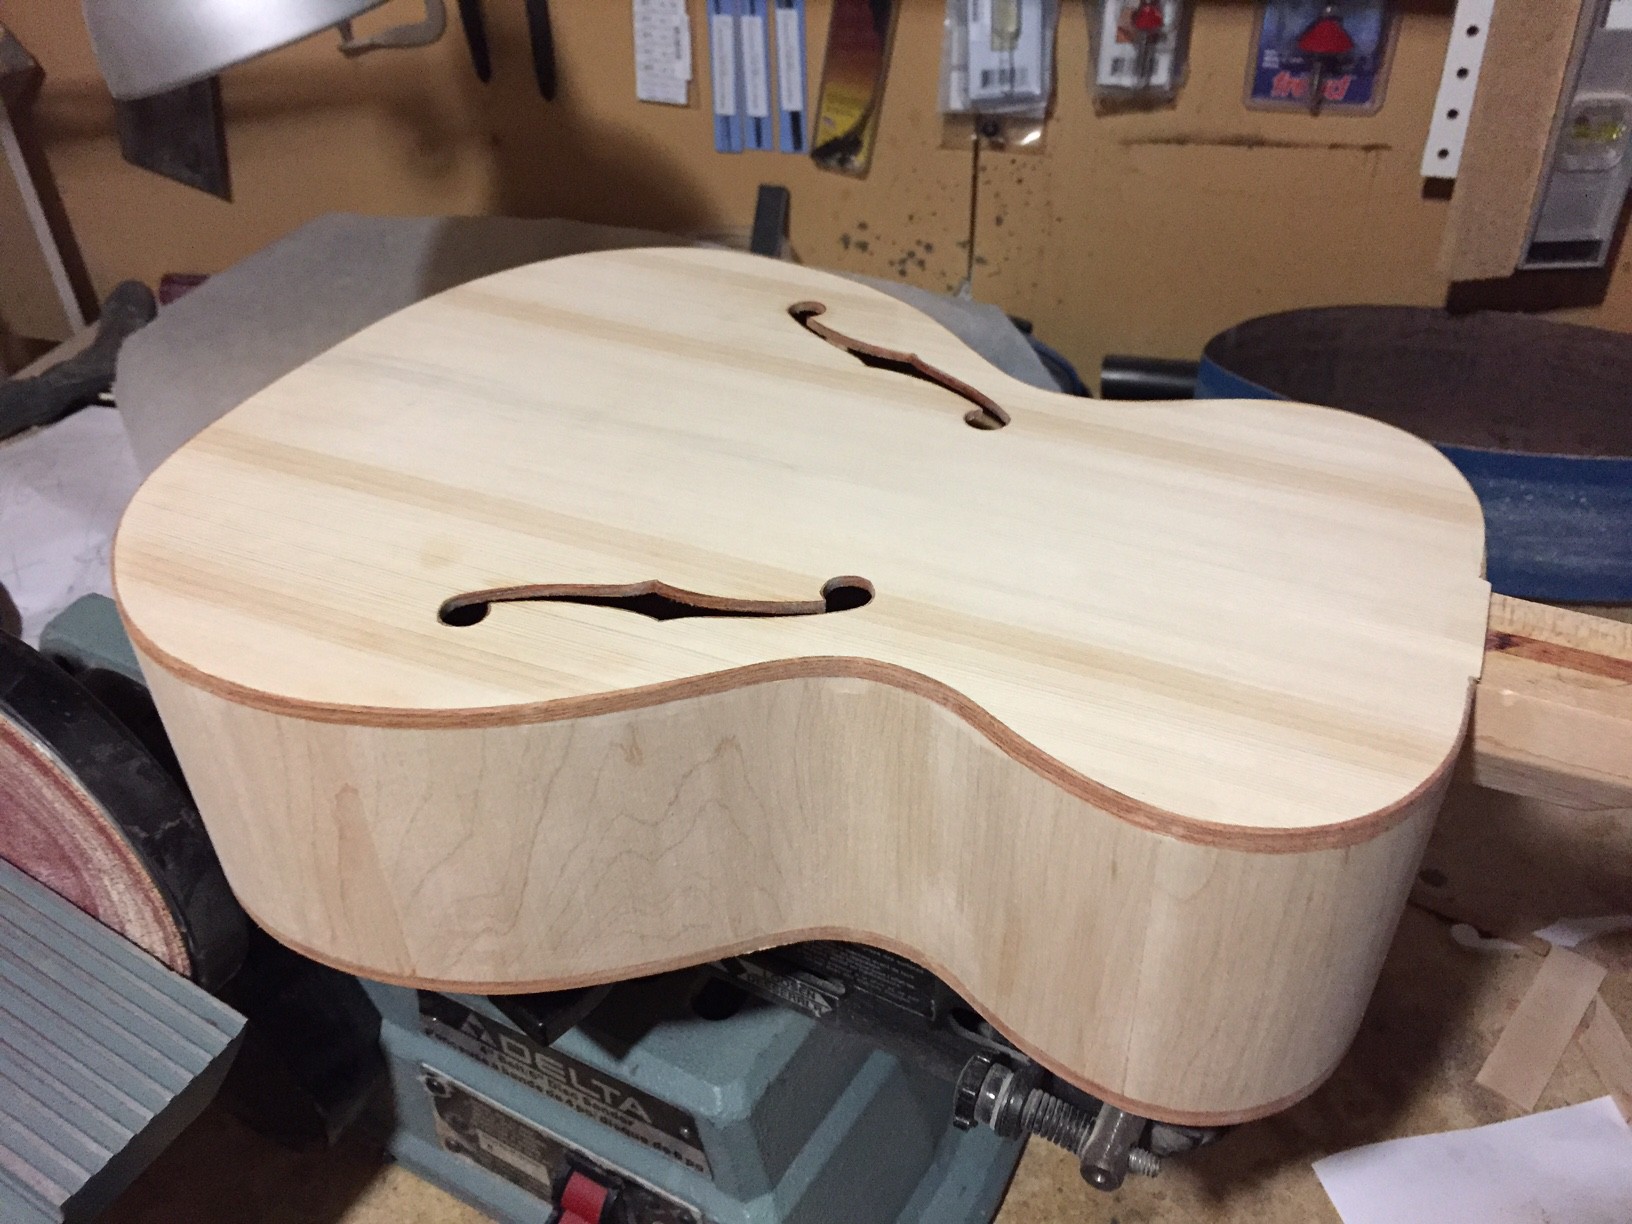
After gluing on the sound board, I bound the body with matching arariba strips.
![]()
![]()
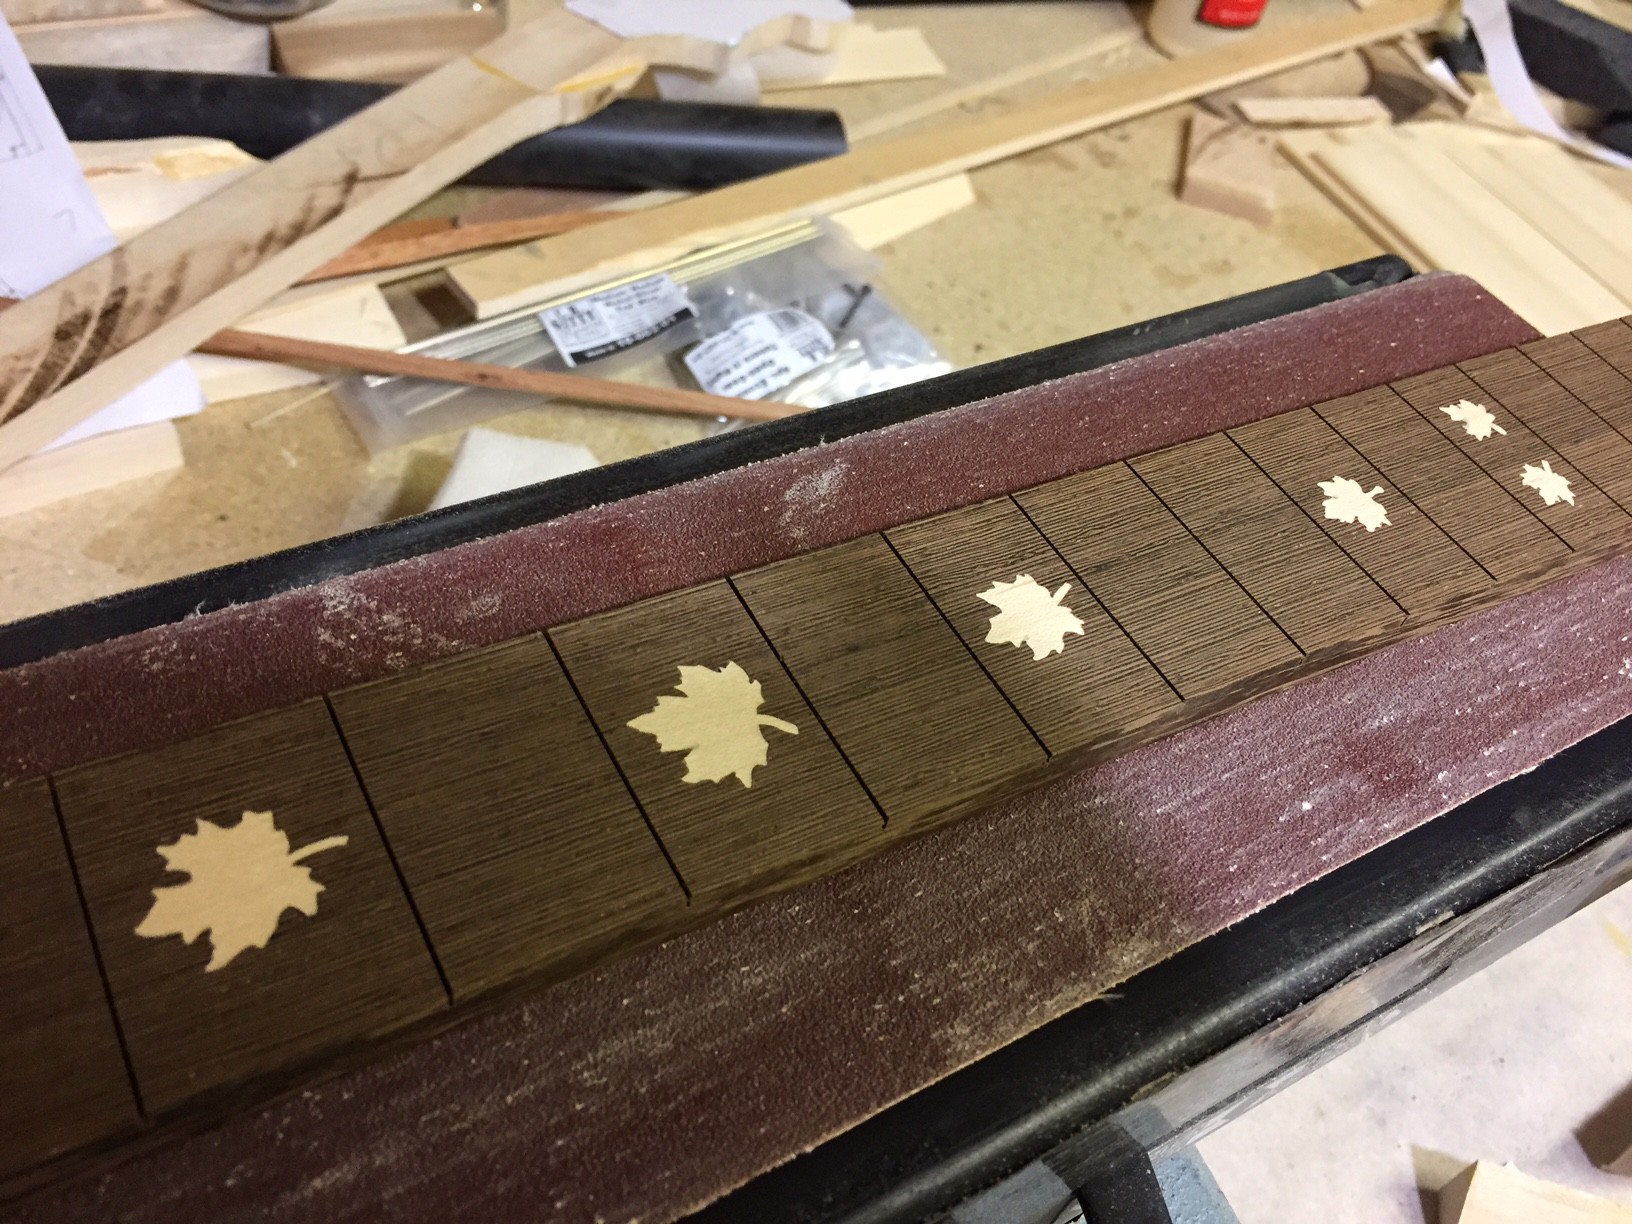
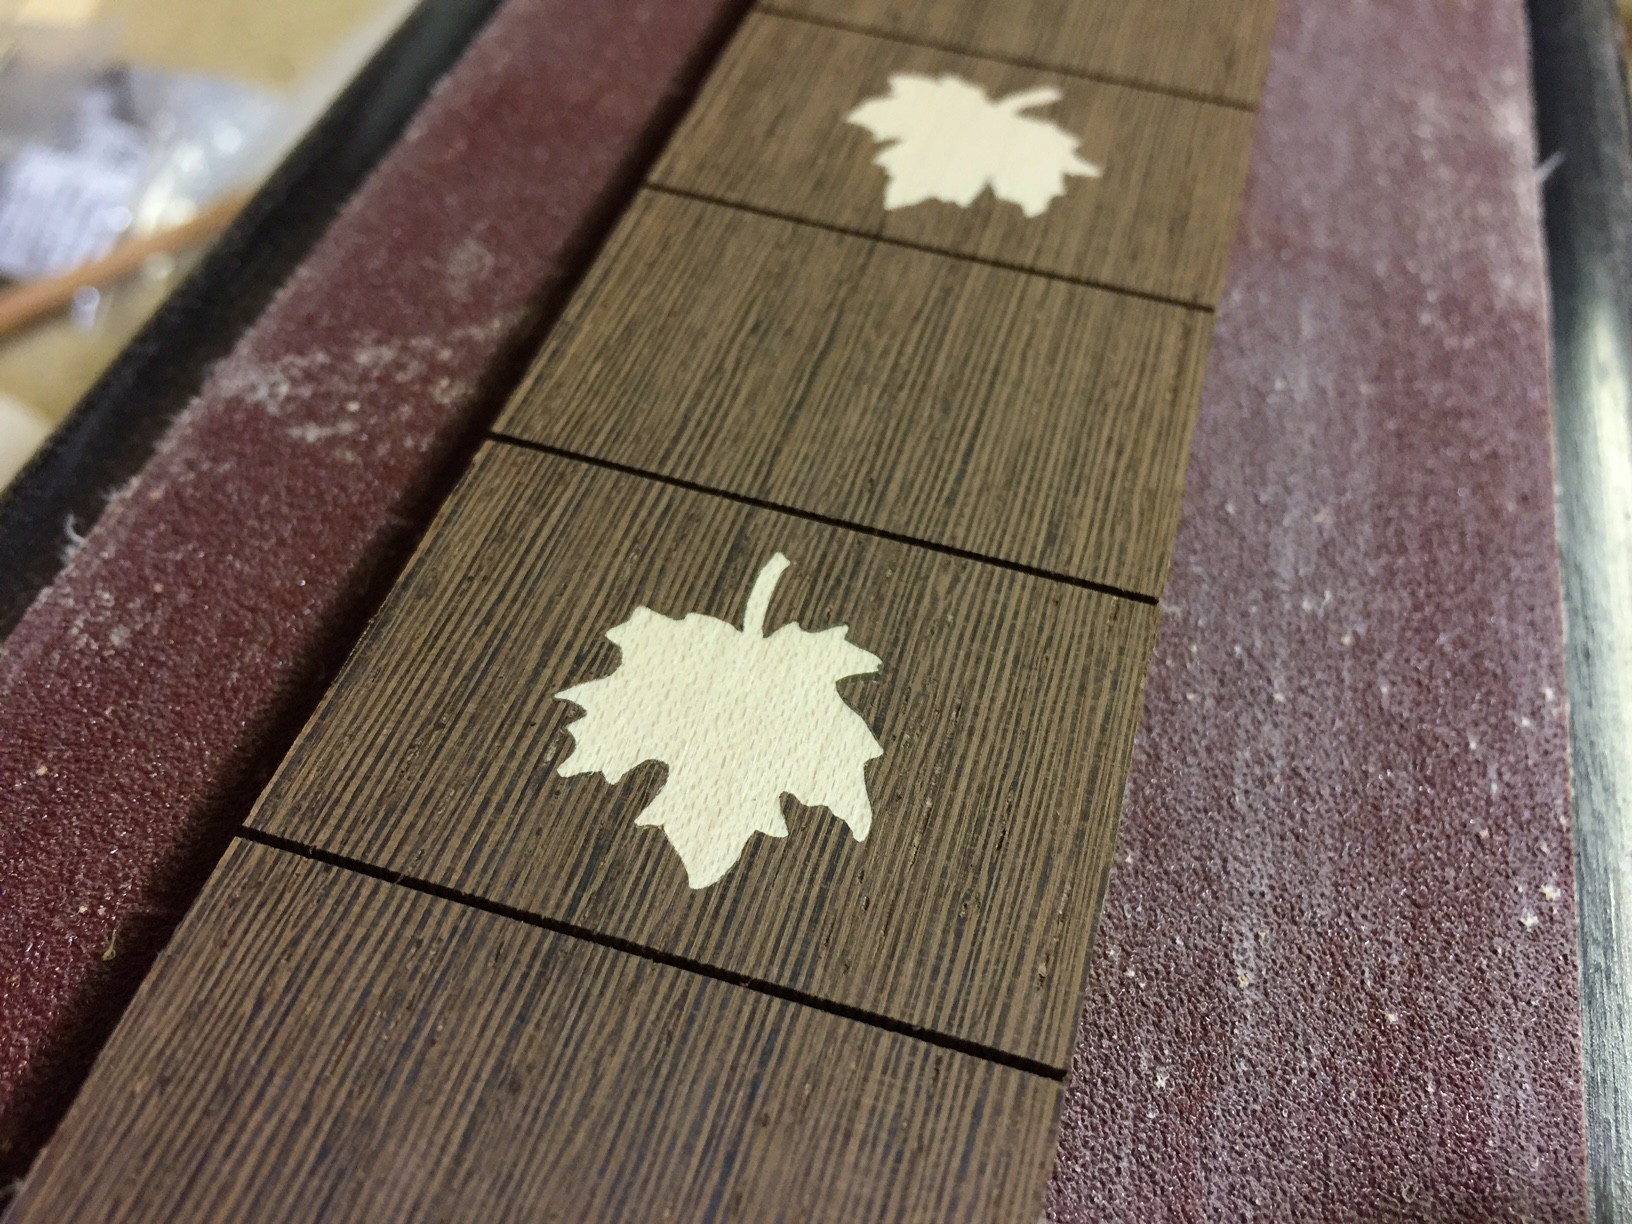
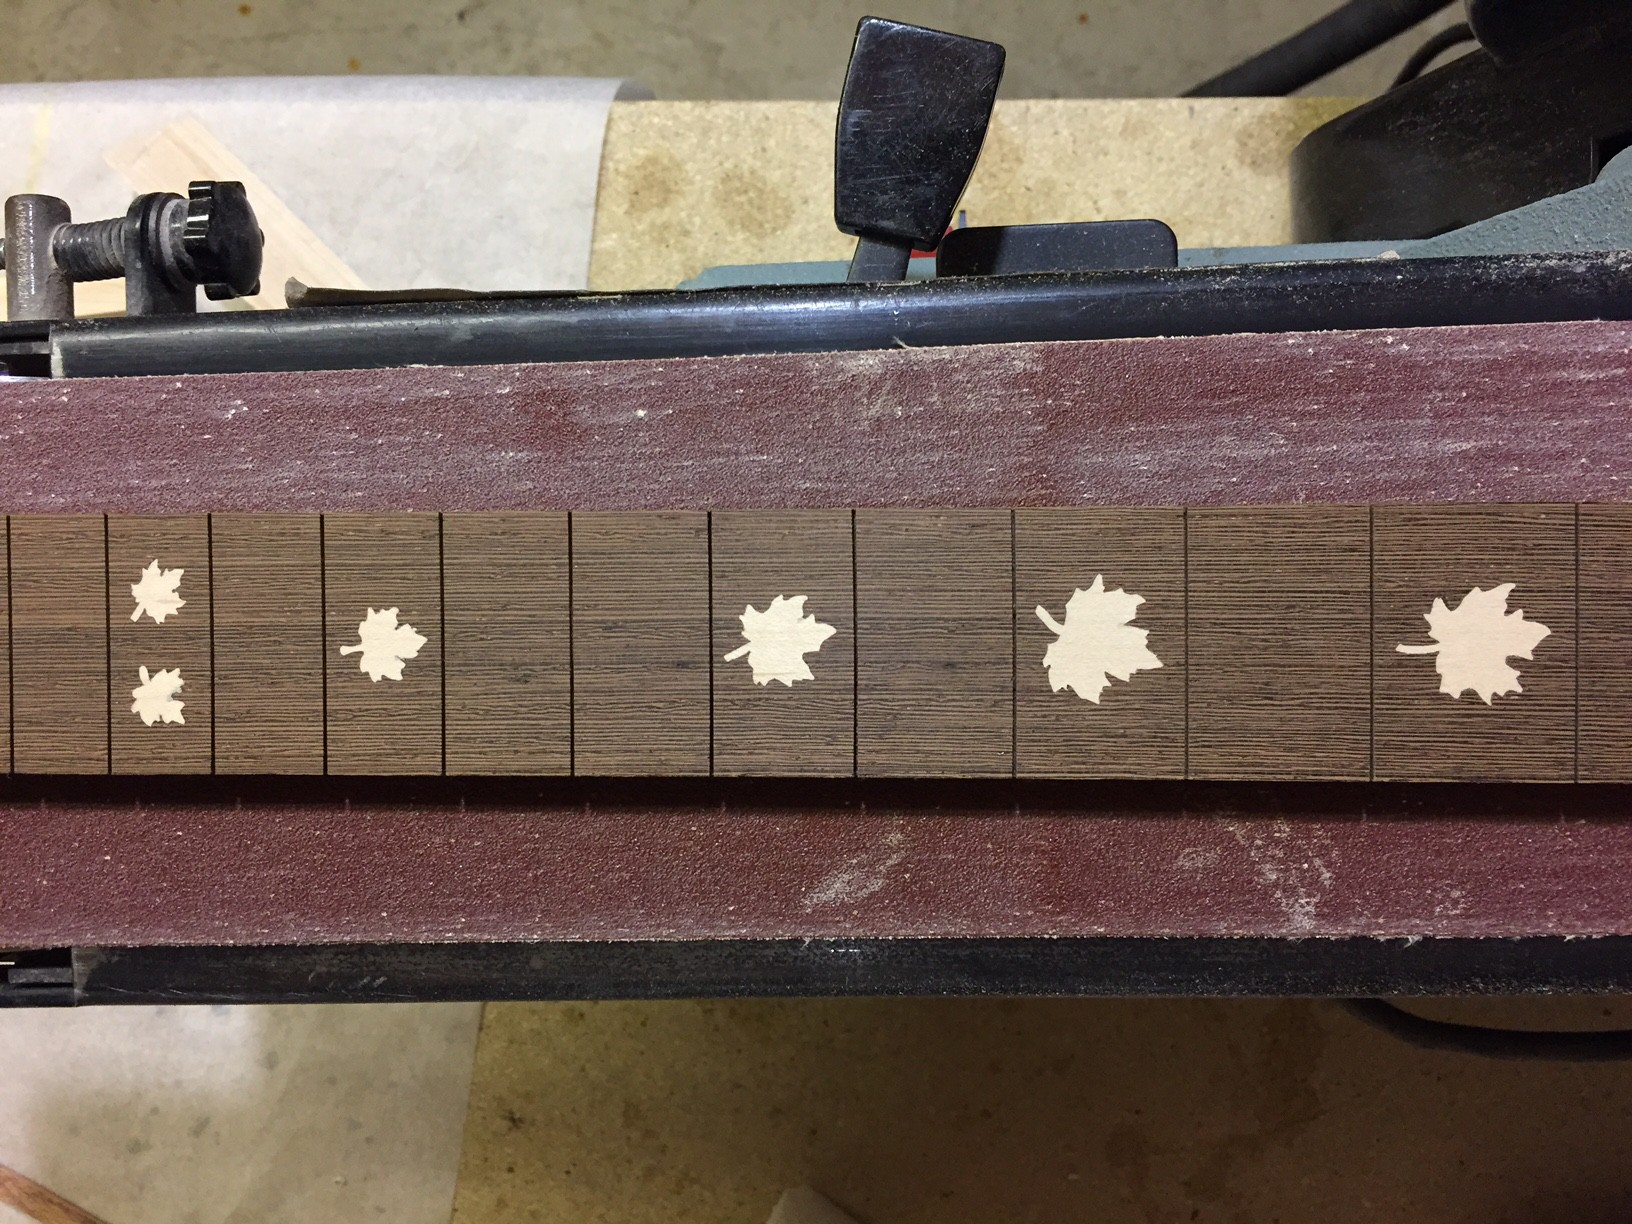
I cut the fretboard from wenge, cut the fret slots, and used the scrollsaw to inlay maple leaves as fret markers.
![]()
![]()
![]()
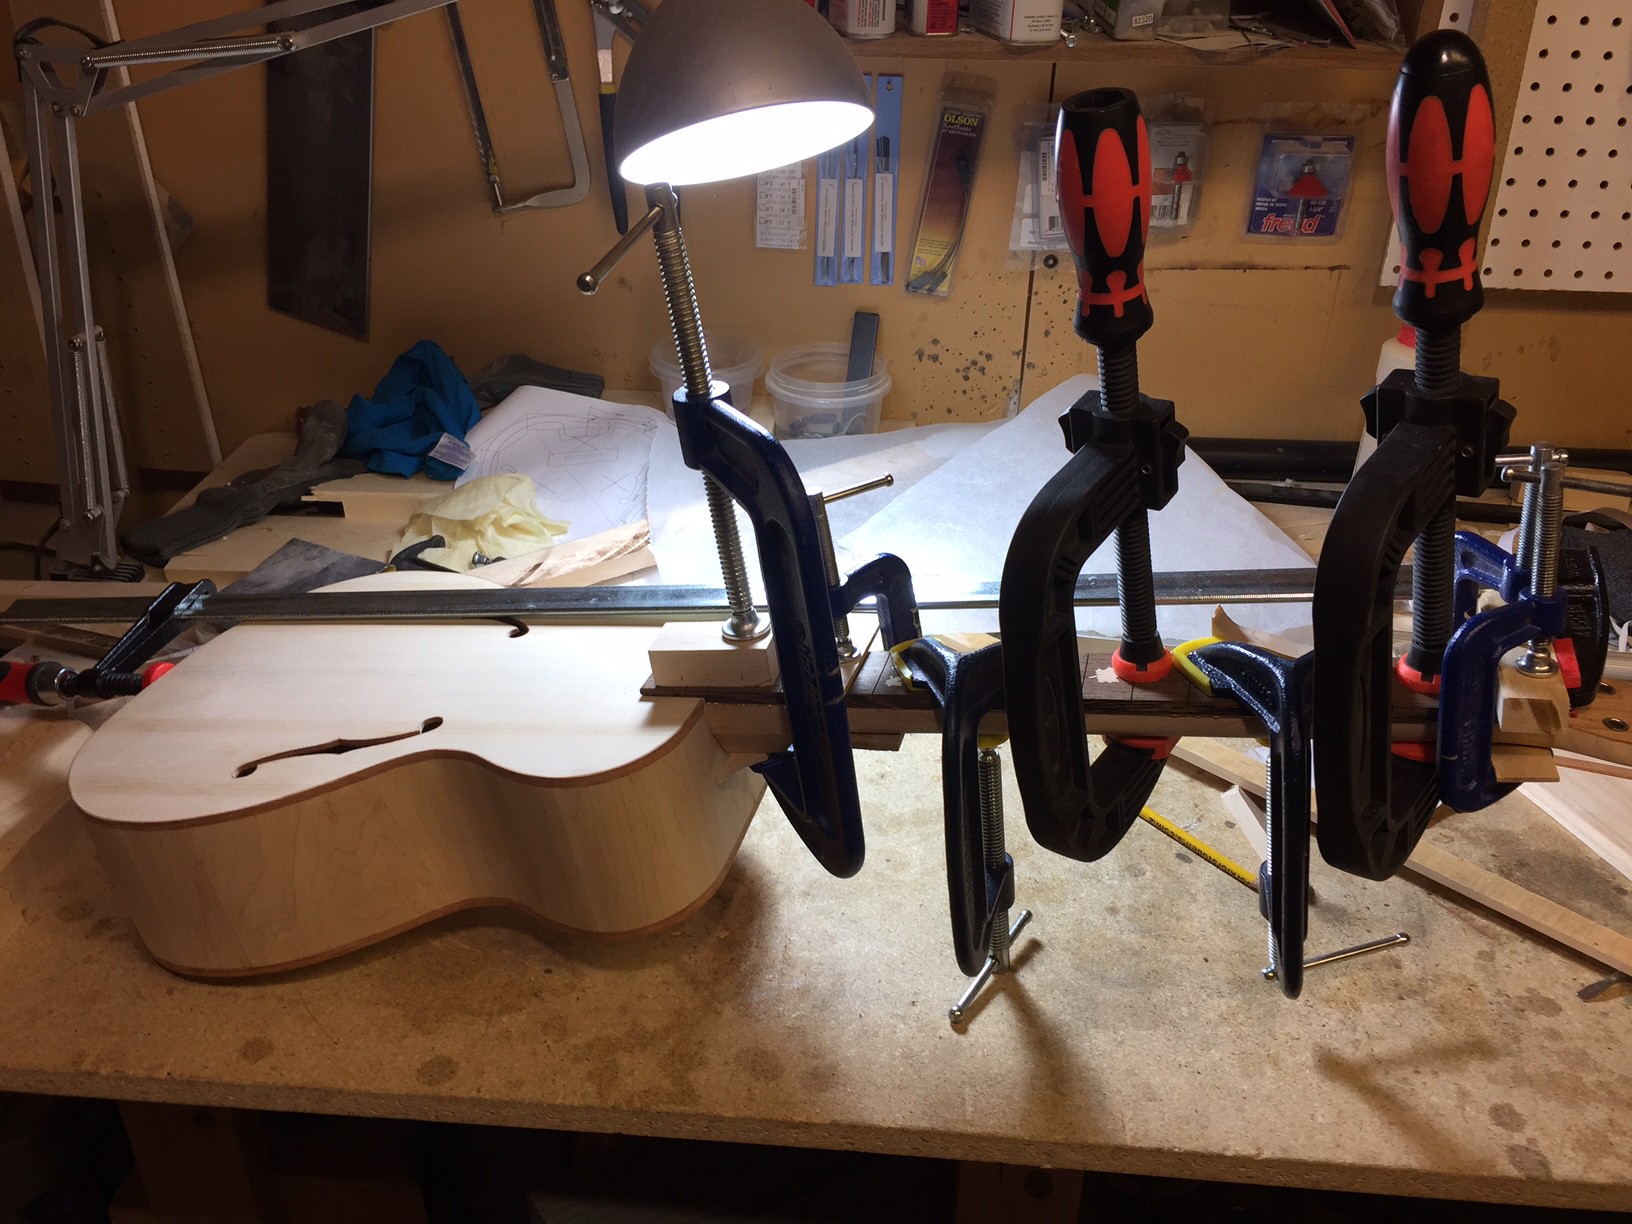
After the inlay work was completed I glued the fretboard onto the neck:
![]()
![]()
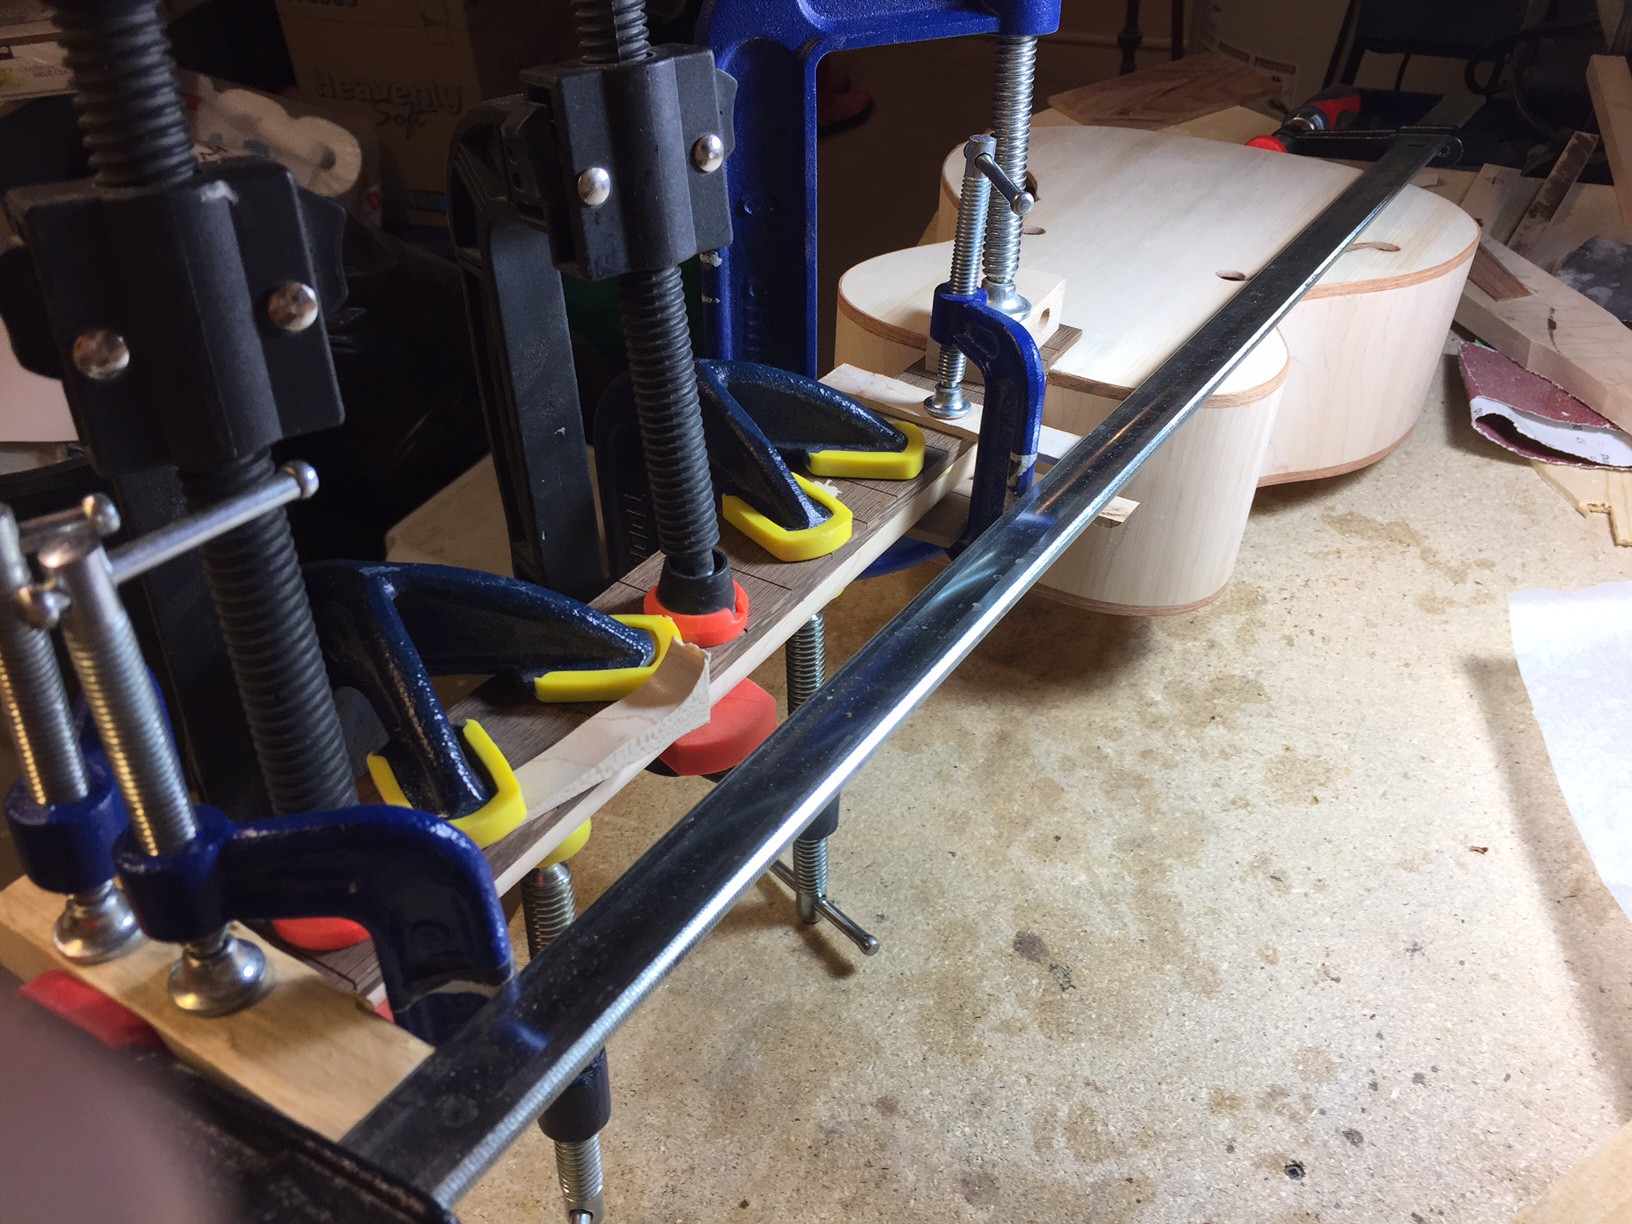
Next I cut rabbets for the neck binding and installed the frets. Once the frets were in, I glued on the binding:
![]()
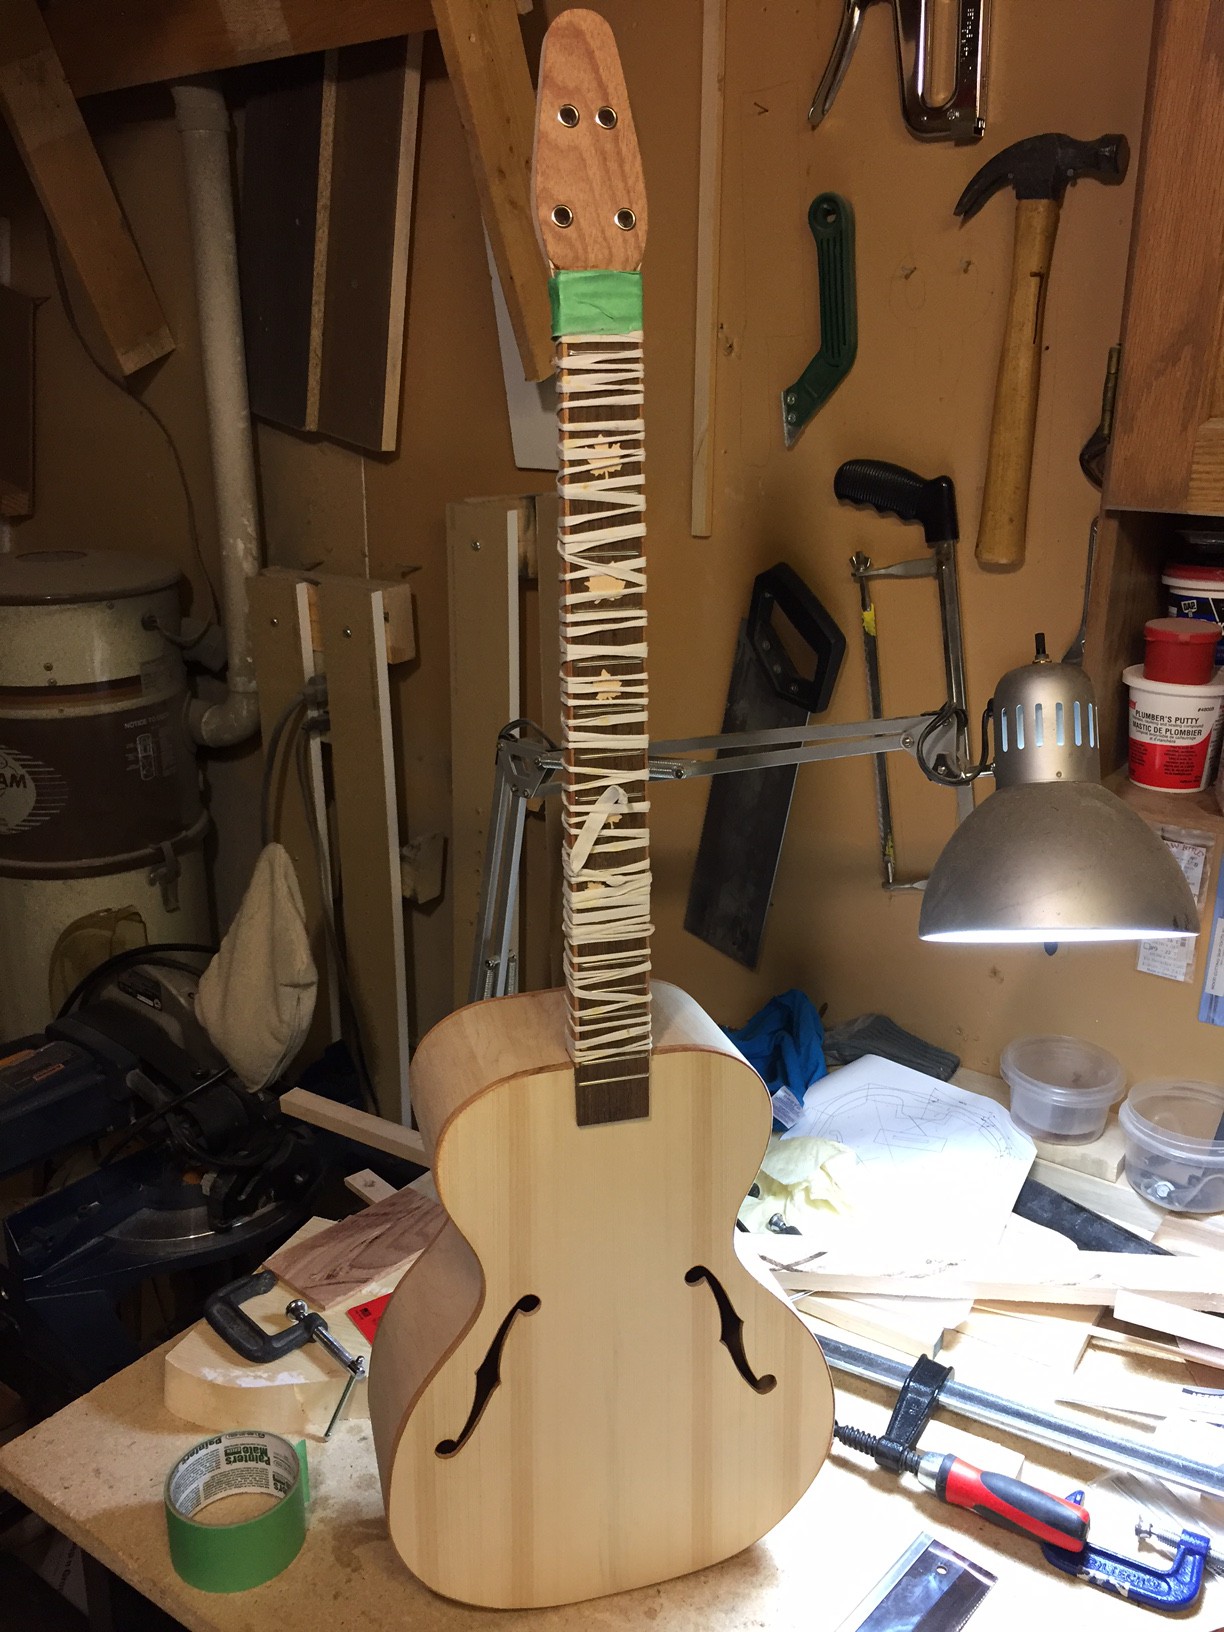
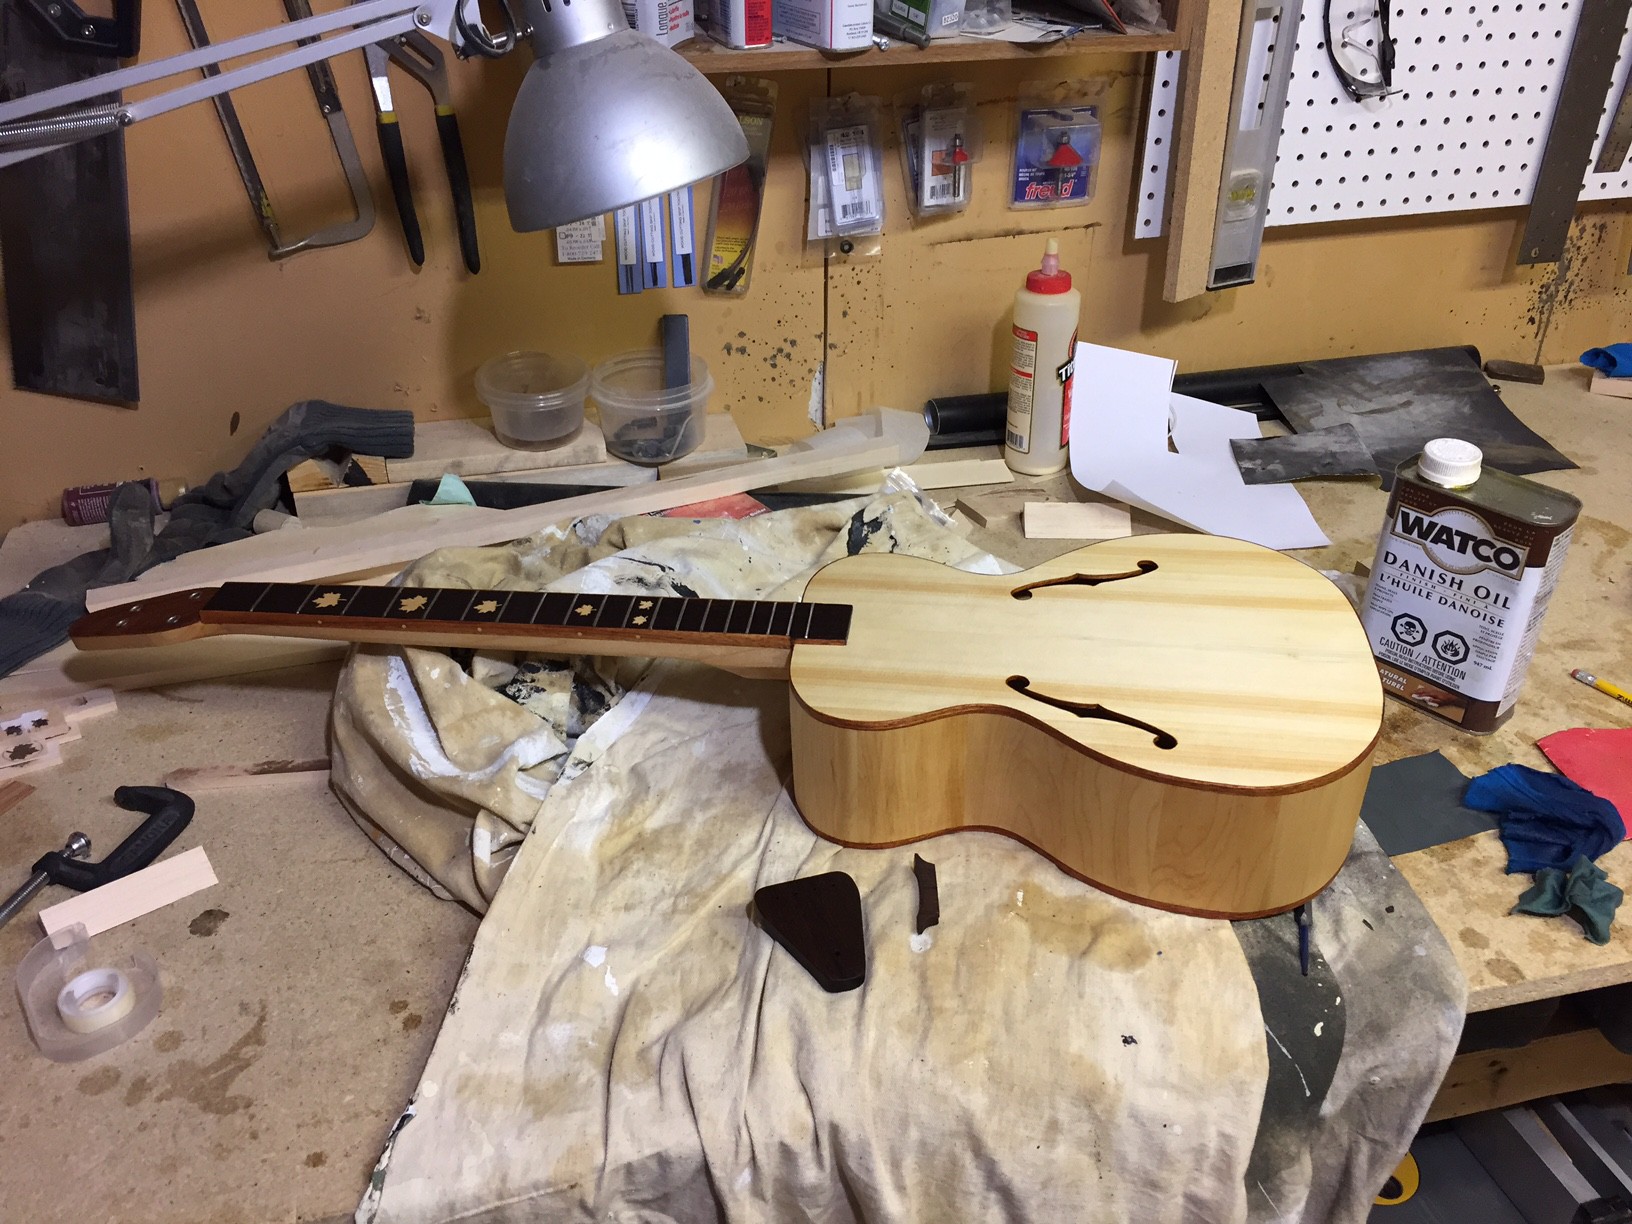
Next up is the finishing. I am using danish oil (a mix of linseed oil and varnish)
![]()
![]()
![]()
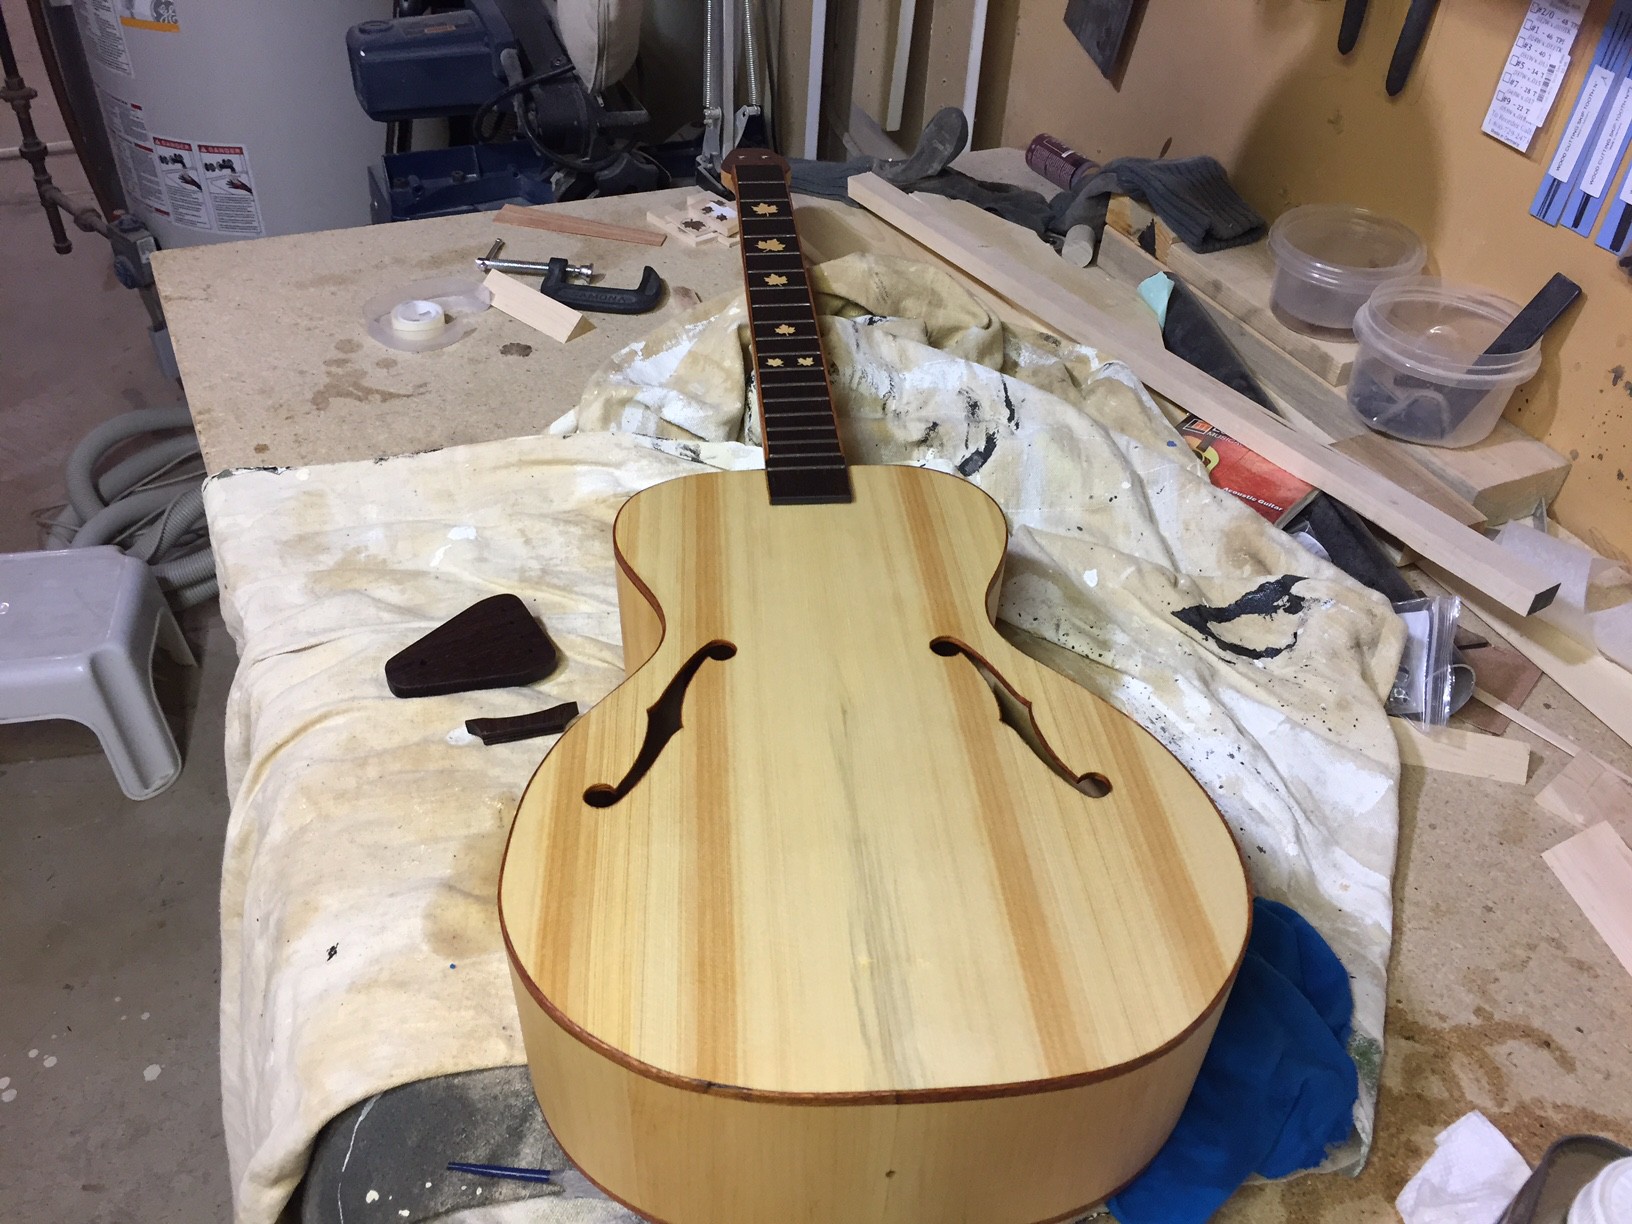
That's about it for the construction process. The next log will include some shots with it all strung up, as well as a video of how it sounds.
Enjoy!
CigarBox-ish Guitar
Acoustic guitar constructed using CBG-style methods, but without the cigar box.