Tindie
-
LayerOne Badge Hack
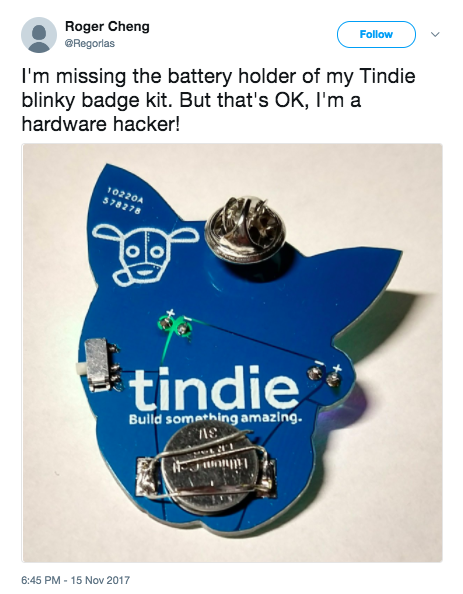
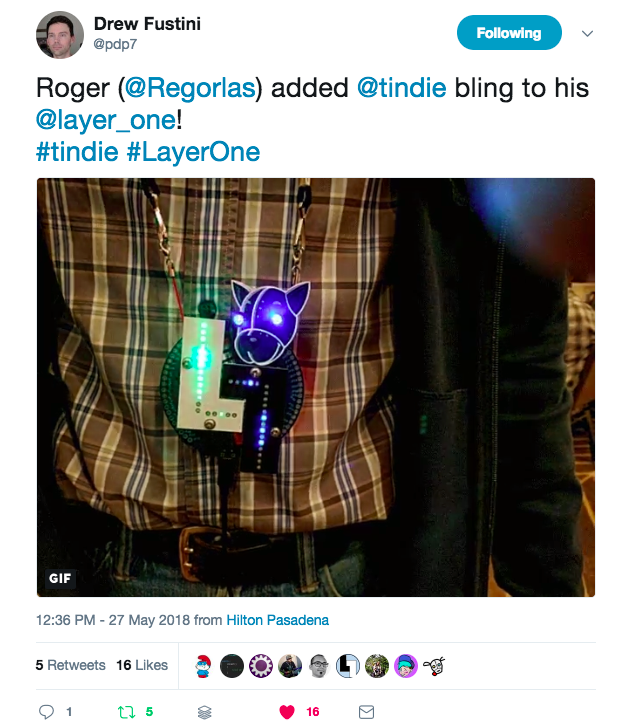
05/31/2018 at 22:32 • 0 commentsThis LayerOne we were honored to have Hackaday's Roger Cheng attend. He got straight into badge building and added a Tindie flair.
https://twitter.com/pdp7/status/1000822988420206592
Check out Roger's post 'BADGE BLING AND MORE AT LAYERONE 2018' on Hackaday.com.
-
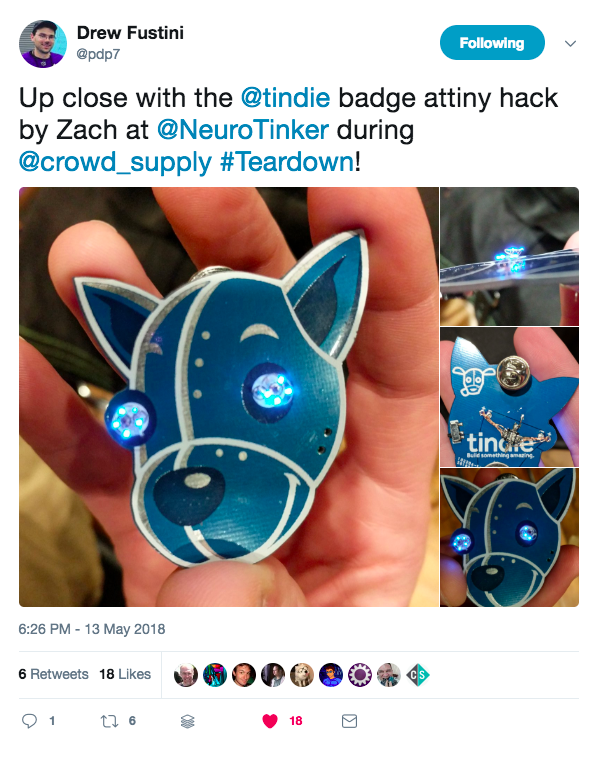
NeuroTinker's badge hack (with more photos)
05/14/2018 at 18:19 • 2 commentsThanks to @oshpark for sharing these photos of @zakqwy awesome badge hack taken at Crowdsupply's Teardown conf!
Larger photos over on Twitter https://twitter.com/pdp7/status/995837087587823618 and vidhttps://twitter.com/pdp7/status/995837087587823618
-
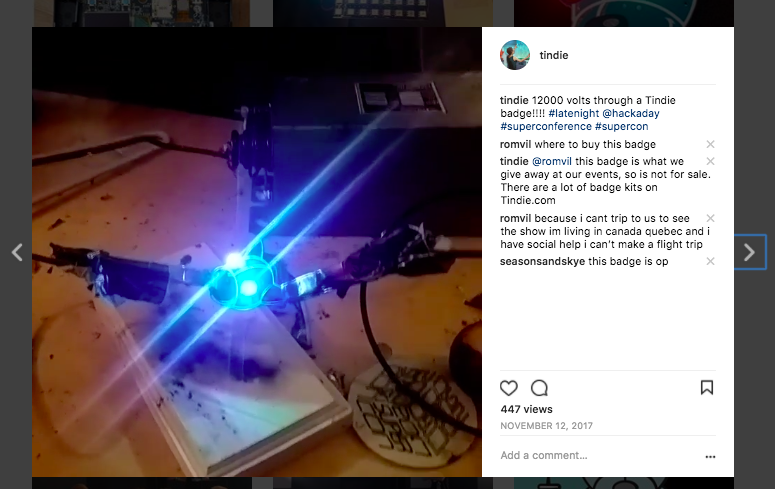
12000 volts through a Tindie badge!!!!
04/29/2018 at 21:56 • 0 comments -
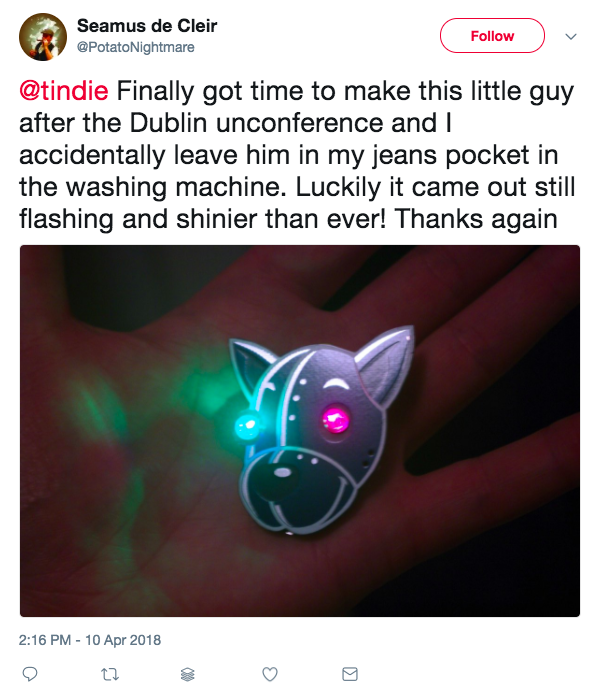
Tindie Badge survives washing machine. Come out blinkier than ever!
04/11/2018 at 00:17 • 0 comments -
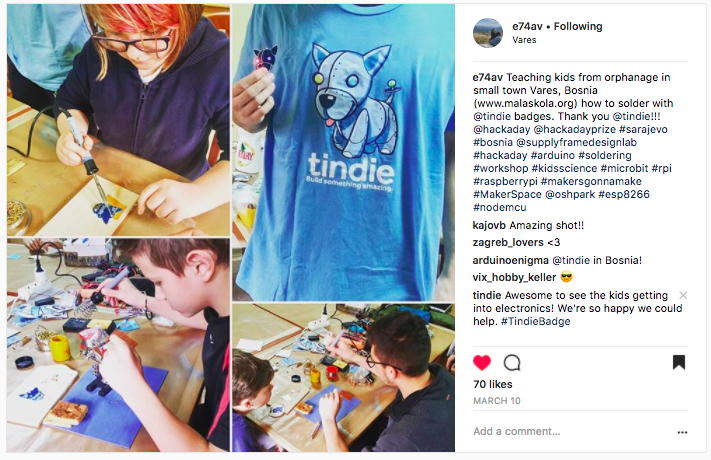
Orphans in Bosnia learn to solder
03/21/2018 at 23:16 • 1 comment -
Successful experiments in multicolor circuit boards
03/06/2018 at 02:16 • 0 commentsRead the full article from @Benchoff on Hackaday.com:
https://hackaday.com/2018/02/26/successful-experiments-in-multicolor-circuit-boards/
-
Evan's hack
12/08/2017 at 01:18 • 0 comments -
Roger's hack
12/08/2017 at 01:15 • 0 comments -
Zach's hack
12/08/2017 at 01:12 • 0 comments![]()
Watch the video here: https://www.instagram.com/p/BcaqHDYDXQN/
-
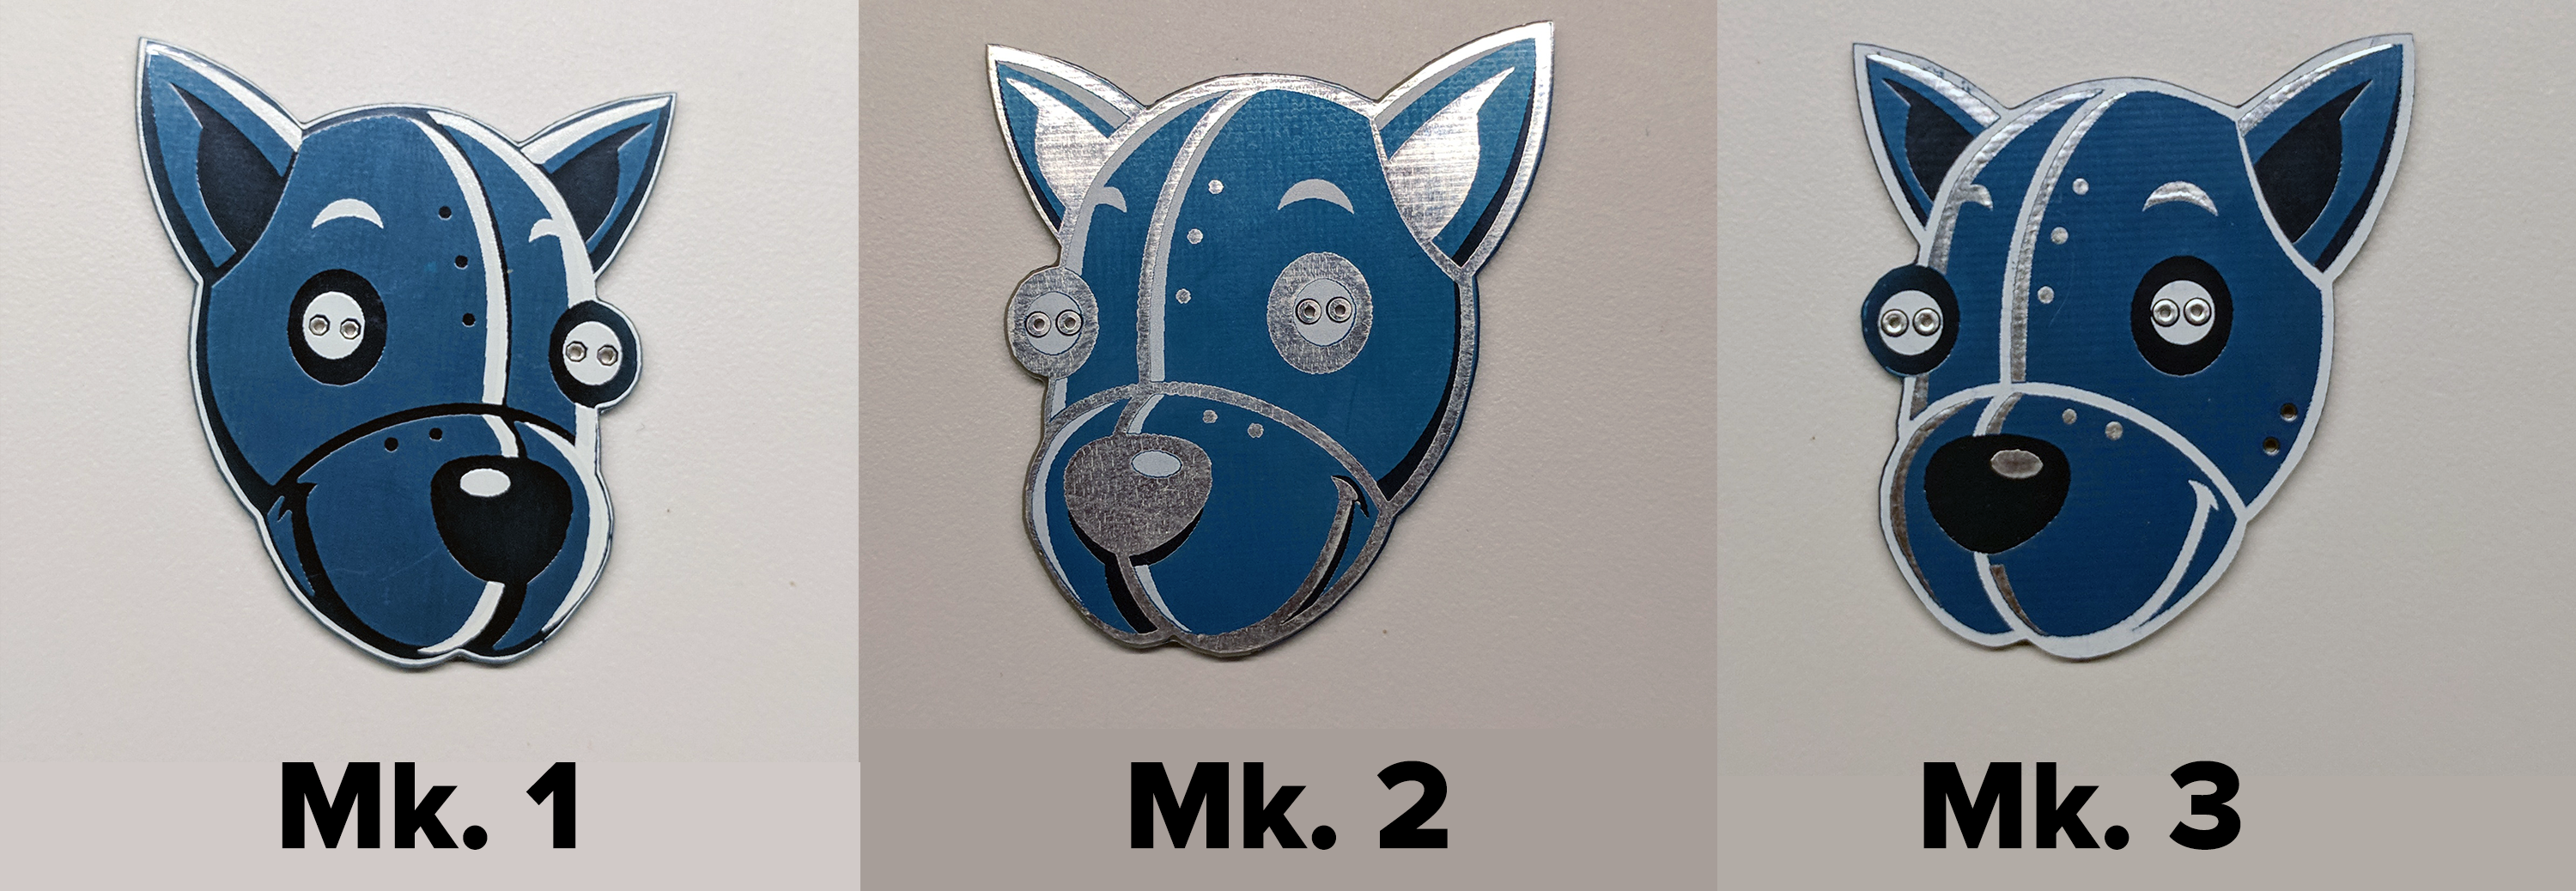
After 2000 units, we finally have a design we like
09/27/2017 at 21:10 • 2 commentsThis project log is a bit of a retrospective of the development of the Tindie Blinky LED Badge, how we made the first few hundred units, what we didn't like, what we changed, what we changed again, and how we ended up at a design we liked. Oh, the new design has a vastly reduced BOM cost, thanks to some strategic Alibaba shopping.
![]() ---------- more ----------
---------- more ----------The Tindie Badge, Mk. 1
![]()
This is the first revision of the Tindie badge. I wrote about it on the Hackaday blog earlier, but the simple version is pretty much Jasmine saying, "Hey, we should build a Tindie badge for DEF CON". K. I didn't have my hands full at the time. Slash ess.
The Mk. 1 Tindie badge is just about as simple as it gets. There's a battery holder, a battery, and two flashing RGB LEDs. Some BMP hacking in Eagle makes for a great PCB, and a 'pin clasp' soldered to the back of the badge makes it... a badge. Or something.
Kitting and distribution of this badge went great, and the BOM cost was reasonable: $1.83 per badge at quantity 300. Great for DEF CON, and a potential to be a *great* bit of swag. A lot easier to lug around than a bunch of t-shirts, in any event.
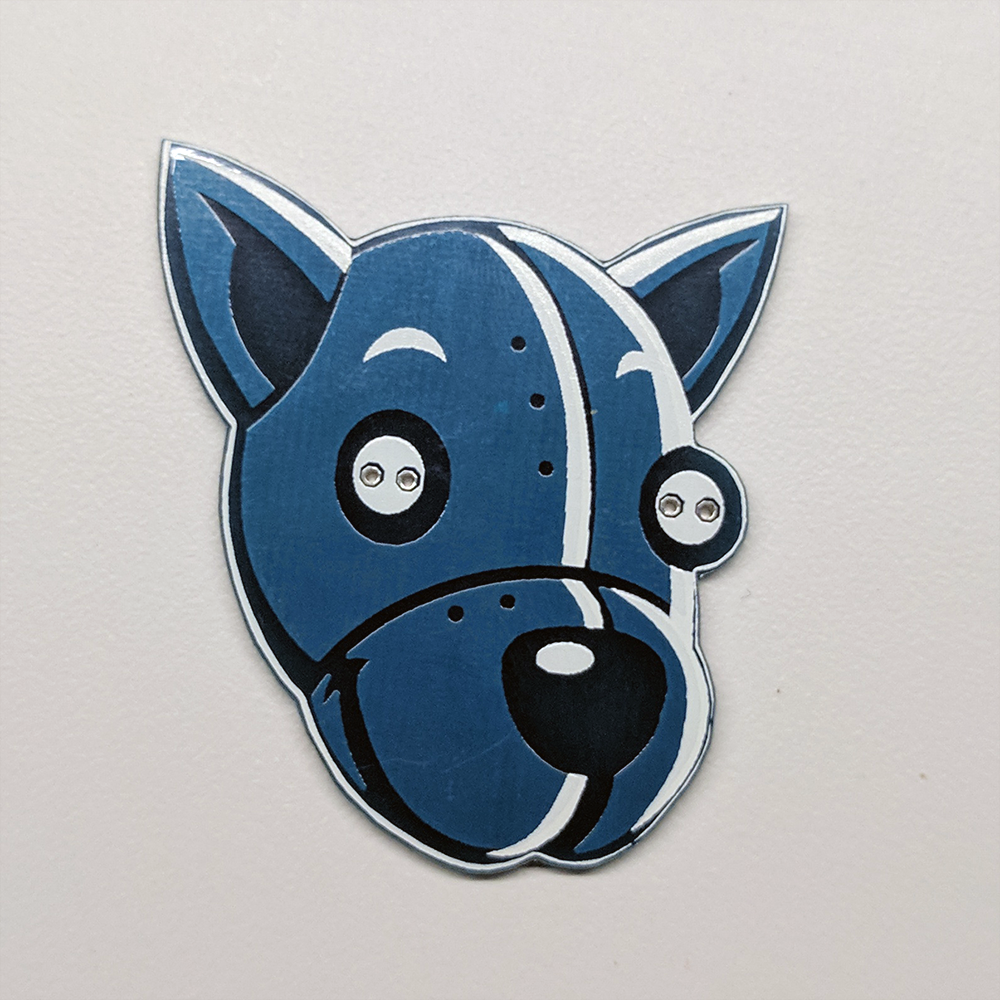
The Tindie Badge Mk. 2
![]()
With the success of the Tindie DEF CON badge, we decided to make a few more up for our next event: World Maker Faire in NYC. Confident in our ability to put together badges quickly, our target quantity was 1000. A thousand badges, and only a month and a half to get it together. Not a problem.
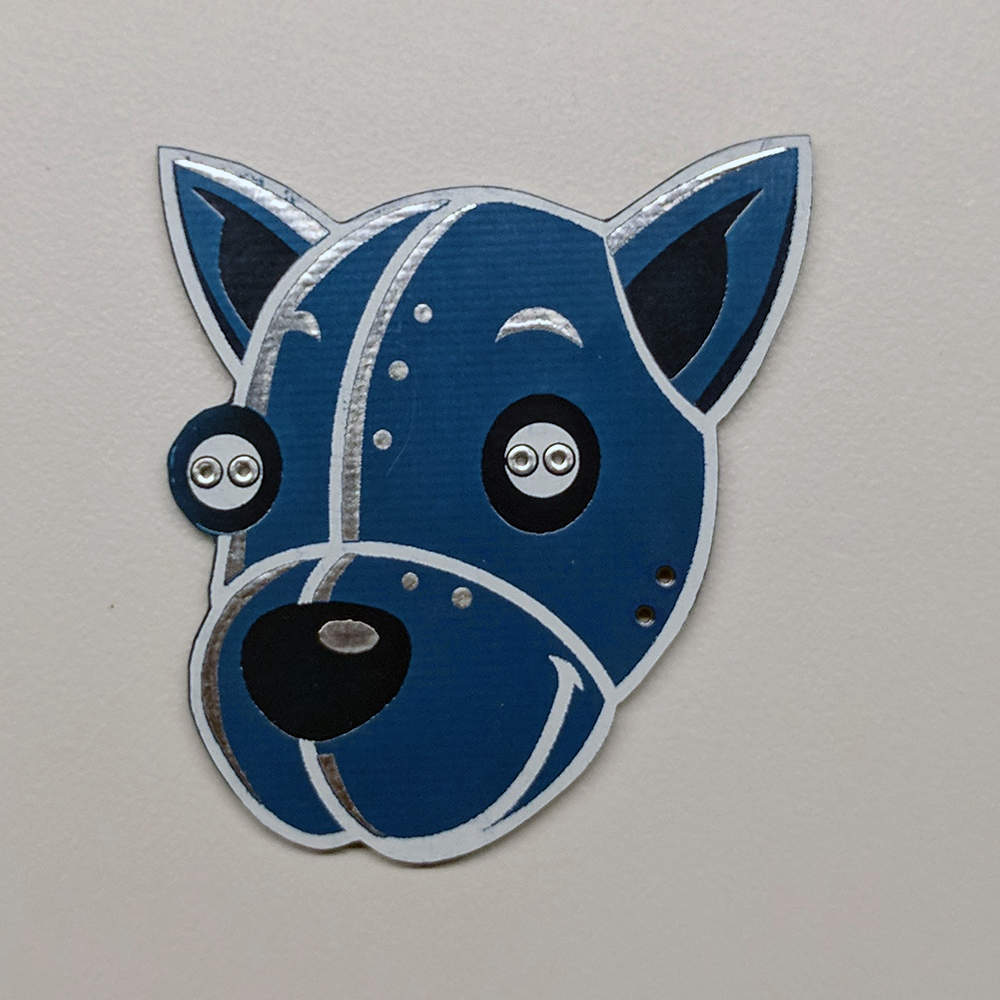
The changes from the Mk. 1 to Mk. 2 badge were purely cosmetic. While using layers of copper, silk, copper resist, and mask do work to put art on a board, I wasn't quite happy with how the first version of the Tindie badge turned out. There wasn't a whole lot of difference between the dark blue and light blue, the eyes could have used more definition, and Tindie's rivets should look like actual rivets. This meant I needed to change some of the dark areas to tinned areas. Not a problem -- it's just playing around with Illustrator, BMPs, and Eagle.
The Mk. 2 badge for Maker Faire was a success, both as a bit of swag and from an engineering standpoint. Instead of the $1.83 the first version cost, the Mk. 2 version was only $1.23. We used the same suppliers for the parts, so really that's just a quantity discount. This is still a significant cost reduction, and considering how many stickers we give away at events, this is a very attractive bit of swag.
Was I happy with it? No. The plan to put tinned copper everywhere didn't pan out, and the original badge looked better. At the very least, the nose and ears should be dark blue. There's only so much you can mock up in illustrator without having a finished board in your hands. Still, we made 1000 for Maker Faire, and the cost per badge came way, way down.
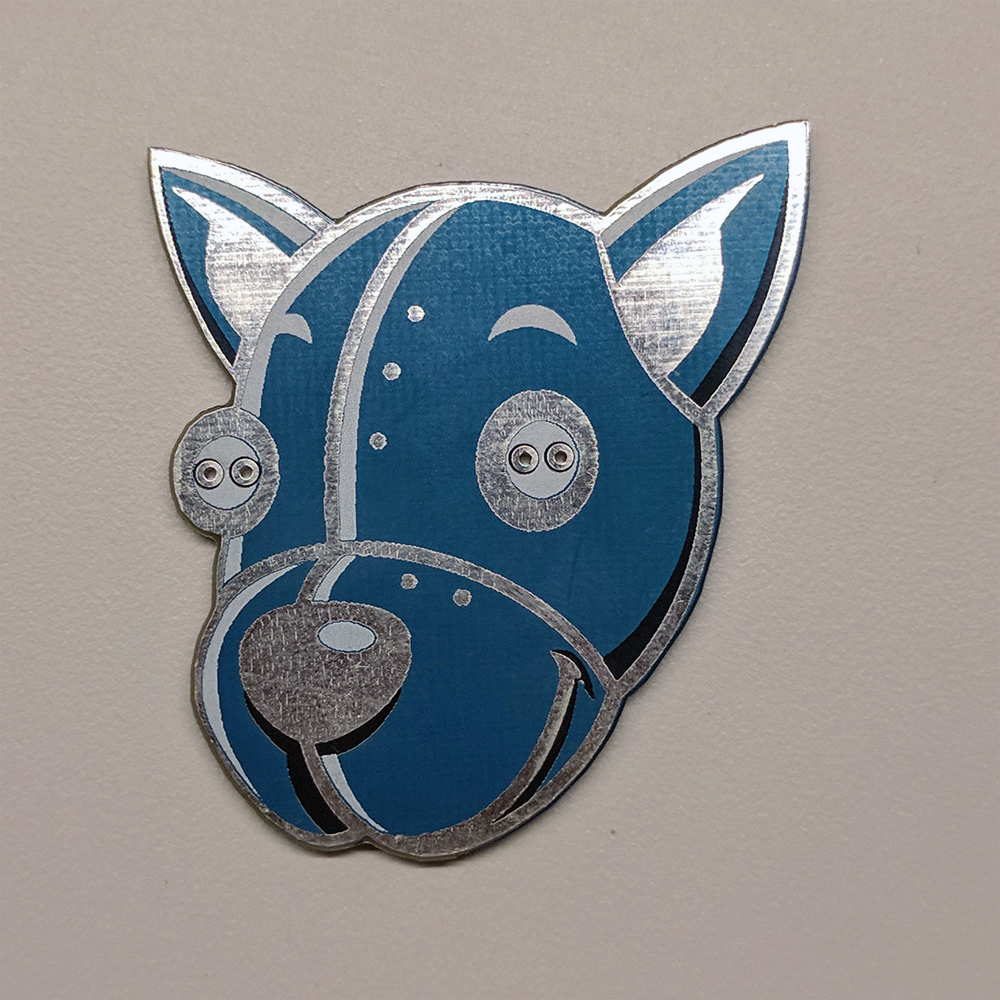
The Tindie Badge Mk. 3
![]()
Our next event after Maker Faire was the Open Hardware Summit in Denver. After that, it's the Hackaday Supercon where we're expected to make it rain robotic dog heads. The most important issue to fix was, of course, the art. The basic idea behind the art was to refine the design, make the nose and 'inside' ear dark blue, keep the rivets silver, and use the white silk a bit more. I wrote another Hackaday post on how to do this art in Eagle, and that went together pretty easily. We're all happy with the results.
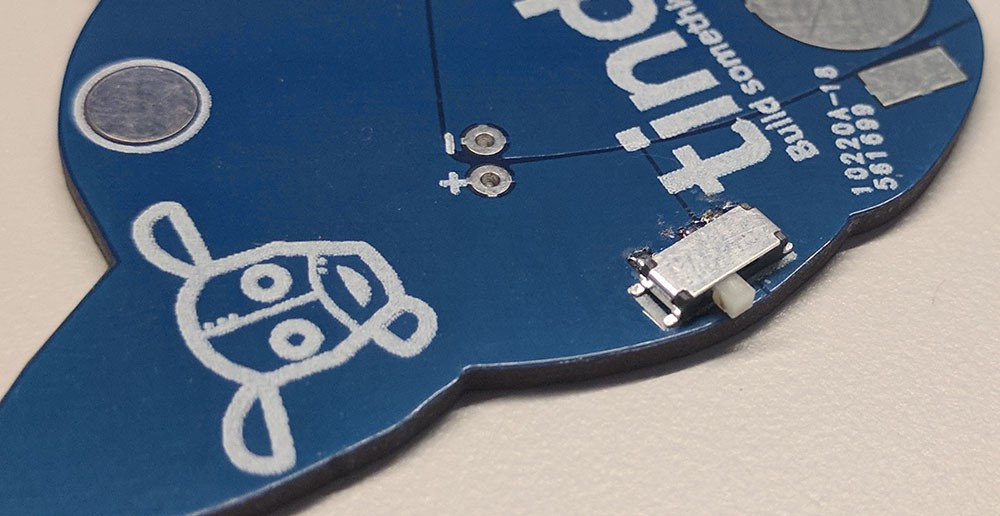
The Mk. 3 Tindie Badge is a major revision. We're doing actual, real, hardware changes. What's the biggest change? A switch. I've tested the Tindie badge, and a fresh battery will blink the eyes for days, but some people like to take the battery out for some reason. Whatever, we need a switch.
![]()
The requirements for this switch were simple enough. It had to be an SMD (so the front art wouldn't be messed up) SPST switch. Smaller was better, and as with all the components, we're looking for the cheapest option. We landed on an Alps switch from Mouser, available for $0.14 in quantity 1000. That's cheap enough.
With board art we're happy with and the BOM pretty much sorted, let's do a cost breakdown for 1000 Mk. 3 badges:
Part Unit cost Total Cost Source Bags $0.03 44.96 AliExpress Tacks $0.11 114.11 AliExpress Battery holder $0.36 357.26 Digikey BK-916-CT-ND Battery $0.17 170.35 Amazon 5mm LED $0.02 49.80 Amazon Boards $0.54 321.77 Seeed Switch $0.14 144.00 Mouser 688-SSSS810701 The total cost per badge, in quantity 1000, is $1.37, basically the same as the Mk. 2 badge, but adding a switch. Acceptable, but I'm still not happy with how much we're paying for battery holders and switches. We're going to roll with the Mk. 3 badge for Open Hardware Summit and Supercon, but I'm going to make a few changes to the BOM going forward.
Actual, real, engineering
We're not going to cut the BOM cost on the bags, tacks, or the LEDs. Those are already as cheap as they're going to be. Likewise, the price of the PCB isn't going to come down much unless we order in obscene quantities. Likewise, I shopped around for batteries before building the first one, and trust me, Amazon has really, really cheap CR1220 cells.
This basically leaves the switch and battery holder as the places where we're going to cut costs.
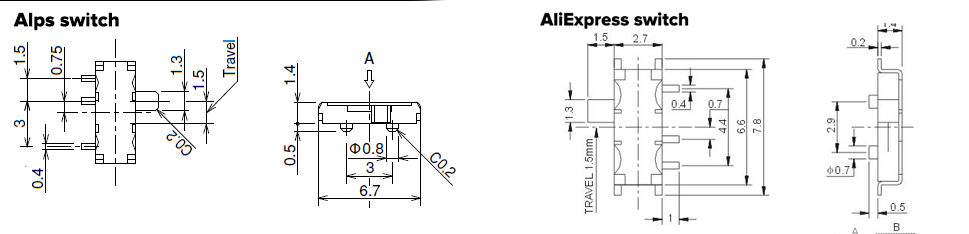
The first switch I found that fit the bill was from Alps, but quite a lot of electromechanical parts have a Chinese equivalent that's more or less the same. After a bit of searching, I found this guy on AliExpress. Take a look at the drawings of both:
![]()
No, they're not identical. The 'studs' on the bottom of the switch are different; the AliExpress switch has 0.7mm diameter studs, the Alps has 0.8mm diameter studs. If you really study these drawings, though, they're more or less the same. They're effectively interchangeable; if you make a part for one in Eagle, you have a part for both.
Here's the kicker: I can get 1000 Alps switches for $144. I could also get 1000 of the AliExpress specials for $31.26. That's $0.14 a badge for the Alps version, or $0.03 for the AliExpress version. I just saved eleven cents. For 1000 boards, that's a hundred and ten bucks. Awesome.
The biggest expense on the BOM is the board, and there's little I can do to change that. The next biggest expense -- by a large margin -- is the battery holder. Not the battery, mind you: the battery holder. This is just a tiny piece of stamped metal, and it costs $0.36 in quantity 1000. Unfortunately, AliExpress doesn't help me here. The vast majority of CR1220 battery holders from the usual Chinese suppliers are plastic, through-hole jobbies. I don't want that; they're bigger parts, they'll ruin the art on the front, and they're still pretty expensive at about $0.20 in quantity 1000.
The battery holders for the Mk. 1, Mk. 2 and Mk. 3 badge were from Digikey. They work, they're great, but you should always do a search on both Mouser and Digikey before designing something (or sign up for Findchips. That would have probably saved some money). Here's what I found on Mouser. It's a different part from a different supplier, and it's only for CR1216 and CR1225 batteries -- not CR1220 batteries.
Those of you who know how the names of coin cells are derived are laughing right now, but here's what's going on. The first two numbers are the diameter. These batteries are 12mm in diameter. The second two numbers are the thickness. A CR1216 battery is 12mm in diameter, 1.6 mm thick. A CR1225 battery is 12mm in diameter, 2.5mm thick. Of course my CR1220 battery will work in a battery holder that accepts both 1216 and 1225 batteries.
The Mouser part is $0.19 in quantity 1000, saving me $0.17 per board. That's $170 in quantity 1000. Let's look at that BOM again, with the new parts:
Part Unit cost Total Cost Source Bags $0.03 44.96 AliExpress Tacks $0.11 114.11 AliExpress Battery holder $0.19 191 Mouser 712-BAT-HLD-012-SMT Battery $0.17 83.35 Amazon 5mm LED $0.02 49.8 Amazon Boards $0.54 321.77 Seeed Switch $0.03 31.26 AliExpress Total Cost: $1.09 After three revisions, we're happy with the art on our magnificent Tindie badge, and we brought the cost down and saved almost a dollar per badge. That's really incredible, and a testament to how much you can save just by seeing what options you have available to you.
What are the plans for the Tindie badge going forward? We've pretty much got the Supercon order lined up, and that'll be the last con we're going to this year. Next year, though, we're distributing Tindie blinky badges far and wide. These things are some of the cheapest swag we have, and people love them. It's a soldering kit, and they're much cheaper and much more easy to distribute than t-shirts. We're aiming for several thousand by New Years, and we're going to make it rain robotic dog heads.
Going forward, there are a few options for what we can do with the Tindie badge. I'm doing a few experiments with custom silk and solder mask, and I think this is the perfect platform to demonstrate a few techniques. The top of the list for these experiments is an Aladdin Sane Tindie badge, a Kiss Army Tindie, and maybe one with the Mike Tyson face tattoo. Or Chakotay. I always get those mixed up.
Tindie Blinky LED Badge
There's some through hole & surface mount soldering to be done, but when you're finished you've got a sparkly eyed Tindie head lapel pin.
 Follow