Ruud van Falier
-
STM32 experiment
09/10/2017 at 16:34 • 0 commentsJust ordered some STM32F103CB boards for $3 each. I'm hoping that I can use one to generate the composite video signal for the expansion board that I'm working on.
It's about the same size as the Arduino Nano board and will easily plug into the PCB and it can supposibly be programmed with the Arduino IDE.
We'll find out in a few weeks!
-
Thanks for your interest
09/04/2017 at 08:15 • 0 commentsIt's awesome to see so many people interested in this project.
I've been quiet for some days because I was on a holiday but work will continue soon! -
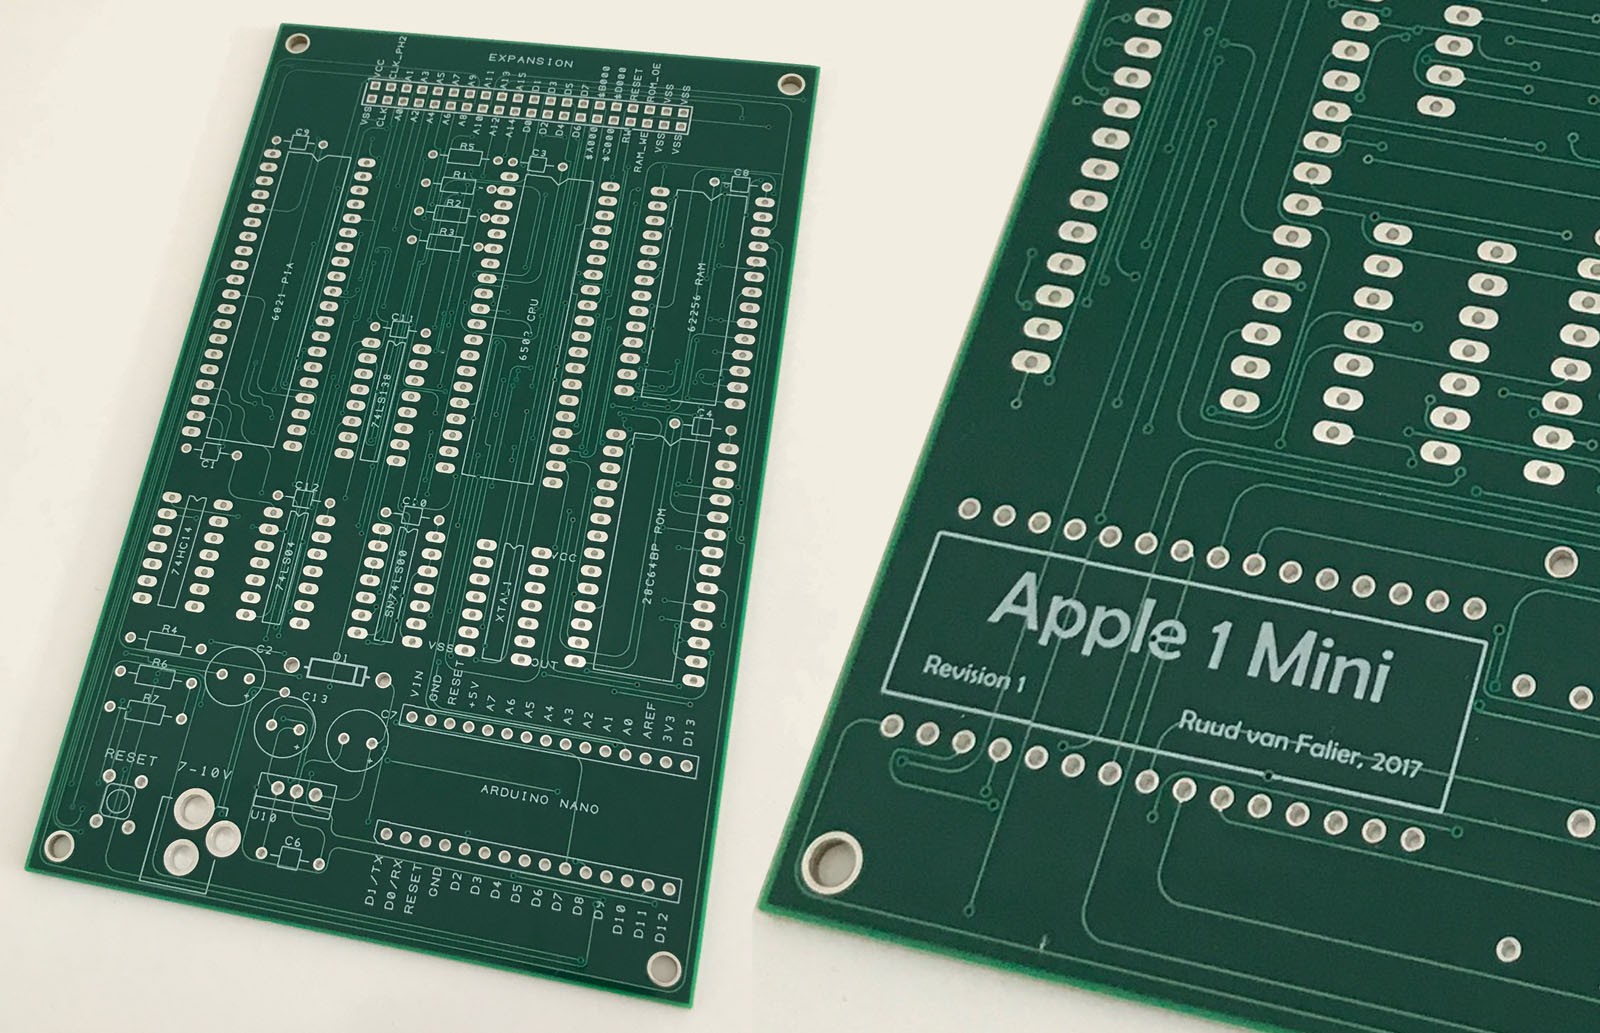
New PCB came in!
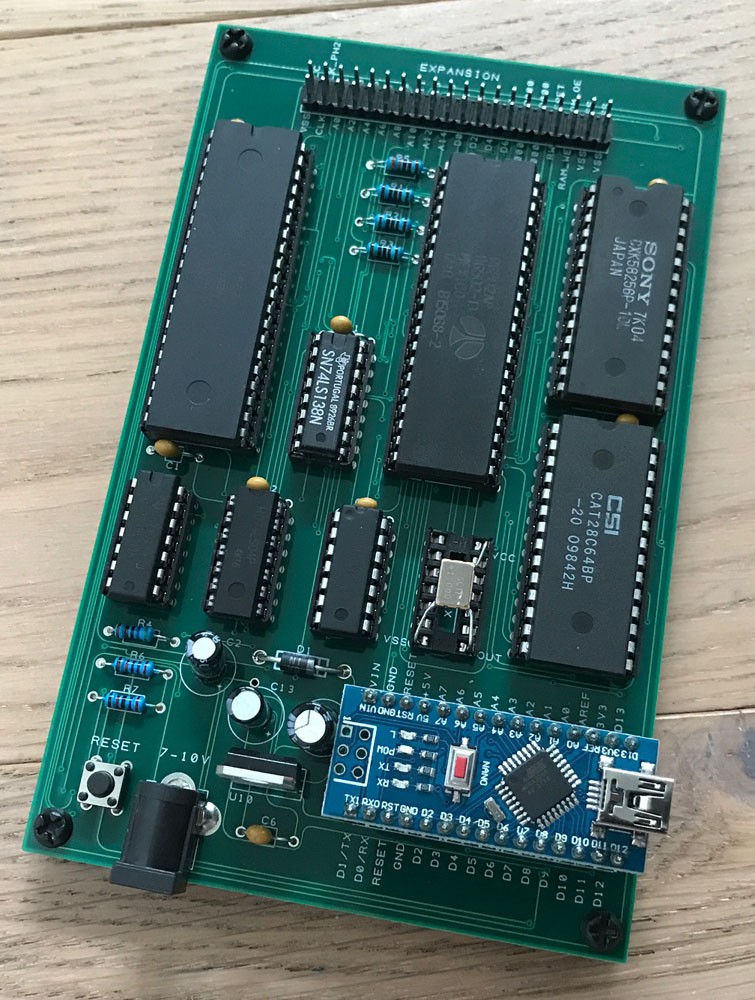
08/23/2017 at 15:29 • 0 commentsThe redesigned PCB came in today!
Quickly assembled it and everything seems to be in working order.I will do some more thorough testing, but if everything checks out, this will be the PCB used for the first production run of DIY kits.
In the mean time, I've been busy trying to design the first expansion board that adds composite display and keyboard functionality to the Apple 1 Mini.
Unfortunately the progress is slow and I haven't succeeded yet in rendering the 40x24 characters that the original Apple 1 support on screen...
But there are still some options open, so more news on that will follow later!![]()
![]()
-
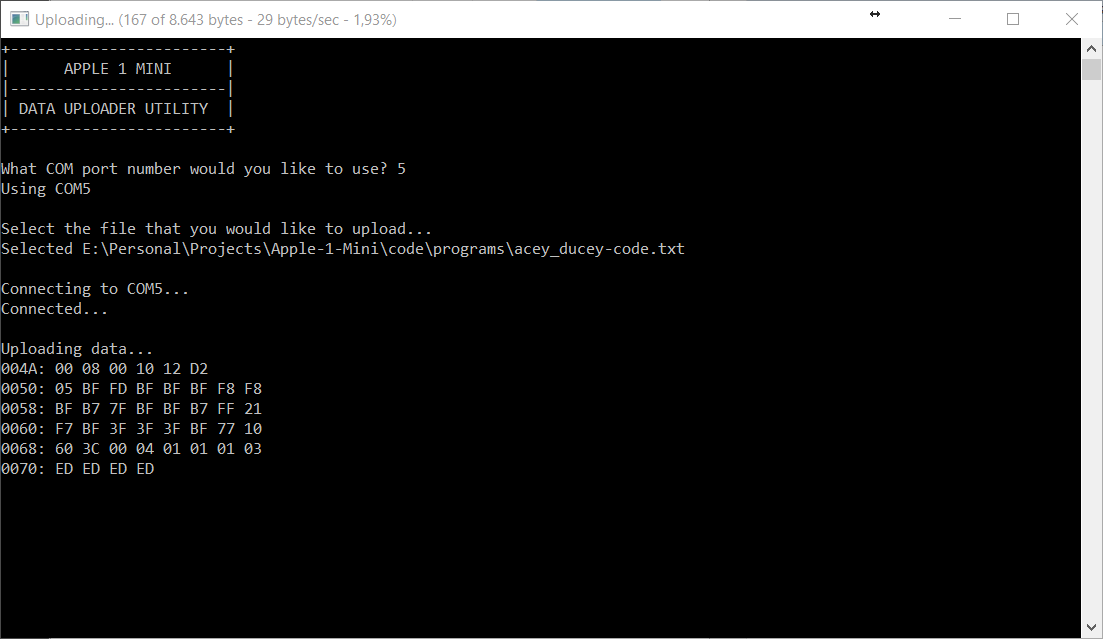
Data upload utility
08/06/2017 at 18:56 • 0 commentsTransferring data from my PC to the Apple 1 Mini proved challenging.
The transfer requires a delay after each byte and a bit more delay after a carriage return.
Without these delays and a few other details, the transfer fails.I added a simple utility that handles this upload process and I've been using it to test the small library of program code that I found for the Apple 1.
It uploads data at a whopping 29 bytes per second!
The utility seems to work very well at this point and I've enjoyed playing a few simple games on my Apple 1! :-)Source code and binary for the utility is available from the GitHub repository.
![]()
-
Sneak preview of revision 1
08/05/2017 at 08:48 • 0 commentsHere is a sneak preview of the (much smaller) revision 1 PCB that is currently being produced for testing.
![]()
-
Let's get it started...
08/04/2017 at 14:37 • 0 commentsA good month ago I was contemplating what to build next...
I had just finished building an 8-bit CPU on a breadboard - thanks to Ben Eater's amazing teaching skills - and figured I could step it up a notch.
That's when I came across the other Ben's (Heckendorn) videos on him building an Apple 1 on a piece of perf board and my new goal had been set: to build myself an Apple 1.I started by researching the resources Ben Heck had left behind, which was mainly based on Briel Computers' Apple 1 Replica project.
During that research I began creating a new circuit diagram for my own build.
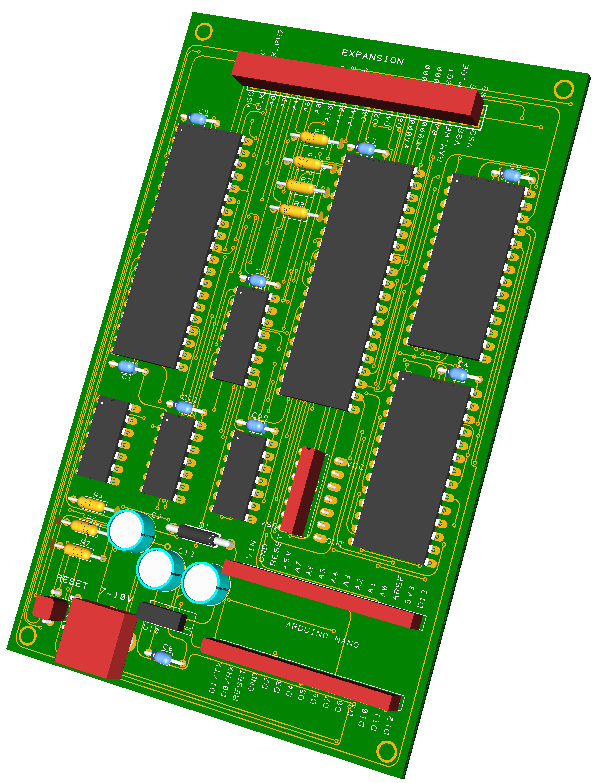
Starting a new circuit from scratch really helped me understand every aspect of the computer. That and troubleshooting it with my oscilloscope and logic analyzer once I put everything on a prototype board.Once the prototype was functional, I decided to produce one (inefficient) PCB to verify my circuit diagram was correct.
The result of that first PCB (revision 0) can be found in the gallery; it's a rather large board, but works exactly as I hoped!What I have so far:
- 6502 CPU with 6821 PIA, 8 KB (EEP)ROM and 32 KB RAM
- ROM containing BASIC, Krusader and WozMonitor
- Firmware running on an Arduino that provides serial communication between the computer and an external terminal client (PuTTY, for example)
- The firmware mimics Apple 1 visual representation (only uppercase, blinking "@" as cursor)
I intentionally started with a board that does the bear minimum; run 6502 code and provide serial communication.
The idea is that the computer is expanded in the future by adding boards on top of the main board using the expansion header.What I have planned for this project:
- Produce a smaller PCB that is easy to fit into a casing.
- Create one or more expansion boards, for example to provide an interface for a monitor and keyboard so the computer can run standalone.
- Create a modular casing from laser cut pieces. Modular in the sense that it can fit just the main board, but the casing itself can be expanded (using interlocking tabs) once expansion boards are added.
- And most importantly: release the computer as DIY kit, in different variations!