 Lars Borm
-
1Frame construction
![]()
![]()
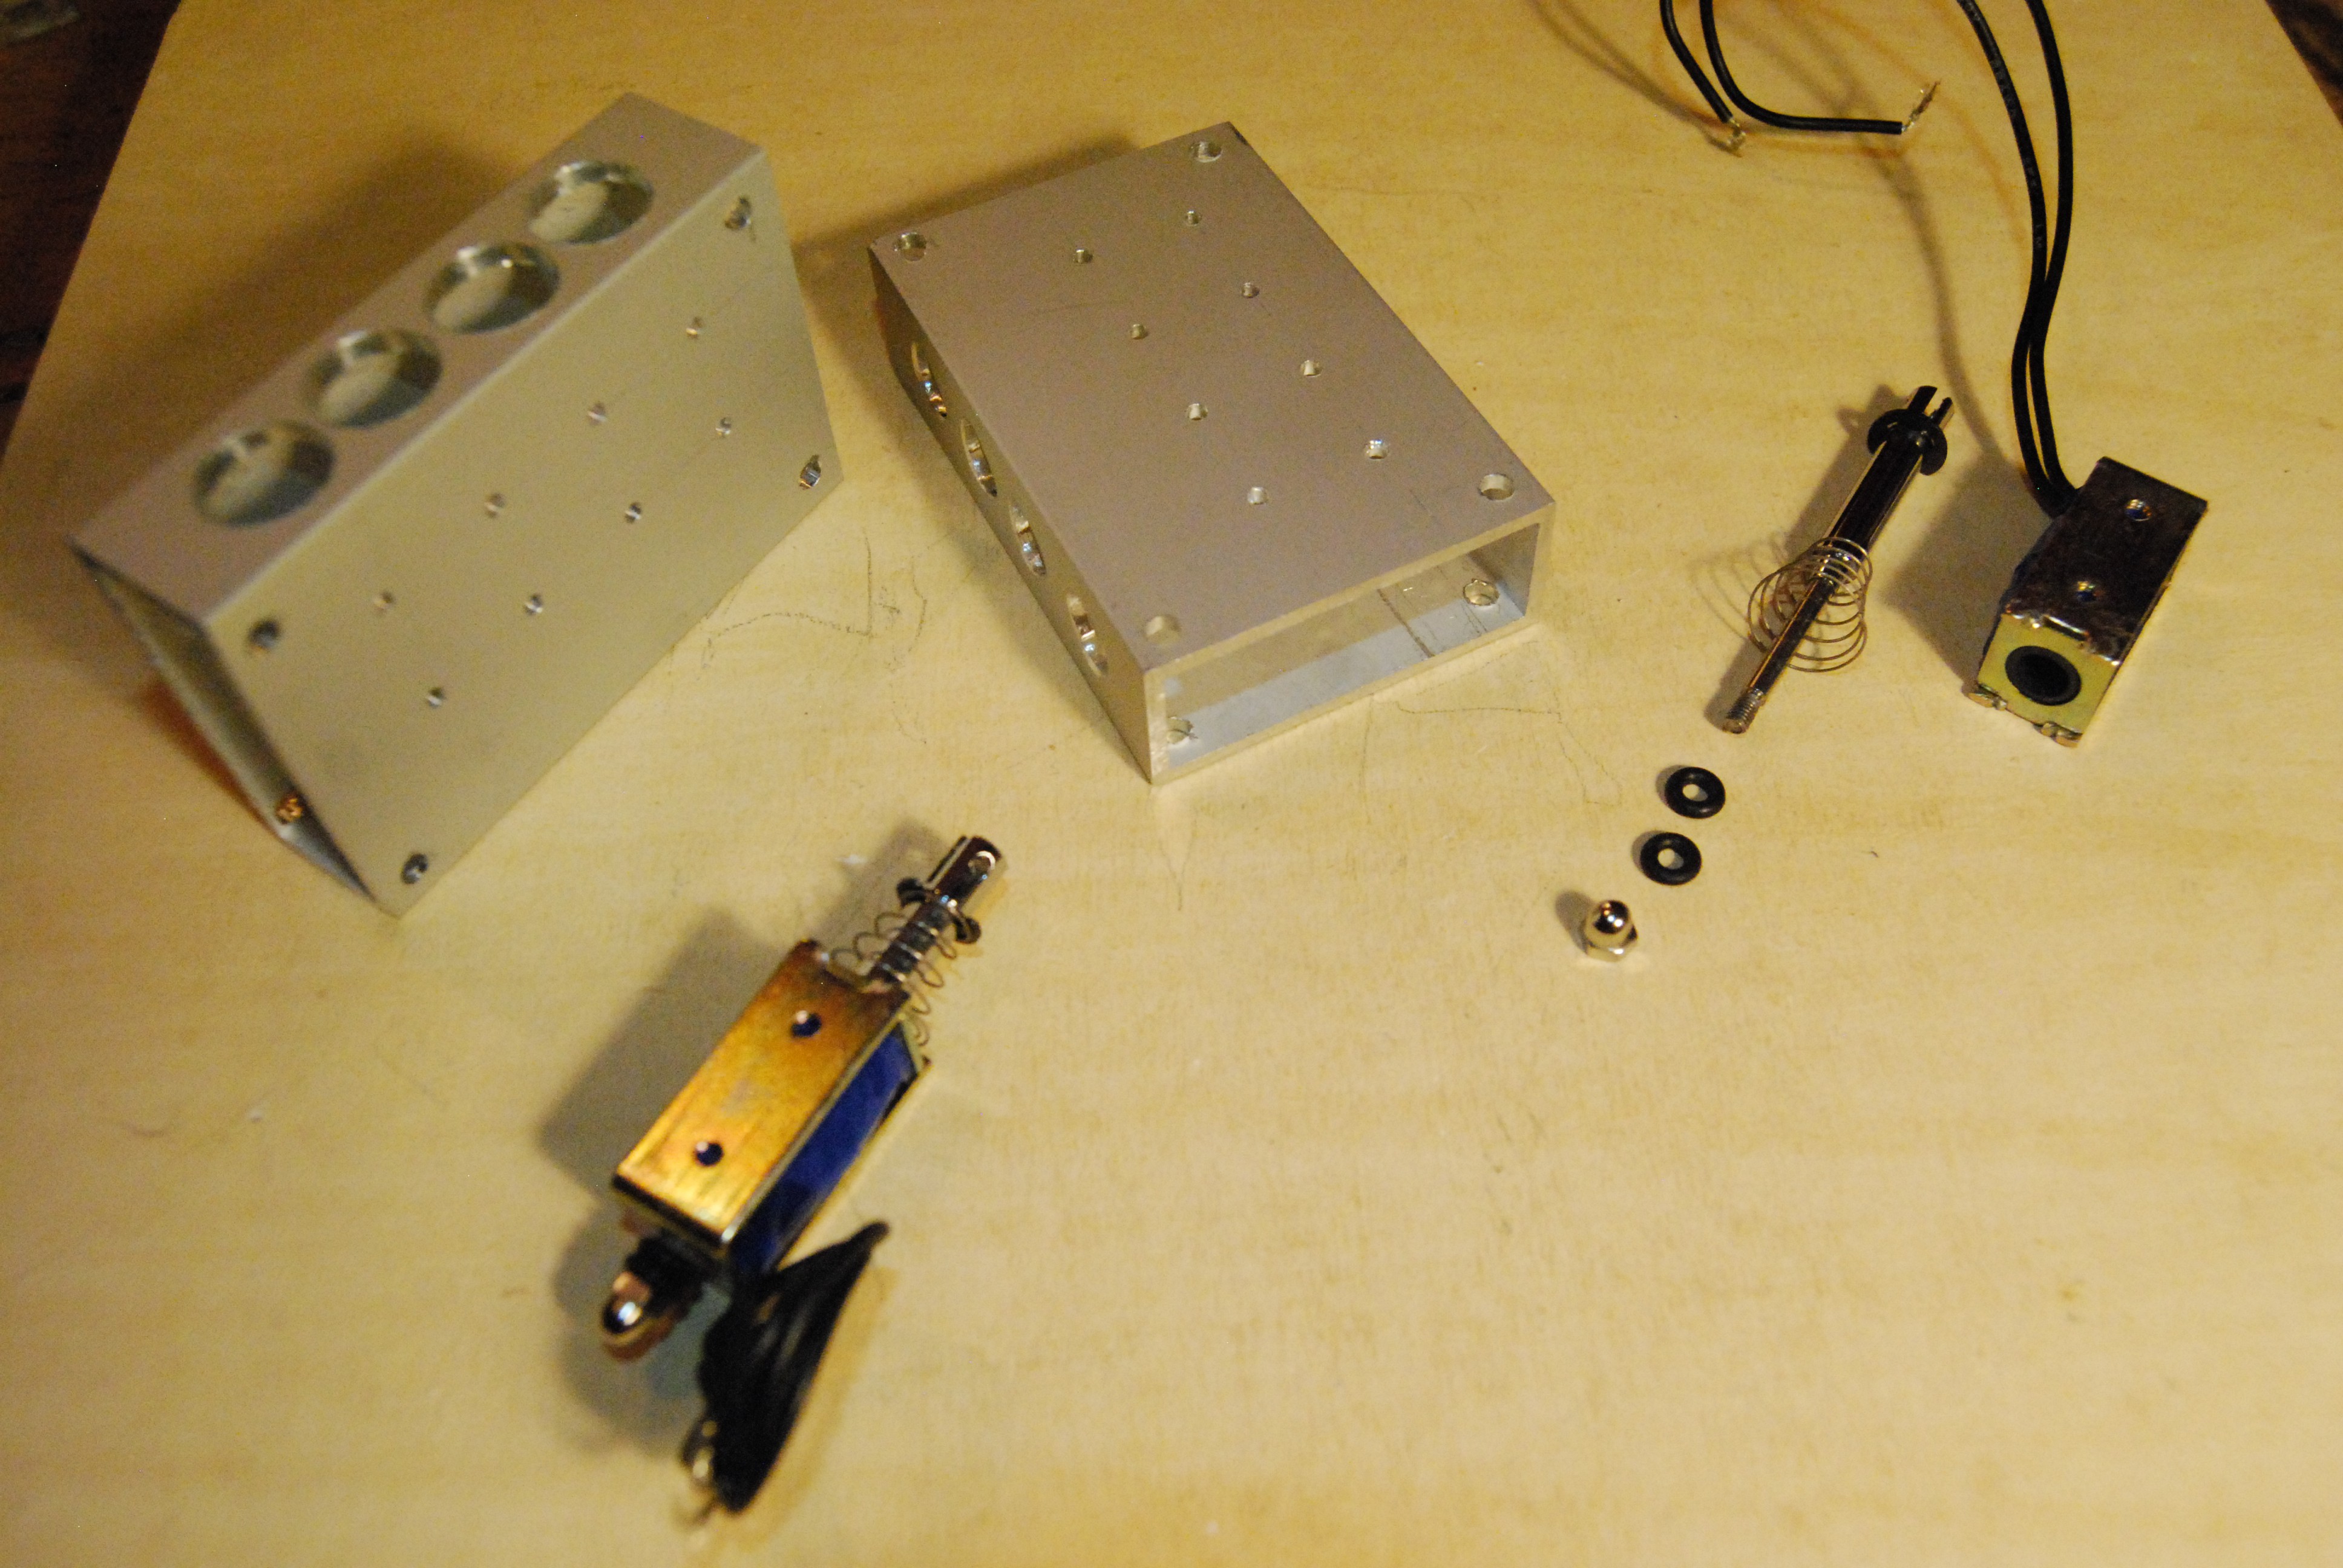
Take a 76mm x 50mm x 20mm aluminum hollow beam.
To accommodate the rod af the actuator, drill four 13mm holes in the top and four 10mm holes in the bottom.
![]()
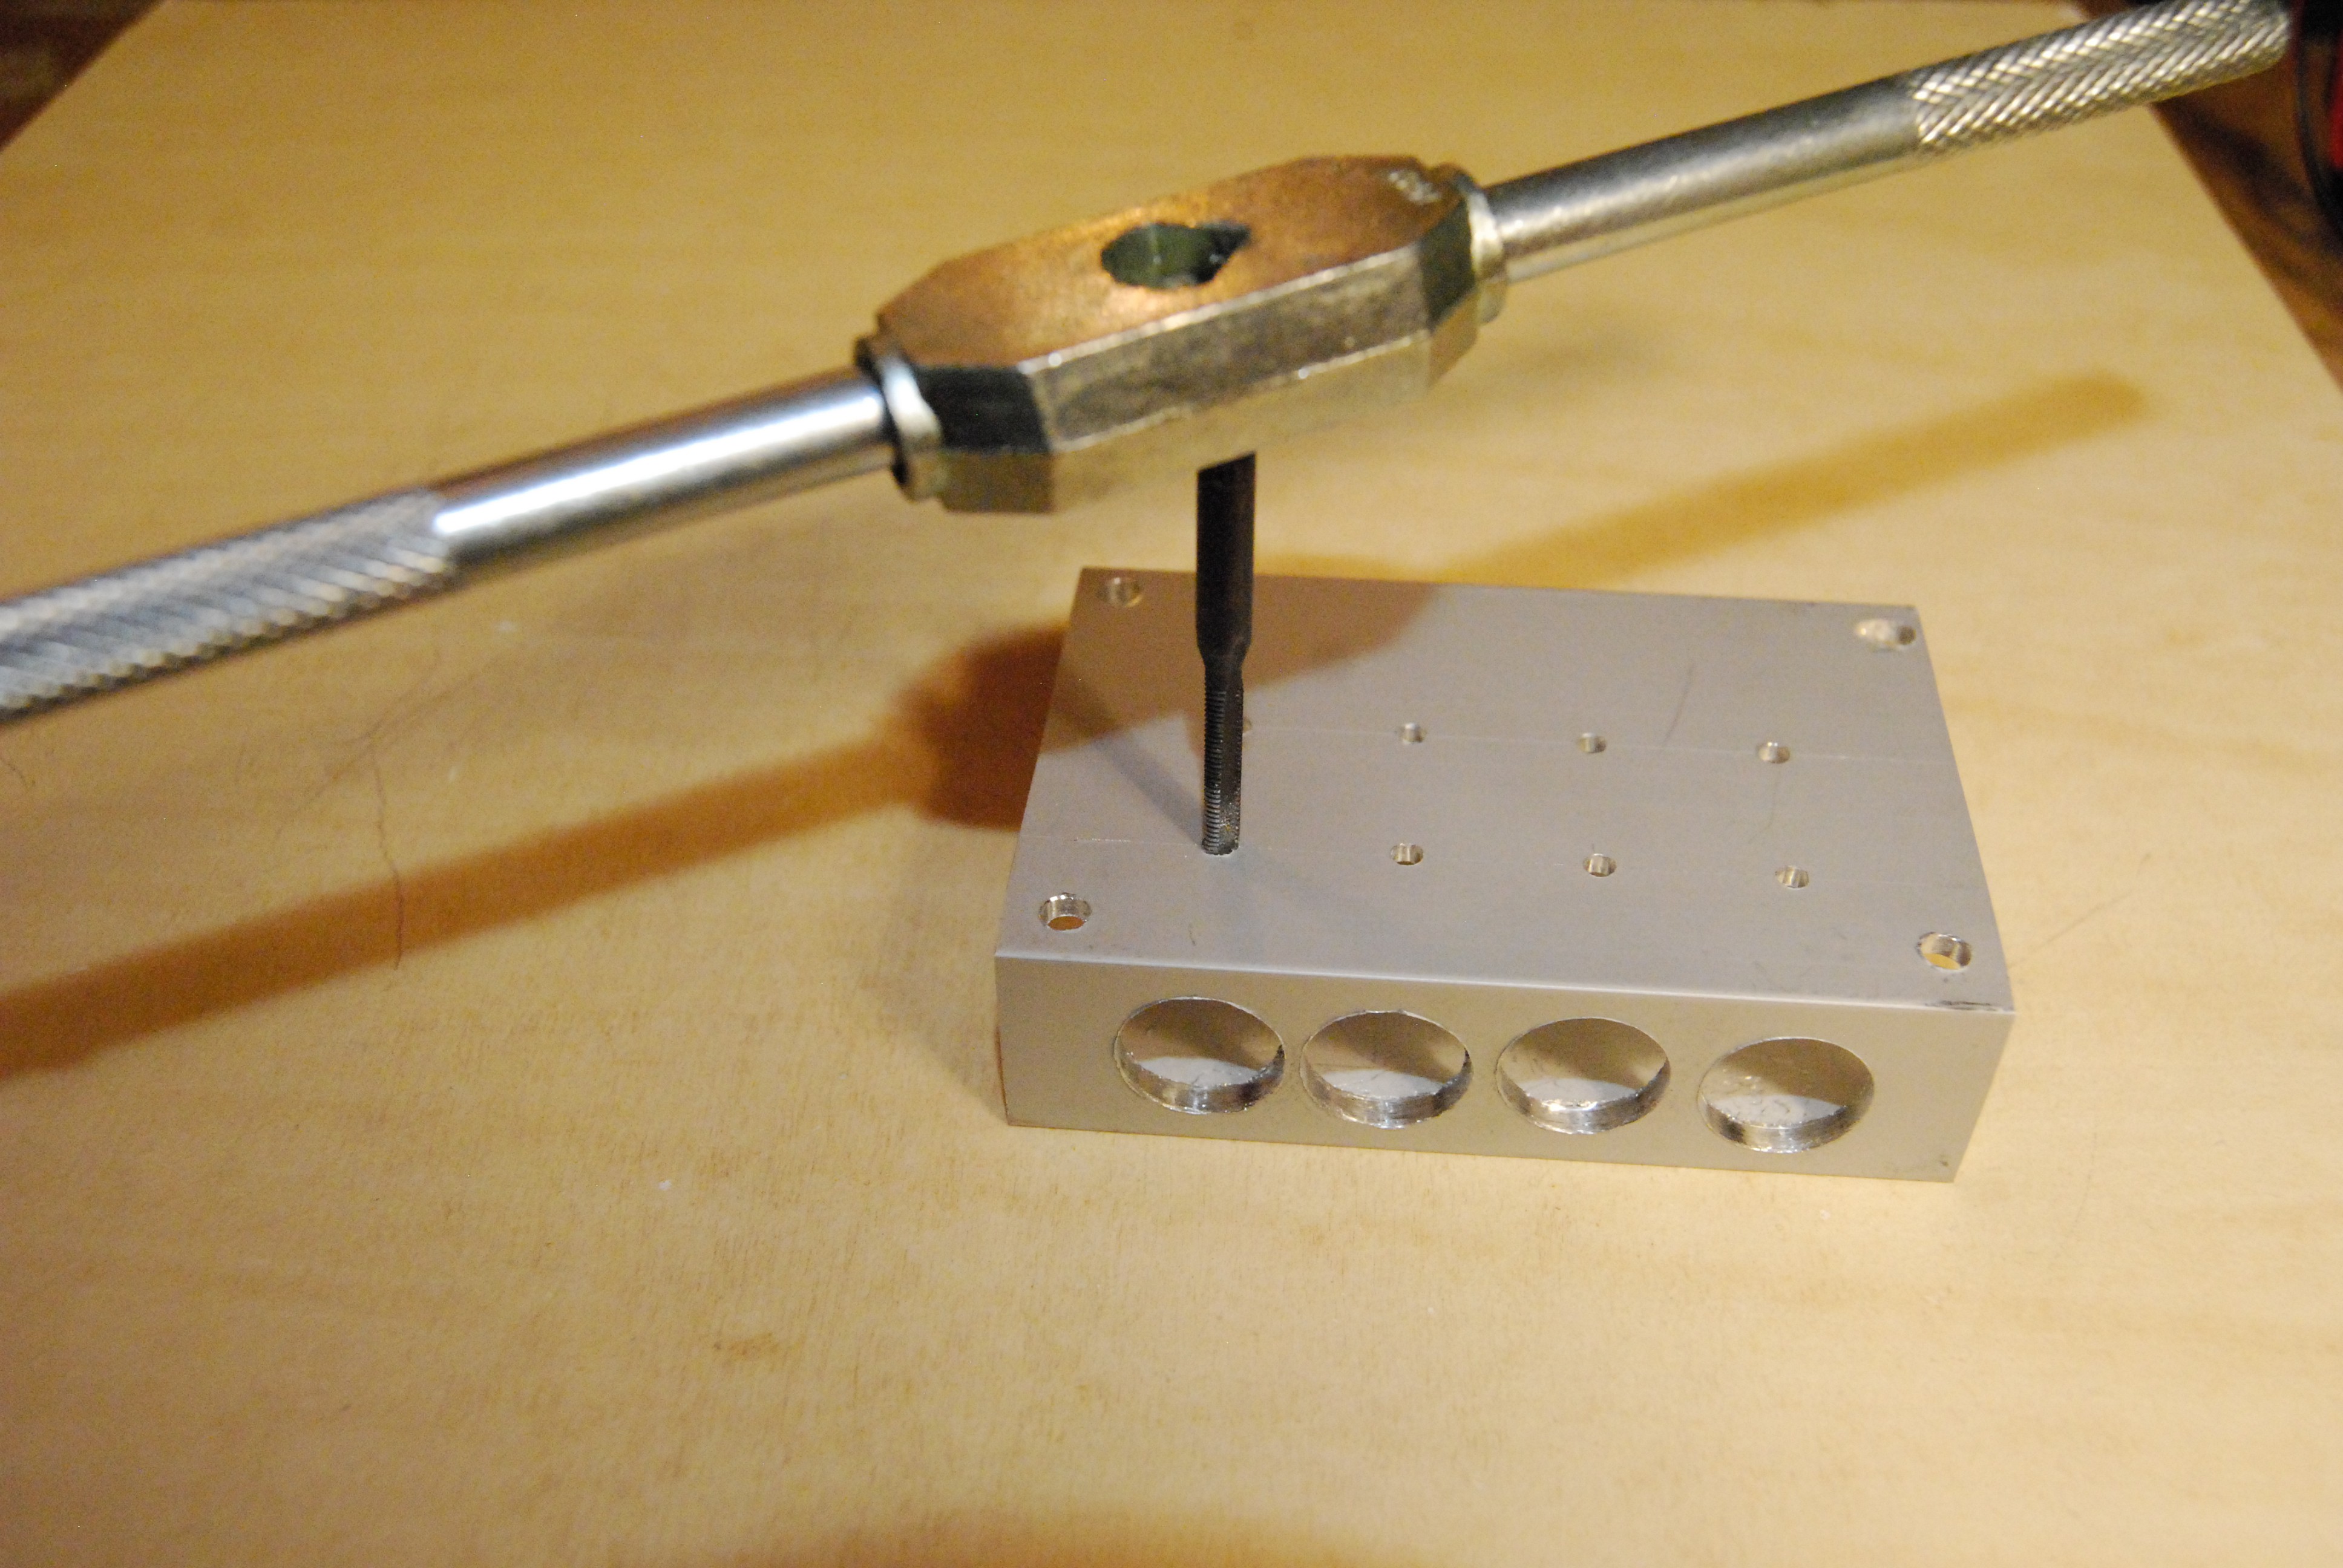
On the back, drill two holes per actuator to mount the actuators. For the Actuators used in this project, the holes should be 15mm apart and they have a M3 thread that can be used to mount them in the frame. You can either drill 3mm holes or drill slightly smaller and make a M3 thread in them for extra security. I choose to drill a 2.4mm hole and thread them with a tap drill.
-
2Actuator mounting
Take apart the actuators by unscrewing the domed nut, and pulling out the rod.
Place the actuator body in the aluminum frame. Align the holes of the actuator and the frame and mount with a M3 screw.
Re-assamble the actuators by first twisting the spring into the frame and then placing the rod back.
Make sure the cables go to one side.
-
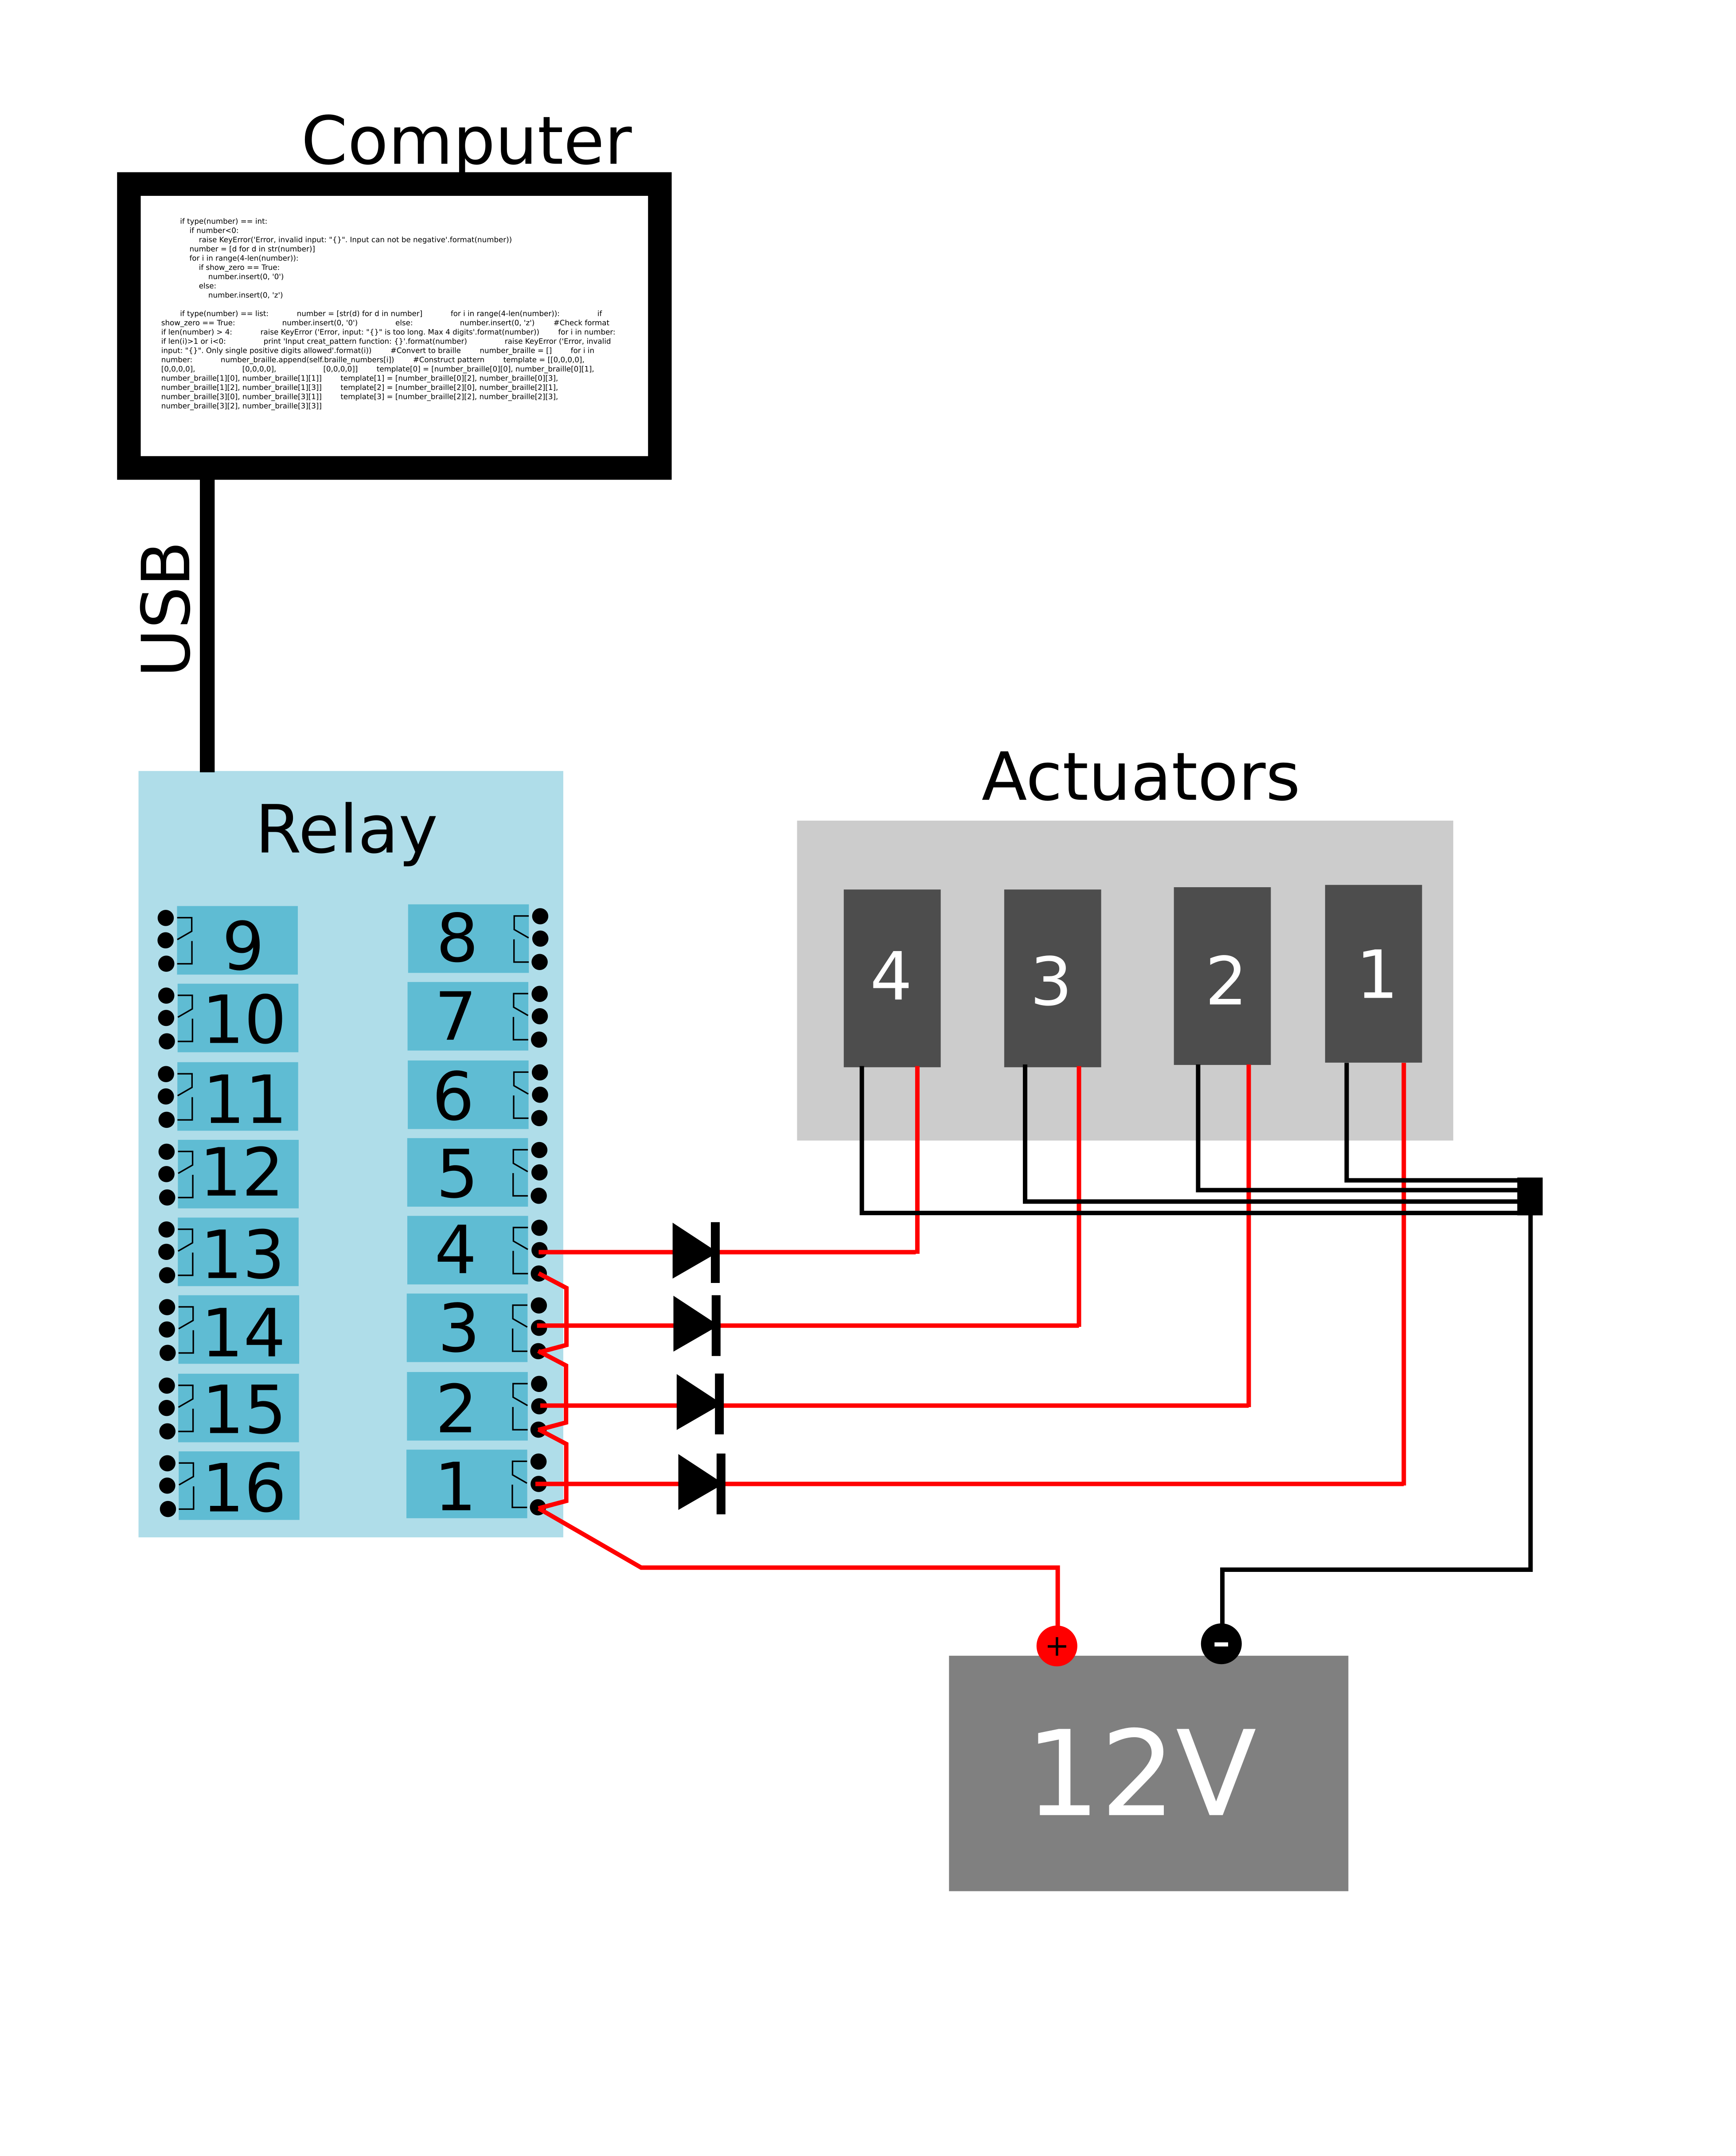
3Wiring
Use a 12V power supply to power the relay board and the actuators.
It is advisable to place a diode between the relay board and the actuators. Because the actuators are essentially electromagnets, they will give a back current once the activating current is released.
Wire the system according to the scheme below:
![]()
For simplicity only the first 4 actuators are wired, but all other follow the same scheme. Take note of the jumper wires between the relays. The relay board can be powered with the same 12V power supply.
-
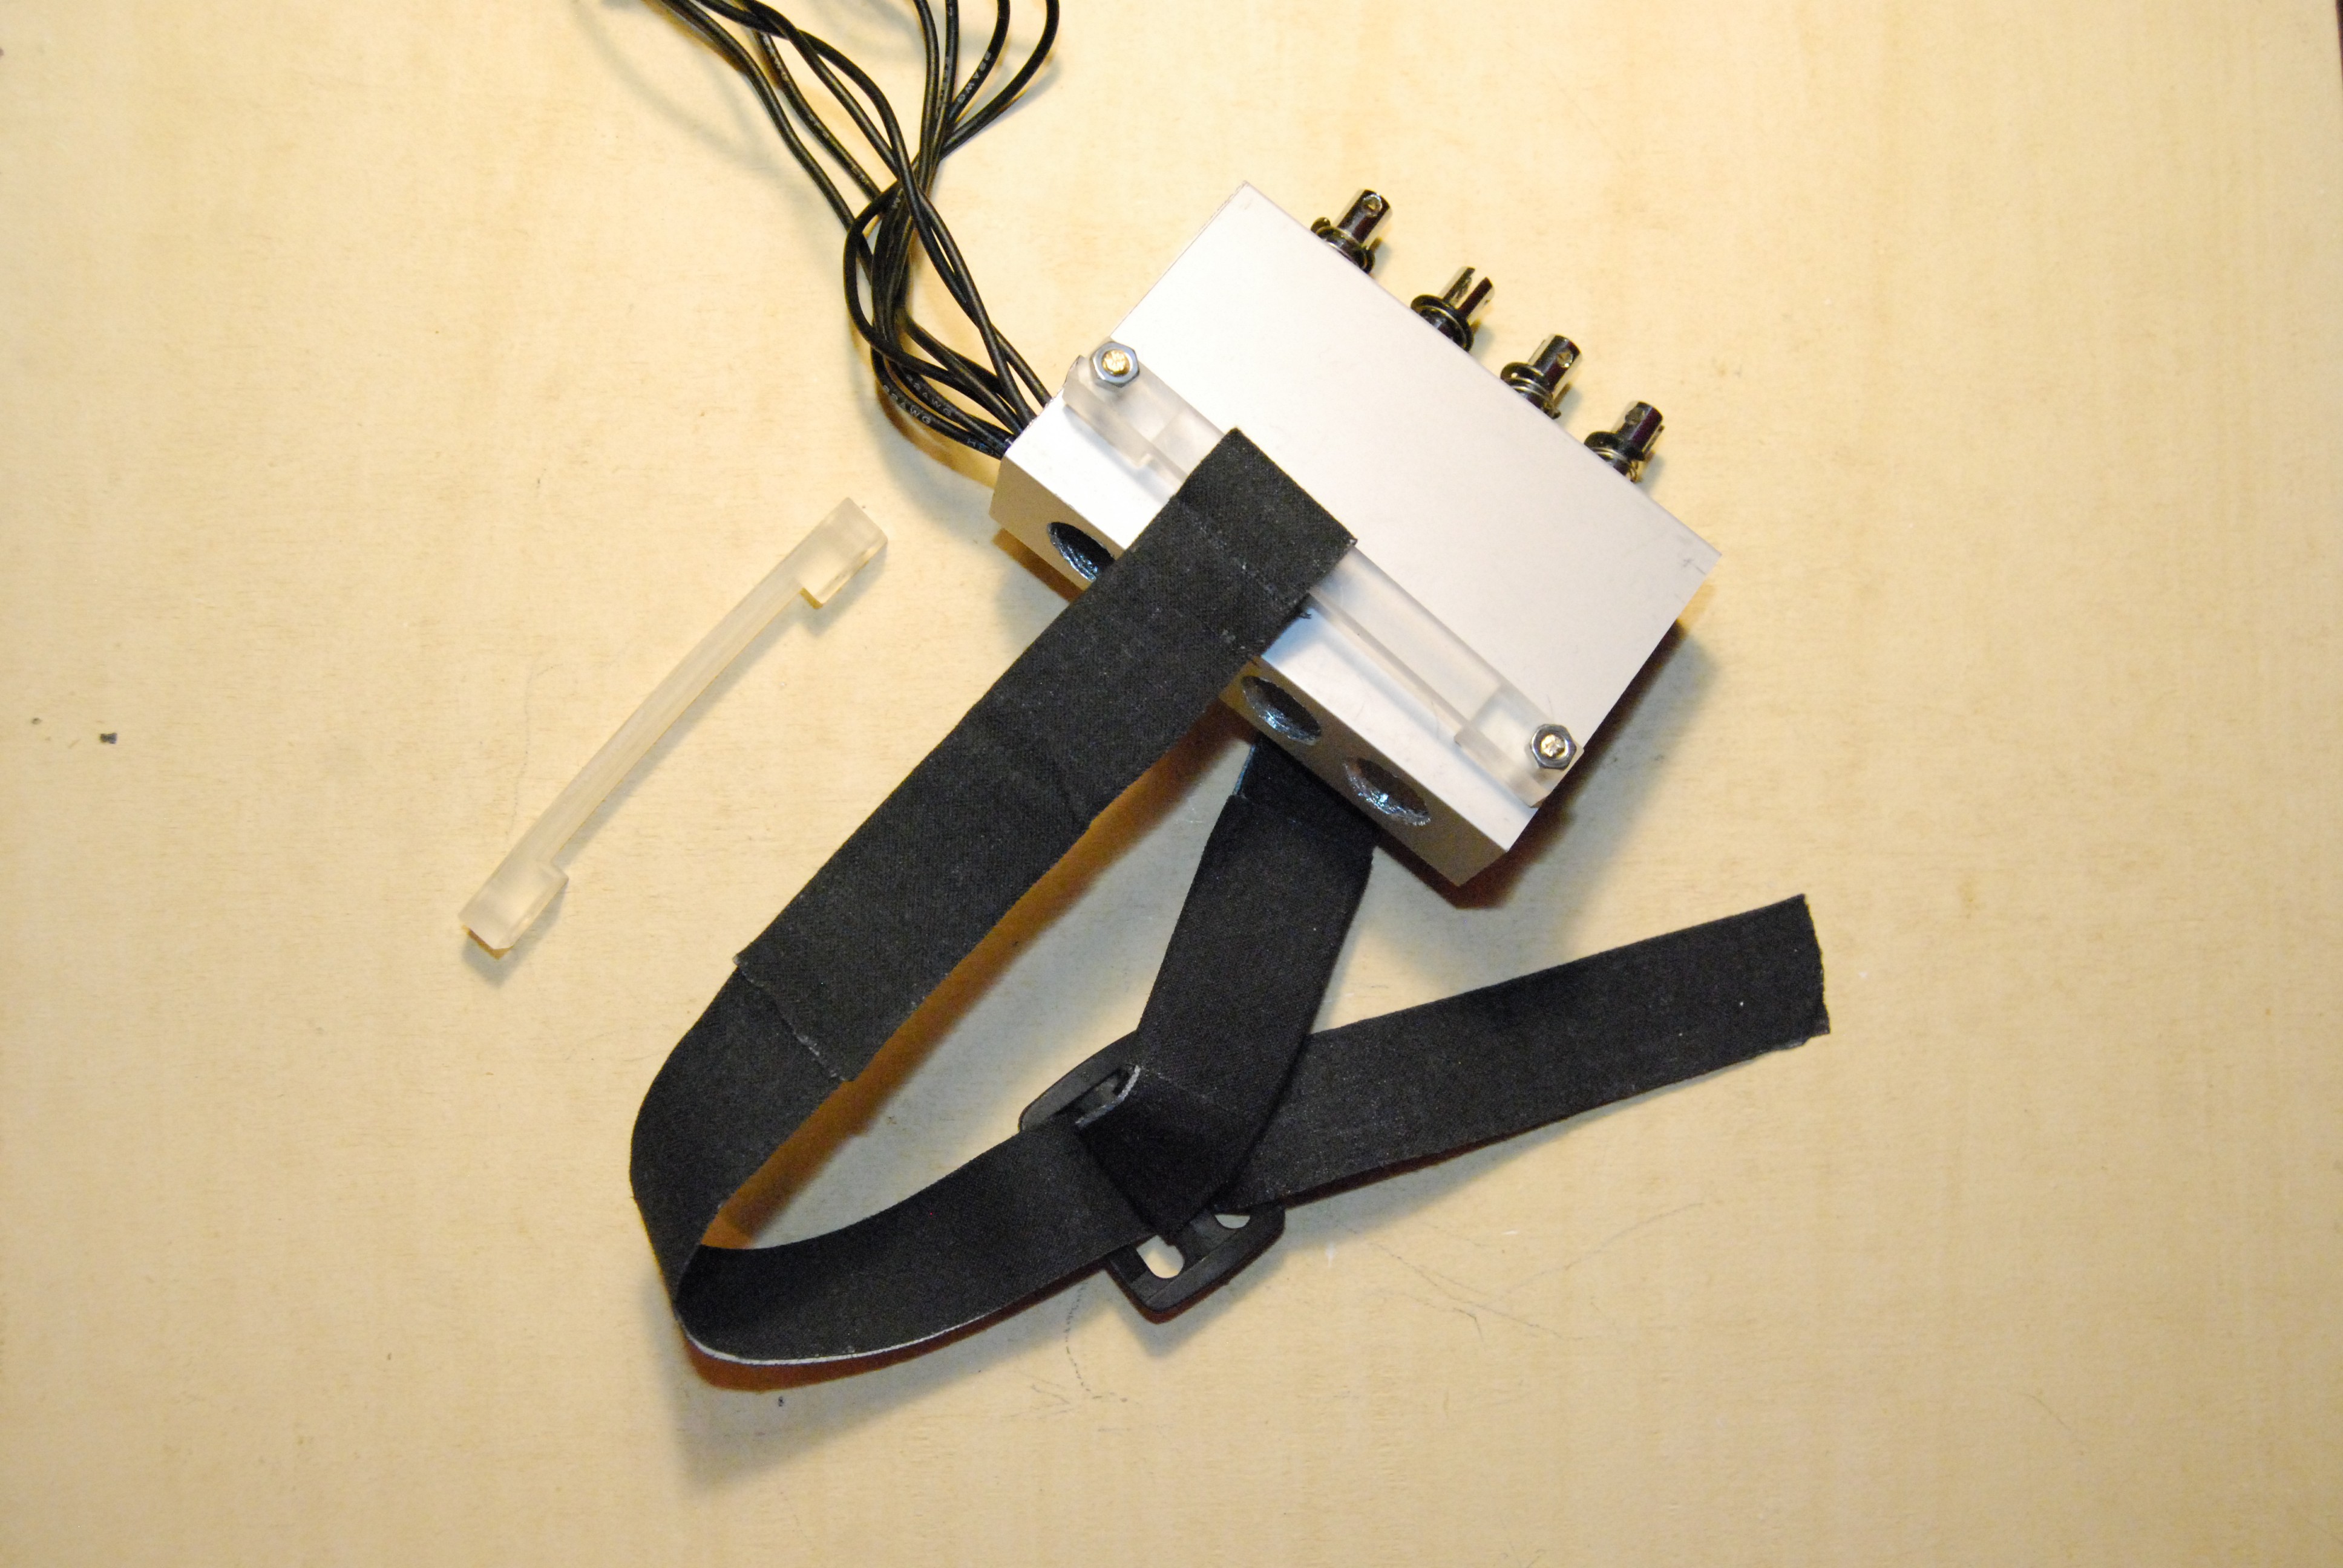
4Strap
In the file you will find a .stl 3D file with a model for the wrist strap mounts that can be 3D printed. Drill hole though the sides matching the holes in the mount.
Cut a 3mm rod to shape and use M3 nuts to secure the mount to the casing of the Haptic Input device.
Run a strap through it and use a buckle to adjust the tightening
![]()
-
5Practise
Connect the relay board to the computer and run python. 2
Import the module and instantiate the Haptic Input class. Then you can start practising.
import Haptic_Input_Py27 as Haptic_Input
HI = Haptic_Input.Haptic_Input()
HI.train_binary( number_of_rows=1 )

Discussions
Become a Hackaday.io Member
Create an account to leave a comment. Already have an account? Log In.