A multi-tool tool holder for amputees
To make the experience fit your profile, pick a username and tell us what interests you.
We found and based on your interests.
PortaCadenaaRectificado.SLDPRTThe chain goes stored in heresldprt - 298.98 kB - 08/31/2017 at 02:23 |
|
|
CadenaMasGrandeRectificado.SLDPRTThis is the chain, you should print 13 of themsldprt - 69.15 kB - 08/31/2017 at 02:23 |
|
|
TapaPortaCadenaRectificado.SLDPRTCover of the chain storage partsldprt - 105.80 kB - 08/31/2017 at 02:23 |
|
|
FijadorPortaCadenaRectificado.SLDPRTPart to fix the chain storagesldprt - 89.89 kB - 08/31/2017 at 02:23 |
|
|
TenedorRectificado.SLDPRTForksldprt - 232.63 kB - 08/31/2017 at 02:23 |
|
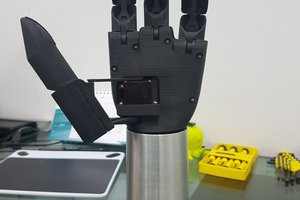
Not an euphemism, just a weird skiing accident. They took two weeks and three x-rays to diagnose it!
I'm known in my school as "the hand guy" (for this and other prosthetic/hand/arm related projects I'll post in the future) and now they think I hurt it on purpose...I swear I didn't!
Still, I'm gonna make the best of it! It's gonna be a way to see which things are harder to do one-handed for one-handed people, and to get new ideas for tools to use and other new projects! :D
I'm only going to have it for two or three weeks so I don't have time to design or build something for the cast, but I'll think of something for next time. Maybe put some buttons or sensors on it and turn it into a smartcast/controller? hehe
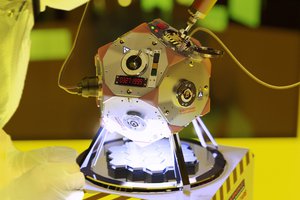
The other thing that took a lot of thought was the general shape of the arm and the tool holder inside. Of course my first designs were akin to that of a revolver: round and with the tools of the periphery. I even did a few sketches of it but they ended up being as hard or more to fit stuff inside than the current model. Constraining myself to just the shape of a circle was hard and I always ended up going through the border: having two servos plus the chain just wasn't compatible with the geometry. The more "rectangular" shape the two weird holders gave me was much more comfortable. Nice extra too, I could extend the tool from the center of the arm instead of the border, which was a little aesthetic plus.
I might eventually return to a rounder design for the aesthetic aspect, but for now I'm staying with my weird and overly complicated double barreled revolver design :D
I believe the part I spent most of the time thinking about is how I was going to push and retract the tools. While there are a bunch of mechanisms to provide linear motion, most of them have the same issue: length. Things like pistons and rack and pinion mechanisms all need to have the same length (or slightly more) than the travel they can do. As the travel I'm using is around 6 cm (this is also the max length of each tool), this means I would need at least a bit more than that only for the dispensing mechanism. Now go ahead, measure 12 cm in your forearm. As this is a project planned for below-the-elbow amputees, I didn't want to limit it to people with extremely short stumps, so I knew I had to go with something different.
For a good while the best I had was to use something like a birthday horn , which I'd activate with pneumatics or hydraulics.
Then one day and while browsing the Internet, I found it: rigid chain actuators. Here's the wikipedia article I found with a list of them.
https://en.wikipedia.org/wiki/Rigid_chain_actuator
After looking up and researching each one I decided to modify and adapt the 1901 chain rammer
A simple mechanism: basically a rolled up toothed chain and a gear that pushes it through a path. I decided to go even further and make the gear perpendicular with the plain of the chain to allow a greater chain length.
To avoid the complications of little details in 3D printing, I forego the traditional concept of a linked chain and decided to just link the links together by pasting them to a flexible piece of plastic.
This is my current design:
Write to me if you have any questions about the mechanisms or if you have any better ideas!
After around 4 months of waiting and 7 failed attempts of the printer failing (it either stopped extruding mid print or the bed wasn't leveled properly), I'm finally going to get the prints of the new prototype tomorrow! :D (hope I didn't jinx it by writing this but last time I saw it, the print was way more advanced than the rest of the times combined. It's a different printer I'm using, and this time with a honeycomb pattern and a slightly higher infill).
Will update you once assembled (I'm only testing out the tool selector mechanism and printing a few chain links to see if what I was thinking to link them together will work correctly or if I have to change anything).
So excited! Really missed this project.
Create an account to leave a comment. Already have an account? Log In.
Become a member to follow this project and never miss any updates

 Dewet
Dewet
 Giovanni Leal
 Oscar S.
This is really cool. Still I wonder if a less cool approach would be more practical.
I wonder if a purely mechanical solution would be better. You can push buttons by pressing against the hip or hooking at your belt. You could even have something at the belt that helps with that.
Did you have a look at the through-the-front switch blade mechanism. It requires very little mechanical work. May be instead of a single button you could have a ring that actuates only one tool depending on the rotation.