Close
0%
0%

Ebers

Smart insole for diabetic people

Similar projects worth following
Ebers is an insole, capable of measuring plantar pressures, temperature and humidity throughout the day in patients suffering from diabetes to avoid the formation of ulcers. The data obtained are sent via Bluetooth to a smartphone that alerts the patient about possible abnormal pressures that can cause him any type of damage at plantar level. Also the data obtained are sent to the doctor so him can count on this information when he need it.

Diabetes is a chronic disease that has become a global epidemic with complications in the feet that include, among others, infection of the same. Ulcers in the feet of individuals suffering from this pathology are extensions and are estimated to affect 25% of patients throughout their life, due to neuropathy and the potential existence of a vascular disease. Foot infections are the major causes of morbidity, including a reduced quality of life in physical and mental appearance, antimicrobial therapy, wound care, and in many cases surgical procedures that result in loss of ex tremor due to the need to amputate them. Patients with diabetes are susceptible to infections related to immunodeficiency, neuropathies and arteriopathies. An infected foot with ulcer has a 60% chance of being amputated, making infection the main cause of this tragic outcome. For the treatise of this pathology, the main attention is required to the appropriate diagnosis, an accurate classification of the lesions, obtaining the samples suitable for the culture and prescribing a definitive antimicrobial therapy or the rapid determination when the surgical interventions are necessary and intensive care in wounds.
In diabetics, the foot passes through several pathological stages, in which the tissues of the lower limb have been affected: beginning with the skin, followed by the subcutaneous tissue, muscles, bones and joints, nerves and blood vessels. Infections in the feet, the child plus the consequence of the cause of foot ulcers.
These infections begin with a cleft in the skin, usually at the site where the trauma was generated (whether due to mechanical or thermal causes) or ulceration. An infection is defined as the invasion of microorganisms, their multiplication in hostile tissues that trigger inflammatory responses and produce destruction of them. It should be noted that these complications in the feet occur in the soft tissues and lower malleolus. Several factors facilitate foot infections in a diabetic patient, including neuropathies, vasculopathies, immunopathies and biomechanics in the foot.
As mentioned above, infections are an attainment of the formation of ulcers. A common type of pen is the one that originates from the high pressures exerted on a sector of the foot. Routine monitoring by the patient or health personnel is the key to preventing inheritance from forming, and also to avoid amputations by extension, reducing the latter by 50% to 80%. That is why new monitoring tools are required, being the measurement of pressures on the surface of the skin of the sole of the foot one of the many solutions that can prevent the development of this pathology improving the quality of life of the person and avoiding so that drastic measures are taken

BTdisc.rar

Java software

RAR Archive - 1.29 MB - 09/04/2017 at 04:33

Download

Ebers.rar

Processing Files

RAR Archive - 332.73 kB - 09/04/2017 at 04:20

Download

Ebers3.aia

Android application

aia - 1.87 MB - 09/04/2017 at 04:19

Download

ArduinoFinal.ino

Arduino code

ino - 2.59 kB - 09/04/2017 at 04:19

Download

  • 1 × Arduino Pro Mini
  • 1 × Chip FTDI
  • 1 × HM-10 module
  • 1 × Li-Po battery 150mA or coin cell LIR2032
  • 1 × Tp4056

View all 12 components

  • Software

    Facundo Noya09/04/2017 at 04:32 0 comments

    Software Design

    The language used for software development was Java®. This programming environment evolves from C and C ++, but it eliminates certain aspects of the latter two and constitutes an object-oriented language.
    Java® is a useful language for almost all kinds of problems, its download is free. Among its features are:
    • "Client" applications are those that run on a single computer without having to connect to another machine. They can be used for example to perform calculations.
    • "Client / server" applications: they are programming that need to be connected to another machine to ask for some service in a more or less continuous way, such as the use of a database.
    • Web applications: Java programs that run on a web server. These applications receive applications from a computer and send to the browser (Firefox, Google Chrome, etc.) that acts as their client. (Rodríguez, 2016)
    This computer platform was selected over other languages, for three reasons:
    • It is multiplatform, ie with Java® you can do the same application written once and that works on any operating system: Linux, Windows, Mac, among others.
    • It is free, you do not need to buy a license of any kind.
    • Flexibility, when updating an application is not necessary to rewrite it, Java allows to use the same code and add new features without altering the initial one (Monillo007, 2016).

    Interface

    The software developed has a user-friendly interface, and an update of the received data automatically. For the same it is necessary to have installed the Google Drive® application, which will allow access to the files of the data obtained in the patient's cell phone from the health professional's computer.
    The reason we selected the data to be uploaded to Google Drive® plataform is that the Android operating system that owns the cell phone was developed by Google® as well. This means that all phones have the application of Drive, which allows to synchronize the files of the phone with the readings made so they can be uploaded to the device of the health professional.
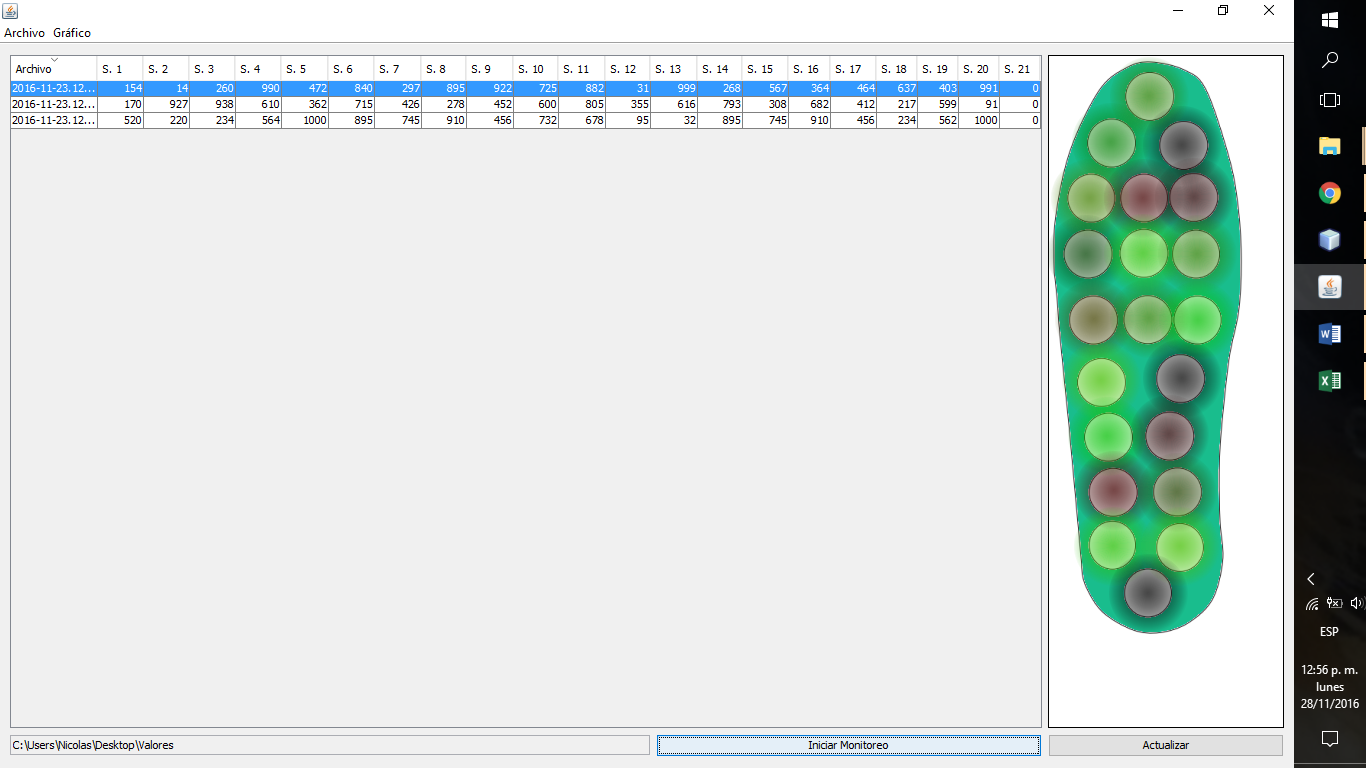
    As shown in Figure 158: Software interface PCIlustration 158, on the left is a table where the first co-lumina indicates the date and time of the measurement performed, while the rest are for the values of the readings made in each of the 21 sensors that own the template.
    To the right of the image, there is a drawing with the geometry of the template and inside it, circles that correspond to the location of each of the sensors.
    On the lower left margin, is indicated from which folder is acquired the file with the readings obtained and to its right there are two buttons, one to update the files of the source folder and another to start the monitoring.

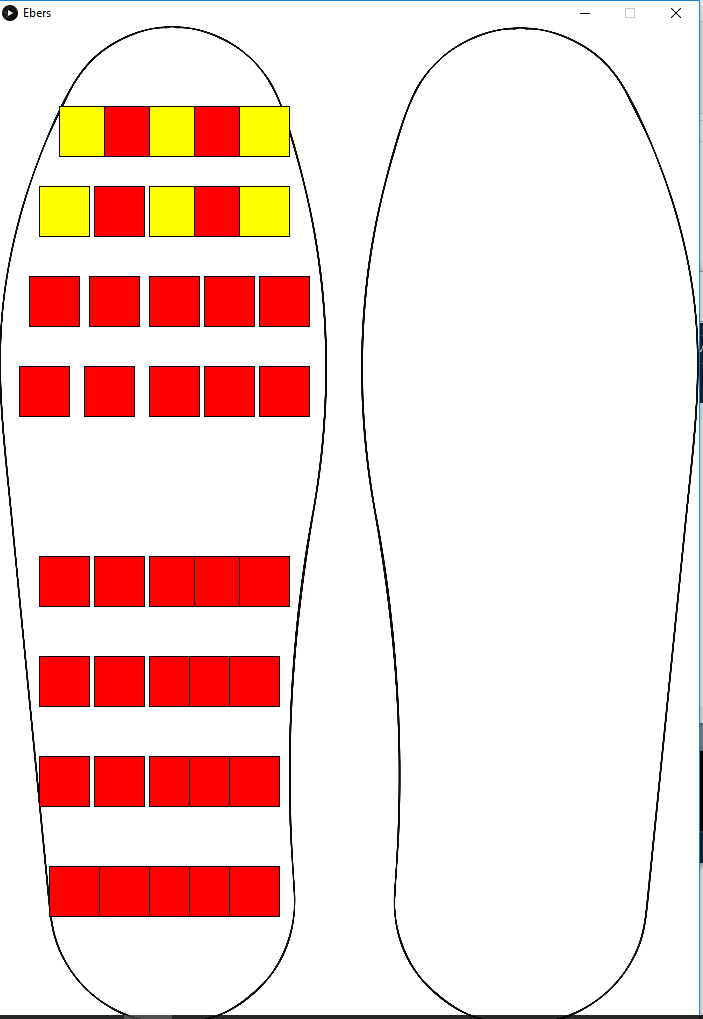
    Another option we have is to transmit data direct to the PC via Bluetooth. In this case we use a processing code that works similar to the java soft.

  • Interface board

    Facundo Noya09/04/2017 at 04:13 0 comments

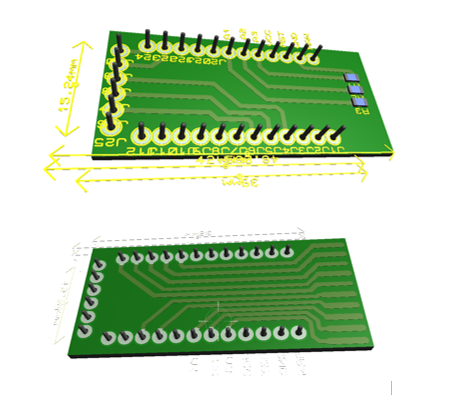
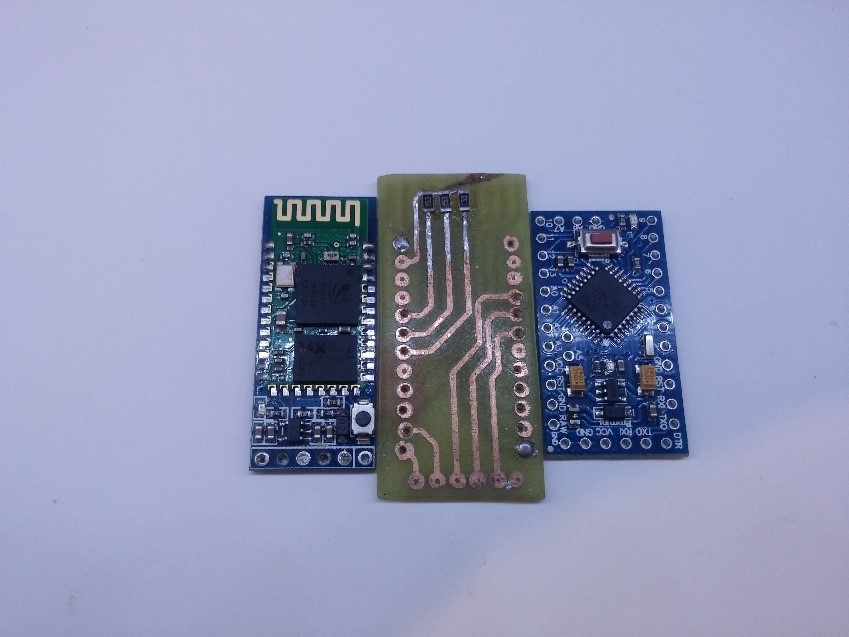
    As the name says this stage has the objective of functioning as a link between two different levels. The first is the flexible circuit developed with silver ink (the active zone of the sensors), and the second is to connect all the electronics in a reduced and efficient way.

    It consists of a double face plate, type FR4 (fiberglass), which improves electromagnetic interference and allows it to have a longer duration over time. So that tracks that do not work as contacts are not exposed (reacting with oxygen, with its consequent oxidation), were coated with flux that also works as an insulator of the tracks and facilitates their welding.
    In addition to this, the lower surface has 3 resistances of 15KOhm which are parts of the resistive divider needed by the sensors. These are SMD type because they take up less space, consume less energy and do not need to drill the plate.

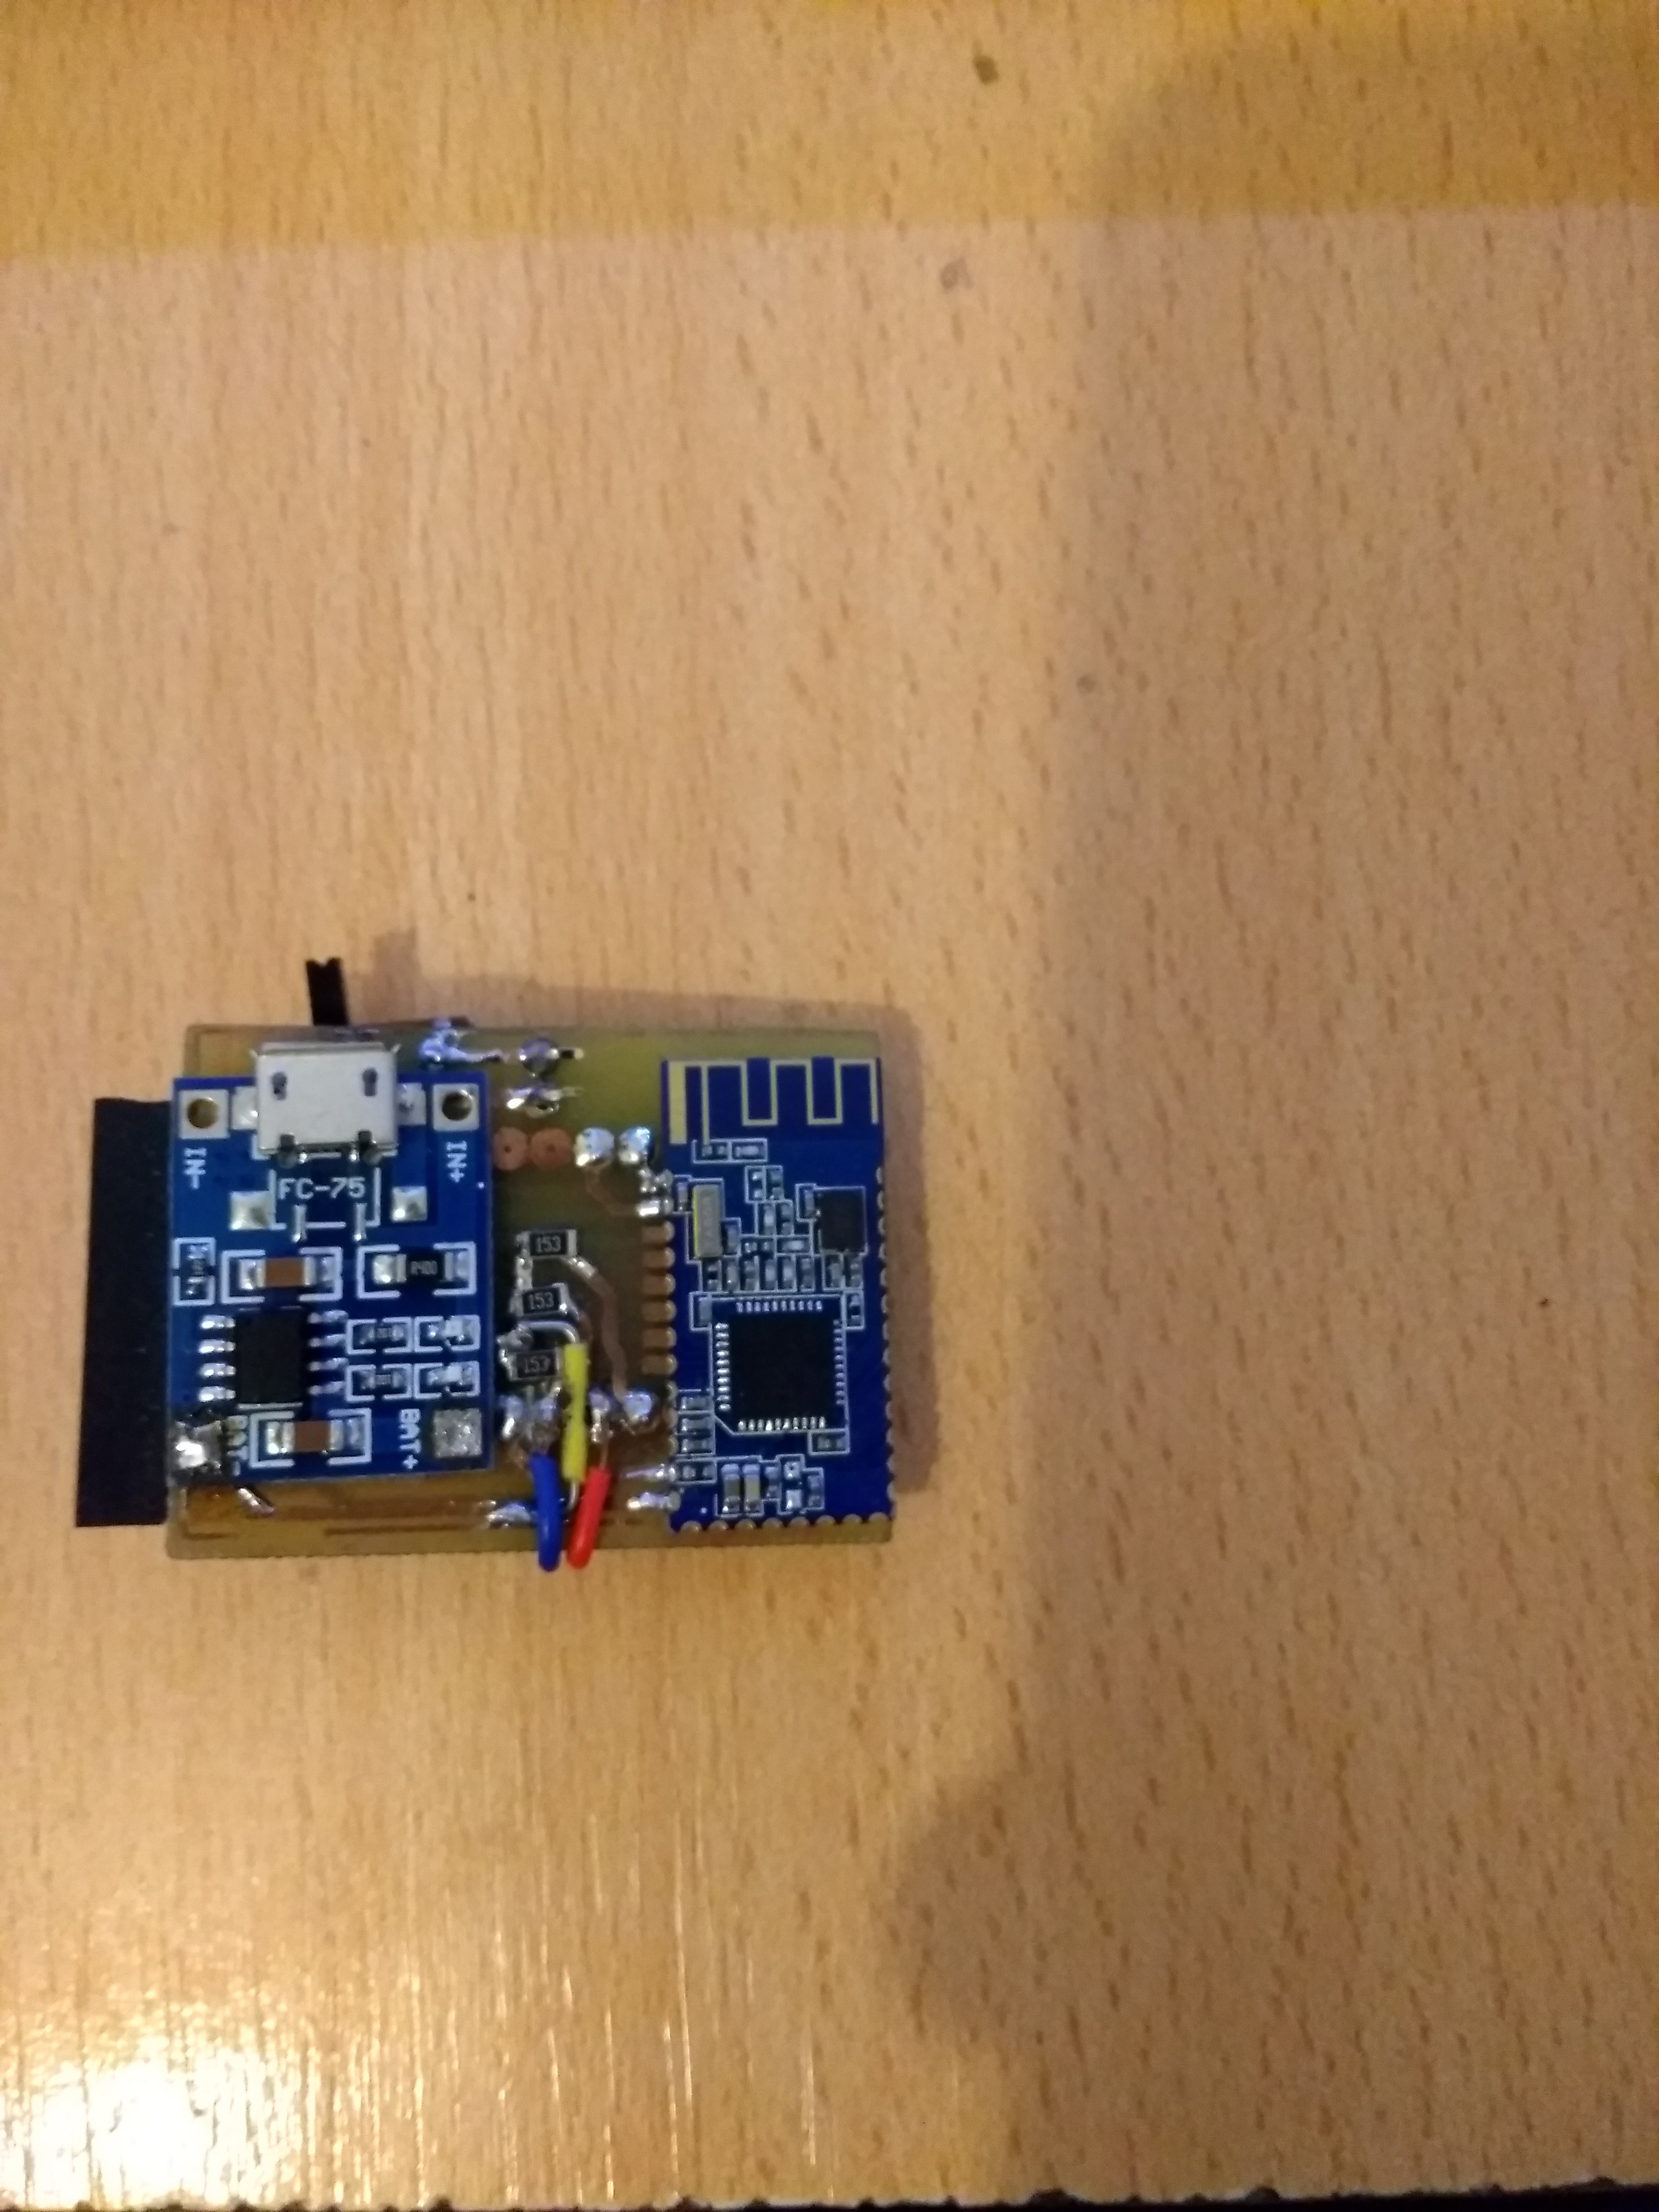
    The second version incorporate a tp4056 for lipo battery and HM-10 Ble module 

  • Send data

    Facundo Noya09/04/2017 at 03:59 0 comments

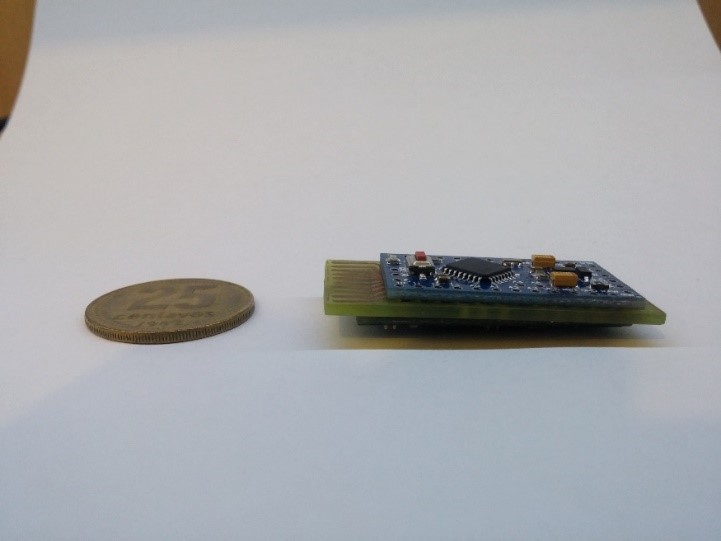
    For reading and sending data will require two components: an Arduino board with a microcontroller that performs the first and a Bluetooth module that allows sending the measurements made, wirelessly, to the cell phone. In turn, you need to be able to connect the template with this electronics. Here it presents a difficulty since you can not sol-give the silver tracks. To solve this issue, contacts were made which are to be fixed by pressure between the two surfaces.

    As mentioned above, 7 digital outputs and 3 analog inputs are used for data readings. Once the data of each sensor are obtained, they are stored on the Arduino board and then sent to a cell phone, which has an application that will be responsible at the end of the day to transfer the readings obtained in a full day to a platform of storage so that the health professional can access the state of the patient's foot. However, in situations of foot pressure, the application offers an alert system that instantly notifies the patient to corroborate the position in which he is or to make a control inside his footwear to confirm that there is not any object that can lead to an injury.
    Arduino is an "Open Source" electronic platform based on an easy-to-use hardware and software method so that anyone can do interactive projects. This platform consists of a board that contains a microcontroller with input and output pins that can control motors, actuators, lights and obtain sensor readings. In order to send you orders and perform various actions, you can use a programming environment of the brand known as "Arduino IDE".
    There are several models of these plates, depending on the need and utility can be taken into account various factors such as size, quantity of inputs / outputs, microcontroller used, memory required, consumption, among other aspects that can be taken into account at the time to choose one. In this project due to consumption issues, number of inputs / outputs and mainly size was chosen by the name model Pro Mini.
     

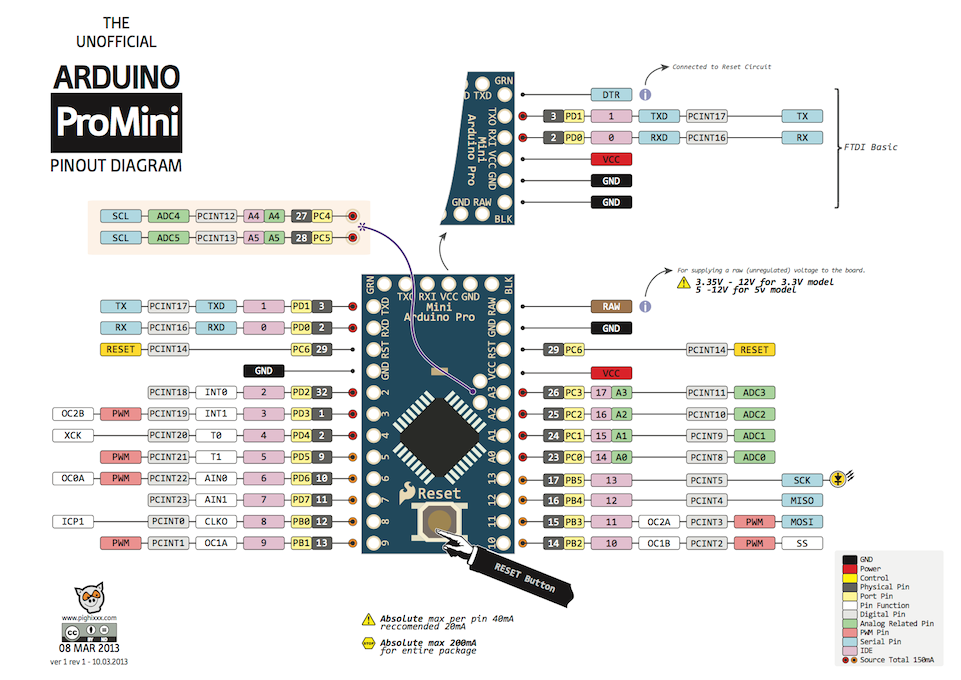
     Arduino ProMini
    Arduino Pro Mini is a board with the ATME-GA328 microcontroller. It has 14 digital pins that can function as inputs and outputs (6 of which can be used as PWM outputs), 6 analog inputs, a reset button and pin mounting holes. Six pins can be connected to an FTDI-type cable or to a Sparkfun board to provide power and USB communication to the Arduino. It has a circuit that operates with 3.3 V and 8 MHz and at 5 V with 16 MHz (Arduino, 2016).

    The reasons for selecting the Arduino platform for the project were:
    • Easy to program: in an Arduino-based development environment (IDE), it has pre-set functions that reduce the logic and reading of inputs, control of times and outputs in a semantic and intuitive way. It has the advantage of not needing a type of programming card like other microcontrollers, but the board can be connected to the computer via USB and can load the programs without risk of damaging the card due to its additional protection. The code is extremely friendly and has its own high level language called Processing, although this does not limit Arduino to be programmed in any language.
    • Wide variety of documentation and tutorials, from the same page of the company, the IDE comes with many examples, as well as countless YouTube tutorials.
    • Libraries for practically any ex-suit component that you want to dock, making it unnecessary to have to use the component datasheet permanently. Among the libraries we can find are Wi-Fi, Bluetooth, Ethernet, Servo, among others.
    • Variety of plates, as mentioned earlier in this section, there are plenty of plates every need of the developer. Among them we find the MEGA, ONE, NANO, LEONARDO, PRO MINI, etc.
    • Extensive ranges of shields or extra plates that fulfill specific functionalities like Ethernet. Wi-Fi, Blue-tooth, Relay control, among others. They can be coupled to the plate in a simple way and thus generate an increase in the available applications. In addition, Ar-duino is compatible...

    Read more »

  • Fill Patterns

    Facundo Noya09/04/2017 at 02:31 0 comments

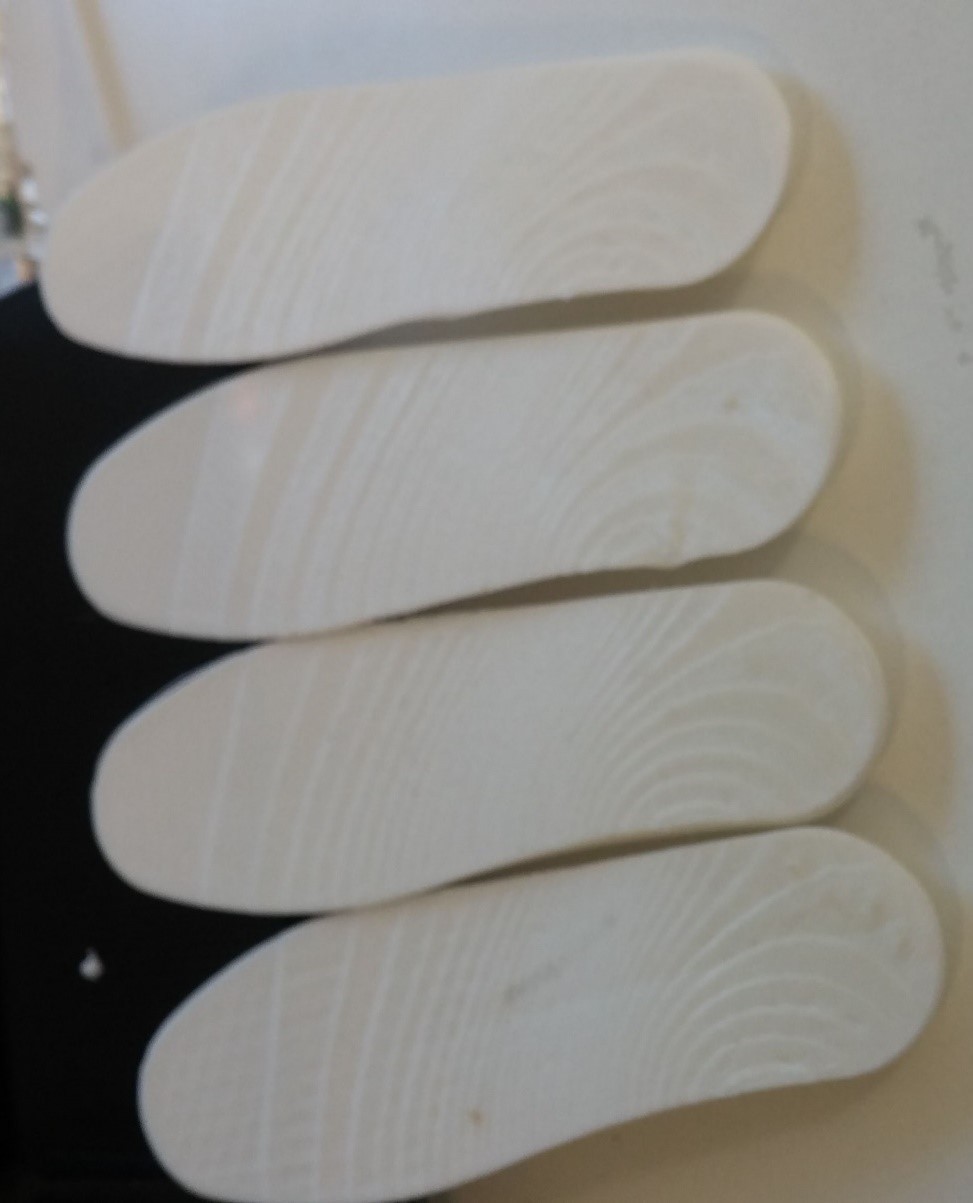
    After designing the template, it was printed. To do this, first determine the solidity, ie, what will be its density of filling. In this way, the piece will be more or less resistant depending on the filling pattern or if solid layers are included therein. If the re-filled density had a value of 100% it would mean that a solid part would be printed, whereas if this value were 0% it would be totally hollow.


     Fill Density Scale
    For an increase in the stiffness of the pieces, solid layers are introduced between the filling, ie in addition to the lower and upper solid layers, there will also be more in the intermediate zone. This method will favor robustness, because it allows selecting as many layers of fill as desired. However, it should be noted that the more solid layers you have, the more material you will need and the longer it will take to print.
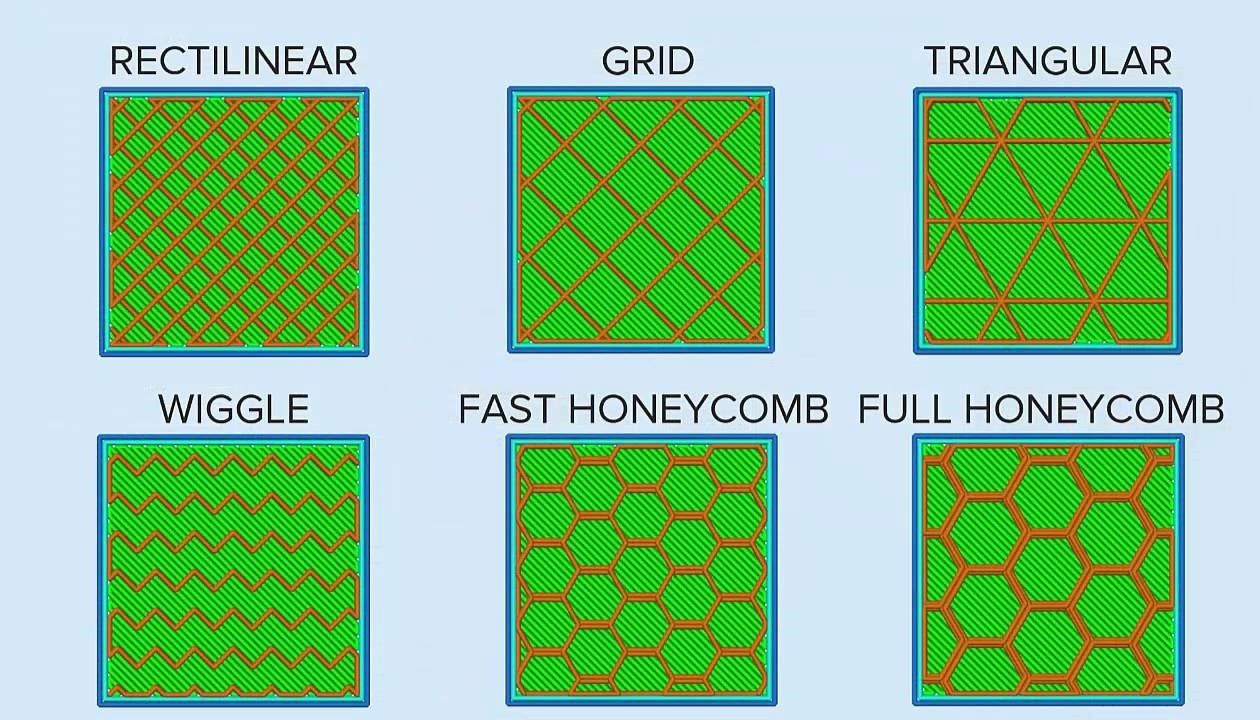
    On the other hand, if the fill pattern is used, both the amount of row-ment and the print times would be decreased. For this case, it is recommended to print with fill density ranging between 20% and 60%. Among the different types of patterns we find:
    • Rectangular or grid: this is usually the default in the software. It offers a great relation between hardness and speed of printing, although com-stopped with others it takes more time of impression. However, although it fulfills its function, it offers no advantage over the rest.
    • Triangular: optimal for parts that need robustness in the walls, as it offers good resistance and high side loads. It is the most time-consuming printing.
    • Wiggle or curvilinear: Ideal if you want parts with some flexibility but without losing the robustness.
    • Fast HoneyComb or hexagonal: Considered the most optimum for most printed parts. It is the best relationship between used material and resistance making it the most efficient. It im-prime quickly allowing time savings and, as mentioned above, material, while offering a high robustness to the piece and fits most designs.
    • Full HoneyComb: similar to the previous one, but its hexagons unlike the previous one have double walls (Experts, 2016).

     
     Filling patterns
    These fill patterns were those used to make the test specimens of scaled templates and thus to be able to determine which has the most appropriate behavior for the project.


     Probes with different filling patterns

    After analyzing, it was decided to use the Wiggle pattern. This is characterized by being the least rigid of all patterns since the frame only has lines in the transverse direction of the piece thus obtaining superior flexibility in the longitudinal direction, which is the axis of greater movement that the template presents. The fill density selected for this template was 20%

  • 3D printed insole

    Facundo Noya09/04/2017 at 02:25 0 comments

    Several techniques were proposed for the construction of the insole. Some of them consisted of CAD software design, such as AutoCad, Inventor, SolidWorks or some more specific ones like Autodesk Footwear, Delcam Orthotic. These latest ideals for custom design insoles. The disadvantage they have is their high cost and the lack of free licenses for testing or for students which makes it impossible to use them.


    Another technique investigated was by means of 3D scanning of a insole of a sports footwear that would be digitized and thus obtaining the mesh of points. With this technique a relatively low resolution was obtained for what was wanted, so it was quickly discarded.
    Once the previous options were discarded, the virtual platform of parametric design of insoles "GenSole" (GenSole, 2016) was used. This programming environment has advantages as ease of use as it can enter the necessary parameters, the final model adapts to these measurements. This feature is desirable and important when the user is put in focus, who has particular characteristics in the measurements of his feet.


    GenSole Logo

    GenSole was developed by "GyRobot", a mechanical design consultancy company located in England. They specialize in the use of CATIA V5, a 3D CAD software product, which can be used to design, simulate and manufacture a wide variety of products. In addition, the company offers 3D printing facilities.
    Various facilities are offered by the GenSole website, including:
    • The possibility of shaping the top of the insole, from a 3D scan of the user's foot so that it can match the surface and thus generate a more personalized insole.
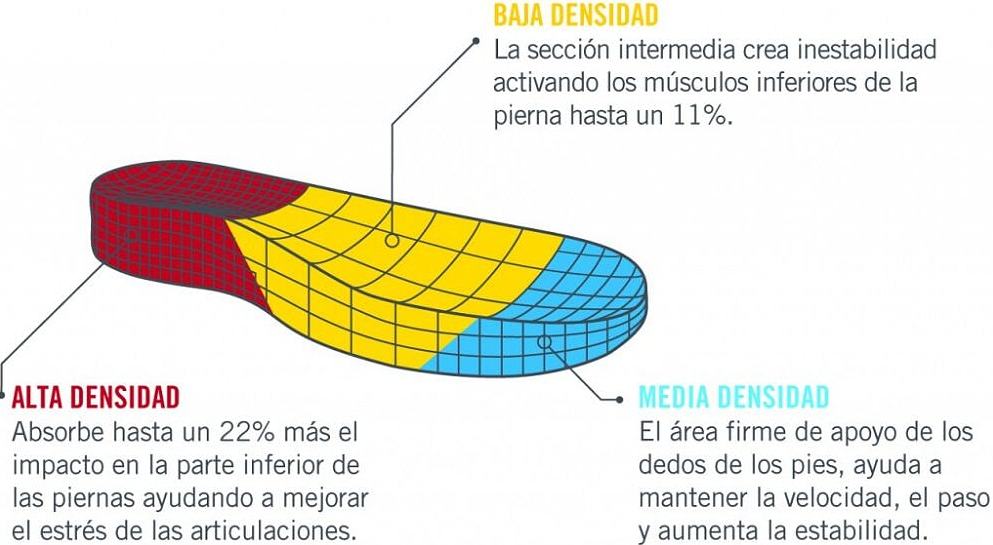
    • Various filling patterns so that the internal mesh of the structure can help discharge high pressures in the sectors where they occur.
    • Both the upper and lower surfaces can be printed with perforations to assist in the circulation of air, favoring the breathing of the foot.
    • From parametric designs, boundary curves can be edited to fit the user's foot and need (GenSole, 2016).
    The options offered by the website were the reason why it was selected to be able to make the surface of the insole in charge of covering the array of sensors that will feel the pressures in the different points of the foot.
    On the other hand, with this software you can also generate a rest insole in a more customizable way for your best adaptation and convenience to the person who will use it.
    The steps to carry out the insole design, are simple and with a friendly interface, turn the website also offers a video tutorial for the construction of this piece. Once the process is finished, you get an ".STL" extension file that can be opened with other software like Inventor Professional for adding different aspects, editing, among other possibilities. With this file extension, you can perform the slicing that will generate the G-Code, explained above, that will guide the printing in three dimensions.
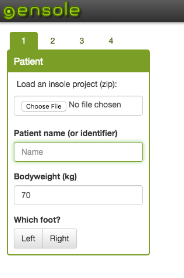
    The design of the insole consists of four steps. In the first one, the shoe size is used specifying the size of the shoe used to know the size of the piece. The next parameter is to indicate which foot is the insole (left or right) and is also asked to complete indicating the weight of the user, to be able to determine the density of material that will require the insole to make it as comfortable possible (it is not the same as a plan for an overweight person than for one with an average weight). As an optional service, you can place the name of the user or the one you want, so that it appears written on the piece at the time of printing and give a detail to the piece. In this integrative project as a parameter, a insole size 41 (European scale) was introduced for a person weighing 80 kg, left foot and engraving of Ebers, in honor of the person who discovered the first papyrus where referred to diabetes.
     

     GenSole user menu
    Once this data is entered, proceed to the second step. This consists in entering the parameters of the curvatures. It is recommended...

    Read more »

  • Sensor design

    Facundo Noya09/04/2017 at 00:18 0 comments

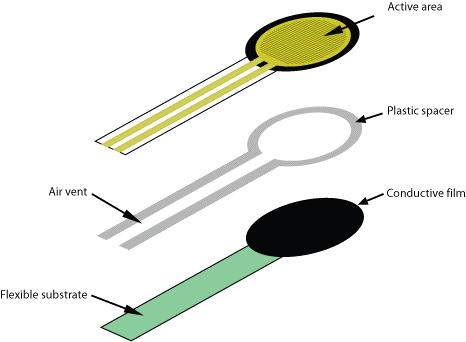
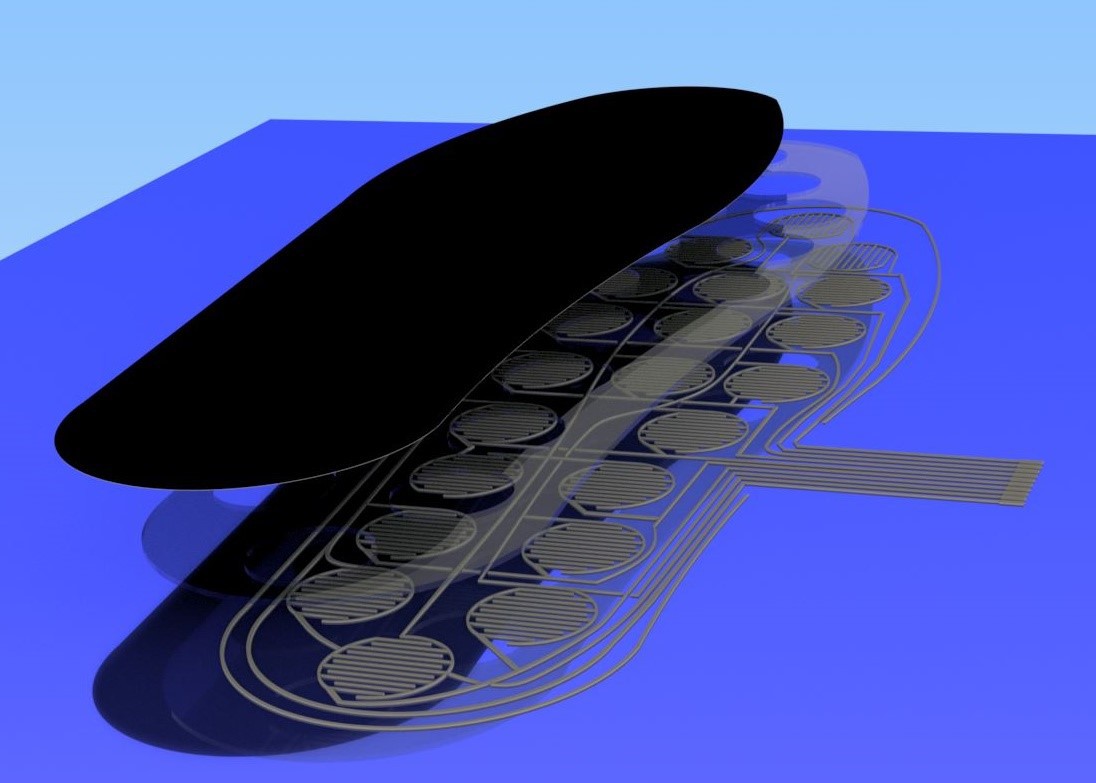
    A resistive sensor, also known as FSR (For-ce Sensing Resistor), is a polymer film device that exhibits a decrease in resistance when the force applied to the active surface is increased. FSRs are not load cell or strain gauge gas although they have similar properties.

    This sensor consists of four layers:
    • A layer of dielectric plastic
    • An active area consisting of a conductor pattern, which is connected to the cables that will go to the processing circuit.
    • A plastic separator, which includes an opening aligned with the active area.
    • A flexible substrate coated with a thick polymer conductive film, aligned with the active area. This polymer is most often replaced by an FSR ink layer


    The basic principle for the use of an FSR is a conditioning circuit of the voltage divider type, whereby the output will be an analog volt- age of 0-5 V and varies according to the force exerted on the sensor (SensorWIki, 2016).
    Figure 93 shows the connection diagram of a resistive divider or voltage divider. It consists of a voltage source and two resistors connected in series. The current supply will flow through the two resistors evenly because they are connected in this way. One of the two resistors has a variable value, and is that which belongs to the resistive sensor while the other has a fixed value. As explained in this section, an FSR sensor has as its operating principle to decrease the resistance when it increases the force exerted on its surface, which is why it behaves as a variable resistance in the circuit.


    By Ohm's Law, the voltage drop in a load is proportional to the current flowing through it and the resistance it has, and by Kirchoff's Law, the sum of the voltage drops in a circuit is equal to the voltage delivered by the source. When no pressure is applied to the sensor, the top layer and the bottom layer are not in contact, so the resistance is infinite and no current flows through the circuit. As the pressure on the sensor begins to exert force, the two layers mentioned above begin to come into contact and the resistance begins to decrease, whereby current begins to flow through the circuit thus generating voltage drops by the two resistors -tencias (both fixed and variable).
    In these sensors, there is a threshold or breaking force that is when the contact between the two layers is sufficient to start running and another step that is saturation, which occurs when the weight increases are very low or no decrease in resistance

    Sensor construction 

    The instrumented insole has a series of layers or plates, each formed by the following stages.
    The first layer, is a XactFSR from the company Sensitronics (Senstronics, 2016). It is a plate that has a deposition of carbon on one of its faces, which gives a resistive property to the passage of time. In this way we can obtain an analogue measurement as a function of the pressure exerted on this sheet.
     

    The second layer is a dielectric material that will function as a separator. It has the characteristic of having holes that coincide with the location of the active parts.
    The last layer is an acetate sheet as above. In it are traced silver conductive ink tracks with the selected shape of the sensor. The manufacturer of the XactFSR iron recommends the following specifications for the tracks:


    • The width of the combs and the spaces between them will affect the sensor response. 7mil (.007 ") is a common dimension for both, but other dimensions are viable and may even be desirable depending on the application.
    • Sensors with finely spaced fingers will be more sensitive to small forces than sensors with grooved fingers.
    • The PCB finish will influence the sensor response. An ENIG (gold) finish is recommended.
    • The thickness of the copper will influence not only the sensor response, but also affect its useful life. When the thickness or weight of the combs are raised copper, will raise the FSR material and increase the deformation of the sensor under load. This deformation...

    Read more »

View all 6 project logs

Enjoy this project?

Share

Discussions

Facundo Noya wrote 10/03/2017 at 04:10 point

Thanks you @Simon Merrett !! Your project looks really interesting. 

Maybe we could work together and learn from the other. If you are interested write to me!

See you

  Are you sure? yes | no

Simon Merrett wrote 10/01/2017 at 23:05 point

Hi @Facundo Noya, thanks for posting your project on hackaday.io. You have given me plenty to think about. You might be interested in my project, also making a healthcare insole https://hackaday.io/project/27067-solesense

  Are you sure? yes | no

Similar Projects

Does this project spark your interest?

Become a member to follow this project and never miss any updates