Several techniques were proposed for the construction of the insole. Some of them consisted of CAD software design, such as AutoCad, Inventor, SolidWorks or some more specific ones like Autodesk Footwear, Delcam Orthotic. These latest ideals for custom design insoles. The disadvantage they have is their high cost and the lack of free licenses for testing or for students which makes it impossible to use them.
Another technique investigated was by means of 3D scanning of a insole of a sports footwear that would be digitized and thus obtaining the mesh of points. With this technique a relatively low resolution was obtained for what was wanted, so it was quickly discarded.
Once the previous options were discarded, the virtual platform of parametric design of insoles "GenSole" (GenSole, 2016) was used. This programming environment has advantages as ease of use as it can enter the necessary parameters, the final model adapts to these measurements. This feature is desirable and important when the user is put in focus, who has particular characteristics in the measurements of his feet.

GenSole Logo
GenSole was developed by "GyRobot", a mechanical design consultancy company located in England. They specialize in the use of CATIA V5, a 3D CAD software product, which can be used to design, simulate and manufacture a wide variety of products. In addition, the company offers 3D printing facilities.
Various facilities are offered by the GenSole website, including:
• The possibility of shaping the top of the insole, from a 3D scan of the user's foot so that it can match the surface and thus generate a more personalized insole.
• Various filling patterns so that the internal mesh of the structure can help discharge high pressures in the sectors where they occur.
• Both the upper and lower surfaces can be printed with perforations to assist in the circulation of air, favoring the breathing of the foot.
• From parametric designs, boundary curves can be edited to fit the user's foot and need (GenSole, 2016).
The options offered by the website were the reason why it was selected to be able to make the surface of the insole in charge of covering the array of sensors that will feel the pressures in the different points of the foot.
On the other hand, with this software you can also generate a rest insole in a more customizable way for your best adaptation and convenience to the person who will use it.
The steps to carry out the insole design, are simple and with a friendly interface, turn the website also offers a video tutorial for the construction of this piece. Once the process is finished, you get an ".STL" extension file that can be opened with other software like Inventor Professional for adding different aspects, editing, among other possibilities. With this file extension, you can perform the slicing that will generate the G-Code, explained above, that will guide the printing in three dimensions.
The design of the insole consists of four steps. In the first one, the shoe size is used specifying the size of the shoe used to know the size of the piece. The next parameter is to indicate which foot is the insole (left or right) and is also asked to complete indicating the weight of the user, to be able to determine the density of material that will require the insole to make it as comfortable possible (it is not the same as a plan for an overweight person than for one with an average weight). As an optional service, you can place the name of the user or the one you want, so that it appears written on the piece at the time of printing and give a detail to the piece. In this integrative project as a parameter, a insole size 41 (European scale) was introduced for a person weighing 80 kg, left foot and engraving of Ebers, in honor of the person who discovered the first papyrus where referred to diabetes.
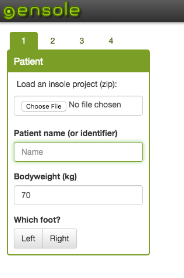
GenSole user menu
Once this data is entered, proceed to the second step. This consists in entering the parameters of the curvatures. It is recommended from the page to make a photo of a user's plate and on it take the measurements that are needed from the software. Once the image was made, the Autodesk Inventor design software was entered where the required arcs and distances were measured.
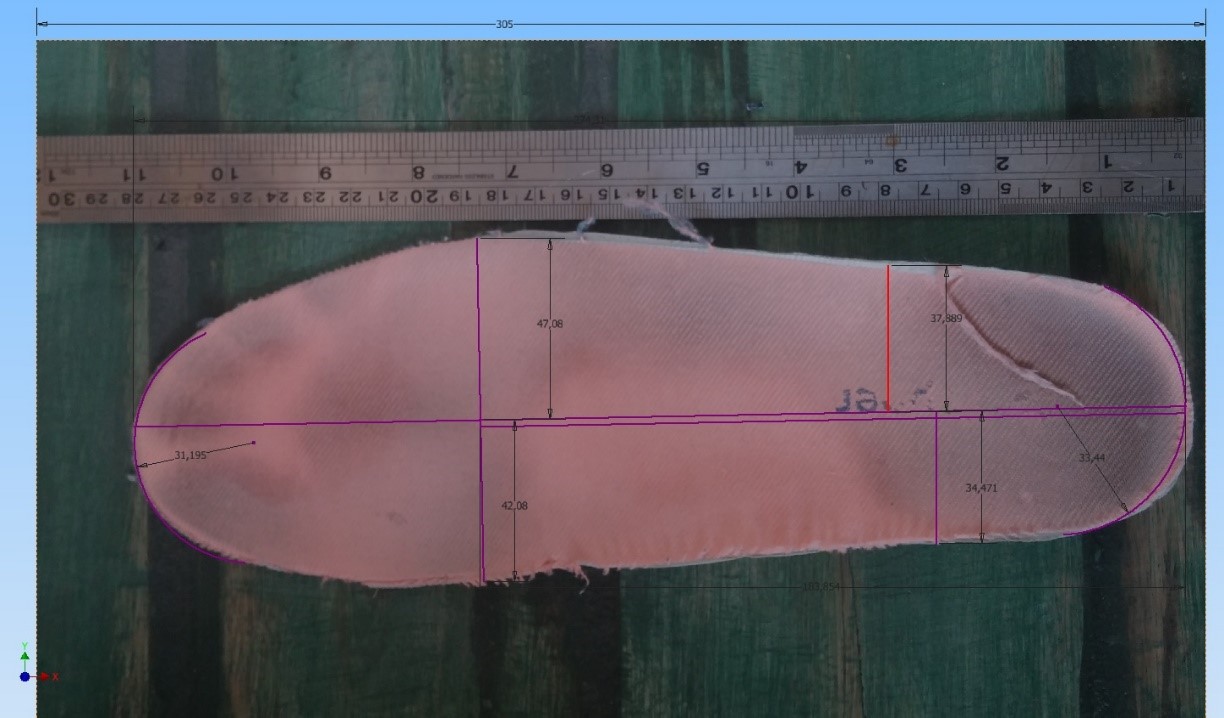
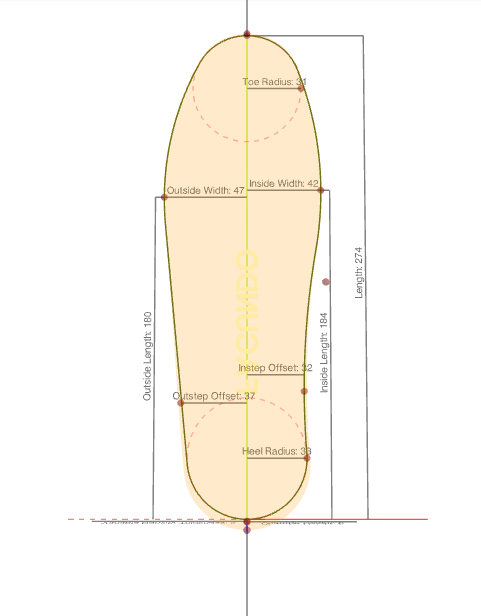
The third stage is very important for custom designs. It allows us to upload three-dimensional models of the user's foot that were previously scanned and digitized. With this technique we obtain a template with the morphological patterns of the patient. As in our work the template was used for diagnosis it was not necessary to perform the scan of the person.
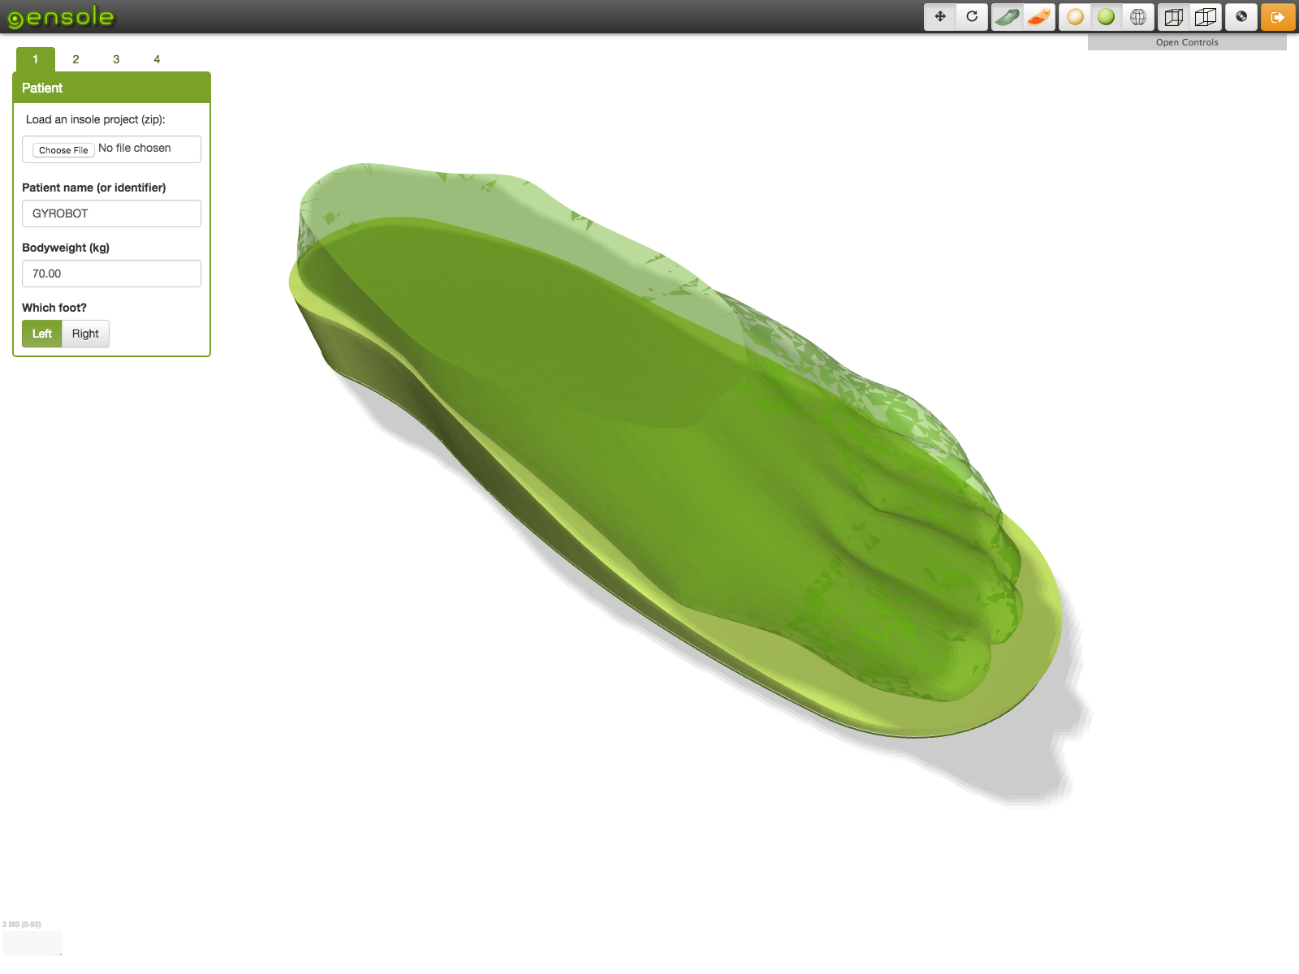
Software preview where a 3D scan of a foot was imported
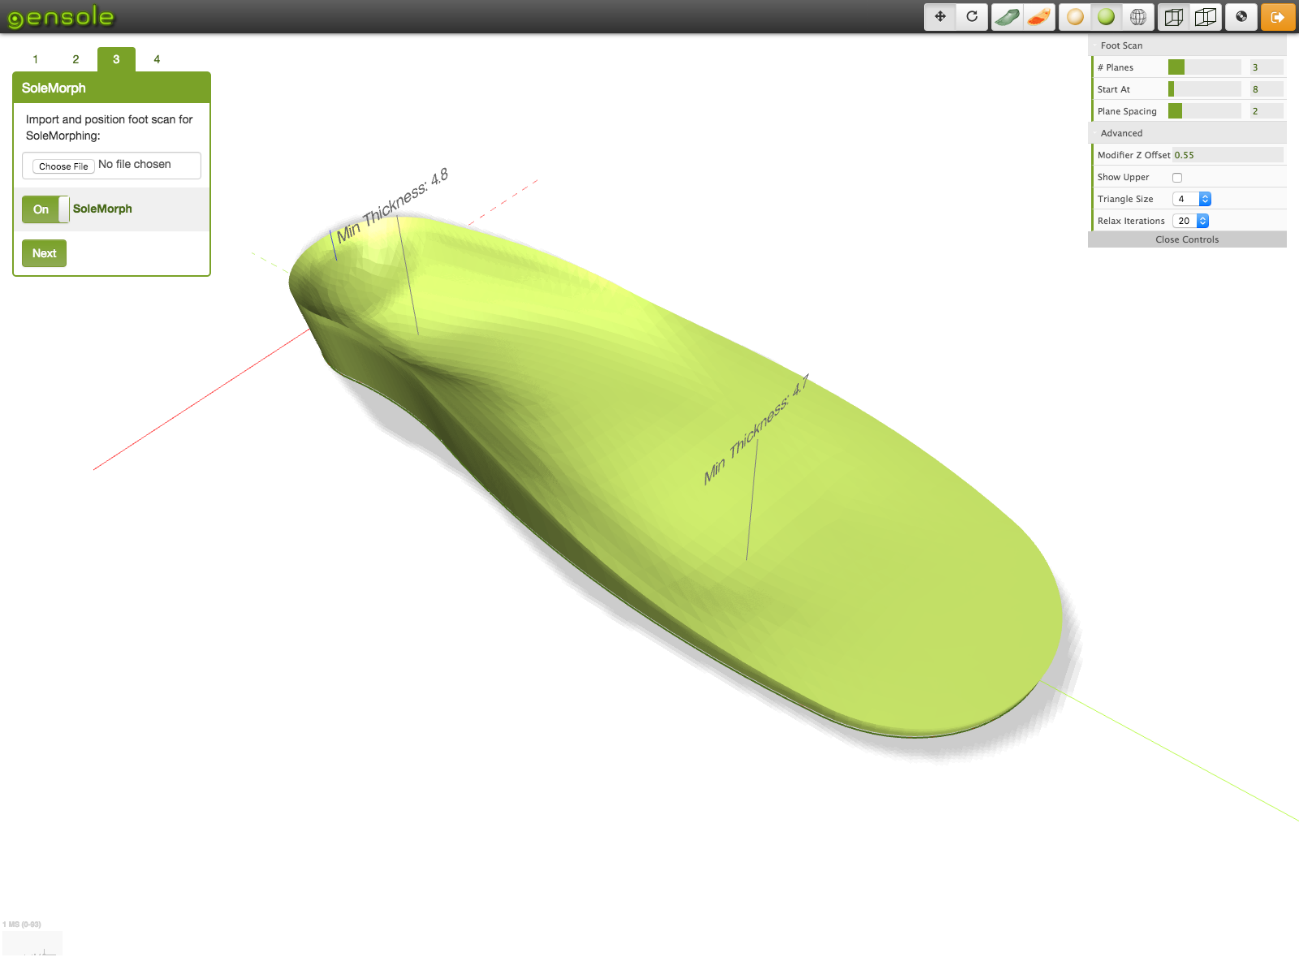
Custom template from a 3D scan
The latter function is perhaps the most important for the treatment of diabetic ulcers. In this stage it is possible to enter the zones of greater load that the patient presents through DXF curves. With this we can change the density of the fill patterns in that area to achieve a more resilient, flexible structure and help to discharge those zones.
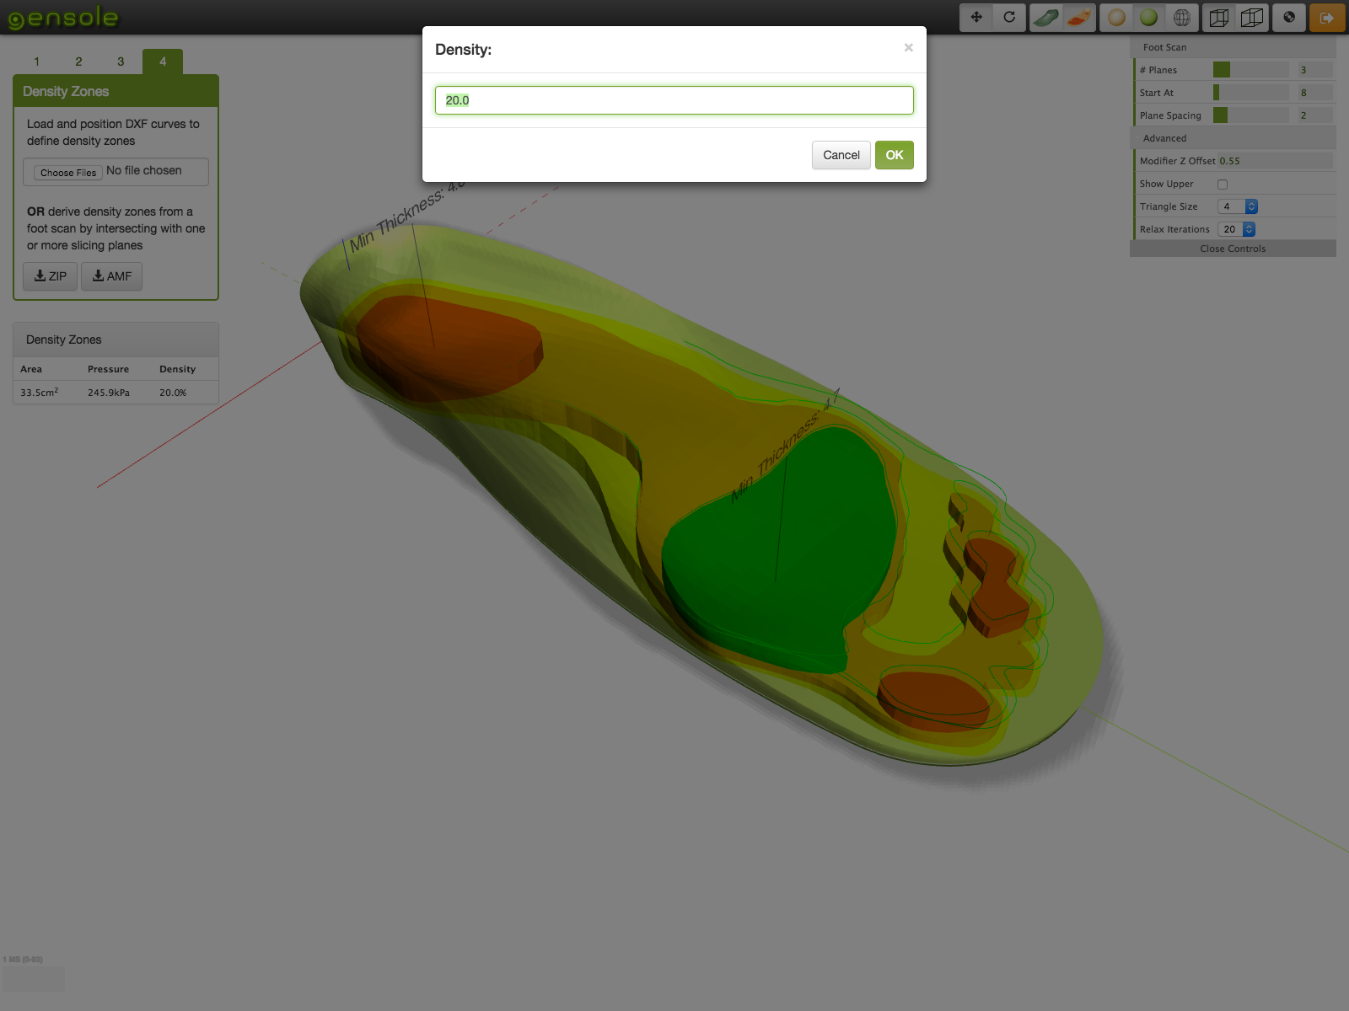
Color Map of High Pressure Areas with Density Editing Menu
Once all the steps are done we can download the STL model to print it. GenSole recommends using the software to perform the "Slic3r" which is the one that will generate the G-Code.
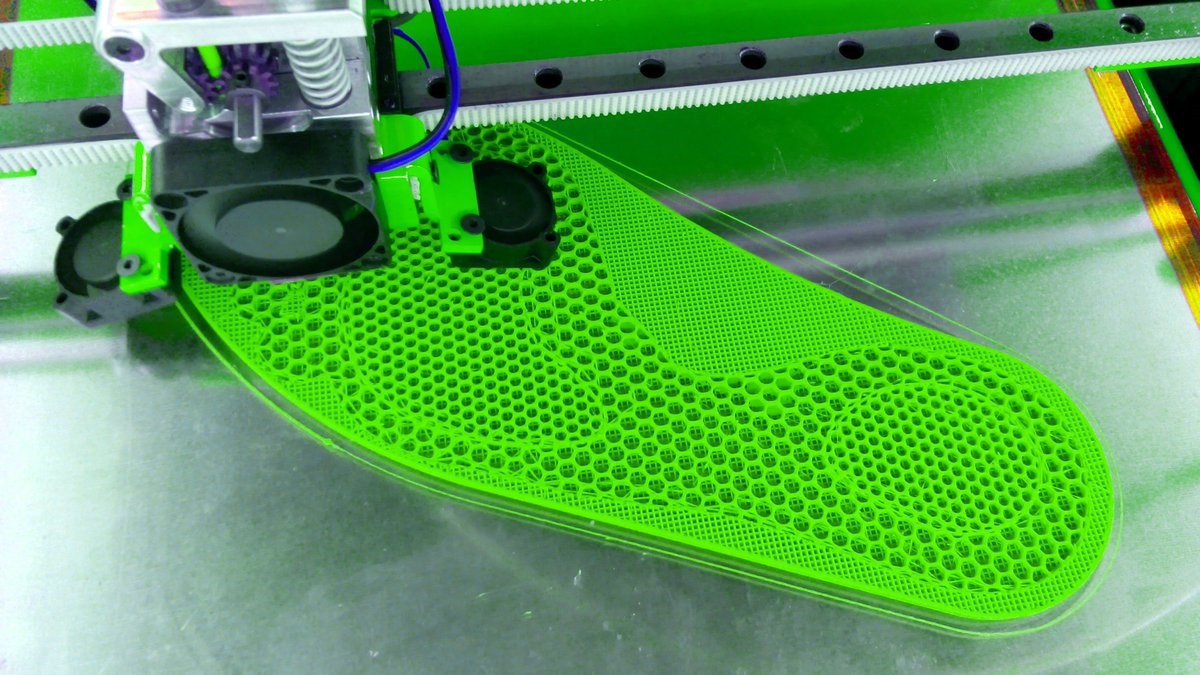
However, this is not the only program that can be used. In this project we used the software of Simplify (Simplify3D, 2016) where you can print the template with different patterns of filling between the po-demos find Honeycomb (rectangular, triangular, wiggle, among others) .
We can see how there are different densities within the template. With a higher density in the region of the forefoot and heel to withstand the greater load and larger spaces in areas that need superior flexibility.
 Facundo Noya
Discussions
Become a Hackaday.io Member
Create an account to leave a comment. Already have an account? Log In.