 Richard Crowder
-
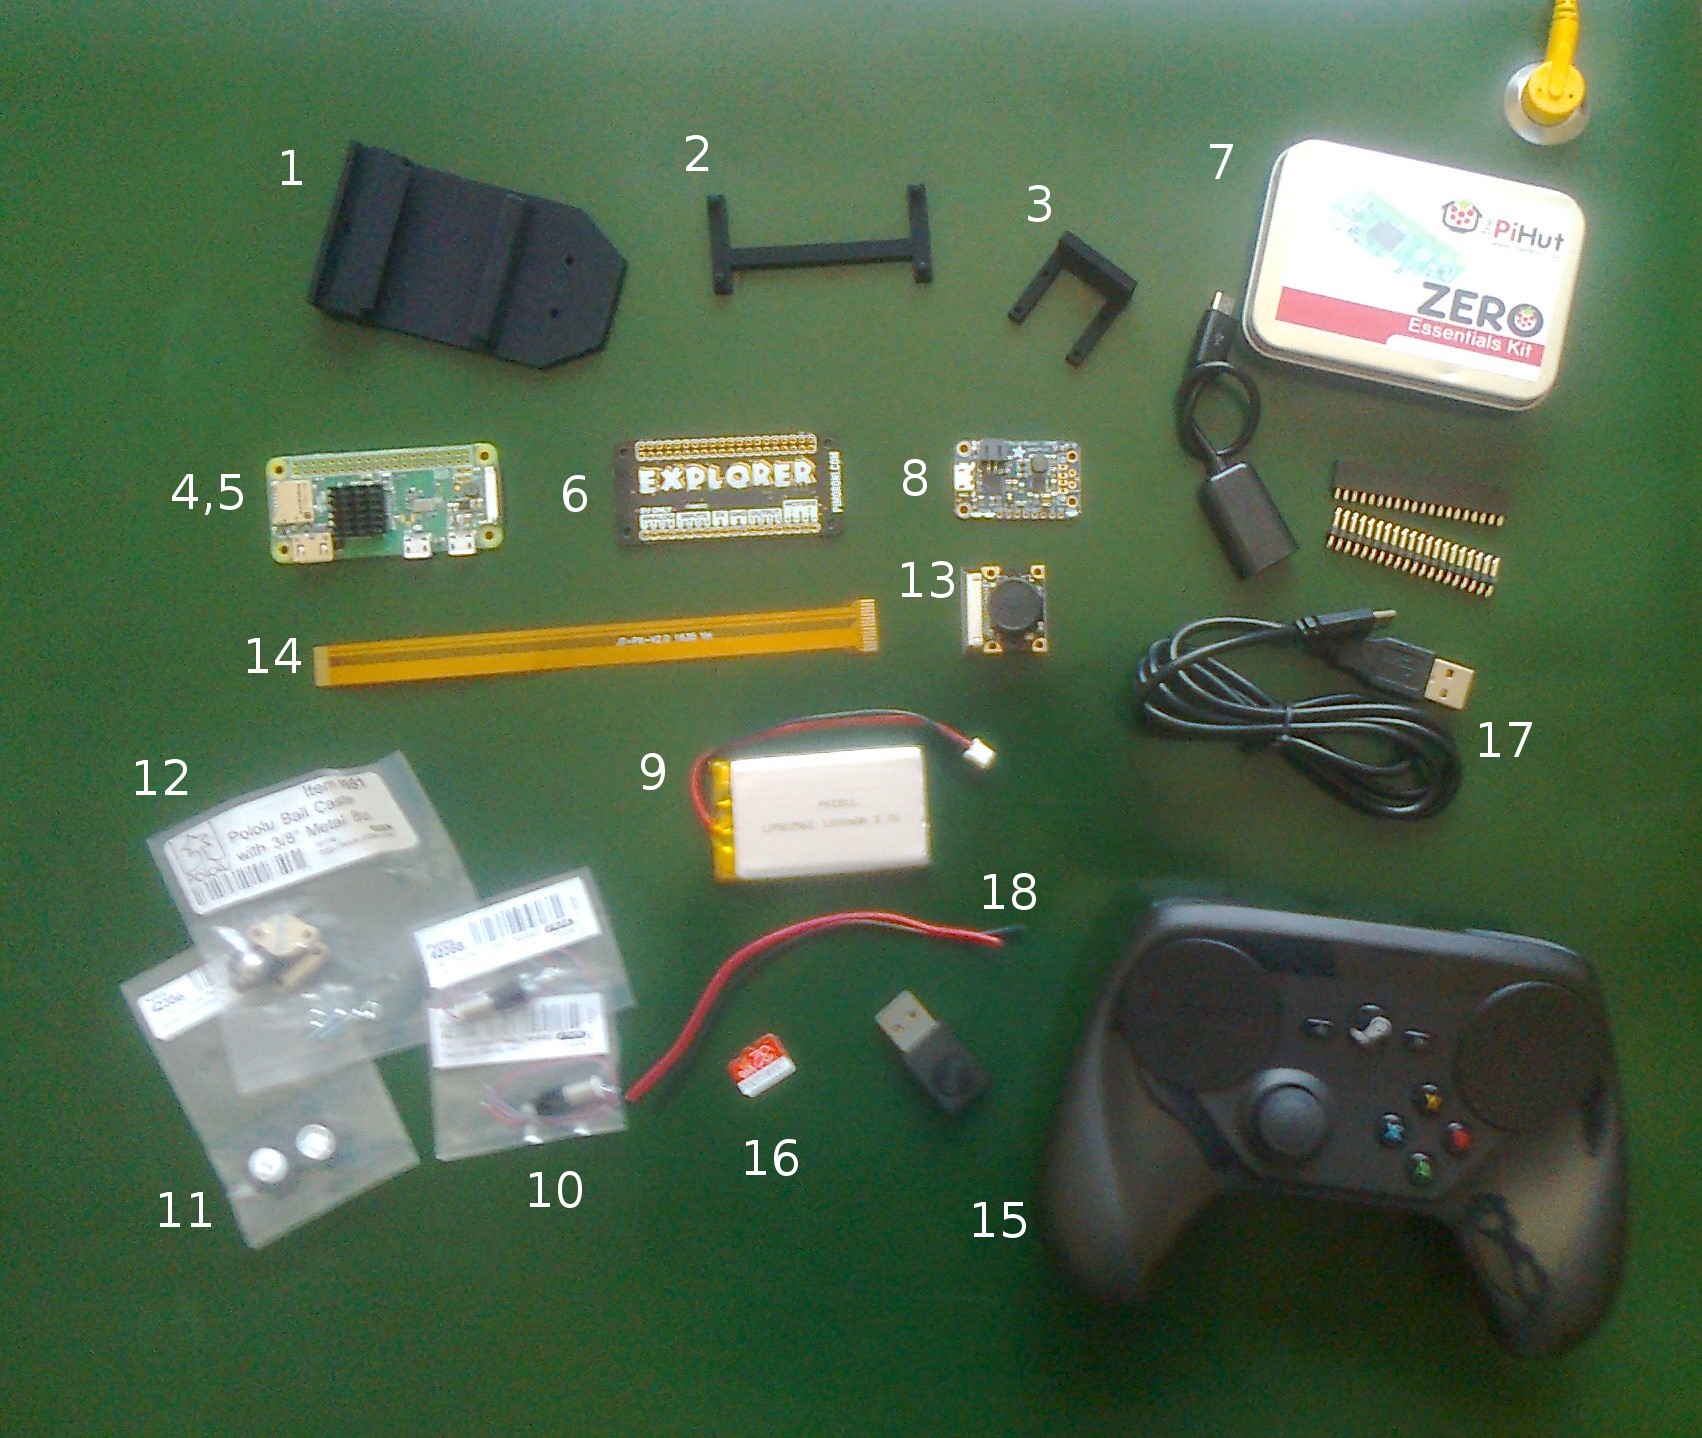
1Step 1 - Acquiring Parts and 3D Printing
![]()
The above image ties in with the Bill Of Materials (BOM) found here:
https://github.com/ogmacorp/EOgmaDrive/blob/master/Configuration3/BillOfMaterials.mdA 3D printer, or printing service, can be used to make the main base and mounting parts. All other items should be readily available from online suppliers.
The 3D Printing service we used created a case study for our print work, that can be found here: https://www.3dprint-uk.co.uk/portfolio-item/ogma-corp-richard-crowder-self-drive-car/
-
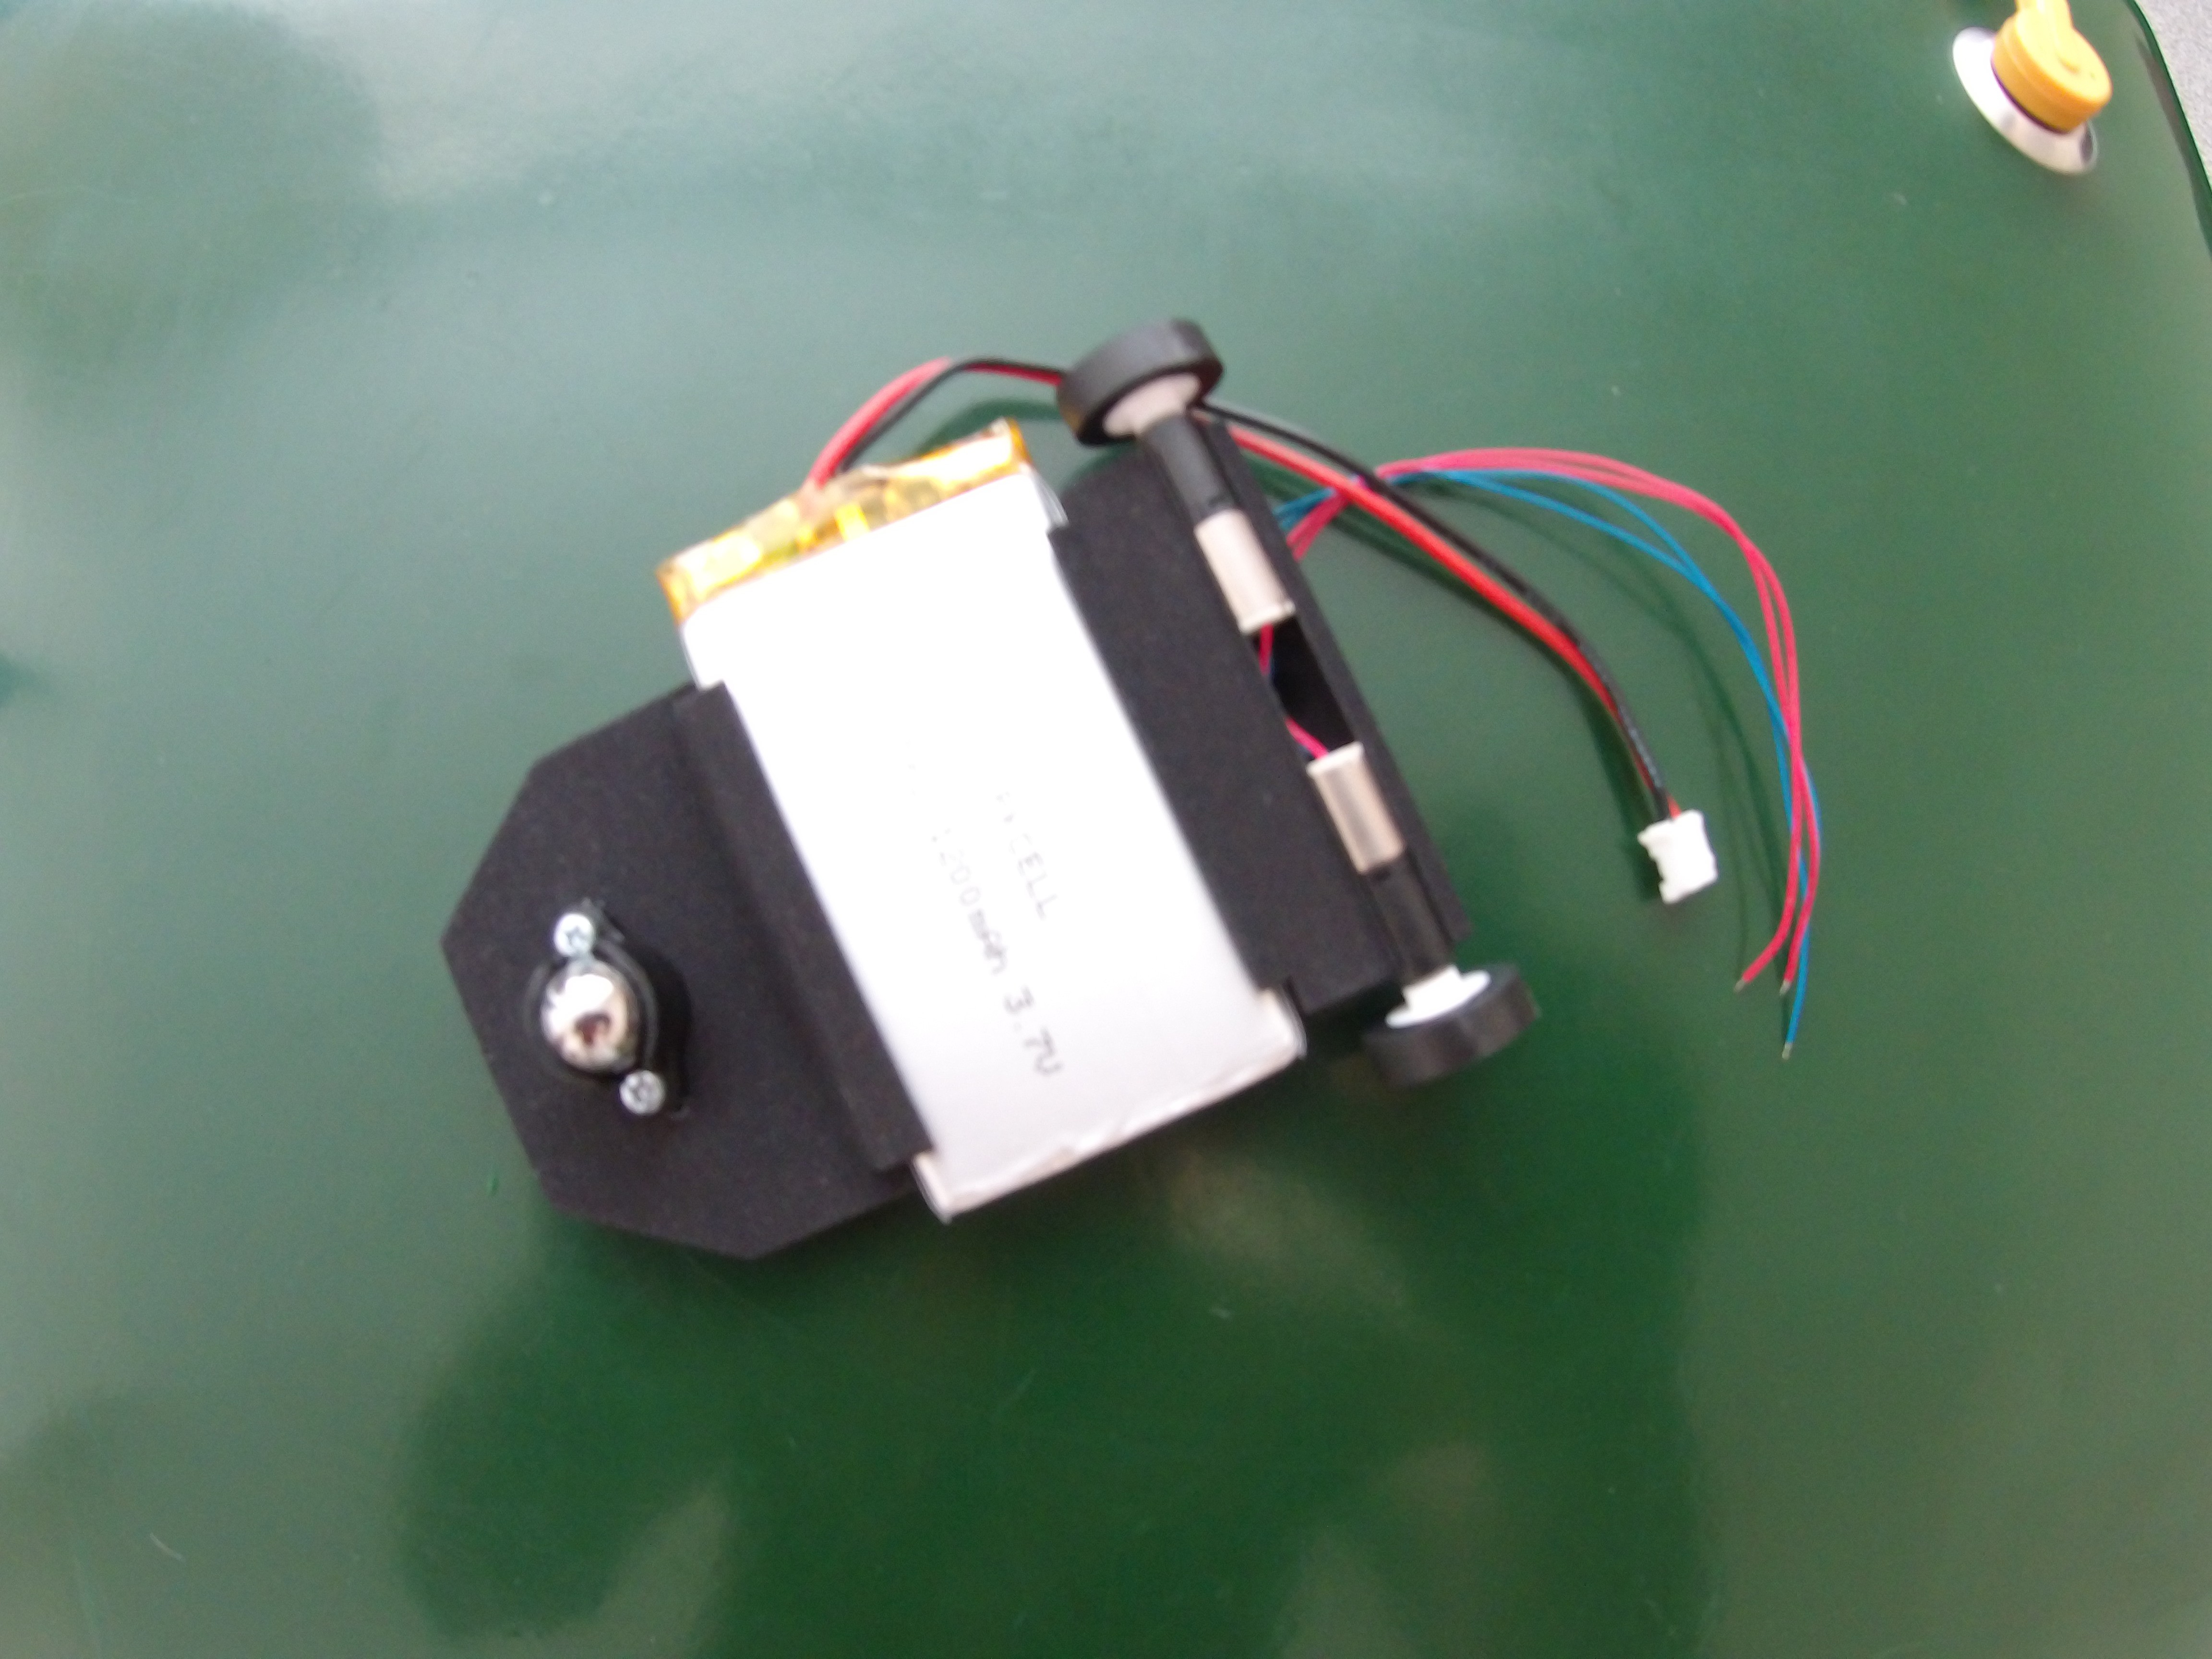
2Step 2 - Mounting front ball caster, motors, and battery
![]()
- Glue the wheels to the Pololu motors. Take care not to get any glue into the black motor gearbox casing.
- Slot the motors into the base. Feed the motor cables through the hole in the base.
- Bolt the Pololu ball caster to the base. Use the larger spacing plate supplied with the ball caster.
- Slide the Adafruit LiPo battery into the base.
-
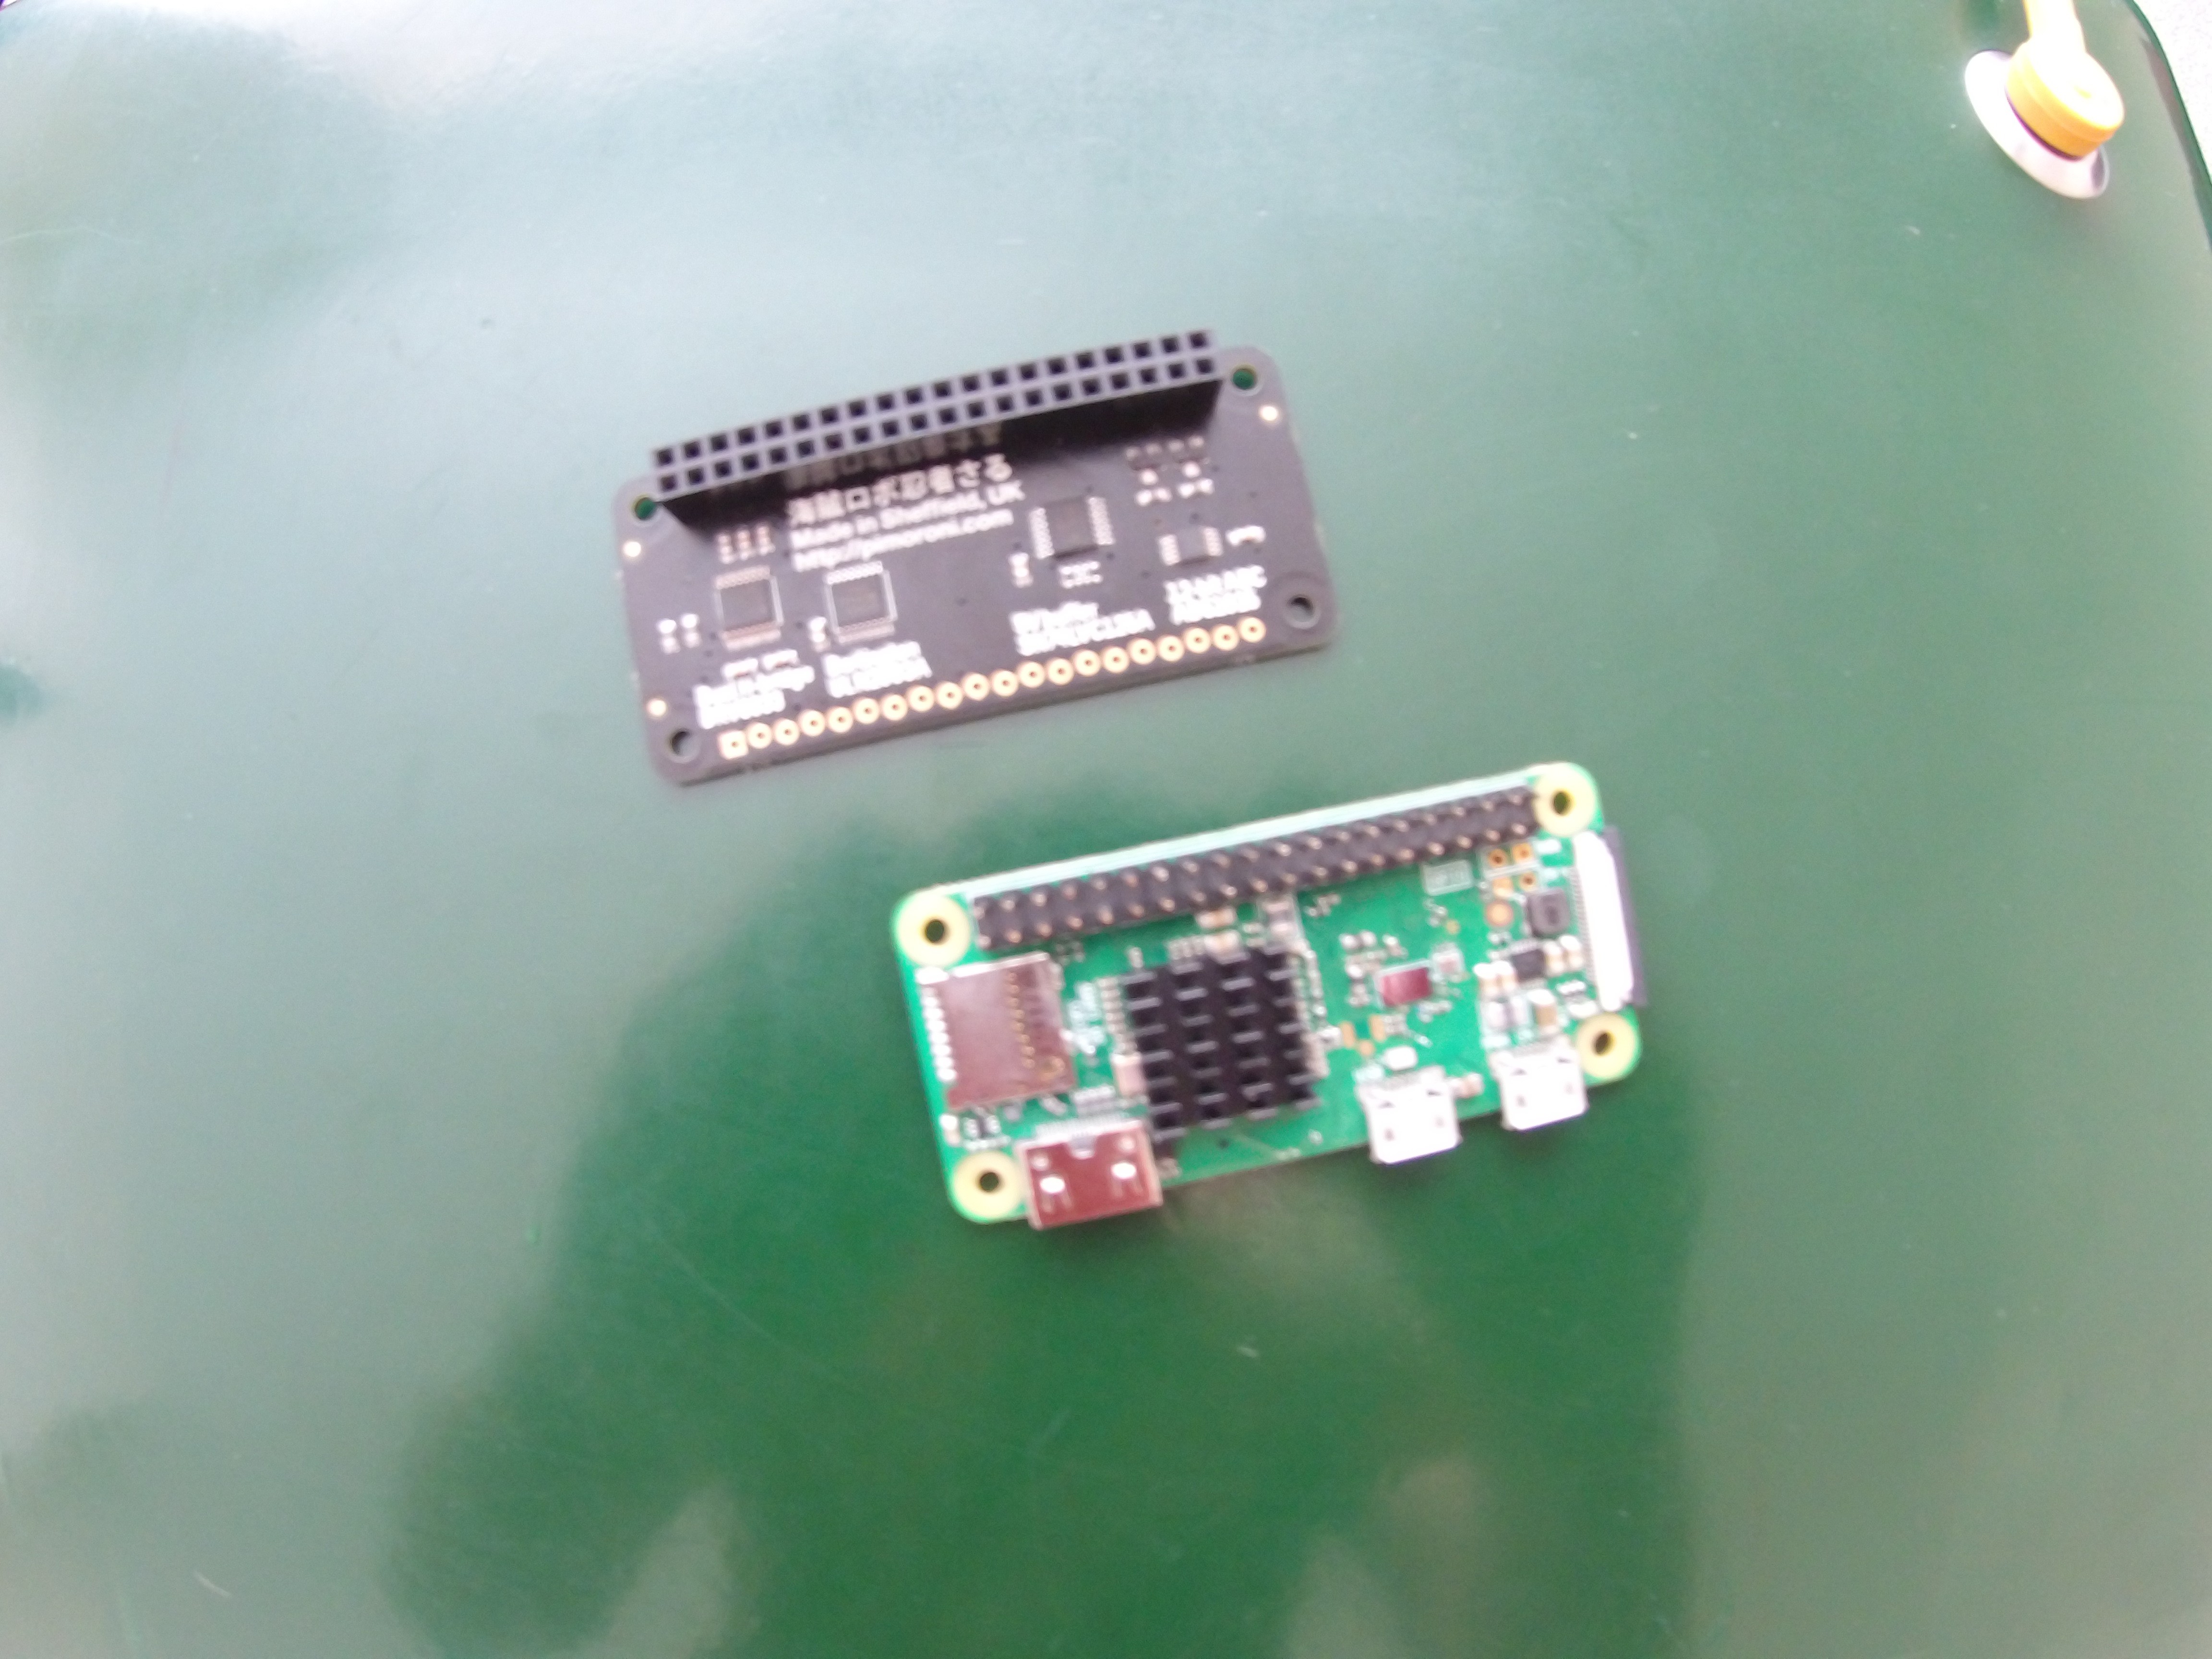
3Step 3 - Solder headers to the RPi ZeroW and Explorer pHAT
![]()
- Solder GPIO headers onto the Raspberry Pi ZeroW (male header) and Explorer pHAT (female header).
- Stick a heat sink onto the Pi ZeroW Broadcom CPU.
-
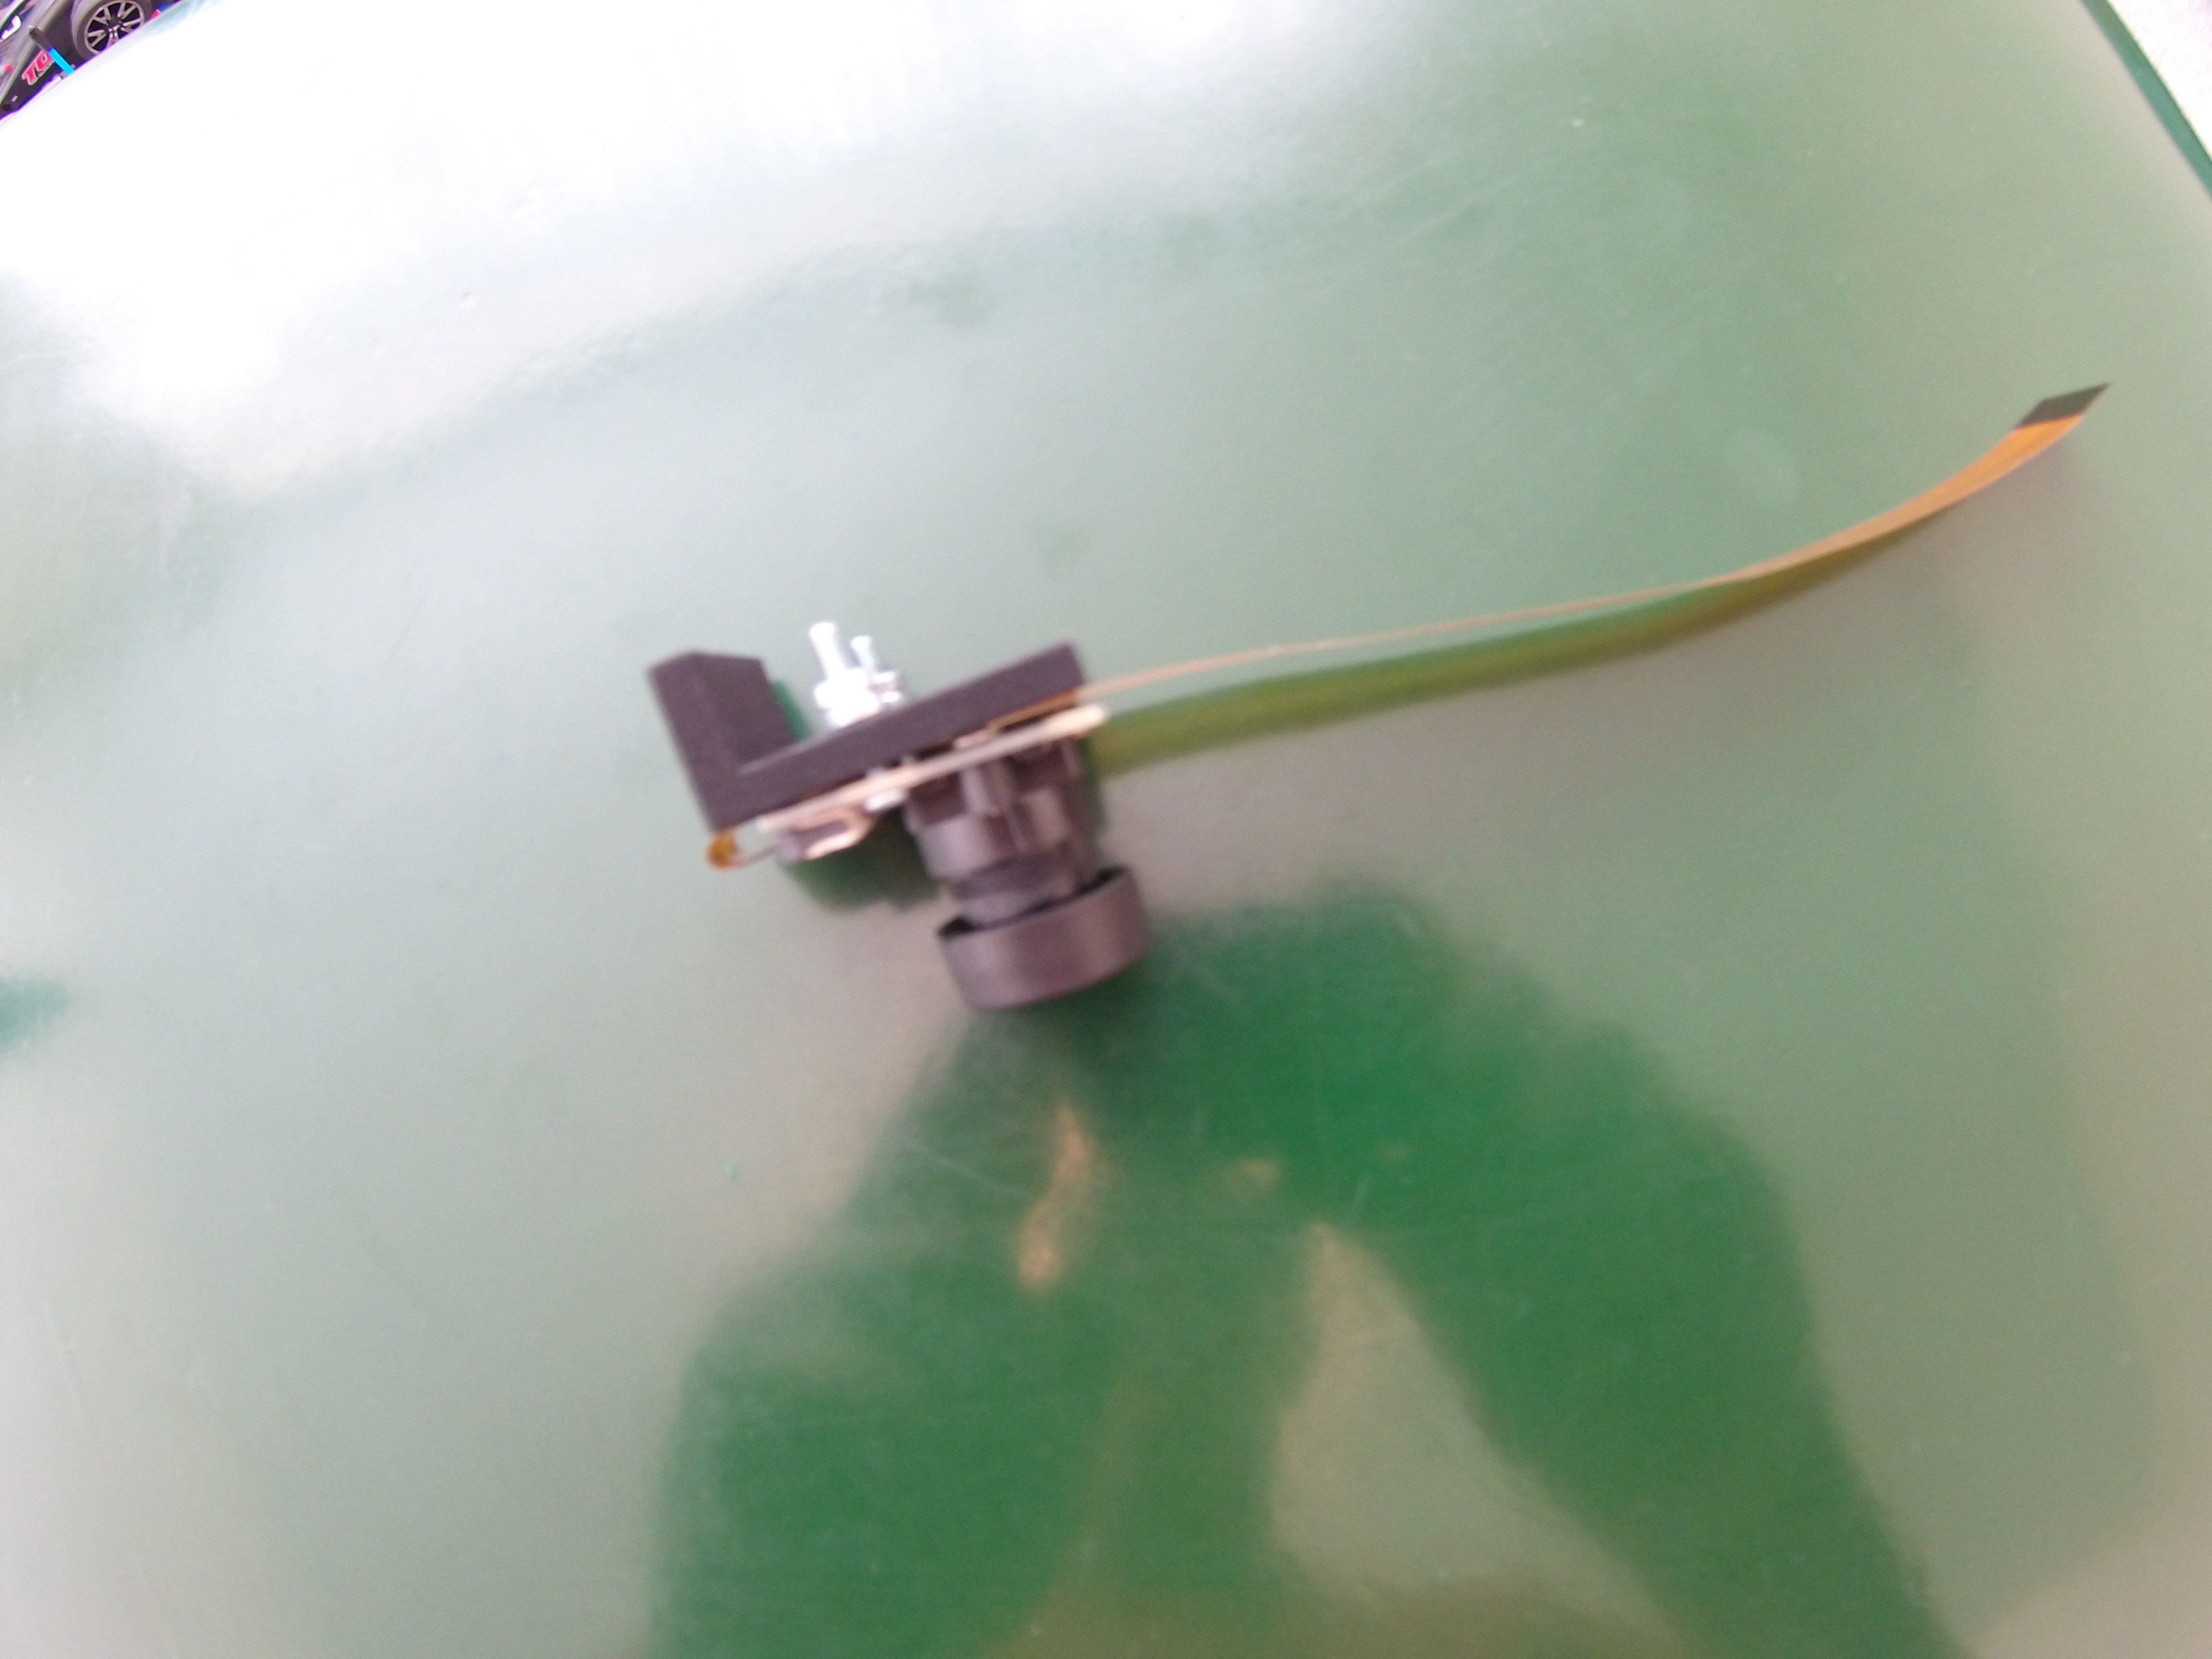
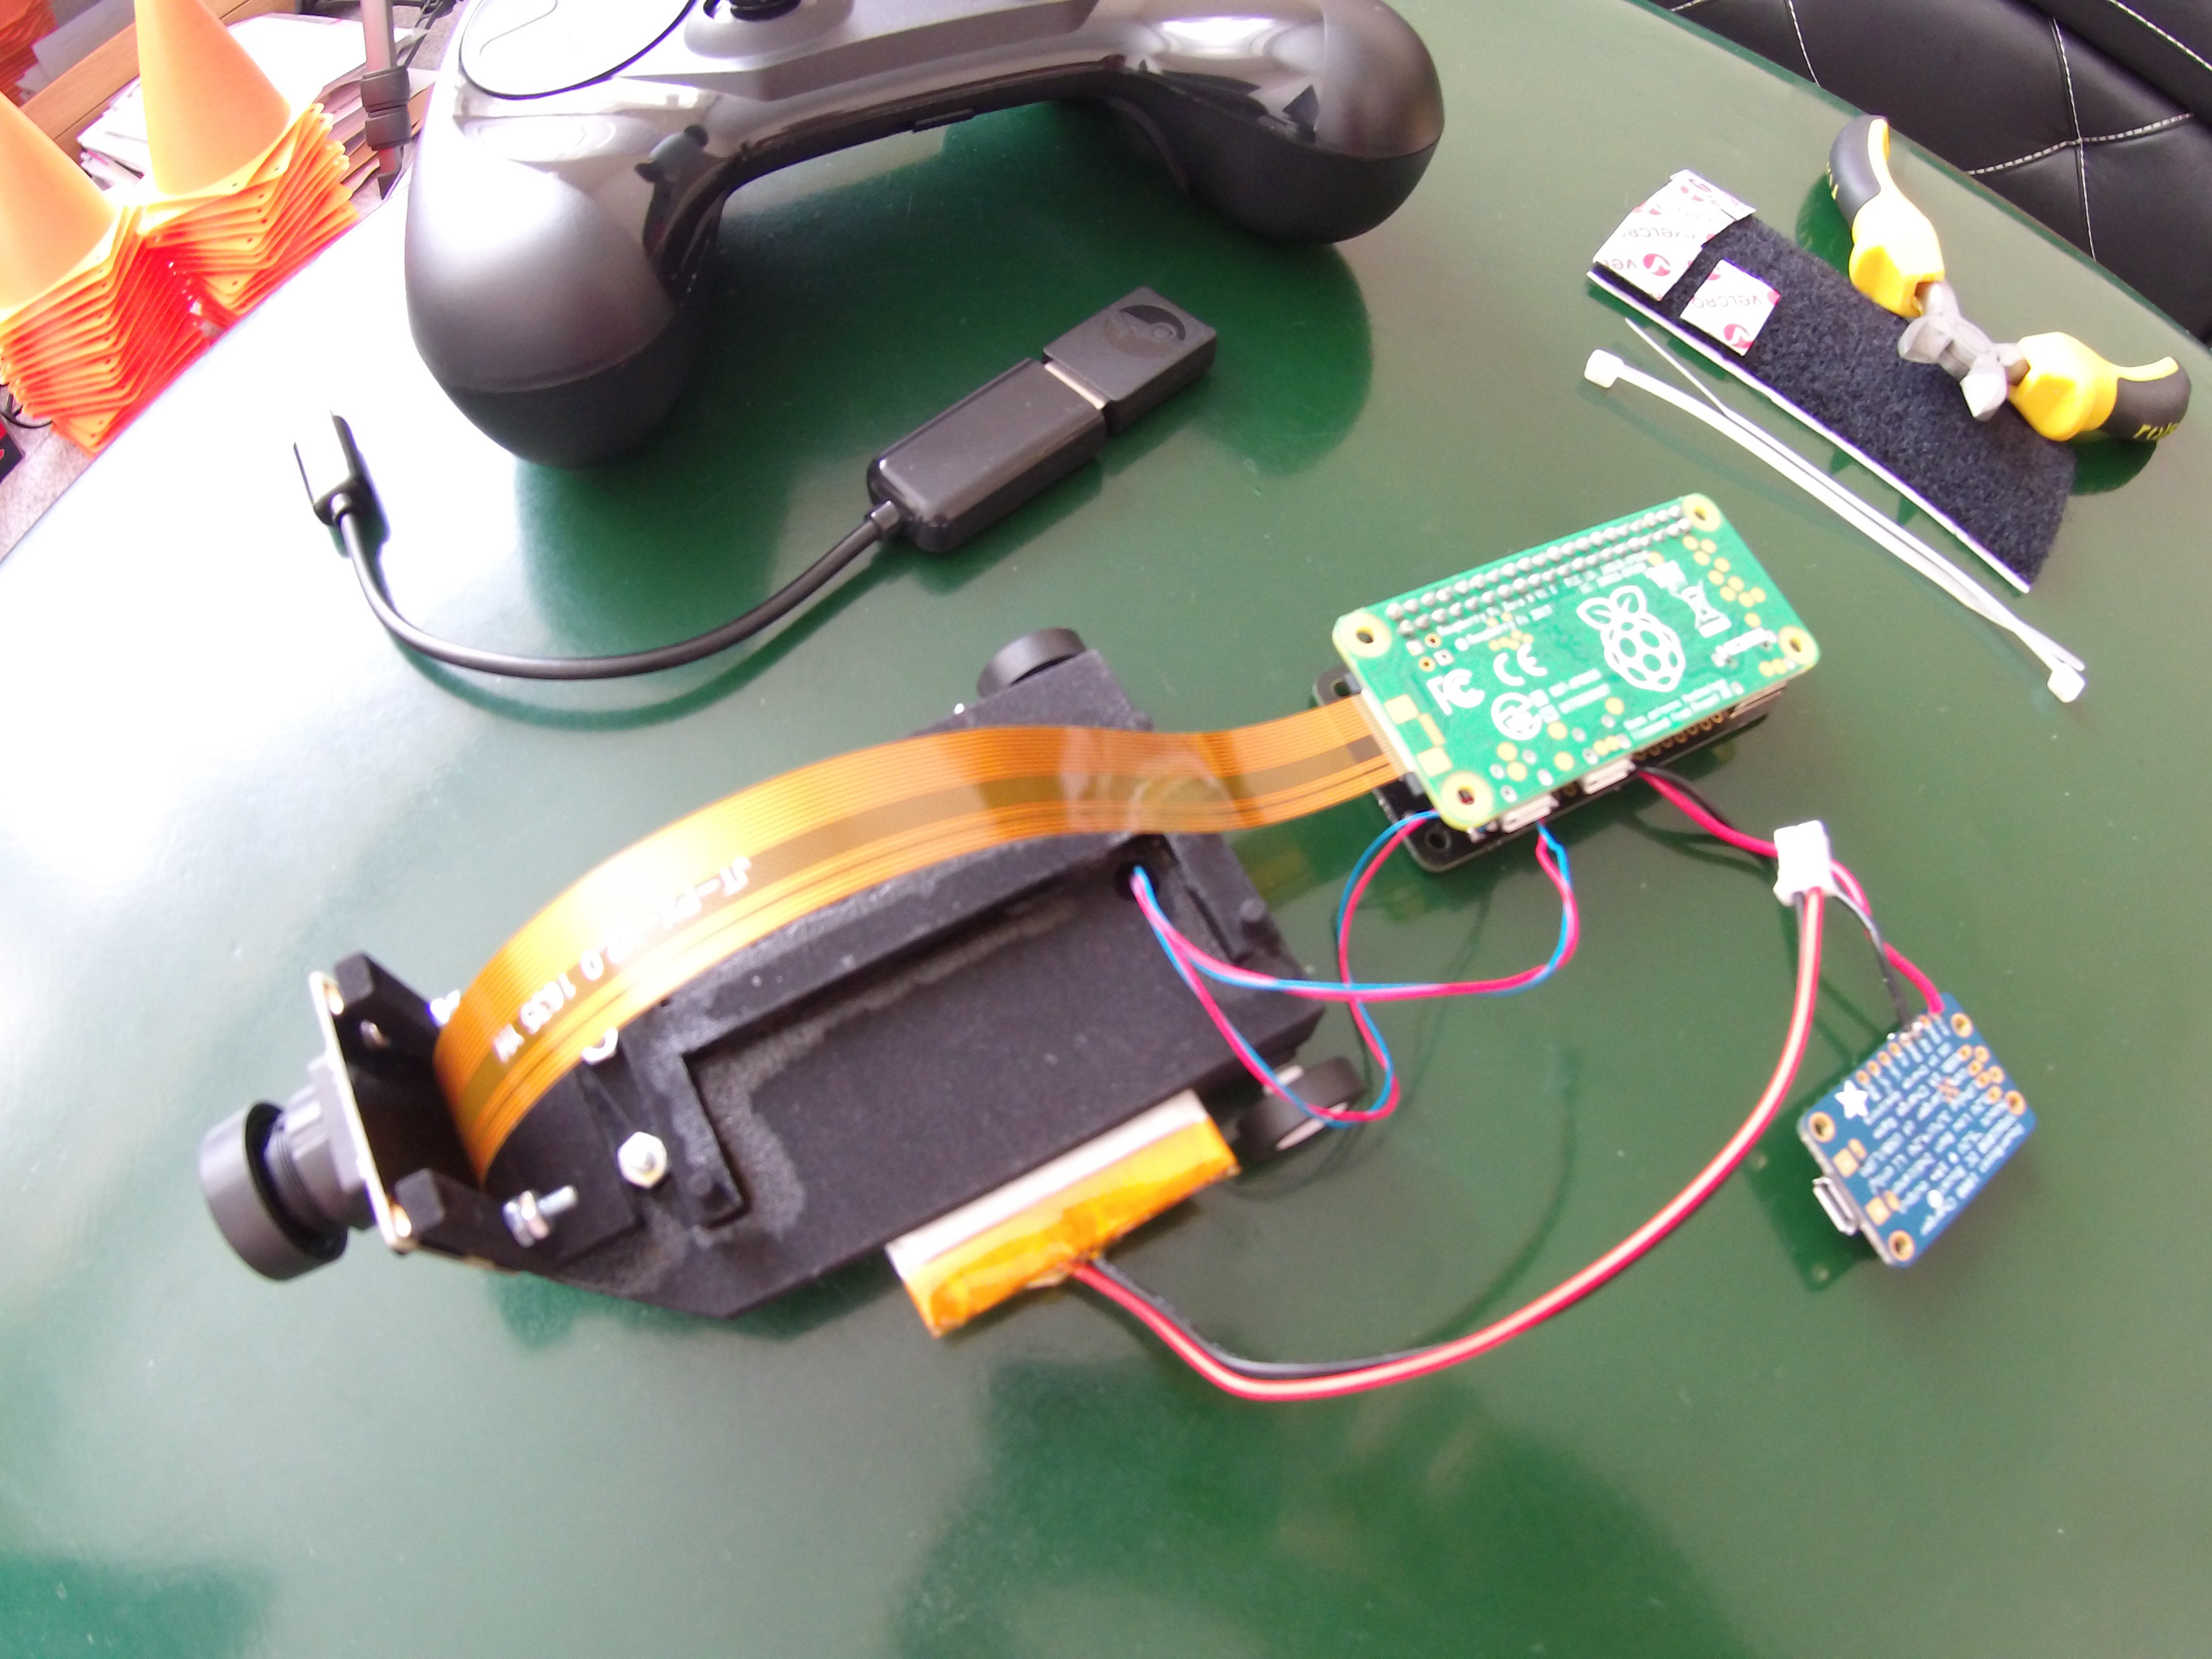
4Step 4 - Setup the RPi camera module
![]()
- Attach the camera cable to the camera module.
- Bolt the SainSmart camera board to the 3D printed mounting part.
- Connect the camera cable to the Raspberry Pi ZeroW.
-
5Step 5 - Solder the motors cables to the Explorer pHAT
![]()
- Solder the motors cables to the Explorer pHAT.
- Blue wires to the Explorer pHAT
Motor-and Red wires to the Explorer pHATMotor+
- Blue wires to the Explorer pHAT
- Solder the motors cables to the Explorer pHAT.
-
6Step 6 - Solder the Adafruit Powerboost connections to the Explorer pHAT
![]()
- Solder the Adafruit Powerboost connections to the Explorer pHAT.
- Gnd to Gnd (black wire),
- 5V and 5V (red wire).
- This step completes all the soldering work, so make sure that all connections are complete.
- Solder the Adafruit Powerboost connections to the Explorer pHAT.
-
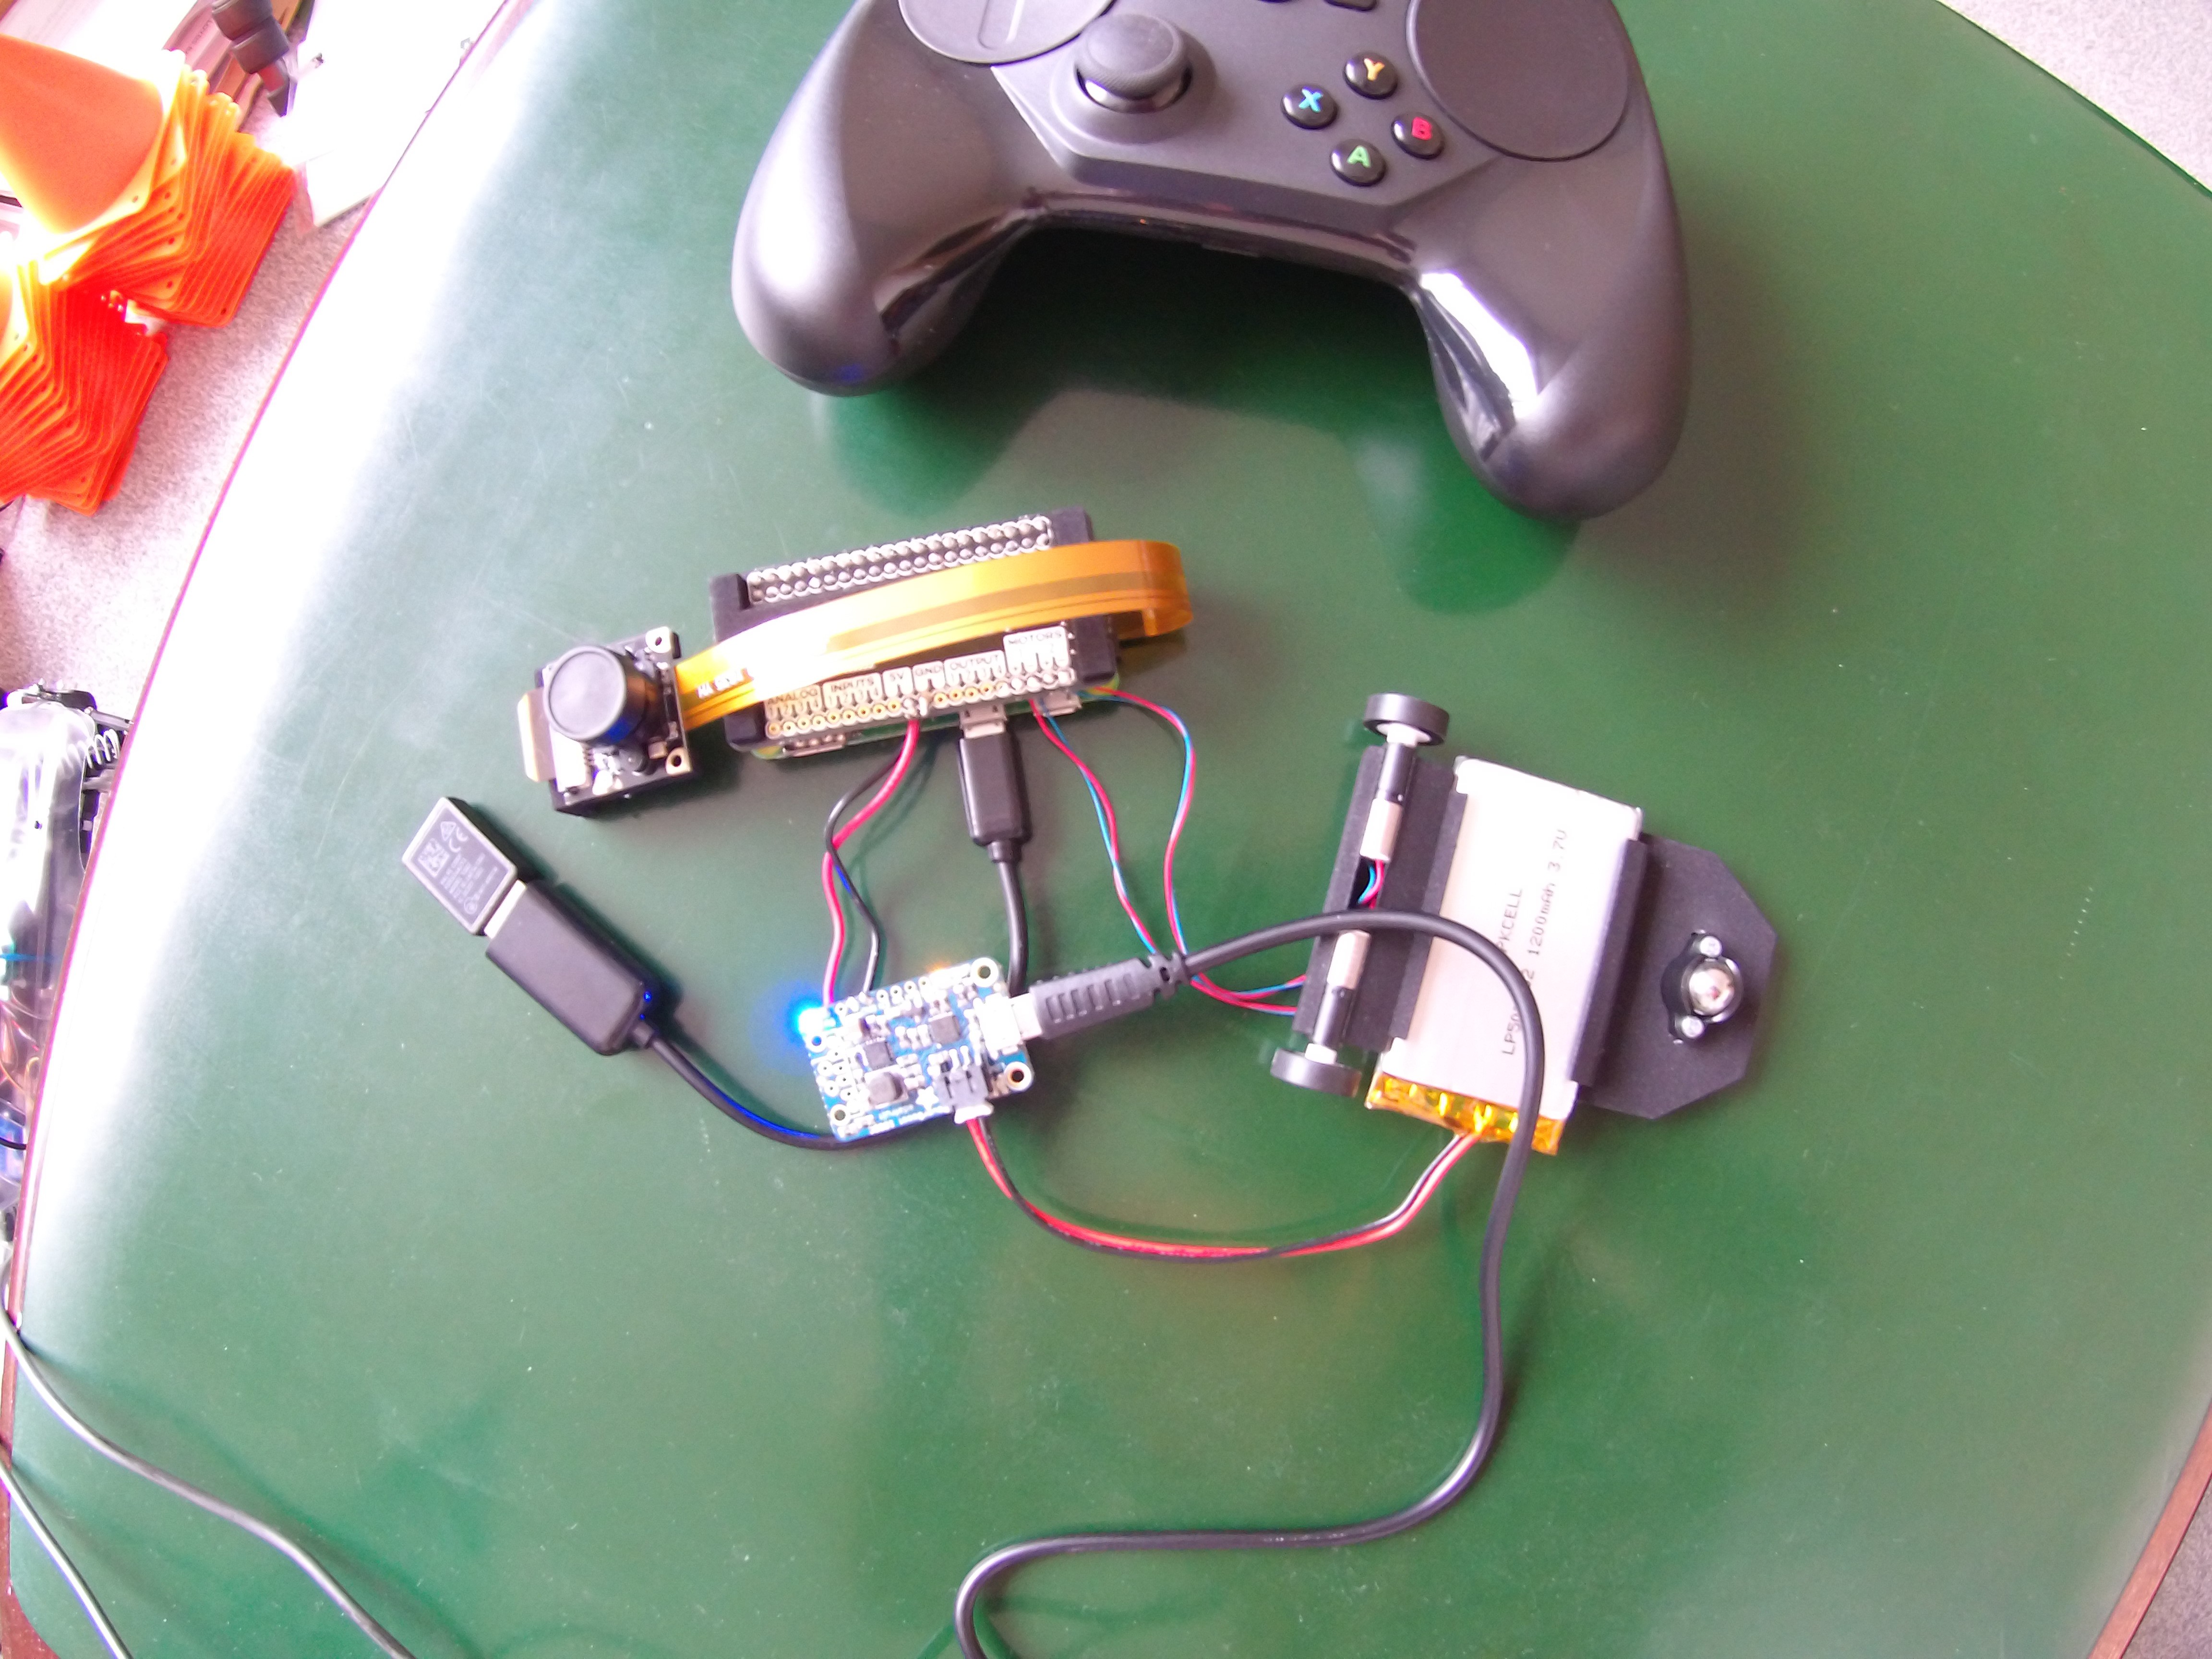
7Step 7 - Final connection checks and battery charging
![]()
- Connect the Steam Controller dongle to the Raspberry Pi ZeroW
usbconnector. - Attach the Explorer pHAT to the Raspberry Pi ZeroW
- Connect the LiPo battery to the Powerboost JST connector.
- The Powerboost Blue LED should light up.
- The Green LED on the Raspberry Pi ZeroW will light and flash as it boots into the Raspbian Jessie (Lite) OS.
- Connect a PC/Laptop to the Powerboot USB.
- The Powerboost Orange LED will light to show that it is charging the LiPo battery.
- The Powerboost Orange LED will change to Green when charging is complete.
Notes:
- The Powerboost USB connection can be removed once the battery has been charged. The Powerboost will then continue to supply battery power to the Raspberry Pi ZeroW.
- Enabling WiFi on the Raspberry Pi ZeroW will allow for SSH shell access into it. See the SoftwareInstallation.md file for further details.
- Connect the Steam Controller dongle to the Raspberry Pi ZeroW
-
8Step 8 - Glue the three 3D printed parts together
![]()
- Glue the Camera mount to the front of the base.
- Glue the Pi mount onto the base part.
-
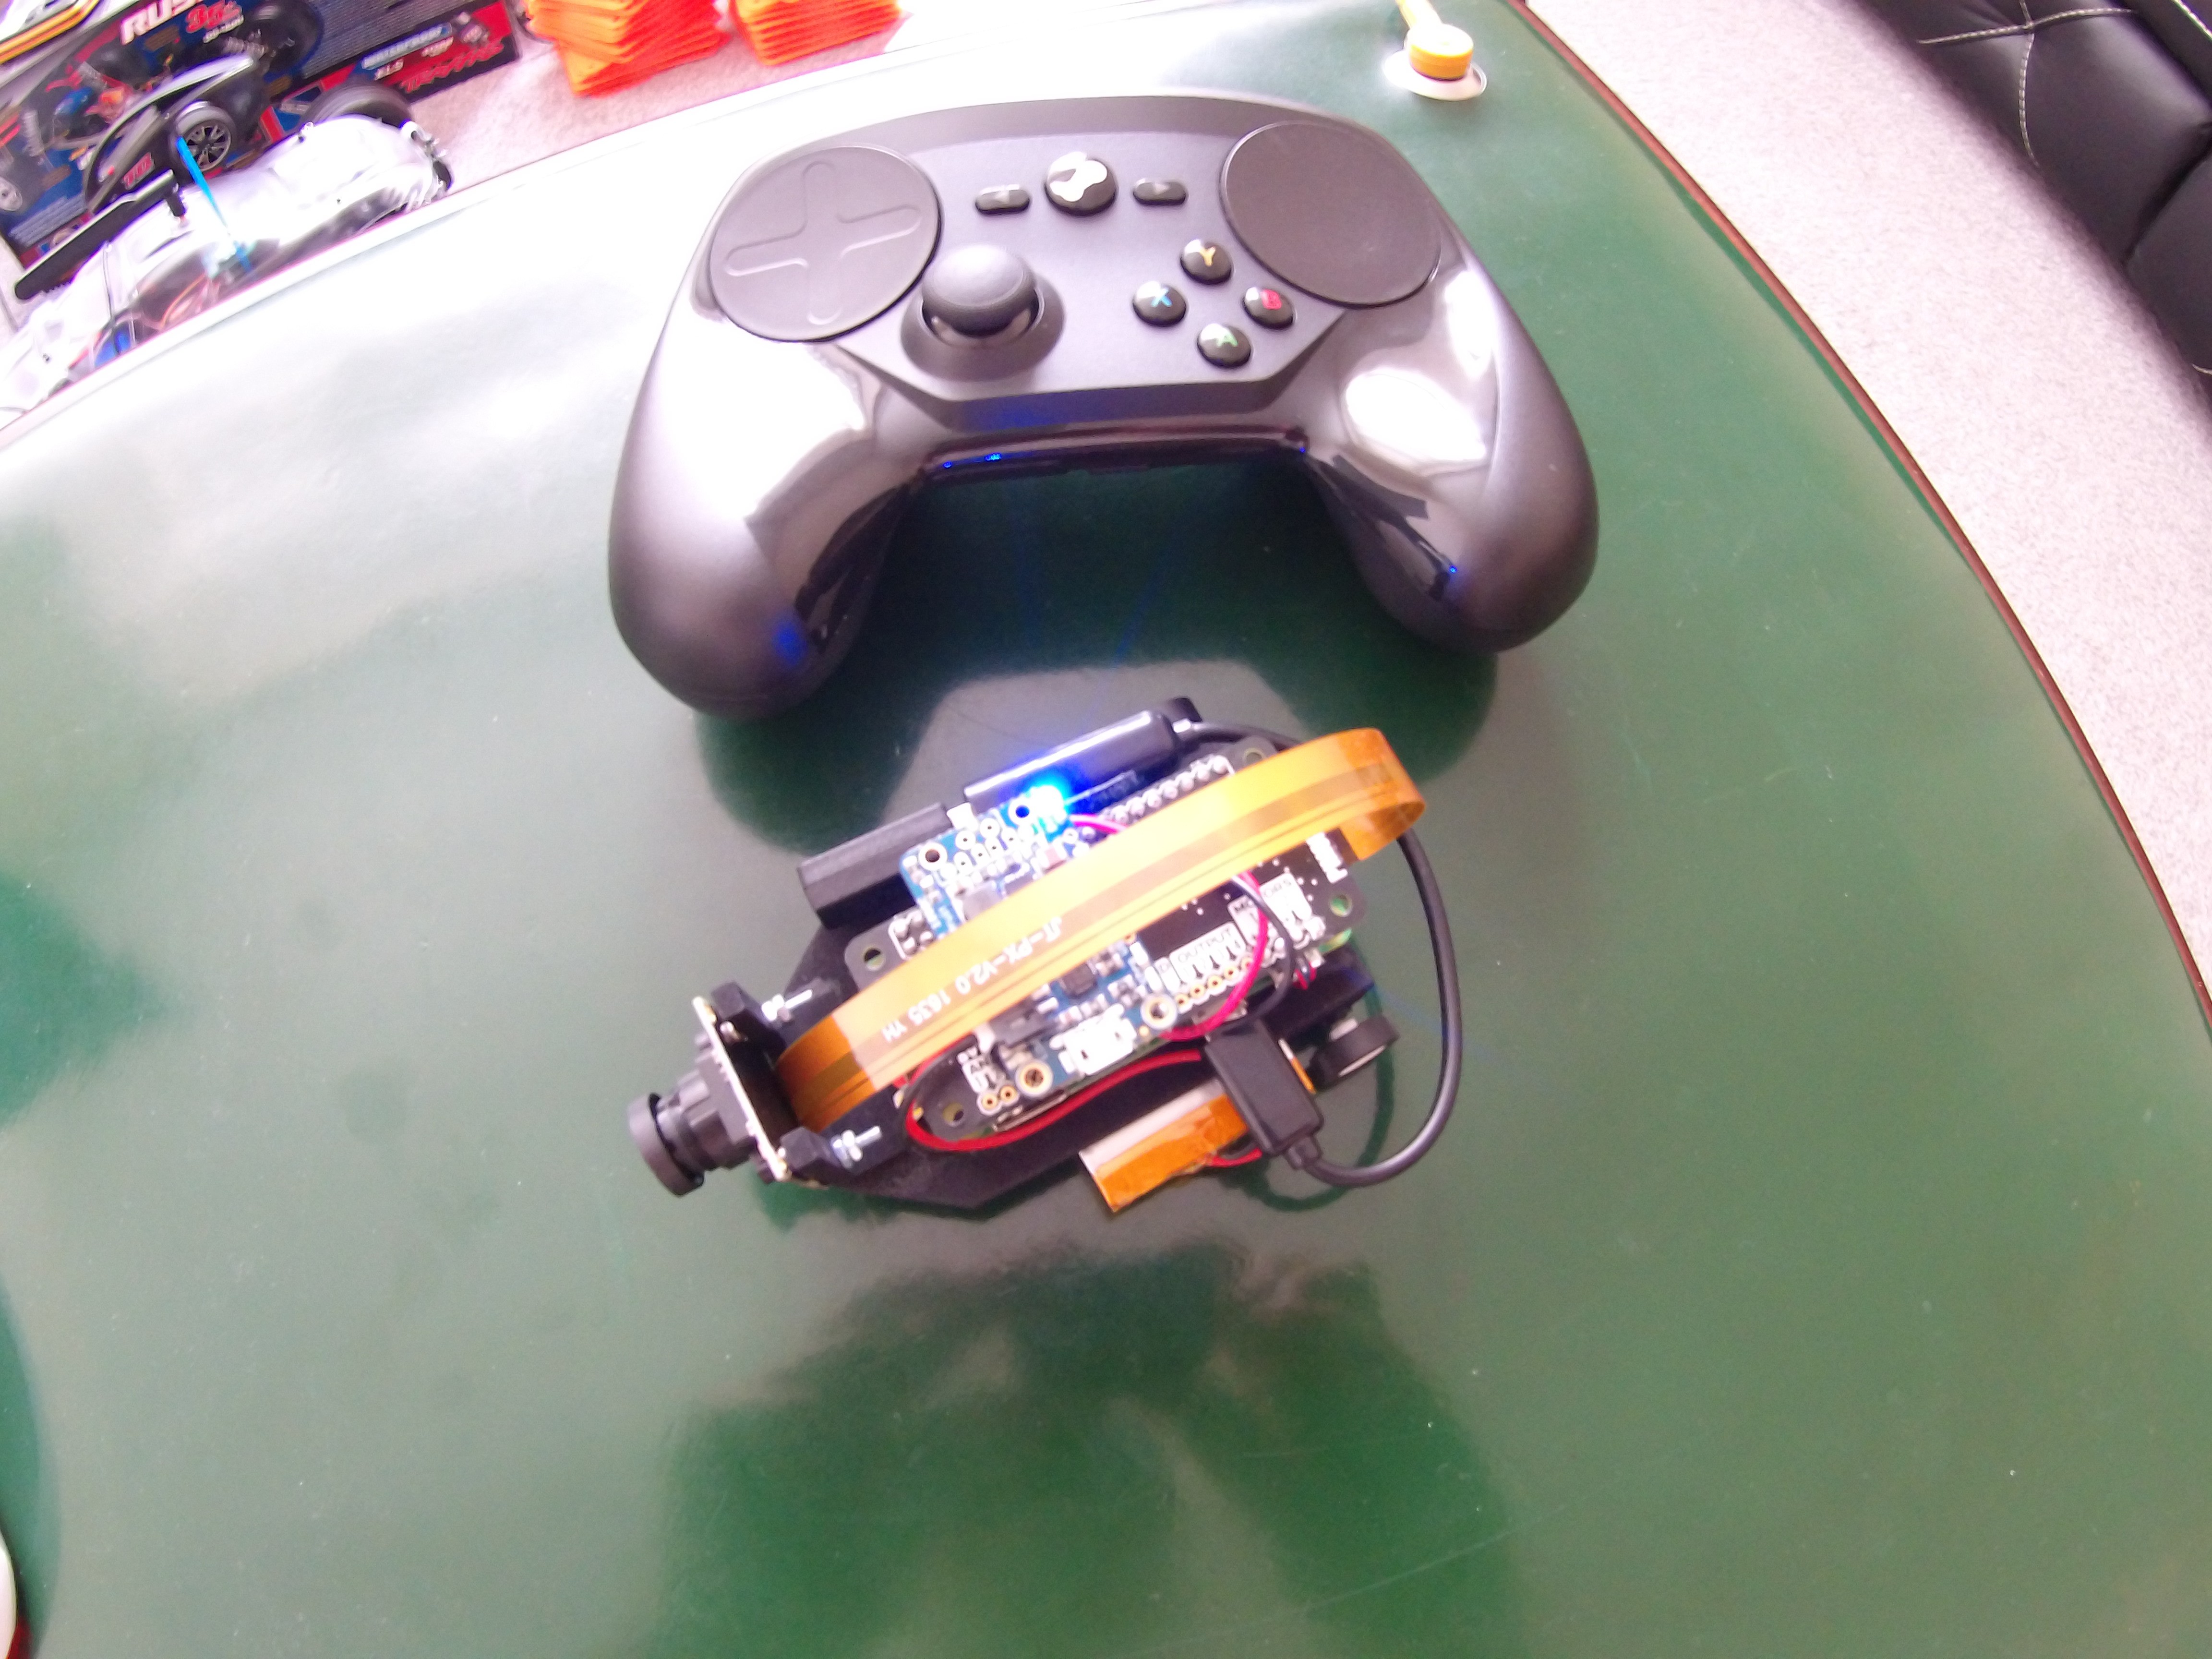
9Step 9 - Complete the assembly
![]()
- Place the Raspberry Pi ZeroW and Explorer pHAT, onto the mounting part.
- Mount/Velcro the Powerboost board on top of the Explorer pHAT.
- Re-connect the Steam Controller dongle to the Raspberry Pi ZeroW. Zip-tie/Velcro it in place.
- Re-connect the LiPo battery to the Powerboost JST connector.
-
10Step 10 - Software installation
Jessie image setup
Prepare the Raspberry Pi ZeroW for access via the command line:
- Download [Raspbian Jessie image](https://www.raspberrypi.org/downloads/raspbian/).
- Flash the image to a micro SD card.
- Edit the config.txt and configure.txt boot files, and create the empty `ssh` file. To allow for SSH over USB (e.g. https://gist.github.com/gbaman/975e2db164b3ca2b51ae11e45e8fd40a).
- Configure WiFi (e.g. https://raspberrypi.stackexchange.com/questions/62933/set-up-a-raspberry-pi-zero-w-without-monitor-or-ethernet-module?noredirect=1&lq=1).
Create a SSH shell into the Pi Zero
- Connect the Raspberry Pi ZeroW `usb` port (not the `pwr`) to a PC/laptop using a USB data cable.
- Use `ssh pi@raspberrypi.local` (or `ssh pi@raspberrypi` if configured to use WiFi). Alternatively use PuTTY, for example, to create a SSH shell into the device.
Update Jessie
On the Pi ZeroW, use the following commands to configure and update it:
- Run `sudo raspi-config` to configure the Pi Zero. Options to change:
- `5 Interfacing Options` -> `P1 Camera` to enable the Camera interface.
- `7 Advanced Options` -> `A1 Expand Filesystem` to make sure it uses all of your SD card.
- Run `sudo apt update` followed by `sudo apt upgrade`, to make sure all packages are up to date.
- Use `sudo shutdown -h now` to power off the device.
Common dependencies
sudo apt-get install cmake git python-dev python3-devExplorer pHAT
The easiest way is using the following command:
curl https://get.pimoroni.com/explorerhat | bashChoose `y` (yes) for **all** questions asked by this bash script. The script will initial make sure that your Jessie image contains all the required packages (e.g. Python & Pip, Python3 & Pip3, and the I2C hardware interface is enabled).
Choosing `y` (yes) to the full install questions installs all the necessary Python(3) packages/dependencies required by the Explorer pHAT, its examples and documentation. Dependencies include packages such as PyGame, Git, SMBus, Cap1xxx, and ExplorerHat.
Upon completion of the bash script it should print "All Done. ...". At this point it is possible to check the motor connections using:
$ python
>>> import explorerhat
Explorer pHAT detected...
>>> explorerhat.help()
...
>>> explorerhat.help("motor")
...
>>> explorerhat.motor.one.speed(10)
10
>>> explorerhat.motor.one.speed(0)
0
>>> explorerhat.motor.two.speed(10)
10
>>> explorerhat.motor.two.speed(0)
0
>>> exit()
Full installation instructions can be found here - https://github.com/pimoroni/explorer-hat
Camera Python module
Installation of the Python packages can be done using:
sudo apt-get install python-picamera python3-picameraThe following "Basic Recipe" (http://picamera.readthedocs.io/en/release-1.13/recipes1.html) can be used to capture an image using the SainSmart camera:
$ cd ~
$ python
>>> from time import sleep
>>> from picamera import PiCamera
>>> camera = PiCamera()
>>> camera.resolution = (1024, 768)
>>> camera.start_preview()
>>> sleep(2)
>>> camera.capture('foo.jpg')
>>> exit()
From a host computer the following command can be used to obtain the image:
$ scp pi@raspberrypi:/home/pi/foo.jpg ./foo.jpg
Further information about this Python interface can be found here: http://picamera.readthedocs.io/en/release-1.13/
Steam Controller
Stany Marcel's `Standalone Steam Controller Driver` is used to obtain control information from the controller using Python. It can be found on Github here: https://github.com/ynsta/steamcontroller
The following is a copy of the installation instructions:
cd ~
sudo pip3 install libusb1
sudo pip install libusb1
sudo pip install enum34
git clone https://github.com/ynsta/steamcontroller.git
cd steamcontroller
sudo python3 setup.py install
Create the following udev rules in a new file called `/etc/udev/rules.d/99-steam-controller.rules`
# Steam controller keyboard/mouse mode
SUBSYSTEM=="usb", ATTRS{idVendor}=="28de", GROUP="games", MODE="0660"
# Steam controller gamepad mode
KERNEL=="uinput", MODE="0660", GROUP="games", OPTIONS+="static_node=uinput"
Reload udev with:
sudo udevadm control --reload
sudo reboot
After the reboot, restart a SSH shell and use the following to make sure that the Steam controller and USB dongle are working:
cd ~
sudo python3 ~/steamcontroller/scripts/sc-dump.py
OpenCV with Python bindings
Building OpenCV fresh from source code can take ~9 hours on the Raspberry Pi ZeroW. Therefore, the recommended way is to use a pre-built package.
Jaimyn Mayer supplies a package for OpenCV 3.1.0 on Github. Installation instructions can be found here: https://github.com/jabelone/OpenCV-for-Pi
SWIG
This needs to be installed to allow for the creation of Python bindings for EOgmaNeo. The following can be used to install this required package:
sudo apt-get install swig3.0EOgmaNeo library
The following commands can be used to install the EOgmaNeo library:
cd ~
git clone https://github.com/ogmacorp/EOgmaNeo.git
cd EOgmaNeo/Python
sudo python3 setup.py install
EOgmaDrive
Clone the EOgmaDrive repository, or a fork of the repo:
cd ~
git clone https://github.com/ogmacorp/EOgmaDrive.git
cd EOgmaDrive/Configuration3
A Self-Driving Car using a Raspberry Pi Zero
Using Ogma Corp's EOgmaNeo machine learning library, we created a tiny vision-based self-driving car, powered by a Raspberry Pi Zero.


Discussions
Become a Hackaday.io Member
Create an account to leave a comment. Already have an account? Log In.