 Maria Carlina Hernandez
-
1Setup
This guide assumes your Raspberry Pi has been configured and is already connected to the Internet. If not configured you can quickly do so using this quick start guide from the Raspberry Pi Foundation.
NOTE: If you’re using a WiFi dongle, we suggest using Wicd to manage your WiFi connection.
-
2Connecting the NanoPi to Ubidots using Python
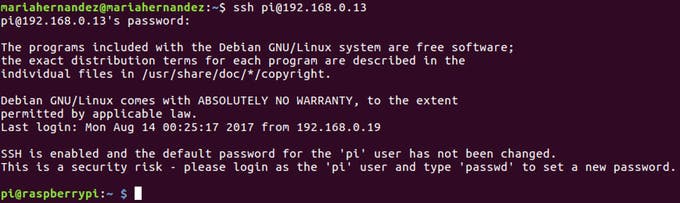
With your Raspberry Pi connected to the Internet, verify the IP address assigned to the board access using ssh in your computers terminal:
ssh pi@{IP_Address_assigned}- User Name: pi
- Password: raspberry
As you can see the image below, your access was successful, and the user now is
pi@raspberrypi:![]()
Now let's upgrade some packages and install pip, Python's packet manager:sudo apt-get update sudo apt-get upgrade sudo apt-get install python-pip python-dev build-essential
Install the below libraries:
- requests: to make HTTP requests from Python to Ubidots
- pyspeedtest: to measure the Internet speed from Python
pip install requests pyspeedtest
Pro Tip: FAQs and Troubleshooting - If you get a permission issue when installing the packages required, change the user mode to root using the following command:
sudo su
-
3Now it is time to code!
Create a Python script in your computer's terminal:
nano ubi_speed_tester.py
And copy this code into it:
#!/usr/bin/python
import pyspeedtest
import requests
st = pyspeedtest.SpeedTest()
payload = {'Download': round(st.download()/1000000,2) , 'Upload': round(st.upload()/1000000, 2), 'Ping': round(st.ping(),2)}
r = requests.post('http://things.ubidots.com/api/v1.6/devices/raspberry-pi/?token=YOUR-UBIDOTS-TOKEN-HERE', data=payload)
Make sure to replace your Ubidots account token in the request URL. If you don't know how to get your Ubidots Token, please see the article below:
Now let's test the script:
python ubi_speed_tester.py
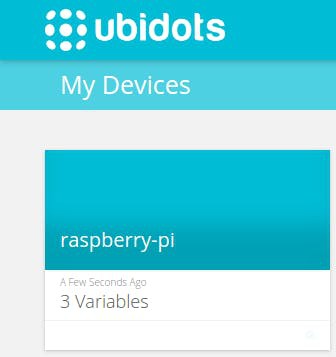
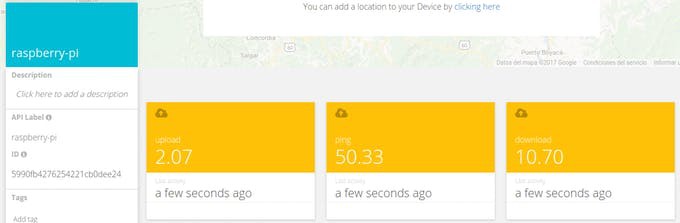
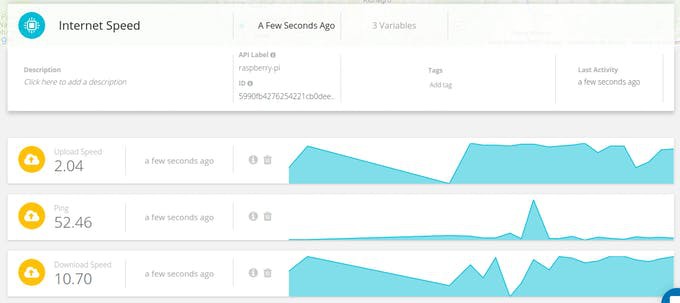
If working properly you will see a new device in your Ubidots account with three variables: Download, Upload, and Ping:
![]()
![]()
-
4Optional Steps: Rename the Device and Variables
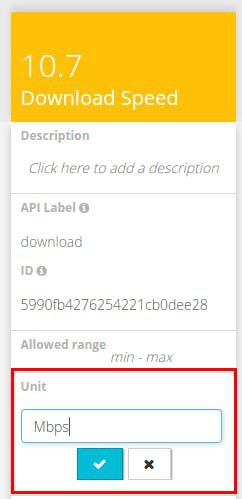
The names of the variables created are the same as the API labels, which are the IDs used by the API. This doesn't mean their names can't be changed, so I recommend changing the names of the devices and variables to make them friendlier. To know how to rename your variables names, see the article below:
You can also add the units to each variable:
![]()
-
5Create a Crontab to run the script every N minutes
Now that we've tested the script, we can set it to run automatically every N minutes. For this purpose we'll use the Linux Cron tool for efficiency.
1. Make the file executable in your computer's terminal:
chmod a+x ubi_speed_tester.py
2. Create a crontab:
For some reason, the command “crontab -e” does not work out of the box, so the work-around is to install cron manually with the below commands:
sudo apt-get install cron
then type:
crontab -e
and add the line
* * * * * python /home/pi/ubi_speed_tester.py
to run the script every minute.
3. Reboot and Check your Data in Ubidots
To reboot the Raspberry Pi you have to use as
root, for this type:sudo su
Then, type the command below to reboot the Raspberry Pi:
reboot
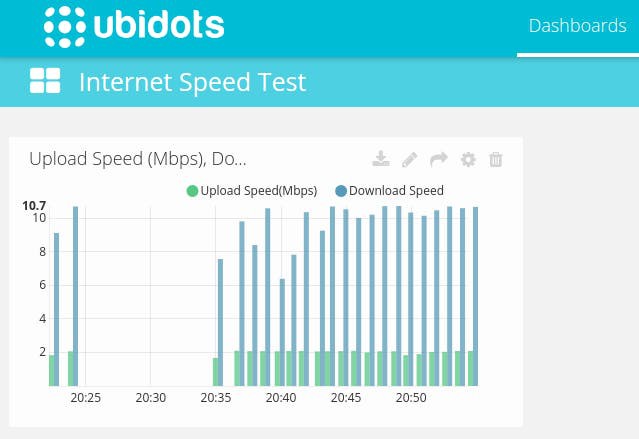
Wait for a minute and then go to Ubidots to start seeing the results updating every minute:
![]()
Now that your data is in Ubidots, you can create dashboards and events using your data. Here'a an example:Bar chart widget
![]()
To see more about Ubidots Dashboards, see the Help Center.
-
6Notifications of slow/no Internet
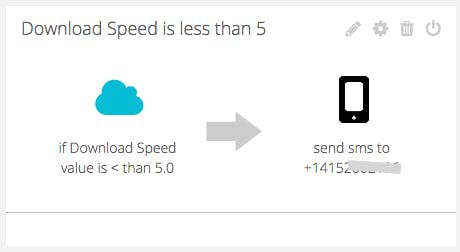
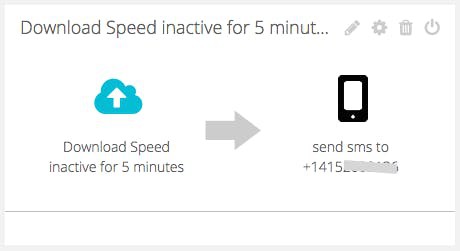
To monitor your internet's speed when away, we added some events to notify a user: if the Internet is slow or if there's no Internet.
Value-based Event (Internet is slow)
![]()
Activity-based Event (Internet is inactive)
![]()
To see more about Ubidots Events, check out this Help Center article for more details.
-
7Conclusion
I just a few minutes you've built an easy DIY Internet Speed Tester. Now put your Raspberry Pi in a safe place behind your router and never wonder your Internet's speed again.
Happy hacking.
Test Your Internet Speed Using a Raspberry Pi
Use your Raspberry Pi to measure any Internet connection speed with Ubidots
Discussions
Become a Hackaday.io Member
Create an account to leave a comment. Already have an account? Log In.