 Maria Carlina Hernandez
-
1Setup
Before beginning, it is important check the points below to make sure your board is programmed correctly:
If this is your first time working with a Pycom board, we recommend you reference to their get started materials and then return to this guide for further instruction once you have become familiar.
-
2Setting up the Project
- Open the Atom editor, and activate the Pymakr plugin.
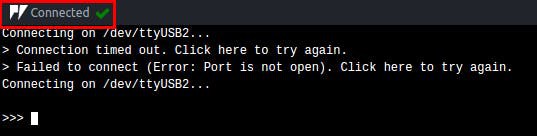
- Connect the board with the Atom editor. Once the board is connected you will see the message "connected" in the status:
![]()
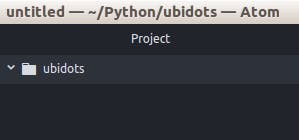
- To start, create a new directory called "ubidots" to manage the codes and libraries. Once the directory is created, in the Atom editor select Open a Project, and search for the directory "ubidots," which was previously created and open it.
![]()
- In the file "ubidots" we are going to manage the libraries and main/boot codes. Please reference and follow the structure below to build your project properly:
> ubidots
  - boot.py
  - main.py
  > lib
    -urequests.py
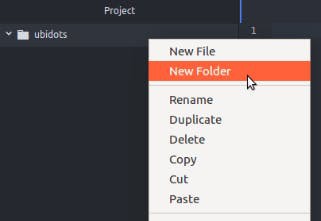
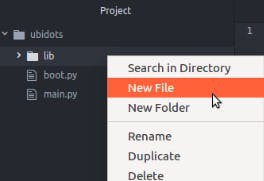
First, we are going to add the folder for the libraries. Right click on the folder "ubidots" and select "New folder", assign "lib" as name.
![]()
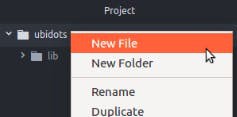
Now, we're going to add the main and boot files:
Right click the folder "ubidots" and select "New File", assign "boot.py" as the name
- Repeat the above steps to create the main called "main.py":
![]()
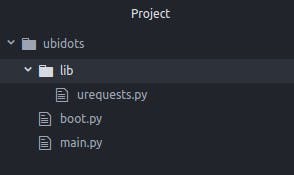
Once both files are created, the structure of your project will look like this:
![]()
To finish, we have to add the library file into the "lib" folder:
- Right click on the folder "lib" and select "New File", assign as name "urequests.py"
![]()
Once the library file is created, the final structure of the project should be like this:
![]()
NOTE: If your are importing a library and after compiling receive a message like this one below, it's because you are using an external library and the file needs to be present alongside the boot.py and main.py. For this reason, we previously added the library file.
![]()
- Now synchronize the project. Press the "Sync" icon from the console, or select Packages > Pymakr > Synchronize project.
![]()
-
3Coding time
Now that we have the project built and synchronized, it's time to code!
- Copy and paste the library from this link into the "urequests.py" file. Once you've pasted the code save it.
![]()
- Next, copy and paste the code below into the "boot.py" file:
from machine import UART
import machine
import os
uart = UART(0, baudrate=115200)
os.dupterm(uart)
machine.main('main.py')
Save your code once you've uploaded to the "boot.py" file.
- Next, copy and paste the code below into the "main.py" file:
from network import WLAN
import urequests as requests
import machine
import time
TOKEN = "Assign_your_Ubidots_token_here" #Put here your TOKEN
DELAY = 1  # Delay in seconds
wlan = WLAN(mode=WLAN.STA)
wlan.antenna(WLAN.INT_ANT)
# Assign your Wi-Fi credentials
wlan.connect("wifi-SSID-here", auth=(WLAN.WPA2, "wifi-password-here"), timeout=5000)
while not wlan.isconnected ():
    machine.idle()
print("Connected to Wifi\n")
# Builds the json to send the request
def build_json(variable1, value1, variable2, value2, variable3, value3):
    try:
        lat = 6.217
        lng = -75.567
        data = {variable1: {"value": value1},
                variable2: {"value": value2, "context": {"lat": lat, "lng": lng}},
                variable3: {"value": value3}}
        return data
    except:
        return None
# Sends the request. Please reference the REST API reference https://ubidots.com/docs/api/
def post_var(device, value1, value2, value3):
    try:
        url = "https://things.ubidots.com/"
        url = url + "api/v1.6/devices/" + device
        headers = {"X-Auth-Token": TOKEN, "Content-Type": "application/json"}
        data = build_json("fuel", value1, "position", value2, "speed", value3)
        if data is not None:
            print(data)
            req = requests.post(url=url, headers=headers, json=data)
            return req.json()
       else:
           pass
    except:
        pass
while True:
    fuel = 123 # Data values
    speed = 234 # Data values
    post_var("pycom", fuel, 1, speed)
    time.sleep(DELAY)
Once you've pasted, assign your Ubidots Token and the Wi-Fi credentials where is indicated in the code, and save the code when finished. If you don't how find your Ubidots TOKEN, please reference this article below.
Save your code once you've uploaded to the "main.py" with with your Wi-Fi credentials, save your work. 4. Now the project is ready to be run! But first verify if the project is synchronized and that all codes are saved properly.
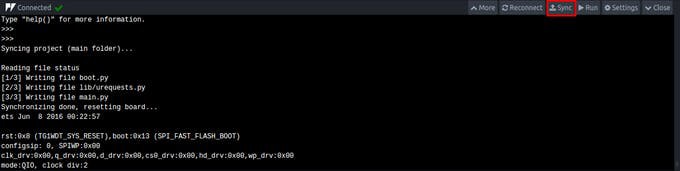
To run the project just press the "Run" icon from the console:
![]()
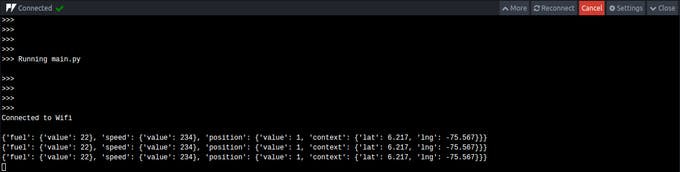
When running correctly, you will receive something like that below:
![]()
NOTE: If you received a error message referring to
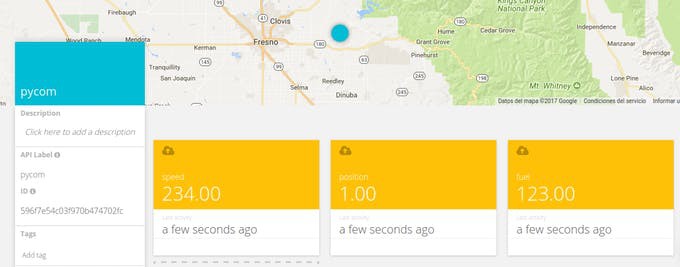
ImportError: no module named 'urequests', synchronize the project again and then rerun the project.Go to your Ubidots account to visualize the device just created.
![]()
-
4Result
In a couple of minutes you are posting data to the Ubidots cloud using any Pycom board via Wi-Fi. Now it is time to create a dashboard to control and manage the variables of your Pycom devices. To learn more about Ubidots widgets and events, check out these video tutorials.
Happy hacking.
Connect Your Pycom Boards with Ubidots Over Wi-Fi
Start with your Pycom devices over Wi-Fi and Ubidots in a few minutes!


Discussions
Become a Hackaday.io Member
Create an account to leave a comment. Already have an account? Log In.