 Sundance Multiprocessor
-
1Running the demo
This instructions will help you setup and run the demo as it is by booting from an SD card.
1. Hardware configuration
1.1 Hardware requirement
- All things listed in Components section
- A HDMI compatible screen
- HDMI cable
- Power supply
- CamerLink cable
- miniUSB to USB cable
- Power/IO connector for the camera
- a computer
1.2 Hardware setup
- Connect the power cable to the EMC² board but don’t switch the power on for now.
- Connect the USB cable between the EMC² board and the computer.
- Connect the screen to the HDMI output on the SEIC add-on board.
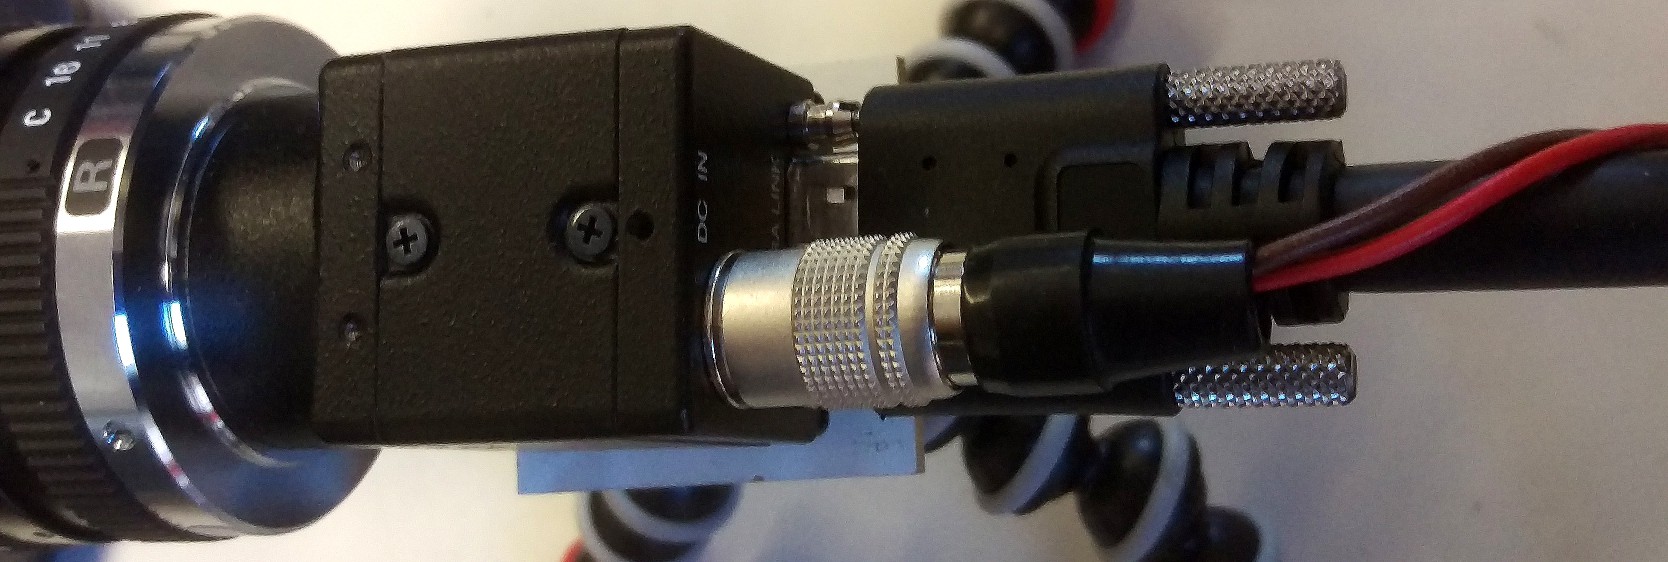
- Connect the camera to the FMC-CAMERALINK daughter board (Channel 2) using the CameraLink cable.
- Connect the Power/IO connector to the camera
![]()
Figure 1: EMC2 board setup
![]()
Figure 2: Camera setup
2. Software configuration
2.1 Software setup
- Copy the BOOT.BIN file from the project folder "sdsoc_app2\Release\sd_card" to the root folder of the first partition of a micro SD card. Such partition must be formatted as FAT32.
- Insert the card into the micro SD socket on the EMC2 board and power on the board.
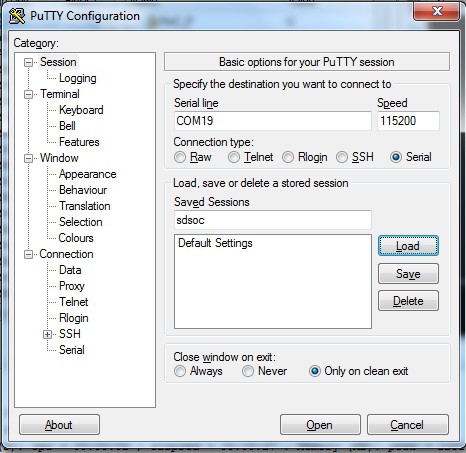
- Open a serial terminal application (we tested it with Putty) and use the following settings:
- Baud rate: 115200
- Data bits: 8
- Stop bits: 1
- Parity bits: None
- Flow control: None
![]()
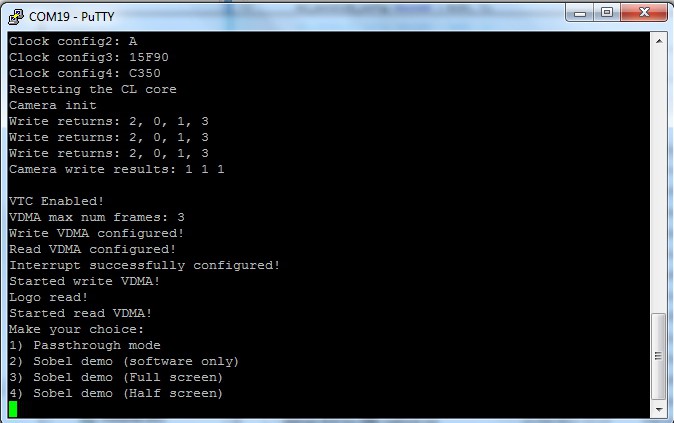
- After the terminal is connected, reset the board and you will see a menu with 4 choices:
![]()
- Make your choice and you should see the demo on the screen. If no signal appear, try to reset the board and make your choice again.
![]()
The console terminal will show the current frame-per-second-value:
![]()
CameraLink on the Zynq based Tulipp Platform
A CameraLink to HDMI with Sobel filter demo showing the possibilities for hardware acceleration and low-power on Tulipp platform


Discussions
Become a Hackaday.io Member
Create an account to leave a comment. Already have an account? Log In.