-
1Searching for the right microphone
I simply took a look on ebay and quickly found a fitting one for about 2 €. It was not exactly the right one with the ideal footprint but at that time I didn`t know better and so i bought it.
(This would be the right one: http://www.ebay.de/itm/Mikrofon-Mic-Konnektor-Microphone-Mikrophon-Connector-fur-LG-G3-D850-D855-K-/321622200576?hash=item4ae22d5100:g:ld8AAOSwiCRUlYVM)
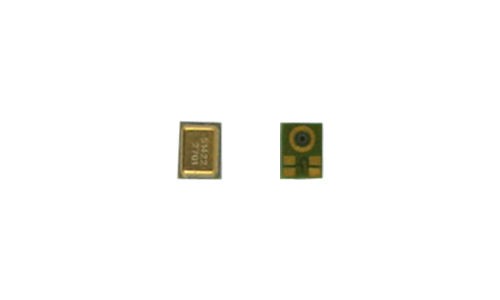
The ideal spare part for the lower microphone (LG G3 D855) looks like this:
![]()
But you know how things are if there is nothing like a instructable or something else on the internet, you simply have to try out and so did I and bought the wrong one. But hey IT WORKS !!! :D
-
2Opening your LG G3
The LG G3 itself is quite "maker friendly". You can open it very easy. As allways keep in mind, that working on a pcb with microcontrollers without ESD-protection is very risky and can destroy your device, so be careful. ( I have actually no particular esd mat or bracelet but I'm trying to ground myself before starting and between the processing. BUT for further works I'll definitly buy one, I mean they cost about 25€ and can protect you against damaging your expensive devices.)
How to open it is well described in this video:
-
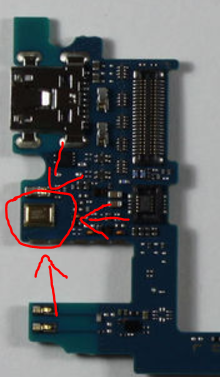
3Finding the microphone on the PCBThe microphone is located near the micro usb connector. I marked it in the picture below.
-
4Desoldering of the IC
To avoid damaging the parts surrounding the microphone-IC, it is the best to protect them with a layer of capton-tape. The desoldering is quite easy. I grapped my soldering iron and a tweezer, heated it up and i was able to remove the case of the IC. The lower part of the microphone was now still there, but also this has gone away after heating it up and nipping it away with a small side cutter. The pads for the IC should remain on the pcb.
-
5Soldering the microphone
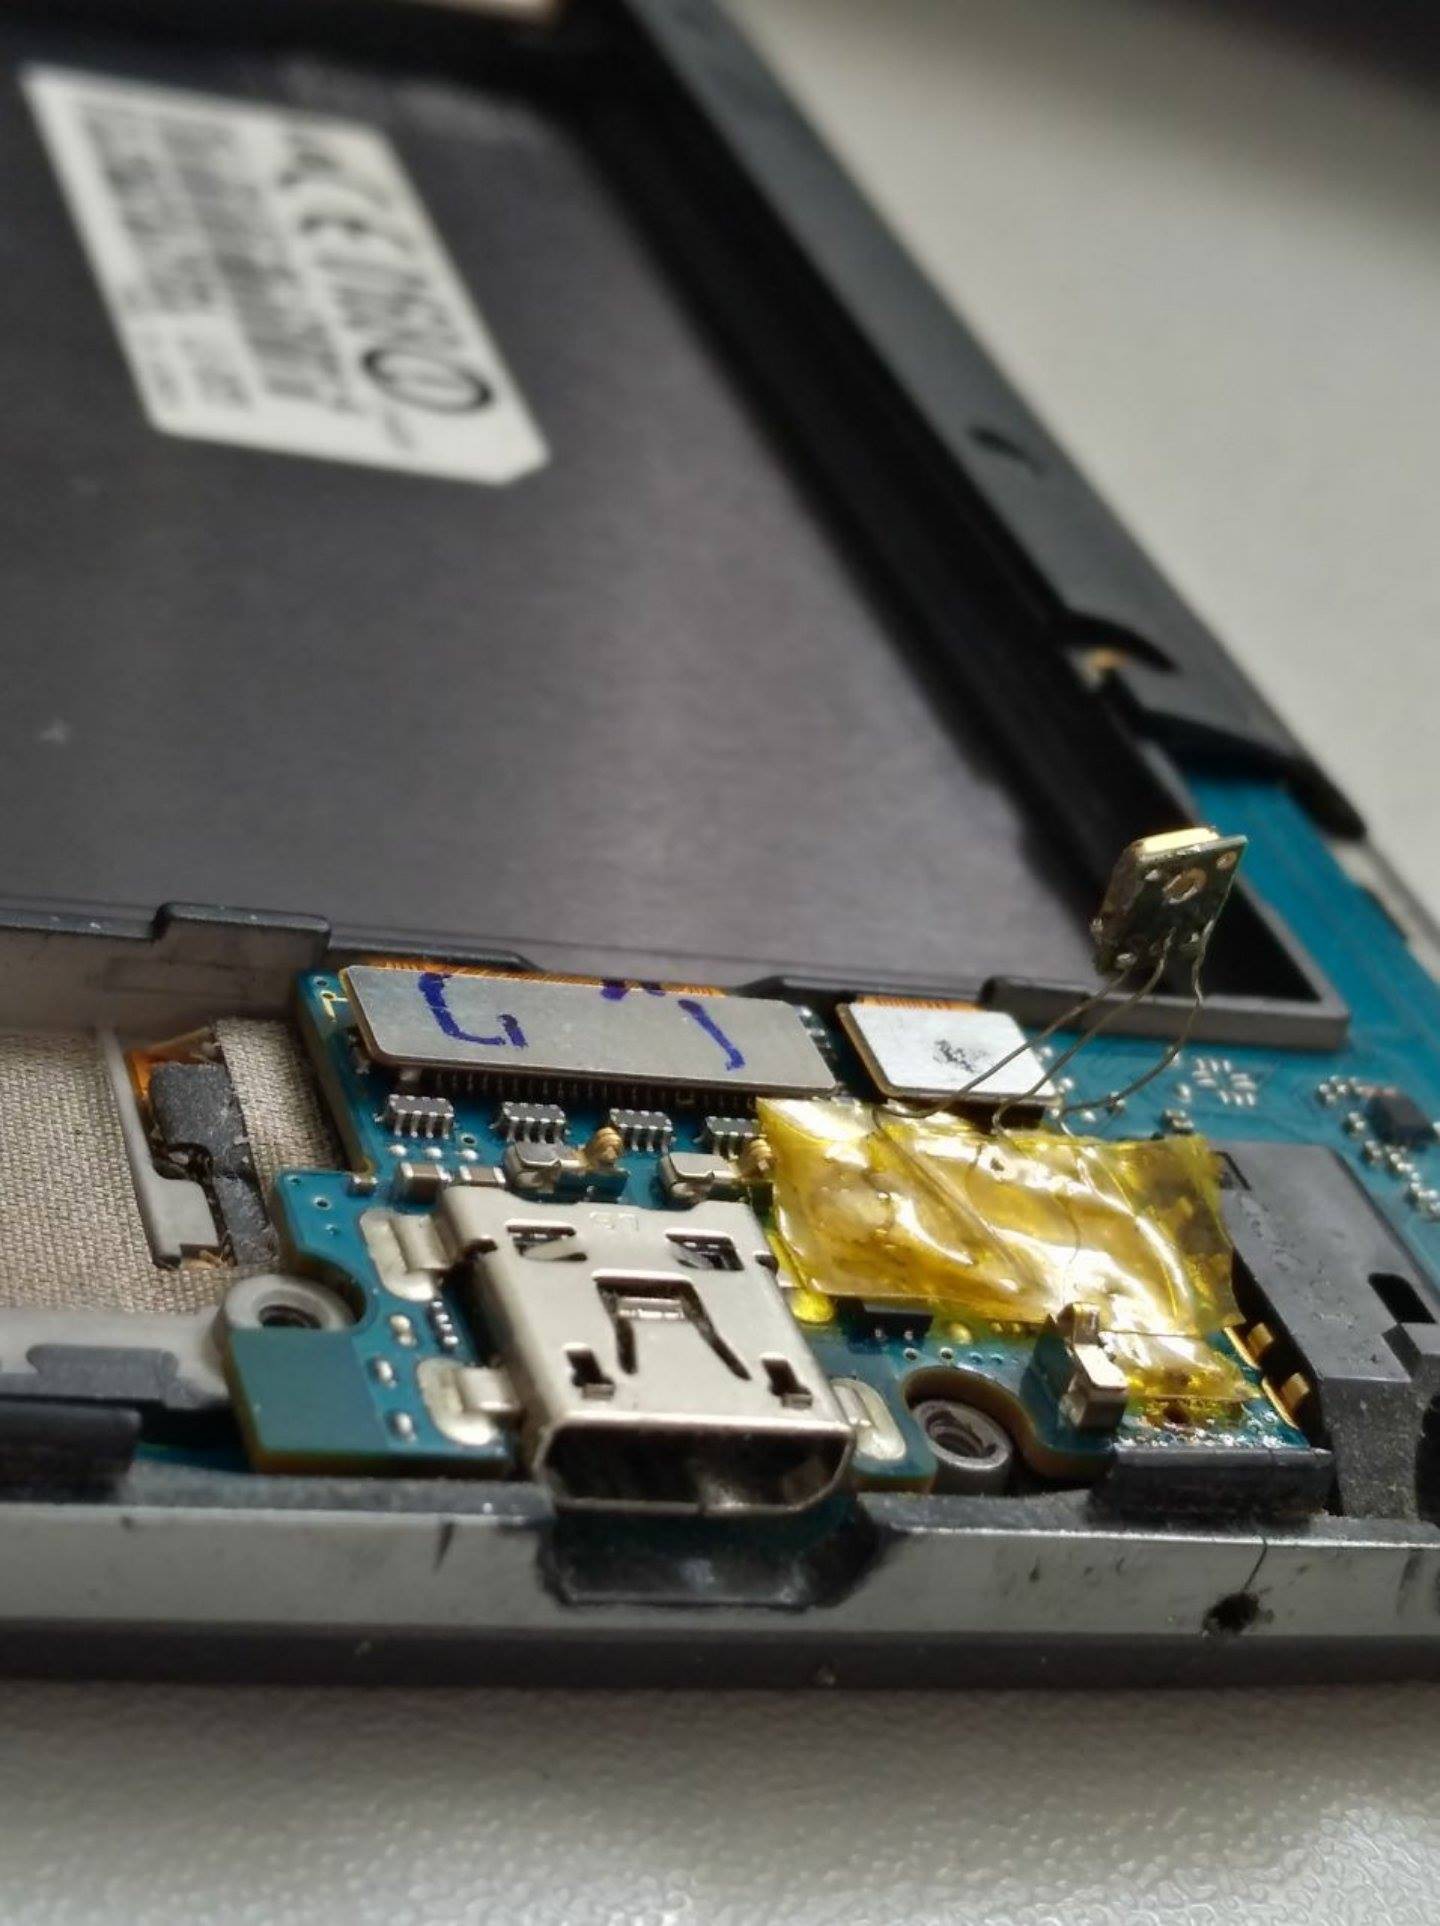
At first I tried to put some soldering paste on the pads and solder it on it's place like a normal SMD-component or like it was originally but I couldn't make it work in this way. So I stripped some cables and took those thin wires to make a connection between the pads on the PCB and my microphone. After testing the hole think and diagnosing, that it works, i removed the old capton tape and put a new one in place. This is important to avoid shortcuts and to ensure that the microphone is still working, when the case is put together. Now you can fold back the wires over the tape and add another layer of capton tape.
![]()
The result should look like this. The last step is to fold the wires again, so that the microphone is placed over the hole where it was. Now you can assemble your case again, normally everything should fit.
-
6The End
I hope this small tutorial was helpfull and your old LG G3 now can be used again for calling and sending voice messages.
Have a nice day ( and a working microphone) !! :D
Repairing the microphone of an LG G3
After 2 years of not being able to send voice messages it was time for a change...
 Kirschner Christoph


Discussions
Become a Hackaday.io Member
Create an account to leave a comment. Already have an account? Log In.