This project shows you how to program an ATTiny9 microcontroller. You need an additional Arduino for this, I tested it with an Arduino Uno, for which the programming script was written. It might work with other Arduinos as well, if you connect it to different pins for SPI, see the connections table here.
This is the circuit diagram, the KiCad files for it are in the files section:
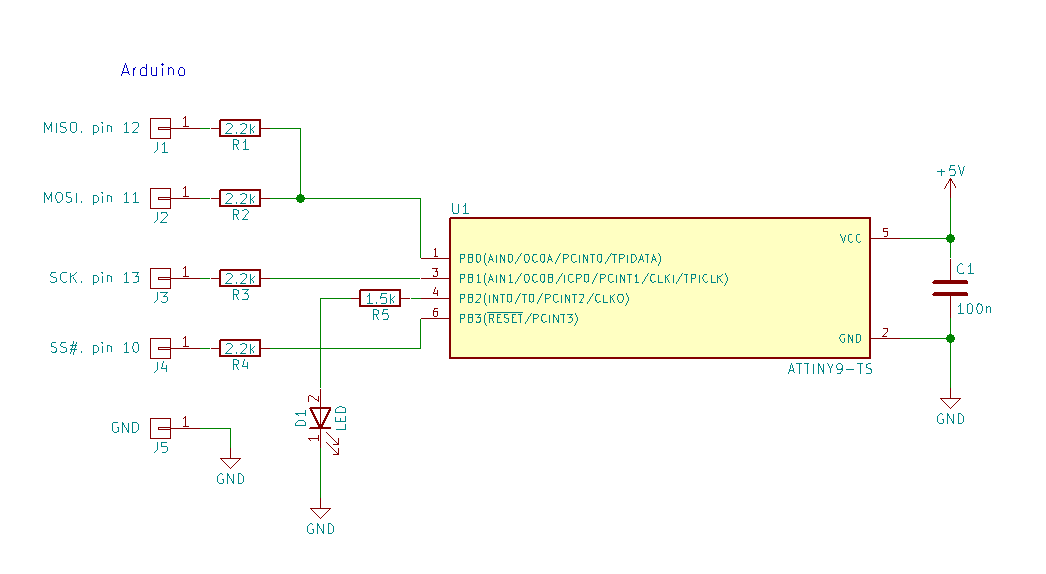
Instead of 2.2k resistors, the programming script says you can use lower values, like 1k resistors, but works with 2.2k as well. And I used an external 5V power supply, but you can use the 5V from the Arduino instead.
You have to connect +5V to pin 6, reset, of the ATTiny9 (or with a resistor), when you disconnect the Arduino programmer.
The Arduino is used as a programmer for the ATTiny9, as described in this article. I copied the Arduino script and the Java GUI in the files section of this project. For a first test, just flash the Arduino script, then start the Java GUI like this:
java -jar ATTiny4_5_9_10_20_40_Programmer.jar
Then you can click "Connect" and if the wiring is right, you should see this:
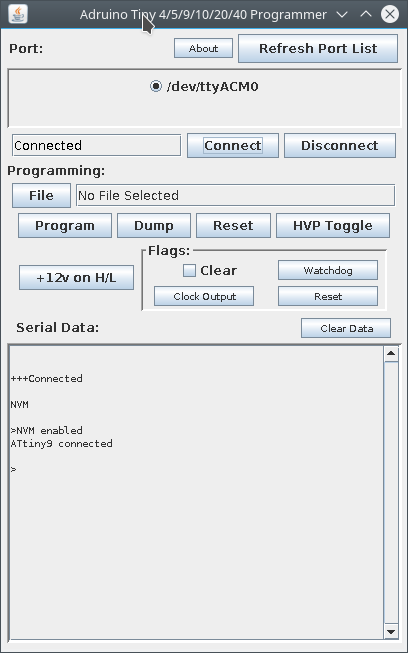
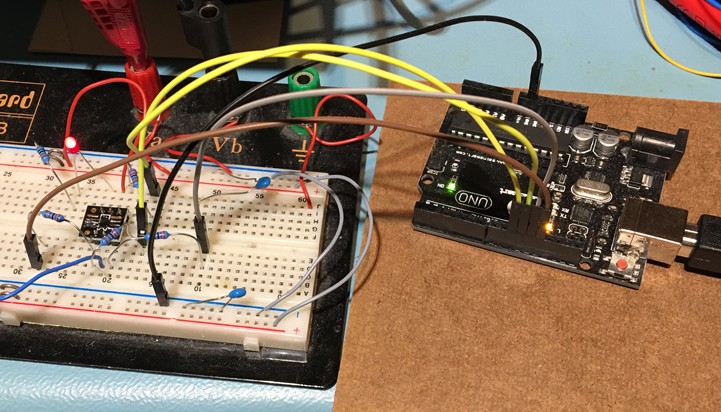
Then you can select the blinky.hex file and click on "Program". It should program the microcontroller and you should see the LED blinking. My test setup:
Closeup of the breakout board:
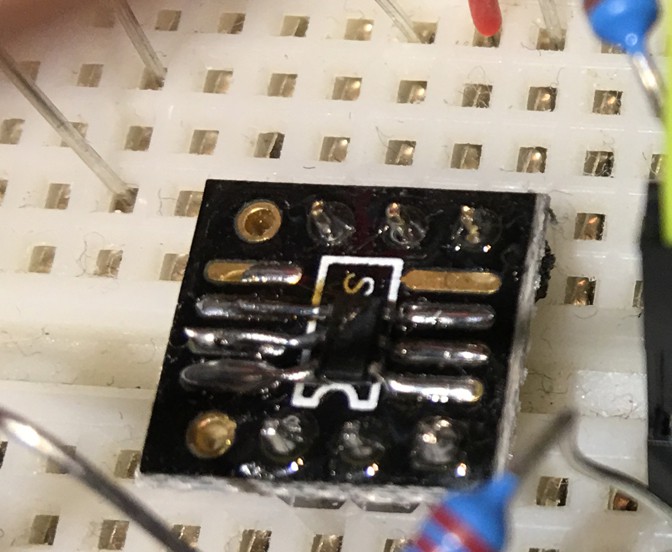
It was not quite the right size, so I used some additional silver wires on one side to solder it.
If you want to write your own programs, first install Atmel Studio. Then follow the steps as explained on my websites, for example this one. After compiling, the resulting HEX file is in the ProjectName/Debug directory. The blinky.hex file in the files section was compiled from the main.c file in the files section.
 Frank Buss
 doctek
 Ray Burne
 Peter
Peter
 Christoph
This programmer seems to reverse the Hex code when programming. A0 9A gets written in memory -> 0A A9 for example and microcontroller won't work. Had better luck with this version of the Arduino TPI programmer code: https://github.com/james-tate/Arduino-TPI-Programmer