Close
0%
0%

using uGFX in Arduino

uGFX was written for use with makefiles. Using it in arduino is possible with minimal effort, though. Here's how.

Similar projects worth following
I've used uGFX with makefiles and in Code::Blocks, which gives you the full list of compilation options. Now that it's possible to compile uGFX as a single file, we can also turn it into an Arduino library!

This project is a trial-and error diary, including my first attempts (confusing arduino) and improvements to make it reusable.

uGFX is configured by a few header files which set flags and parameters for its submodules. The main configuration is done in gfxconf.h, which must be somewhere in the compiler's include path for uGFX to find. gfxconf.h sets things like submodules to include, which OS to use (Win, linux, raw, arduino, ...) and others.

When uGFX includes a hardware driver (for a display, audio device, whatever) it also needs a configuration header that specifies what features that driver has. For a display driver this is done in gdisp_lld_config.h. The driver also needs information about the low-level interface it uses: how to aquire the bus (like SPI), how to reset or select the device, etc.

Arduino looks for libraries until it finds a requested header file like SPI.h. When multiple libraries have this header in their main directory, arduino might pick the wrong one. We need to circumvent this somehow, while still allowing a sketch to configure uGFX through header files which are specific to that sketch.

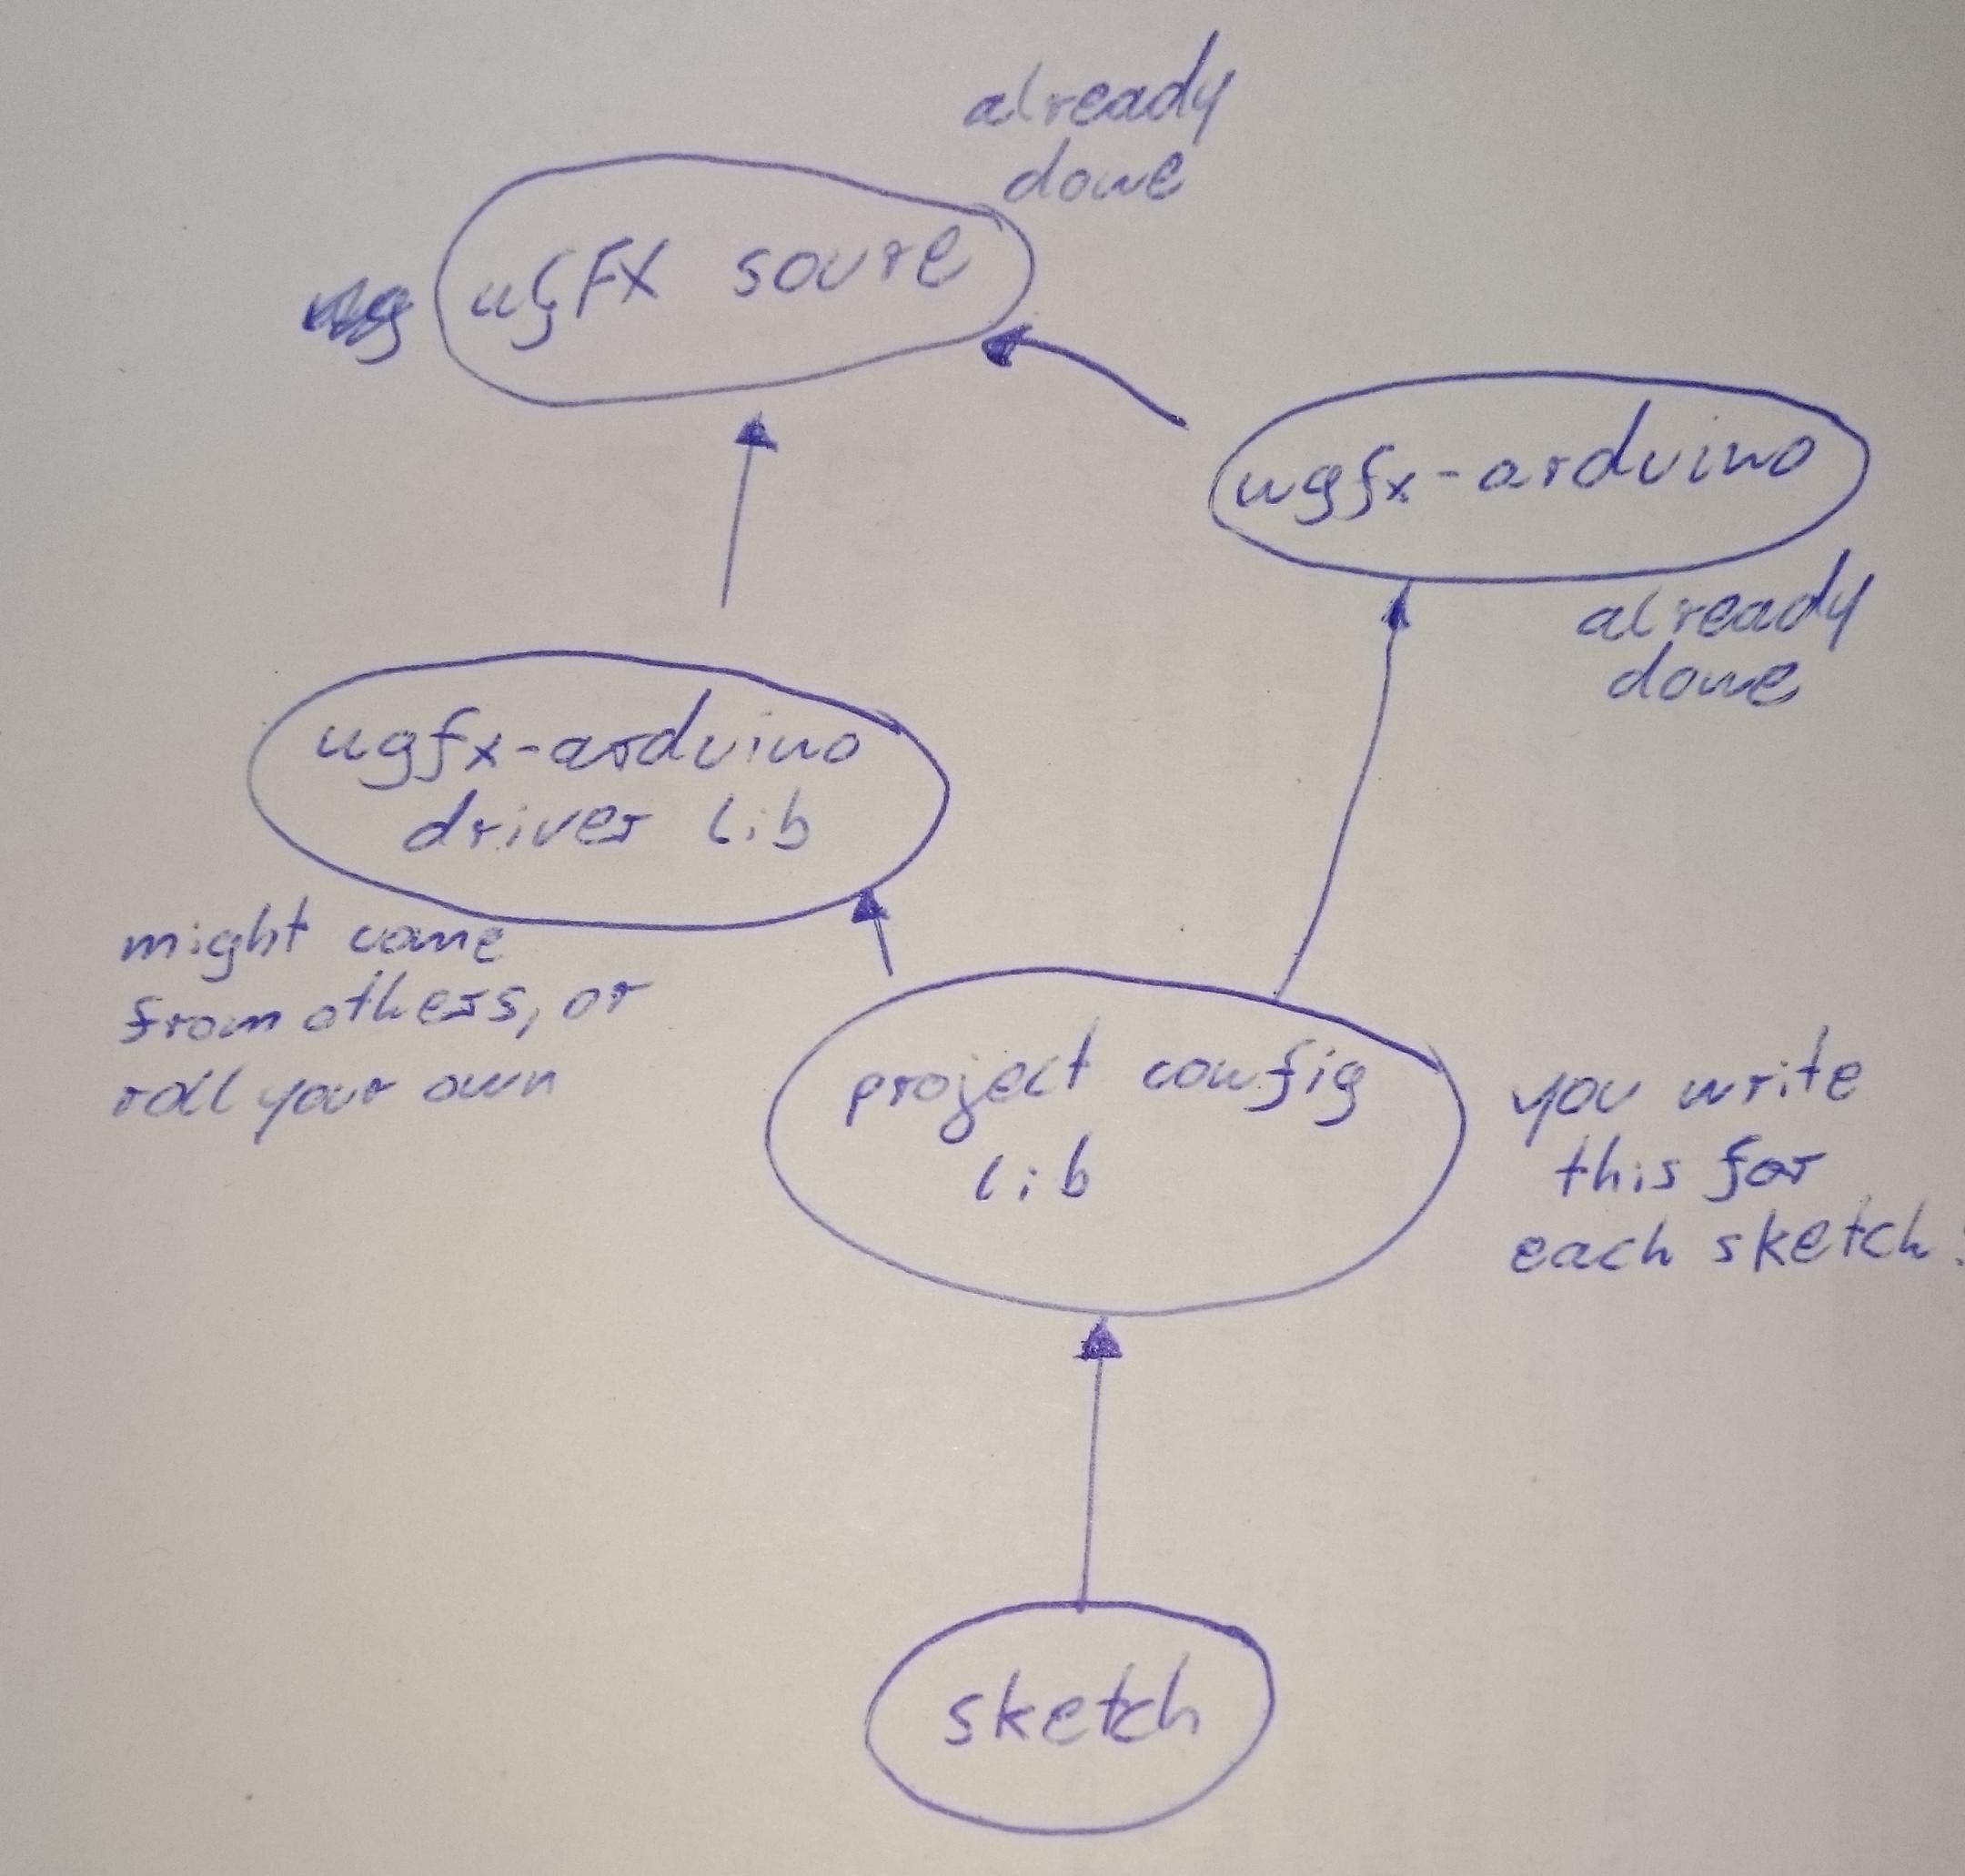
This is where things get complex. I've managed to separate the uGFX core from driver libraries, and this seems to work reliably even though they all provide a gdisp_lld_conf.h. This is the overall structure:

I'm not exactly sure why this works, but apparently it does.

So in order to get ugfx working in arduino, you need a couple of things:

  • ugfx in arduino's library folder. Easy! Just download and extract or clone in that place.
  • ugfx-arduino: The library that picks the correct ugfx core source file. This is simple and available in this project's github repo.
  • ugfx-arduino driver library/-ies: drivers for specific displays or other types of hardware supported by ugfx. These should not specify which pins are used for connecting a piece of hardware to your project, but rely on some external project-specific configuration instead. I've written an example SSD1351 driver.
  • [optional] ugfx-arduino font libraries: it's really easy to add your own custom fonts!
  • project-specific configuration library: supplies configuration information for ugfx and the ugfx-arduino driver libraries. You have to write this for each of your projects. You can also add other classes here that you don't want in your sketch! An example is included in this project's repo.
  • Your sketch.

I'm currently testing different variations of passing information to driver libraries. Header files work, but they can confuse arduino. Configuration structs works as well, and I think they are the way to go if several displays of equal type have to be driven. I've already successfully tested the idea outlined here.

This way of splitting uGFX, drivers, and project-specific configuration into three libraries might actually not work reliably, or break in the future if arduino's way of looking up libraries is changed. I've tested this with arduino-1.6.6

There's a complete example on github to get you started.

  • 1 × Arduino installation
  • 1 × uGFX download
  • 1 × project with a display (preferably supported by uGFX)

  • Pixmaps/multiple displays

    Christoph02/08/2016 at 12:22 0 comments

    uGFX treats pixmaps as off-screen virtual displays. That's kinda neat, but a huge problem: ugfx-arduino uses the single-file compilation mechanism of uGFX, which doesn't support multiple displays. Folks are trying to get around that, though:

  • Passing parameters to drivers during linking

    Christoph11/26/2015 at 15:17 0 comments

    In my example sketch and config library I used a header in the config library to set pin numbers for the display's reset, chip select and command signals. Arduino looks for this header and includes it, which is a source of potential library-mix-up if several config libraries use the same name for this header. They have to use the same name because in that example case the driver source file looks for the pin definition header:

    #include "ugfx-arduino-ssd1351-pins.h"
    Things can be turned around by letting the linker do it, because pin numbers can also be passed with a struct:
    typedef struct {
      const uint8_t pin_reset;
      const uint8_t pin_cs;
      const uint8_t pin_dc;
    } ssd1351_pins_t;
    
    const ssd1351_pins_t ssd1351_pins;
    And then in the sketch or in some other source file at global scope:
    ssd1351_pins_t ssd1351_pins = {1,2,3};
    If done that way or similar (this is just an untested idea, after all), this information is not filled in by the preprocessor but during linking.

  • Adding custom fonts as libraries

    Christoph11/25/2015 at 16:05 0 comments

    Yes, that works, too!

    Here's a sample font library:

    ~/Arduino/libraries/ugfx-arduino-font-had-logos-98/
    .
    ├── bdf
    │   └── had-logos-98.bdf
    ├── fontdata
    │   └── had-logos-98.c
    ├── readme.md
    └── ugfx-arduino-font-had-logos.h
    

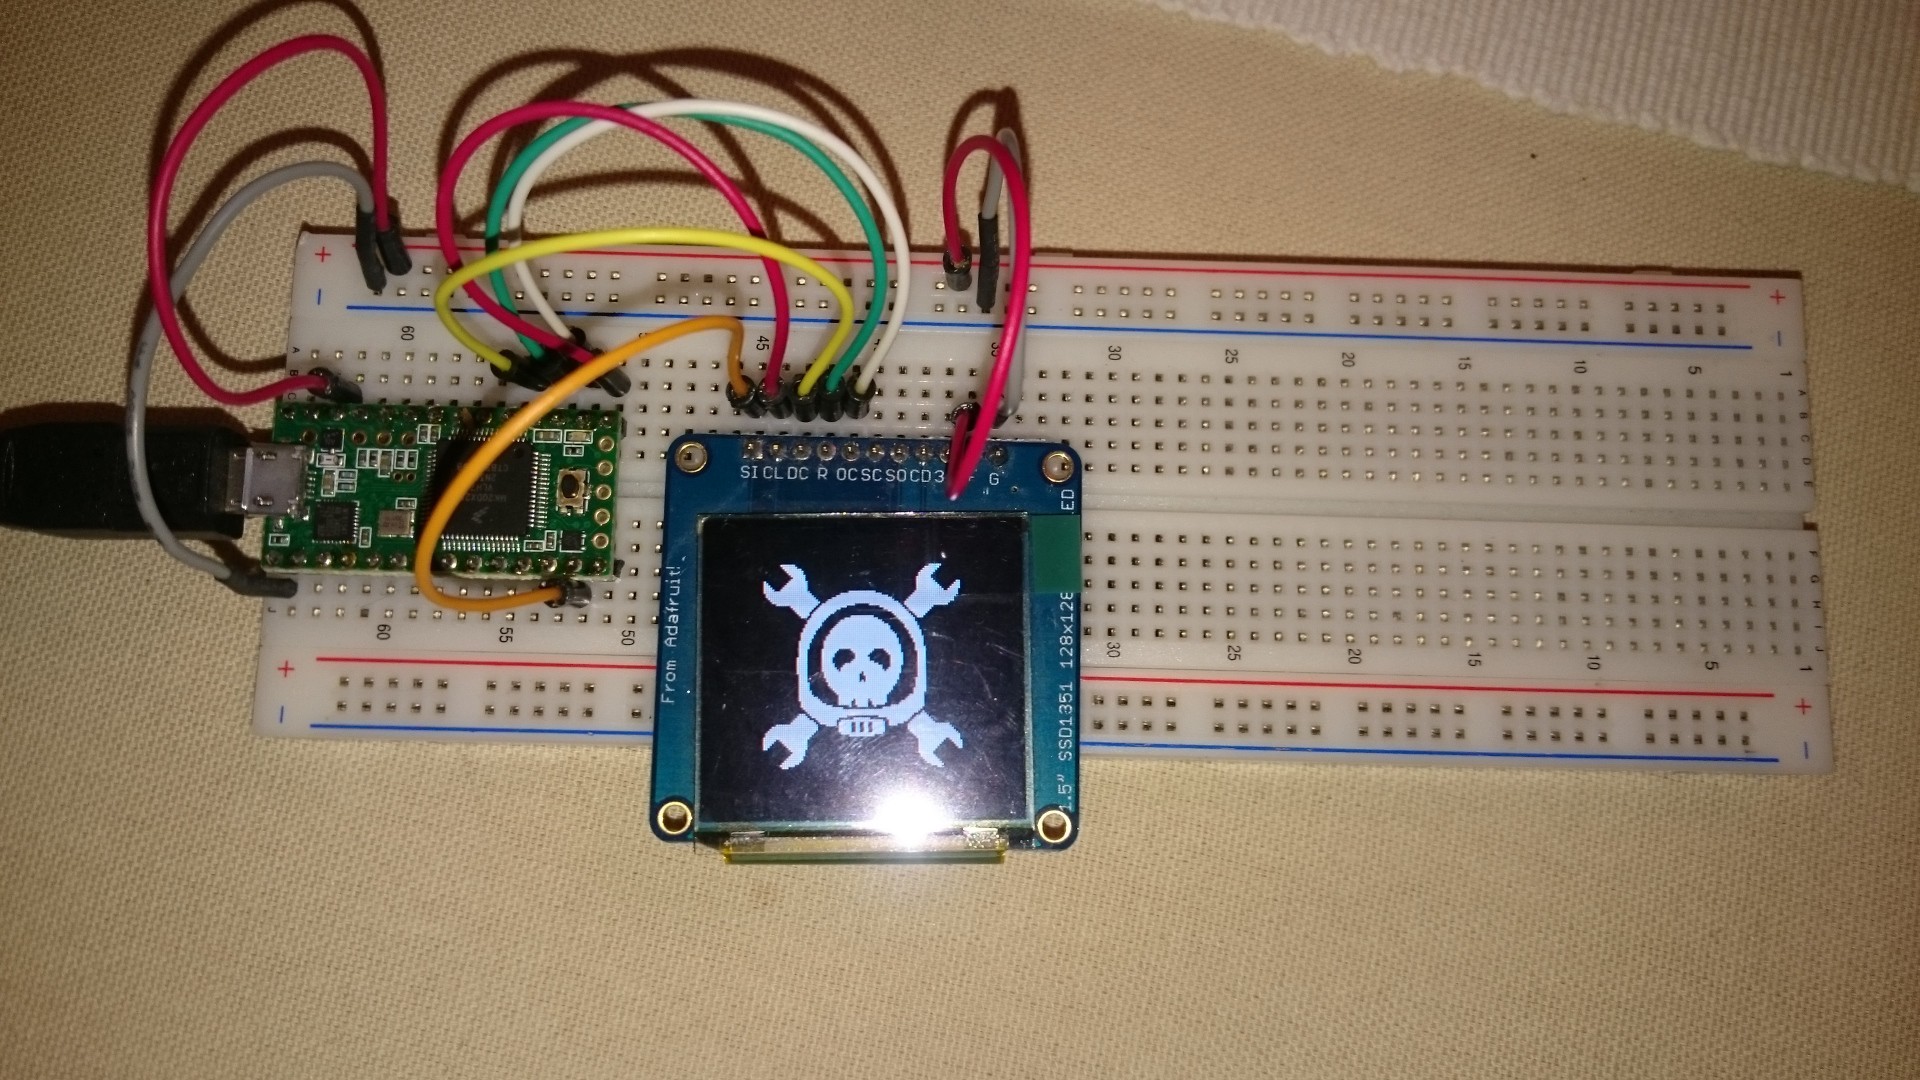
    The font is just the hackaday prize logo (wrenched skull with helmet) from 2014 with 98 pixels height, converted from svg (I don't remember where that came from) to bmp to bdf and then to uGFX's font format using their online converter. I might add more later.

    You can use just about any font you like, as long as

    • you are allowed to
    • you have it as a TTF or BDF file
    • there's enough space left in program memory
    The header (ugfx-arduino-font-had-logos.h) directly includes the font source:
    #include "fontdata/had-logos-98.c"
    The font source must not be in the root directory or in src/, because arduino would try to compile it out of context and spit out errors. That's why it's in fontdata/.

    In the uGFX config file (gfxconf.h) you'd have

    #define GDISP_NEED_TEXT             TRUE
    #define GDISP_INCLUDE_USER_FONTS    TRUE
    
    and in userfonts.h:
    #include "ugfx-arduino-font-had-logos.h"
    
    More can be added here, and arduino will look up the library with that header and include it. Font collections can be created by having the font header include multiple font source files.

    github: ugfx-arduino-font-had-logos

  • Success!

    Christoph11/24/2015 at 23:09 0 comments


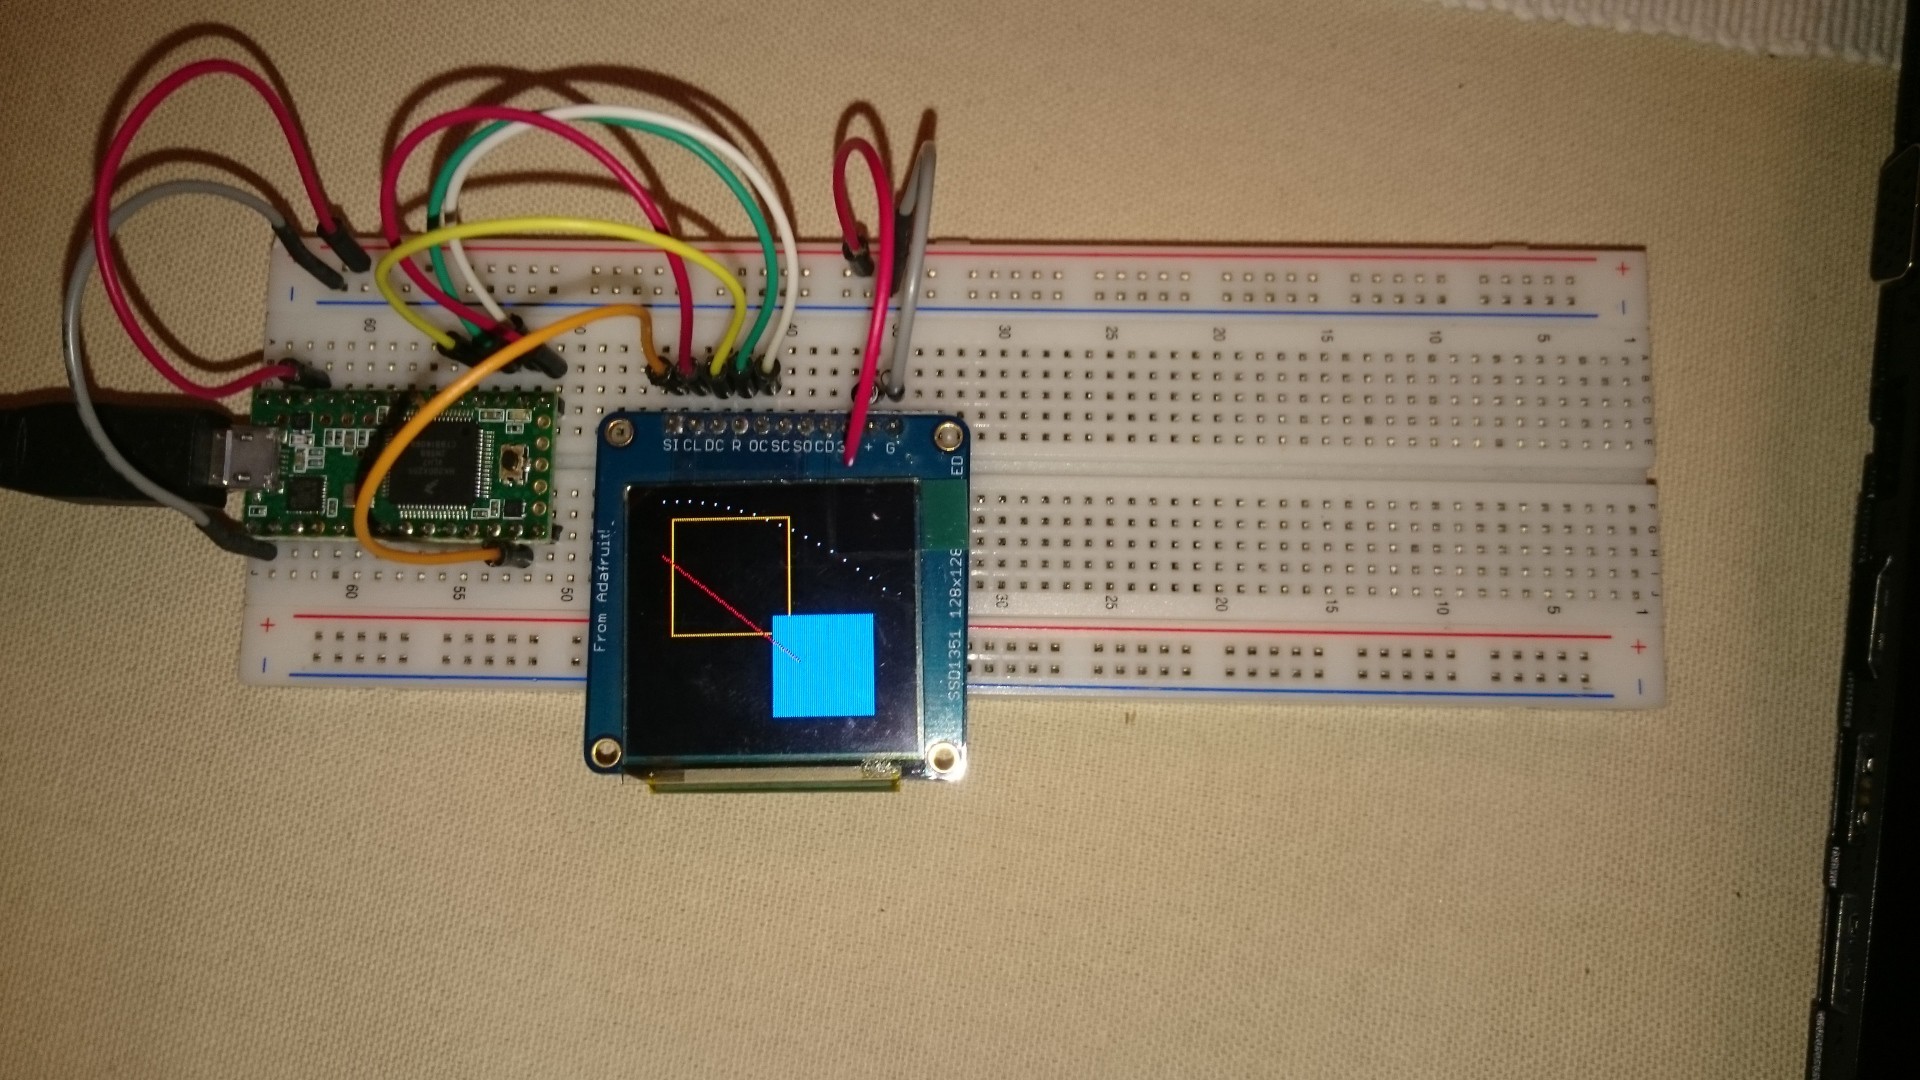
    I've successfully created a set of core, display driver, and project config libraries for an SSD1351 OLED display (adafruit's breakout board).

    How it works:

    • uGFX is added in arduino's library folder. It doesn't work as an arduino library, though, but there's a wrapper for that.
    • ugfx-arduino is a simple library that includes ugfx's single-file-source and the main header (gfx.h). gfx.h is found in the ugfx directory, so arduino will add that to the compiler's include path. We can exploit this to include src/gfx_mk.c, which is the one file we need to compile to use ugfx.
    • ugfx-arduino-ssd1351 is a driver library that has two interfaces: one for ugfx and one for the actual application: pin numbers must be set, and they should not be picked by the driver, but by the application.
    • teensy3.1-ssd1351-ugfx-config is the project-specific library that configures ugfx and the driver for a specific sketch.

    I have not yet found a way of getting rid of the config library, but I think that's not too bad.

    So let's sum it up!

    ugfx-arduino

    The wrapper around ugfx, to make the include path and core available.

    <sketchbook>/libraries/ugfx-arduino/ugfx-arduino.h:

    #ifndef UGFX_ARDUINO_H
    #define UGFX_ARDUINO_H
    
    #include <gfx.h>
    
    #endif // UGFX_ARDUINO_H
    <sketchbook>/libraries/ugfx-arduino/ugfx-arduino.c:
    #include "src/gfx_mk.c"
    

    ugfx-arduino-ssd1351

    A driver I adapted from the ugfx sources. I'll not include the code here because it's simply too much, but this is the place where ugfx is told about the driver's features in gdisp_lld_config.h:

    <sketchbook>/libraries/ugfx-arduino-ssd1351/
    .
    ├── board_SSD1351.cpp
    ├── board_SSD1351.h
    ├── gdisp_lld_config.h
    ├── gdisp_lld_SSD1351.c
    ├── SSD1351.h
    └── ugfx-arduino-ssd1351.h
    
    The board_ files include hardware specific code, and the initialization and updating logic is in gdisp_lld_SSD1351.c. The code for this driver can be found on github, see links.

    teensy3.1-ssd1351-ugfx-config

    The config library tailored to our project.
    ufxconf.h (ugfx feature selection header):
    #ifndef _GFXCONF_H
    #define _GFXCONF_H
    
    /* The operating system to use. One of these must be defined - preferably in your Makefile */
    //#define GFX_USE_OS_CHIBIOS	FALSE
    //#define GFX_USE_OS_WIN32		FALSE
    //#define GFX_USE_OS_LINUX		FALSE
    //#define GFX_USE_OS_OSX		FALSE
    #define GFX_USE_OS_ARDUINO      TRUE
    //#define GFX_USE_OS_RAW32 TRUE
    
    /* GFX sub-systems to turn on */
    #define GFX_USE_GDISP			TRUE
    
    /* Features for the GDISP sub-system. */
    #define GDISP_NEED_VALIDATION	TRUE
    #define GDISP_NEED_CLIP			TRUE
    
    #endif /* _GFXCONF_H */
    
    Nothing surprising here if you have already used ugfx.
    ugfx-arduino-ssd1351-pins.h:
    #ifndef UGFX_ARDUINO_SSD1351_PINS_H
    #define UGFX_ARDUINO_SSD1351_PINS_H
    
    #define GPIO_DC    16
    #define GPIO_RESET 15
    #define GPIO_CS    14
    
    #endif // UGFX_ARDUINO_SSD1351_PINS_H
    the driver library needs these three pin defines to work.
    teensy3.1-ssd1351-ugfx-config.h:
    #ifndef TEENSY31_SSD1351_UGFX_CONFIG_H
    #define TEENSY31_SSD1351_UGFX_CONFIG_H
    
    #include <ugfx-arduino.h> // main library
    #include <ugfx-arduino-ssd1351.h> // display driver library
    
    #endif // TEENSY31_SSD1351_UGFX_CONFIG_H
    so this file just pulls everything into our project.

    Sketch

    #include <teensy3.1-ssd1351-ugfx-config.h>
    #include <SPI.h>
    
    void setup() {
      coord_t    width, height;
      coord_t   i, j;
    
      SPI.begin();
    
      // Initialize and clear the display
      gfxInit();
    
      // Get the screen size
      width = gdispGetWidth();
      height = gdispGetHeight();
    
      // Code Here
      gdispDrawBox(10, 10, width / 2, height / 2, Yellow);
      gdispFillArea(width / 2, height / 2, width / 2 - 10, height / 2 - 10, Blue);
      gdispDrawLine(5, 30, width - 50, height - 40, Red);
    
      for (i = 5, j = 0; i < width && j < height; i += 7, j += i / 20)
        gdispDrawPixel(i, j, White);
    
      SPI.end();
    }
    
    void loop() {
    }
    
    Code is on github, see link section of this project. It should get you started if you want to make your own driver libs.

  • OK, no multiple ugfx versions

    Christoph11/24/2015 at 13:12 0 comments

    I thought I could trick arduino into using a specific version of ugfx by looking for a special include file and adding the appropriate include path for other libraries to find stuff in, but arduino adds all libraries where a specific include file is found. So looking for "ugfx-2.4.h" in my main sketch indeed just adds the folder "ugfx-2.4", but as other files are including "gfx.h" both "ugfx" and "ugfx-2.4" are added to the compiler include path because both contain "gfx.h". This might work, but will surely lead to confusion sooner or later.

    So I'll forget about that for now.

  • Split ugfx, platform-specific driver, and project config

    Christoph11/24/2015 at 10:01 0 comments

    ugfx library:

    Again I started with a bare ugfx clone, with an empty "ugfx.h" file in the base directory:

    ~/Arduino/libraries/ugfx/
    ├── src/...
    ├── other folders/
    ├── ugfx.h (this is not strictly necessary, but will be useful later)
    ├── gfx.h
    ├── other headers
    ugfx-arduino library:

    Another library is used to add ugfx to the compiler include path, without adding all headers to our sketch:

    ~/Arduino/libraries/ugfx-arduino/
    .
    ├── ugfx-arduino.c
    └── ugfx-arduino.h
    

    ugfx-arduino.h:

    #ifndef UGFX_ARDUINO_H
    #define UGFX_ARDUINO_H
    
    #include <ugfx.h> // look for ugfx library
    #include <gfx.h>  // and use gfx.h in that directory
    
    #endif // UGFX_ARDUINO_H

    ugfx-arduino.c:

    #include "src/gfx_mk.c" 
    

    This includes all source code we need from ugfx.

    ugfx-SSD1331-arduinomega library:

    A driver library should be specific to a display connected to some arduino-compatible board. However, it should not specify which pins are used, because that is specific to the project. So I started with all files from ugfx/boards/base/ArduinoTinyScreen and modified them a bit. The main modifications:

    • included source files are now copied into the display-platform library
    • pin definitions are removed.

    The resulting structure:

    ~/Arduino/libraries/ugfx-SSD1331-arduinomega/
    .
    ├── board_SSD1331.cpp
    ├── board_SSD1331.h
    ├── driver_SSD1331.c
    ├── gdisp_lld_config.h
    ├── SSD1331.h
    └── ugfx-SSD1331-arduinomega.h
    

    board_SSD1331.cpp was modified a bit to include a header for the pin definitions:

    #include <Arduino.h>
    #include <SPI.h>
    #include <Wire.h>
    
    #include "board_SSD1331.h"
    
    #define LCD_BOARD_ID		0		// 0 or 1 - set by the position of a resistor near SX1505 (see schematic and board design)
    
    // GPIO Pins
    #include "ssd1331_gpio_pins.h"
    /*
    #define GPIO_DC				0x01
    #define GPIO_CS				0x02
    #define GPIO_RES			0x08
    #define GPIO_BTN1			0x10
    #define GPIO_BTN2			0x20
    #define GPIO_BTN3			0x40
    #define GPIO_BTN4			0x80
    */
    #define GPIO_CMD_START		~(GPIO_CS|GPIO_DC)
    #define GPIO_DATA_START		~GPIO_CS
    #define GPIO_TRANSFER_END	GPIO_CS
    
    ... more code
    
    This header is not part of the driver library, but will be part of our project config.

    ArduinoTinyScreen-ugfx-config library:

    Unfortunately, the project config library is necessary. I was hoping that I could put the ugfx config in the sketch's base directory, but that is not added to the compiler's include path. So we need a library because we need the include path:

    ~/Arduino/libraries/ArduinoTinyScreen-ugfx-config/
    .
    ├── ArduinoTinyScreen-ugfx-config.h
    ├── gfxconf.h
    └── ssd1331_gpio_pins.h
    
    ArduinoTinyScreen-ugfx-config is empty, but it doesn't have to be. It is only used to identify this library as the one to be included in our sketch.

    gfxconf.h configures ugfx, and ssd1331_gpio_pins.h is the one included by ugfx-SSD1331-arduinomega. It contains the pin definitions commented out above:

    #ifndef SSD1331_GPIO_PINS_H
    #define SSD1331_GPIO_PINS_H
    
    #define GPIO_DC        0x01
    #define GPIO_CS       0x02
    #define GPIO_RES      0x08
    #define GPIO_BTN1     0x10
    #define GPIO_BTN2     0x20
    #define GPIO_BTN3     0x40
    #define GPIO_BTN4     0x80
    
    #endif // SSD1331_GPIO_PINS_H
    Sketch

    Now the sketch starts like this:

    #include <ArduinoTinyScreen-ugfx-config.h>
    #include <ugfx-SSD1331-arduinomega.h>
    #include <ugfx-arduino.h>
    //#include <gfx.h>
    void setup() {
      coord_t		width, height;
      coord_t		i, j;
    
      pinMode(13, OUTPUT);
    
      // Initialize and clear the display
      gfxInit();
    
    ... more code

    I wrote earlier that ArduinoTinyScreen-ugfx-config.h doesn't have to be empty, and now we know what we can put in there: The two other ugfx-related includes, so we just need to include the project-specific config header.

    Summary

    It's possible to separate the project-specific code from ugfx, so you can have just on ugfx library instead of one full ugfx copy for each sketch. By creating display-platform libraries it's easy to add an arduino-compatible display driver to your installation without having to modify the driver each time you create a new project, because...

    Read more »

  • Well I was wrong, you *can* split things!

    Christoph11/24/2015 at 00:12 0 comments

    As before, I have a bare ugfx library. The only difference to the original git clone is an additional "ugfx.h" file. It's probably not even necessary, but might help arduino find and pick the correct folder.

    Another library is created for the display driver and ugfx config, the library folder looks like this:

    ~/Arduino/libraries/myproject-ugfx-extdriver
    ├── board_SSD1331.cpp
    ├── board_SSD1331.h
    ├── driver_SSD1331.c
    ├── gdisp_lld_config.h
    ├── gfx.c
    ├── gfxconf.h
    ├── myproject-ugfx-extdriver.h
    └── SSD1331.h
    The important details: some of the files need to include headers or source files in ugfx's directory structure. As arduino adds an include path (.../ugfx), we can dive into ugfx like so (in driver_SSD1331.c):

    #include "src/gdisp/gdisp_driver.h"
    
    The second important detail is that we include ugfx's single-file-source in gfx.c:

    #include "src/gfx_mk.c"
    (this is actually the whole content of that file!).

    I probably just messed up some files or include directive in my previous attempt. The next step is to make the driver code more reusable, probably with another extra library. Then we'd have these libs:

    • ugfx (git clone)
    • ugfx-<display>-<board> (ugfx driver for a specific board, but without pin definitions) This would be reusable and could be included in the ugfx repo if done well enough. Example: ugfx-ssd1331-teensy32
    • myproject-ugfx (ugfx and driver config for a specific project)

    The current state has the latter two merged, making it harder to reuse the driver code.

  • Having config and low level drivers in a separate library

    Christoph11/23/2015 at 20:31 0 comments

    In the previous log I've described how uGFX can be simply put into arduino's library folder (that was trivial). The next step I tried was to create a wrapper library that simply points at the bare ugfx clone, but has only one header in its folder:

    libraries/ugfx-arduino/
    +- ugfx-arduino.h (includes gfx.h and all other ugfx headers)
    +- ugfx-arduino.c (includes src/gfx_mk.c)
    
    That way, when using the library menu to include the ugfx-arduino library, only one header will be added to the sketch. Fine, and now I'll try to create a config and low-level driver library:

    libraries/myproject-ugfx/
    +- board_ssd1331.cpp
    +- board_ssd1331.h
    +- driver_ssd1331.c
    +- gdisp_lld_config.h
    +- gfxconf.h
    +- myproject-ugfx.h (includes ugfx-arduino.h)
    This fails when including myproject-ugfx.h in a sketch:

    In file included from ~/Arduino/libraries/ugfx/src/gdisp/gdisp.h:212:0,
                     from ~/Arduino/libraries/ugfx/gfx.h:198,
                     from ~/Arduino/libraries/ugfx-arduino/ugfx-arduino.h:5,
                     from ~/Arduino/libraries/myproject-ugfx/myproject-ugfx.h:2,
                     from ~/Arduino/ugfx-ArduinoTinyScreen/ugfx-ArduinoTinyScreen.ino:1:
    ~/Arduino/libraries/ugfx/src/gdisp/gdisp_colors.h:394:3: error: #error "GDISP: Unsupported color system"
      #error "GDISP: Unsupported color system"
    I can't do much more than guess why, but I'll try: Probably because ugfx is compiled as a library before the config and low level drivers are compiled (ugfx is one of their depencies, so that would make sense), so no driver color system is known at that time: iirc ugfx uses some header trickery to get low-level driver information. If that's true, it's bad for us.

    It seems the only way to circumvent this is to change the order of compilation or to add the whole ugfx source to the project-specific ugfx library. Some pros and cons of the second option:

    + The ugfx version used in the project is fixed, and updating some central ugfx clone won't affect it. Instead it can be updated when the project needs it.

    - The ugfx source as cloned from the repo is quite large (about 16 MB!?), and having multiple copies will add up quickly. It might be possible to get around this with a file system link, though.

  • Creating a (kinda useless) bare uGFX library

    Christoph11/23/2015 at 16:21 0 comments

    Most parts of uGFX include "gfx.h", so we need to have this available. The only way to trick Arduino into adding an include path (as far as I know) is to create a library. A bare uGFX library can be created by creating a clone in the library folder, like this:

    ~/Arduino/libraries$ git clone https://bitbucket.org/Tectu/ugfx.git
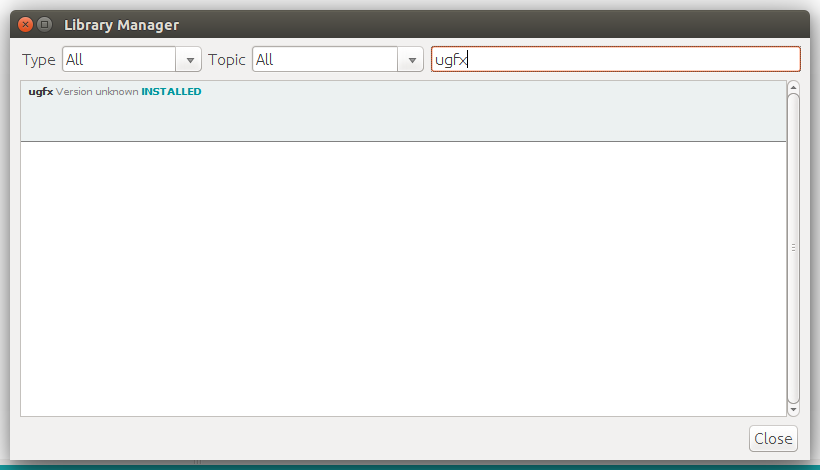
    Firing up arduino and opening the library manger shows the library:

    Good. Including the library in a sketch through the "Sketch->Include Library" menu adds all include files from the library's base directory:

    #include <pffconf.h>
    #include <gfxconf.example.h>
    #include <gfx.h>
    #include <ffconf.h>
    #include <mf_scaledfont.h>
    #include <mf_rlefont.h>
    #include <mf_bwfont.h>
    
    We just need <gfx.h>, but as far as I can tell the others don't hurt. But there's no gfxconf.h and also no project-specific low level drivers. We can't add these to the main sketch directory, because Arduino doesn't add it to the compiler's include path. So we need a ugfx config library for our project.

  • Let's start with their example sketch

    Christoph11/23/2015 at 15:58 0 comments

    The uGFX maintainers have created some simple instructions how to use uGFX with Arduino.

    Heading to ugfx/boards/base/ArduinoTinyScreen (in the repo), these are the instructions:

    This is a working Arduino project for the TinyScreen ATmega board.
    
    To use this with the Arduino IDE Development Environment follow these steps...
    
    1/ Copy the gfx directory from this directory to your Arduino library. eg /Arduino/libraries/gfx
    3/ Create a subdirectory under "gfx" called "ugfx" and copy the entire ugfx system to that directory.
    4/ In the "gfx" directory adjust the gfxconf.h for your project.
    5/ In the gfx directory create a .c file for each driver that you want to use that contains a single line
    	to #include the driver source in the repository file. For a GDISP driver you will also need to create
    	a gdisp_lld_config.h file that contains a single line that #include's the gdisp_lld_config.h file for
    	the GDISP driver. Don't forget to add the board files for your drivers.
    	This example has the files for the SSD1331 TinyScreen display.
    6/ Copy the example ugfx_test.ino file to your Arduino projects directory eg /Arduino/ugfx_test
    7/ Modify the ugfx_test.ino project to suit.
    8/ Remember that for ATmega platforms RAM and FLASH are very limited. Be careful which ugfx options you turn on.
    	Arduino ARM based boards are much less limited.

    Basically it is suggested to add ugfx as a library and configure it for your project. The main problem here is that one might have several projects using uGFX, and altering the library for every project will break all others. That's bad.

    Furthermore it is suggested to add the low level driver files to the sketch main directory, which isn't really neat. There should be a cleaner way of doing this.

    I decided to tackle the first problem first, as it is by far more important.

View all 10 project logs

Enjoy this project?

Share

Discussions

Similar Projects

Does this project spark your interest?

Become a member to follow this project and never miss any updates