-
1About BABYDUINO
Arduino Is Extremely Useful and powerful Development Board. Suppose You Just want to interface RGB LED, or just LED using a button, then just use Babyduino for prototyping this small systems taking least space. Suppose You are making multitasking robot then there is always small space for prototyping. This Board can be used for controlling Motors Or LEDs. Some Specifications are mentioned Below:
- Open Source Hardware!
- Use with standard Arduino IDE or AVR StudioAllows
- FULL use of the 8K memory on the chip (no bootloader needed!)
- All pins broken out for use.
- Reset button on board
- Easy to assemble due to through hole construction
- Easy to replace chip.
- Also easy to take your programmed chip and put it in a final more permanent project. Small and Inexpensive Design.
-
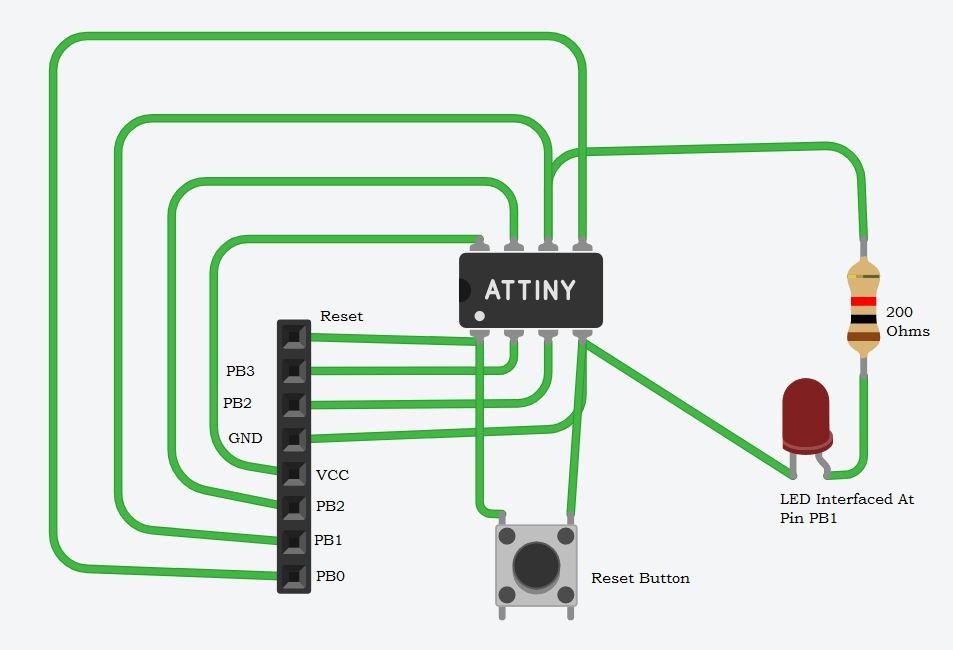
2The Circuit
![]()
Assemble the Components On PCB Or Breadboard as shown in Circuit Diagram. Here we are Using ATTiny 13 Micro controller. A reset Button is Placed along Pin1(Reset) and GND of ATTiny. Headers are placed for each and every pin of ATTiny which makes it easier to connect it with Arduino or any other Modules or Sensors. LED is Interfaced at PB1 as shown in Circuit Diagram.
-
3Connections To Arduino
BABYDUNO is Compatible With Arduino IDE.
We shall use Arduino UNO as USB to TTL Converter and Upload Program using Arduino As ISP.
Connections:
D10 of Arduino to Reset of BABYDUINO
D11 of Arduino to PB0 of BABYDUINO
D12 of Arduino to PB1 of BABYDUINO
D13 of Arduino to PB2 of BABYDUINO
GND of Arduino to GND of BABYDUINO
3.3V of Arduino to VCC of BABYDUINO
BABYDUINO: SHRINKIFY YOUR ARDUINO PROJECTS!!
Let's Shrink Arduino Projects, Robotics and Automation You all did with Arduino UNO. Now There is Shrinkified Version Here!
Discussions
Become a Hackaday.io Member
Create an account to leave a comment. Already have an account? Log In.