 MasterOfNull
-
11) Pick the right tile!
This is by far the largest predictor of success for this project. Look for a tile that you can see a reflection in it that is not distorted. Line the reflection up with the overhead lights (fluorescent tubes) in at least two directions. Look for straight lines. Straight lines means you have an actually flat tile.
-
22) Mark the tile.
Starting 3/4in from the edge, mark off every half inch.
Rotate 90 degrees and mark off both ends 3/4in from each edge.
-
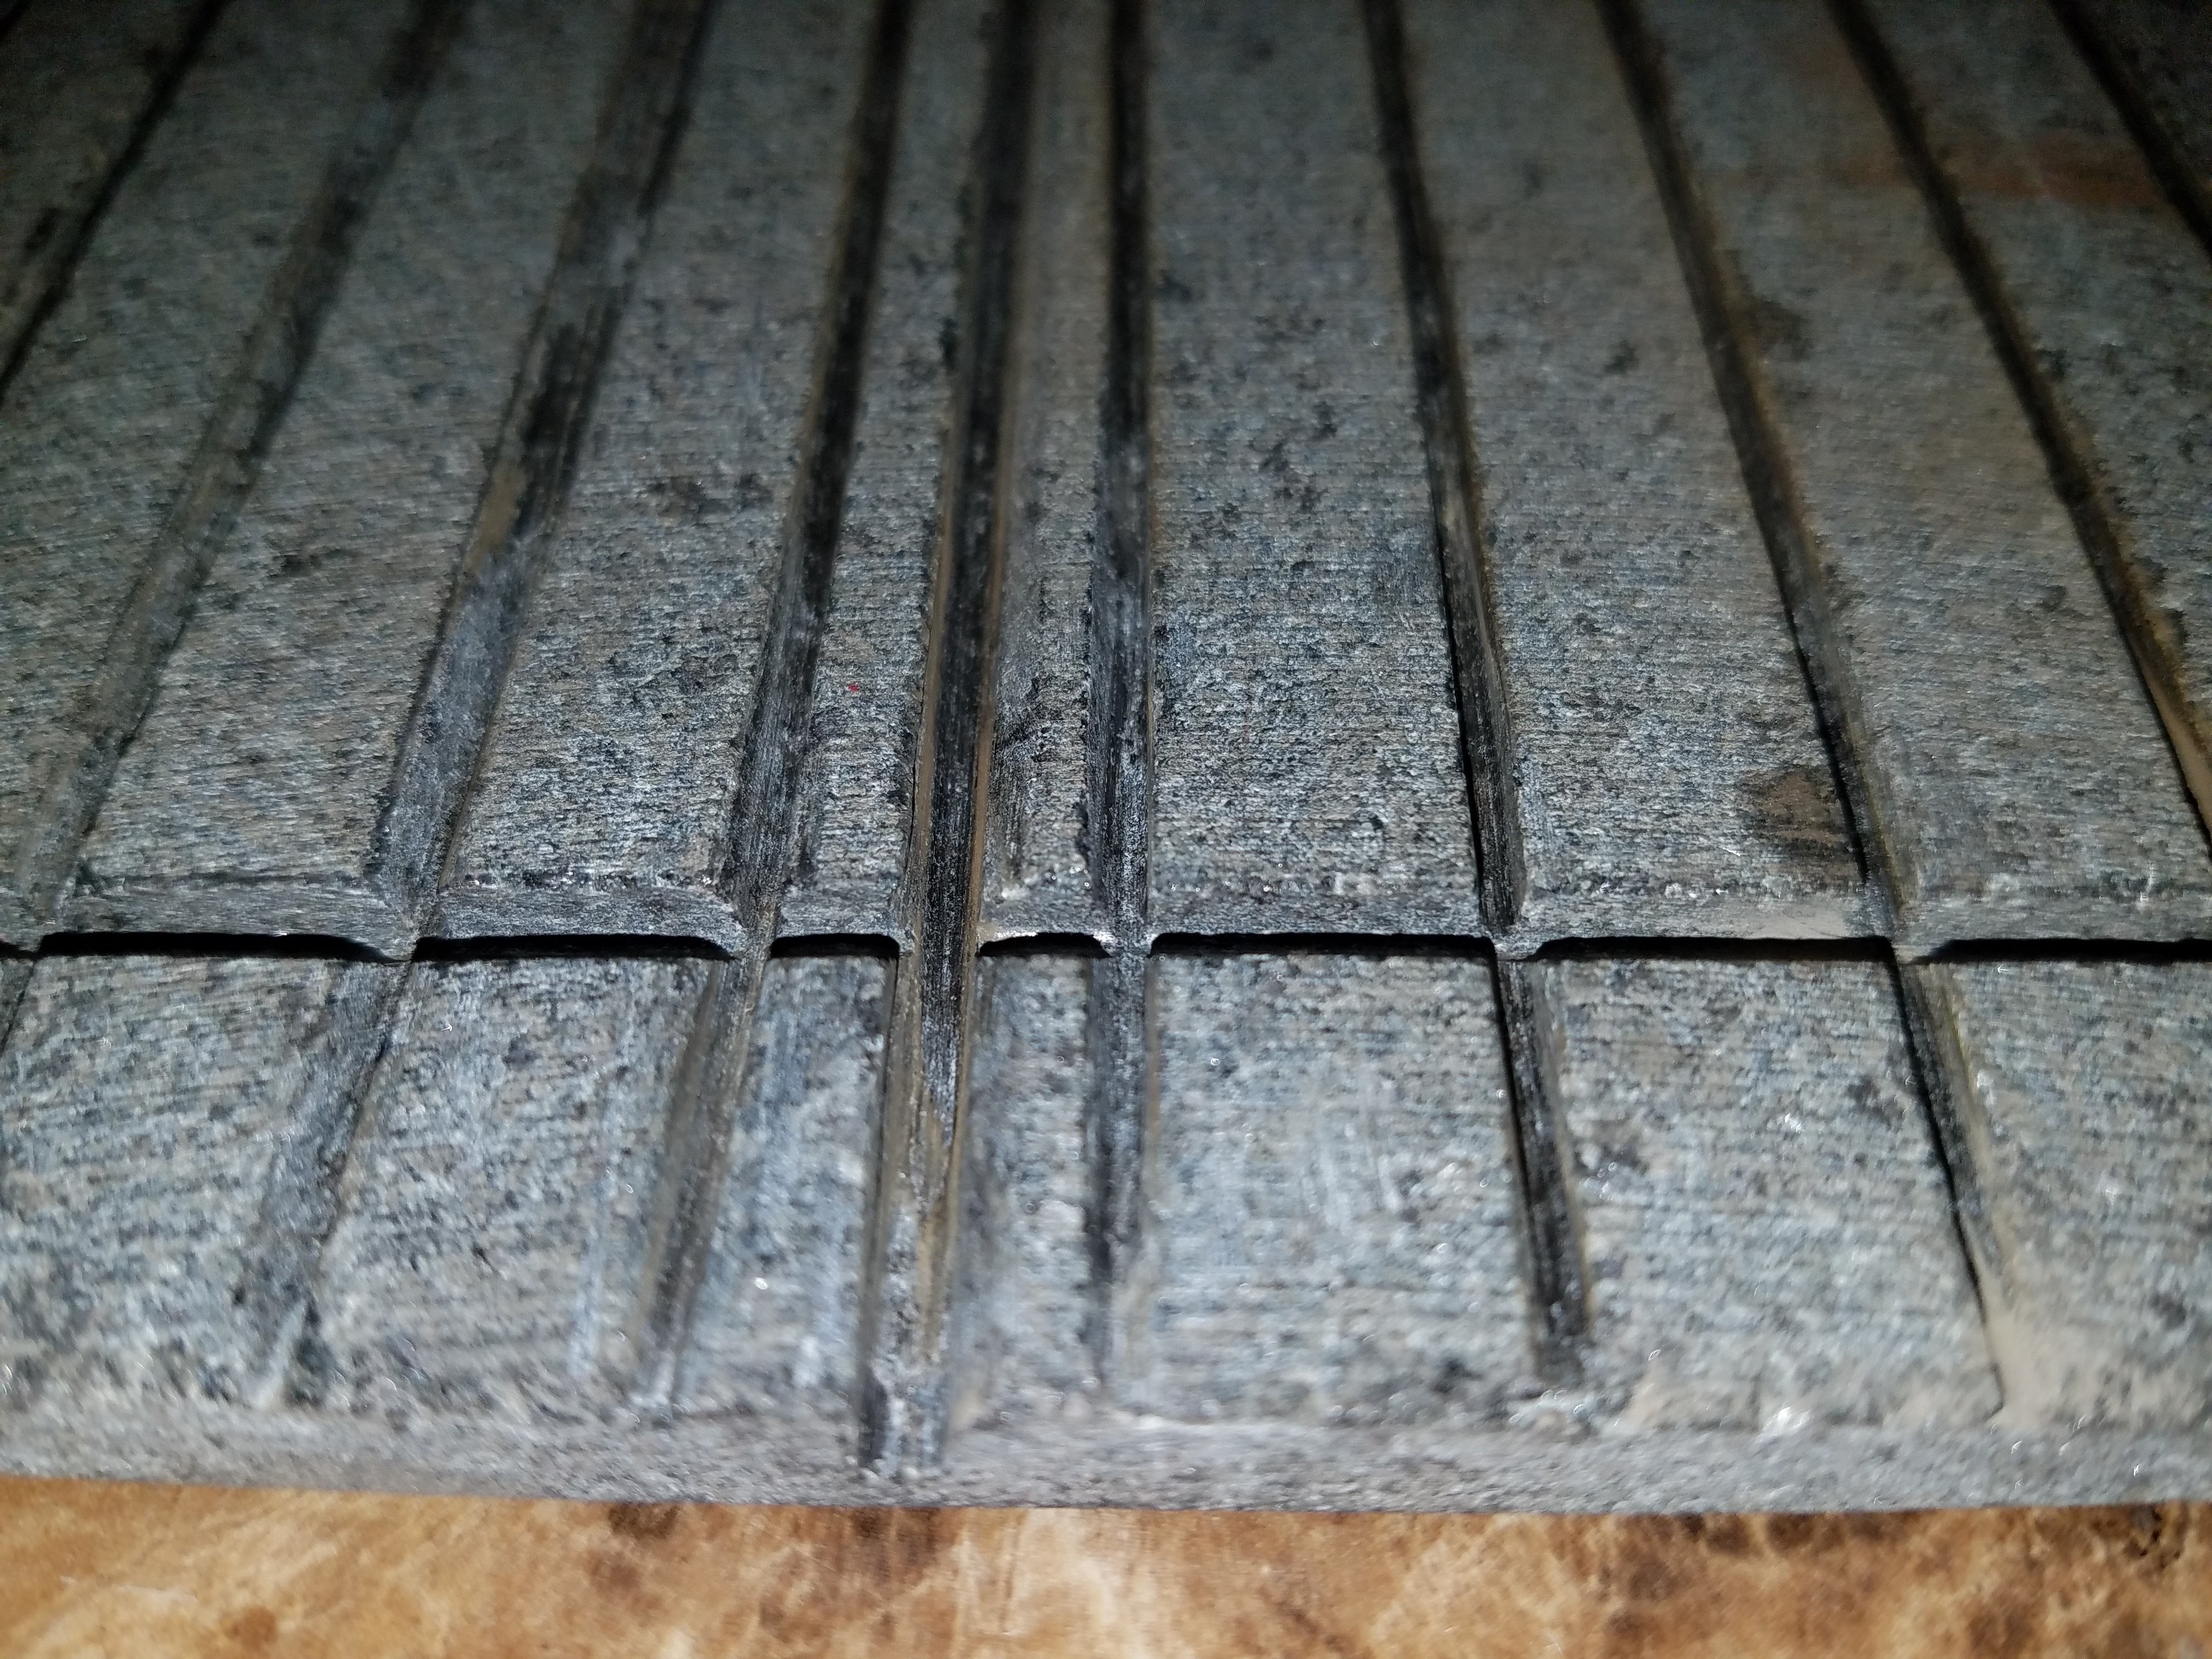
33) Cut the parallel grooves.
Clamp a 1x4 over the tile on a suitable workbench and get prepared to be coated in toxic dust. Respirator and eye protection required.
Using an angle grinder with a stone cutting blade, move the 1x4 so when sliding the blade guard along it, you line up with your first mark. Grind with light pressure pulling the grinder towards you against the direction of rotation of the blade. Once you have a straight line cut, the grinder will follow the groove. Go slow and grind each groove down to 1/8th in depth.
-
44) Cut the end grooves.
Rotate the tile 90 degrees and get a straight line going for the end grooves.
Once a line is established, lean the angle grinder so the blade now comes in at an angle. You need the end grooves to have a small angle to be able to wrap the nichrome later without going insane. About 30 degrees worked well. Cut the end grooves slightly deeper than the parallel grooves.
![]()
-
55) Clean up the parallel grooves.
Rotate the tile 90 degrees again and go back over the ends of all the parallel grooves, deepening them to match the end grooves. At this point I also cut my center groove for cementing in the thermistor.
You are making a slight arch out of each of the long grooves which will serve to pull your nichrome wire against the bottom of the groove while winding.
-
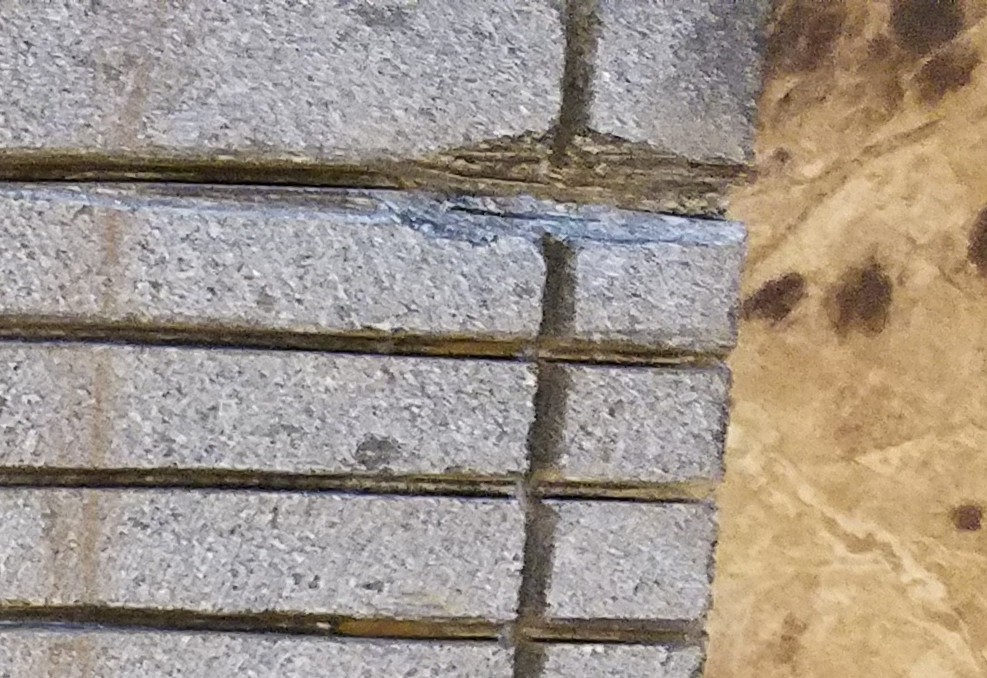
66) Cut pockets for terminating your wire.
By now you should have 2 nearly completely worn stone cutting blades with a pretty small diameter. Take advantage of that and use them to cut the pockets where you will cement in the crimp connectors for terminating the windings.
![]()
-
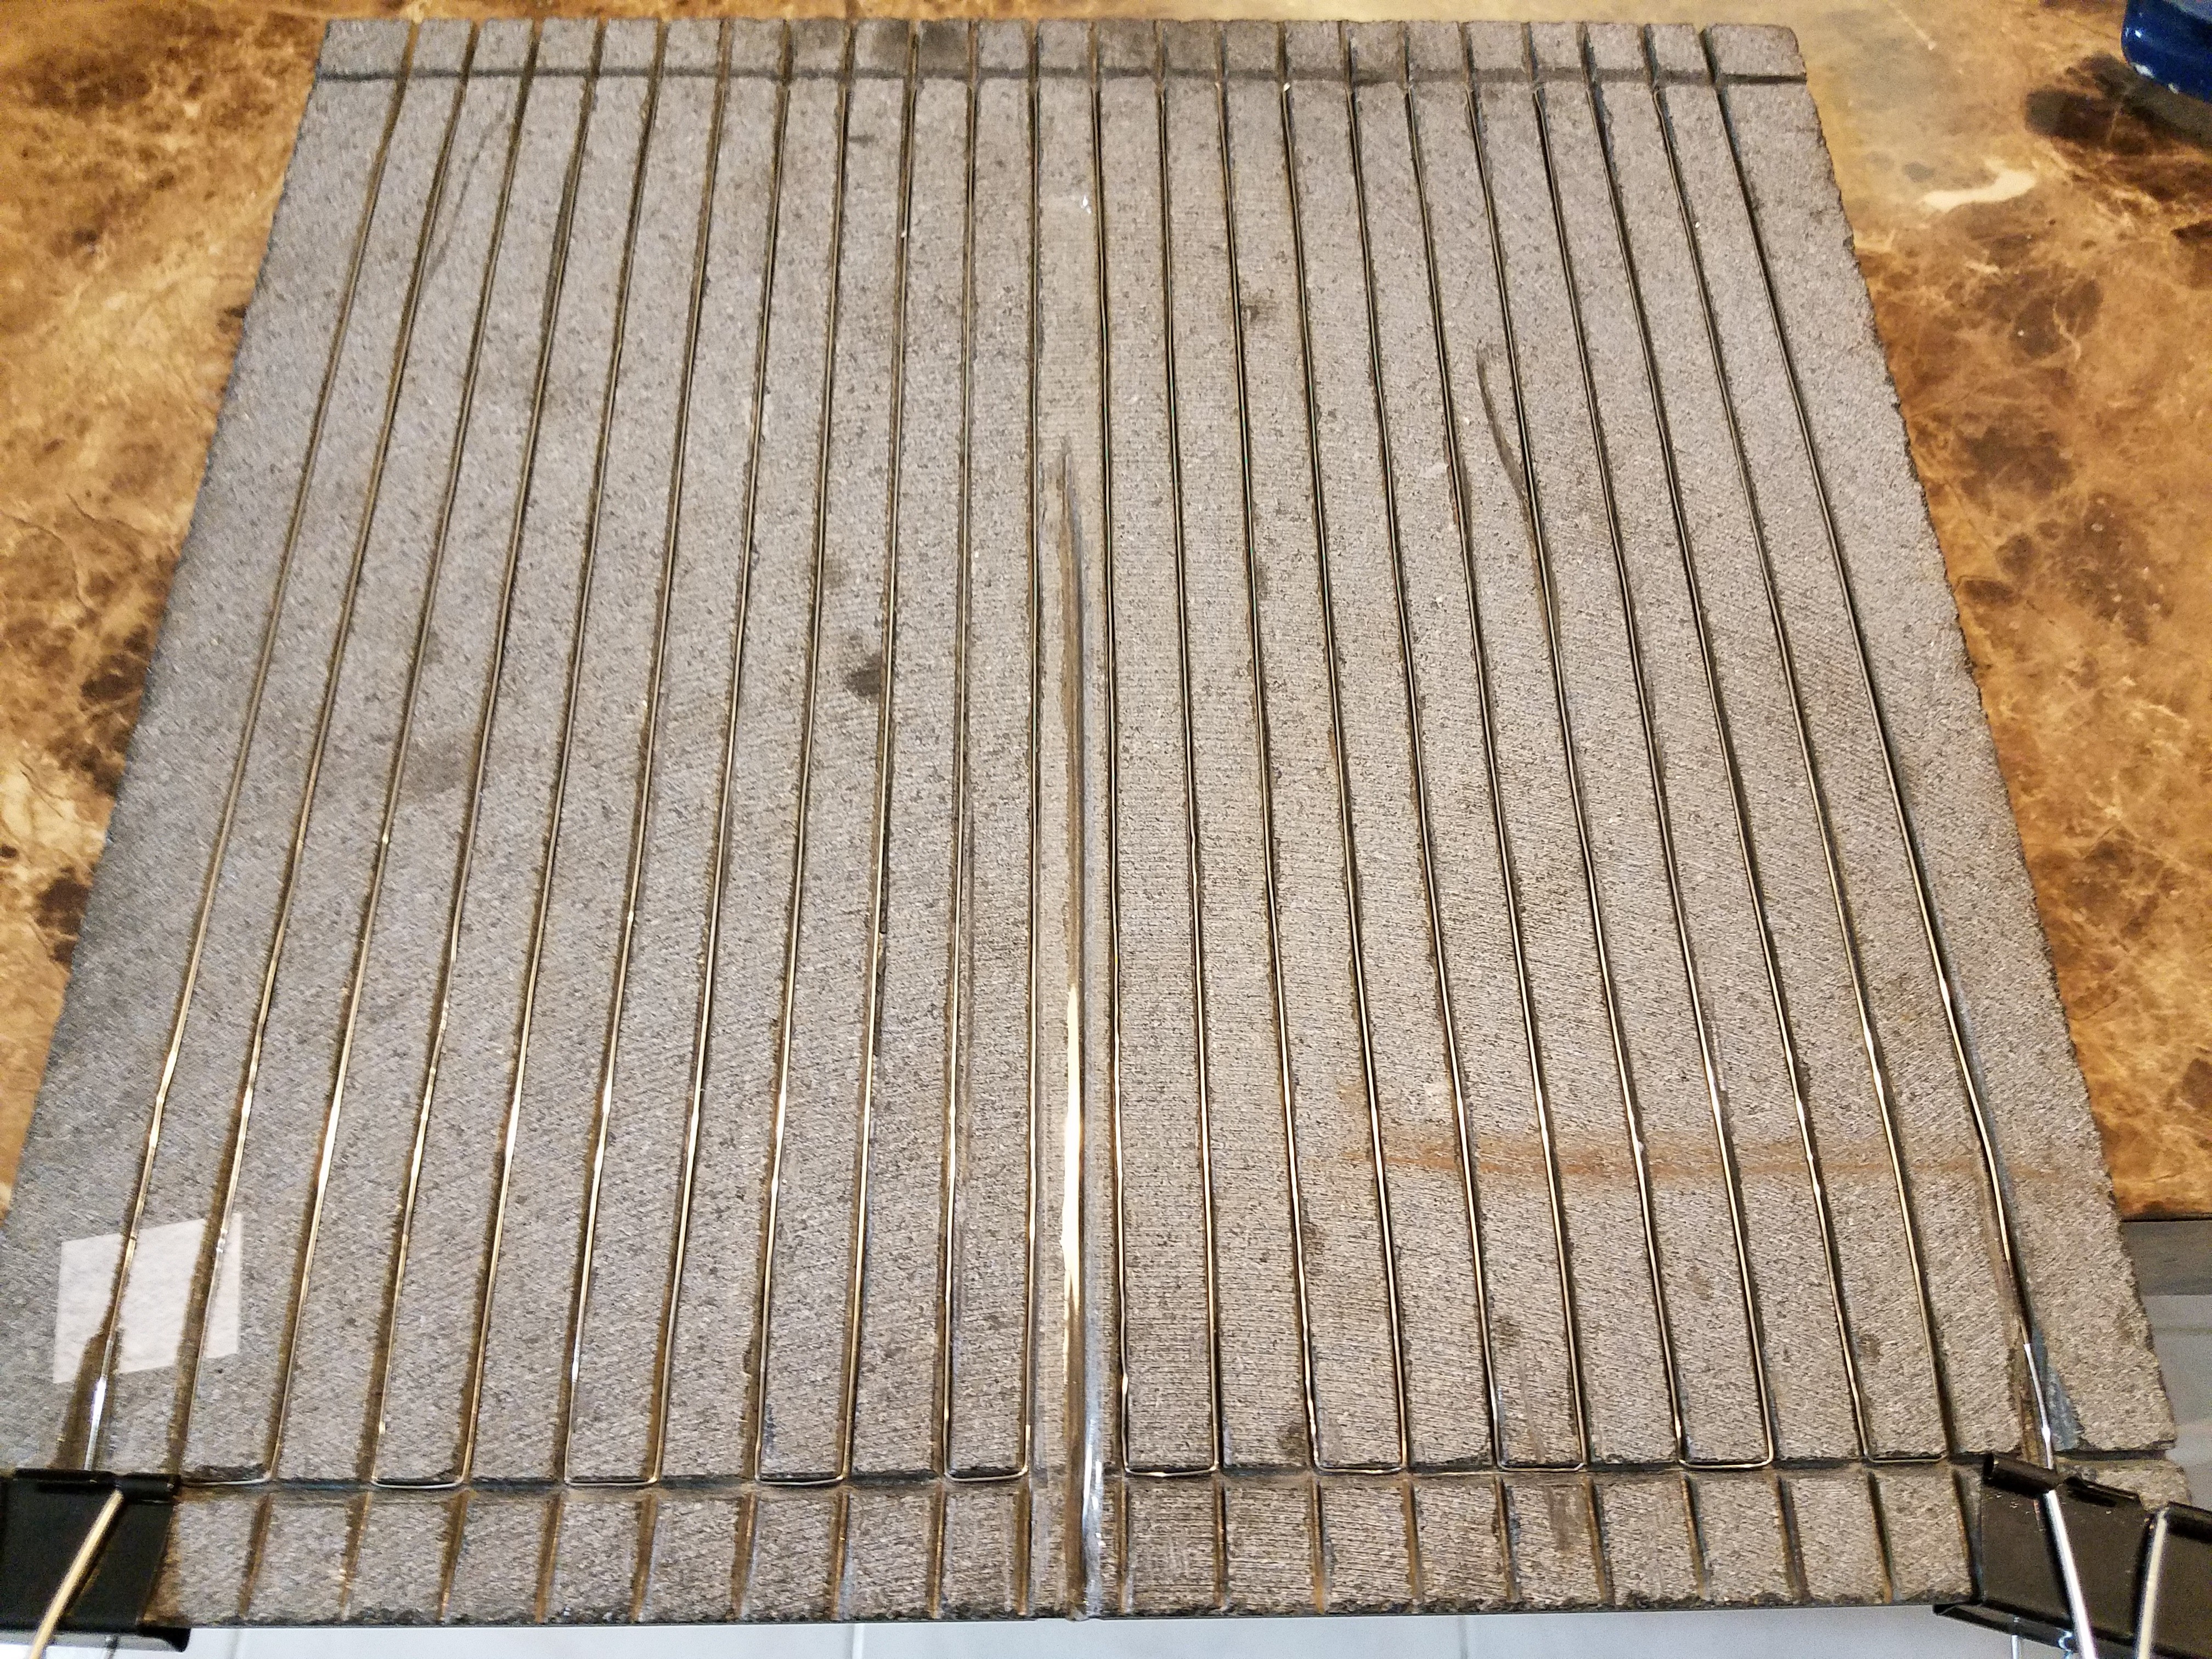
77) WInding the nichrome.
Put the tile on something that won't move around. I used a silicone sheet on the counter.
Keeping the nichrome wire on the roll it came on lets you tension it better without destroying your hands.
Starting at one of your pockets, wrap the nichrome around the edge and secure it with a binder clip. Pull the nichrome down the tile in the slot.
At each turn, press the nichrome into the slot with a screwdriver, then bend it around the corner. It is important to have all the lines tensioned so they do not rise out of the grooves.
If you need to take a break, wrap the nichrome around the edge of the tile and secure with a binder clip.
Periodically, look at the tile from the edge and make sure none of your windings are sticking up. If they are, you need to unwind back to that one, and do it again.
Eventually, you should end up with this.
![]()
-
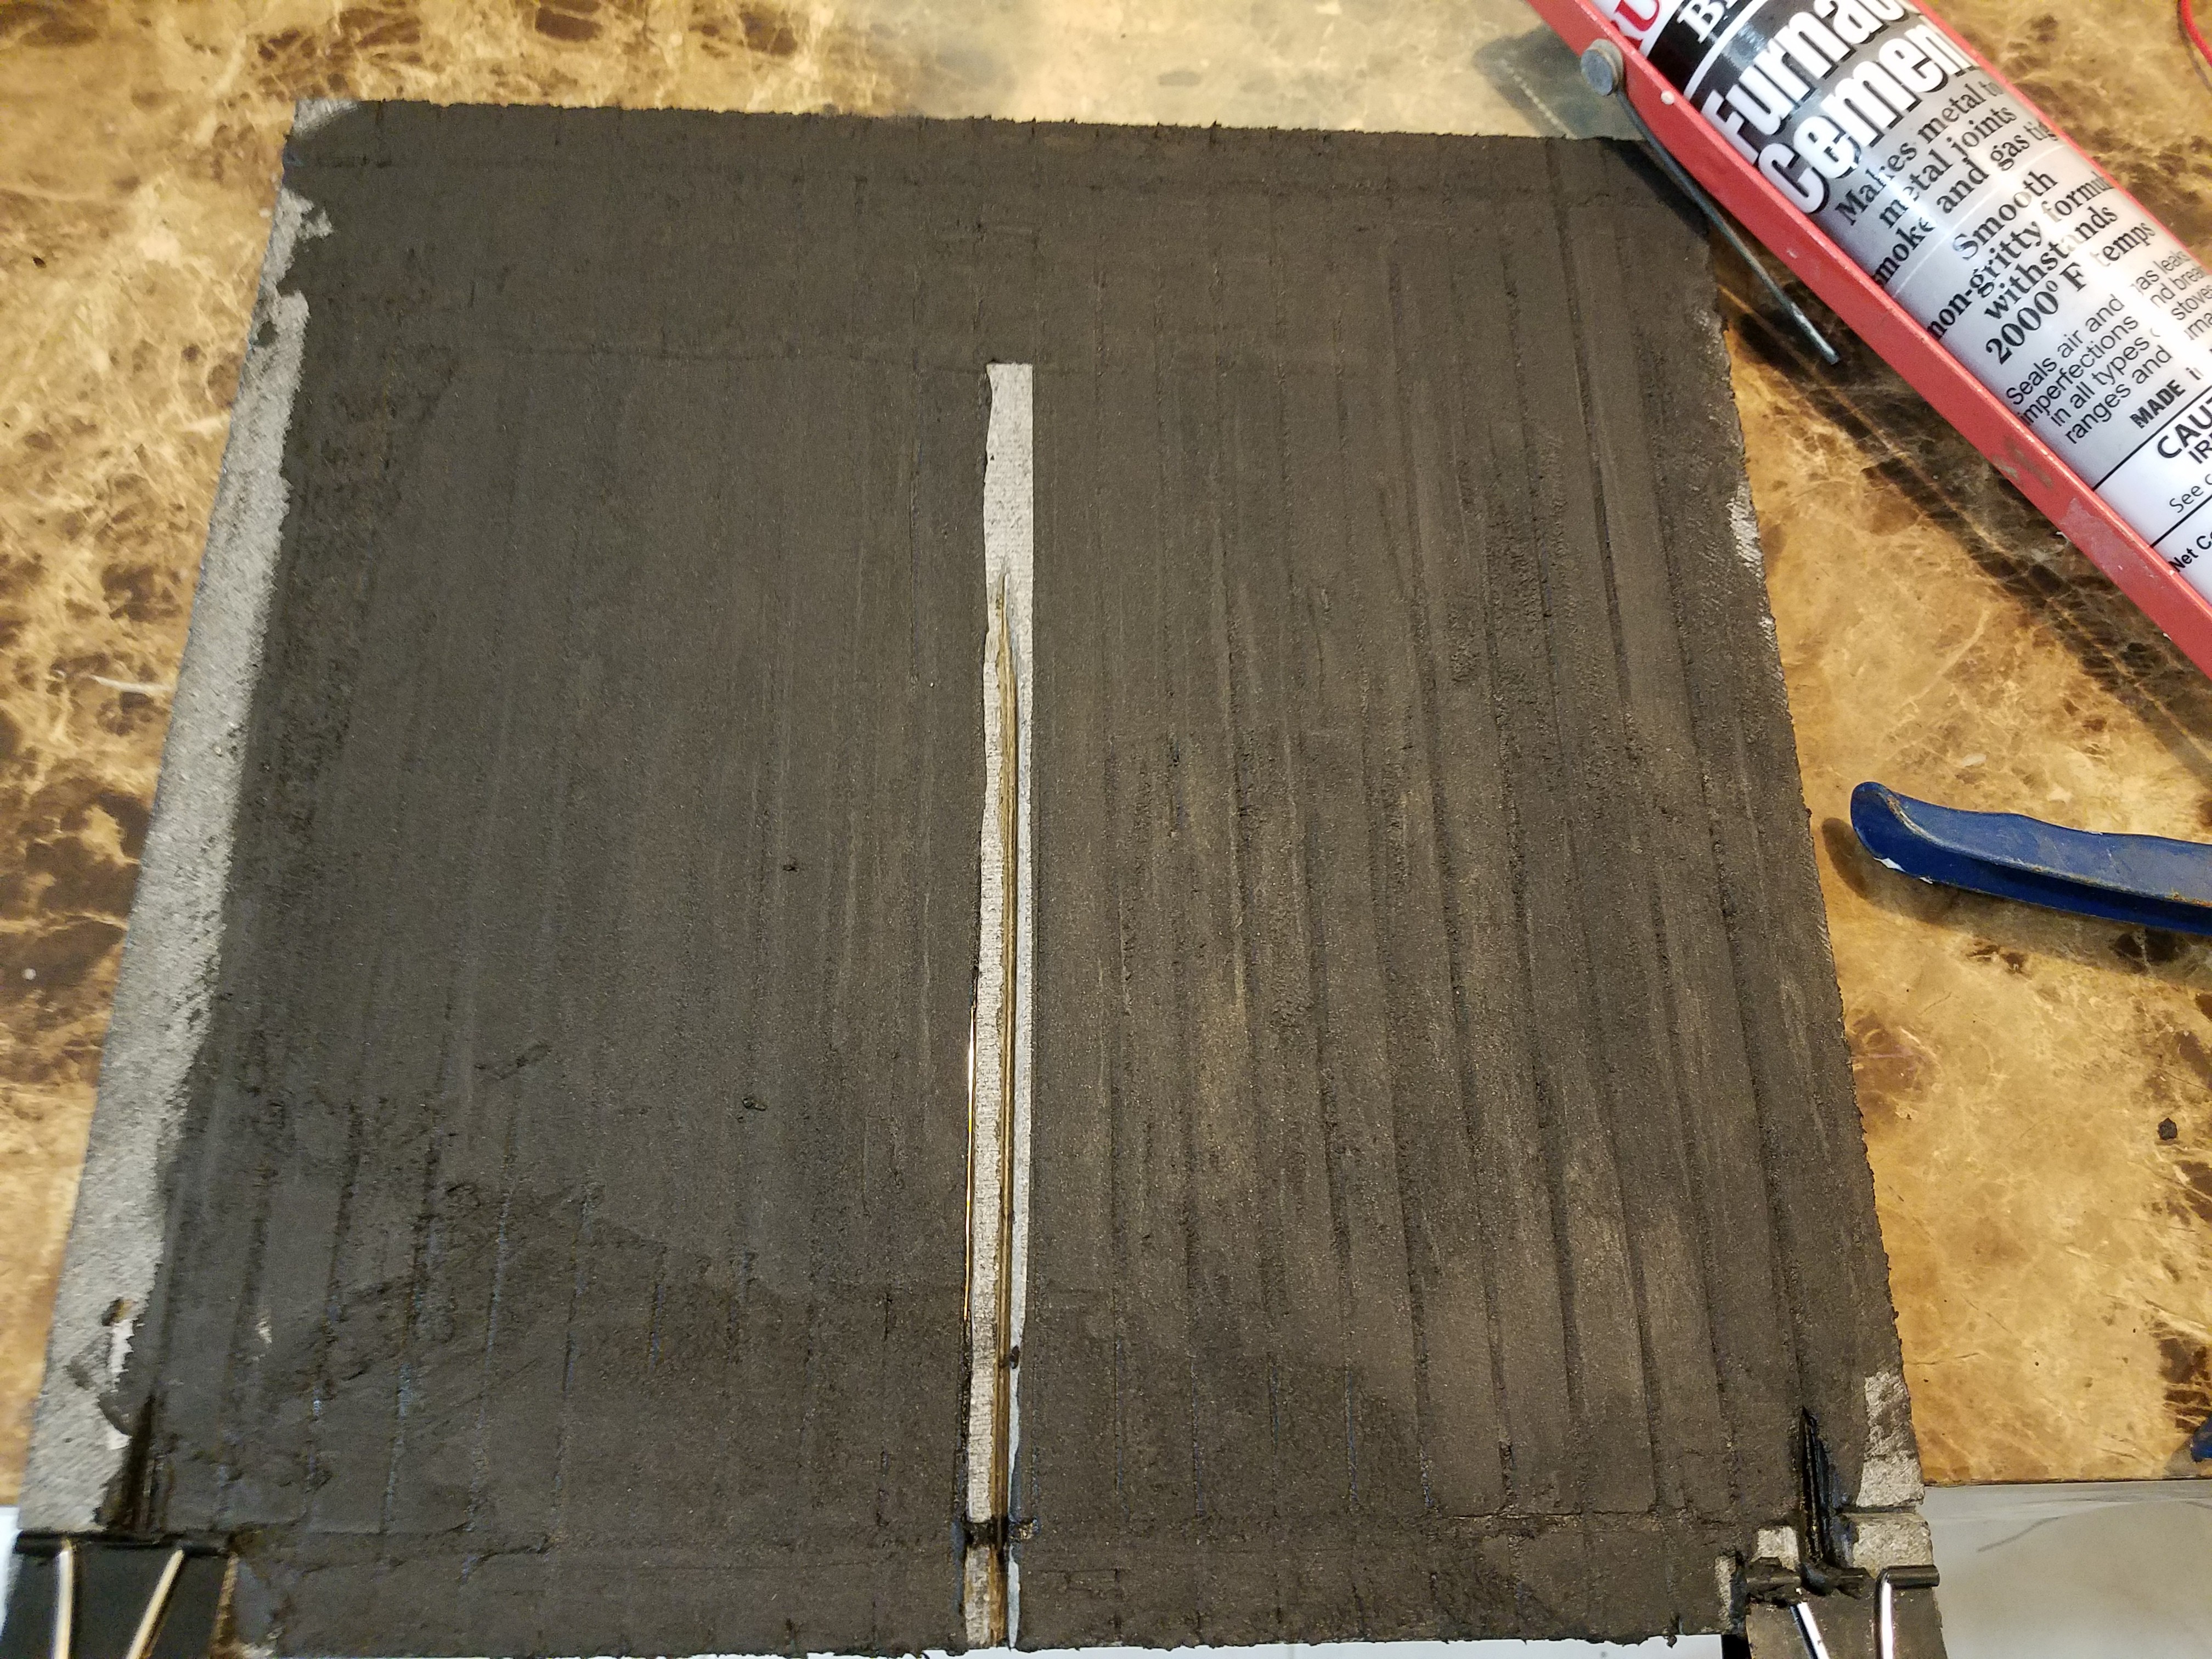
88) Apply the furnace cement
Carefully tape off the groove for the thermistor and both end pockets so you don't get cement in them yet.
Cut the end off your tube of furnace cement and fill each groove. Use a fair amount of pressure when doing this so you don't have any voids. Avoid the end pockets and thermistor groove.
Smooth it out with a credit card or putty knife.
You have to work relatively quickly as the buttery consistency of the furnace cement gives way to a crumbly mess if you wait too long.
-
99) Drying the cement
It is very important that the furnace cement is allowed to completely dry after every step. Any remaining moisture will cause bubbles when you cure it later and if they are bad enough... you will be starting over.
For the impatient, 4 hours in the oven at progressively higher temperatures never exceeding 180F works. Letting it dry 24 hours naturally, is better.
![]()
After it's dry, you can remove your binder clips and the tape protecting the thermistor groove and end pockets. The cement is dry, but not cured. It is strong enough now though to hold the lines in place.
-
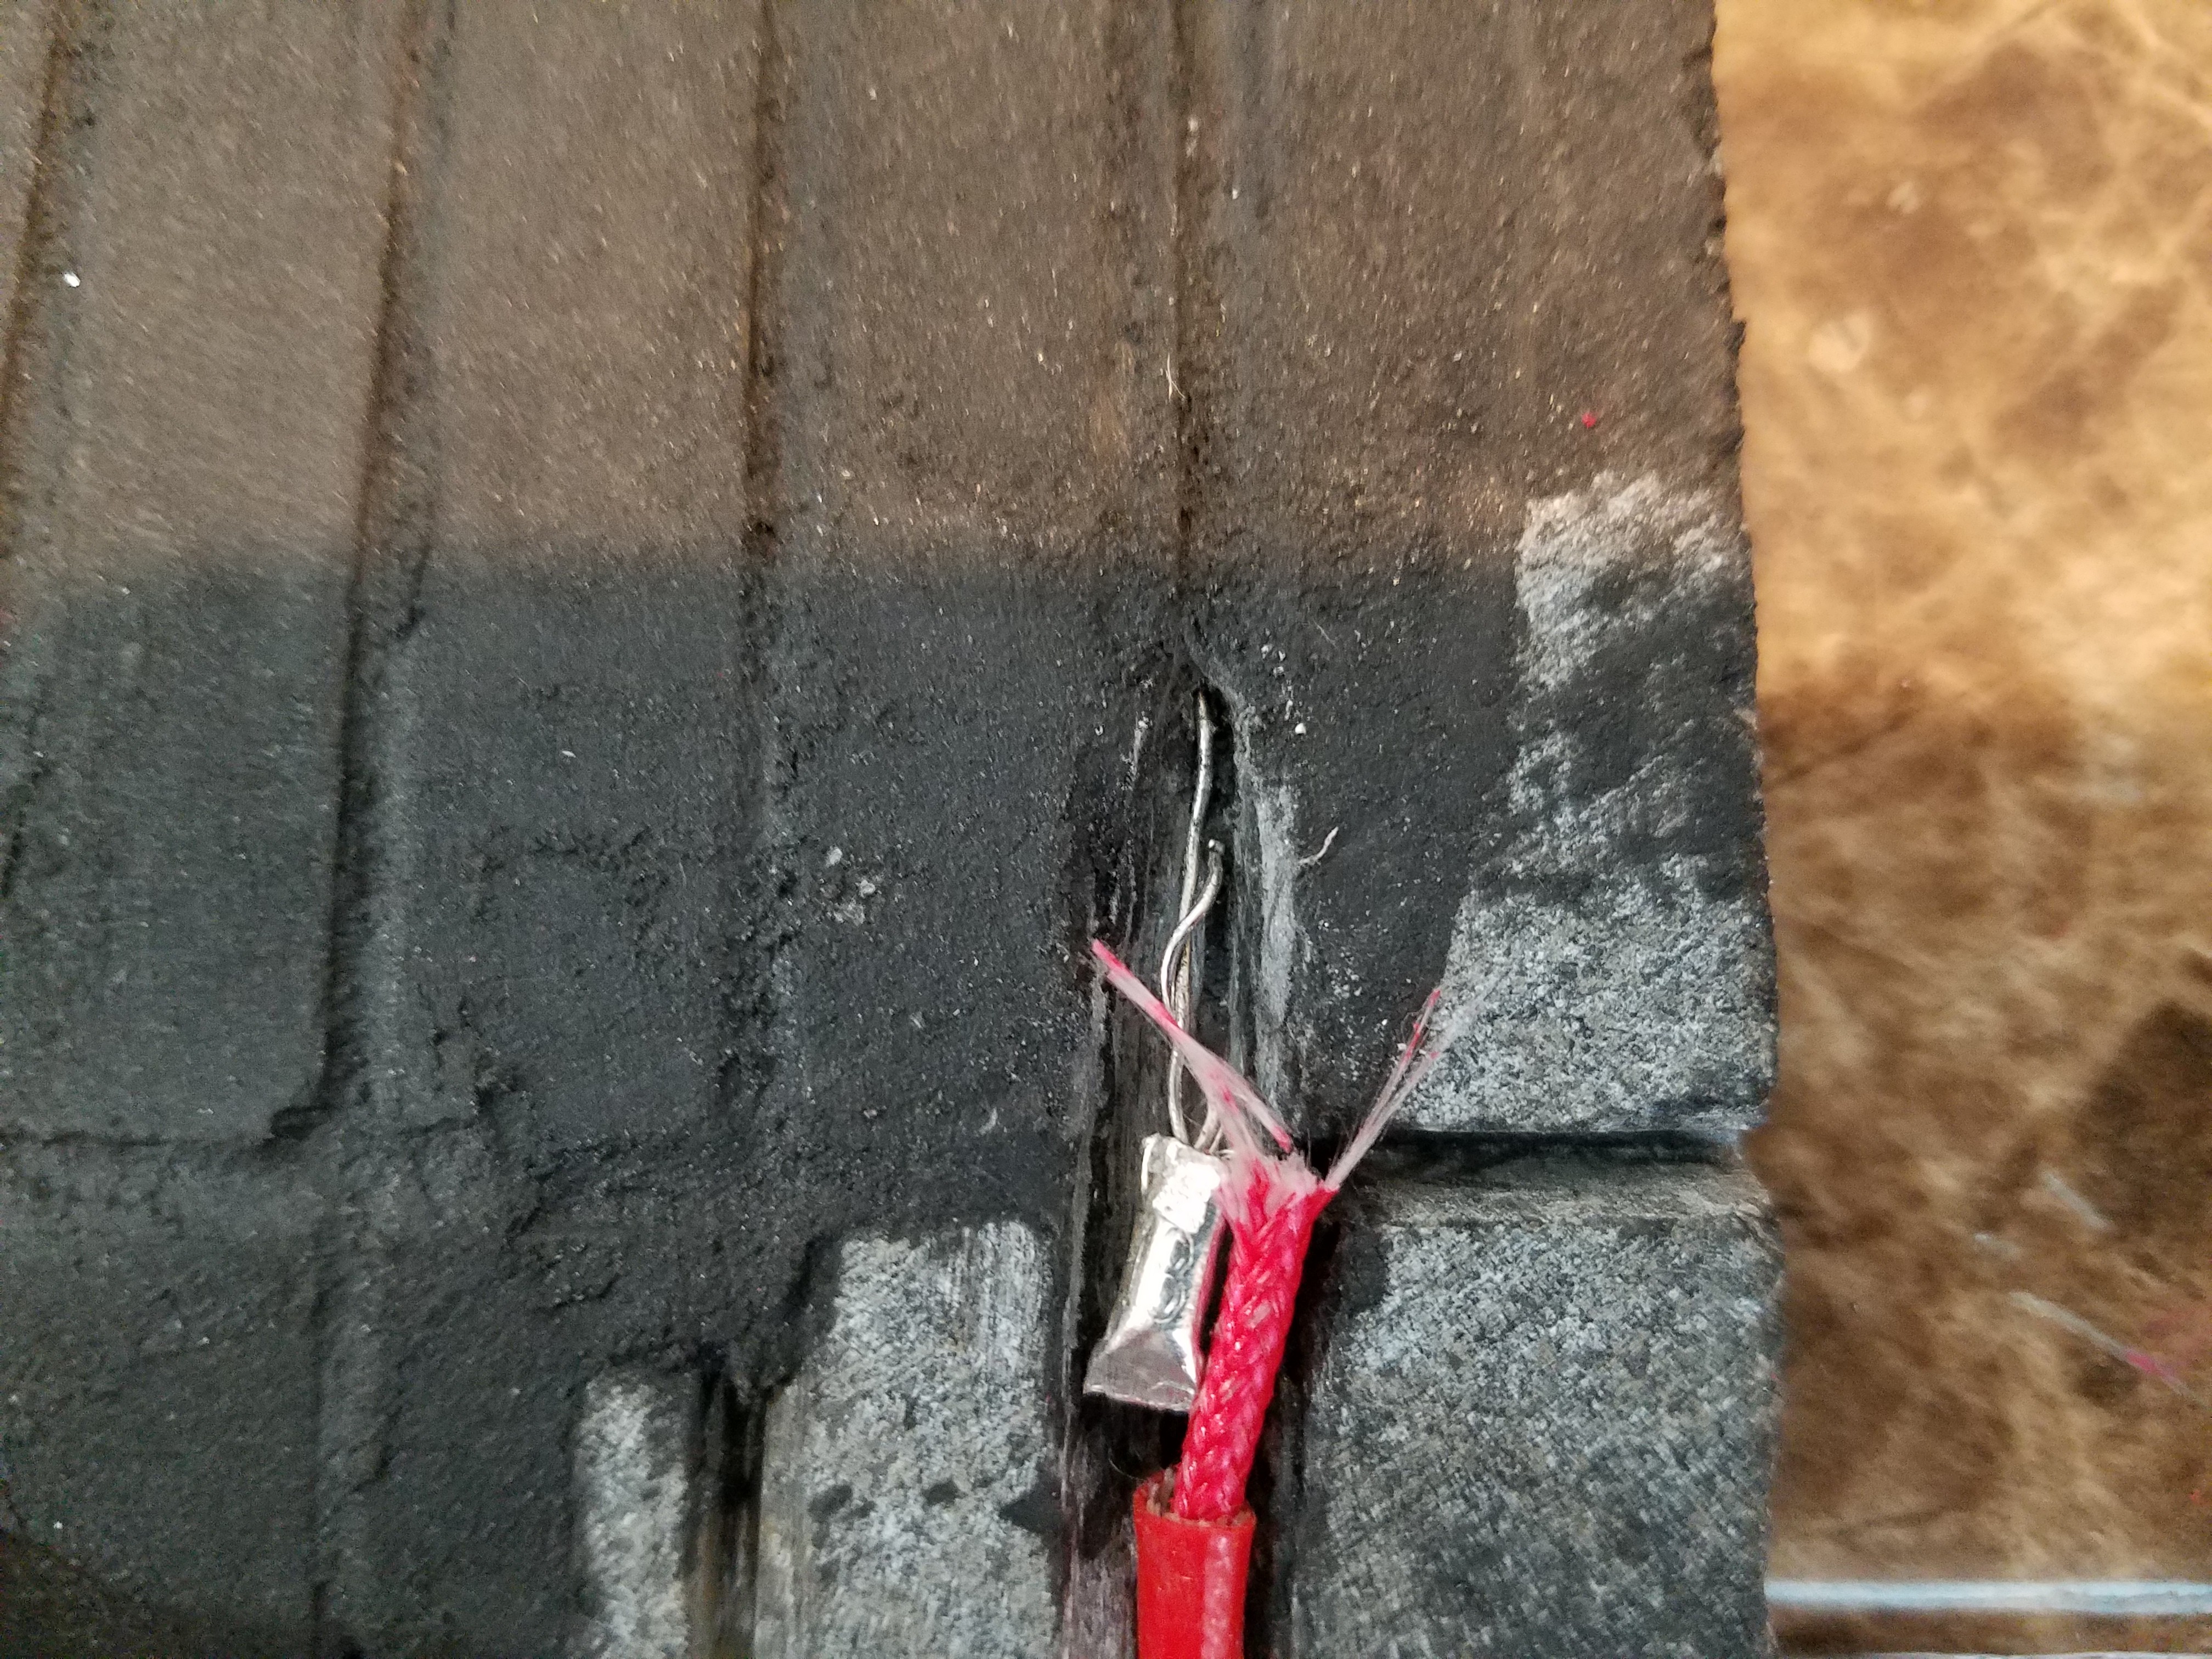
1010) Terminate the ends.
Cut your nichrome off leaving a bit to wrap back around itself. This will reduce the resistance of that section of the wire. That will help to keep your connections from heating.
Crimp your silicone insulation wires on and bend it down so it fits in the pocket.
![]()
Arcus-3D-C1 - Granite heated bed
This is the heated bed I used on the C1 and how I made it.
Discussions
Become a Hackaday.io Member
Create an account to leave a comment. Already have an account? Log In.