mclien
-
Time to shelf
11/10/2024 at 18:16 • 0 commentsOK, a bit of cleaning up. As you could imagine with all the self-made and other smartwatches, this has become kind of useless, since there is no software to sync this one maintained anymore.
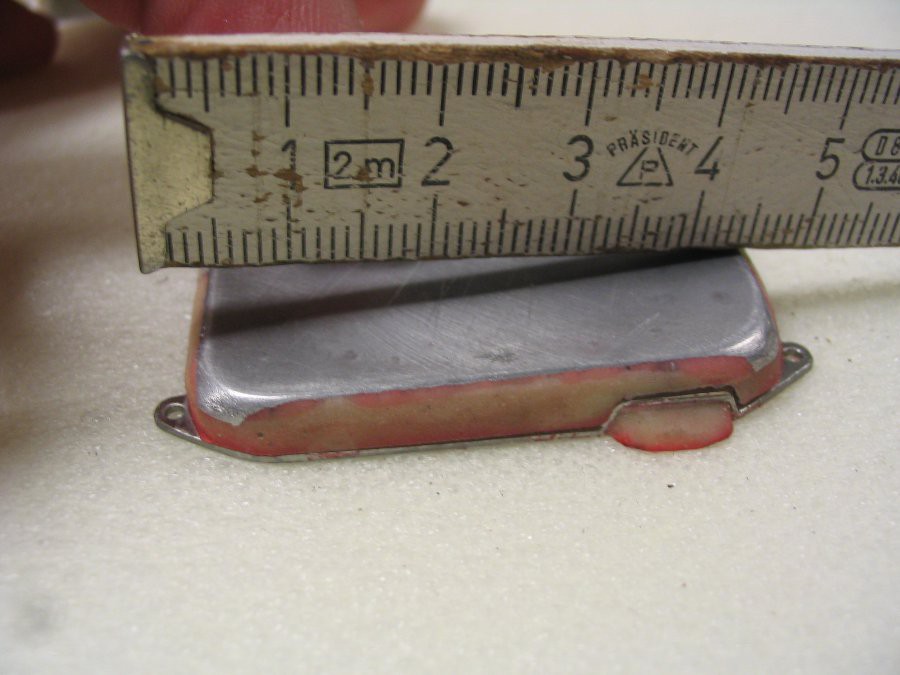
My last attempt to do "something" with this was, to have a look if the inside of the watchy project fit inside. Well the is just 2mm missing to make the e-ink screen fit.
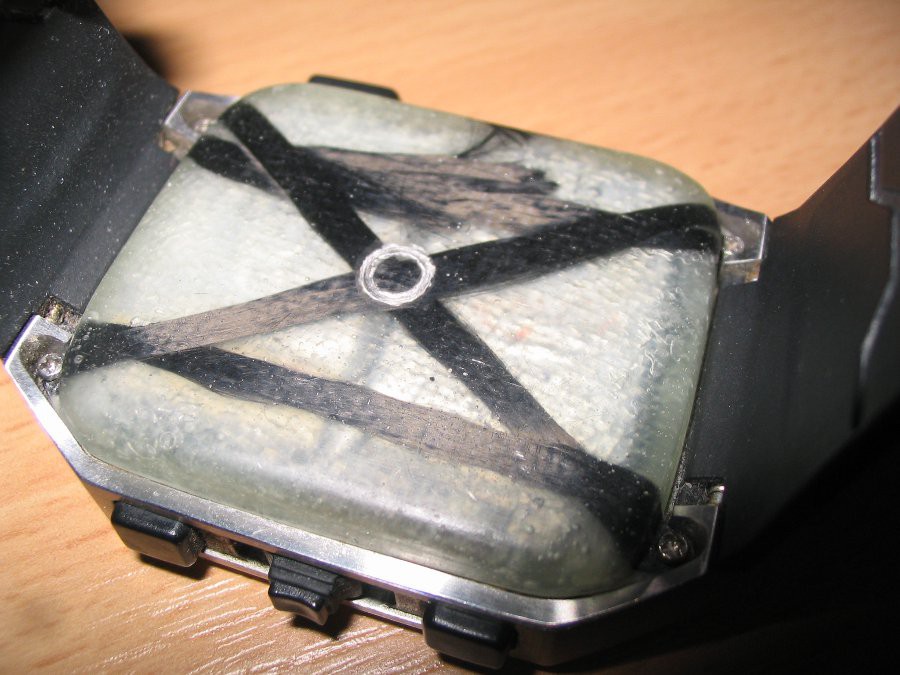
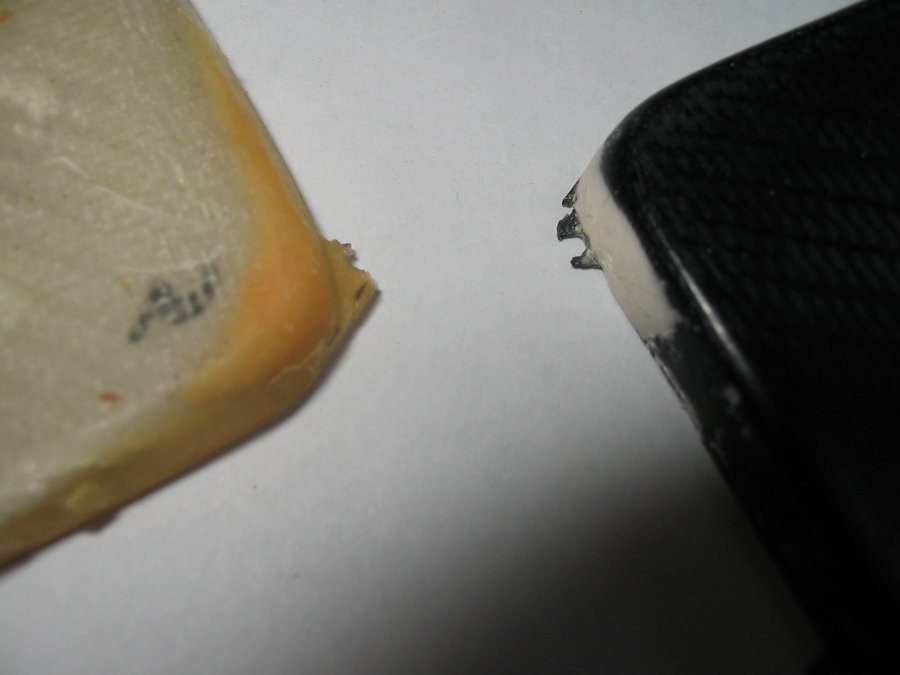
Plus the wristbands (which there are no replacements for and standard wristbands wont fit) are somewhat "dissolving" in one part and breaking into pieces on the other part. It's kind of a wired mix of leather-like material covered on the lower half with plastic.
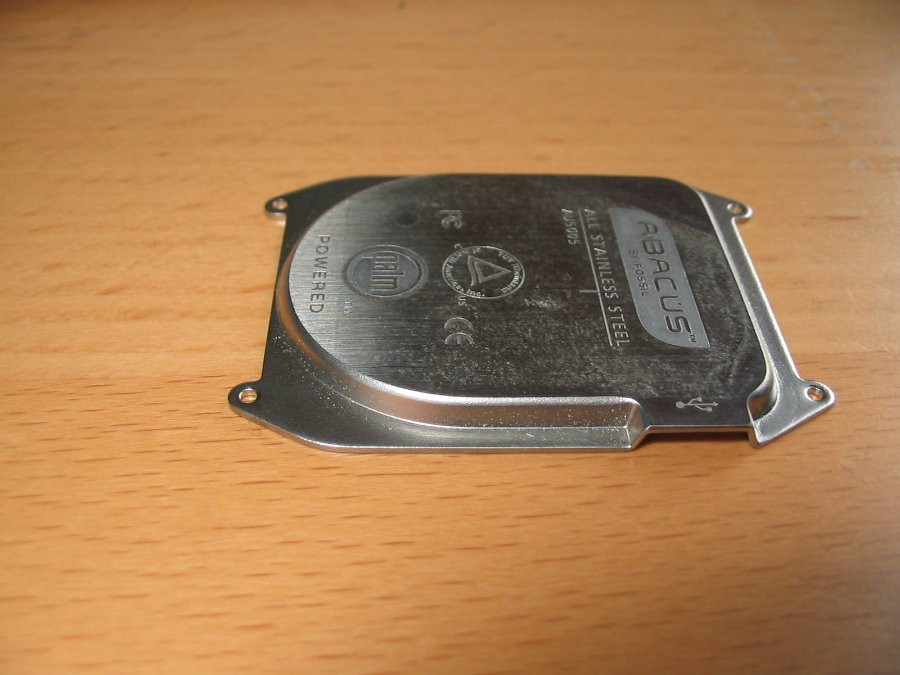
The sad part is the really nicely build of the full stainless steel case of the "movement" itself.
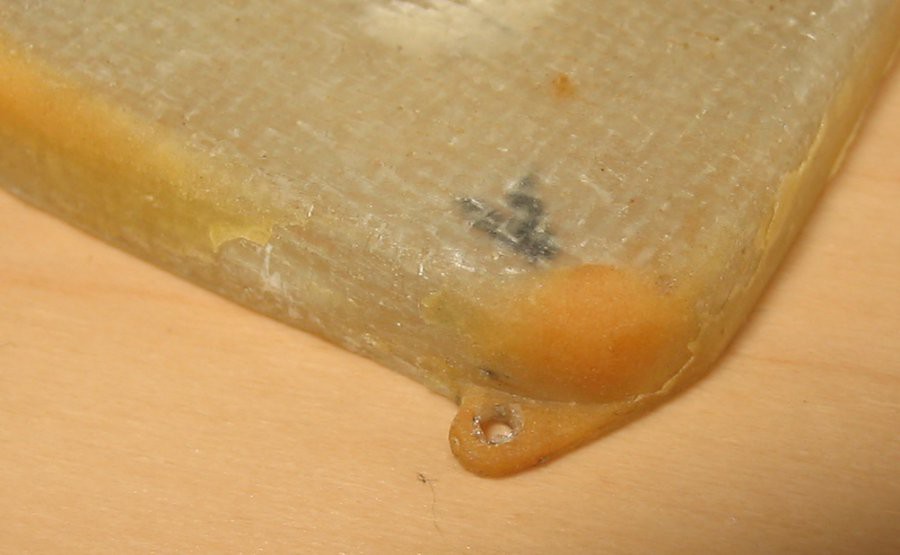
I hope the logs of the GFK parts is still worth it, since the fiber reinforcement is something you can't do easily with a 3d printer.
-
mold, working (4th attempt)
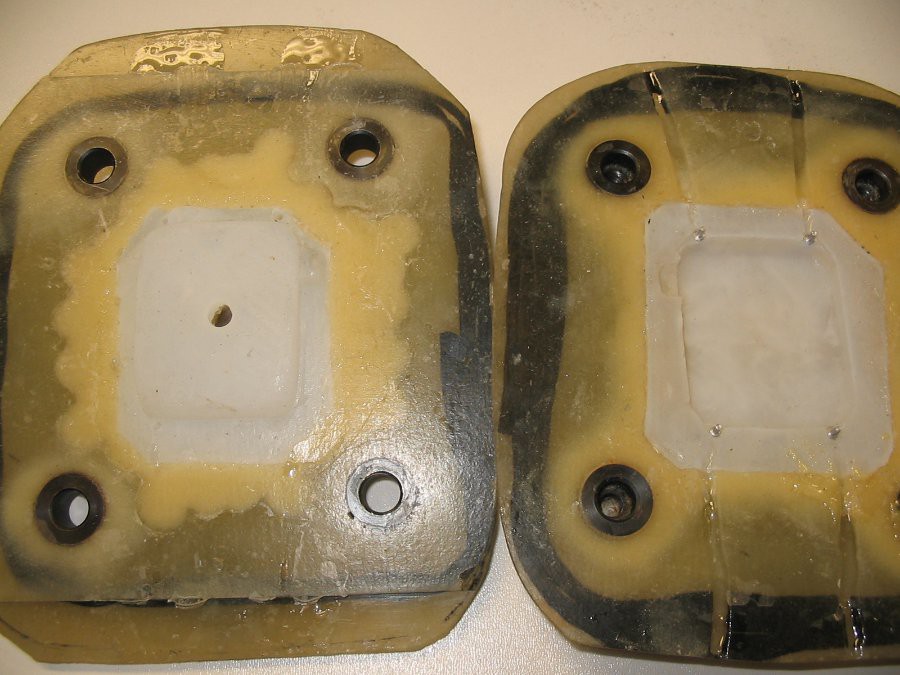
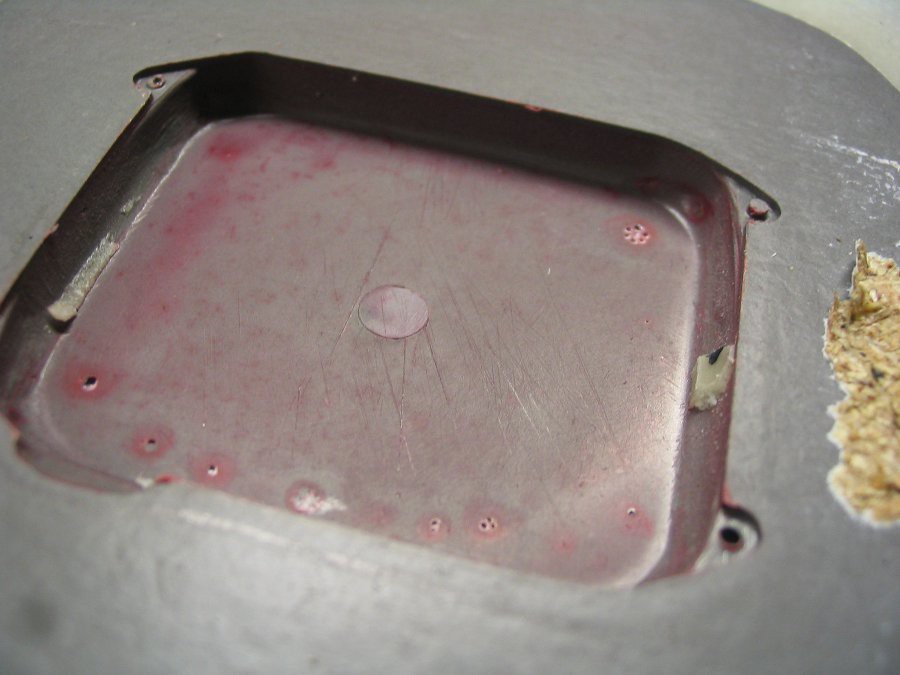
09/14/2014 at 16:17 • 0 commentsSo the working mold is the one without any silicone. Both halfs are simple resin, no special mold resin is needed as I learnded with this one.
The part for the upper half is smooth without any mechanism to pop out the final part. The dottom half has a hole to inject the resin.
Here are the steps in a quick format (detailed one will follow in the Instruction writeup):
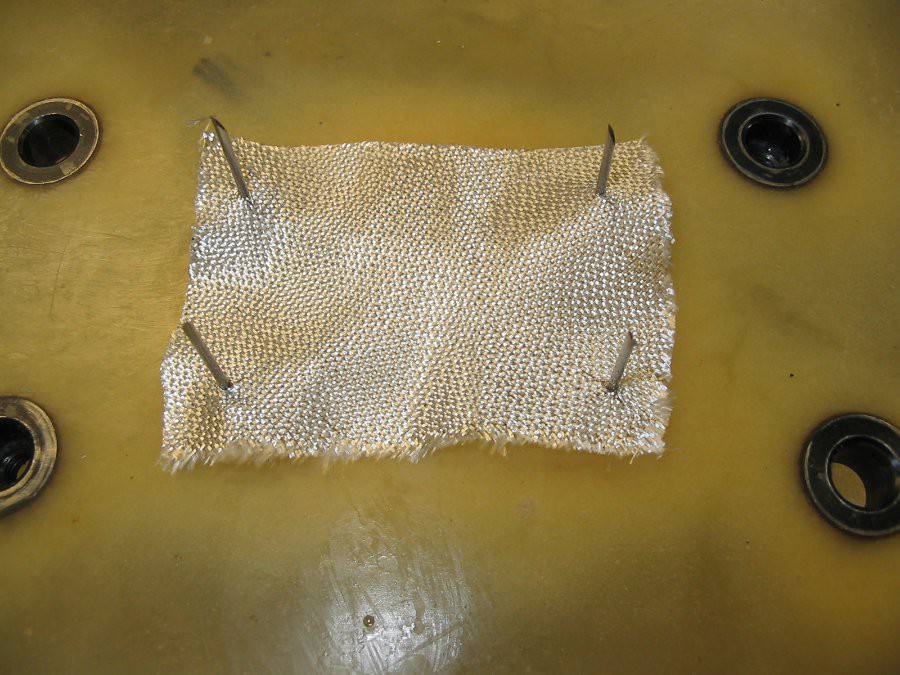
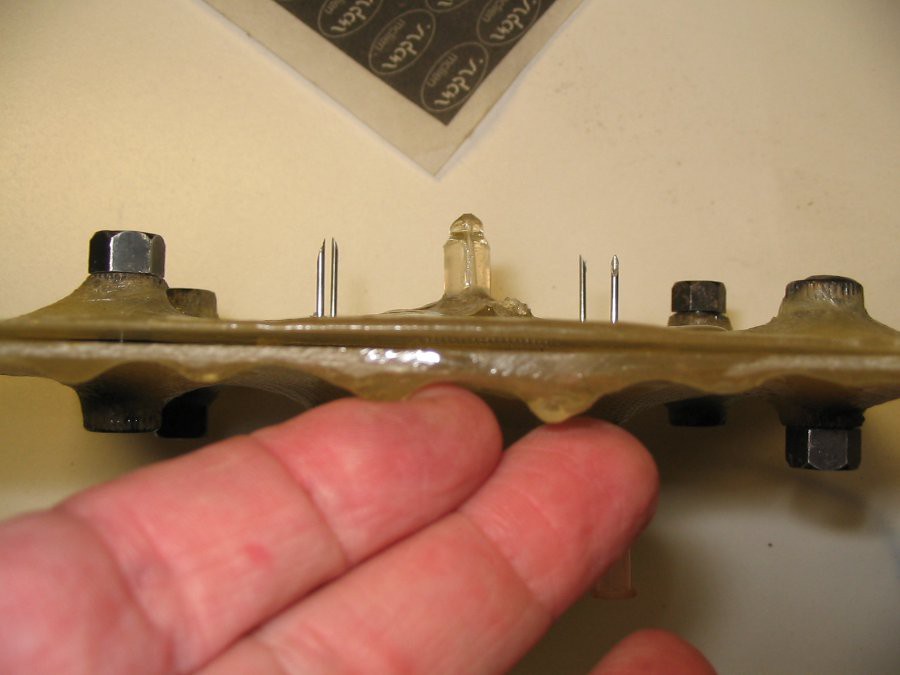
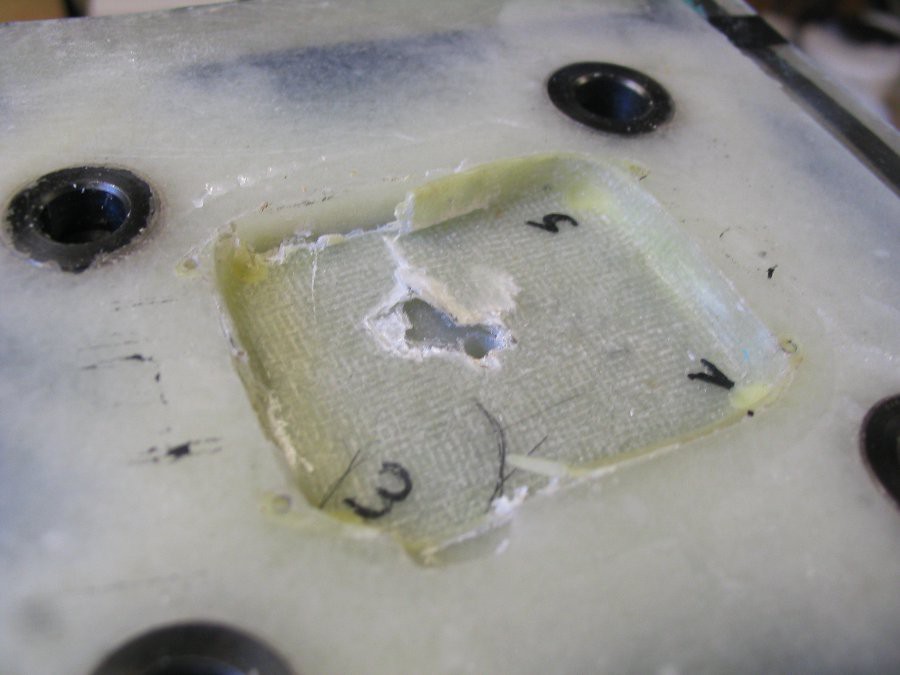
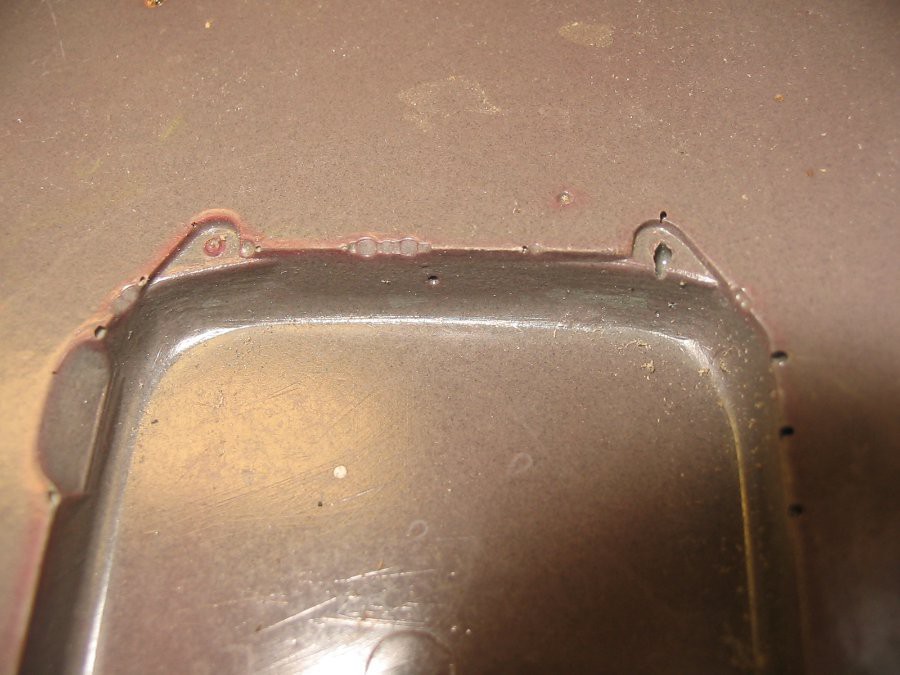
We start upsite down with the mold for the outer shell and the cannulas in place.
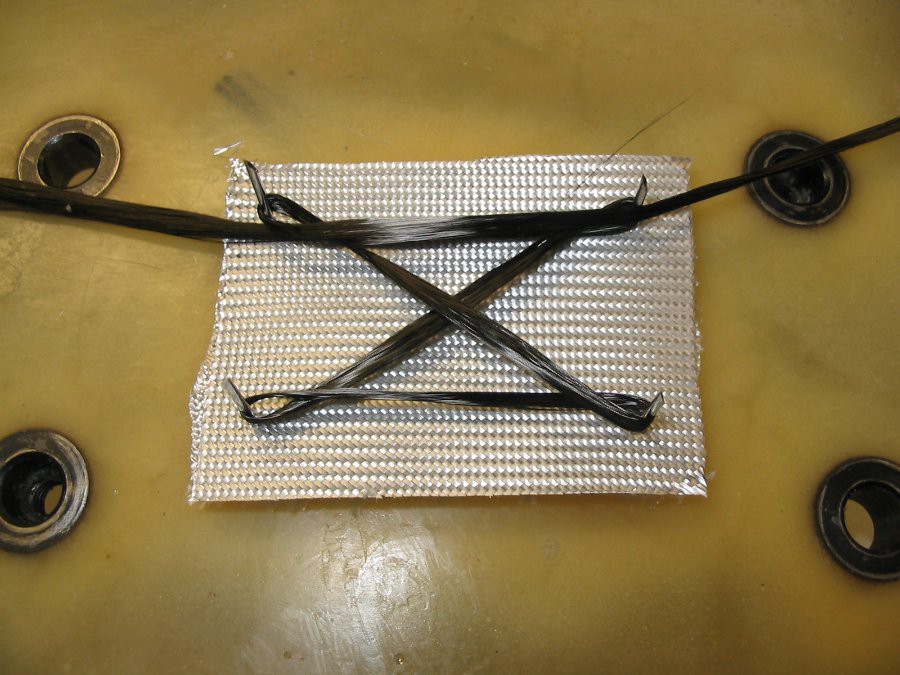
left: first layer: glass right: design fabric and carbon fiber
![]()
![]()
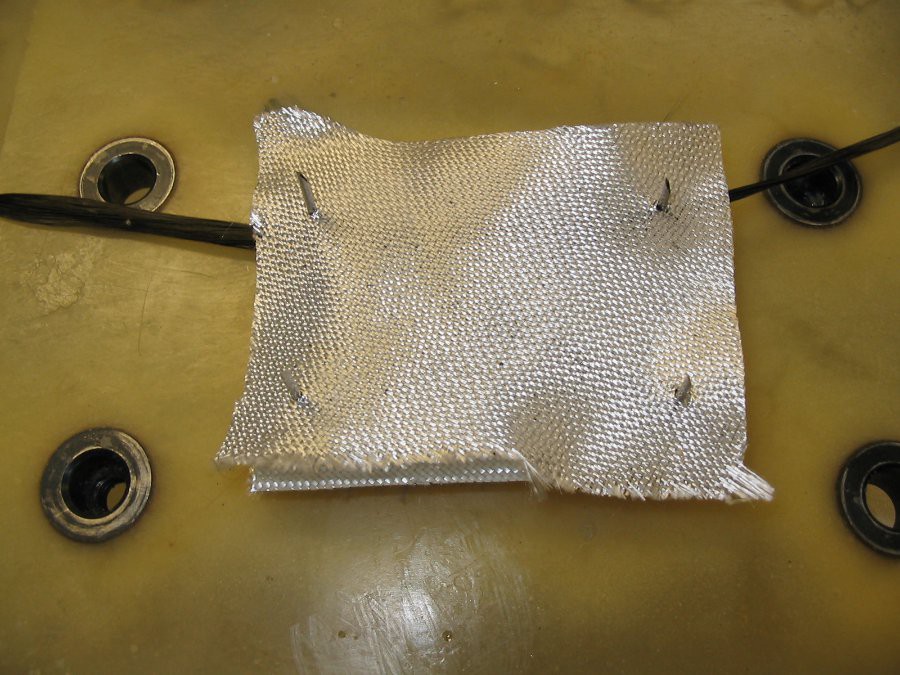
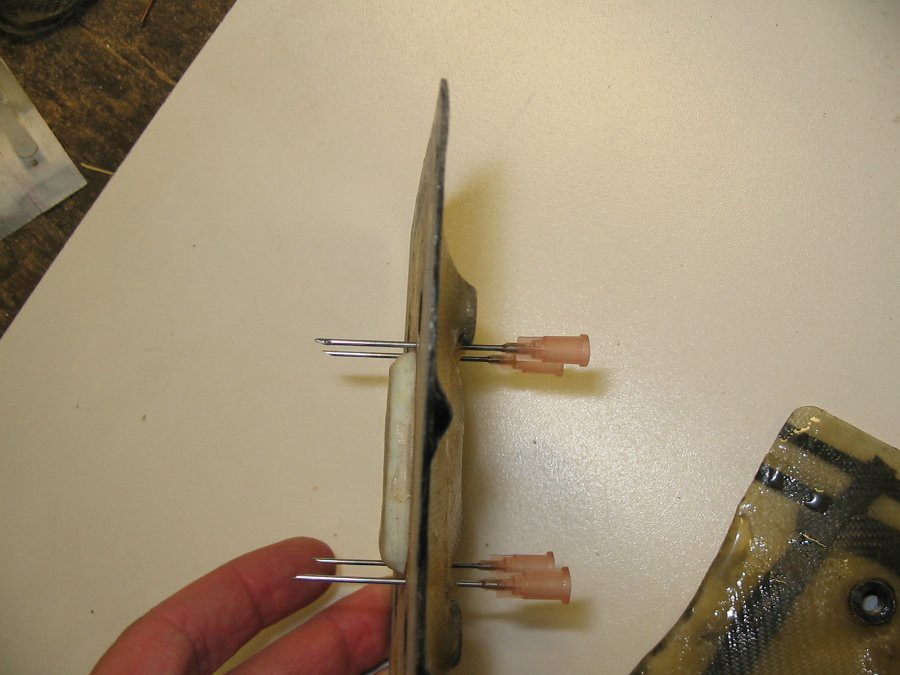
left: last layer of glass fabric right: whole stack with the 2nd half of the mold
![]()
![]()
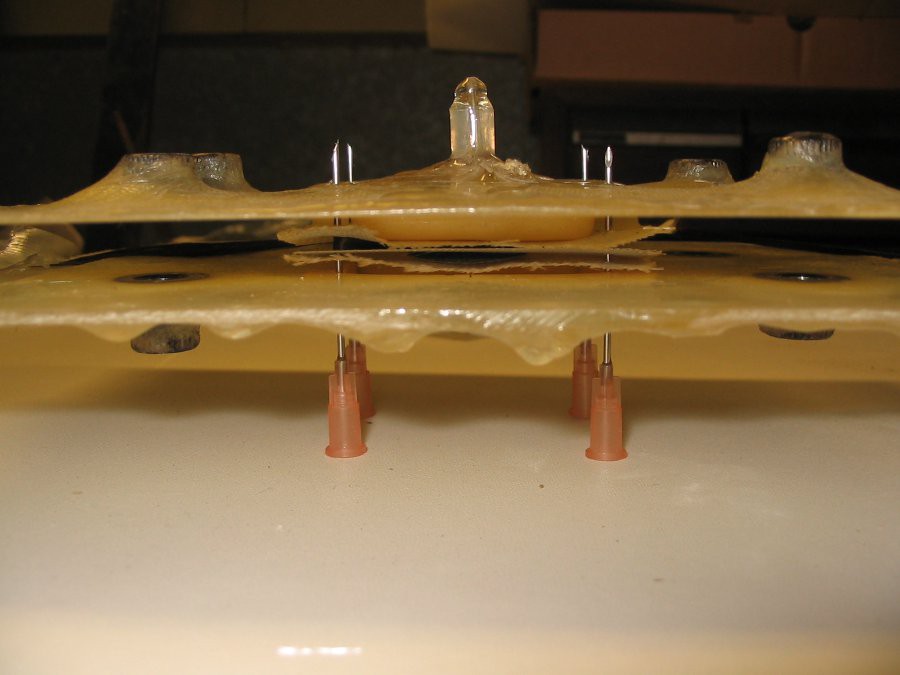
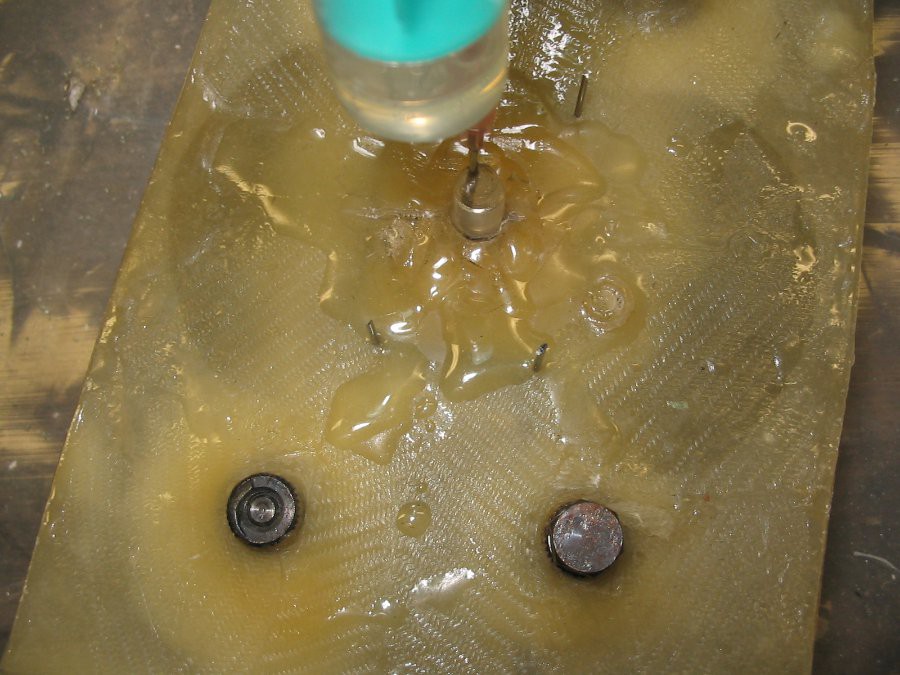
left: leave a small gap between the mold halfes right: injecting the resin
![]()
![]()
The injecting part is the tricky one. The resin is sucked into he fabric SLOWLY, so it's takes again some try and error to get a feeling at which pressure and in which speed the resin goes into the mold. Additionally it's somewhat difficult to get the right depth for the cannula, because a blunt one is closed one it touches the mold half. Using a sharp one is tricky too, because it dosen't spread the resin in all directions evenly. Good part is, as you see in the last picture, you can see how the resin spreads, that is the reason why using standard resin give an advantage here, because it stais a little transparent (which special form resin doesn't.
The rest is waiting for cure of the resin and unforming.
(After I get my digicam working again I'll start the Instruction writup with some more details)
-
Mold fails, #3
09/02/2014 at 21:16 • 0 commentsSo the plan to use a fiber wrapped around a mold part for stiffer mounting holes worked from the stability part, they failed in correctness.
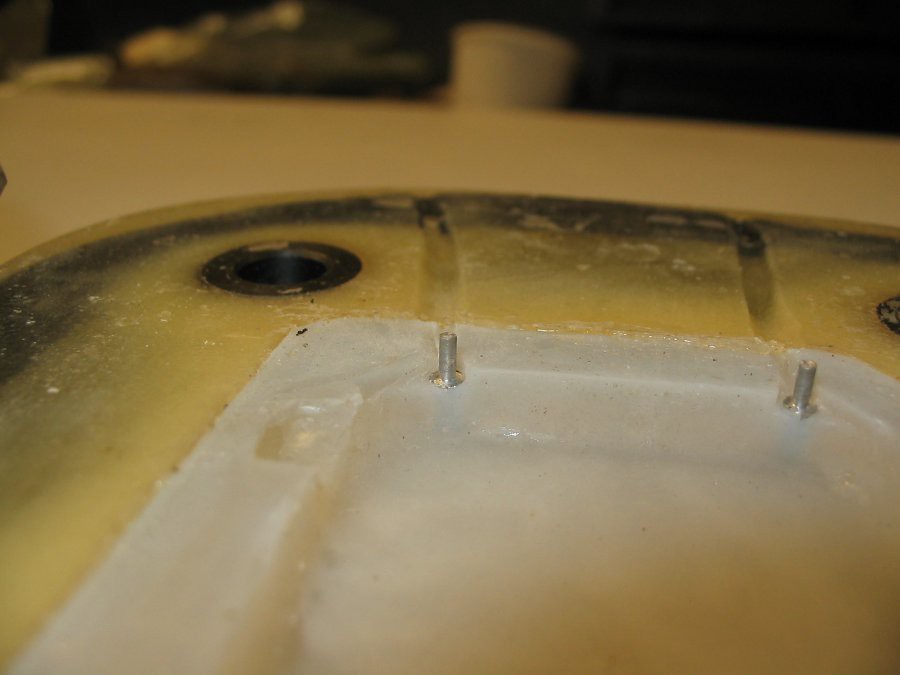
Main goal was to find another way to form these parts. After a while I found the ideal "posts" for that: ultra smoothe surface, stainless steel (which makes it easy to release, because smooth surface and stainless steel don't stick very well). A cannula! (cost next to nothing.)
embeded them while building the mold:
![]()
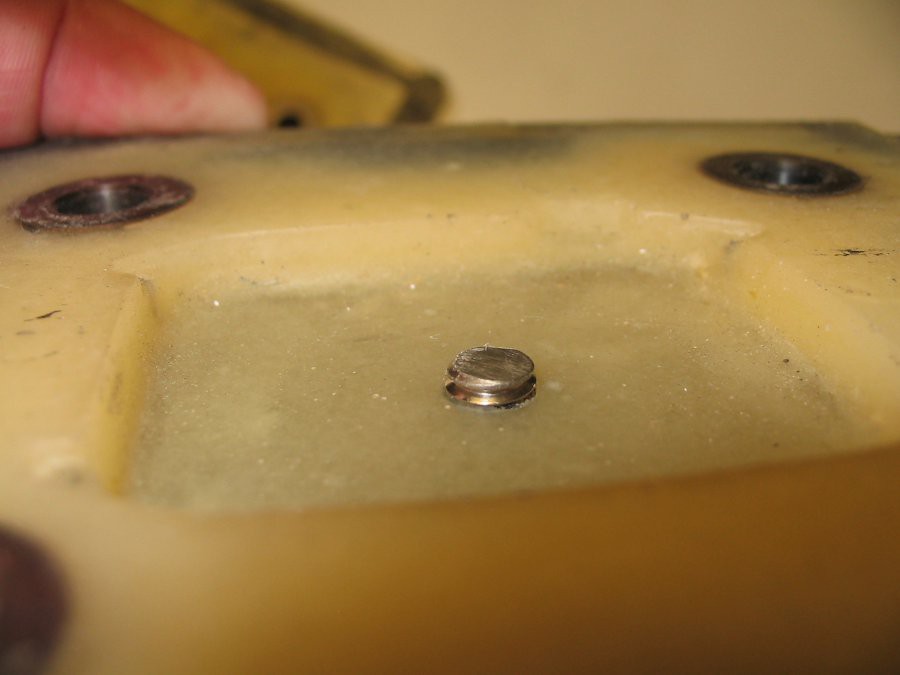
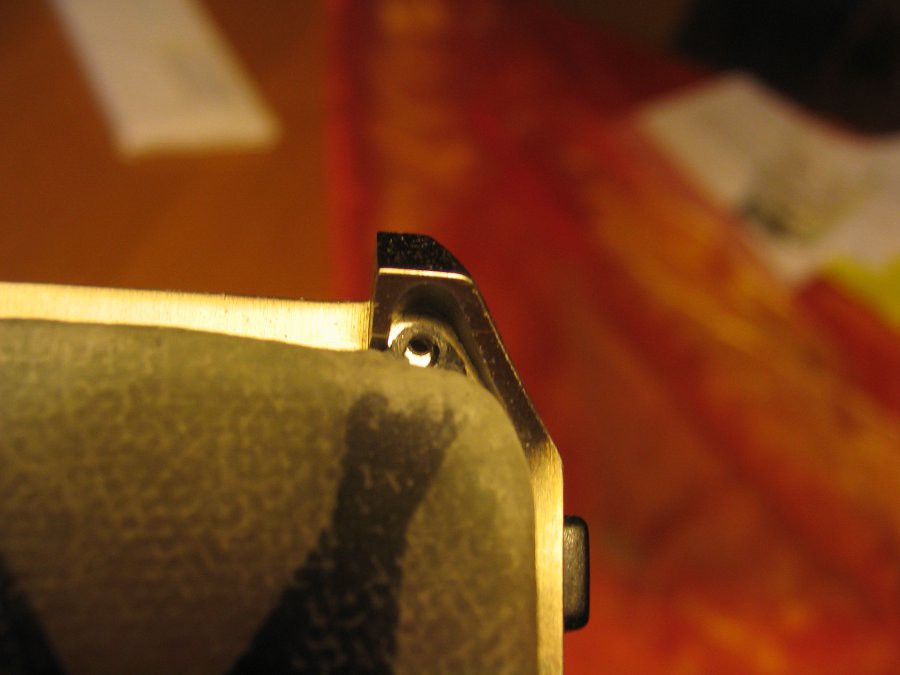
For the top part I places a screw within the mold, which I planned to use as a method to "push" the part out of the mold:
Left: position while making the part right: "push out" position:
![]()
![]()
And the outcomes:
left: using the push method right: using stiffer fabric to avoid outcome #1:
![]()
![]()
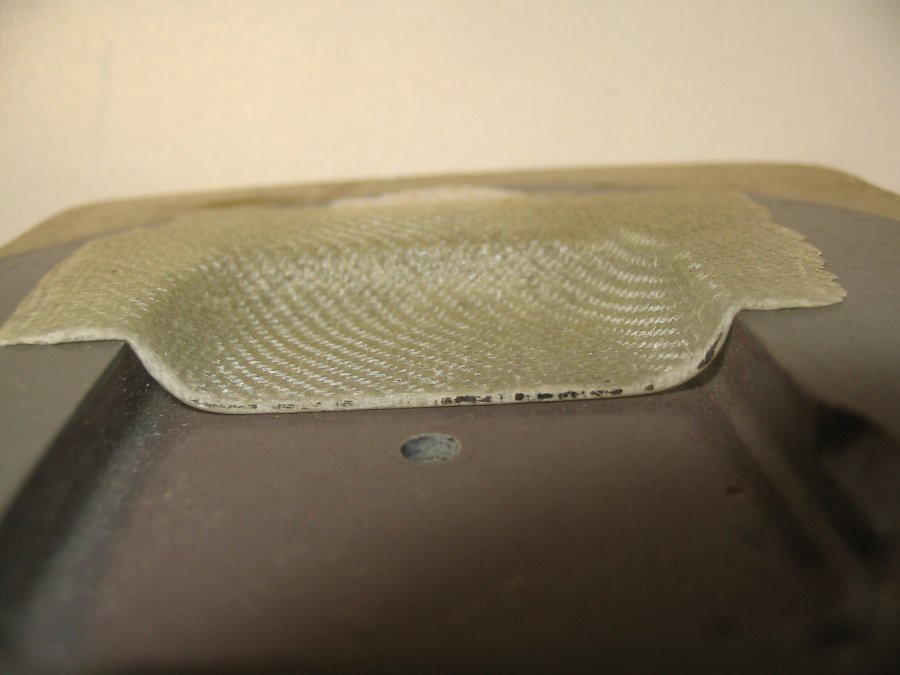
Problem with method #2 is that you enclose air, when putting fabric in the mold that is already succed with resin. With some pratice (using lots of resion in the mold to avoid enclosing air, lots of mold release agent) I got better parts, but still with ugly marks on the surface:
rleft: how the carbon fiber goes into the mold left: the parts with the mentioned marks:
![]()
![]()
Next post will be the working mold, after that I'll start the insruction how to make it right (summary of my experience ). Thanks for the patience ;-)
-
Mold fails, #2
08/24/2014 at 17:11 • 0 commentsThings I learned from the first mold:
A) single sided mold and vacuum won't work
B) getting the parts out of the mold will perhaps break somthing
So I came up with the next mold. 2 parted, closed and with an extra layer of mold silicone to make possibly undercuts less problematic.
First, of course I needed a original part which was shaped correctly on the outer AND inner side. I did this by appling resin and cottonflocks in the missing corners of a bad part. just smeared some of it in the corners of the mold and pressed the part in, removing all resin that squezed out in the process. After curing I used a dremel and dentist millers to get the correct shape:
![]()
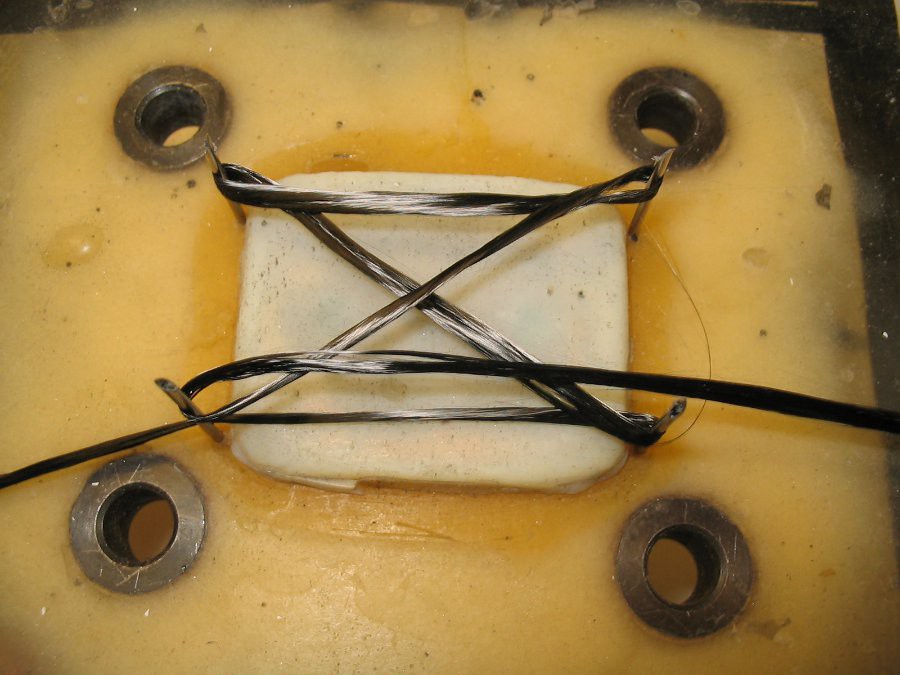
From that I got my new mold. For the mounting holes I used turned parts to represent the mounting holes:
(for the parts a carbon fiber ist wrapped aroud these parts):
![]()
![]()
While the trick with the carbon fiber worked fine, and releasing the parts from the mold worked as expected, there is a major backdraw:
![]()
closing the mold gives quite some tension onto the carbon fiber and for silicone isn't the stiffes material known, it was clear to my why this happens (not before I did it of course).
-
First parts ..not
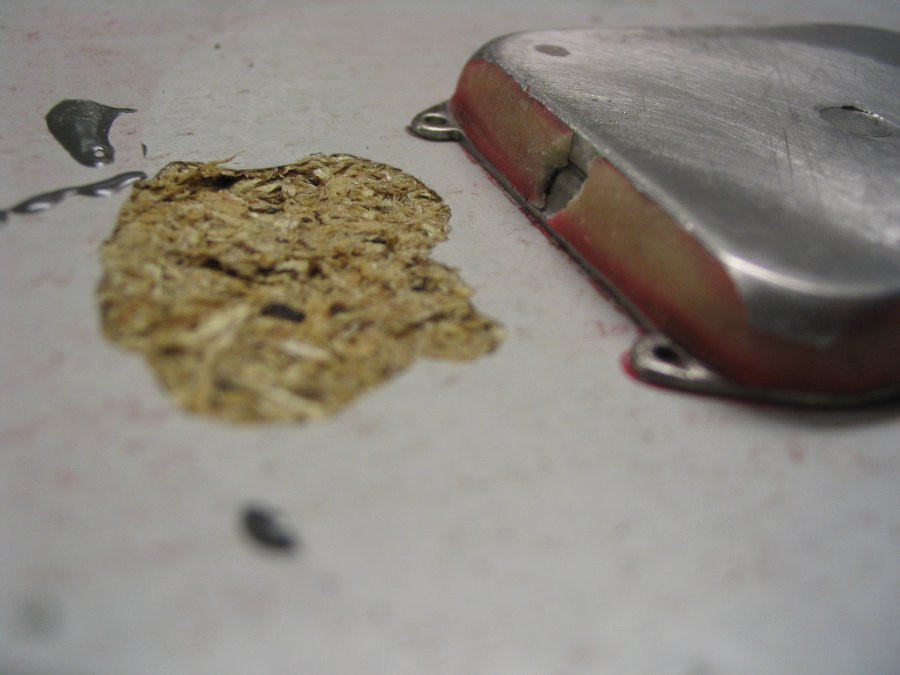
08/24/2014 at 15:56 • 0 commentsNevertheless I decited to start wirst parts for testing the mold. Plan was to just laminate 2-3 layers of glasstwill (this time very light one, about 105gr/m². lightest twill I could get), stuff it into a plastic bag and suck out the air with a vacuum pump to get the fabric squeezed into the mold.
Well, while that works in bigger shapes, the outcome of my fisrt try was this:
![]()
I cutted it in half to get a better idea of what happend. As you see by using only the vacuum it won't work.
After that I did some additional runs in teh same way, but this time I started with only little negative pressure (using a little vavle wich regulates the airflow by open the vacuumback controlled to the environment). In that setup I was able to push the fabric tino the corner t0gether with the vacuumbag. During the pricess I regulated the presure until the fabric was pushed into the corner a lot better.
I ended up with a much better outcome, but was never able to get all corners perfectly. In addition to that the mounting holes for the screws were never filled withe enough fiber. I tried to just repoduce the straps and drill the hols afterwards, but non of those methodes ended up in a durable strap with mounting hole:
![]()
So 2 things weren't working:
1) a mold with only one half and the use of vacuum
2) mounting starps which have no, no oriented or cutted fibers (by drilling the holes later)
-
Mold fails, #1
08/24/2014 at 15:32 • 0 commentsFor the first mold I applied anthor layer of form release agent (some PVA film material, dissolved in alcohol), which tends to build bubbles, whch won't colaps from appling the resioin.
So the outcom wasn't that nice. IN addition to the the perfect reproduced bubbles other parts of the mold had failing release agent so the outcome was poor:
Left: mold with the brocken parts of the original right: perfectly reproduced bubbels.
![]()
![]()
Left: broken parts fo the original parts Right: crack between the original backplate and the newpart
![]()
![]()
-
Case, outer shell #1 (outer dimension)
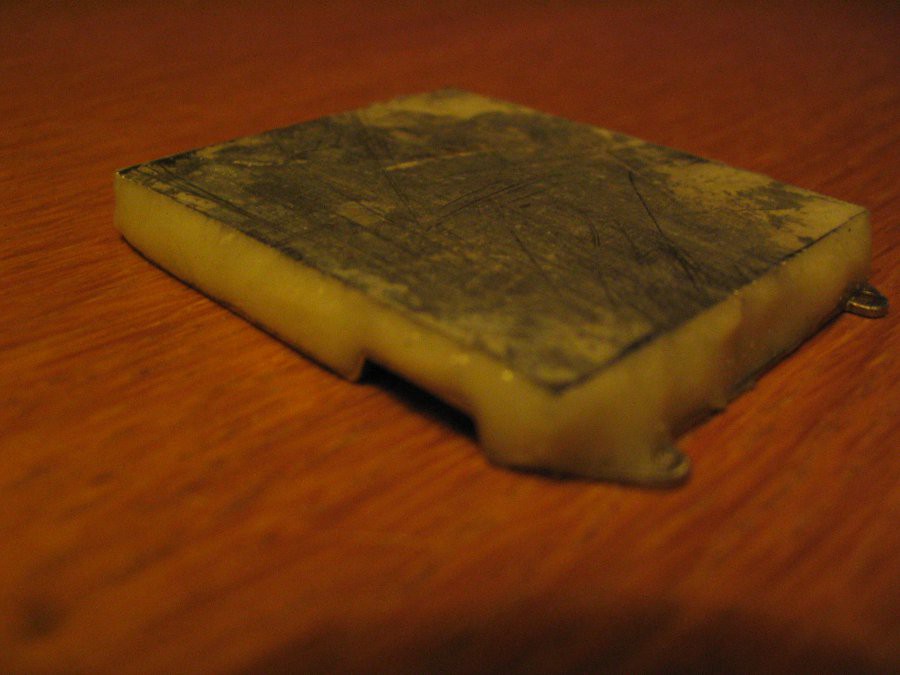
08/23/2014 at 17:32 • 0 commentsI started by using the original back plate and glued a piece of aluminium, 3mm thick, on the back and filled the gaps with a mixture of resin (all resin is epoxy) and cotton flocks:
![]()
![]()
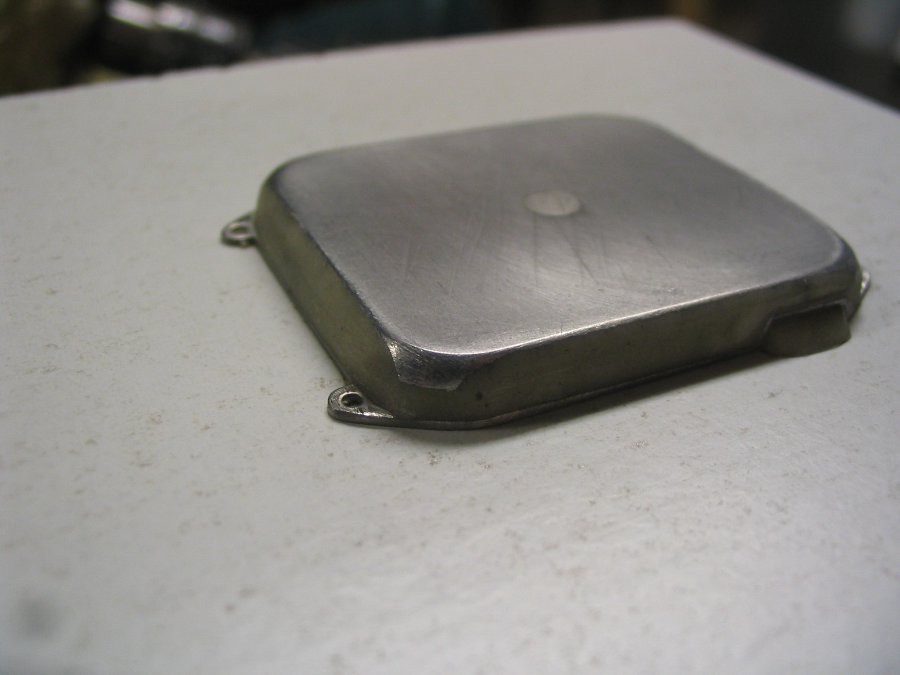
After some rasping and grinding (and appling some resin (with cotton flocks to get a mark for the future USB port ), we have something like this:
![]()
I perhaps somehow fixed that in the coated wooden plate you see here, but I can't remember how. I possibly simply glued it there or fixed it with a metric screw from unterneath. Both will work anyway. Imortant part is, the smooth surface will be the separation plane for the mold.
For this tiny parts the mold release agent I use is wax spray. Apply at least 3 layers (I use 7 often: paranoid mode).
To build the mold, the first step was to apply a layer of special mold resin, which should cover all parts of the original plus som space around. Then comes the tricky timing part, where you need to wait until the reisn is cured in a state, where it's solid enough to not immersing any fabric, but still stick enought to make a good connection to the next layer of the mold.
then you start to laminationg several layers of glass fabric and resin (something loike 5-7 layers of glass twill [163gr/m²].
(Sorry, no pics of the process here. Mostly I work on my own and you simply don' want to touch your digicam while hadling resin...)
-
Packaging (aka finding batteries)
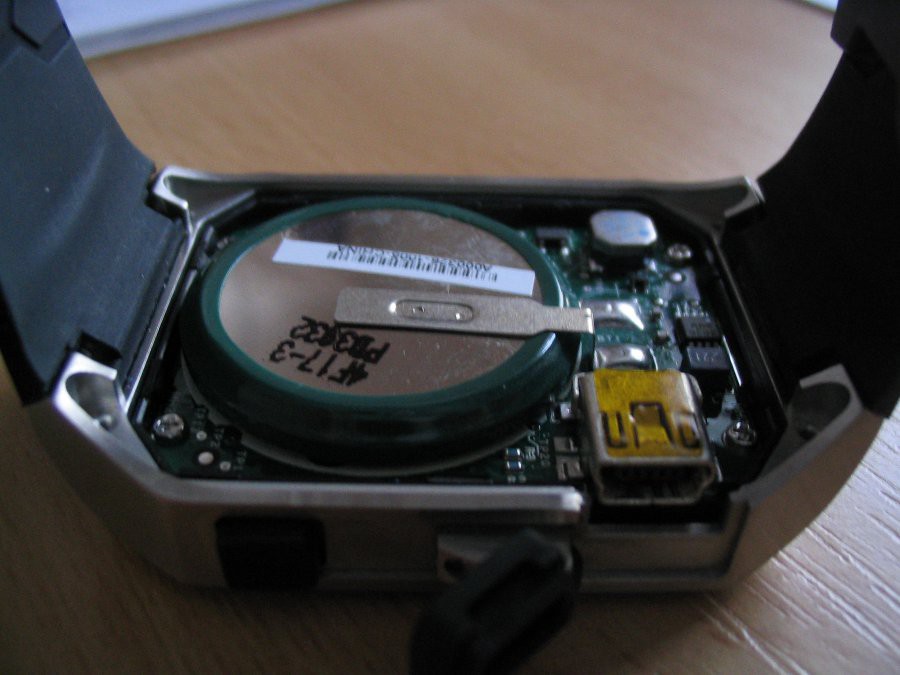
08/23/2014 at 16:59 • 0 commentsFirst of course, open up the thing and remove the old battery, right the new pair of batteries:
![]()
![]()
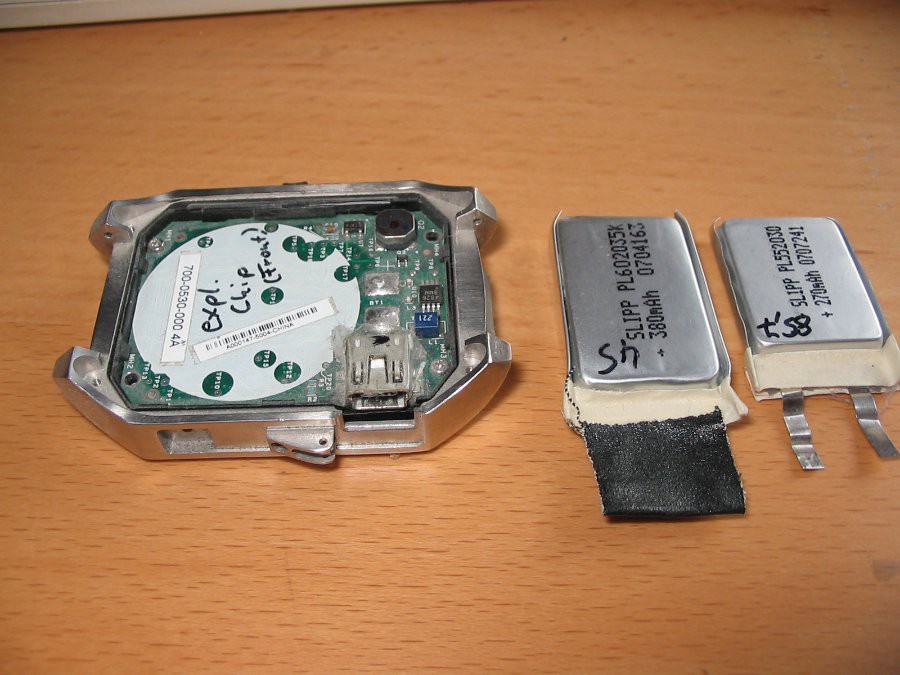
I digged through a lot of sources until I find the above 2 batteries (a 380mAh and a 270mAh), which (very tight) fit like this:
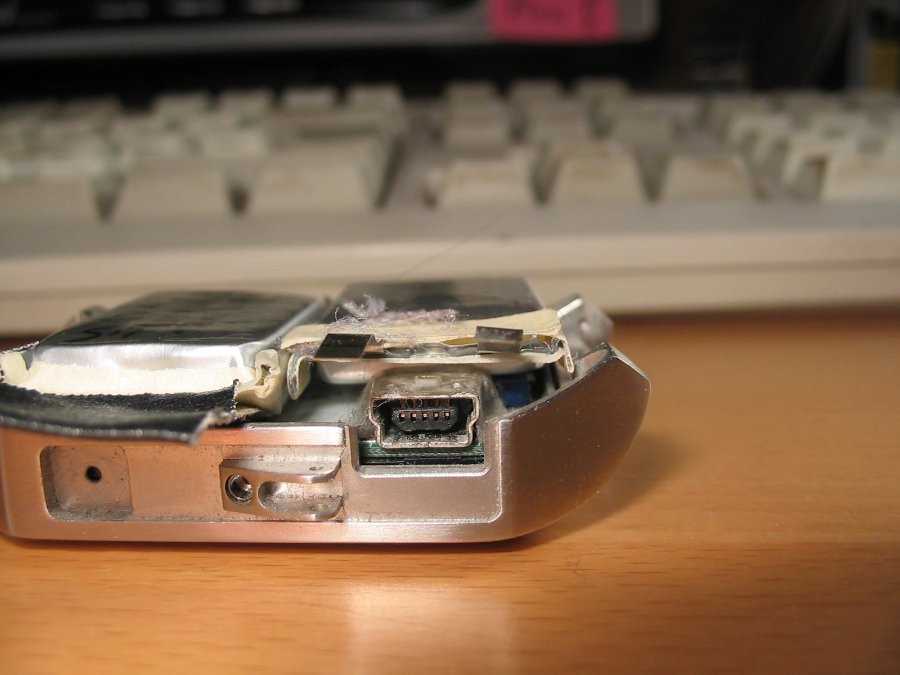
(topview. Yes the contacts o
f the bigger one stick out, but are to bendinside. sidevies: how the smaller battery gives space for the USB port):
![]()
![]()
I thought, if I could use a bit force it should fit in a new case using the whole area of the PCb and only 3mm in hight.
WristPDA (Abacus) Battery upgrade
more than 3 times battery capacity, by building parts of the case/ housing entirely from scratch