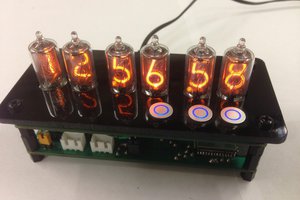
Make a desk clock with vintage IN-12A nixie tubes.
IN-12A Nixie Clock Project
Make a clock with IN-12A nixie tubes.
Make a clock with IN-12A nixie tubes.
To make the experience fit your profile, pick a username and tell us what interests you.
We found and based on your interests.
Make a desk clock with vintage IN-12A nixie tubes.
nixie.lbrIN-12 eagle librarylbr - 11.08 kB - 12/24/2017 at 12:31 |
|
|
main board_Rev.A.brdIN-12A nixie clock's main board (Rev.A)brd - 197.39 kB - 12/20/2017 at 14:14 |
|
|
main board_Rev A.schIN-12A nixie clock's main board schematic (Rev.A)sch - 667.78 kB - 12/14/2017 at 12:01 |
|
I ended up requesting the parts mounting on the main PCB. Perhaps the PCB is likely to arrive in a few days. I'm planning to separate the SMPS from the main board because I want to make a clock that is small, slim, and does not have a lot of heat.
I am not good at soldering. I tried some soldering parts on PCB last time, but failed many times.
So I decided to use PCB production services to save time and money (and health).
This service is a little(or a lot) expensive, but it doesn't matter to me if I not have to smell the flux... :-)
When I finished it, I'll upload it.
The nixie clock's main board that I ordered last time has arrived. (Delivery was faster than I thought ;D )
I ordered ceramic capacitors and several types of 3216 type resistors needed for PCB assembly.
Since the 0.1uF ceramic capacitors were rather expensive, I purchased tantalum capacitors instead.
Because the tantalum capacitors have polarity, I have to mark polarity with a marker pen on the PCB while checking the brd file.
I hate the linear constant voltage IC very much ( For example, 78xx series)
They are difficult to deal with the heat issue. SMPS, however, generates little heat.
I made reference circuit of LM2575 5V.
It generates almost exactly 5V when 12V input is applied.
As planned, nixie tubes are mounted to the top PCB via D'SUB pins. But the pins of nixie tubes are twisted little by little, so I plan to connect the tubes with a standard cable.
I've looked into the IN-12 library to make a "Nixie Board" PCB on which nixie tubes are mounted.
Libraries could find many kinds of things on Google. However, most were slightly different from the datasheet or fitted to typical nixie tube sockets. So I decided to create my own library. Because I decided to use pins from D'SUB instead of a socket to plug in a nixie tube, I also made the hole size for the D'SUB pin. The library contains IN-12A and IN-12B. I uploaded my library.
So it doesn't fit slightly with my library. You need to modify the pin position slightly to fit into your tube. Alternatively, you can increase the size of the hole so that the pin can fit into the hole.
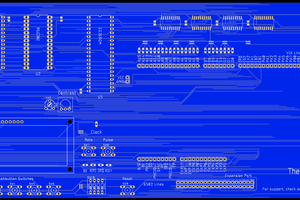
I've finished checking the PCB of my nixie clock's main board. The size of it is 180mm x 50mm. Isn't it small enough to make a desk clock? I have made modifications to the packages of the libraries in Eagle, making it easier to solder the PCB. (Especially I'm beginner in SMD parts soldering) The HV5622 is placed on the bottom side to simplify routing.
I uploaded the completed board file. If I place an order with the PCB manufacturer, I can receive it after one week. In the meantime, I'll try to develop "Nixie Board" and SMPS. (And I'll order some kinds of overseas stock parts in advance.)
I just finished designing the IN-12A nixie clock's main board. I replaced the THD type 2n7000 FET with the SMD type 2n7002 FET to make the main board smaller. I also used the HV5622-PJ directly on the board without using a PLCC44 THD socket. (It is a little difficult for soldering - Could you tell me how to easily solder the PLCC and SOT-23 package? :D) There is no problem with DRC but I will check again if there is something wrong with the PCB and upload the file by tomorrow.
▲ Yippee! No DRC errors!
▲ All routed main board.
My HV5622 serial-to-parallel converter's recommended operating voltage is 10.8v to 13.2v. I wanted to use 12V logic on it, but my MCU uses 5v logic. So I used a MOSFET-based level shifter(The circuit based on this site).
I tested the circuit in my breadboard. The 5v logic connected to the switch(Don't let a pin floating in logic low!) and the 12v logic connected to the multimeter.
That's great!
And I'm doing PCB design of my nixie clock's main board these days.
I ended up drawing the IN-12A nixie clock's mainboard schematic. In schematic, The "pcb header" is the header that connects the nixie board and the power board. Pin A0~F9 is the nixies' cathodes. ( AB : hour, CD : minute, EF : second ) And 5v, 12v, GND is from power board(I'll make it later) I checked the schematic twice, but let me know if you have a better idea or my circuit has a problem. :)
Parts in the schematics are likely to arrive pretty late because of overseas delivery. In the meantime, I will order a PCB board and design a circuit for a nixie board and a power board.
I tested a IN-12A nixie tube. I want to use a nixie socket to use a nixie tube, but it is so expensive to buy one. And then, I found this site. So I decided to buy D-SUB. Today, it arrived. I tested the nixie tube. It is super easy to make D-SUB connector into nixie socket. Just break a metal cover and get plenty of connectors! It fits tightly into the nixie's pin.
It's perfect! And I tested the nixie with jumper wire.
The nixie tube's condition is very good! I love this orange glow discharge.
And I drew my nixie clock's main board schematic. I'll check it one more time tomorrow and then, I'll upload it.
Create an account to leave a comment. Already have an account? Log In.
Become a member to follow this project and never miss any updates


 Josh Kittle
 Jacob Still
 Mike Tripoli