Close
0%
0%

OpenTransport

Arduino-Based Open-Source Transport Controller for DAWs and DVWs

Similar projects worth following
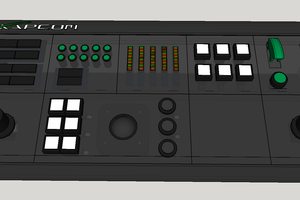
OpenTransport is an open-source, open hardware transport controller for DAW (Digital Audio Workstation) and DVW (Digital Video Workstation) software. It's meant to provide an easy to use and easy to build external transport control surface for those unwilling or unable to spend the incredible costs of a professional control surface.

After becoming tired of how prohibitively expensive audio control surfaces like the Mackie HUI and Avid's Artist Mix are, I decided to build one of my own. However, I'm still very noobish when it comes to making electronics, so I decided to start small by making a device that can handle transport controls (play/pause, stop, ff, rew, rec), scrubbing, a few keys for software specific tools, and a screen to provide a built in interface for switching configurations to suit popular DAW and DVW softwares. It'll work as a Midi device, which would make it more universally compatible making it less work to add support for other DAWs and DVWs.

The idea is that, in the end, it will be daisy-chainable with other modules (track faders, timecode readers, etc) that I'll build as I learn more.

UPDATE: The project is in a stable and useable state, but there is still a bug I've not worked out yet and features I've yet to implement. See the build log for details.

  • 1 × Arduino Micro or Leonardo
  • 2 × rotary encoder with switch
  • 8 × NO Momentary Panel Mount Push Buttons
  • 1 × 2x16 LCD Character Display w/ I2C backpack
  • 1 × 3D Printer

View all 6 components

  • Stable and Useful

    Victor Frost11/03/2014 at 20:23 2 comments

    So, I've been using this little gadget for about a month now with no changes in the code and it's proven pretty useful. It works 100% as intended and, even when it's not plugged in, I find myself unconsciously reaching for it when editing. I think that is a great sign. The wiring is still a mess and I've yet to make a proper enclosure for it, but I think I'll do that after the holidays when I have the time to get my hands on some wood and craft the case.

    There is a hiccup I've been noticing, though. For no apparent reason, it will sometimes refuse to send any signals and won't go back to work until it's been reflashed. This only happens after a powercycle and I can't willfully reproduce it. I'm sure the problem is in my coding, but I don't know where since it compiles just fine. I'll have to ask someone to look over the code and see where the problem lies. *shrug*

    The next step is to make the menu system and finally put that top encoder to use. I may also use the button on the bottom encoder to set a multiplier for scrubbing speed.

  • Code v0.1 Done!

    Victor Frost09/28/2014 at 07:14 0 comments

    So the first real version of the code is done! Check the link in the project links area for the main Git resource where you can download the code. 

    So, instead to starting with keyboard shortcuts, I decided to skip right to doing it properly with Midi. The available controls are: play, stop, fast forward, rewind, record, loop, and mackie keys Function 1 and Function 2. Most DAW and DVW software allow you to map function keys to whatever you want, so I mapped mine to adding a cue marker and the split clip command (the two I use the most). 

    It's taking a lot to resist feature creep. I'm really tempted to move things around and add a joystick(with select) to allow the ability to move the cursor around in the DAW. That sort of thing is useful for moving from one track to another, at which point you can arm tracks separately (ANOTHER BUTTON), adjust track volumes (a pot)... Feature creep is a dangerous thing.

    A couple of things I do want to add, however, is a nice menu system on the LCD. Maybe to change display options. Something like displaying the current timecode or using the LCD as a VU meter for the master channel.

    Going back to the subject of feature expansion, for a moment: I'm thinking that maybe the best way to do that is modularization. Have the transport controls be one device and then maybe make it so you can connect another module (say, a single track fader with mute, solo, and record arm buttons) via a port on the side. Maybe serial to serial connections, with the master device (the one connected to the computer via usb) passing the midi commands right through. Strictly speaking, this should already be possible. Maybe I'll test it out once the menu and lcd stuff gets done.

  • Spiritual Design Ancestor! (also some code)

    Victor Frost09/24/2014 at 08:25 0 comments

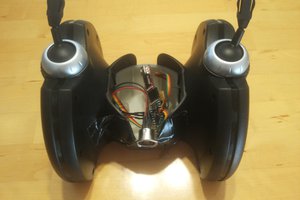
    I found the spiritual design ancestor of the design of OpenTransport at the local Goodwill. In retrospect, I probably should have bought it and re-used the case. Ah well.

    Also, I added the code I've been using to test the wiring, buttons, and libraries to the project links.

  • Hardware HO!!!!!

    Victor Frost09/16/2014 at 08:40 0 comments

    So, it should be said that this thing will, ultimately, be made out of wood and maybe some metal bits. No, I'm not trying to push some artisanal bullshit; I just really like the aesthetic of those old wooden cased radios. I got my degree in radio, so I may be biased. 

    ANYWAY, I couldn't really just have all the parts just loosely connected to the arduino while testing them, so I had to create something to mount them all to in the

     same basic shape of (what I think will be) the finished product. 

    TADA!!!

    Yes, my piece of shit, temperamental as a teething two year old PrintrBot Plus V2.1 finally managed to do something right for once in it's make-Victor-miserable existence and successfully print something larger than a USB key. 

    Mind you, that whole back wall warped and split its layers and had to be removed, but 90% successful is still an A.

    The testing platform perfectly fits both rotary encoders, all eight switches, and the 16x2 LCD with the bonus that there is enough plastic around the LCD that I was actually able to attach it with screws. Now, you may cringe at my wiring, but here is a picture of the underside. I do think I was clever with the weaving of a single solid core wire for all of the ground terminals of the switches.

    Now that all the hardware is at a point where I can start coding, it's time to start hoping.

    Shit.

  • On Inspiration, Drafting, and Part Collection

    Victor Frost09/09/2014 at 22:57 0 comments

    So it all started with a trip to Guitar Center. I wanted a control surface and they typically have good equipment for cheap. But BY GOD were they expensive. I always knew control surfaces weren't cheap (new ones for home studios running from $1000 up to $3-4 thousand), but even the used ones were in the $500-700 range. As an audio engineer, while I know how nice it is to mix with a nice, smooth, and shiny control surface, I also know that a control surface doesn't do a single thing to improve the sound quality of a mix. I was not going to drop nearly $1000 on a glorified mouse and keyboard.

    And that's, to use the cliche', when it hit me. Arduino's can fake being keyboards and mice. I know all the keyboard shortcuts, so why not make one? 

    But I'm not stupid. I know my level of skill is low, so I decided to start small and make a simple control surface. I settled on making a simple transport control surface. Limiting myself to this meant I didn't have to deal with midi and really could just have it be a keyboard emulator. 

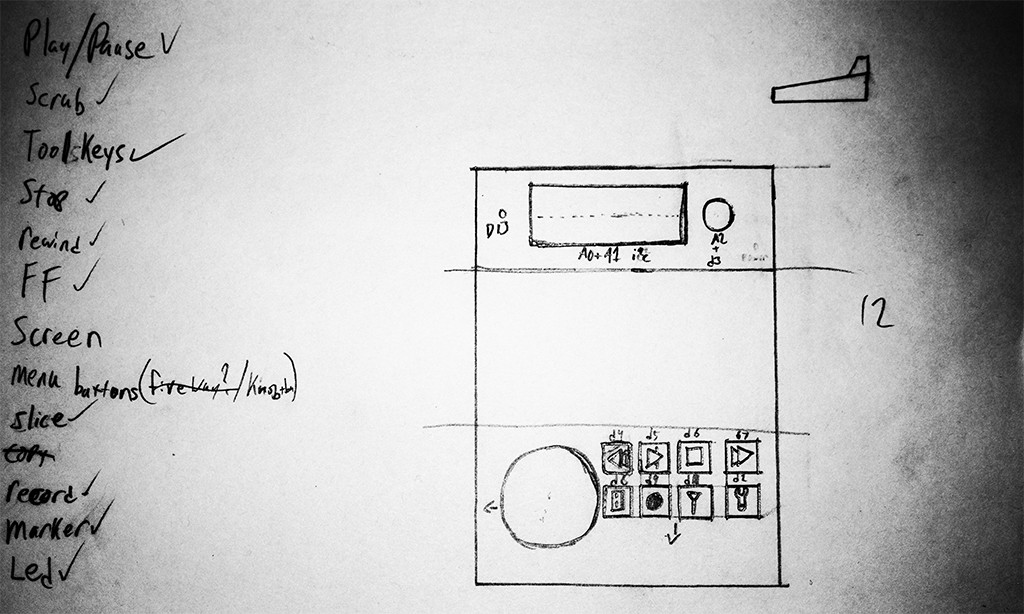
    On one of our many late night trips to Denny's, My friend Amanda and I sat down with some paper and pencils and began drawing: her, long flowing arcs becoming figures; me, straight lines, sharp edges, kept tidy with a ruler and eraser. I had a first draft of the hardware.

    After listing out what functions I would actually need from it, I decided to cut out the middle segment entirely.

    I did figure out, though, that I would need a rotary encoder: a thing which I have never used. I mean, I have lots of things with rotary encoders in them, but I've never has one as a part. And, it turns out, it was harder for me to get my hands on one than I thought it would be. Neither RadioShack nor Fry's Electronics had any and, frankly, I didn't want to wait for one to ship to me. So, I started googling. 

    The first few places only dealt in large industrial rotary encoders. One place actually laughed at me when I asked if they had any $1-2 ones, saying that the cheapest one they have is 1-2 THOUSAND dollar ones. Shit.

    I did eventually find this place called All Electronics. They're fairly local (about a 20-30 minute drive) and they have a retail store attached to their warehouse.

    I cannot express to you the level of glee I felt when walking into this place. Don't get me wrong, it was a bit of a wreck in there. Messy as all get out, in fact, but it was the right kind of wreck. The same kind of wreck that a fashionista would fawn over if it was filled with nouveaux-retro-chic clothes (or whatever fashion is into these days) instead of oscilloscopes, bulk wiring, and connectors old enough to replace parts for one of the Apollo missions. If I had my wits about me, I would have taken a picture of this place. Next time, I suppose.

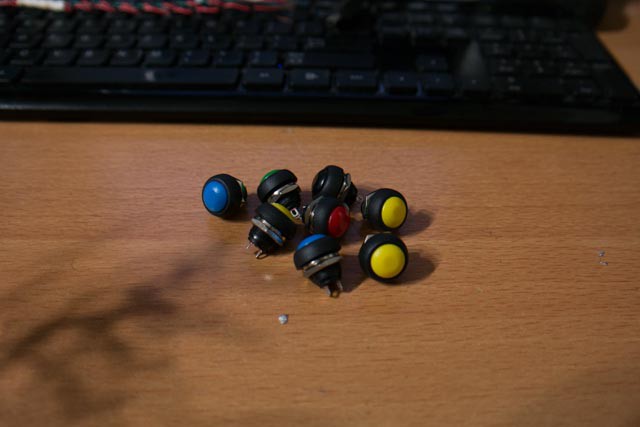
    Rotary encoder found and in hand, I set upon their shelves, looking to see if there was anything else I needed... and I found the most wonderful little panel mounted buttons ever. They looked like a cross between skittles and personality cores, but in button form, and they have the most satisfying click. In fact, it's less of a "click" and more of a miniaturized "clunk": like those big, red, industrial emergency stop buttons, but smaller. 

    Admittedly, they're cuter in person.

    I took the time to learn how to use a rotary encoder with arduino last night, and so I will begin refining the design of the physical device tonight... after the Hackaday meetup in Pasadena, of course. 

View all 5 project logs

Enjoy this project?

Share

Discussions

Alexandre Travi wrote 02/05/2020 at 17:18 point

Hi, where is the link for GitHub?

  Are you sure? yes | no

romandesign wrote 01/25/2019 at 18:21 point

Also, which version on GitHub has the most functionality implemented? I see some test ino files that look incomplete and one text files that looks the longest... Thanks

  Are you sure? yes | no

romandesign wrote 01/25/2019 at 18:18 point

Also, I see you connected a nice blue LED - how did you do that? Is it controllable by Arduino too, or just a light...

  Are you sure? yes | no

romandesign wrote 01/25/2019 at 18:17 point

Hi, Is there a wiring diagram for this project? How did you connect everything to Arduino? Did you ever solve the spontaneous freeze bug or implement top dialer etc.? I'm thinking of doing a Premiere Pro controller without MIDI control (via keyboard presses), with maybe top encoder switching between different application key maps for other apps - photoshop etc. So no MIDI, just key presses. This project is closest starting point I've found. I wonder if you did any work with it... Thanks.

  Are you sure? yes | no

[deleted]

[this comment has been deleted]

Victor Frost wrote 09/24/2016 at 06:55 point

Go for it! I wish you better luck than I had!

  Are you sure? yes | no

Daron wrote 01/21/2016 at 23:06 point

Very cool project.  Feature creep is definitely a real thing, lol!  I am looking to do a similar project, and I'm curious how you got the display the transport information from the DAW on the arduino LCD.  In my case, I want to display other track or software instrument information.  Are you using MIDI commands to receive this data?  Could you offer some online references/resources?

  Are you sure? yes | no

Victor Frost wrote 09/24/2016 at 06:54 point

I didn't. I just had the arduino display "Play" when I pushed the play button. Same with other buttons. 

  Are you sure? yes | no

Similar Projects

Does this project spark your interest?

Become a member to follow this project and never miss any updates