Ben Delarre
-
Animations!
04/15/2015 at 20:43 • 1 commentSo after you have a working LED matrix, you can't stop there. Otherwise you just have a big display running strandtest and that frankly just sucks.
We built a Javascript animation engine that we use to drive the display, this runs NodeJS which allows you to write Javascript in the browser, test out your animations, then push them to the server which will render them in real time and stream them across the wifi to the display.
This is an awful lot of fun, with just a few lines of code you can get some great effects really quickly. Its even become part of our front-end programmer test at Supplyframe!
So I thought I had best build some examples to show how its done, and recreate some of my favourite old school demo effects. The code for the Javascript engine, and all the animations shown below is in our public repository here.
Here's a video:
And here's some photos:
First up, pulsing colored lights with additive blending:
![]()
Next, the 'green meanie' plasma:
![]()
No demo would be complete without a mandlebrot zoomer!
![]()
![]()
Next up some blobs:
![]()
![]()
And of course your classic 3d textured tunnel:
![]()
A spinny cube!
![]()
Inside another cube!
![]()
And a nice simple palette based plasma:
![]()
![]()
-
It's alive!
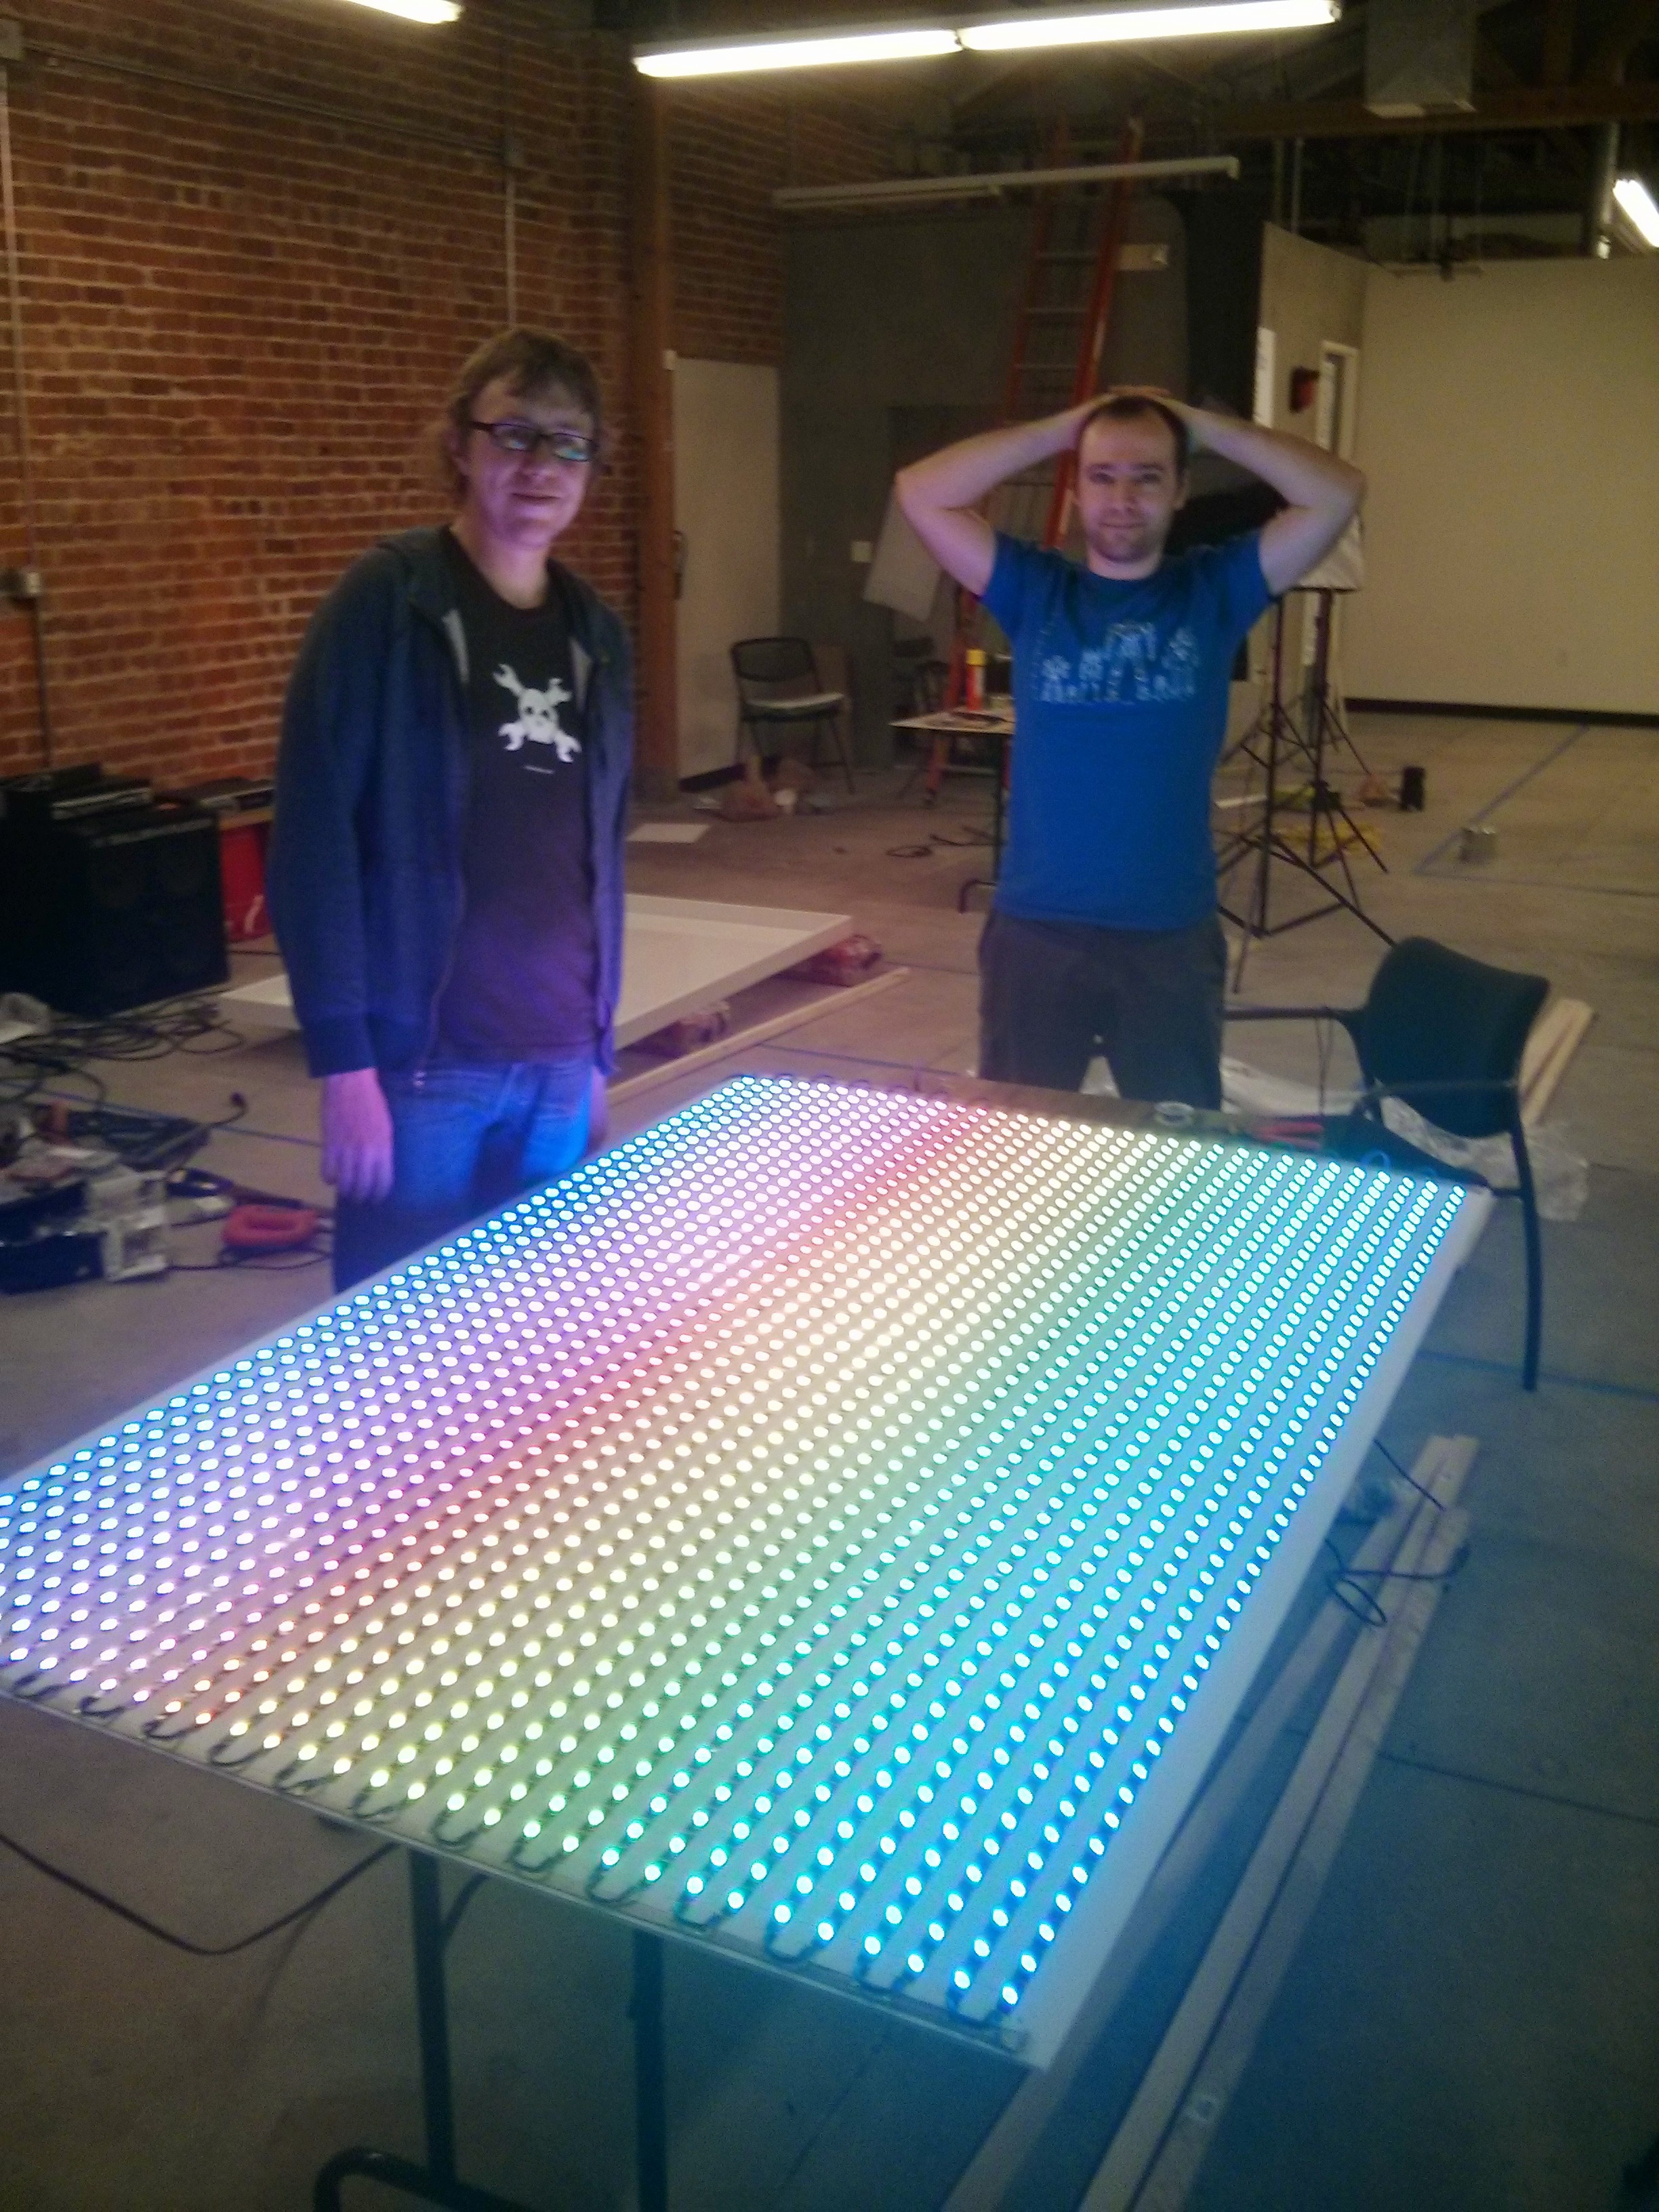
03/31/2015 at 21:13 • 3 commentsFinally, after much fiddling around, the upgrade to FLED is operational.
We're now running a grand total of 1768 LEDs, in a 52x34 configuration. The setup is a Beaglebone Black connected to an RGB-123 48 output cape. The cape level shifts the Beaglebone GPIO to 5v to communicate with the APA102 LED strips. We're running 17 strips in a 104 LED per strip configuration.
The Beaglebone Black is running two pieces of software, first a Go program which I'm currently calling GoFLED which receives color data from any number of TCP streams. This program can do a number of effects processing on the streams, such as blending them over each other, providing transitions between streams and allowing for brightness and other modifications. It also provides a web UI to visualize the streams over a web socket, and provide an interface for controlling the system.
Once the LED data has been calculated it is then sent over a TCP connection to the LEDscape opc-server using the Open Pixel Control protocol, this then sends the data out across the strips as fast as it can.
As you can see from the video above its running pretty well, however there are still many things to do. Such as integrating the LEDscape code directly into GoFLED in order to avoid unnecessary data copies, making the GoFLED protocol comply with OPC, fixing some bugs in transition effects, and enabling some additional buffering of frame data from animation sources to avoid hiccups in the WIFI connection causing nasty frame drops.
Oh and just in case you think the above video looks washed out, rest assured this is a stupidly bright LED matrix. We're running it at 30% right now in the hopes of not blinding our colleagues, but I think we're still developing a tan!
-
Some assembly photos
02/18/2015 at 22:12 • 1 commentWe still haven't had time to finish this off completely yet. We do have the driving system working, but its not yet stable and its not yet in the box.
In the meantime we figured we'd post some more assembly photos. So here's Jasmine...laying out 1758 LEDs!
![]()
![]()
![]()
![]()
![]()
![]()
-
Success!
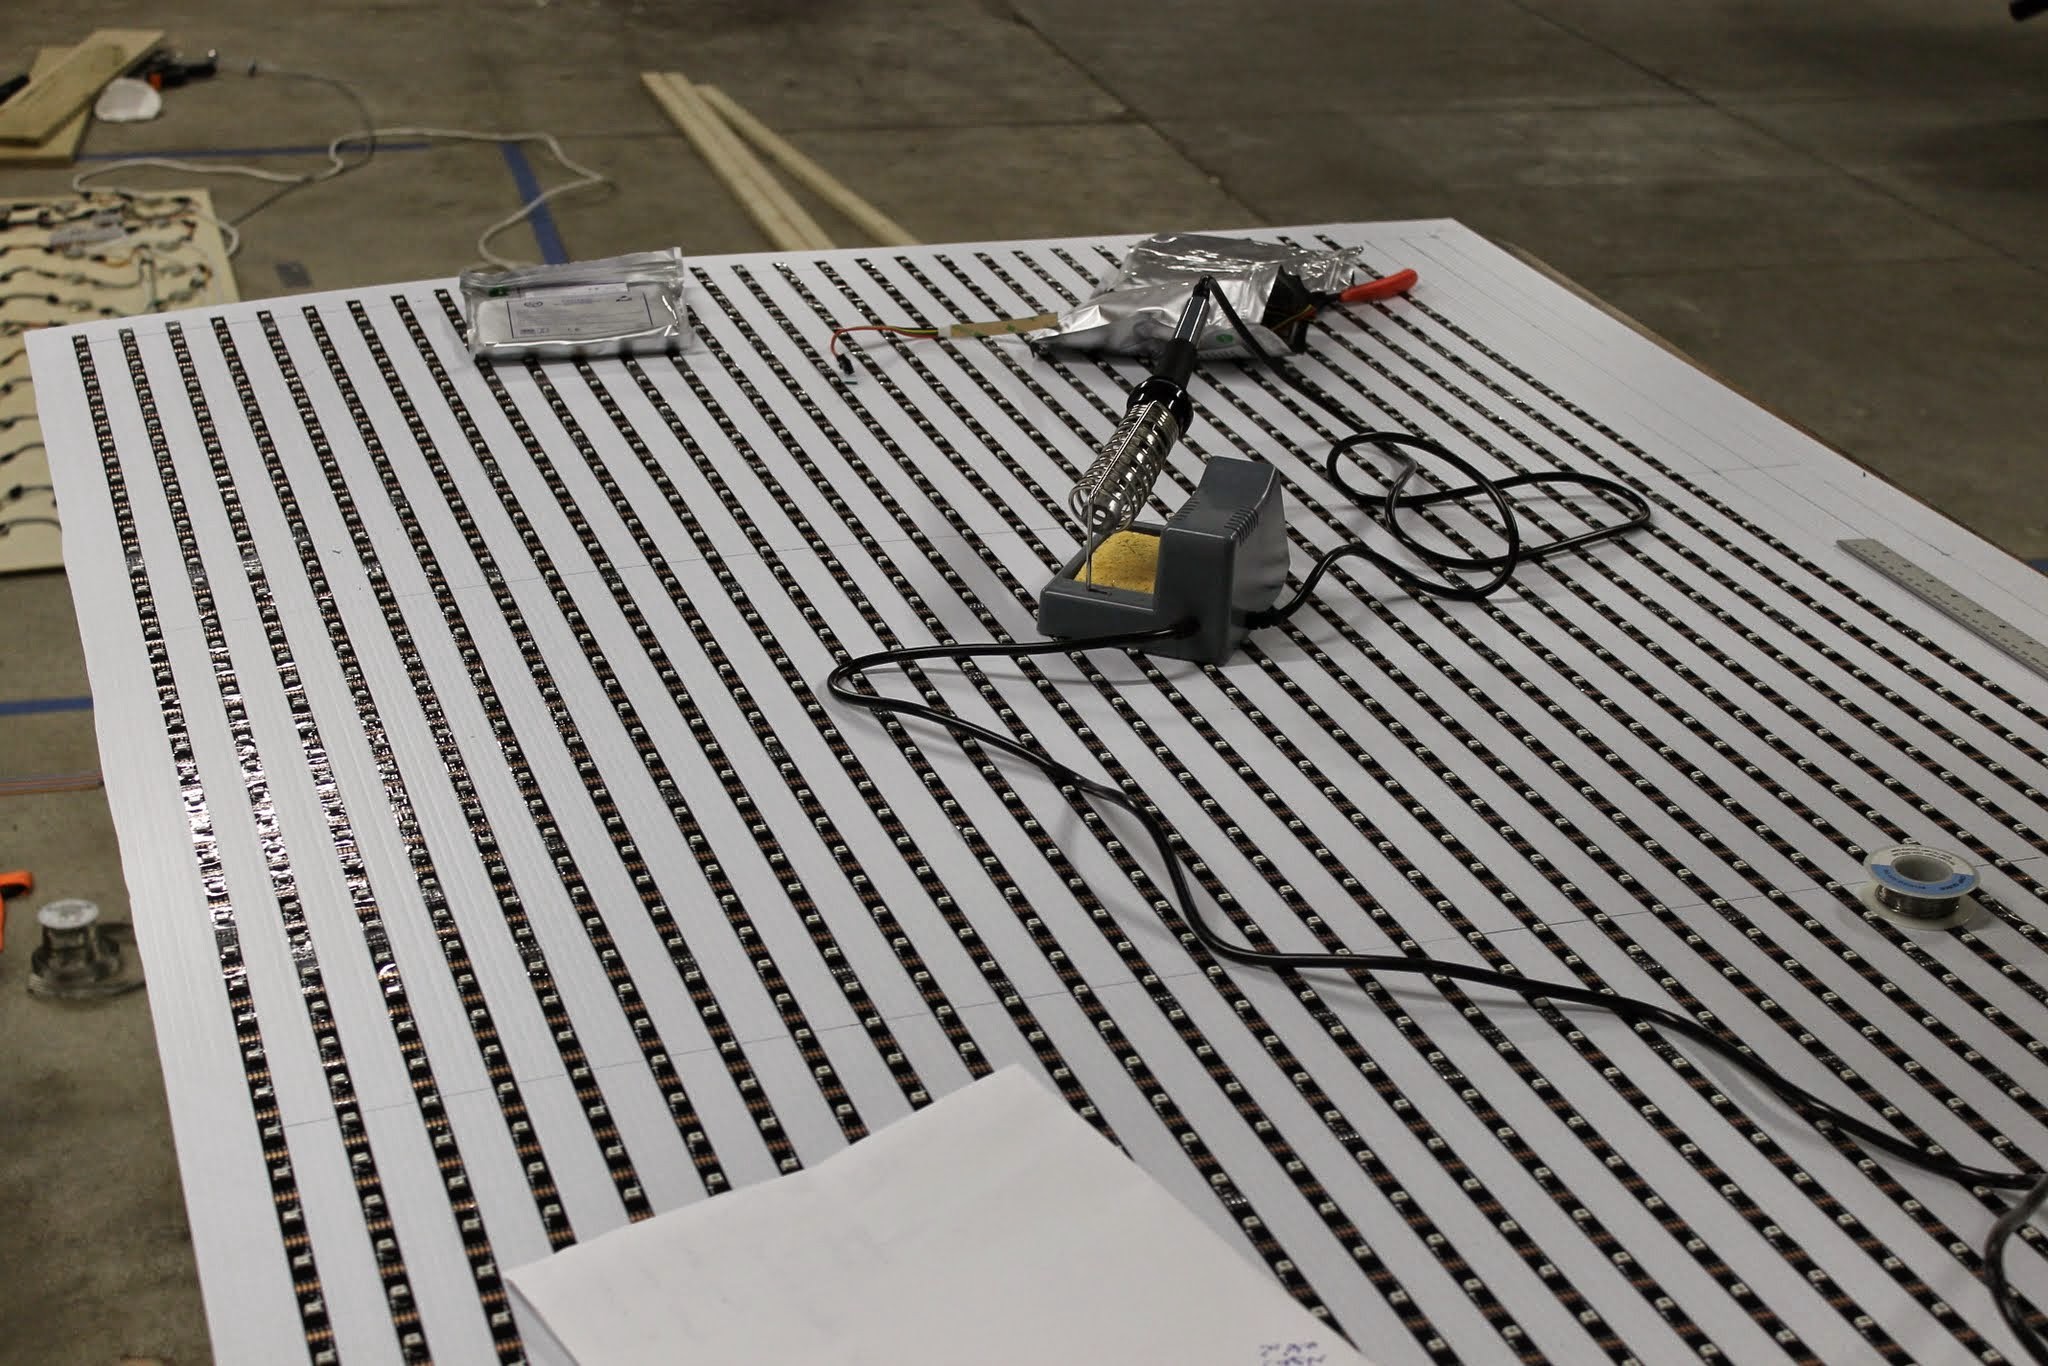
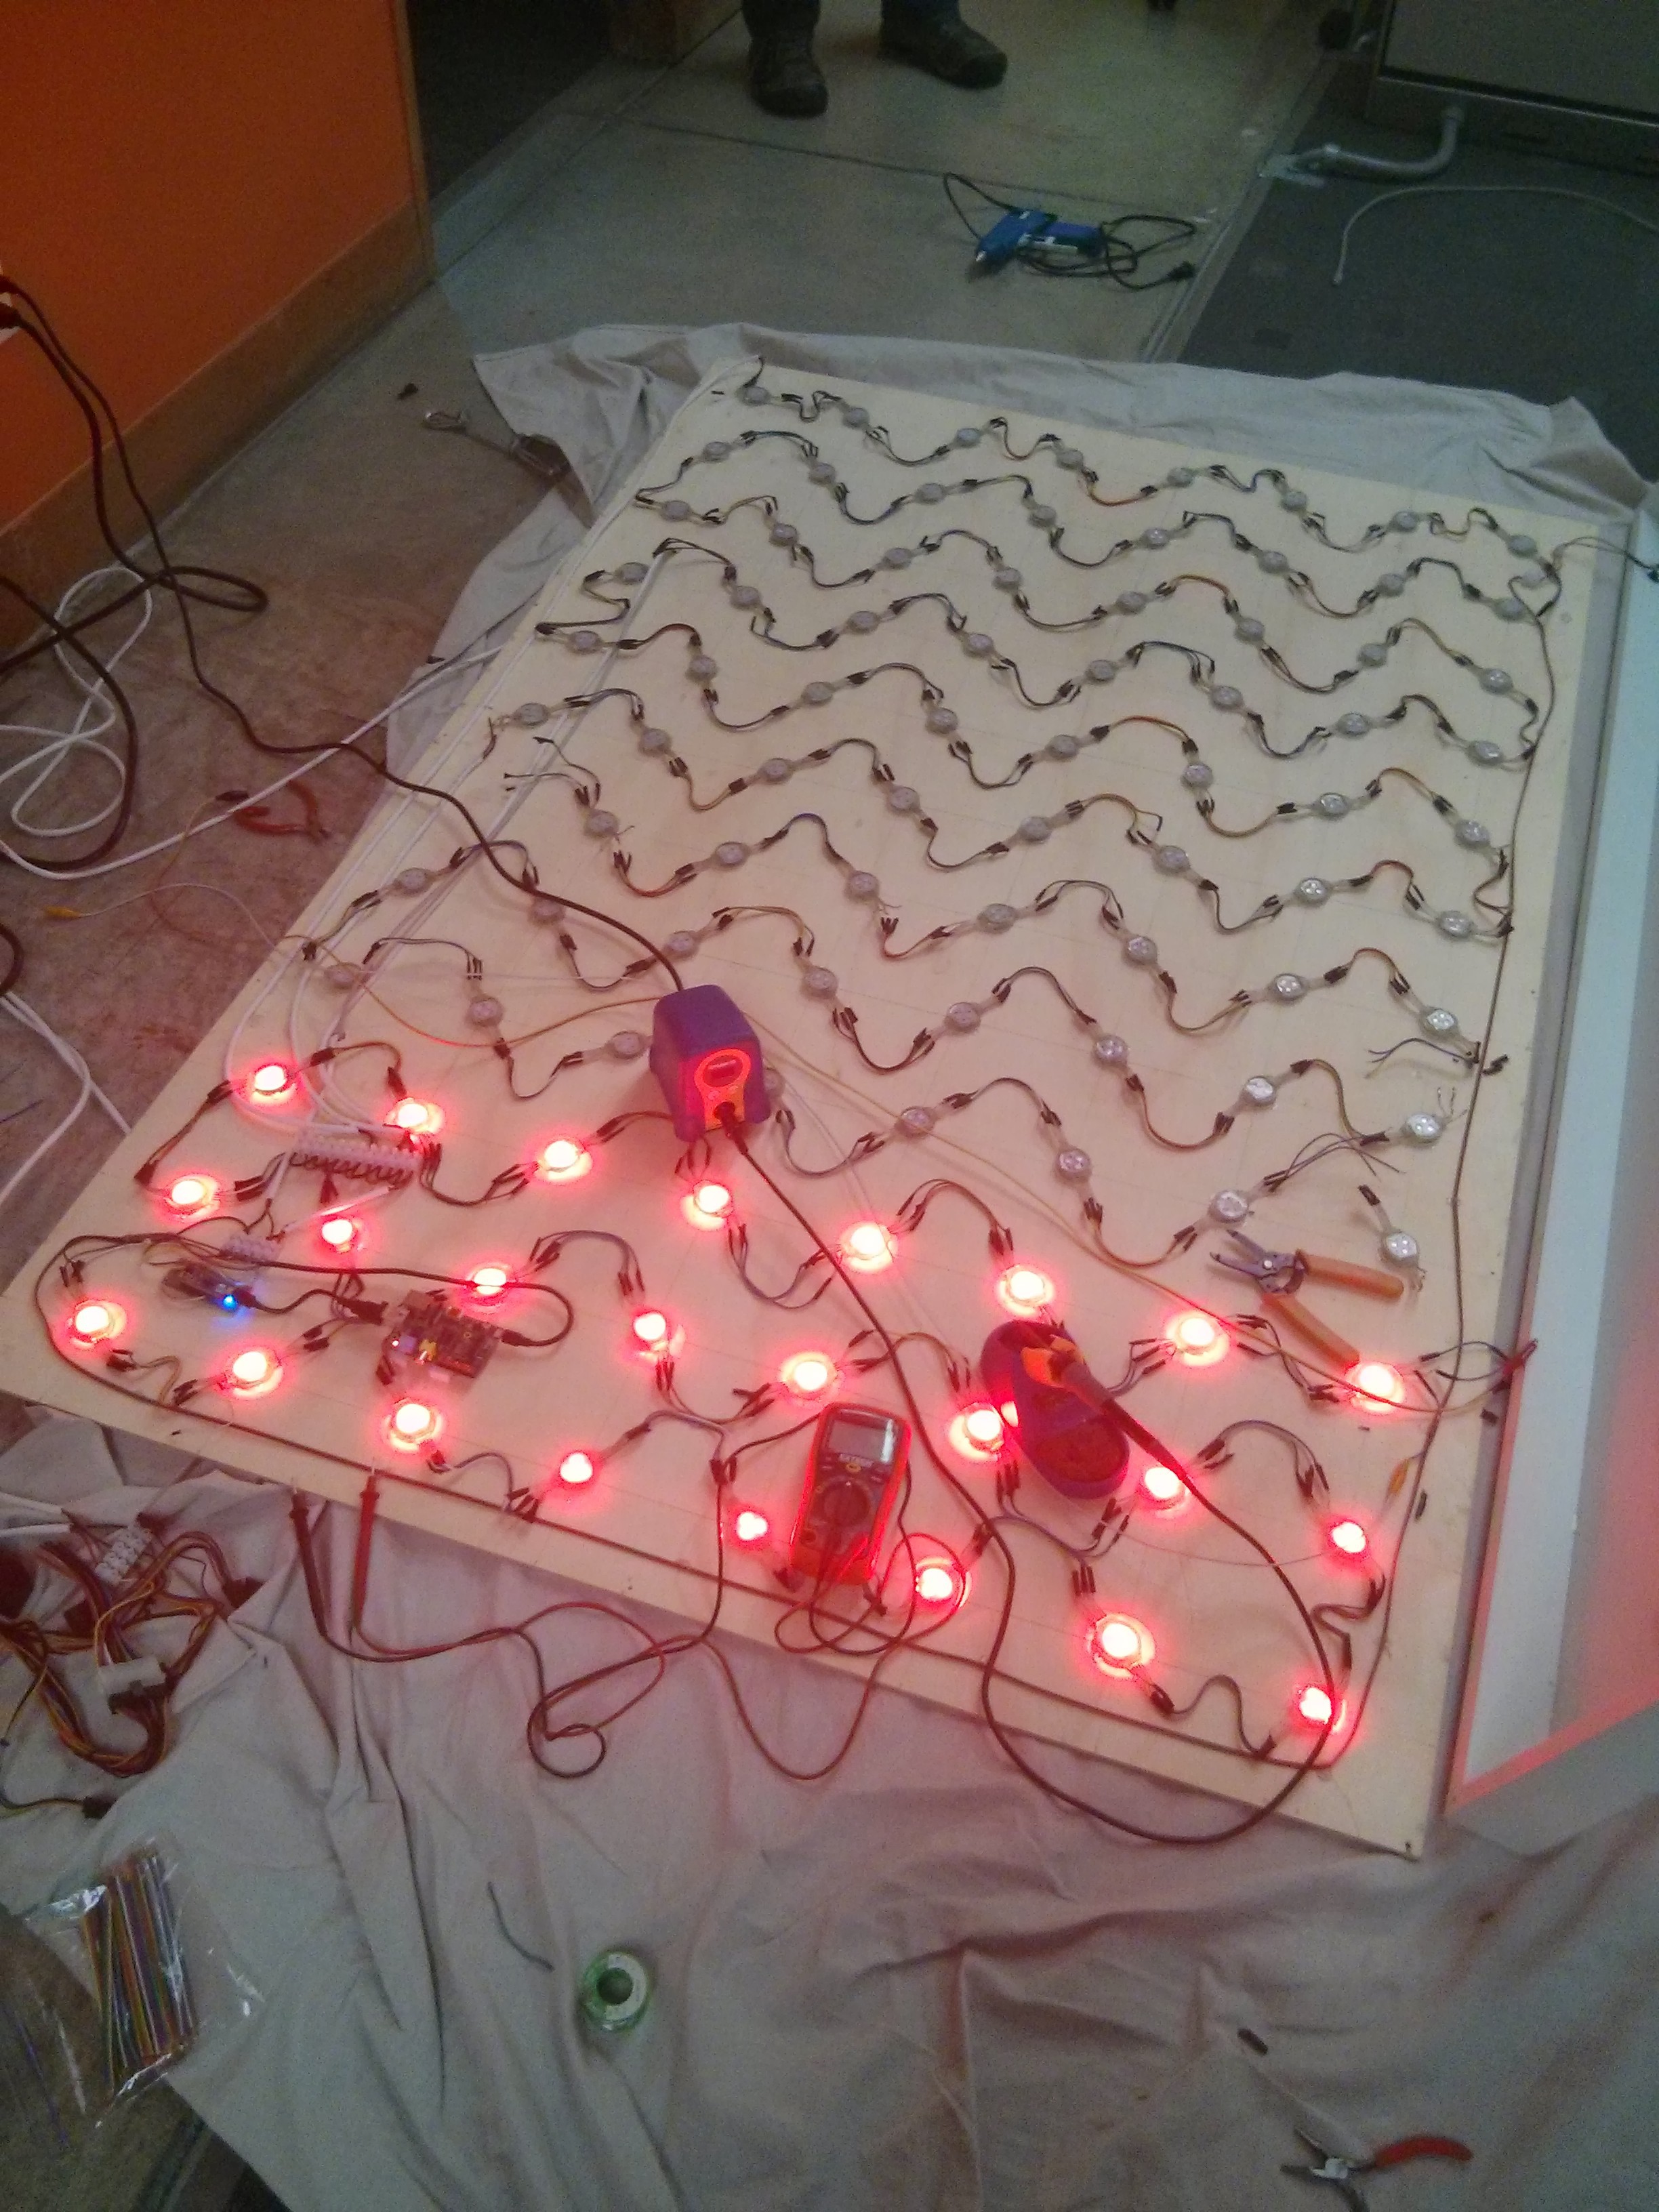
02/04/2015 at 18:55 • 0 commentsAfter much soldering....and a little debugging we managed to get the array lit up.
![]()
If you look carefully you can see the grounding braid we used as a power and ground bus at either end of the strips. We then simply hooked up data and clock (these are APA102 LEDs remember so are SPI driven) using a pair of wires to create one long strip.
We had some flickering problems to start, but it turned out we had the SPI frequency set to high, turning it down to around 3mhz worked wonderfully. More on how we are driving it to come...
-
1728 leds is a lot more data than you think
01/30/2015 at 00:30 • 0 commentsIn the original FLED implementation we had a Raspberry Pi inside the case. This Pi ran a NodeJS application that executed the animation code written in JavaScript and provided a web interface for users to create animations within. This all worked fairly well and gave us a smooth 30fps even with quite complex animations. However, we only had 96 LEDs at the time. Even then it would occasionally run slow with a badly written animation. Scaling this up to 1728 leds just isn't going to work on the Pi.
So I decided a good option might be to put a Teensy 3.1 inside the case, with an ESP8266 wifi module. I would then generate the LED data using code running on a machine elsewhere in the office, and then just stream the raw LED data over the wifi to serial bridge and have the Teensy send it out to the LEDs. This seemed like a solid idea till I started running the numbers...
(1728 * 3) * 30 = 155520 bytes per second., or about 155kb/s.
That's pretty hefty...the max baud we can get out of an ESP8266 is 921600 bits per second giving us just 115200 bytes per second. Not quite enough to run our animations smoothly!
Now we could faff around trying to get two ESP8266 modules to work on the two high speed UARTs on the Teensy. Our sending application would then send to two separate ports on the Teensy, splitting our data between two packets on two chips giving us enough bandwidth. Of course then we would have to faff around figuring out how to synchronize the two wifi modules so we had complete packets before sending them out. This was starting to feel like a hack.
In the end I decided to switch to a Beaglebone Black that we had sitting around the office. Using this we could use a proper USB wifi module which would provide a much higher data rate, we also have a lot more power so we can start doing some fun things. With all this extra power we can setup things like receiving multiple streams at once from a variety of sources, allowing us to have alerts that are blended over the main animations. We would still have the animation data generated externally, but the Beaglebone Black would act as a blender and manager of sources, and provide a UI to control what gets shown when.
I still suspected NodeJS would be a performance hog in this regard and since we no longer had to run JavaScript on the server this let me dive into writing this in Go to get a nice performance bump. More on that later...
-
A new start....
01/27/2015 at 18:25 • 1 commentSo the LEDs have died again. Typical really, we fixed them up just two days ago replacing another blown unit, but it once again died. These really have been the worst LEDs I have ever encountered, bright and cheap, but completely unreliable.
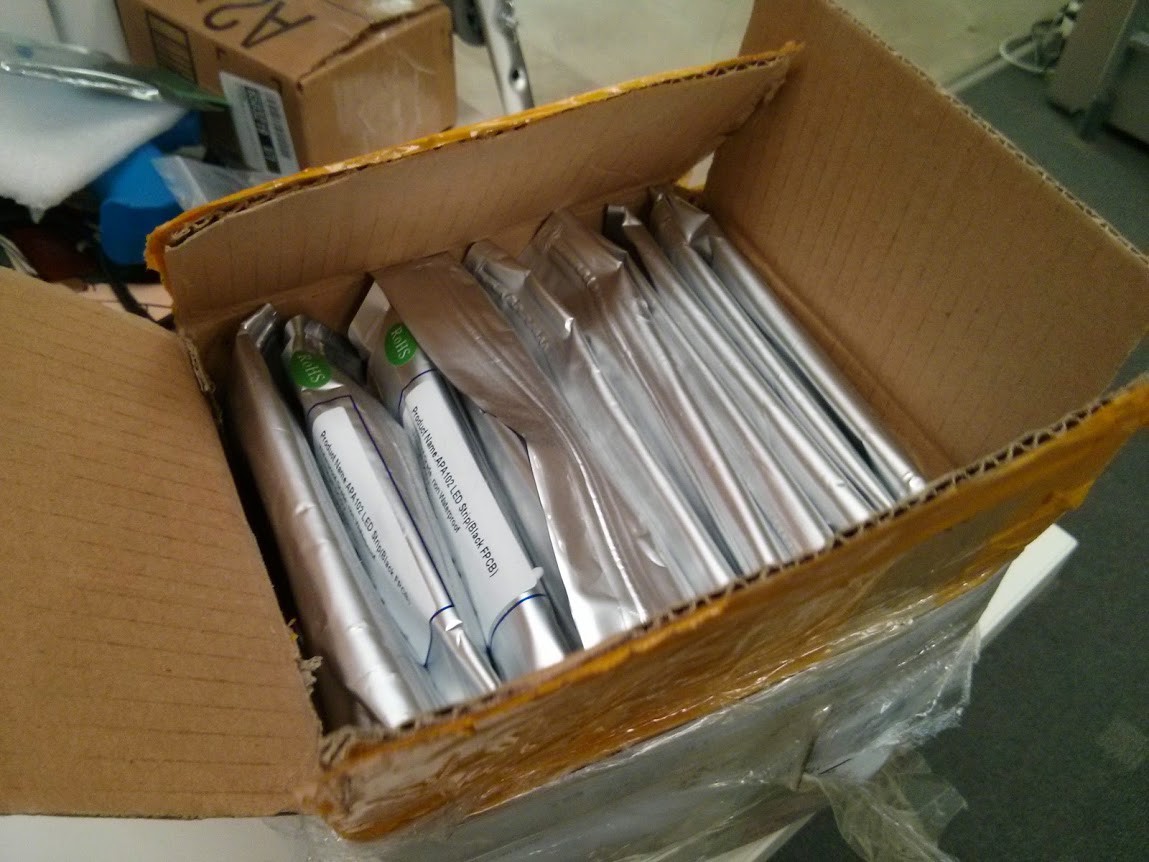
Therefore its time to start our rebuild. Our APA102 led strips have arrived from aliexpress, 12x 5m strips:
![]()
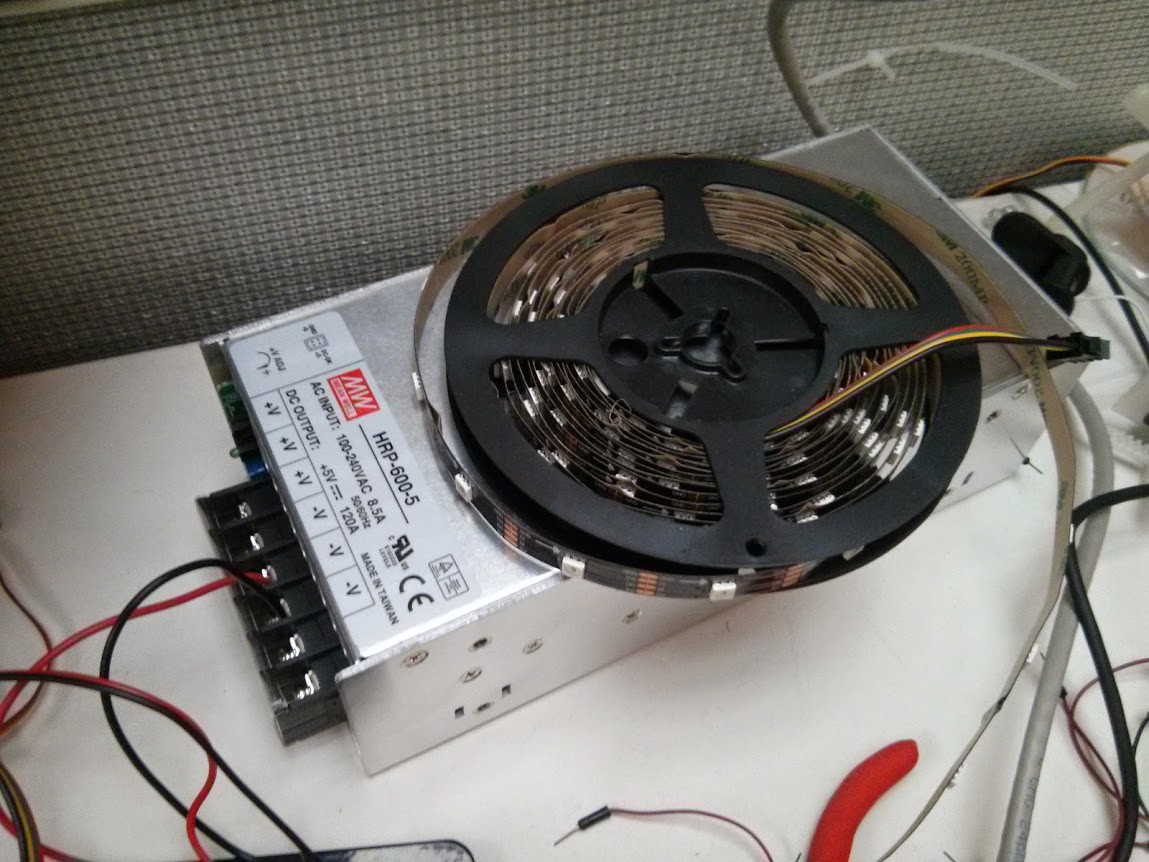
We also got a new 120A 5v supply to run them all since we're going to be driving 1728 (54x32) leds at a max rating of 60ma we're talking just over 100A draw when full white.
![]()
Time to figure out how we're going to drive them!
-
A quick video...
03/03/2014 at 21:41 • 1 commentEren had his nice camera in the office a couple of weeks ago and he put together this quick video of some of the animations on FLED. They're not the best (you should see some of the cool stuff our staff have been hacking together), but its pretty cool nonetheless. You'll have to excuse the wire you can see in the top right, this has since been fixed...
Some of our top animations now include the local weather report (streamed from Yahoo Weather API), a game of PONG, and many other message scrollers.
-
Oh No! *Pop*
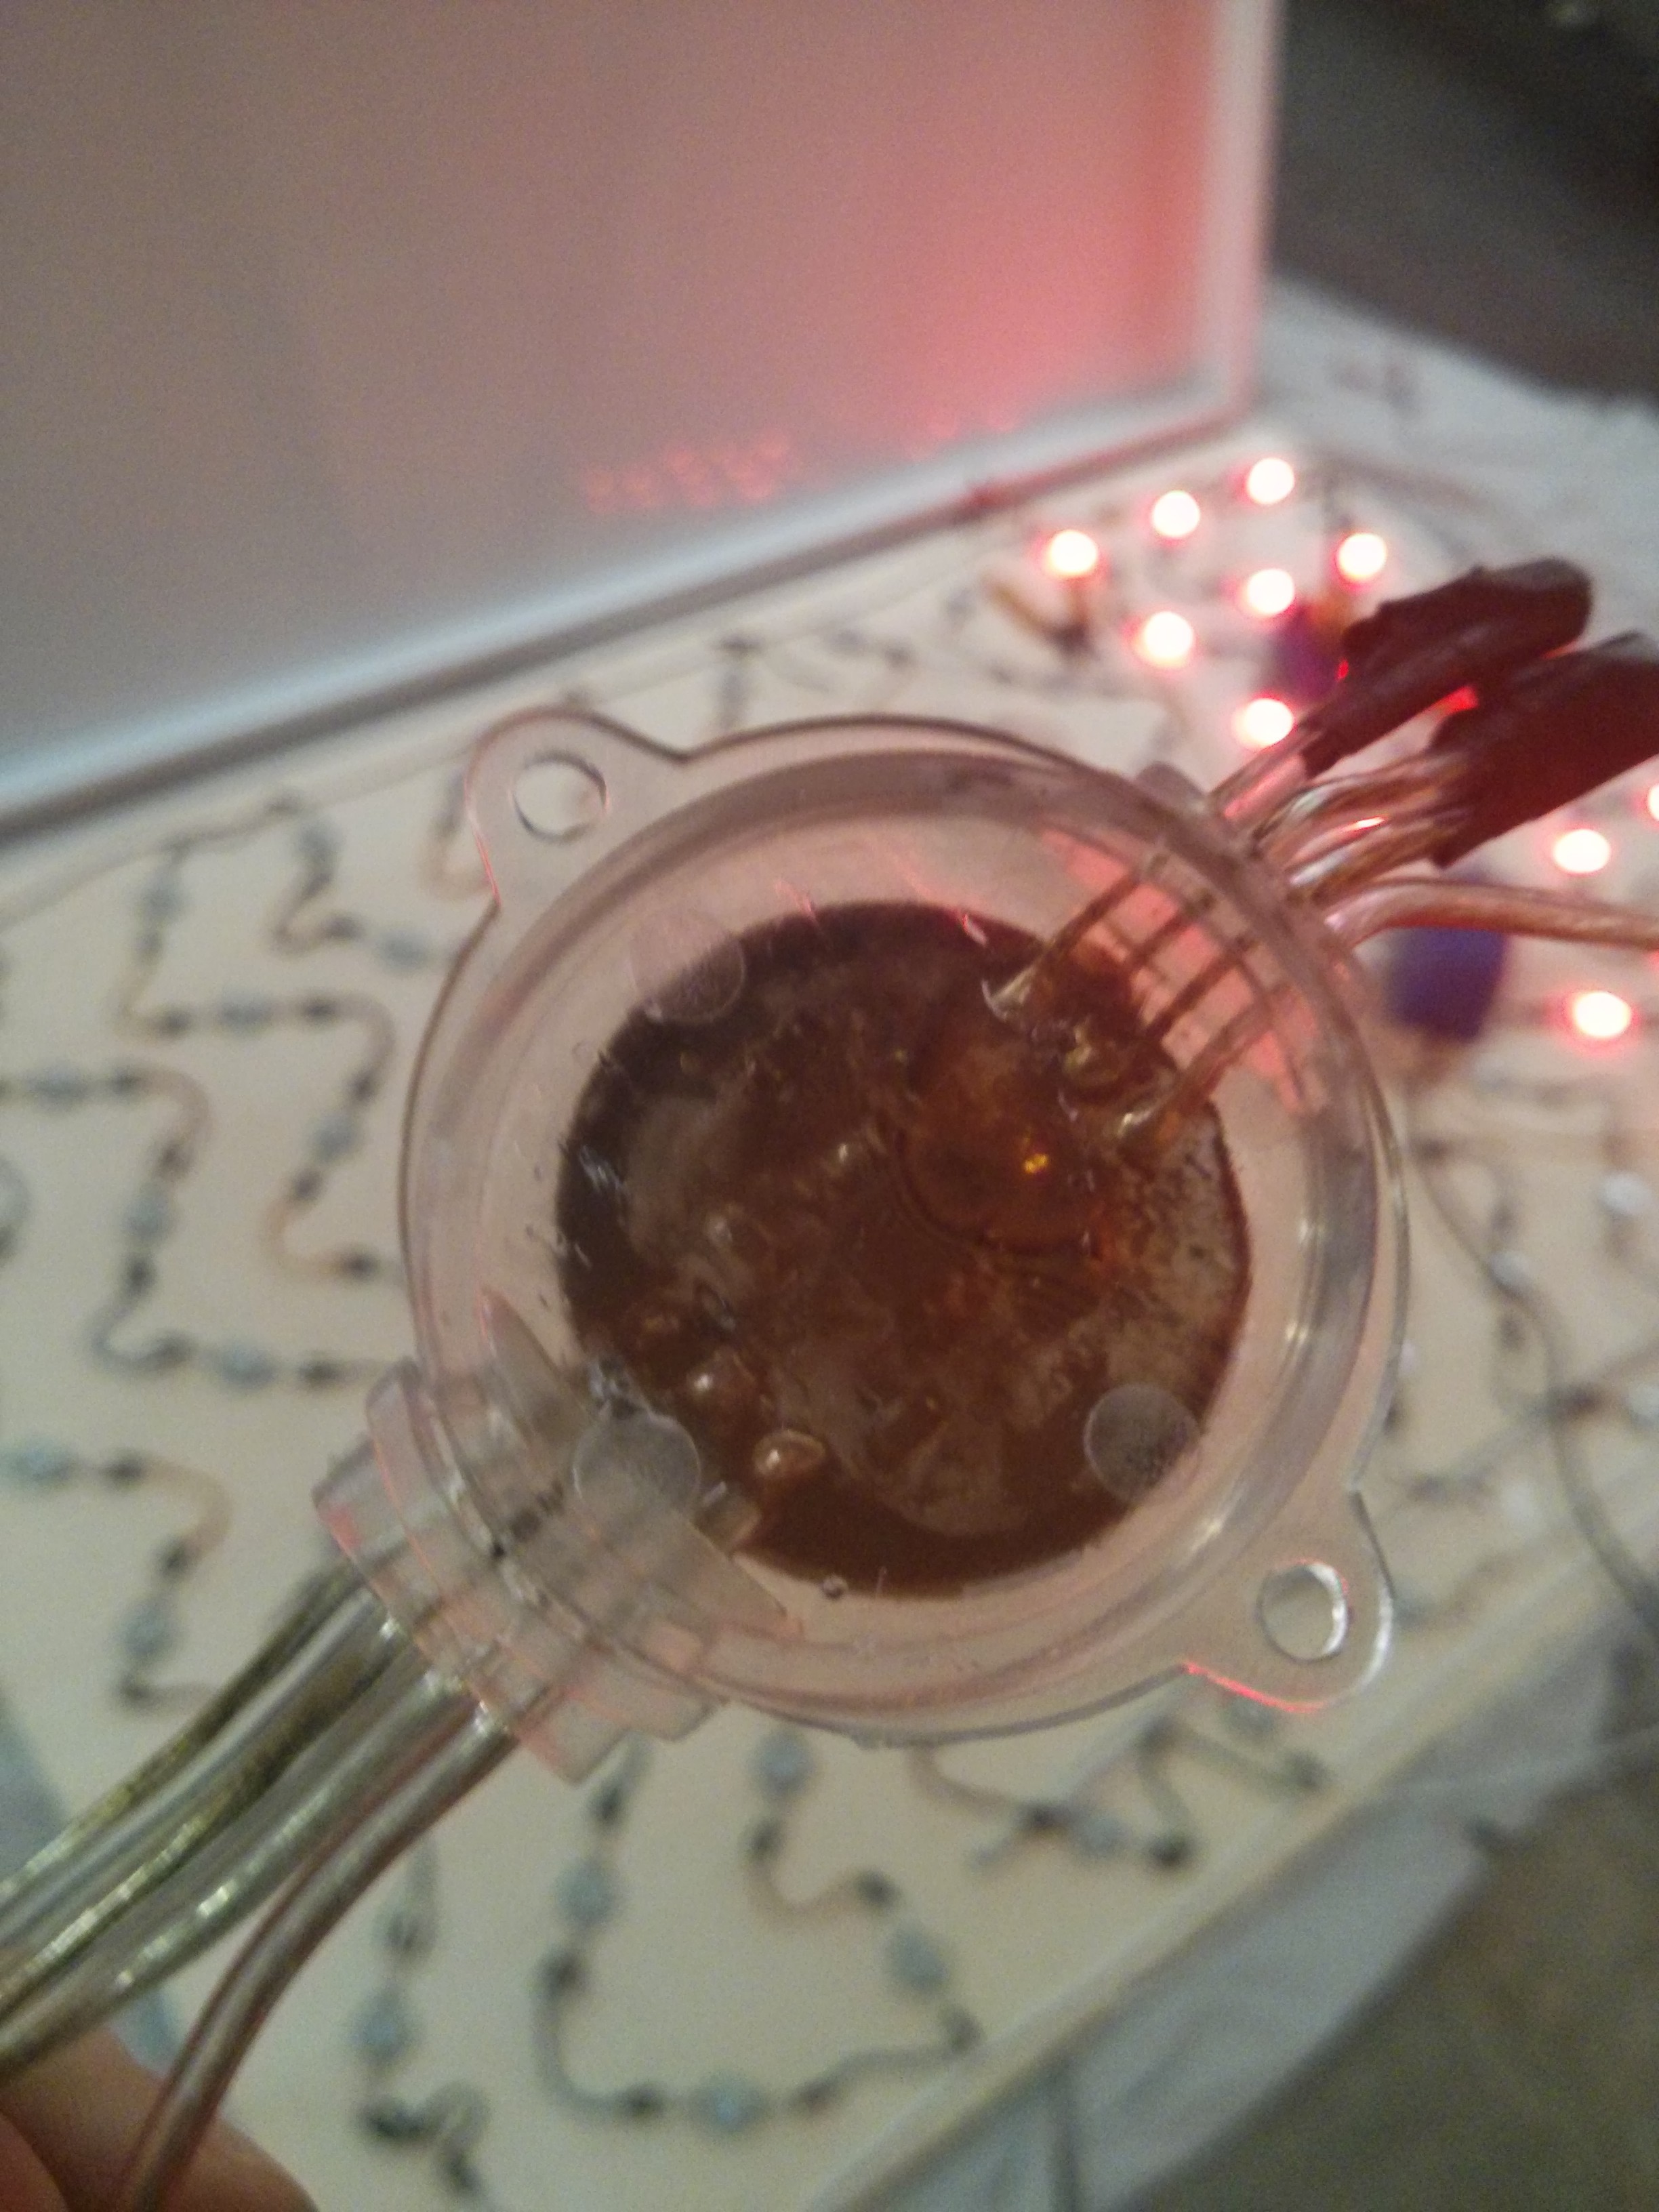
02/28/2014 at 18:34 • 1 commentSo just after presidents day we came back into the office and found that the FLED was dead! Turned it on and nothing happened. After eliminating the ATX PSU from the equation it became clear we would need to pull the display down and open it up to find out what was wrong.
Once we got it open we discovered that the PSU was tripping out, evidently from a short in the LED chain. We disconnected the LEDs and everything started up again. So it was time to find the short. Since we'd constructed this string of LEDs ourselves it seemed likely that a connection had broken or shorted. We carefully went over every connection and found that none of them were obviously broken. Therefore it must have been the LED units themselves.
![]() Because we're using WS2811 driven LEDs it didn't seem like there was any easy way to debug the LEDs individually. So we had to resort to a binary search, this meant cutting the strip at various points to find where in the chain the issue was found. After 7 cuts we managed to isolate the one LED that was causing the problem. After tearing it off the backplane we were treated to this lovely example of what happens when you have lots of heat sealed inside some silicone!
Because we're using WS2811 driven LEDs it didn't seem like there was any easy way to debug the LEDs individually. So we had to resort to a binary search, this meant cutting the strip at various points to find where in the chain the issue was found. After 7 cuts we managed to isolate the one LED that was causing the problem. After tearing it off the backplane we were treated to this lovely example of what happens when you have lots of heat sealed inside some silicone!![]()
Once we replaced the LED and reconnected the cuts we made FLED was restored to all its blinky glory. If anyone has any better ideas about how to debug WS2811 strings we would love to hear your thoughts.
-
Nginx and Memcached
01/29/2014 at 17:46 • 0 commentsWith FLED we are trying to make a visualization platform, somewhere all our apps and monitoring tools can send data and where we can then use that data to make interesting visualizations.
As such we need to be able to accept data from a variety of sources quickly and easily, and we need to be able to do that constantly without impacting how the animations run. We also need to expose data to engineers developing new visualizations, and ensure that while engineers are developing code they can't impact the animation running on the display.
All this means we need to create some separation of concerns. It turns out that NodeJS isn't a good fit for accepting constant post requests containing data from services, since it only has the single event loop and since the Raspberry Pi is single core, any incoming requests cause our animation loop to suffer.
After much head scratching we decided to try a different approach. Memcached is very good at keeping data in memory, and makes it easy to make simple fast requests to it to retrieve data when its needed. All we need is a good way of posting data into it. Nginx it turns out has a very useful module called HttpMemcModule. This module lets us setup simple Nginx configurations that let us post and get data into Memcached with the absolute minimum of overhead.
To set this up we first had to compile a version of Nginx for the Raspberry Pi with this module included, here's the steps:
mkdir nginx-src
cd nginx-src
wget 'http://nginx.org/download/nginx-1.4.3.tar.gz'
tar -xzvf nginx-1.4.3.tar.gz
wget 'https://github.com/agentzh/memc-nginx-module/archive/v0.13.tar.gz'
tar -xzvf v0.13.tar.gz
wget 'https://github.com/agentzh/echo-nginx-module/archive/v0.49.tar.gz'
tar -xzvf v0.49.tar.gz
wget 'https://github.com/agentzh/headers-more-nginx-module/archive/v0.23.tar.gz'
tar -xzvf v0.23.tar.gz

cd nginx-1.4.3
./configure --prefix=/opt/nginx --add-module=../echo-nginx-module-0.49 --add-module=../memc-nginx-module-0.13 --add-module=../headers-more-nginx-module-0.23

make -j2
make install
sudo mkdir /opt/nginx/sites-available
sudo mkdir /opt/nginx/sites-enabled
sudo mkdir /var/log/nginx
We now need to setup the config for this Nginx configuration, for this we just do a very simple basic config that loads subconfigurations from /opt/nginx/sites-enabled.
worker_processes  1;


events {
    worker_connections  1024;
}


http {
    include       mime.types;
    default_type  application/octet-stream;


    sendfile        on;


    keepalive_timeout  65;


    gzip  on;


    include /opt/nginx/sites-enabled/*;
}
You'll also need to setup Nginx to start on boot, on Raspbian we do this with Sysinitv. To do this create a file at '/etc/init.d/nginx' and add the following to it:
#! /bin/sh

### BEGIN INIT INFO
# Provides:          nginx
# Required-Start:    $all
# Required-Stop:     $all
# Default-Start:     2 3 4 5
# Default-Stop:      0 1 6
# Short-Description: starts the nginx web server
# Description:       starts nginx using start-stop-daemon
### END INIT INFO

PATH=/usr/local/sbin:/usr/local/bin:/sbin:/bin:/usr/sbin:/usr/bin
DAEMON=/opt/nginx/sbin/nginx
NAME=nginx
DESC=nginx

test -x $DAEMON || exit 0

# Include nginx defaults if available
if [ -f /etc/default/nginx ] ; then
    . /etc/default/nginx
fi

set -e

. /lib/lsb/init-functions

case "$1" in
  start)
    echo -n "Starting $DESC: "
    start-stop-daemon --start --quiet --pidfile /usr/local/nginx/logs/$NAME.pid \
        --exec $DAEMON -- $DAEMON_OPTS || true
    echo "$NAME."
    ;;
  stop)
    echo -n "Stopping $DESC: "
    start-stop-daemon --stop --quiet --pidfile /usr/local/nginx/logs/$NAME.pid \
        --exec $DAEMON || true
    echo "$NAME."
    ;;
  restart|force-reload)
    echo -n "Restarting $DESC: "
    start-stop-daemon --stop --quiet --pidfile \
        /usr/local/nginx/logs/$NAME.pid --exec $DAEMON || true
    sleep 1
    start-stop-daemon --start --quiet --pidfile \
        /usr/local/nginx/logs/$NAME.pid --exec $DAEMON -- $DAEMON_OPTS || true
    echo "$NAME."
    ;;
  reload)
      echo -n "Reloading $DESC configuration: "
      start-stop-daemon --stop --signal HUP --quiet --pidfile /usr/local/nginx/logs/$NAME.pid \
          --exec $DAEMON || true
      echo "$NAME."
      ;;
  status)
      status_of_proc -p /usr/local/nginx/logs/$NAME.pid "$DAEMON" nginx && exit 0 || exit $?
      ;;
  *)
    N=/etc/init.d/$NAME
    echo "Usage: $N {start|stop|restart|reload|force-reload|status}" >&2
    exit 1
    ;;
esac

exit 0
Here's the config we add to our sites-enabled folder to configure Nginx to push data into Memcached and to forward all other requests to our Nodejs process.
upstream node_app {
    server localhost:8080;
}


server {


  listen 80;
  server_name localhost;


  root /home/ubuntu/fled;
  access_log /var/log/nginx/fled.access.log;
  error_page 404 /404.html;


  location /data/set {
    set $memc_cmd 'set';
    set $memc_key $arg_key;
    set $memc_flags $arg_flags; # defaults to 0
    set $memc_exptime $arg_exptime; # defaults to 0


    memc_pass 127.0.0.1:11211;
  }


  #location /data/register {
  #  set $memc_cmd 'append';
  #  set $memc_key 'variables';


    # create wrapper around object name
  #  set $dataname ',"${arg_key}"';


  #  set $memc_value $dataname;


  #  memc_pass 127.0.0.1:11211;
  #}
  location /data/list {
    set $memc_cmd 'get';
    set $memc_key 'variables';


    echo_before_body -n "[";
    memc_pass 127.0.0.1:11211;
    echo_after_body -n "]";


    more_set_headers 'Content-Type: application/json';
  }
  location /data/get {
    set $memc_cmd 'get';
    set $memc_key $arg_key;


    more_set_headers 'Content-Type: application/json';


    memc_pass 127.0.0.1:11211;
  }
  location / {
    try_files $uri $uri/ @proxy;
  }
  location @proxy {
    # required for socket.io
    proxy_set_header X-Real-IP $remote_addr;
    proxy_set_header X-Forwarded-For $proxy_add_x_forwarded_for;
    proxy_set_header Host $http_host;
    proxy_set_header X-NginX-Proxy true;


    # supposedly prevents 502 bad gateway error;
    # ultimately not necessary in my case
    proxy_buffers 8 32k;
    proxy_buffer_size 64k;


    # the following is required
    proxy_pass http://node_app;
    proxy_redirect off;


    # the following is required as well for WebSockets
    proxy_http_version 1.1;
    proxy_set_header Upgrade $http_upgrade;
    proxy_set_header Connection "upgrade";


    tcp_nodelay on; # not necessary
  }
}
We should now have a working Nginx server, that is pushing data to Memcached and passing through to our NodeJS application on port 8080. We can setup our monitoring tools and services to push data into the Memcached instance by making HTTP GET request to '/data/set?key=OurVariableName&val=OurValueHere'. We can also use the 'flags' and 'exptime' parameters to control how Memcached handles our data.
Now that we have a working data system we need to setup a system for animations to be able to pull this data, and for engineers to be able to get access to that data while developing animations. We'll cover this in a bit more detail next time, but its actually pretty simple.
We setup a bunch of flags on an animation that declare which variables need to be available for that animation to work, when an engineer is developing an animation they simply go to the Data tab, tick the tickboxes for the variables they want to use and our system then sets up a Socket.IO message that starts pushing that data to the engineers browser. In this manner only the data necessary gets pulled from Memcached and sent over the wire, so we're doing the minimum possible work at any time. When we load an animation to view on the main display we read this list of required data variables, ensure they are available then start pulling them from Memcached for the animation to use.
All this code will be documented in our repository which we'll open source as soon as the project is complete. This could be a month or two though, so much to do!
-
Software stack
01/21/2014 at 22:55 • 0 commentsThe display is looking great, but we really need to make this into more than just a pretty rainbow colored matrix.
To do this we decided we wanted to be able to open up the control of the lights to all our developers, and we want to be able to feed data from our various services into the system so we can make animations and alerts using the display. We tried a variety of methods for doing this.
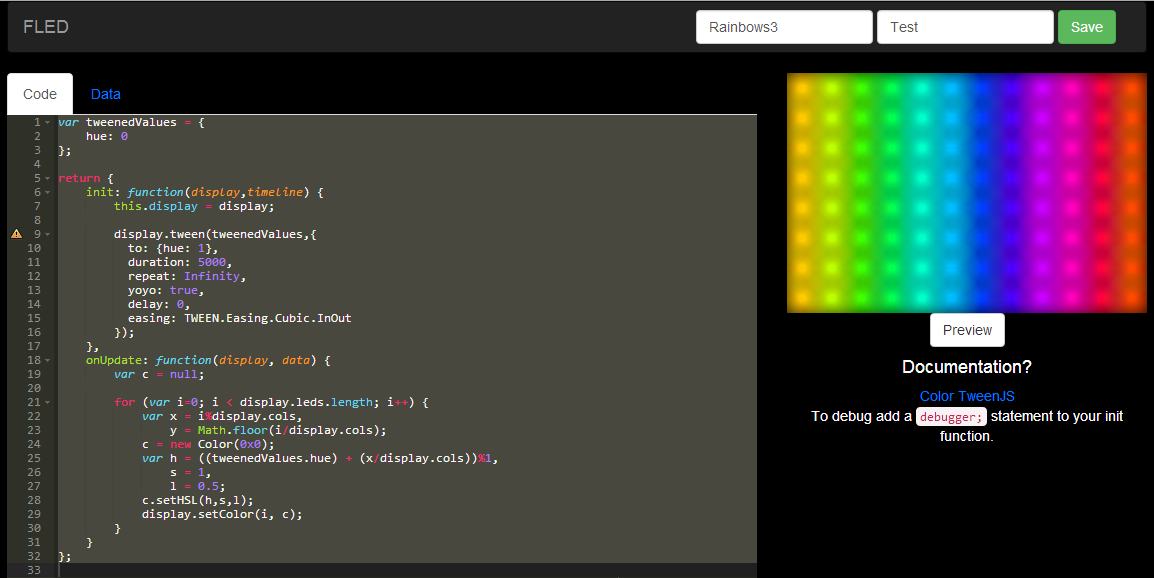
I had previously built a system that used NodeJS to run JavaScript written in a web application context that would allow web developers to control the LEDs. So we repurposed some of this system for FLED, this quickly gave us a simple website where users could edit JavaScript to write animations for the system. This worked pretty well, and the Raspberry Pi was surprisingly able to keep up with all this and put out a nice smooth 30fps on the LEDs.
![]()
Now it was time to start adding the data. Initially we thought we would have the system keep open a TCP socket to which clients could connect to send data, we tried this but since we wanted multiple services to send in data we would need to maintain multiple socket connections and it turned out that the Raspberry Pi didn't like this very much. So next we thought simple HTTP requests on the same NodeJS application could be used to post data into memory. This seemed like a good idea, but actually meant that whenever data was incoming it would block the NodeJS event queue while the data was copied into memory. This meant our LED animation loop took a hit and we saw skipping in our framerate. Not ideal.
In the next log we'll cover how we solved this using Memcached and Nginx, and how we setup a system to allow engineers to edit animations using real live data, but without applying too much load to the NodeJS system controlling the animations.
FLED
An LED display showing visualizations and rendering data from a variety of TCP sources over the Open Pixel Control protocol


 Because we're using WS2811 driven LEDs it didn't seem like there was any easy way to debug the LEDs individually. So we had to resort to a binary search, this meant cutting the strip at various points to find where in the chain the issue was found. After 7 cuts we managed to isolate the one LED that was causing the problem. After tearing it off the backplane we were treated to this lovely example of what happens when you have lots of heat sealed inside some silicone!