To make the experience fit your profile, pick a username and tell us what interests you.
We found and based on your interests.
Today I pushed a pile of changes to the GitHub repository. While the prototype design works well enough, I had accumulated a long list of improvements for the next version. So I've been slowly working down the list over the last few days. I'm not finished yet; there are still some issues to work out with the new design, but there's enough done to see what the alpha kits will look like.
I'm not happy with the new arrangement for the X-motor and rails. I moved the X-motor off of the carriage to reduce the carriage's weight, but finding a new home for the motor was trickier than I expected. I'm still tinkering with that part.
Some people were having problems getting all of the code installed and running properly. I think we're past the majority of those problems now. If you're still having trouble, please let me know so I can get it straightened out.
Some of the changes ended up being larger than I expected. Not because they were huge design changes, but because I had written the code badly and it needed refactoring. The underlying framework changed a lot while I was developing sintertest, and it shows in the code. Some parts of the design use the old way of doing things, and some parts use the new, and that makes the code rather brittle. Amazingly, it actually works.
So Hack A Day featured this project last night (thanks!) and this morning I woke up to more email than I've ever seen before. I'm slowly getting out from under it. If I haven't replied yet, don't take it personally. How is it noon already?
At long last, I've finally posted the source code for Ester. This isn't actually the repository that I've been developing in. That one was called 'sintertest', and as you might expect, was only supposed to be a quick test. As with most such 'quick' projects, it grew. And grew, and grew, until it turned into an unwieldy mess. I wanted to give Ester a fresh start, so I created a new project and copied over the files from the latest prototype. I also wanted to take the time to write up some proper instructions for getting a development environment set up. That turned out to be harder than expected.
You see, I have this problem. I tend to do things the hard way. Especially if the hard way is also a new way. I know, it's a disease, but I just can't help it. Consequently, Ester's design is not the collection of CAD files that you might expect. No, it's all code. Ruby, to be exact.
If you've used OpenSCAD, then you understand the idea of code as CAD. If not, then think of it as writing a program that generates the CAD files so that you don't have to. It's the "Computer Aided" part of CAD, taken to the next level. Traditional CAD design is a lot of tedious work, and oftentimes it's a lot of tedious rework. If you've used the traditional CAD tools, you know that they're mostly a glorified version of the pencil and paper drawings of old. We've traded the drafting table for a monitor, but that's about as far as it's gone. With the rise of modern programming languages, we can now automate a lot of tedium inherent in the old ways. On top of that, all of the tools developed for managing software projects become useable for hardware projects too.
These ideas all seemed like a no-brainer to me. But then, I'm a programmer, so what would you expect? I looked at the other nascent solutions for "scripted CAD" and decided that there was much to contribute to this new idea. So, I set myself to creating the tools to do what I wanted. Ruby seemed like a natural choice because it has a history of being friendly to Domain Specific Languages, and that's exactly what I wanted. I wanted something that could be bent to the needs of the hardware developer, but had the power of a modern language as its foundation. And Ruby is all about being bent in weird ways.
Around the time I was starting that particular adventure, I found myself playing with lasers and burning holes in things. It didn't take much to put the two projects together. So, for the last 3 years, I've been developing a laser sintering printer while writing a Ruby-based CAD system on the side. Both projects have driven development of the other. In hindsight, that's probably not the best way of doing things. But it sure was fun.
After much trial and tribulation, I finally having a working Bearing Gear that doesn't fall part in my hand. It's still not as strong as ABS, but it's getting closer. I would have posted this yesterday (Friday) but I was exhausted. On Thursday I was on a roll...each print was better than the last and I felt like I knew exactly what I needed to do. Both the printer and I were firing on all cylinders. It was great. So great, that I didn't notice when I had started an 8 hour print at midnight.
Around 1am I decided that I needed some sleep, and the printer could run by itself. But, did I really want to sleep with a laser burning away? Not really. So I decided to set a 1 hour alarm. I would sleep for 1 hour, wake up, check on the printer, and then go back to sleep for another hour. It sounded like a good idea at the time. Apparently it's very hard to get to sleep when you're worried about your house burning down. Needless to say, I was in rough shape yesterday.
But it was worth it. All but the last few layers were perfect. Although, the Y-axis jammed up at the very end. Some time around 8am I woke up to the sound of stepper motors loudly complaining about something. When I checked on the printer, the y-carriage had jammed itself to one side, the power supply was in current-limiting mode, and the laser was drilling a hole in the powder. I was too tired to think, so I turned it all off and went back to bed.
When I had finally woken up enough to think, I found this...
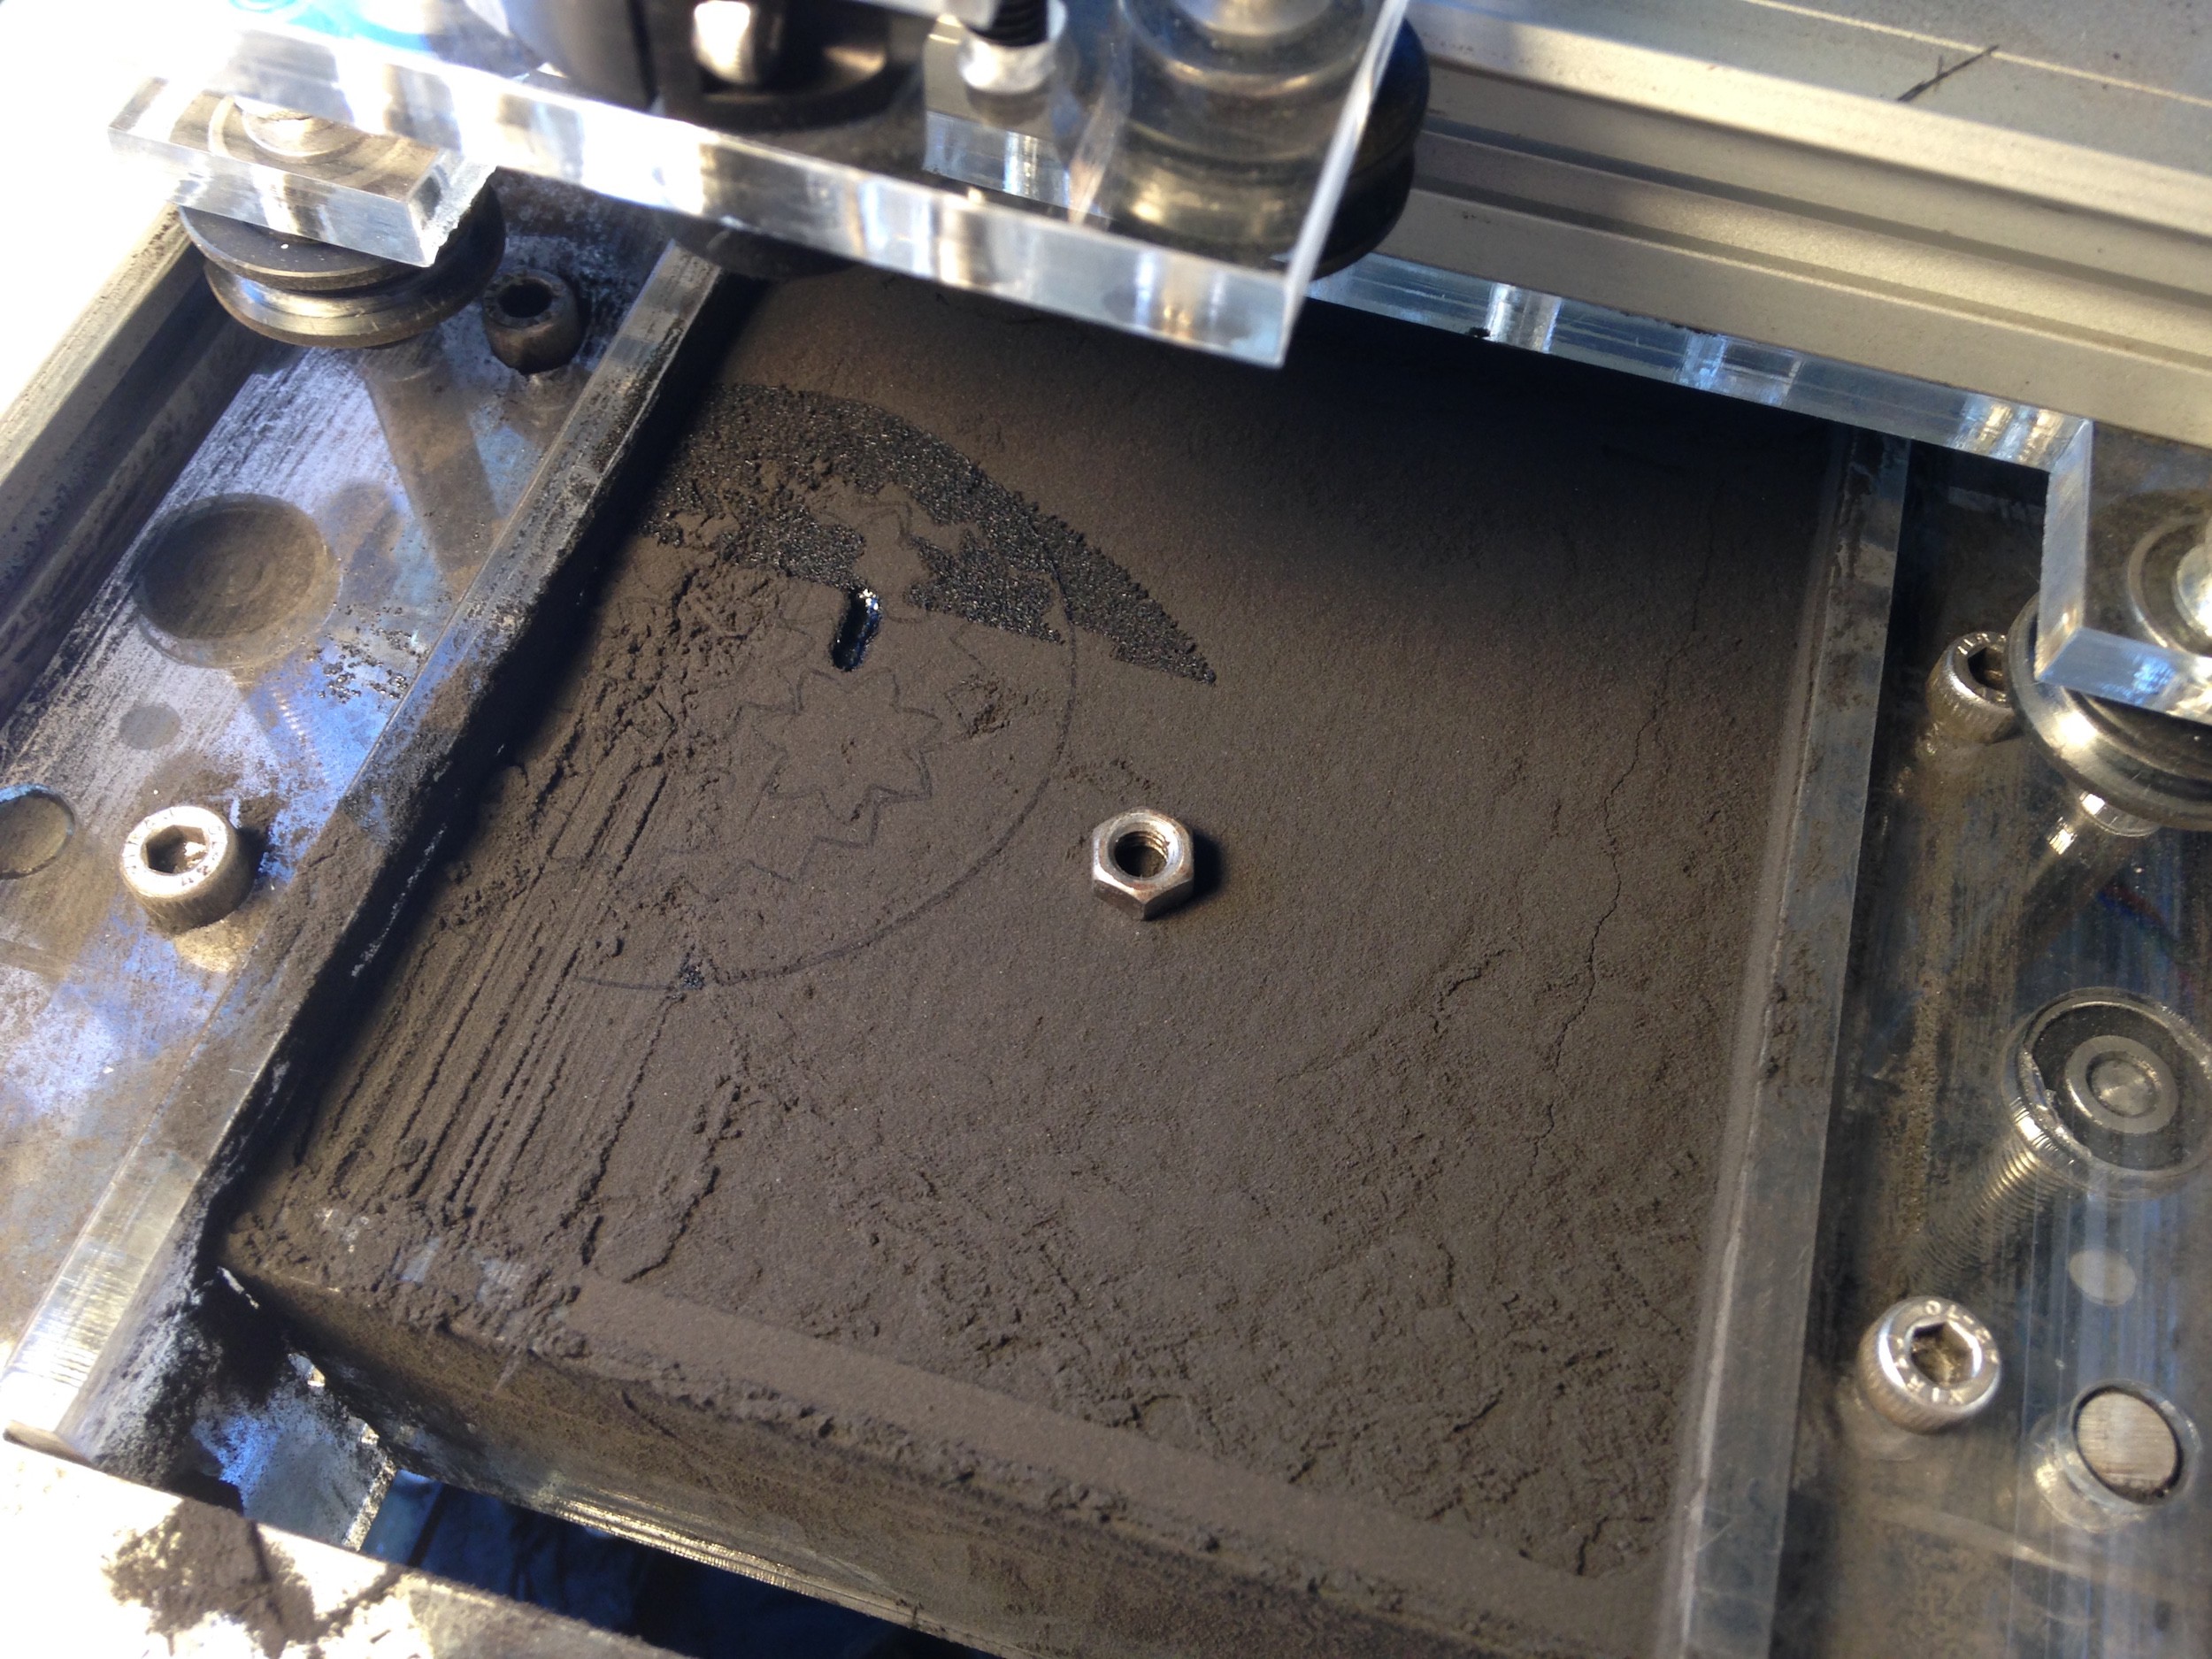
On the one hand, there's a random nut sitting in my powder bed, and that can't be good. On the other hand, it's sitting on top of the powder. Usually the powder is so soft that anything metallic falls straight to the bottom. Apparently there was a nearly completed part lying just below the surface...right where it should be. I must have woken up in time to catch it only a layer or two after the failure occurred. And, based on the times, it was only a few layers from finishing anyway. At 125 microns per layer, that's pretty close to a complete part.
My best guess, for the moment, is that the y-axis driver chip on the Smoothieboard got itself into a bad state. I've seen this happen before, but it's been pretty random. The few times I've actually seen it happen it just comes out of nowhere, and it seems like the driver chip is somehow locked up. The affected stepper motor either starts vibrating or gets stuck bouncing between two points. About the same time, the power supply hits its current limit, which would certainly cause weird motor behavior. It's not clear if the PS is somehow causing this, or if the driver/motor is suddenly drawing too much current. My guess is that it's the latter, which probably means either the driver chips are going bad or the firmware has issues. I've had issues with Smoothieware locking up after several hours of use, so that's a possibility too.
The random nut turned out to be from the bracket holding the laser diode to the y-carriage. I suspect that the vibrations from the locked-up motor shook it off. That mounting setup is due for a redesign anyway, so I made a note to do better next time.
All in all, I'd say it was a success. I can now print in polyester well enough to make mechanically functional parts. I haven't tried breaking this part, so I'm not sure how strong it is, but it's held up to a lot of gear spinning...
I had to stop this print early so I could leave for a meeting. I'm still not comfortable leaving a laser running while I'm gone. I probably shouldn't ever be comfortable with that. Anyway, I was sad because this print was doing so well.
This morning I worked up the courage to see what the damage was, and I was pleasantly surprised. About 3mm worth of layers had printed and it looked great. After a bit of careful cleaning, the gears actually worked!
But then I got a little over confident and tried to use a hex key to spin the gears, which is when I broke it. Either the hole was a tight fit or there was some powder left in it. Either way, I tried to force the issue and broke the outer ring. I think if I had let the print finish it would have been plenty strong. I just started another one, so we'll see how that turns out.
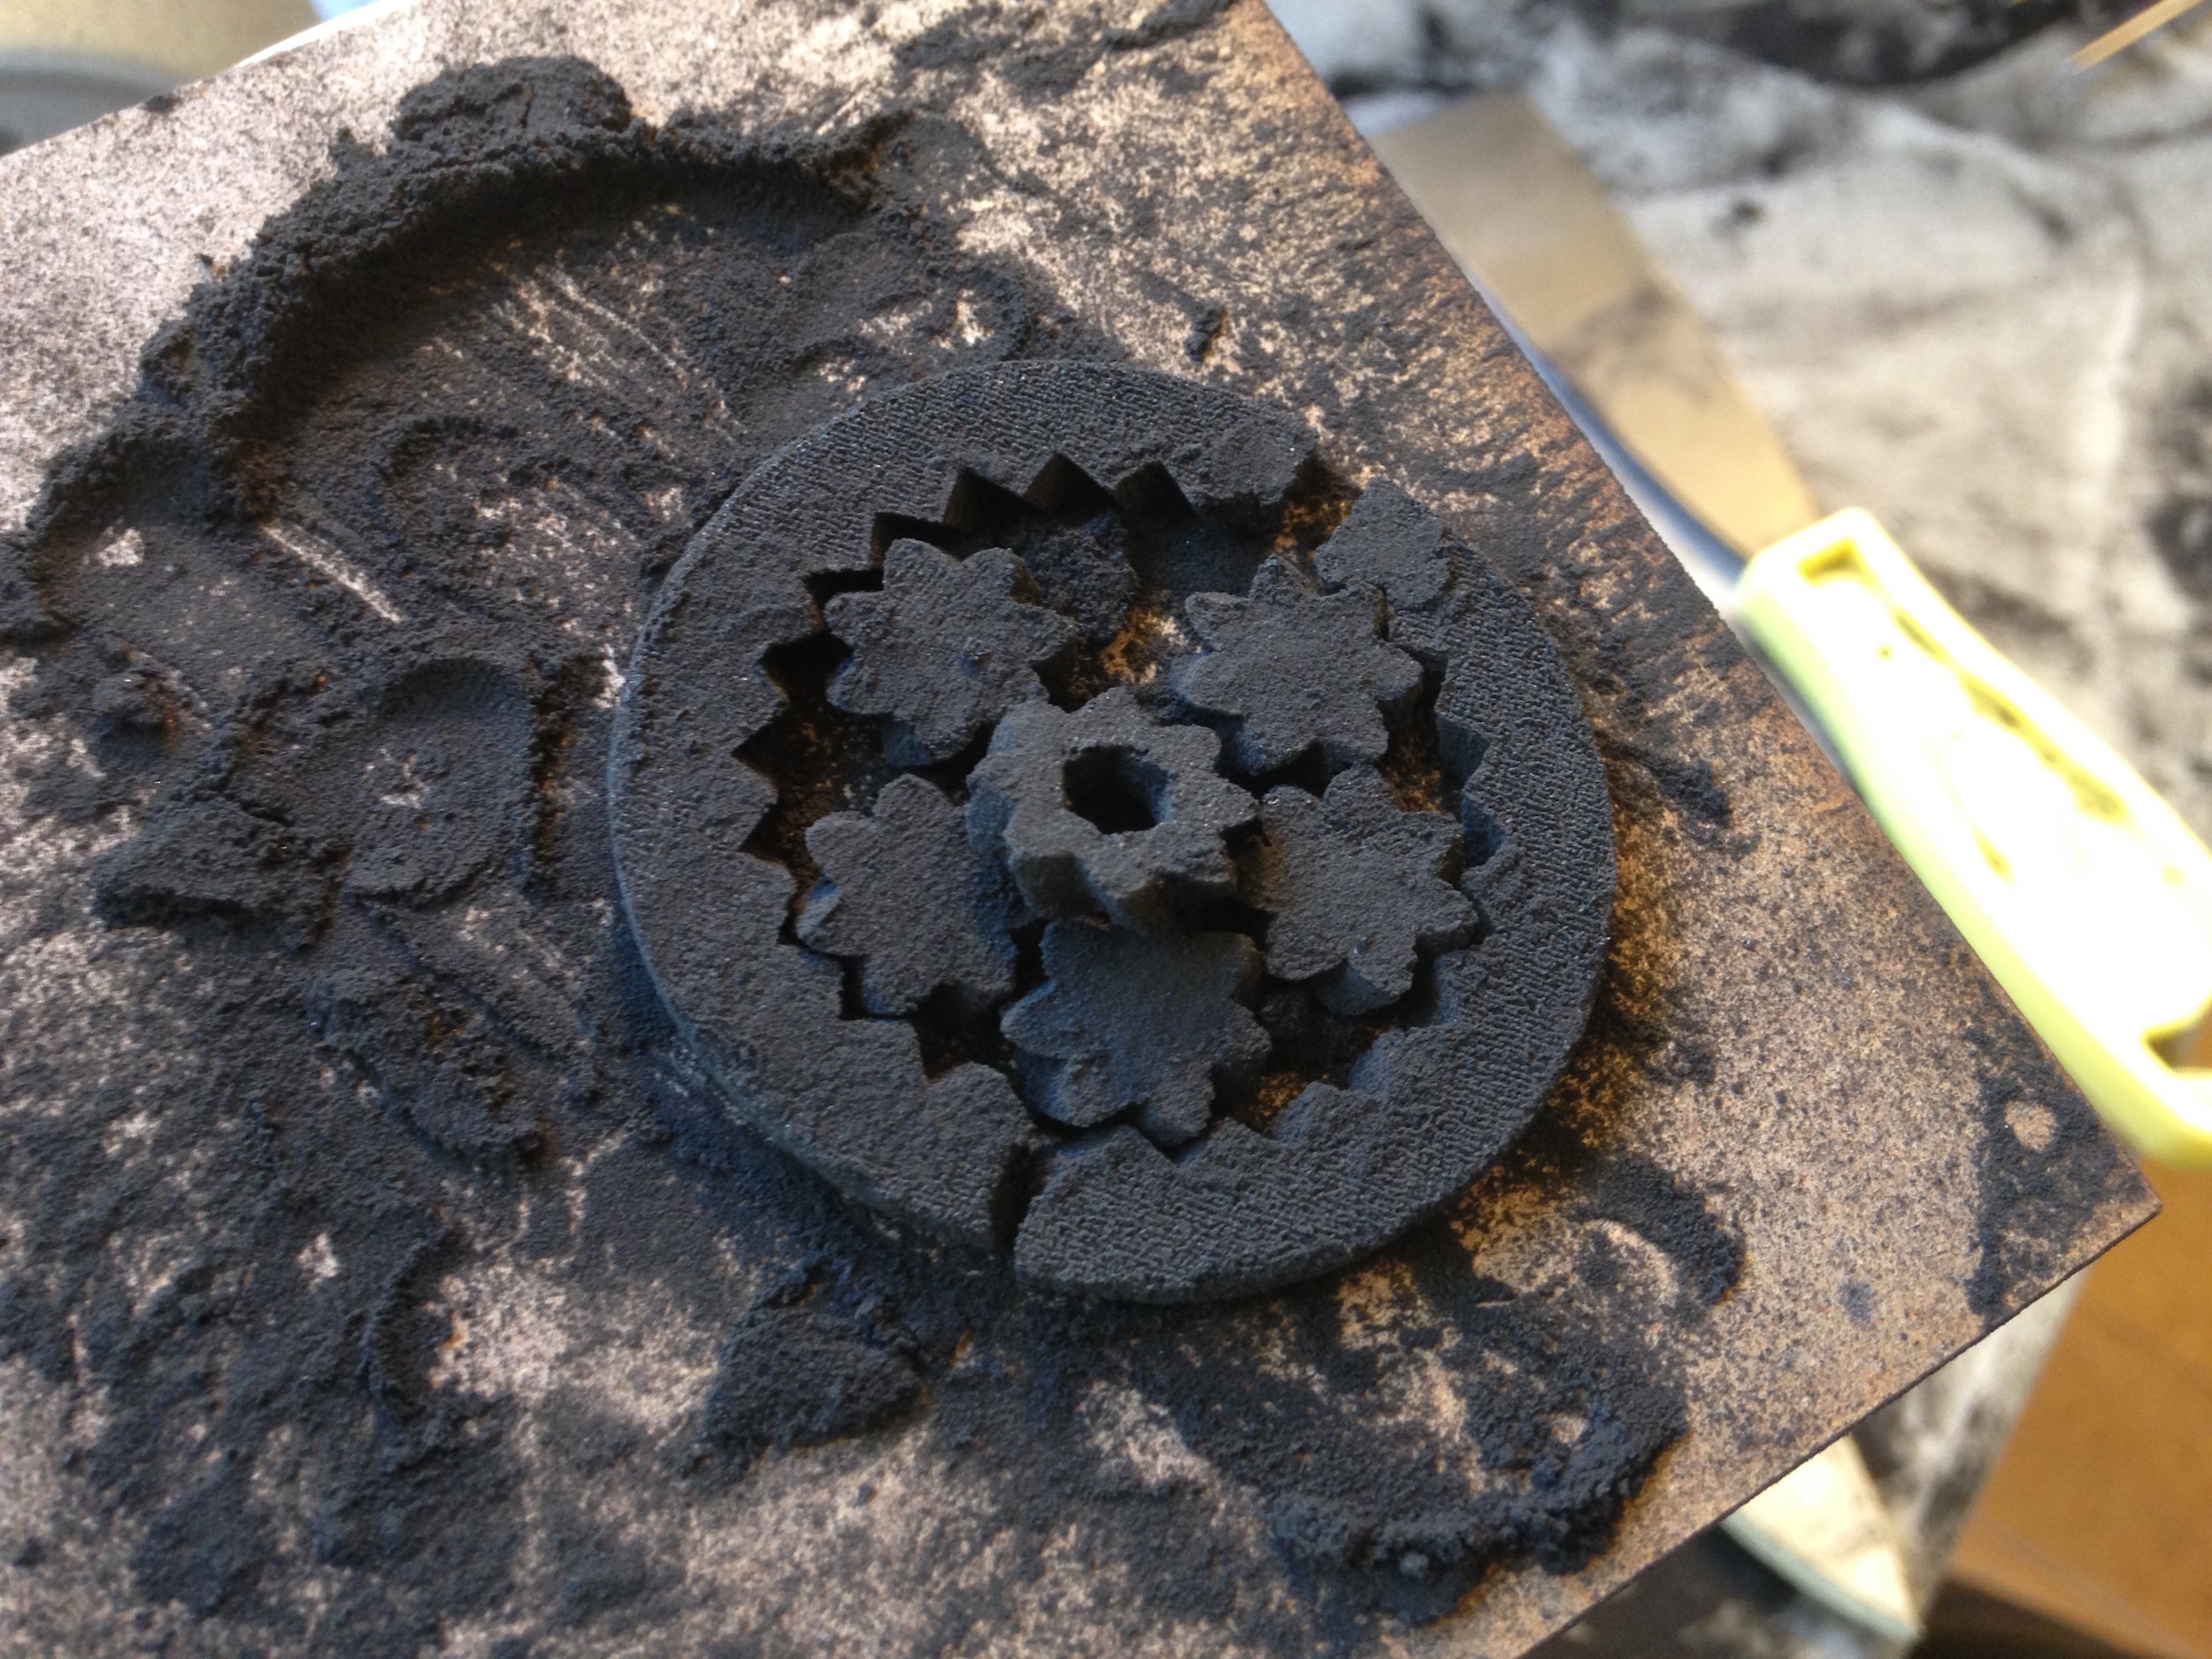
Over the last week or so, I've been fiddling with the sintering parameters to see if I could get stronger parts with the current hardware. I also upgraded the laser to a 1 Watt diode that I had on hand. I didn't put much effort into adjusting the optics for the new diode (each one is a little different), so the spot size isn't as small as it could be. But, I actually got results anyway.
I was able to get fully melted parts that don't curl or spike...much. Spikes are still an issue, particularly around the edges, but most of the time they've been small enough to break off instead of catching the blade. I tried increasing the sweep speed as well, and that seemed to help some. But it's still not as reliable as I'd like. Something else is causing the prints to fail. I'm going to try adding perimeters to see if that helps with the edge spikes.
Here's the TechShop gear again, but this time a lot stronger. Layer height was 125 microns.
Most of the materials used for 3D printing are either moisture sensitive, moisture absorbing, or both. We all know it, and we try to deal with it as best as we can. But sometimes it bites you anyway. Here in San Jose, CA it actually rained the other day. That's a big deal around here, what with the drought going on. So while the rain was welcome on its own merits, it also provided a good learning opportunity. And, of course, all of the frustration that comes with learning things the hard way.
The humidity here got up over 70% while it was raining and stayed that way for most of the day. That entire day, I couldn't get anything to print. The powder looked funny while it was sintering, it curled and 'spiked' like crazy, and just wasn't spreading right. It looked a lot clumpier than normal. I tried running the powder through the sieve again, which helped a little, but not enough.
Since then I've been paying more attention to the humidity while I'm printing. This morning the humidity was over 50% and I was again having problems with the printer. Some time after noon, it got down to 45% and suddenly I could print again. Right now (almost 1am) the humidity in my house is 42% and the print I have going is looking pretty good.
So, lesson learned. Keeping your material dry isn't enough. You also have to keep the air dry. Or at least keep it below 45%. Now how am I going to do that?
So far I've only been printing "solid" parts; calibration cubes, companion cubes, simple gears, etc. I finally got around to trying something a little more complicated. At first, I wanted to print the bearing race model on Thingiverse that seems to be a popular test print. But after I sliced it, and found out how long it would take to print, I decided to go for something simpler. So I went for a bearing gear instead. It took about 6 hours with a layer height of 150 microns.
This time I used a 10 second interval between images, which seems to have worked better. I'm tempted to try 5 seconds, but that would produce a huge pile of images. As it, the camera battery didn't last the full 6 hours, so I doubt it could handle taking twice as many pictures. Anyone know of a good camera that can be powered externally?
I'm playing around with creating time-lapse videos of a part being printed. My camera is an old Canon Powershot SD880 IS, and apparently they hadn't invented time lapse back then. So, I had to install the Canon Hack Development Kit and use the intervalometer script. The on-screen interface that CHDK adds is rather nasty looking, but it worked well enough. I set the interval to 15 seconds and started a print of the TechShop logo that I bummed off one of the DC's. It's not a very interesting print in terms of time-lapse video because the cross section is pretty much the same the entire time. But, it's an easy print and doesn't take too long. I'll have to try something more interesting for the next test. Any requests?
BTW, I used the GoPro studio software to create the video from the still images.
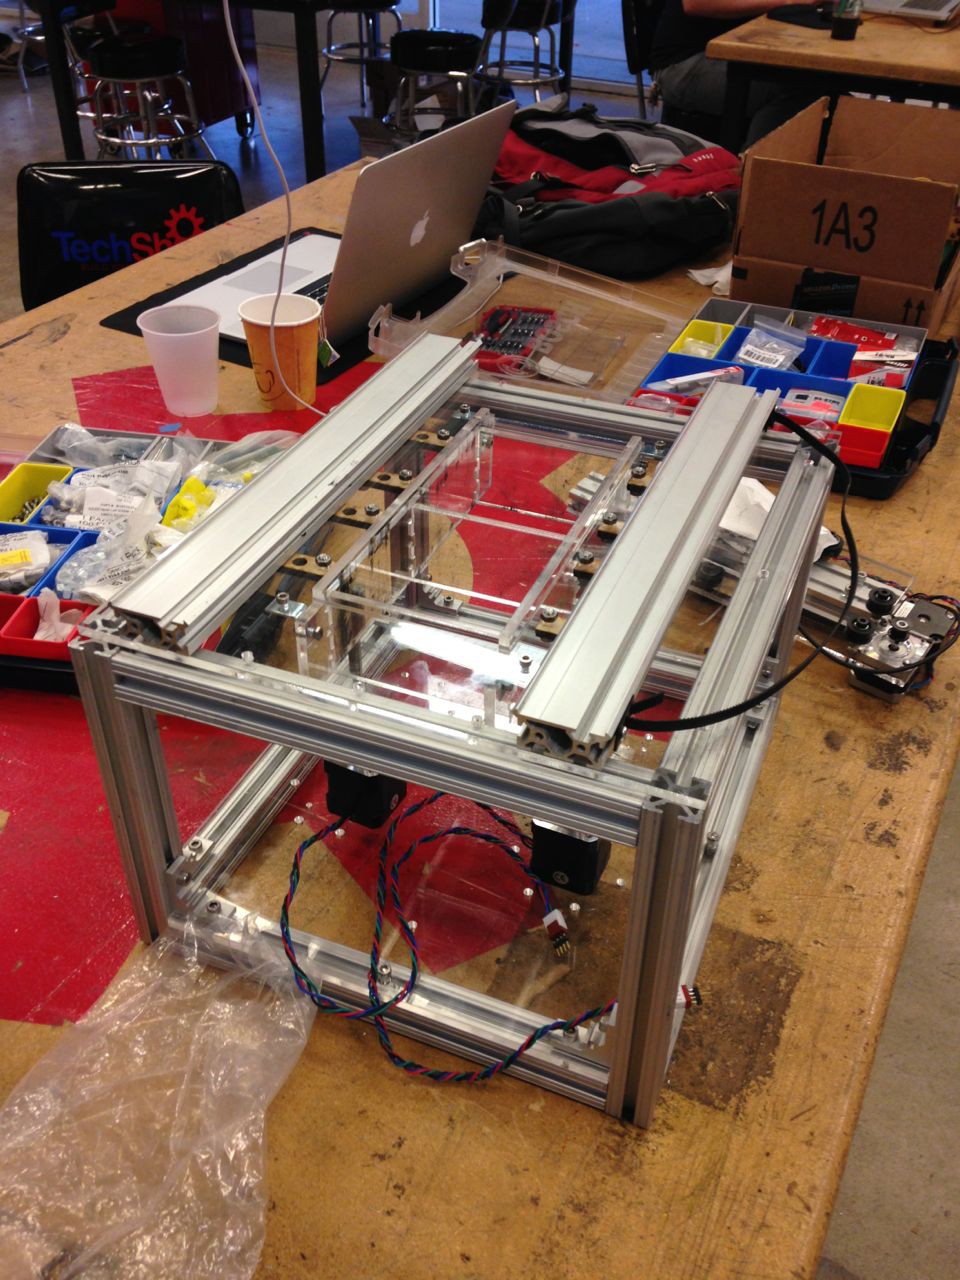
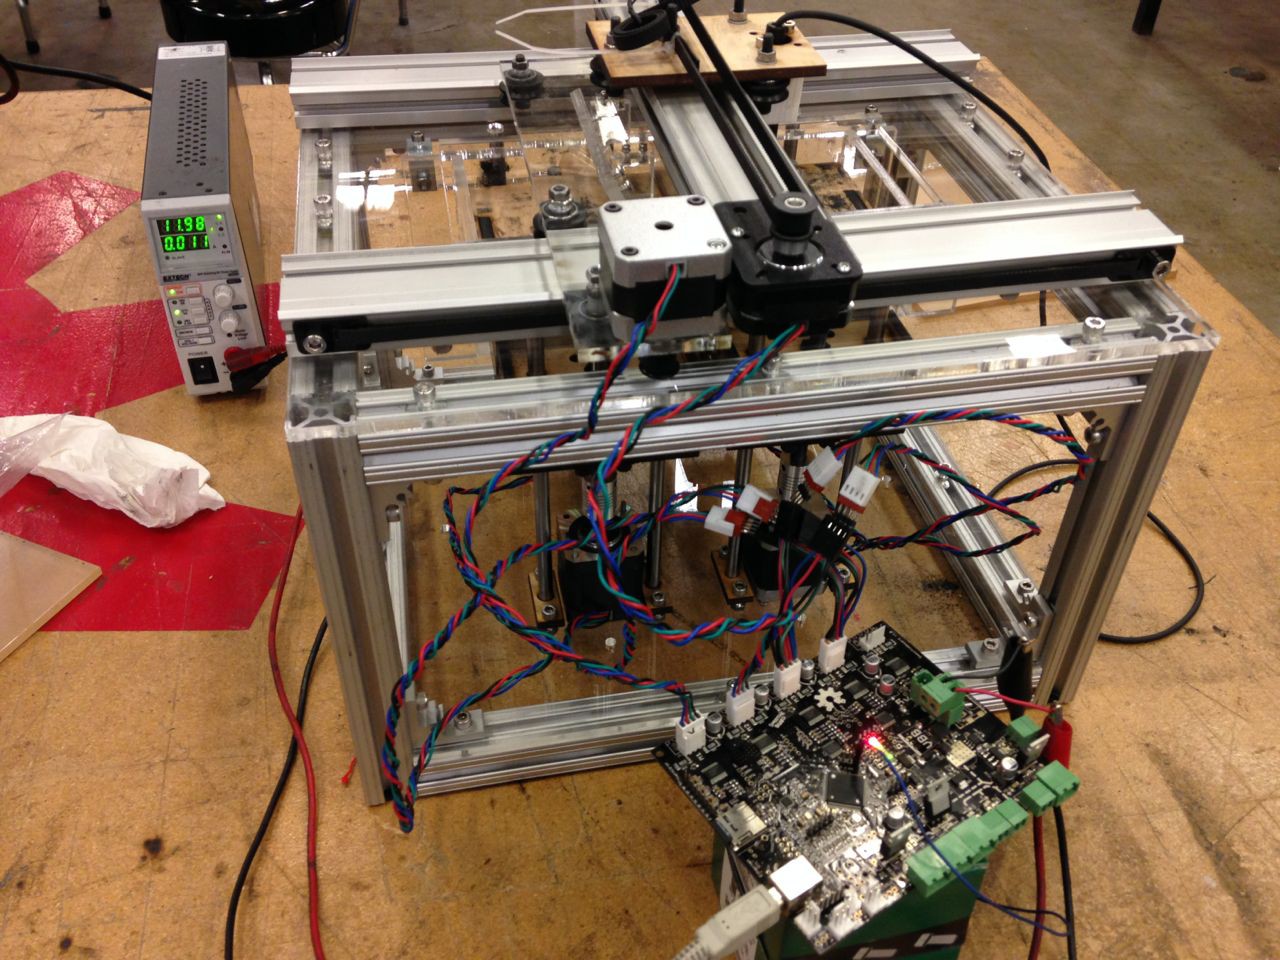
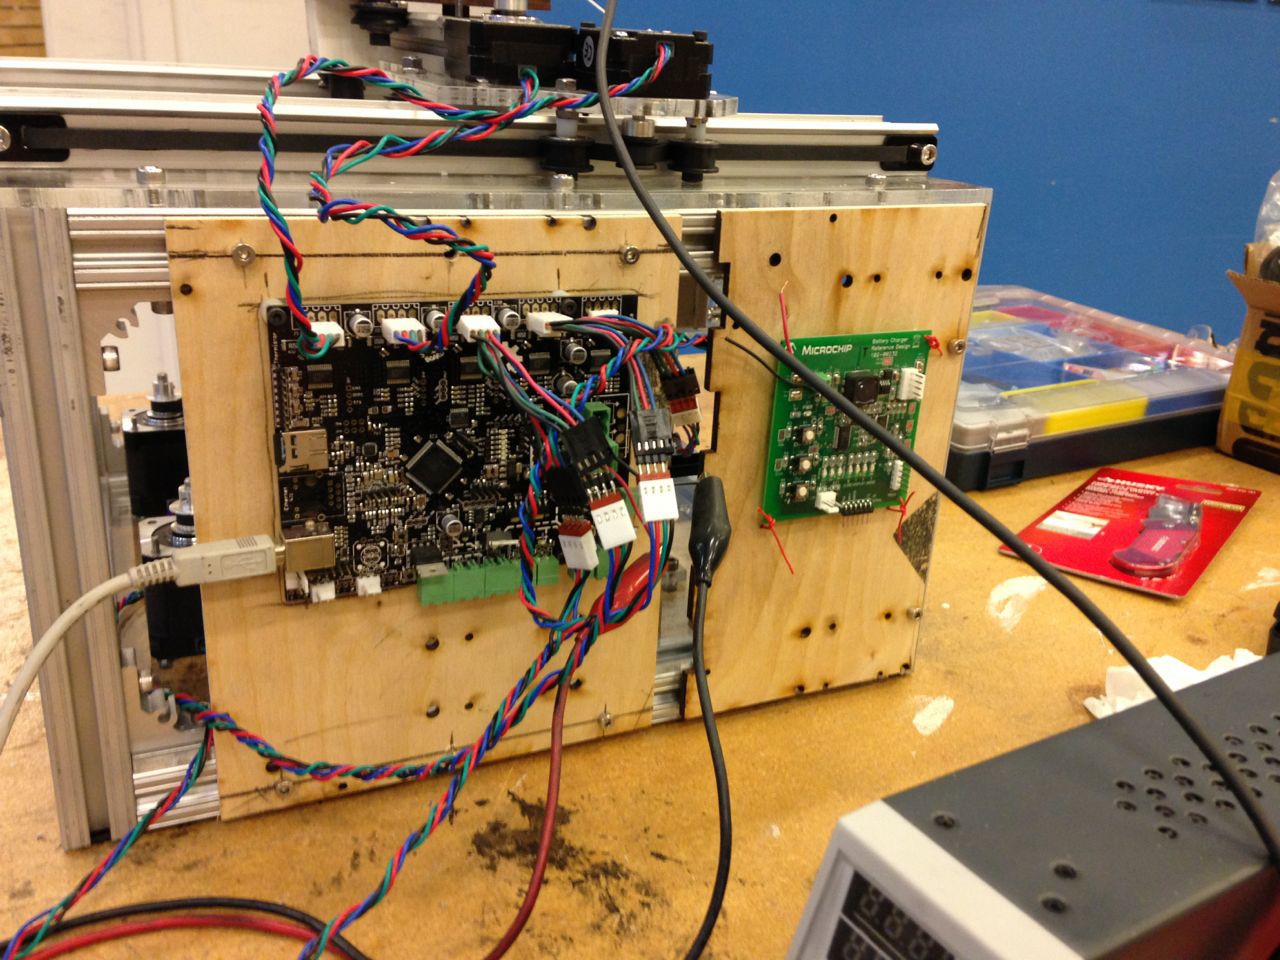
Here are some old pictures from building a previous iteration. For those keeping score at home, this was version 4. I'm currently on version 4.5, but for some reason I didn't take many pictures of that one. The changes are mostly tweaks to the vertical axes and the piston walls. The bits of plywood you see in these pictures were just temporary, except the panel holding the Smoothieboard. That one lives on. And the zip ties. Some people use duct tape, I use zip ties.

Create an account to leave a comment. Already have an account? Log In.
Does the printer work okay without internal heating to 160-deg C? What type of laser are you using?
It depends on the material that you're printing in. Polyester does pretty well without extra heating. I'm using diode lasers; the kind you can get from eBay, etc.
Thanks for the info. I plan on using Carbon Fiber Nylon 12 material for printing 99% of the time. I figured since nylon usually has a large shrinkage factor after cooling, heating the medium might be required. Any thoughts? Also, what do you think of this type of diode laser - http://www.ebay.com/itm/1000MW-laser-power-DIY-laser-engraving-machine-marking-machine-W-Power-supply-/271808756352?pt=LH_DefaultDomain_0&hash=item3f49107a80
?
I work on direct metal deposition. Great job printing the gear looks fabulous!
Become a member to follow this project and never miss any updates
 AccidentalRebel
 Josh Cole
 MasterOfNull
 Mike Maluk
Tutorial how prepare Gcode to make laser engraving using inkscape
I'm shure it will be useful for you! :)