 David Hopkins
-
1Step 1
Get parts required.
Other power options and microcontrollers are available, but the DigiSpark is largely black, was best use of space for my design and have used it before. (I have a couple of trinkets kicking about but never used them).
Power-wise, i wanted to avoid LiPo, and went for 2xCR2032, but they just wouldnt have enough uumph to do the job when the brightness went up.
-
2Step 2
Measure, plan, measure, and measure again.
I tried lots of spacing options but eventually went for 25mm gaps between the slots for the leds, this allowed me enough space for batteries, micro and switch at the end.
-
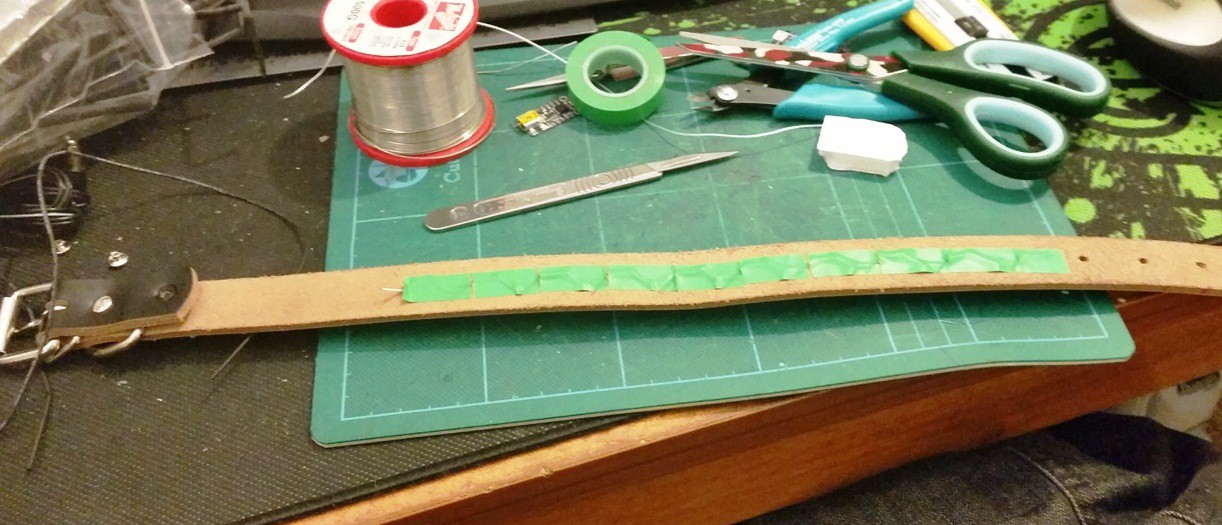
3Step 3
Cut the slots for the leds.
Make sure you use a fresh blade in your scalpel/craft knife, leather is tough stuff and you want clean cuts.
Don't cut too close to the edge of the collar otherwise you will compromise its integrity.
-
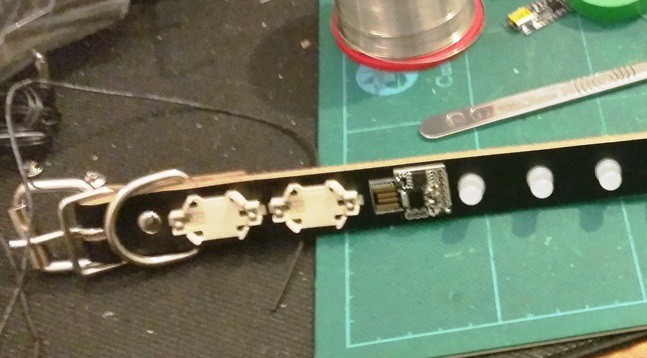
4Step 4
Thread LEDs and solder together.
REMEMBER:
This thing will need to flex, make wiggles in the wire so that it does this properly, if you have it, use silicone wire (as this is high-flex). I used Kynar wire (or rework wire / wrapping wire).
this shows the first stage where i have connected DOUT to DIN on the leds, but not yet the power.
![]()
Next hook up power, dont forget a filtering cap across the power rails to remove flickering.
-
5Step 5
Lay out other components.
this shows when i was trying to use CR2032's before i found them to be unsuitable:
![]()
-
6Step 6
re-layout components after design changes :-P
![]()
-
7Step 7
Attach parts (sewing of double-sided sticky tape)
Warning:
Leather is a right sod to sew, i drilled small holes first where i needed to attach things.
-
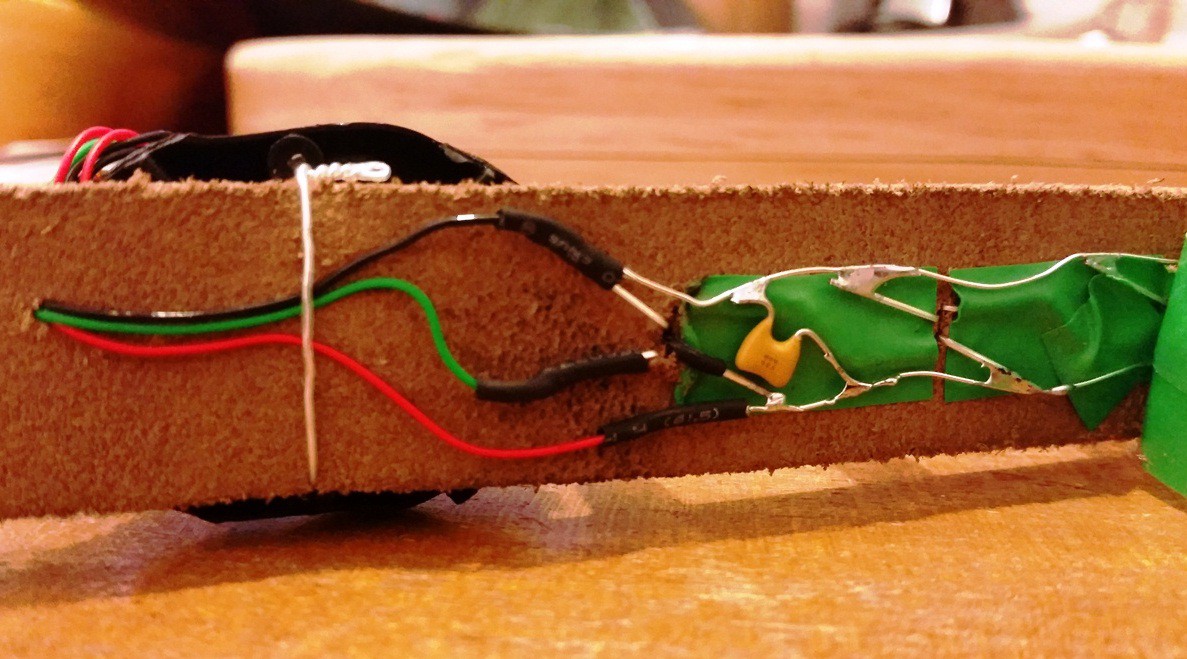
8Step 8
Final soldering once parts are in place
eg wires cut to just the right length etc
this shows underside final wiring (with wiggles and filter cap):
![]()
-
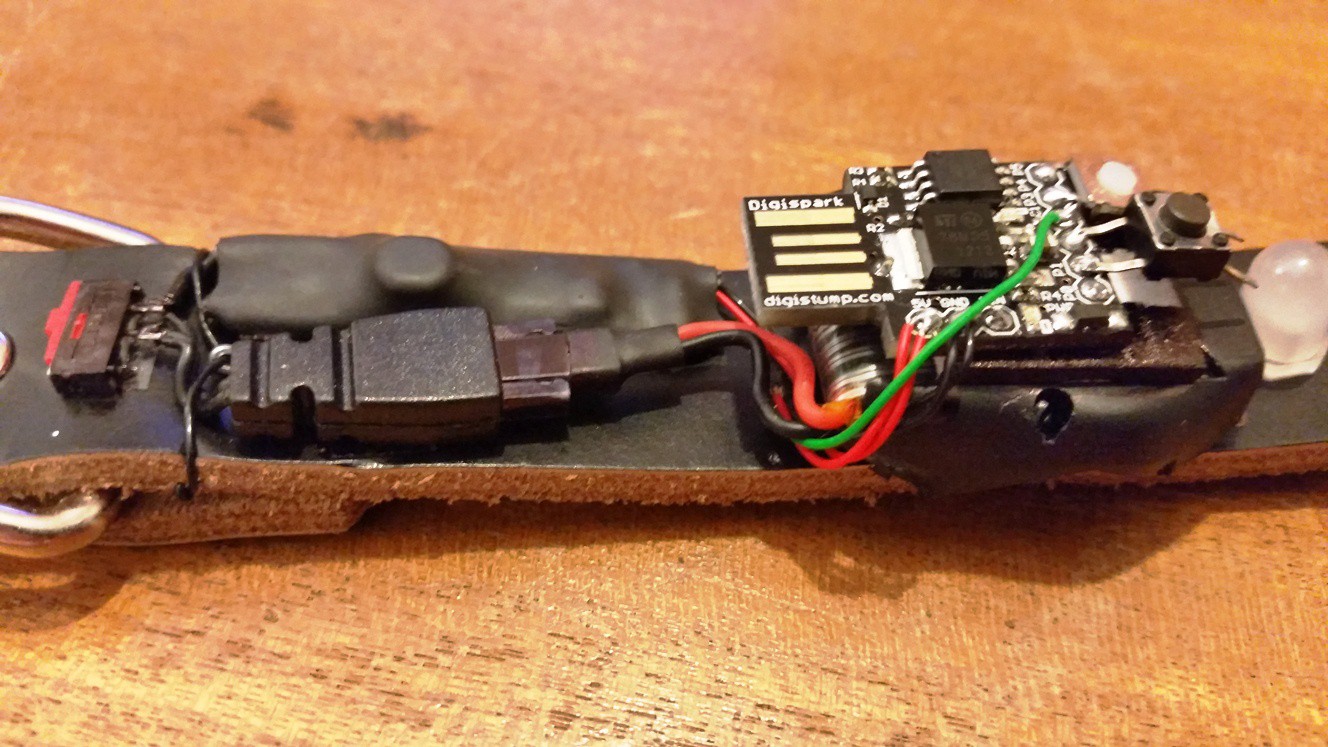
9Step 9
Finish up and make good.
make it all neat, colour in bits with black marker where needed etc :-)
![]()
this shows a substitute switch, both are now low profile silicone ones (instead of plastic)
-
10Step 10
At some point, coding will be required, I did this fairly early on, of you want to copy the design/pinout etc, feel free to use my code as is (messy though it may be). Have Fun :-)
RGB Punk Collar
'Punk' Collar with RGB LEDs, driven by a DigiSpark and a small LiPo Inspired by a similar design by Adafruit.

Discussions
Become a Hackaday.io Member
Create an account to leave a comment. Already have an account? Log In.