Hari Wiguna
-
Downloading and Installing NodeMCU Firmware
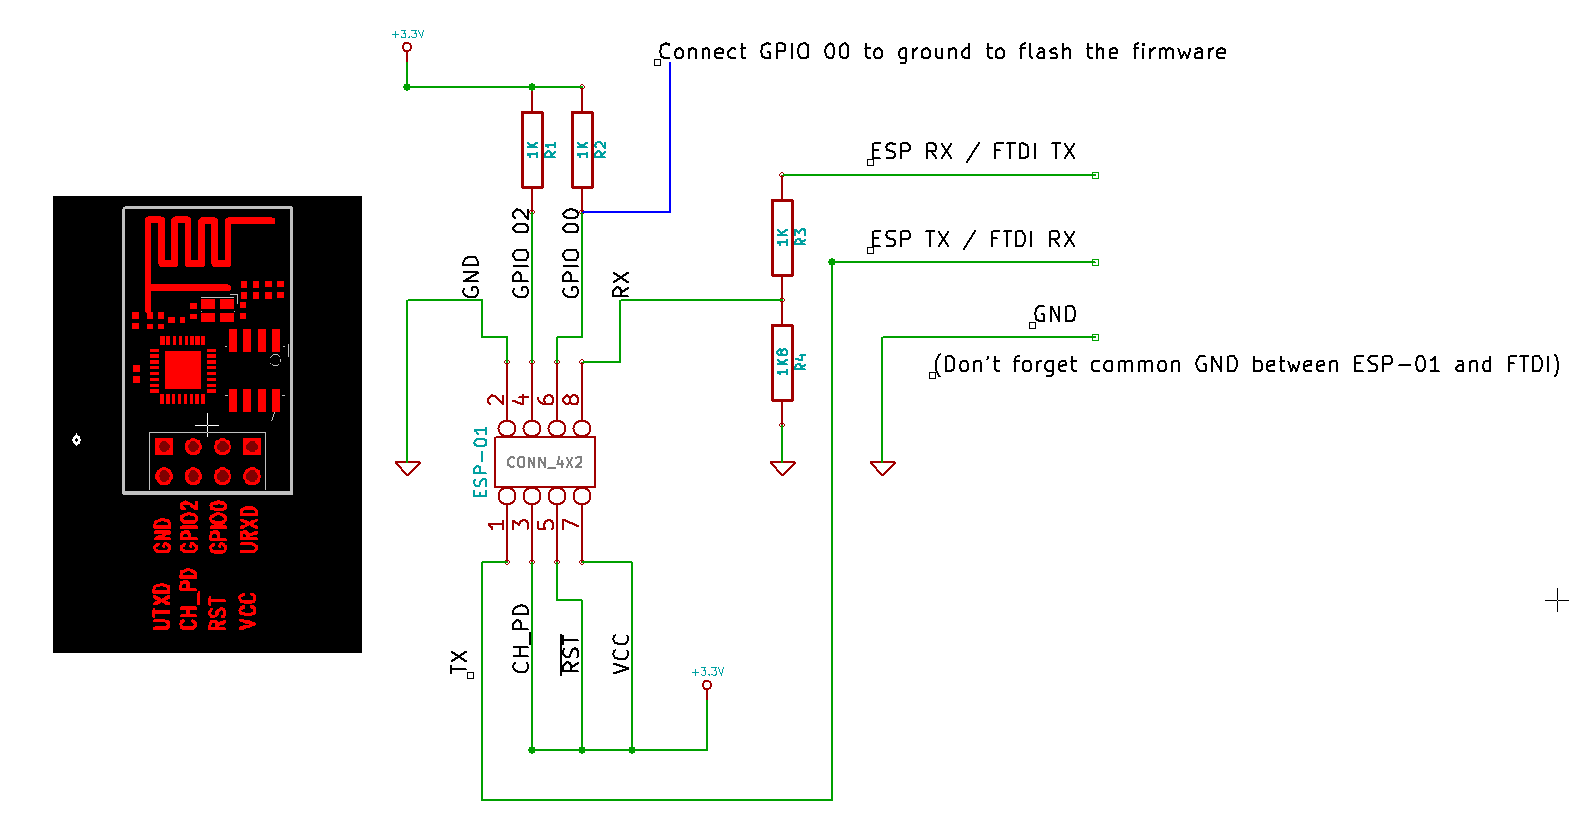
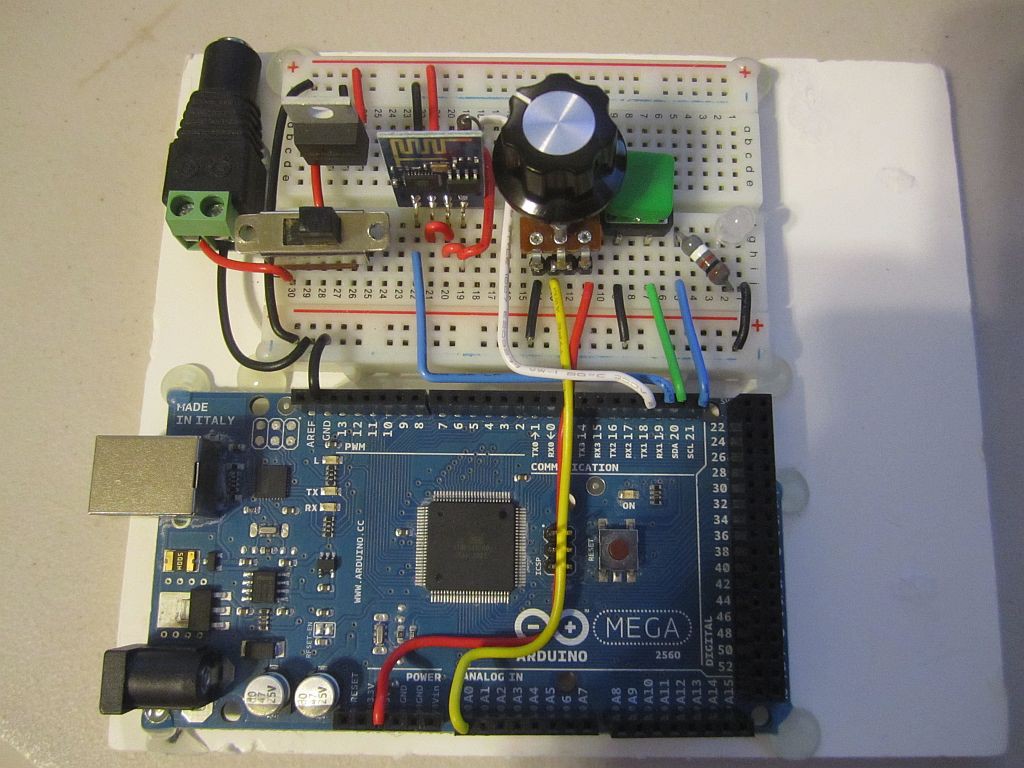
01/07/2015 at 03:58 • 1 comment1. Wire up the ESP-01. To prepare it for firmware flashing, GPIO 00 should be connected to ground before you apply power to the ESP.
![]()
2. Visit www.nodemcu.com
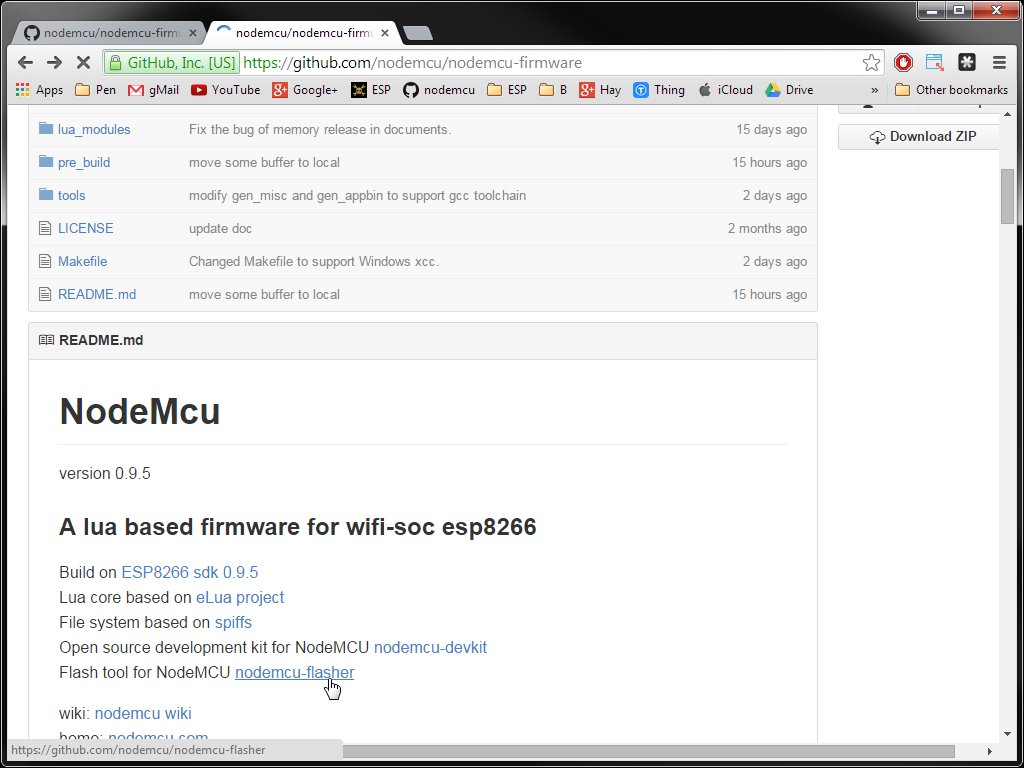
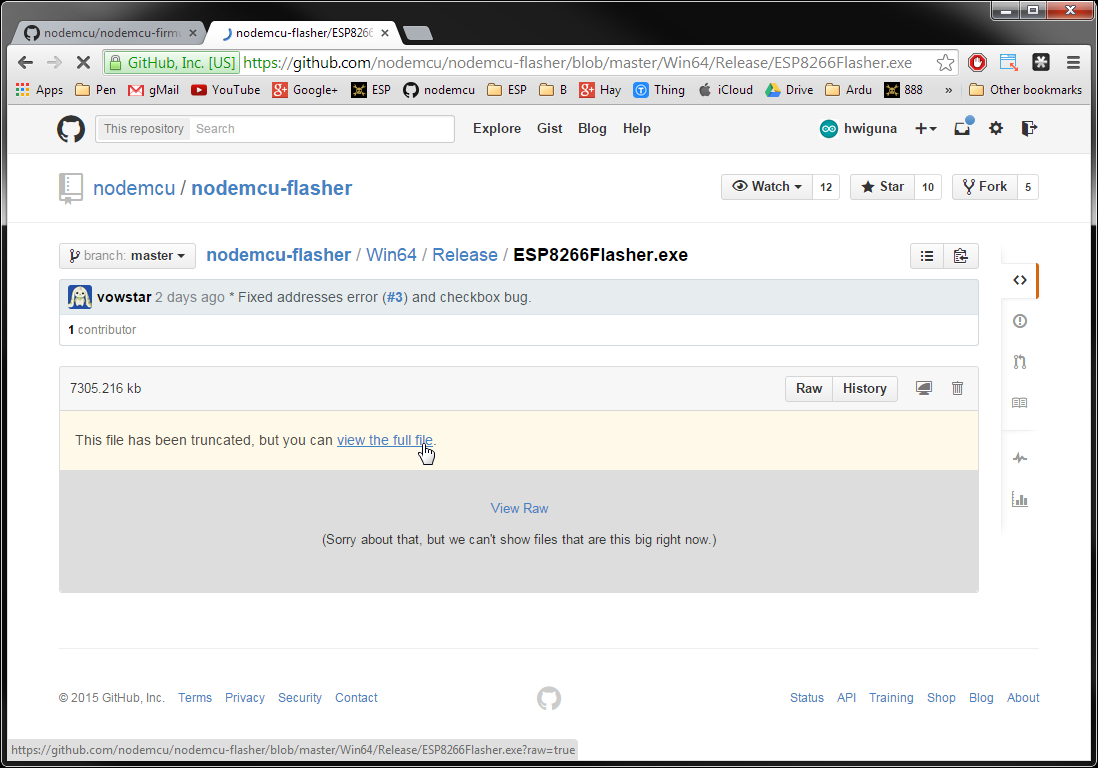
3. Navigate to Github to download the firmware.![]()
![]()
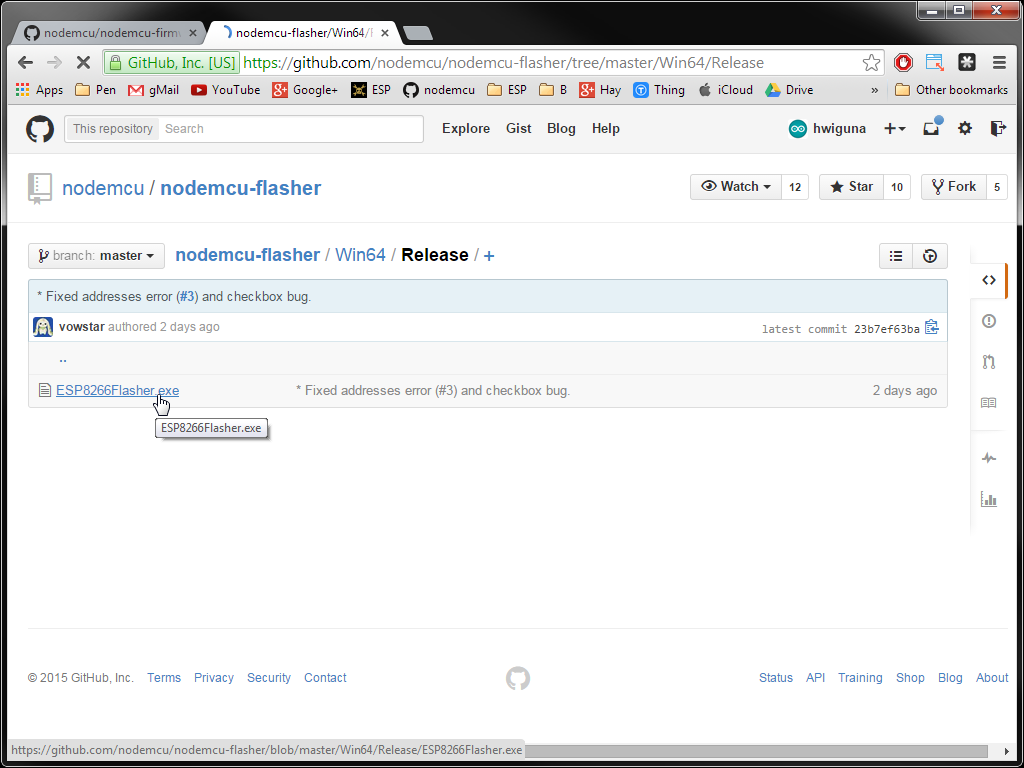
4. You can download the actual firmware binaries in pre_built. However, it's even easier if you download the flasher itself because it has the firmware included in there! Get the 32bit or 64 bit version depending on your PC's OS.
![]()
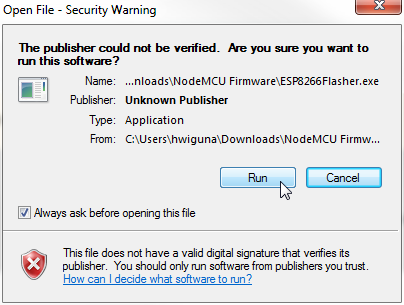
5. Run it. Yeah, you'll get unsigned app warning.![]()
![]()
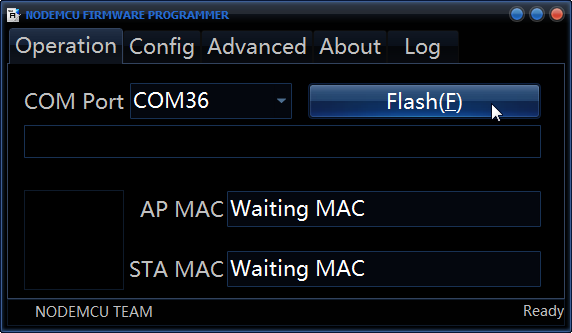
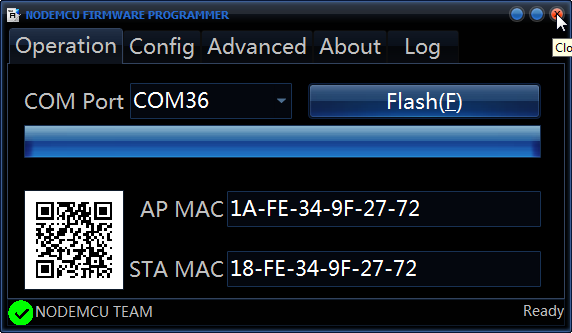
6. It should find your FTDI port automatically. Click Flash button and wait till you get a checkmark at bottom left.
![]()
7. Quit the flasher app.
8. Connect GPIO 00 to vcc (via 1K resistor if you have it, but I've connected it without a resistor also). Recycle power on the ESP. If you forget to do this, the next step will not work because it thinks that you're going to re-flash the firmware.![]()
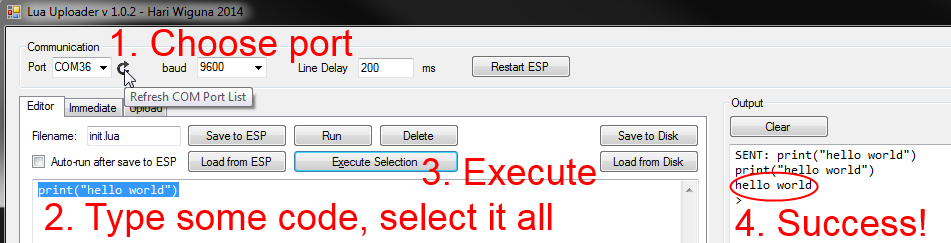
9. Use some sort of a terminal program to connect to the FTDI port. I'm biased towards LUA Uploader (I wrote it :-))
10. Write a hello world lua progam.
11. Have fun!
![]()
-
MQTT
01/06/2015 at 05:44 • 0 commentsThis is a placeholder for resources that I'm studying towards using MQTT with the ESP8266.
-
World record?
12/25/2014 at 13:08 • 0 commentsHow many ESP-01s can we fit on one breadboard?
Actually, this is a demo of ESPs talking to each other. However, I do have quite a few ESPs on the breadboard.
-
ESP8266 (2014) meets X-10 (1975)
12/16/2014 at 07:22 • 0 commentsI wanted to control A/C devices, but I didn't want to deal with high voltages. Then I remember X-10 home automation system which according to Wikipedia is 40 years old!? Probably not very practical, but it was fun!
-
WiFi I/O using ESP-03 and Shift Register
12/13/2014 at 20:27 • 0 comments -
Unlimited WiFi I/O pins for just a few dollars!?
12/11/2014 at 06:52 • 0 commentsHuge thanks to NodeMCU!
Code and Schematic coming soon... -
NodeMCU + NodeJS + JQuery = IoT
11/30/2014 at 05:17 • 0 comments -
NodeMCU LUA Firmware
11/29/2014 at 16:40 • 0 comments -
Talking to a remote webserver
11/27/2014 at 06:36 • 0 comments![]()
Arduino Code
Source: ESP8266 documentationAT // Returns OK
AT+RST // Returns OK
AT+CWMODE=1 // 1=Client, 2=Access Point, 3=Client & AP. Returns either "OK" or "no change"
AT+CIPMUX=0 // 0=Single Channel, 1=Multi Channel. Returns OK
AT+CIPMODE=0 // 0=Received data will be sent to serial port as +IPD,conn, len. 1=plain data stream. Returns OK
AT+CWJAP="WIFI_SSID","WIFI_PASSWORD" // Connect to WIFI_SSID. Returns OK
AT+CIFSR // Returns module's IP Address followed by OK
AT+CIPSTART="TCP","SERVER_IP",PORT_NUM // Connect to SERVER_IP to send data. Returns OK
AT+CIPSEND=LENGTH // Prepare to send string of LENGTH bytes. Returns ">"
Once ">" is received, send the actual data (must end with two sets of CR+LF (counted in LENGTH). Returns OK or ERROR.
AT+CIPCLOSE // Close the connection to SERVER_IP. Returns OK or ERROR
Playing with ESP8266
What I've learned about the very exciting $3 WiFi module.