PointyOintment
-
Parts arriving!
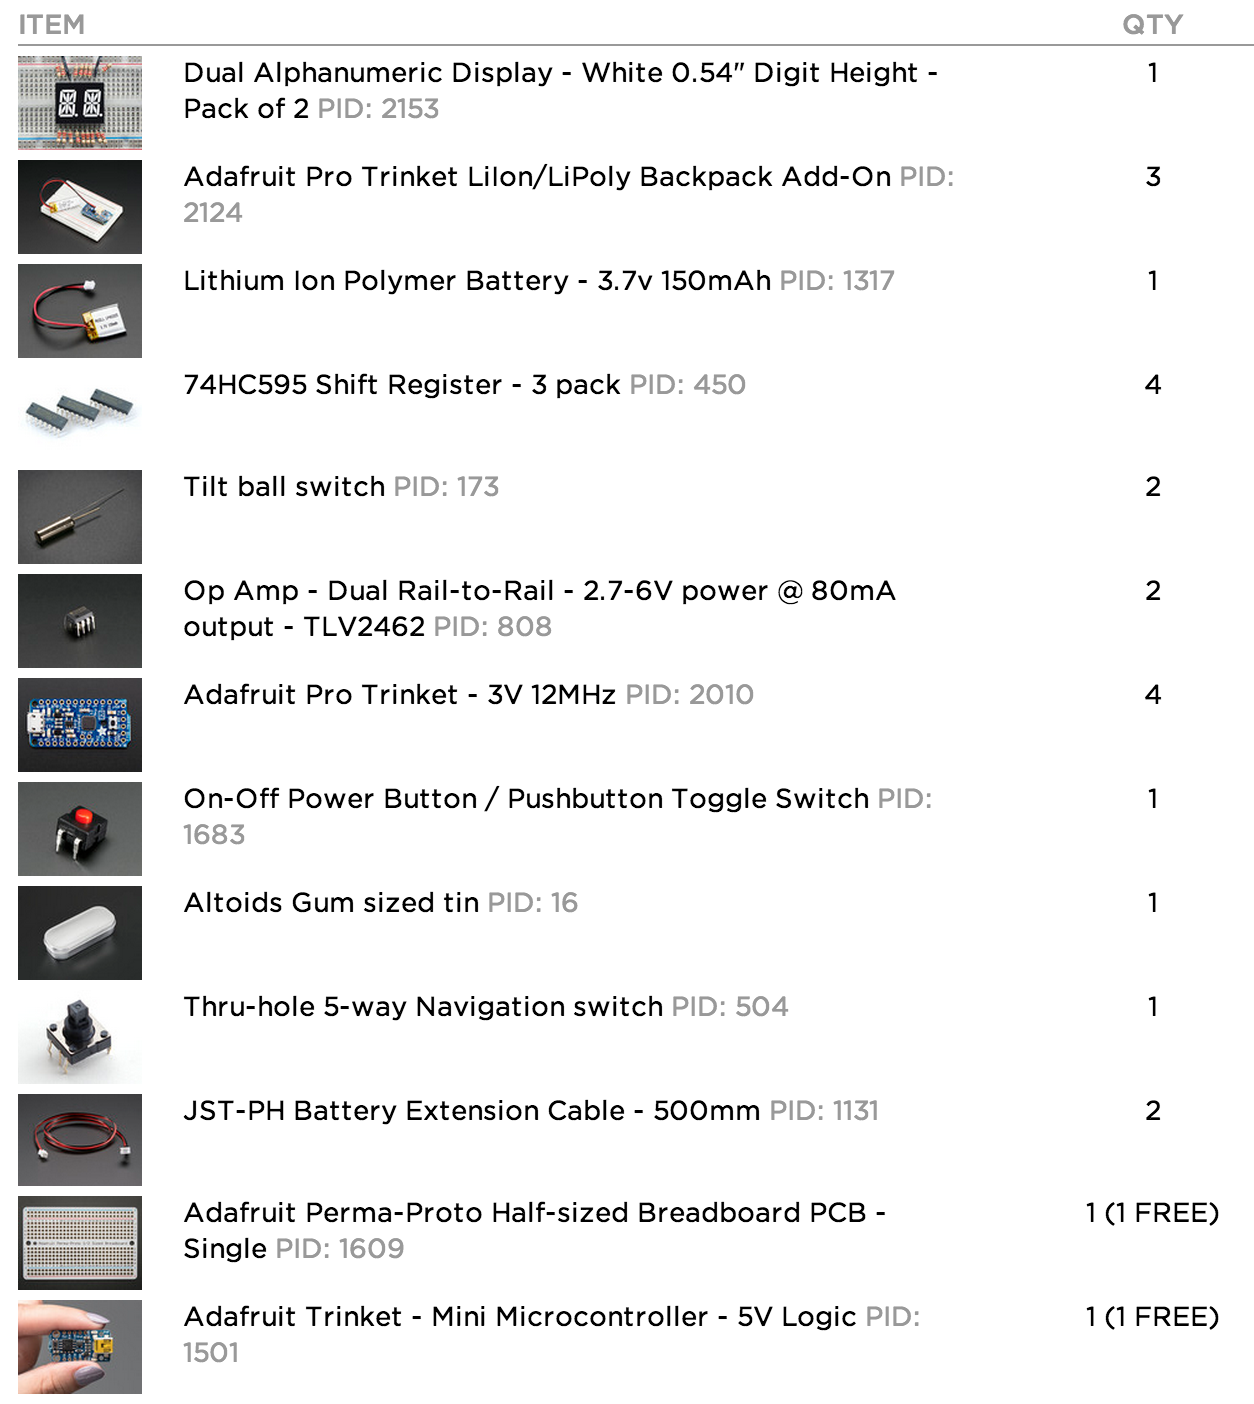
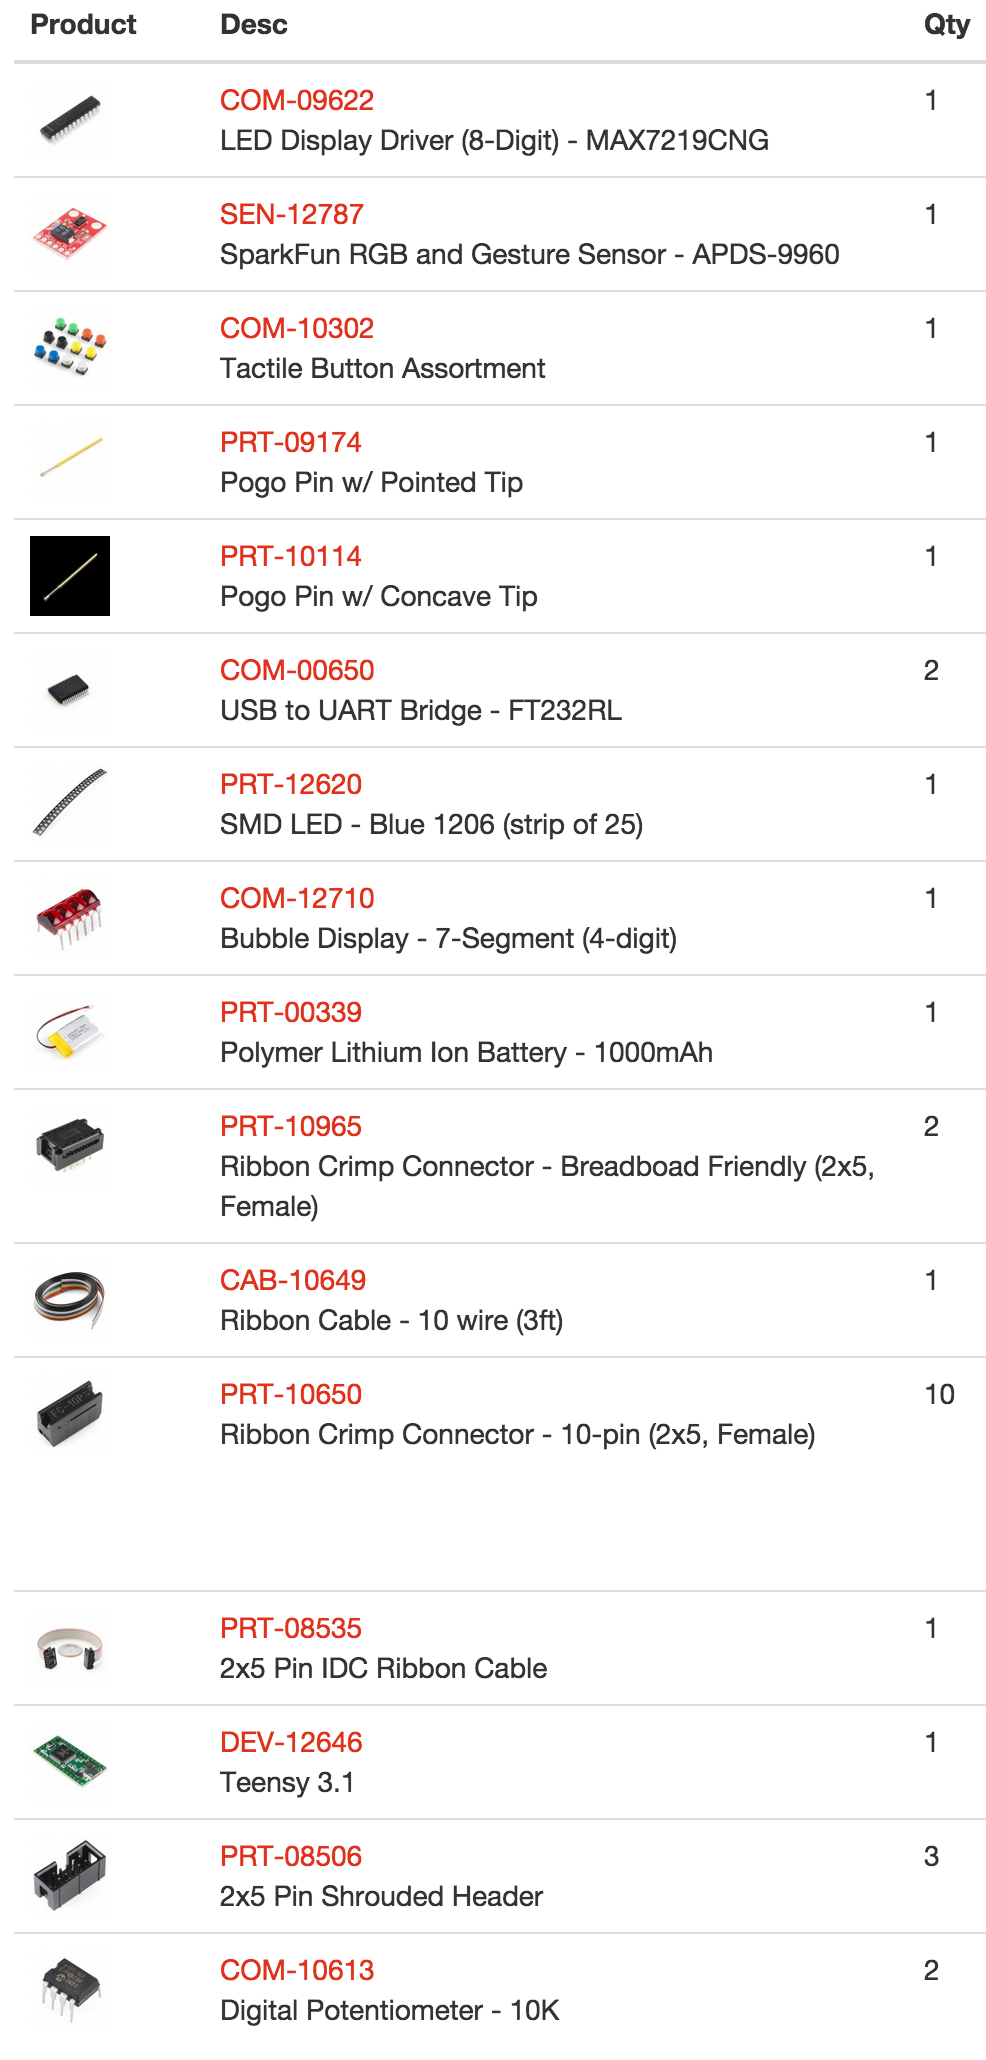
12/24/2014 at 00:48 • 0 commentsI placed one order with Adafruit and one with SparkFun last Tuesday, for parts for all three of my Trinket EDC Contest entries. Unfortunately, SparkFun wasn't offering USPS Priority Mail Express International for some reason, so I had to shift stuff around so all of the things I needed right away were in the Adafruit order, for which I could use the fast shipping. It arrived at the post office this morning; I'm going to go pick it up tomorrow. Here are the relevant parts I ordered:
![]()
![]()
Yes, that Teensy is relevant. :D
With the parts arrived/shipped, all three projects will be going ahead even if they miss the contest deadline.
Also, as I said in a comment, the MAX7219CNG is just in case I can't get it working without, because it would make the watch way bulkier.
-
A minor setback
12/09/2014 at 00:46 • 0 commentsTwo days ago I uploaded an image of a 3D model I'd made of the Pro Trinket. I was going to do the same for the other components, but my computer stopped working. It does this thing whenever it restarts where its screen doesn't work for about 40 minutes after booting. This time, though, it didn't work for a couple of days. I tried restarting again, resetting the SMC, etc., and the best I got was the screen working for a few seconds after boot and then going black. I remembered that the last time this happened, I had to boot the computer and then leave it closed for several hours to get it to work again. I did so, and it works again. I will try to model the other components later tonight.
![]()
-
Displaying raster images
12/03/2014 at 07:08 • 0 commentsAfter much struggling, I managed to get it displaying hardcoded raster images chosen by sending a letter over the serial connection. Here it is displaying A, B, C, a smiley face, and the LEDs that are illuminated in my mockup image (taken from [Daniel]'s photo):
I first tried to use a switch case statement to load the chosen pixel array into the pixel array that refreshScreen() reads from, but apparently you can't set all elements of an array unless you're doing so when you're first defining it. Seems strange to me, but whatever. I changed those pixel arrays to constants, and then made a switch case statement inside refreshScreen() that chooses among them as it draws to the LED matrix. After that I had loads of syntax errors resulting from moving code around and trying different approaches, but they were all easily fixed. It's not particularly efficient (or maintainable), but it looks like it updates plenty fast—much faster than the x-y demo I did earlier, for some reason. It's good enough for a proof of concept, at least. The actual word clock function will use a more dynamic way of generating the pixel arrays. Here's the code:
char imageID; // images: const int pixelsA[8][8] = { {1,1,1,0,0,1,1,1}, {1,1,0,0,0,0,1,1}, {1,0,0,1,1,0,0,1}, {1,0,0,1,1,0,0,1}, {1,0,0,0,0,0,0,1}, {1,0,0,1,1,0,0,1}, {1,0,0,1,1,0,0,1}, {1,0,0,1,1,0,0,1} }; const int pixelsB[8][8] = { {1,0,0,0,0,0,1,1}, {1,0,0,1,1,0,0,1}, {1,0,0,1,1,0,0,1}, {1,0,0,0,0,0,1,1}, {1,0,0,0,0,0,1,1}, {1,0,0,1,1,0,0,1}, {1,0,0,1,1,0,0,1}, {1,0,0,0,0,0,1,1} }; const int pixelsC[8][8] = { {1,1,0,0,0,0,1,1}, {1,0,0,0,0,0,0,1}, {0,0,1,1,1,1,0,0}, {0,1,1,1,1,1,1,1}, {0,1,1,1,1,1,1,1}, {0,0,1,1,1,1,0,0}, {1,0,0,0,0,0,0,1}, {1,1,0,0,0,0,1,1} }; const int pixelsSmile[8][8] = { {0,0,1,1,1,1,0,0}, {0,1,1,1,1,1,1,0}, {1,1,0,1,1,0,1,1}, {1,1,1,1,1,1,1,1}, {1,0,1,1,1,1,0,1}, {1,1,0,0,0,0,1,1}, {0,1,1,1,1,1,1,0}, {0,0,1,1,1,1,0,0} }; const int pixelsWords[8][8] = { {1,1,0,0,0,0,0,0}, {0,0,1,0,1,0,1,1}, {1,1,1,0,0,0,0,1}, {1,1,1,1,1,1,1,1}, {1,1,1,1,1,1,1,1}, {1,1,0,0,0,0,0,0}, {1,1,1,1,1,1,1,1}, {1,1,1,1,1,1,1,1} }; void readSerial() { // get value from serial: imageID = Serial.read(); } void refreshScreen() { // iterate over the rows (anodes): for (int thisRow = 0; thisRow < 8; thisRow++) { // take the row pin (anode) high: digitalWrite(row[thisRow], HIGH); // iterate over the cols (cathodes): for (int thisCol = 0; thisCol < 8; thisCol++) { // get the state of the current pixel: //int thisPixel = pixels[thisRow][thisCol]; int thisPixel; switch (imageID) { case 'a': thisPixel = pixelsA[thisRow][thisCol]; break; case 'b': thisPixel = pixelsB[thisRow][thisCol]; break; case 'c': thisPixel = pixelsC[thisRow][thisCol]; break; case 's': thisPixel = pixelsSmile[thisRow][thisCol]; break; case 'w': thisPixel = pixelsWords[thisRow][thisCol]; break; } // when the row is HIGH and the col is LOW, // the LED where they meet turns on: digitalWrite(col[thisCol], thisPixel); // turn the pixel off: if (thisPixel == LOW) { digitalWrite(col[thisCol], HIGH); } } // take the row pin low to turn off the whole row: digitalWrite(row[thisRow], LOW); } } -
Basic LED matrix control
12/03/2014 at 04:37 • 0 commentsModifying the Arduino example I linked to earlier, I made a basic sketch that takes X and Y positions via serial and illuminates the corresponding LED.
![]()
Here's the code I added/changed:
void loop() {
   // read input:
   while (Serial.available() > 0) {
   readSerial();
   }

   // draw the screen:
   refreshScreen();
}

void readSerial() {
   // turn off the last position:
   pixels[x][y] = HIGH;
   // get value from serial:
   x = Serial.parseInt();
   y = Serial.parseInt();
   if (Serial.read() == '/n') {
      x = constrain(x, 0, 7);
      y = constrain(y, 0, 7);
   }
   // set new pixel position on:
   pixels[x][y] = LOW;
}
Now I can just type two digits from 0 to 7, separated by a non-digit (e.g. a space) in the serial terminal, and the corresponding LED on the matrix will light up.
Next I will try to get it to display predefined raster graphics. This will be the basis of the word clock functionality.
-
The LED matrix
12/02/2014 at 06:50 • 0 commentsI picked up this LED matrix at a local electronics store several weeks ago, thinking I might find an interesting project for it:
![]()
(Is that green bag supposed to be static-dissipative?)
The pinout of these is very strange. I found this Arduino tutorial quite helpful. I tested it on a breadboard:
![]()
![]()
It looks like it should work fine.
echo "…" | wc
11 58 340
yay
Word watch
There's not much that's more EDC than a watch. LED matrix-based word watch, inspired by Daniel Rojas's micro word clock recently on the blog