Close
0%
0%

AVR BASIC Computer V0.1

A BASIC computer which generates composite video, reads PS/2 keyboard input and has an 8KB EEPROM IC for saving BASIC programs to.

danDan
Similar projects worth following
A computer which runs the TinyBASIC Plus (TBP for short) programming language on an ATmega 1284P 8-bit microcontroller. A composite screen (such as a TV) and a PS/2 keyboard are used to interact with the computer, allowing users to write BASIC programs without requiring a separate computer (such as a PC) for programming.

The computer has the following specifications:
- ATmega 1284P 8-bit microcontroller running at 16MHz
- Over 7KB SRAM for writing TBP programs into
- 8KB EEPROM for saving TBP programs to
- Composite video output
- PS/2 keyboard input
- GPIO pins for connecting additional hardware and components
- Input voltage range from 7V to 20V (using a 7805 regulator)

Simply connect the computer to a power source (such as a PP3 battery), a PS/2 keyboard and a composite screen (such as a TV) to begin creating BASIC programs.

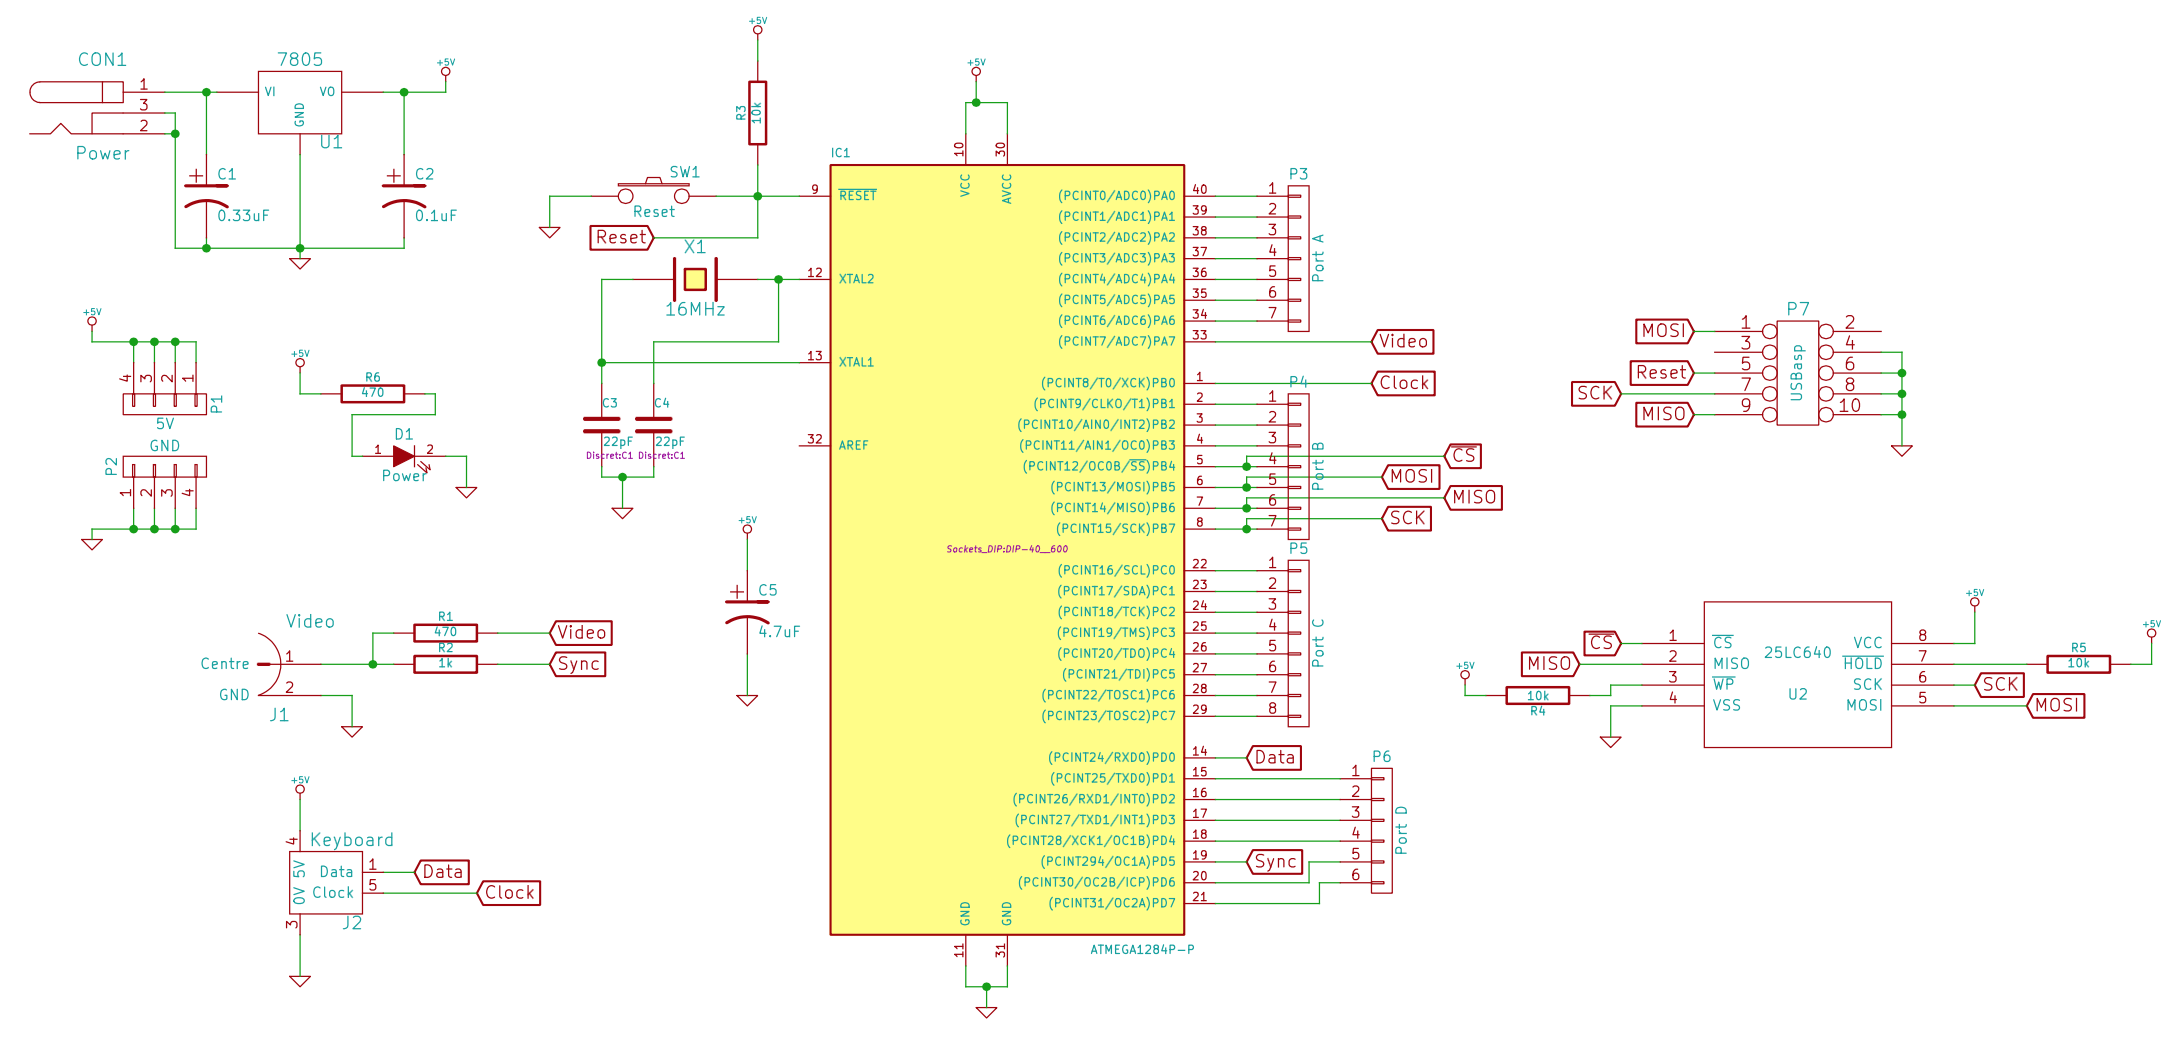
The above image shows the schematic for the computer, which was created in KiCAD. The circuit uses an ATmega 1284P microcontroller which was boot-loaded and programmed using the Arduino IDE. An 8KB SPI EEPROM IC (25LC640) is connected to the 1284P and used for storing BASIC programs as the 1284P only has 4KB internal EEPROM so an external EEPROM IC was used for larger program space. The 1284P is responsible for running the BASIC interpreter (TinyBASIC Plus), generating composite video (using the Arduino TVout library), reading PS/2 keyboard input (using the Arduino PS2uartKeyboard library) and talking to the EEPROM IC (using the Arduino SpiEEPROM library).. The circuit is powered via a 7805 voltage regulator allowing a range of voltage sources to be used to power the circuit (such as a 9V battery or 12V wall mounted transformer). A full list of components can be found under the 'Components' section of this page.

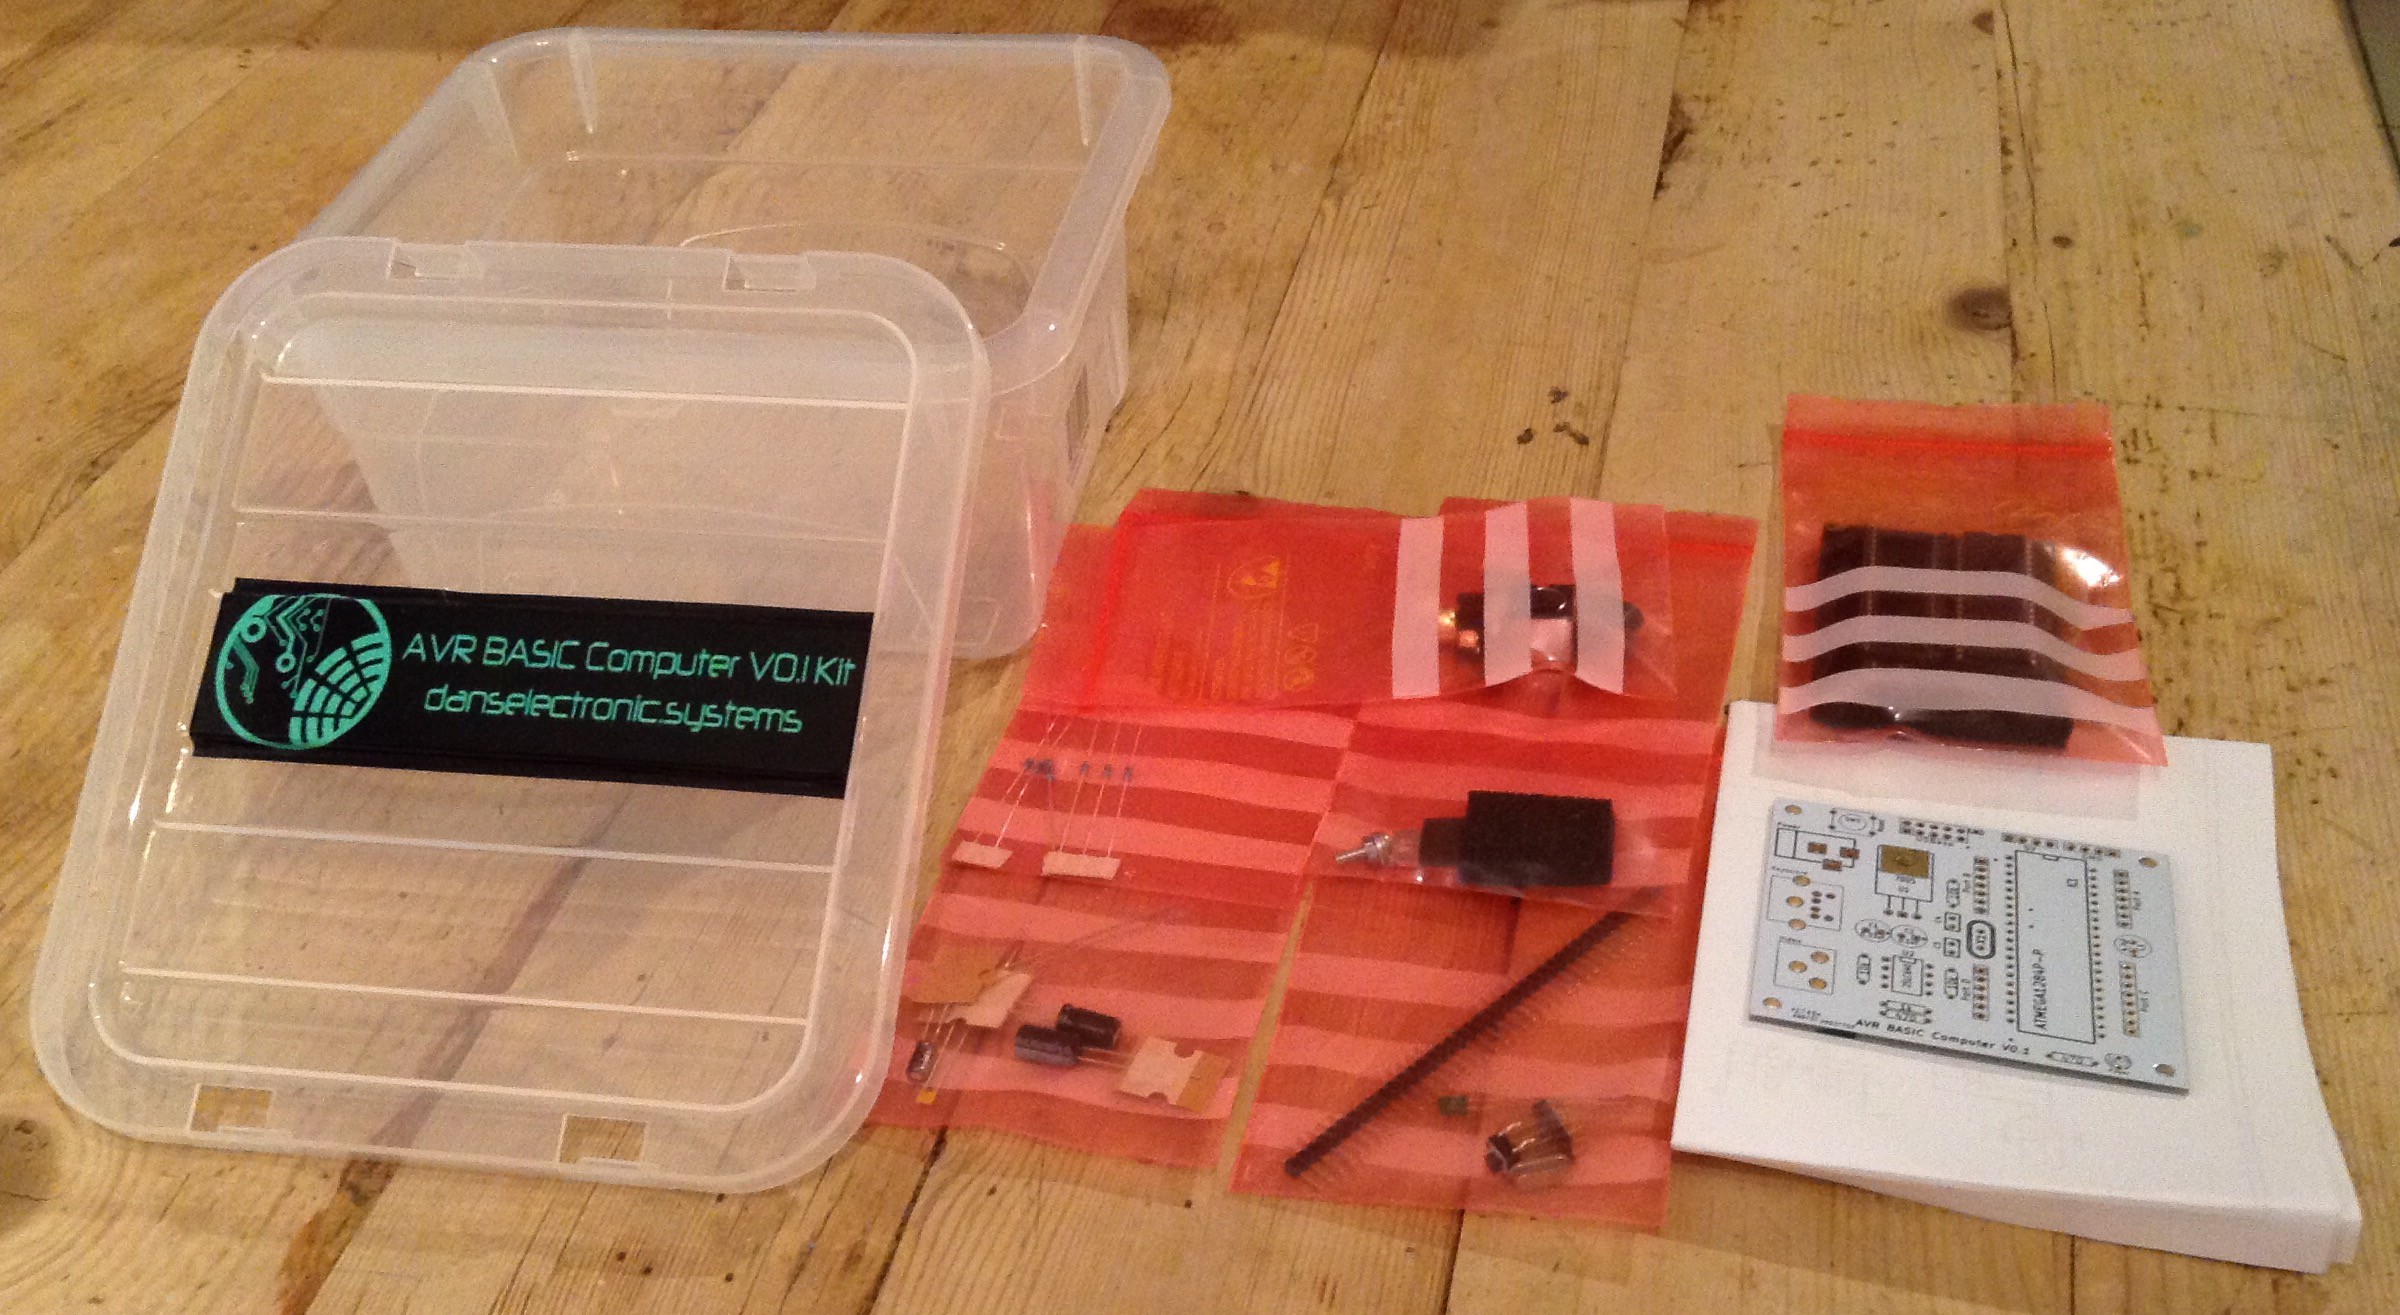
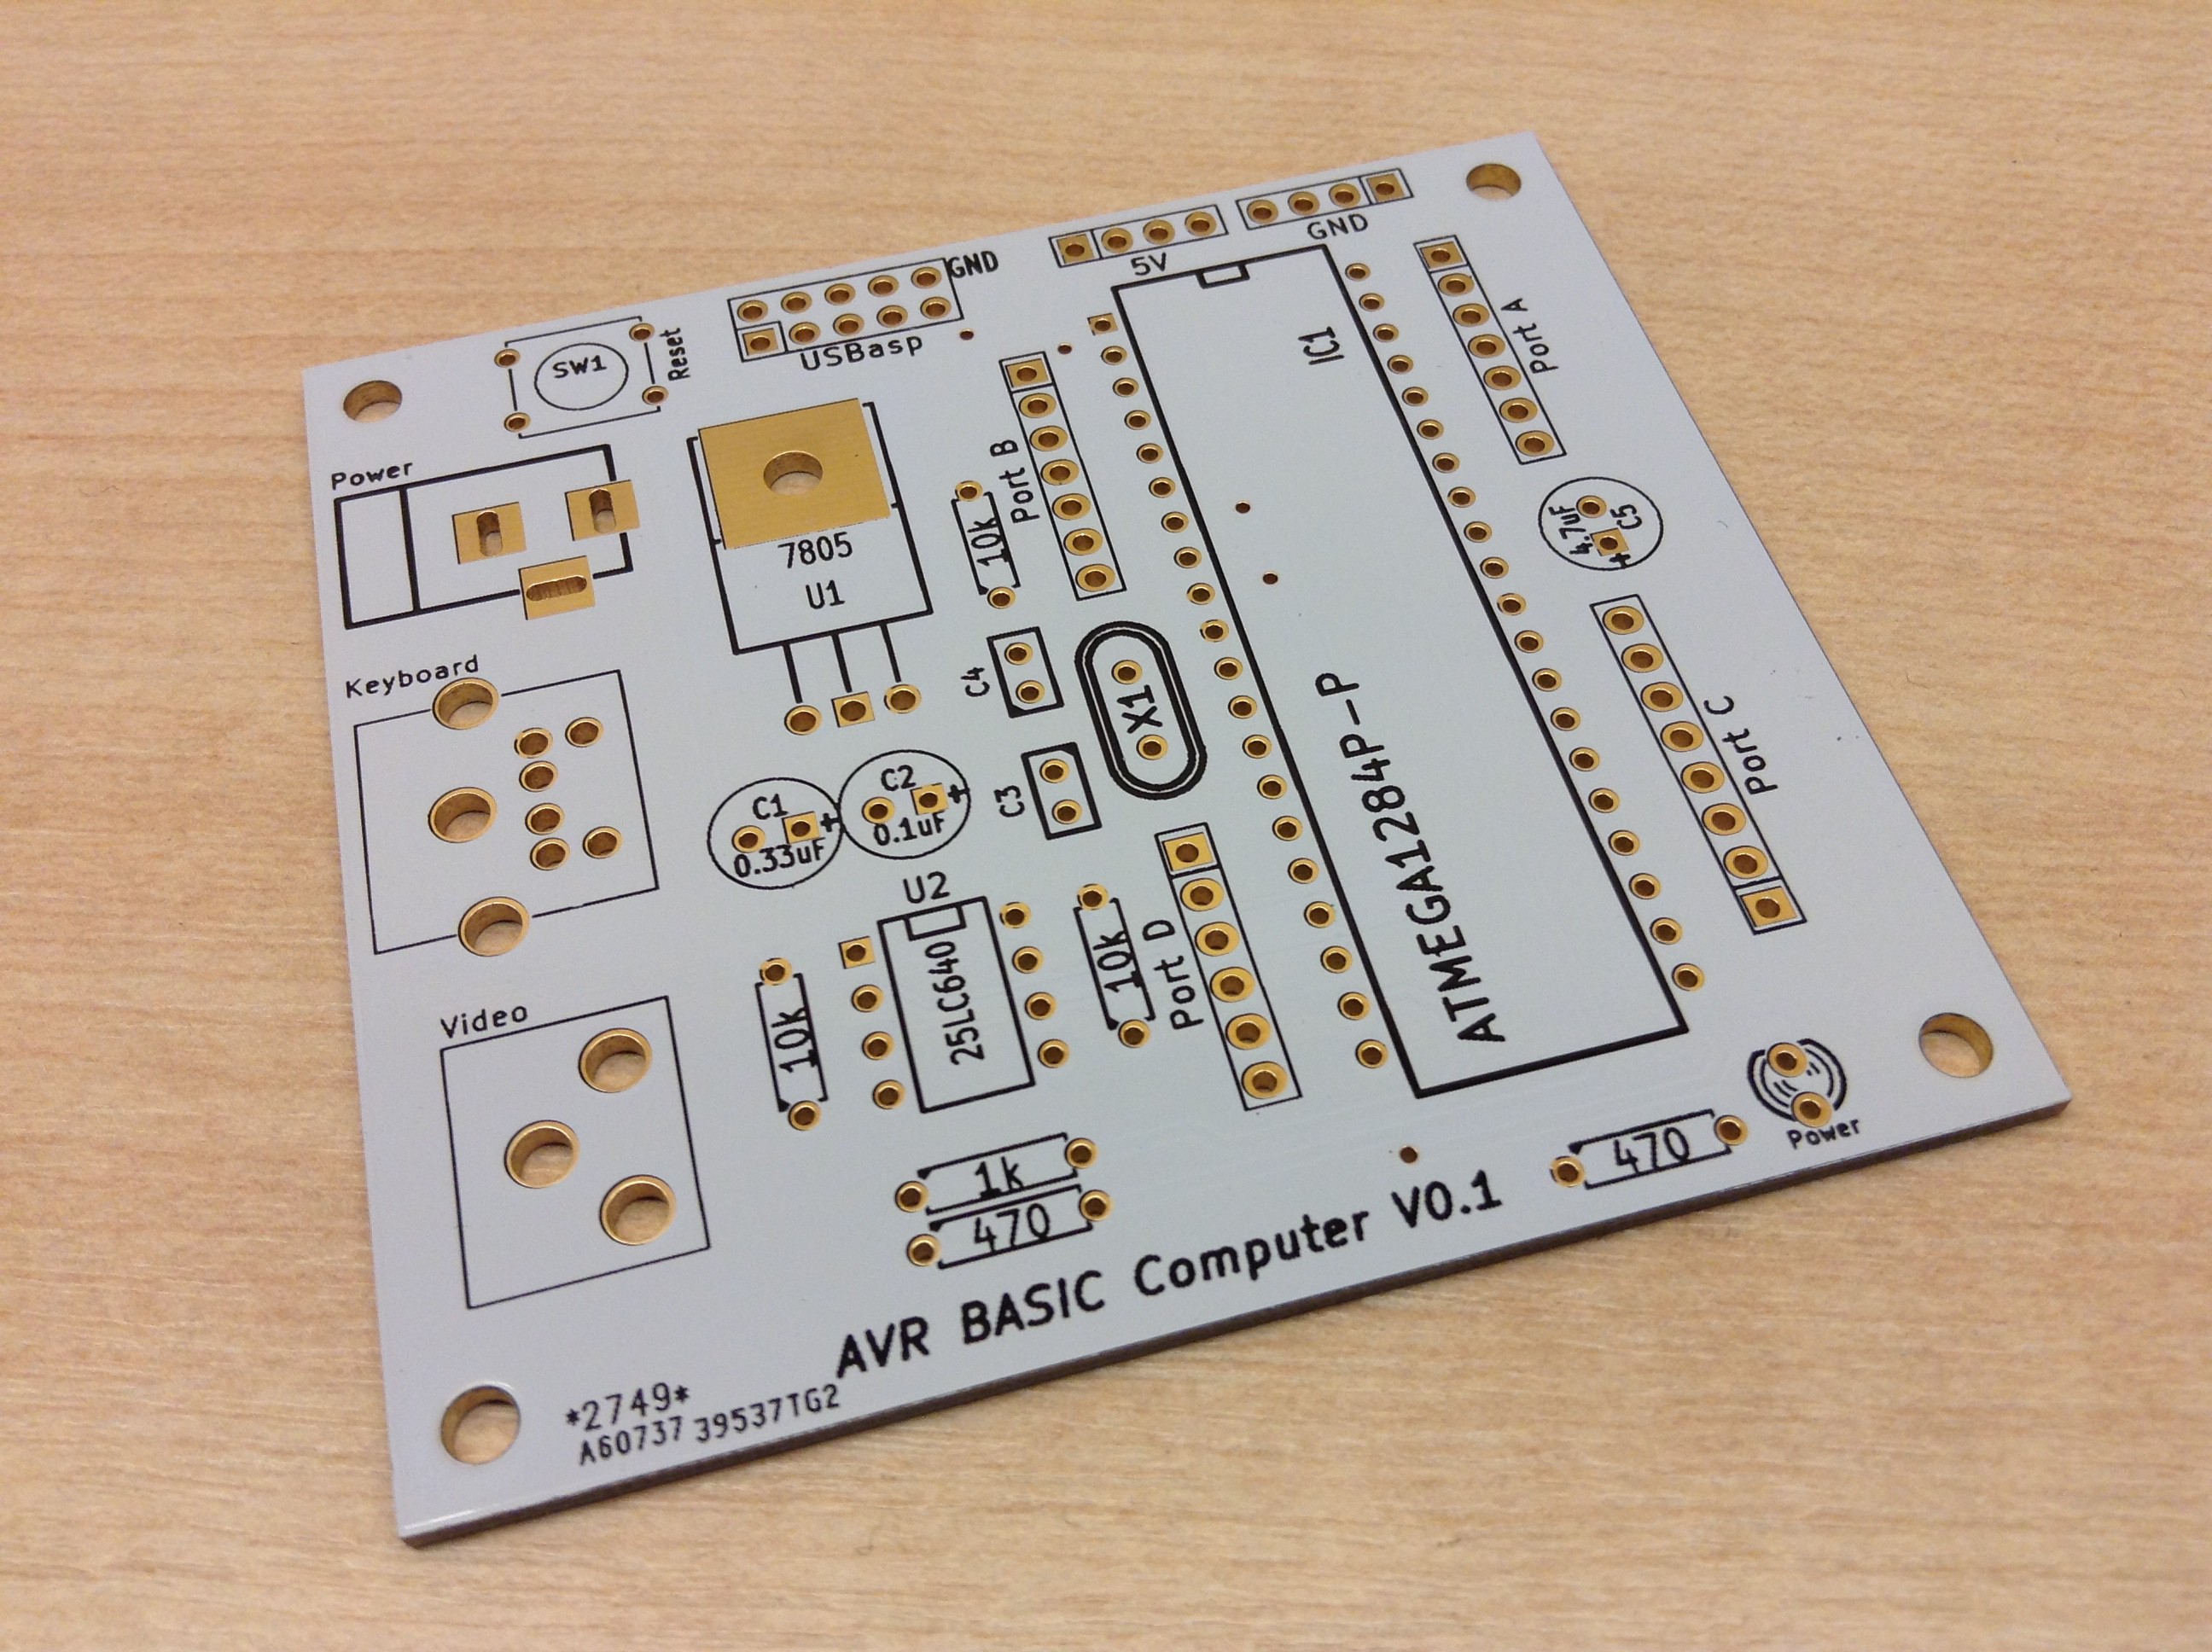
The computer is designed entirely using through-hole components making it easy to assemble at home. PCBs are available to purchase through eBay from me by clicking the 'Purchase PCBs' link on the left hand side of this page. Once a PCB has been purchased and the components gathered, the PCB simply needs to be assembled and then programmed. Programming involves using a USBasp programmer connected to the USBasp header on the PCB and following the programming instructions in the 'Build' section of this page (an Arduino can be used as the programmer for the circuit if required). The firmware (code), Arduino boot-loader and circuit diagram can be downloaded using the links on the left hand side of this page.

Some commands and BASIC program examples for the TinyBASIC Plus programming language can be found at the Github page for TinyBASIC Plus (https://github.com/BleuLlama/TinyBasicPlus). Below is a small list of some TinyBASIC Plus commands:

PRINT "hello world!" - Prints text within the " marks
MEM - Displays SRAM and EEPROM memory usage
NEW - Clear current loaded program from SRAM
LIST - Display the current loaded program
ELOAD - Load program from EEPROM
ESAVE - Save program to EEPROM
EFORMAT - Format EEPROM

A simple example program (with following commands):
10 print "hello world!"
20 goto 10
ESAVE
RUN

Note, programs saved in EEPROM are automatically 
run upon boot. To stop any program running, press the ESC key.

  • 1 × ATmega 1284P + 40Pin 0.6" IC Socket 8-Bit Microcontroller
  • 1 × 25LC640 + 8Pin 0.3" IC Socket Memory ICs / EEPROMs
  • 1 × 16MHz Crystal
  • 2 × 22pF Ceramic Capacitor 2.54mm Pin Spacing
  • 1 × 4.7uF Electrolytic Capacitor 2.54mm Pin Spacing

View all 17 components

View project log

  • 1
    Step 1

    The Firmware & Bootloader

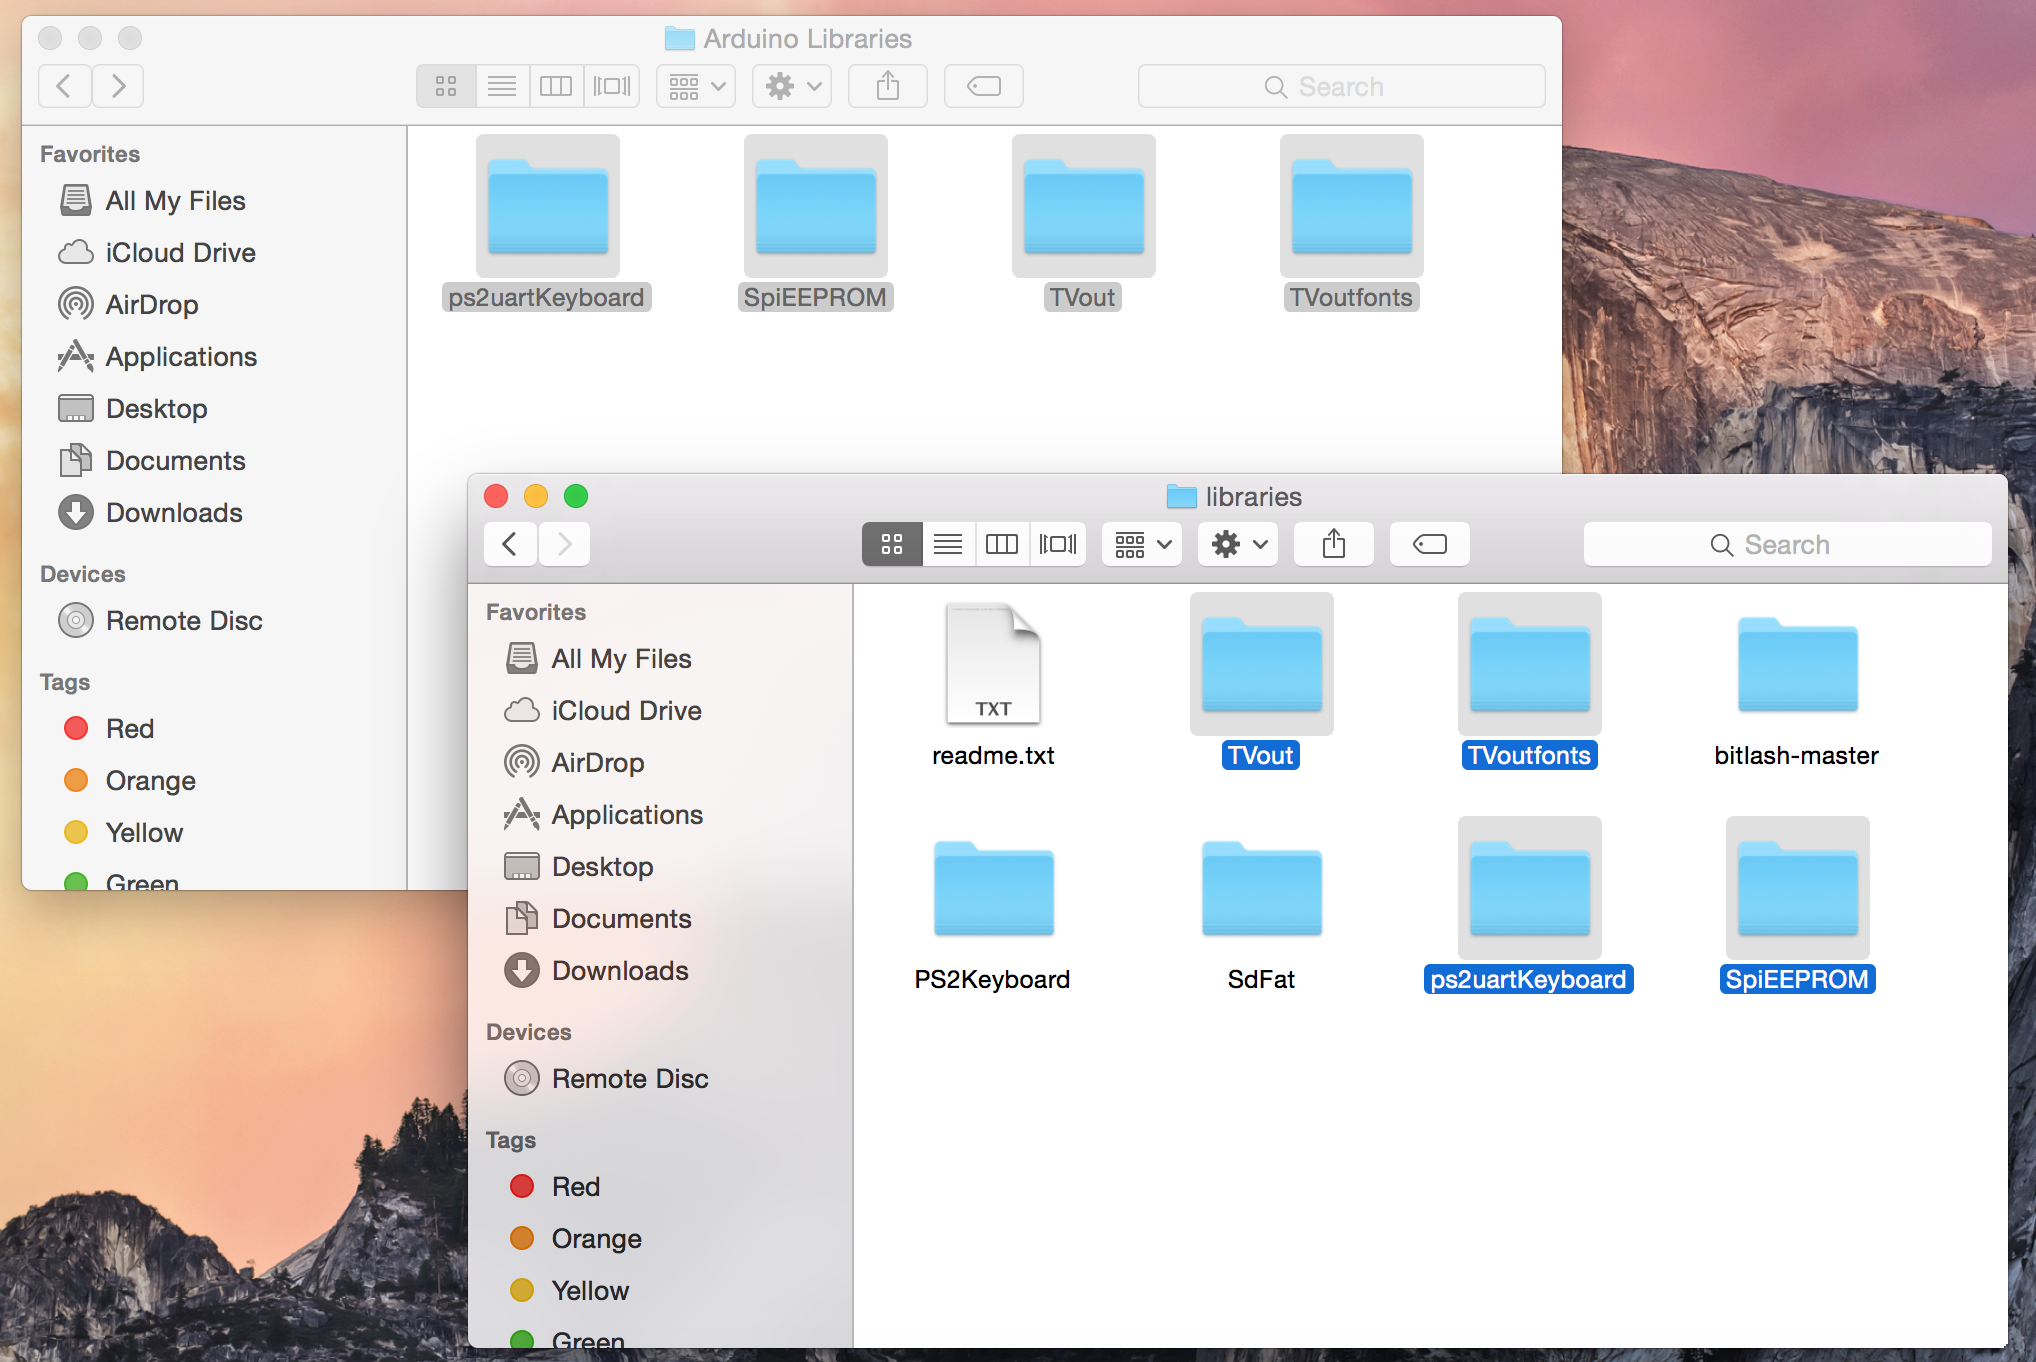
    Clicking on the "Firmware" link on the left-hand side of this page goes to a zip archive containing the firmware (code - an Arduino sketch) for the computer as well as the Arduino libraries required for the sketch. Once the zip archive has been downloaded, extract it and place the folders within the "Arduino Libraries" into the Arduino libraries directory as shown in the image below:

  • 2
    Step 2

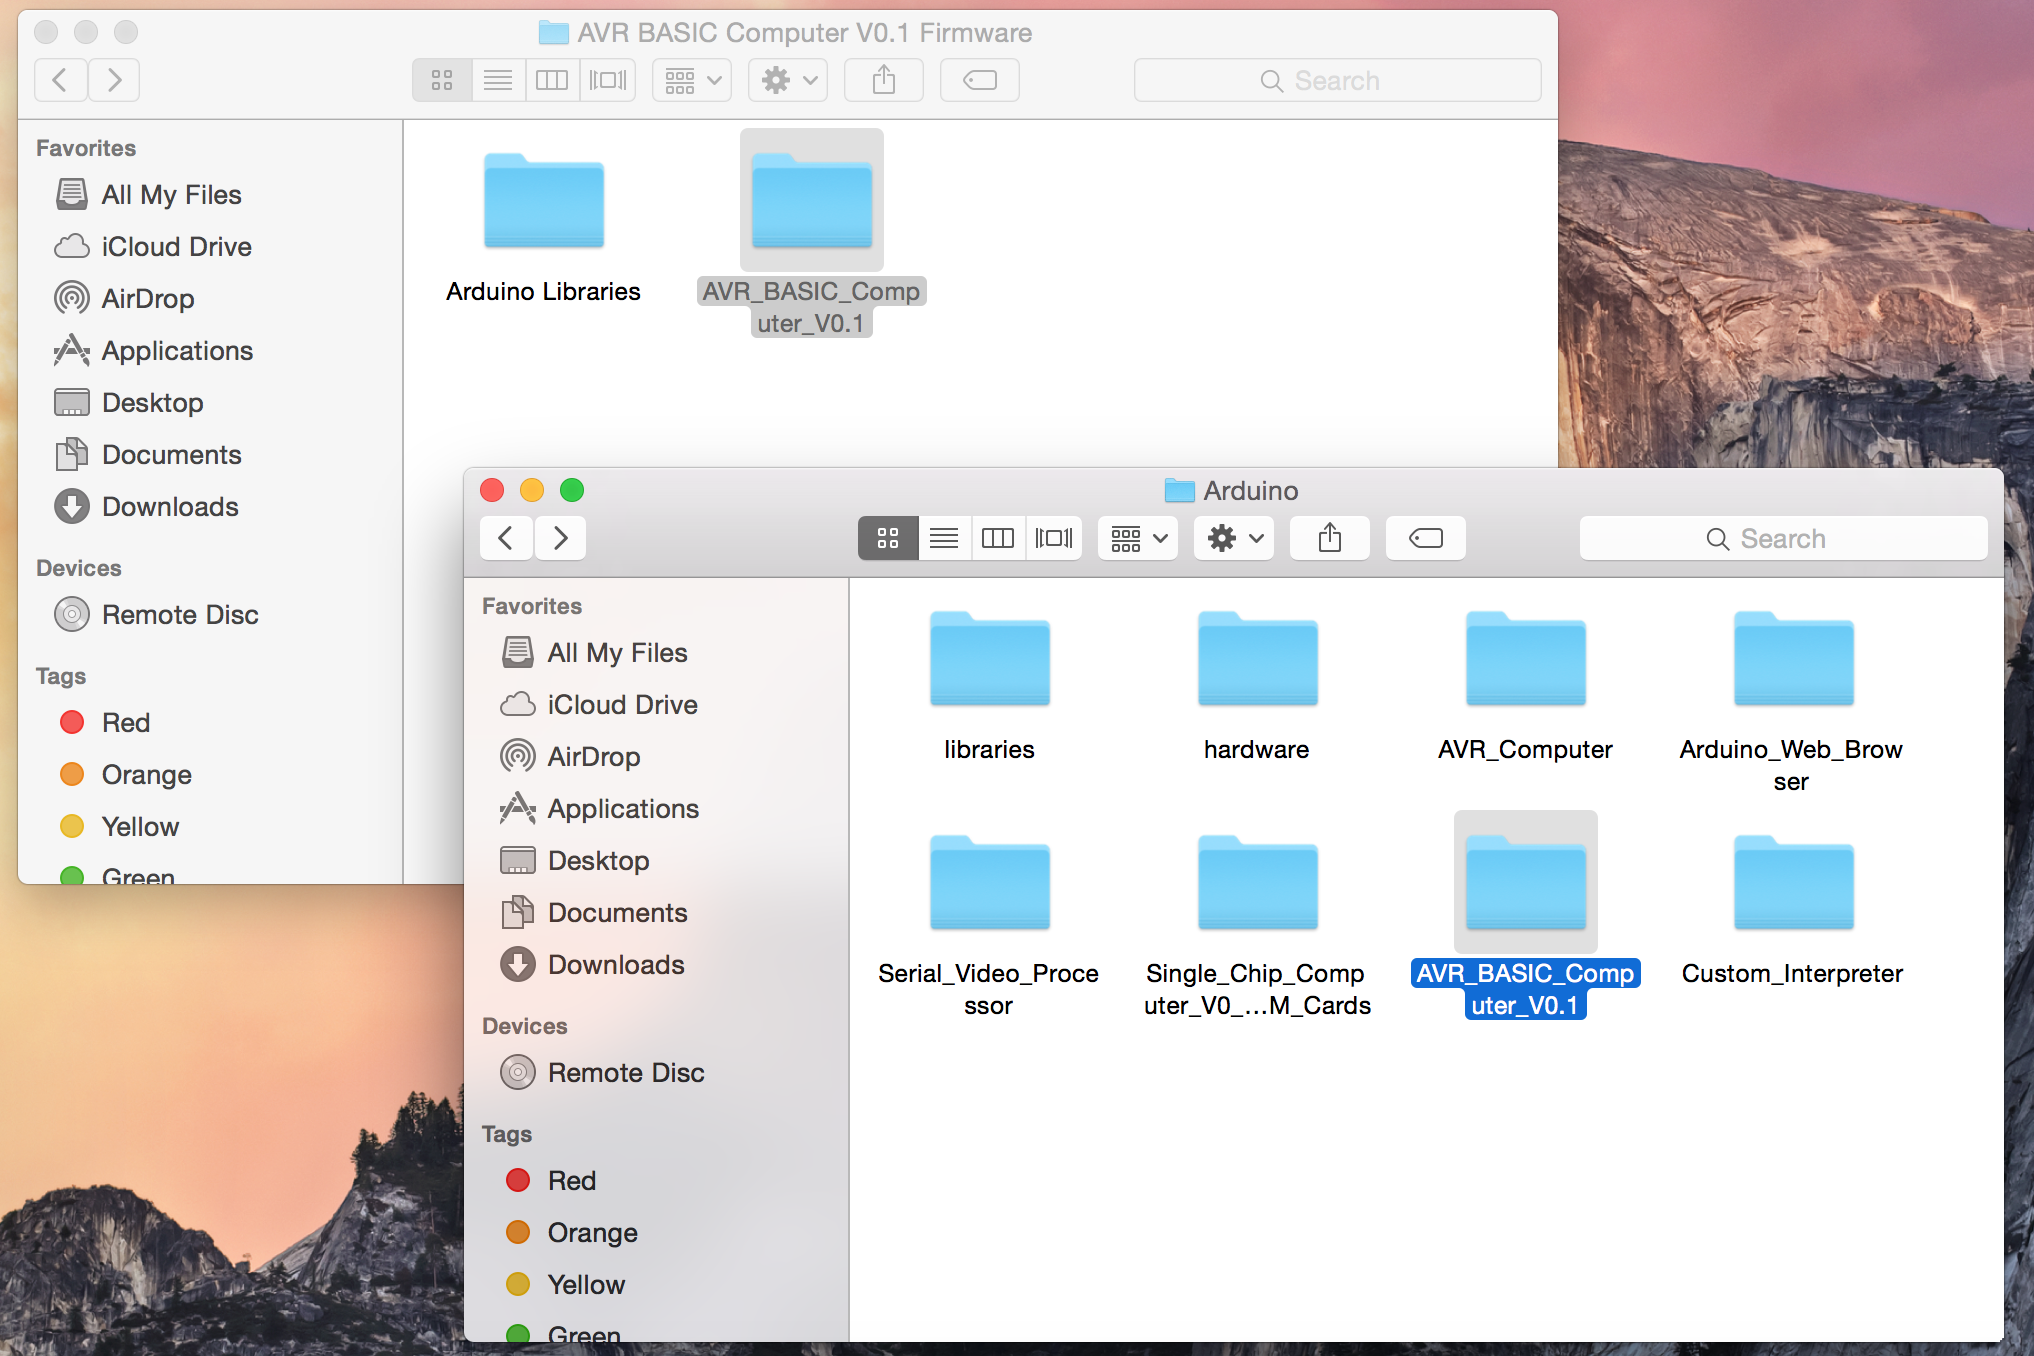
    Once the Arduino libraries have been placed in the correct directory, the Arduino sketch needs to be placed in the Arduino sketches directory as shown in the below image:

  • 3
    Step 3

    After the firmware folder has been dealt with, the bootloader can be downloaded from the "ATmega 1284P Arduino Bootloader" link (which goes to a Github page; use the download as zip link on the right hand side of the Github page) and placed within the Arduino hardware directory as shown in the following image:

View all 4 instructions

Enjoy this project?

Share

Discussions

kleinp994 wrote 03/09/2024 at 12:25 point

I have faced no such issues 

  Are you sure? yes | no

miara wrote 04/09/2022 at 14:27 point

is possible increase memory to 400-512KiB? for mRuby

  Are you sure? yes | no

Ian wrote 11/27/2021 at 22:40 point

Not sure if anyone is still working on this project, but I made a parts list on Mouser that should be the correct parts for this project. I haven't tried putting it together yet. Let me know if I got anything wrong with the list.

https://www.mouser.com/ProjectManager/ProjectDetail.aspx?AccessID=eafa5344c7

  Are you sure? yes | no

Peabody1929 wrote 02/04/2020 at 19:35 point

Has anyone tried to make a shield for an Arduino ATMega 2560 board?  It would be "two" boards that plug together, but it would be more capable.

  Are you sure? yes | no

razvan.clontea wrote 08/30/2018 at 09:10 point

I want to go on with project.  I made a new PCB on EasyEDA Designer.  You can download Gerber file or you can order at JLCPCB 10pcs PCB at 2$

https://easyeda.com/tazyman/avr-basic

  Are you sure? yes | no

james wrote 02/04/2020 at 01:19 point

Any idea which RCA jack to use for this? Trying to find something that fits the footprint and I'm coming up short.

  Are you sure? yes | no

SeC wrote 02/04/2020 at 13:28 point

Hi,

I've used those - http://tiny.cc/i7jkjz - and also ordered the boards based on the PCB project done by @razvan.clontea - after soldering and uploading firmware - LED is on, but there's nothing on the TV out :( tried diffrent versions of Arduino and firmware for boards - no luck. Don't know if it's my soldering or something else or how to debug this stuff :( Still have 8 pcb's not soldered (I did two to be sure, but two are giving black output on video).

  Are you sure? yes | no

razvan.clontea wrote 04/14/2020 at 18:28 point

I noticed a design error. For those who ordered PCB before 14.04.2020 a wire must be glued to the board. I will send the information at request. Thank you!

  Are you sure? yes | no

SeC wrote 04/20/2020 at 17:54 point

PCB is fine - in my case removing reset button made the board alive - just if anyone got problems with it, remove the reset switch from pcb :)

  Are you sure? yes | no

Fuzzy wrote 11/15/2017 at 13:33 point

I made this update to this project for those who wish to use it with a later Arduino IDE (>= 1.8)
https://github.com/fuzzymannerz/AVR-BASIC-Computer

  Are you sure? yes | no

SirWolf wrote 03/20/2018 at 09:17 point

Great work, thank you!

  Are you sure? yes | no

[deleted]

[this comment has been deleted]

K.C. Lee wrote 06/02/2016 at 21:53 point

FYI: https://hackaday.io/project/2032-pic32-oscilloscope-1-msamplesec
This project has NTSC framework for PIC32 using DMA, so that get you the TV interface which is going to be the more tricky stuff.

  Are you sure? yes | no

howardthecow wrote 02/12/2015 at 22:52 point

So, I actually have the board all together and running and have managed to run the print "Hell o wWorld " loop program 

it works!!!!

The issue I am having is simple - when  using the keyboard I cannot use the delete or backspace keys

I purchased a PS2 minin keyboard from Newegg.com but it does not work at all, nor do USB to PS2 adaptors.

Any Ideas???? all the best

JDH

  Are you sure? yes | no

Radu Motisan wrote 07/09/2016 at 11:24 point

  Are you sure? yes | no

Jeffery H Leichman wrote 01/27/2015 at 08:02 point

Howard the Cow: The ATmega1284Px datasheet is available at

http://www.atmel.com/devices/ATMEGA1284P.aspx.

BE SURE TO GET THE "P" package, and not a surface mount chip.

As for the electrolytic capacitor, it most likely has a stripe on the side over one of the leads, yes? That's the GND. Do not insert electrolytics in backwards - likely to explode when power is applied. Won't kill anyone, but will make a mess, and pants may be soiled.

  Are you sure? yes | no

howardthecow wrote 12/31/2014 at 23:10 point

ATMEGA1284-PU ???

  Are you sure? yes | no

howardthecow wrote 12/31/2014 at 22:42 point

i also purchased a 4.7 uF @ 50 volts electrolytic cap

but upon closer inspection it has no + or -

it is bypolar - not OK?

  Are you sure? yes | no

howardthecow wrote 12/31/2014 at 22:26 point

will an LM7805C work OK? thanks

All the best JDH

  Are you sure? yes | no

Similar Projects

Does this project spark your interest?

Become a member to follow this project and never miss any updates