-
1Step 1
The Firmware & Bootloader
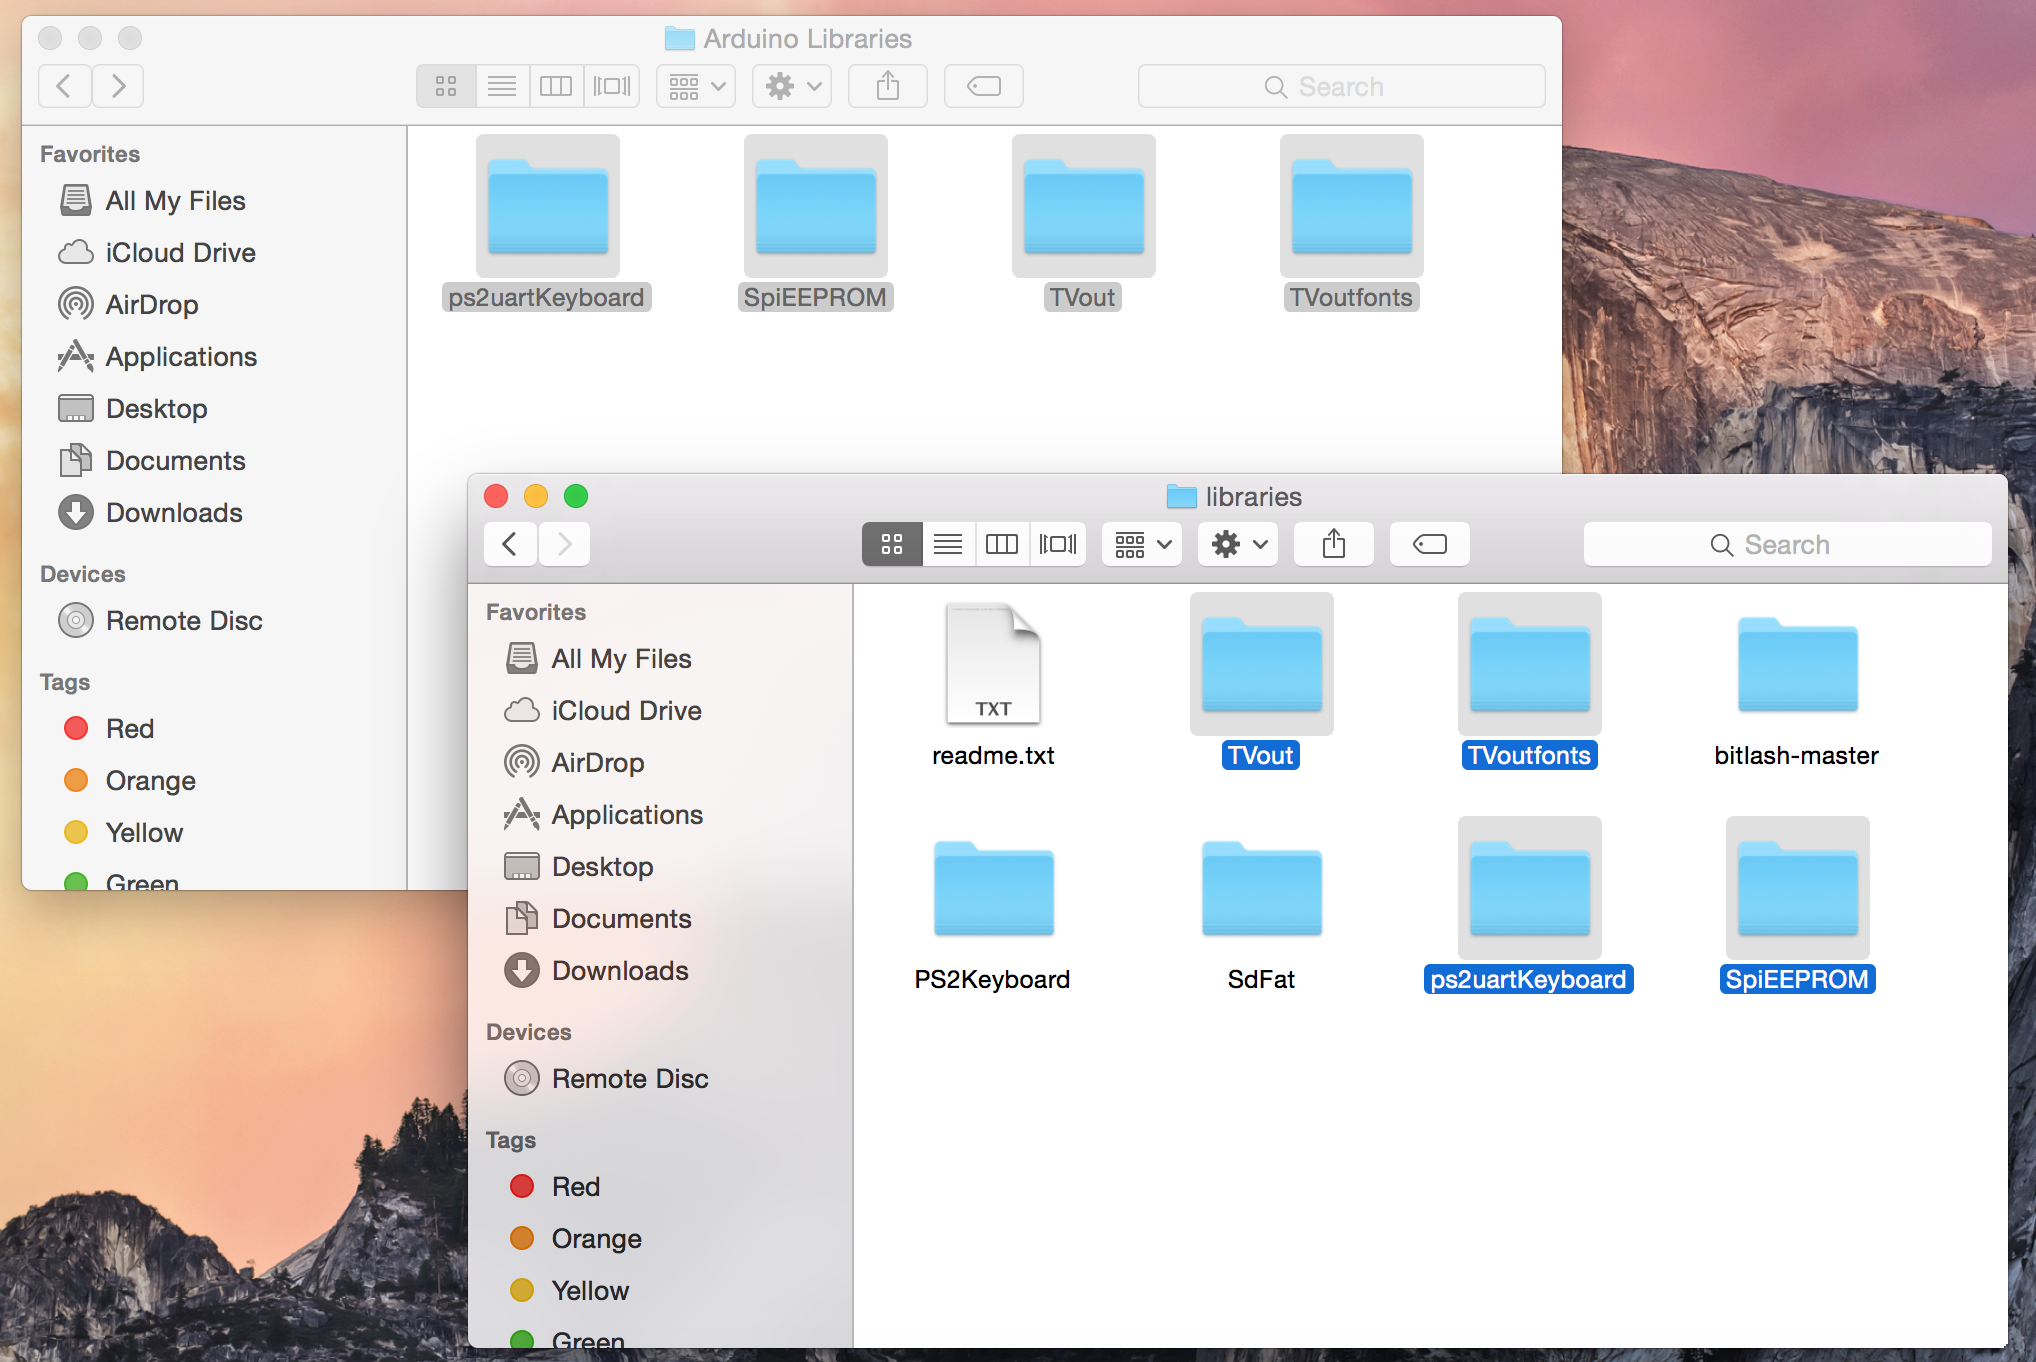
Clicking on the "Firmware" link on the left-hand side of this page goes to a zip archive containing the firmware (code - an Arduino sketch) for the computer as well as the Arduino libraries required for the sketch. Once the zip archive has been downloaded, extract it and place the folders within the "Arduino Libraries" into the Arduino libraries directory as shown in the image below:
![]()
-
2Step 2
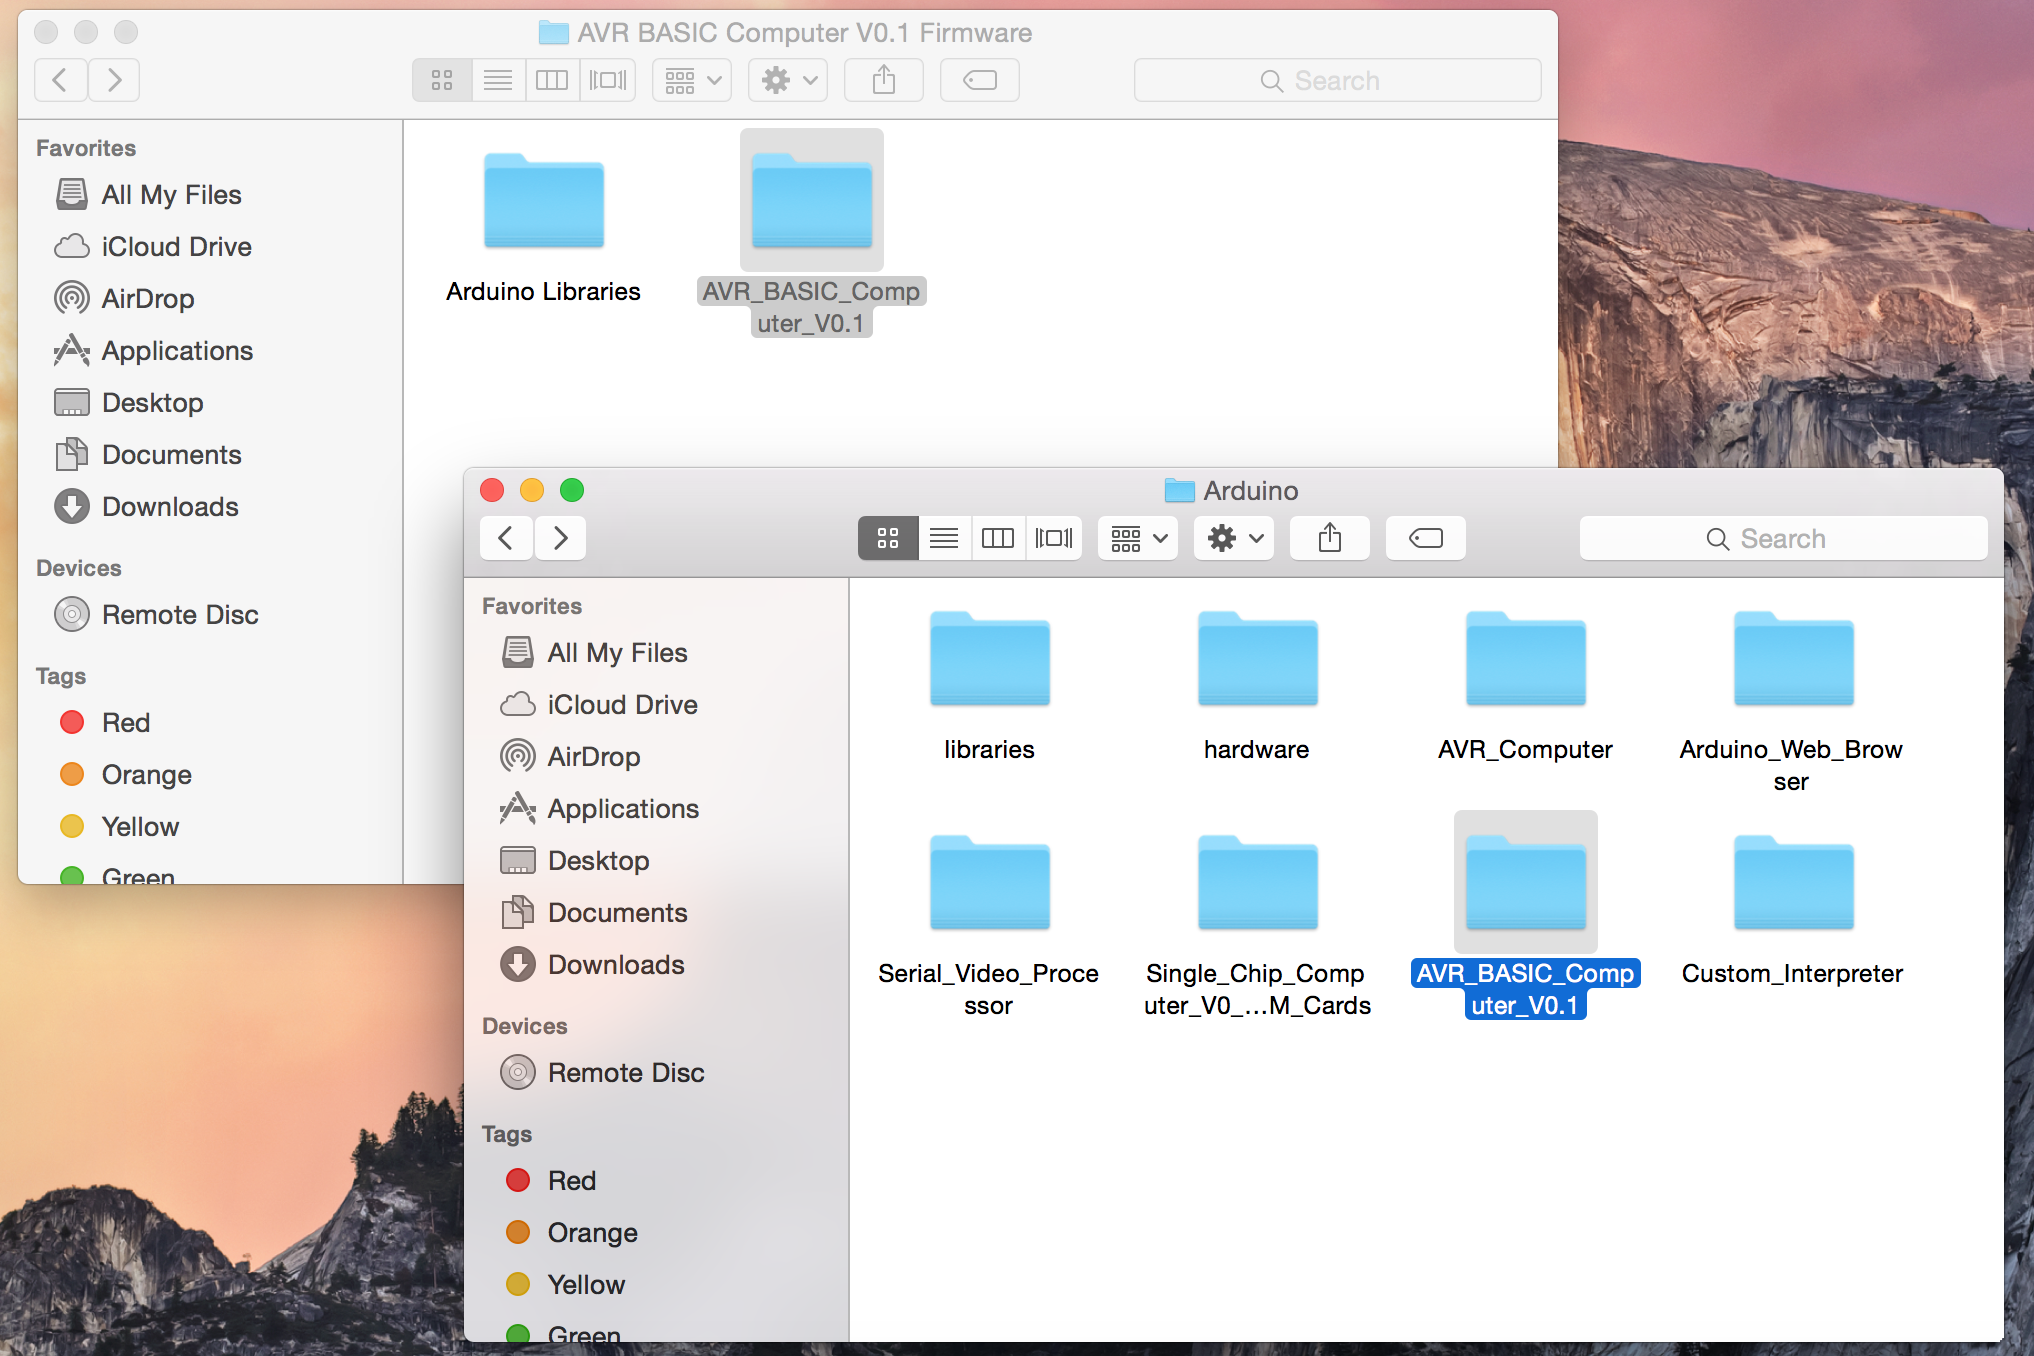
Once the Arduino libraries have been placed in the correct directory, the Arduino sketch needs to be placed in the Arduino sketches directory as shown in the below image:
![]()
-
3Step 3
After the firmware folder has been dealt with, the bootloader can be downloaded from the "ATmega 1284P Arduino Bootloader" link (which goes to a Github page; use the download as zip link on the right hand side of the Github page) and placed within the Arduino hardware directory as shown in the following image:
![]()
-
4Step 4
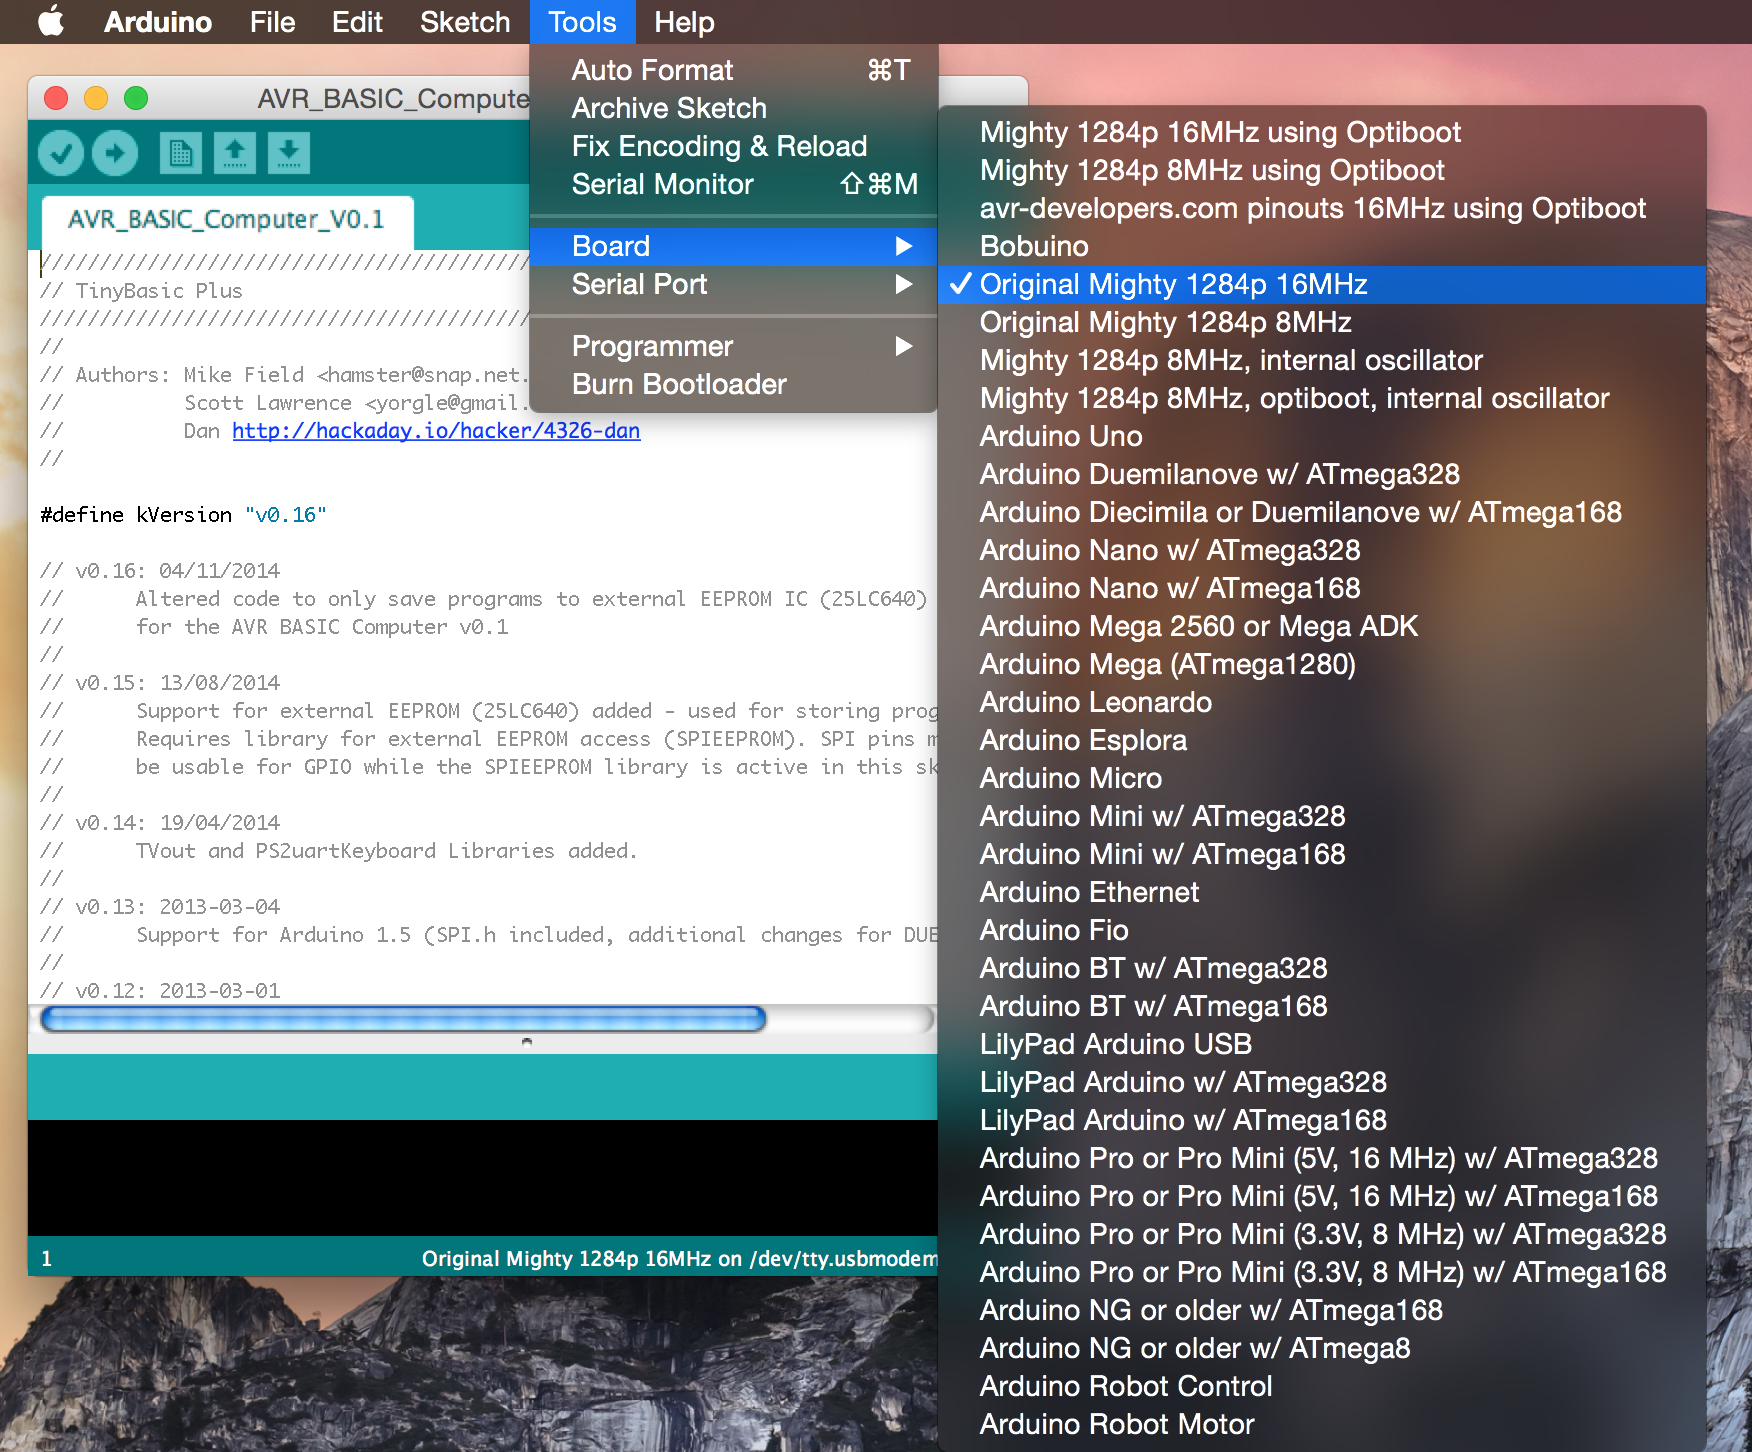
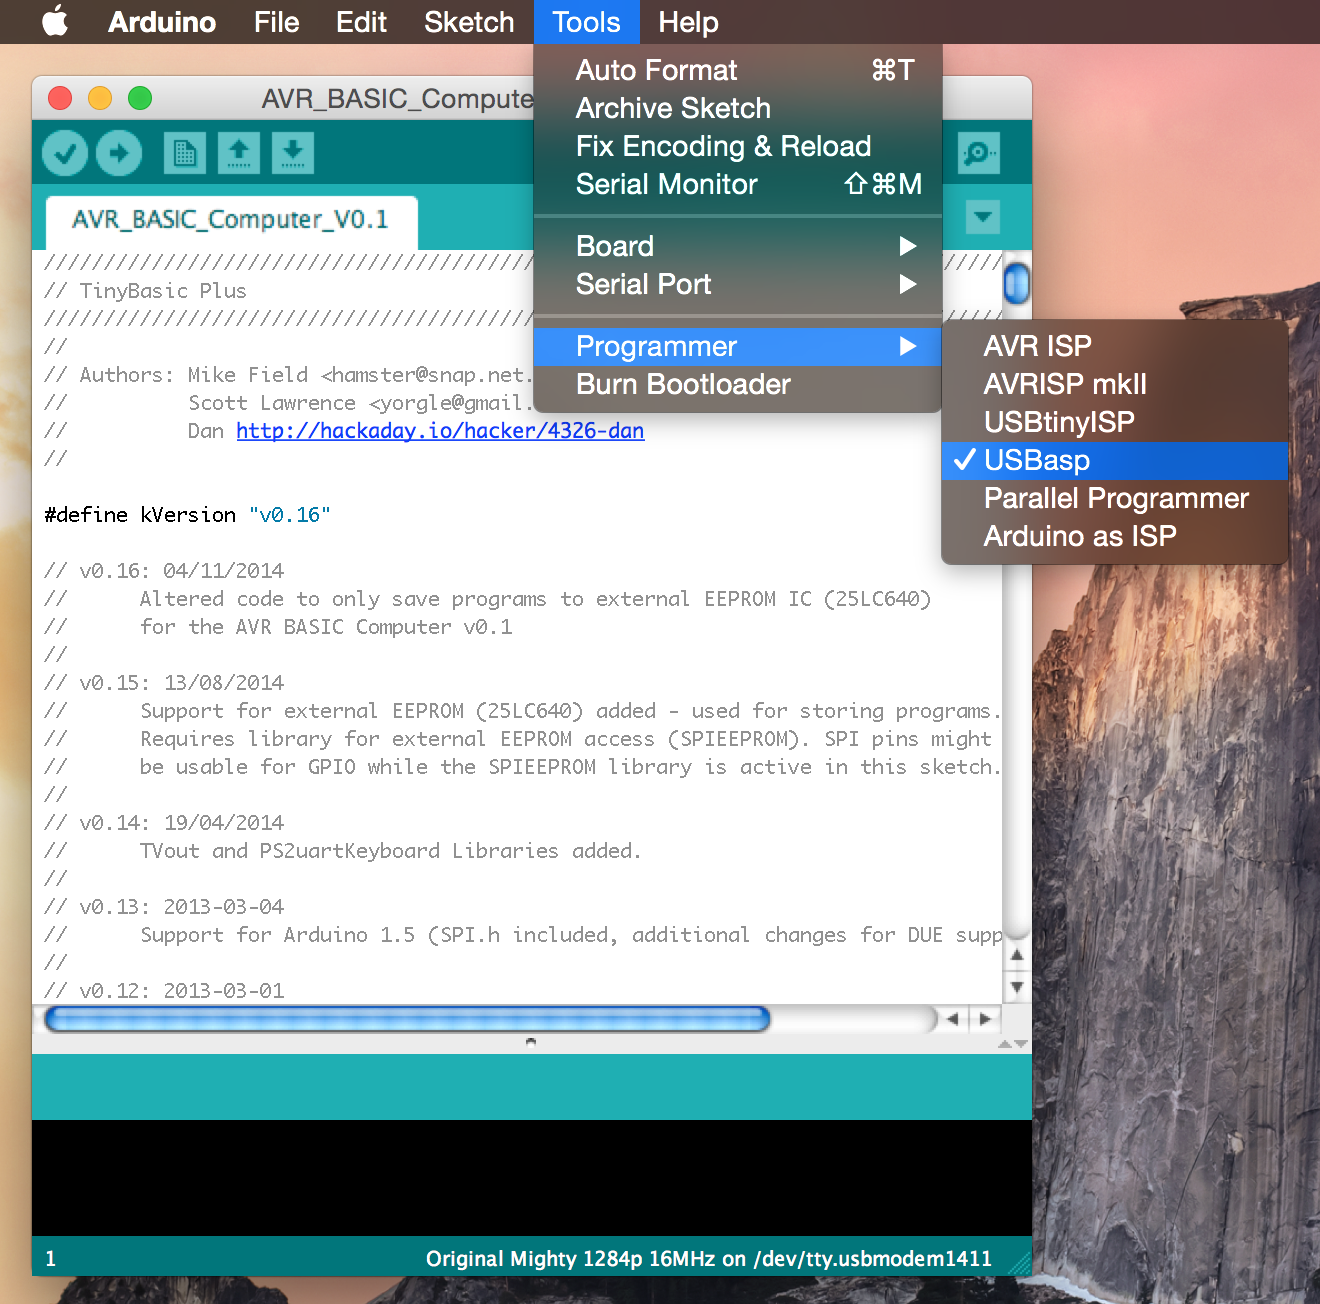
Once both the bootloader and the firmware files have been dealt with, the Arduino IDE can be opened. Open the "AVR_BASIC_Computer_V0.1" sketch and then select "Original Mighty 1284p 16MHz" from the board menu (Tools -> Board). Then select the "USBasp" from the programmer menu (Tools -> Programmer) or alternatively "Arduino as ISP" if an Arduino is being used. Pinouts for the USBasp header on the PCB can be found by googling "USBasp pinout" (I have marked the ground connections on the PCB). The below images show these steps:
![]()
![]()
Finally, connect the USBasp programmer to the assembled circuit (along with a power source) and select "Upload Using Programmer" from the file menu as shown in the below image:
![]()
Done! Now the computer is programmed and ready to be used. Simply connect a keyboard and composite display (such as a TV) to begin writing BASIC programs.
AVR BASIC Computer V0.1
A BASIC computer which generates composite video, reads PS/2 keyboard input and has an 8KB EEPROM IC for saving BASIC programs to.
 Dan
Dan


Discussions
Become a Hackaday.io Member
Create an account to leave a comment. Already have an account? Log In.
Hi, it works now :-) But not with the Programmer USBasp V2 with Arduino IDE ??? The *.hex File is in a temporary Folder from window (search ;-) ) and "Khazama" can burn it in the Flash from ATmega1248 :-) :-)
Are you sure? yes | no
hi, with IDE1.0.6 and Win 7 it works (translate) without Errors :-) but now the USBasp is only as an USB Device and the IDE ask for a COM-Port??? what kind of Programmer I need? Burn the Bootlader works for few minutes, the LED on the USBASP V2.0 is on, then I reed it with Khazama only FF is in the EEPROM and FLASH ??? I look for the next Step ;-)
Are you sure? yes | no
o.K. the "WProgram.h" is now "Arduino.h" (http://markus.jabs.name/2011/12/arduino-kennt-wprogram-nicht-mehr/), but now more Errors :-( :-( is the IDE 1.5.8 to high for this project?
Are you sure? yes | no
Hi, Arduino IDE 1.5.8 Win8.1.Install all like this Instructions
1 Error: "
Third-party platform.txt does not define compiler.path. Please report this to the third-party hardware maintainer.
"
Then I install the 1248 Liberies from the side "
http://openhardware.ro/using-atmega1284-arduino-ide/
"
Using ATmega1284 with Arduino IDE
the Checktranslate runs but with new Error :-(
2 Error: "
In file included from AVR_BASIC_Computer_V0.1.ino:182:0:
P:\Program Files (x86)\Arduino\libraries\SpiEEPROM/spieeprom.h:14:22: fatal error: WProgram.h: No such file or directory
#include
" Where is "WProgram.h" ???
danke
Are you sure? yes | no
don't I have to burn the bootloader first? Then program the board
I am a little confused but
What have I missed?
Thanks
JDH
Are you sure? yes | no