Close
0%
0%

TTTOTP

Tiny Trinket Time-Based One-Time Password

Similar projects worth following
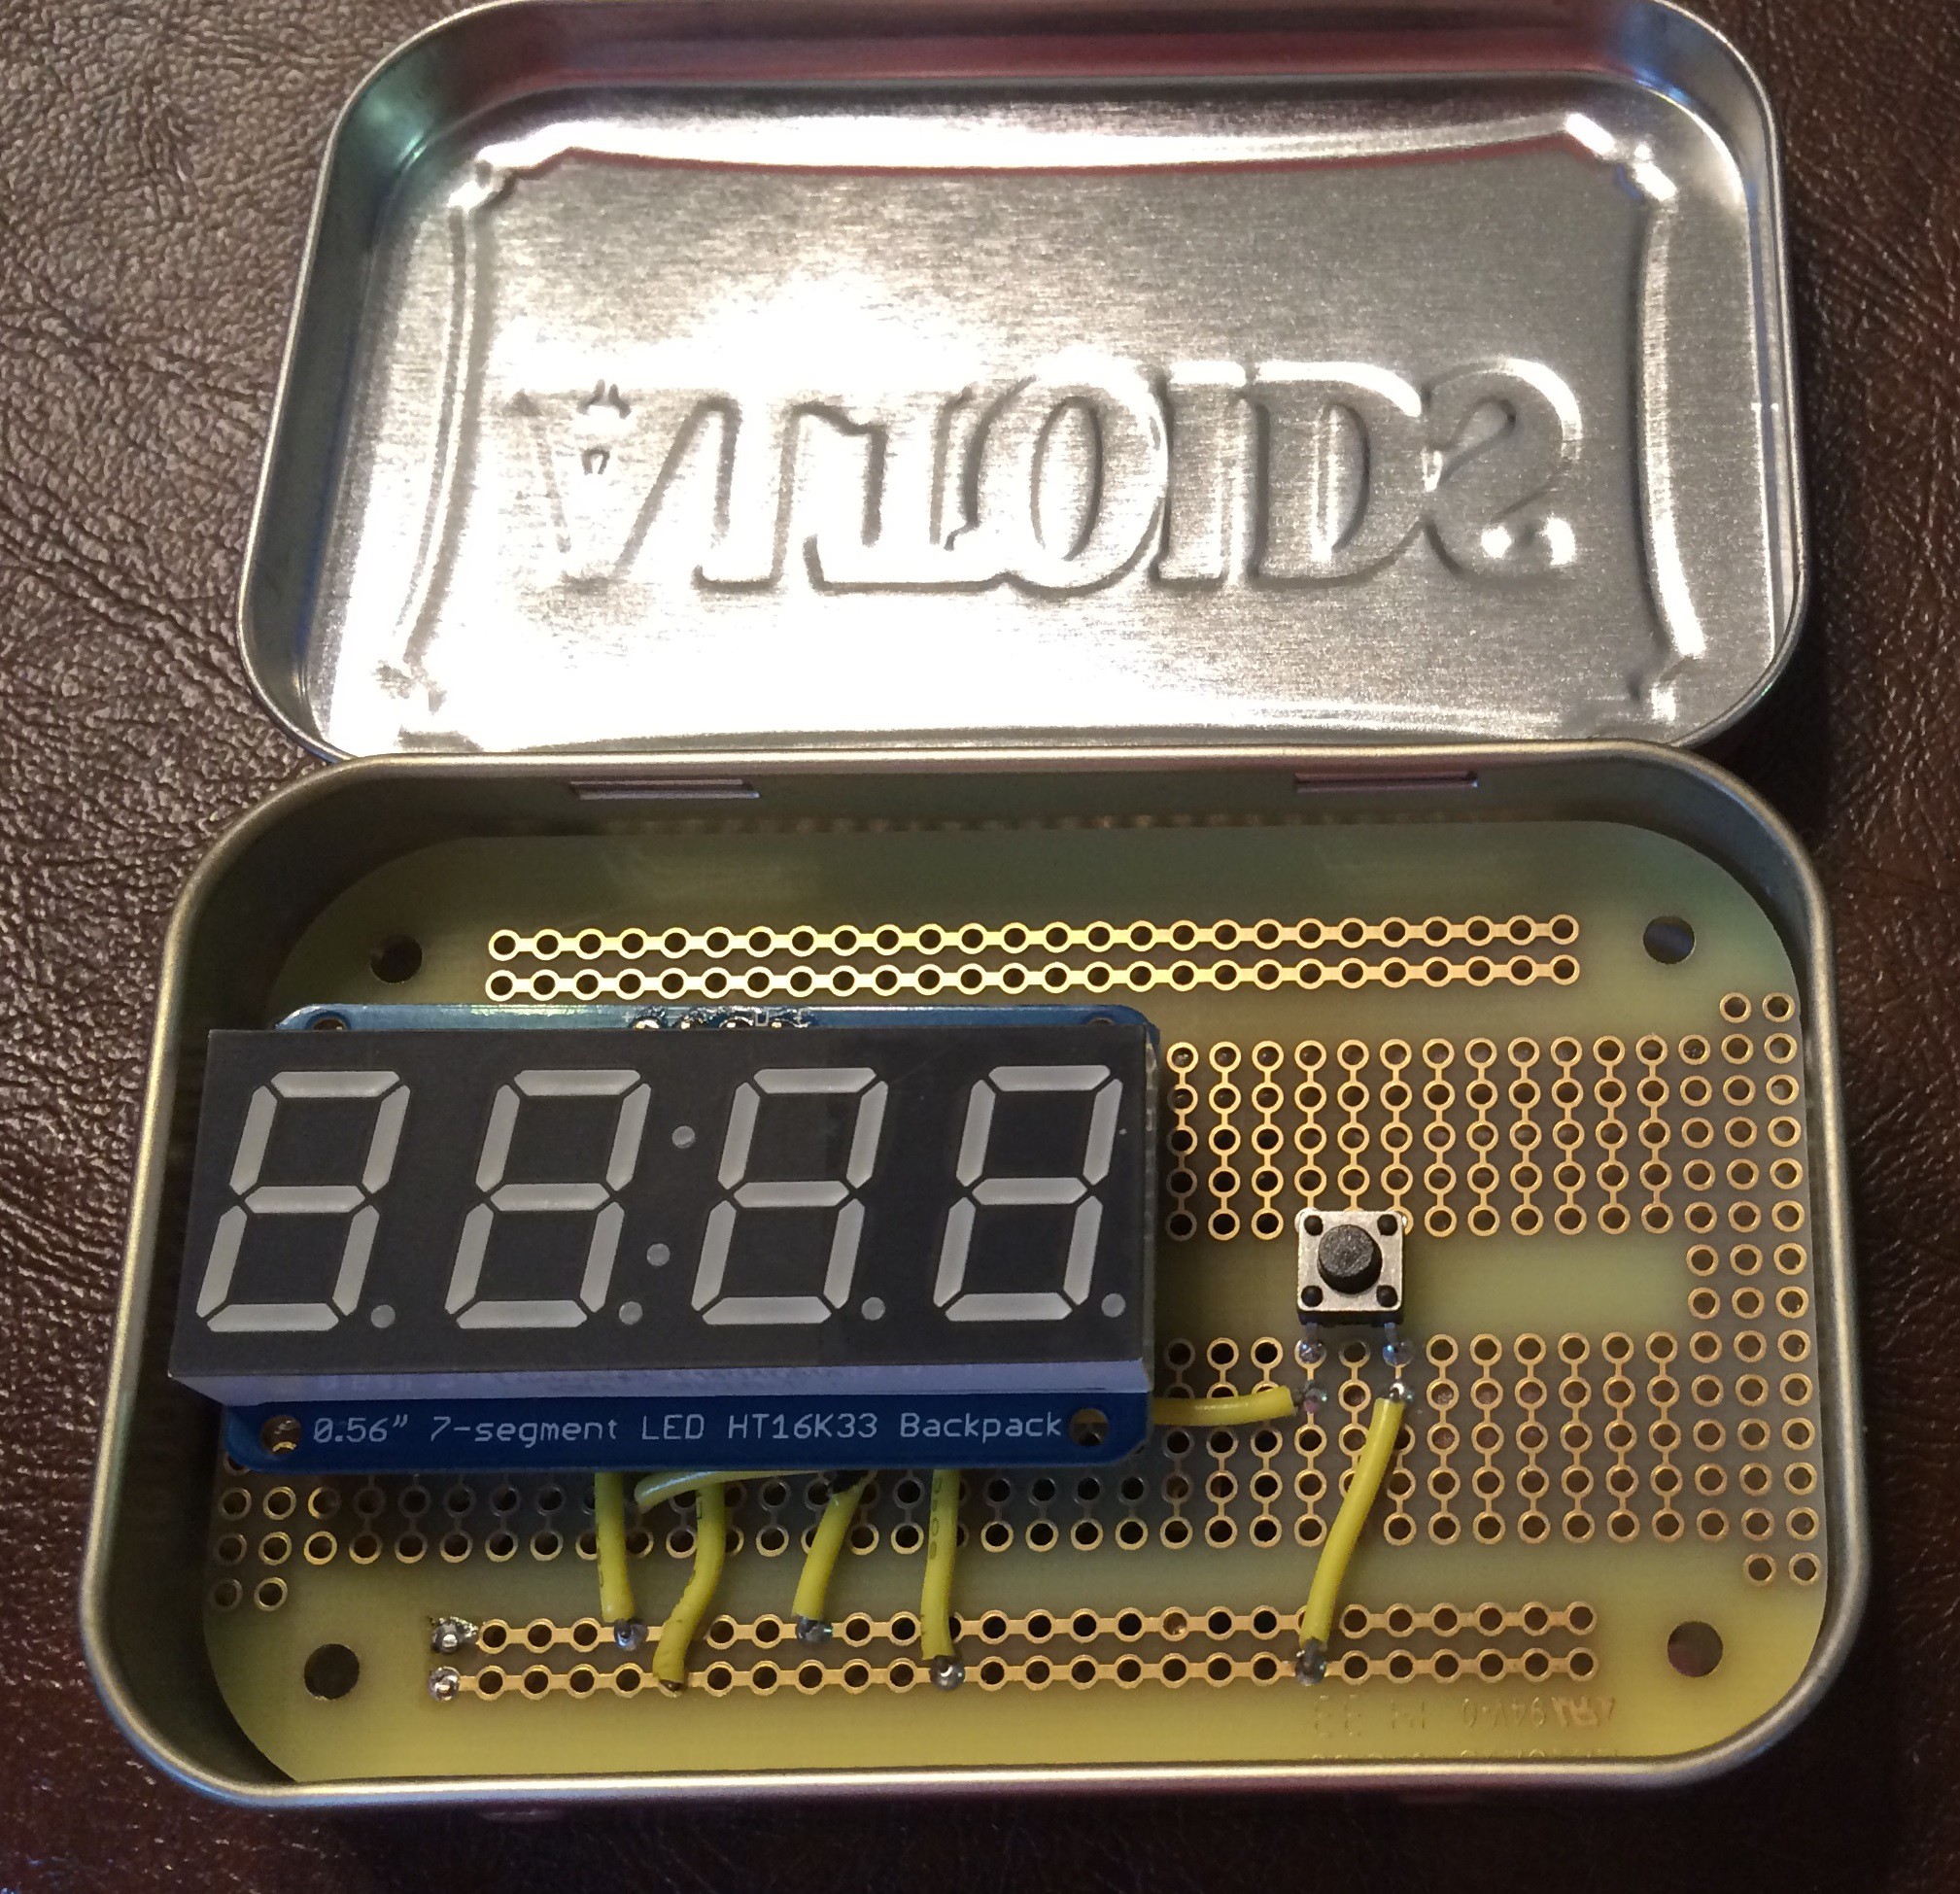
A small TOTP device consisting of Trinket Pro, display, time source, button and battery.

The project goals are:

- Implement TOTP on a Trinket Pro.

- Retrieve time from a clock source. A DS1307 is the initial choice.

- Use a display to show the generated hash. A .56" LED display is the initial choice. It is 4 digits so the hash will display one half at a time.

- Use a button to generate a hash and display it.

Success criteria:

- Successfully generate reference TOTP hashs from the RFC.

- Successfully retrieve time from the RTC

- Successfully display the hash on the LED.
View all 6 components

  • Mounted!

    colonwq01/02/2015 at 22:07 0 comments

    I have mounted the board on an Adafruit Permaproto Breadboard sized for an Altoids can. This was my first time using one of these boards.

    I have learned a few things:

    1. Don't run the wires from point to point. Routing is better.
    2. Mind the soldering iron shaft. I scorched a couple of wires.
    3. Get more colors of wire. Yellow, yellow and yellow are not enough.
    4. Test mount everything with stacking headers. If it all works, remove the headers

  • And now with video!

    colonwq01/02/2015 at 17:14 0 comments

    I have added a video of the start up of the device and the generation of two TOTP codes. The first half of the code is displayed while the button is pressed. The second half is a fixed amount of time. You can generate the same code twice if you press the button within the same 30 seconds.

  • Breadbaord and code complete

    colonwq12/28/2014 at 22:59 0 comments

    Bad jumpers make troubleshooting very difficult.

    I successfully bread boarded this projected with a Sparkfun Redboard. I happened to have to SIKs on my desk. I then transferred the wiring and code to my Trinket Pro. Only minor changes needed to be made.

    Operation:

    1. Apply power to the board
    2. Press the push button
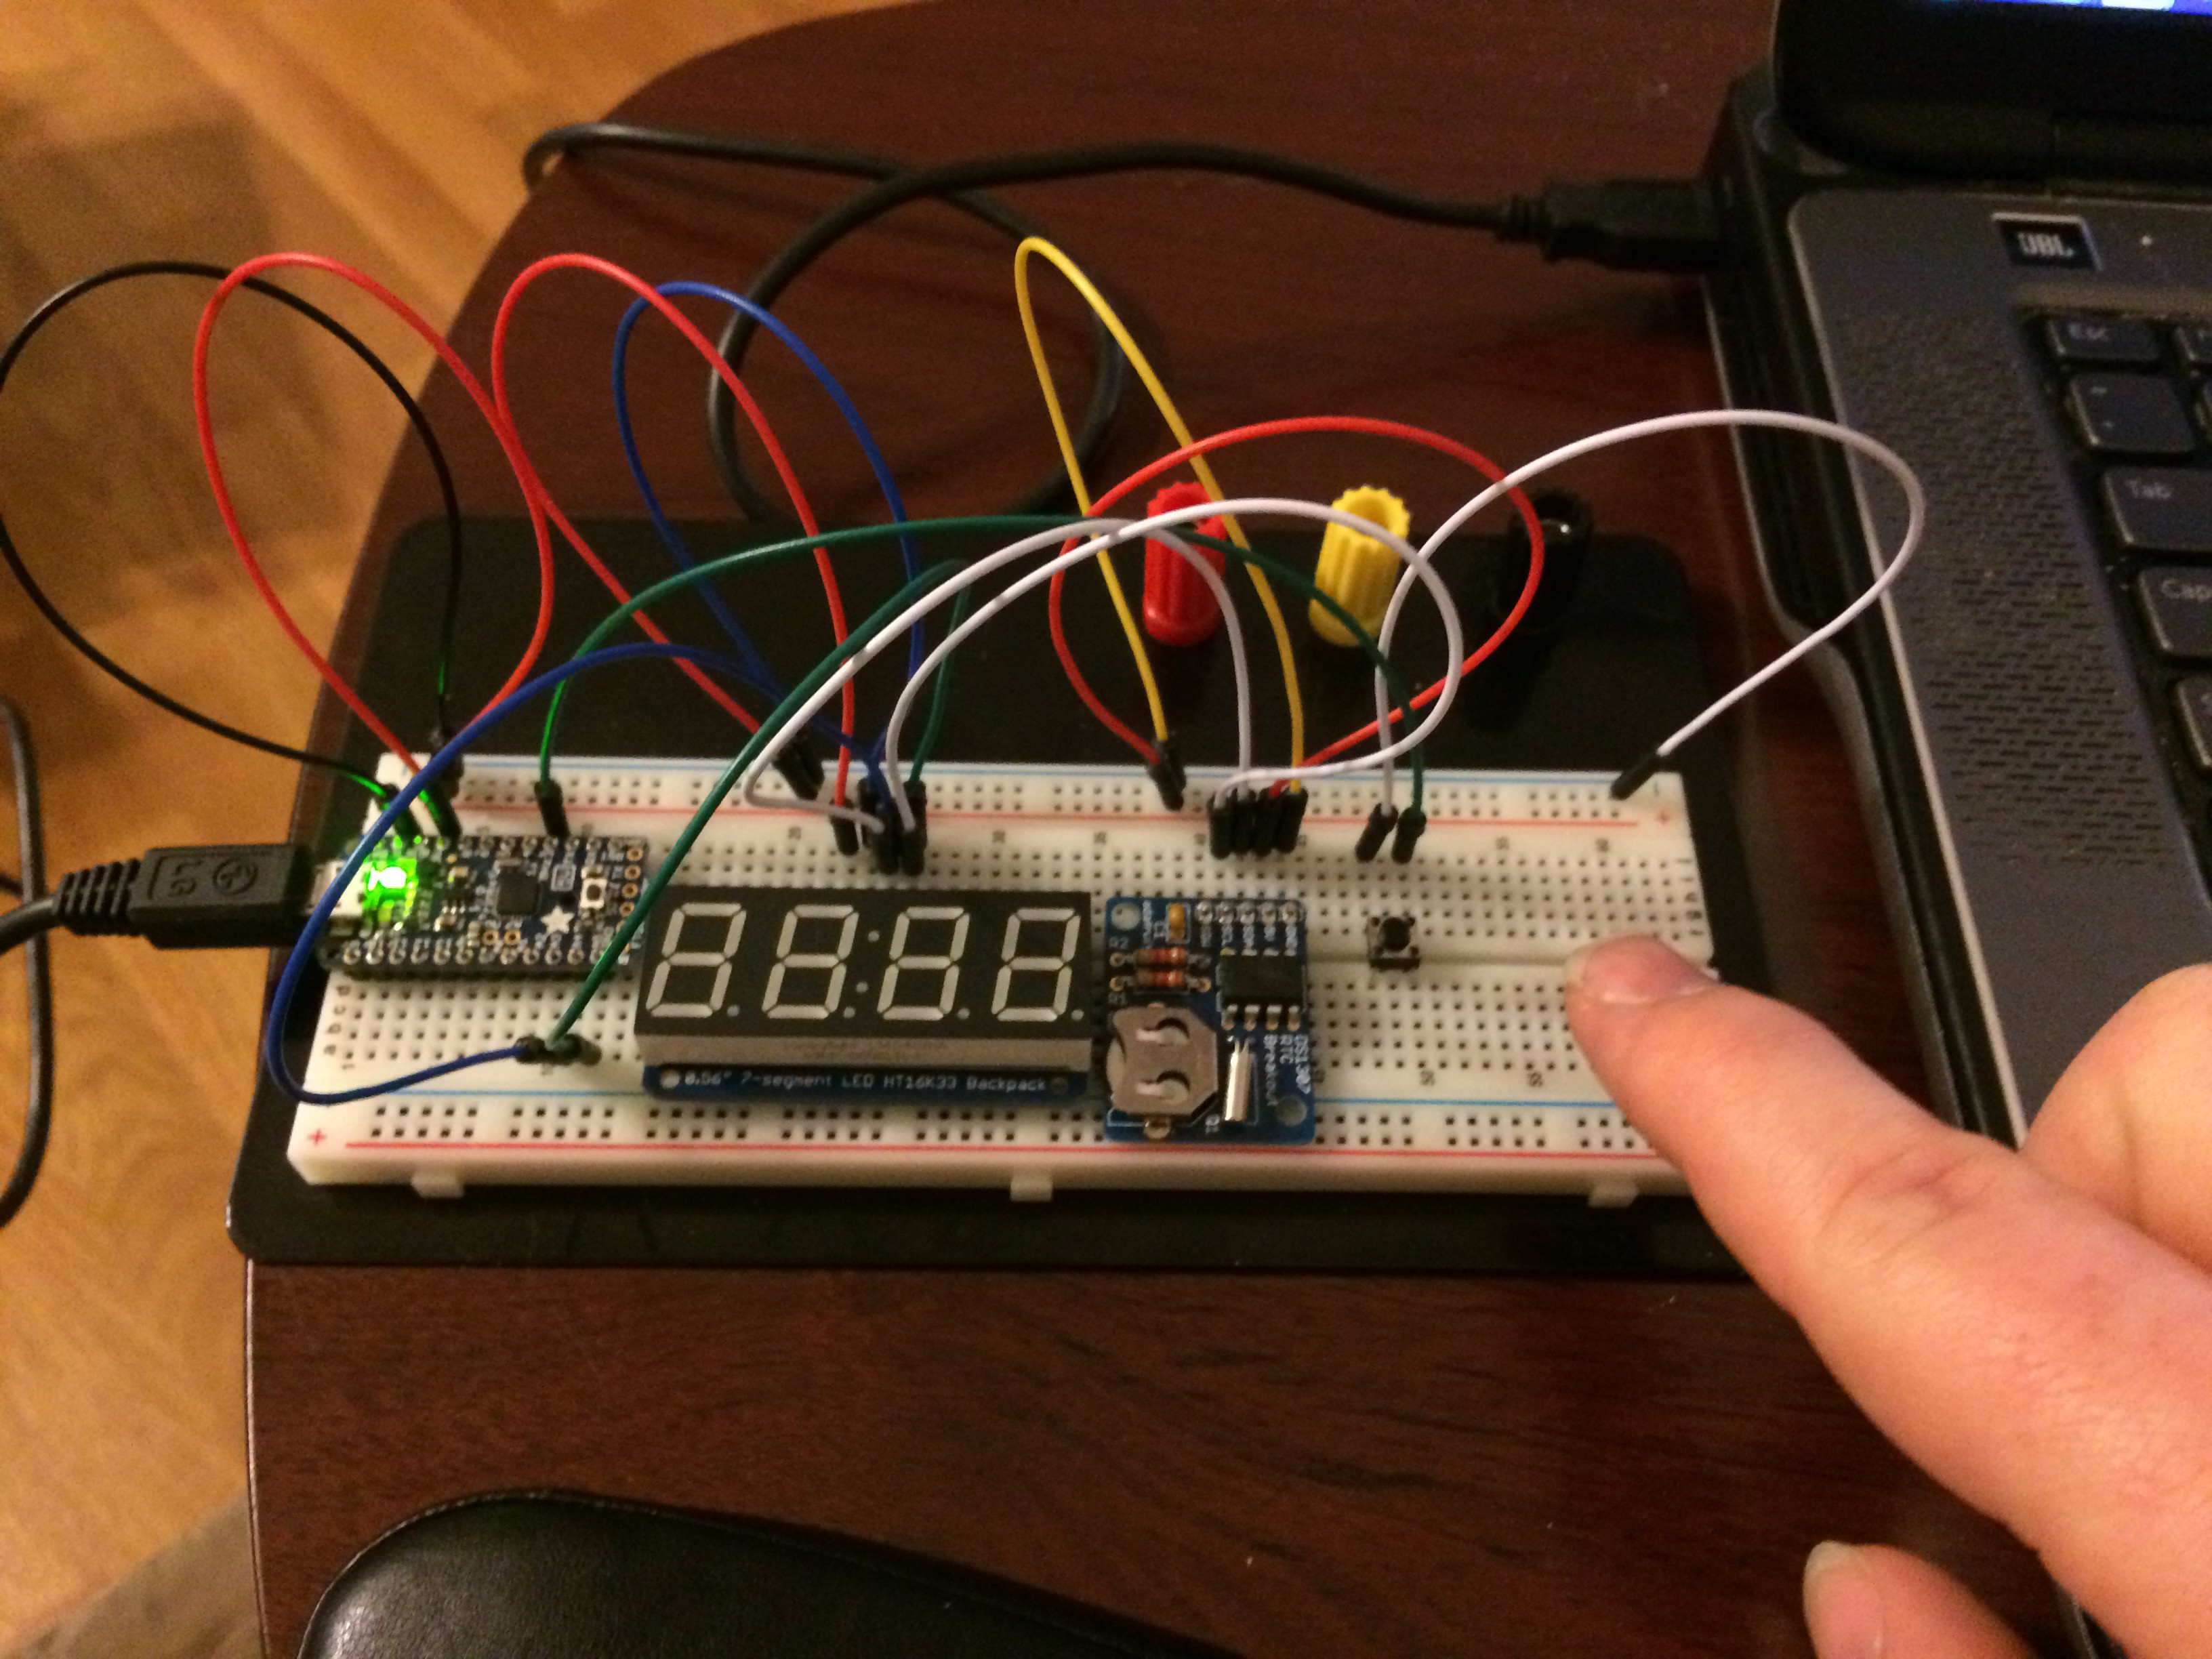
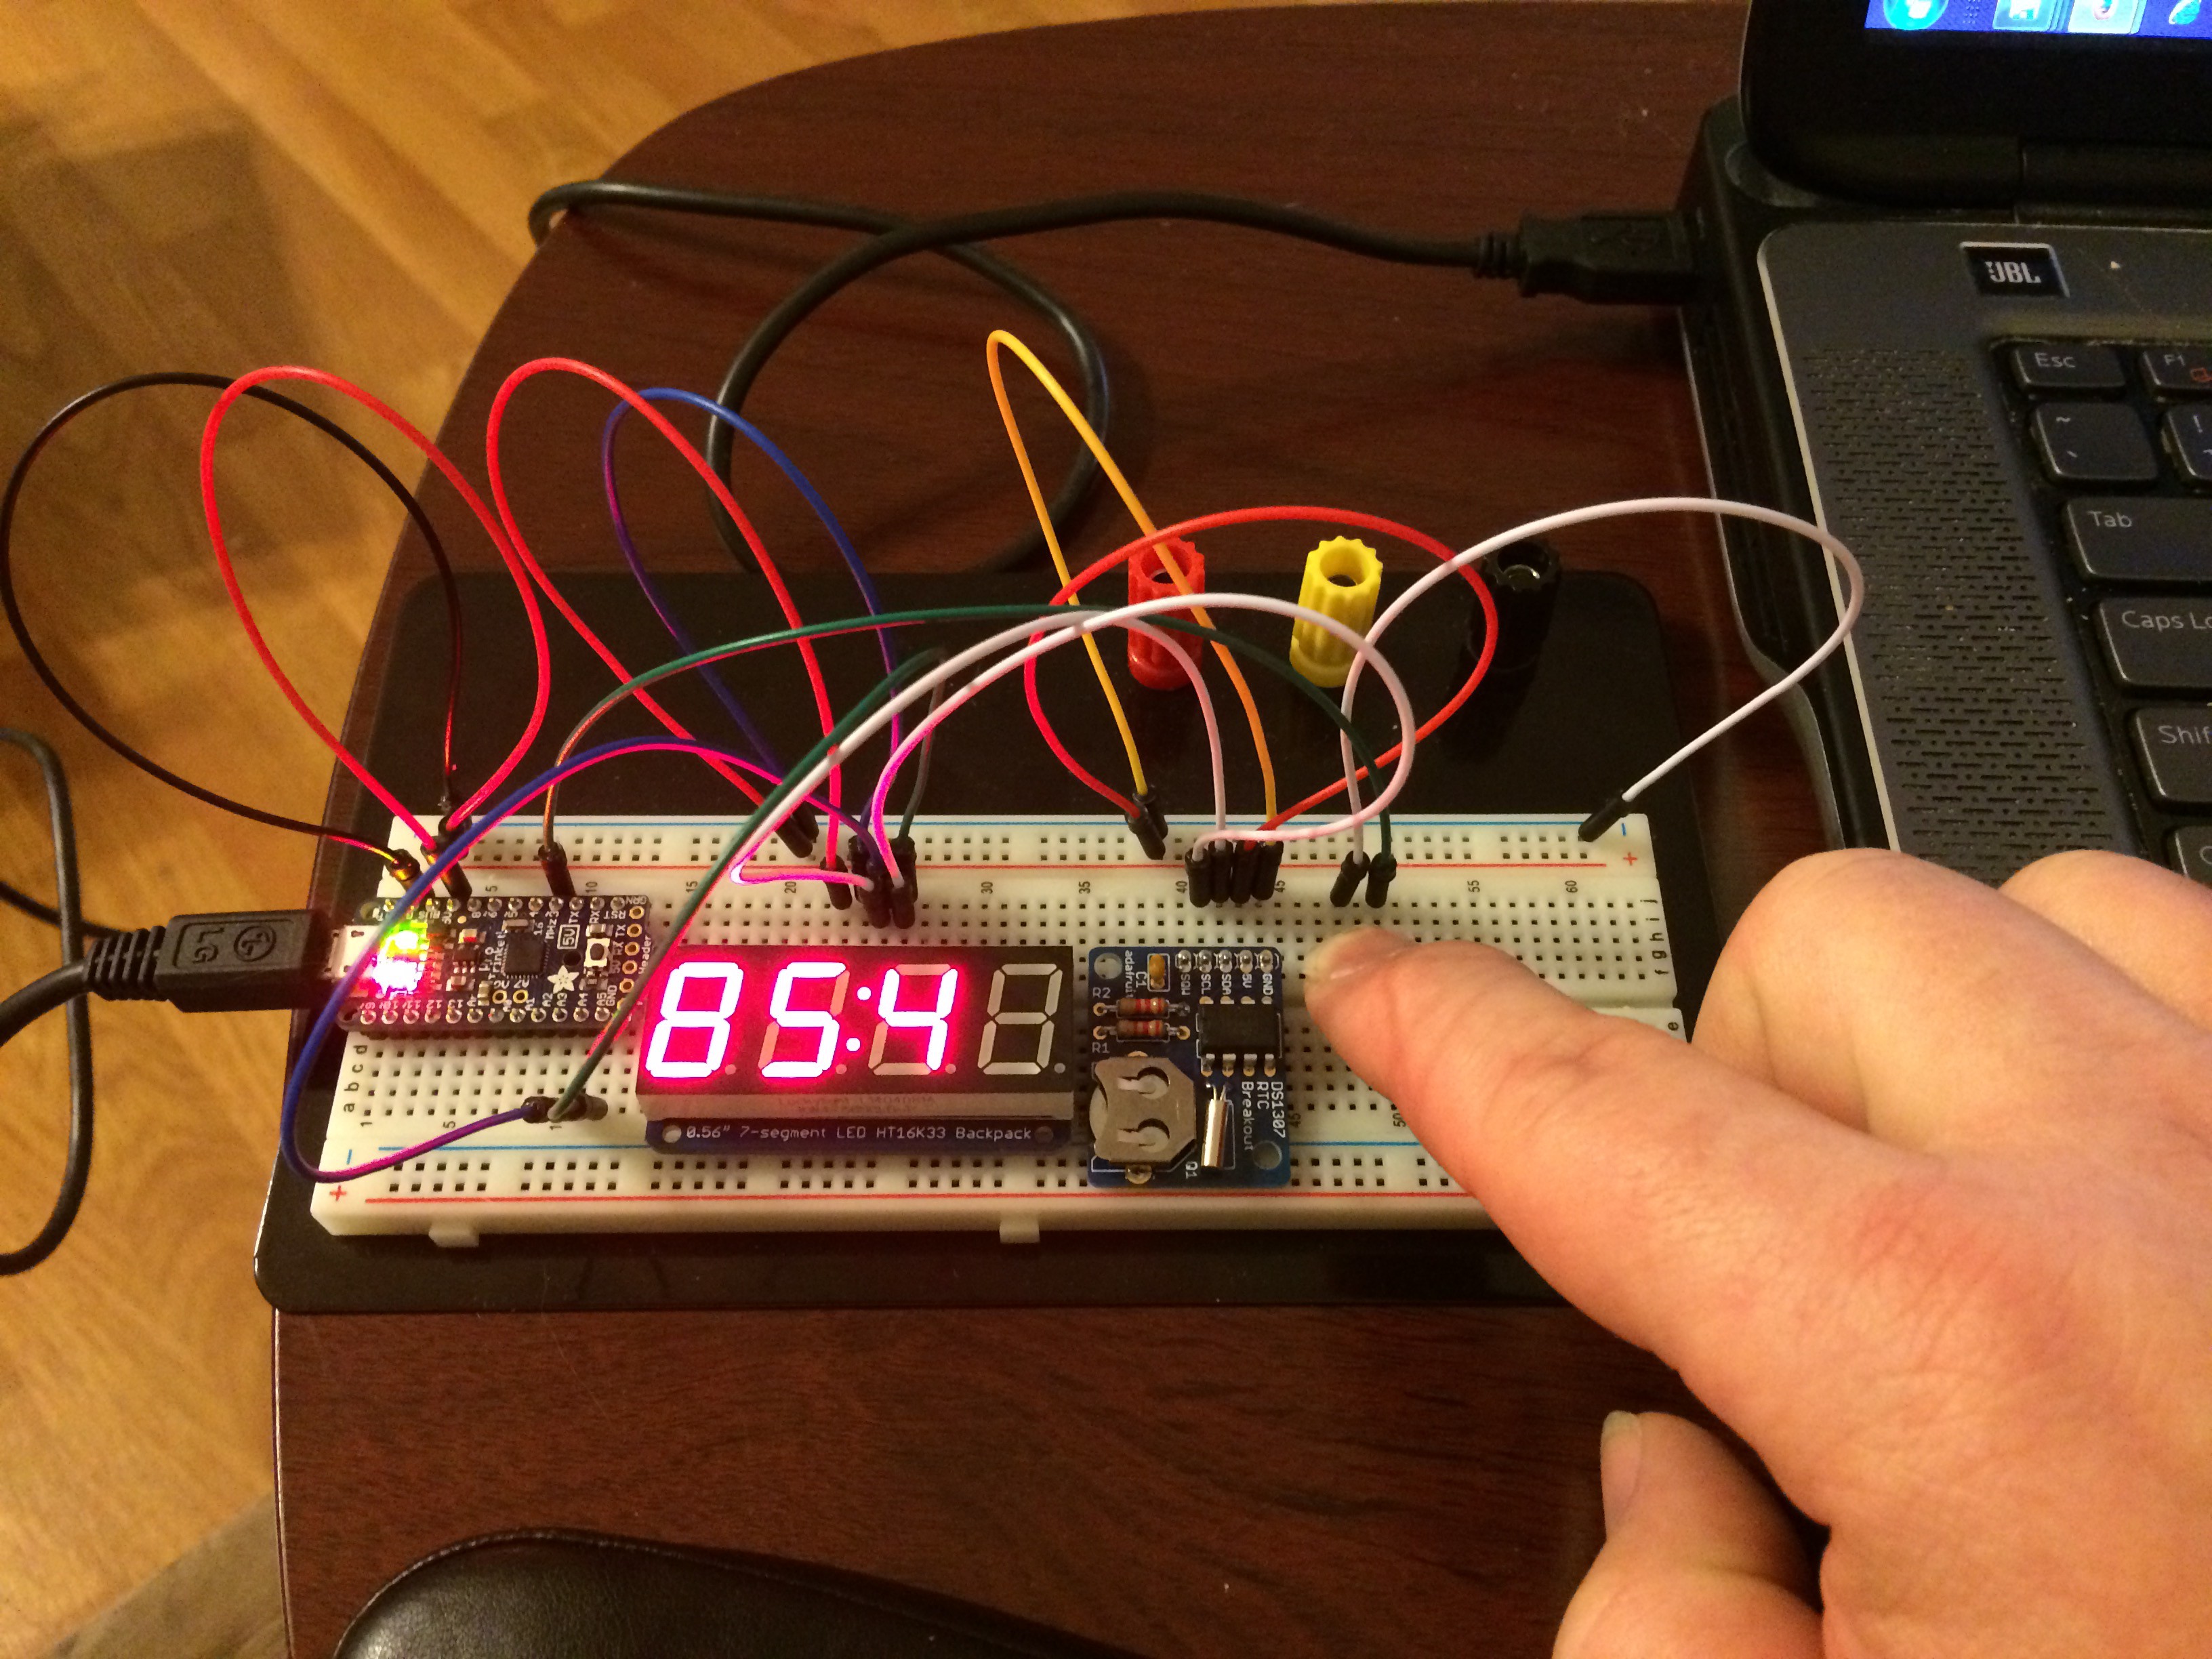
    3. The first 3 digits of the TOTP on the left hand side of the display. The digits will display while the button is pressed. The red LED of the Trinket Pro and the colon of the LED display will turn on .
    4. Release the button
    5. This will display the second 3 digits of the TOTP on the right hand side of the display. The digits will display for 10 seconds.

    The code has been added to github: TTTOTP Source

    Images:

    Before:

    Pressed:

    Released:

    Tada.

  • First parts arrive, some assembly required

    colonwq12/07/2014 at 16:32 0 comments

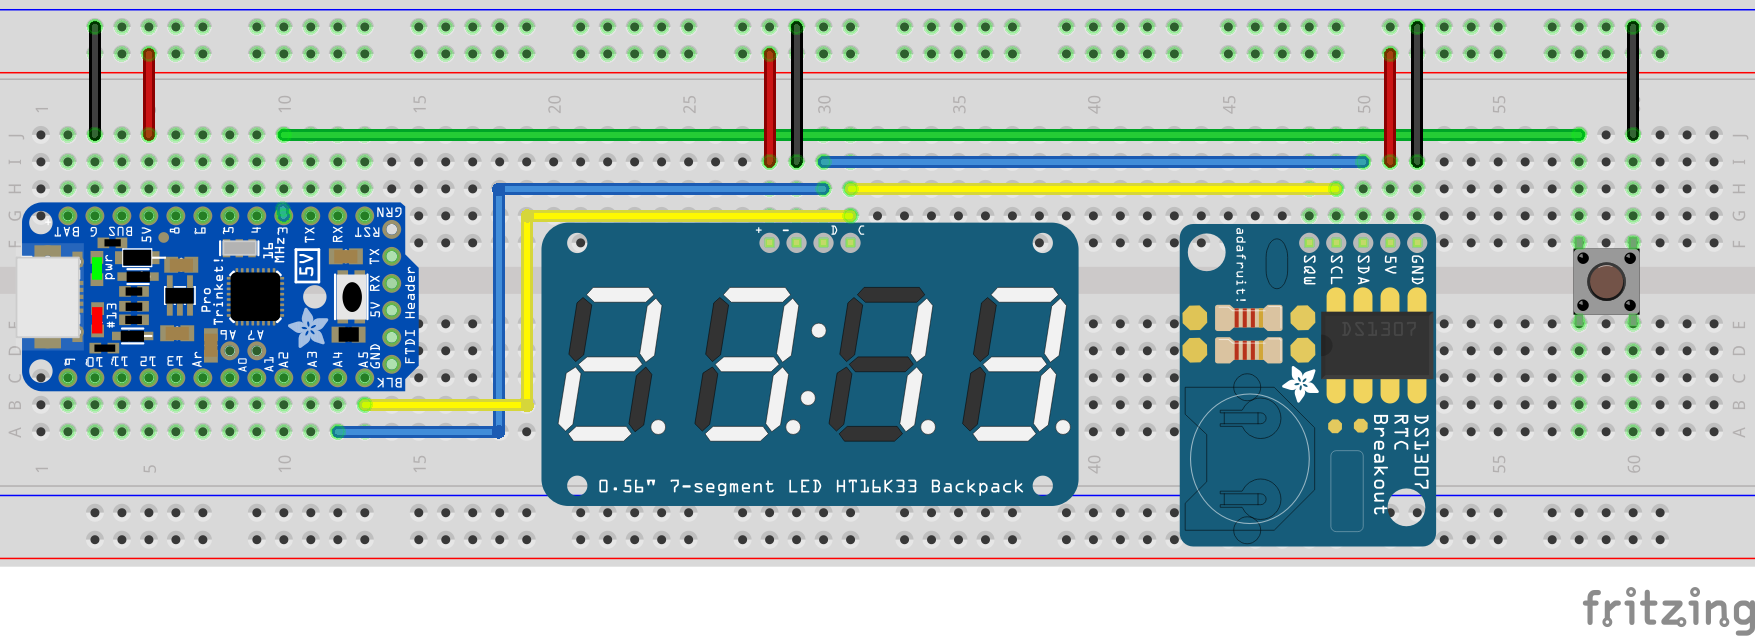
    The Pro Trinkets, LEDs and DS1307 RTC arrived. I even got buttons. I have a basic breadboard schematic. I need to assemble the LDS and RTC breakouts and put headers on the trinket.

    I will probably develop on my SIK first.

    The project path will be:

    • assemble parts
    • breadboard everything using a SIK
    • talk to the RTC, set time, get time, get Unix epoch seconds.
    • Talk to LED
    • Implement TOTP and perform RFC validations.
    • Integrate all of the hardware and software
    • Use seconds to generate TOTP
    • Space optimize the code
    • Magic.

  • Project Risks

    colonwq12/04/2014 at 18:27 0 comments

    There are a number of project risks:

    - Design skill. I typically do software. Stitching hardware is new to me.

    - Limited programming space. How tiny is the Trinket? I need to talk SPI to my target display and clock source while having space to do a TOTP. I may have to remove uneeded code from support libraries.

    - Size of components. Trinket small... Display not small.

    - Implementation time. I expect my adafruit delivery on Friday Dec 5th. Who needs sleep?

View all 5 project logs

Enjoy this project?

Share

Discussions

TinLethax wrote 09/17/2021 at 01:57 point

Really nice project, I've been looking for this about 2 years now and have no idea where to start. But since I'm working on Fl3xWatchOLED project. Integrating this into the watch is really useful.

  Are you sure? yes | no

Similar Projects

Does this project spark your interest?

Become a member to follow this project and never miss any updates