Can I borrow a feeling?
or, how I can access a random emotion at the press of a button.
or, how I can access a random emotion at the press of a button.
To make the experience fit your profile, pick a username and tell us what interests you.
We found and based on your interests.
I guess the big question with an Everyday Carry entry is will it fit in a pocket?
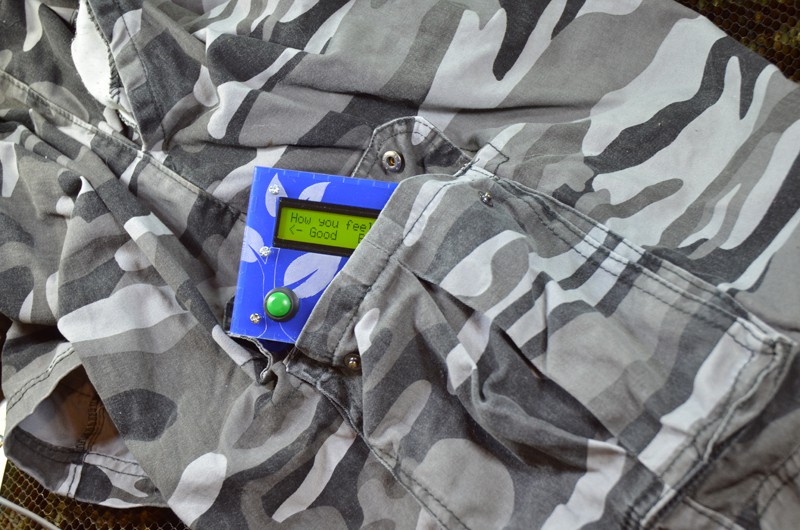
Yes! Yes it does :)
And here's a video of it in action -
Enjoy!!
Well, this is it! Final assembly :)
First step in final assembly was to pass the wires from the buttons through the case - as these need to be in place when I solder the wires onto the Trinket Pro. If I could count the times I've soldered switches and buttons up too soon.... But not this time!
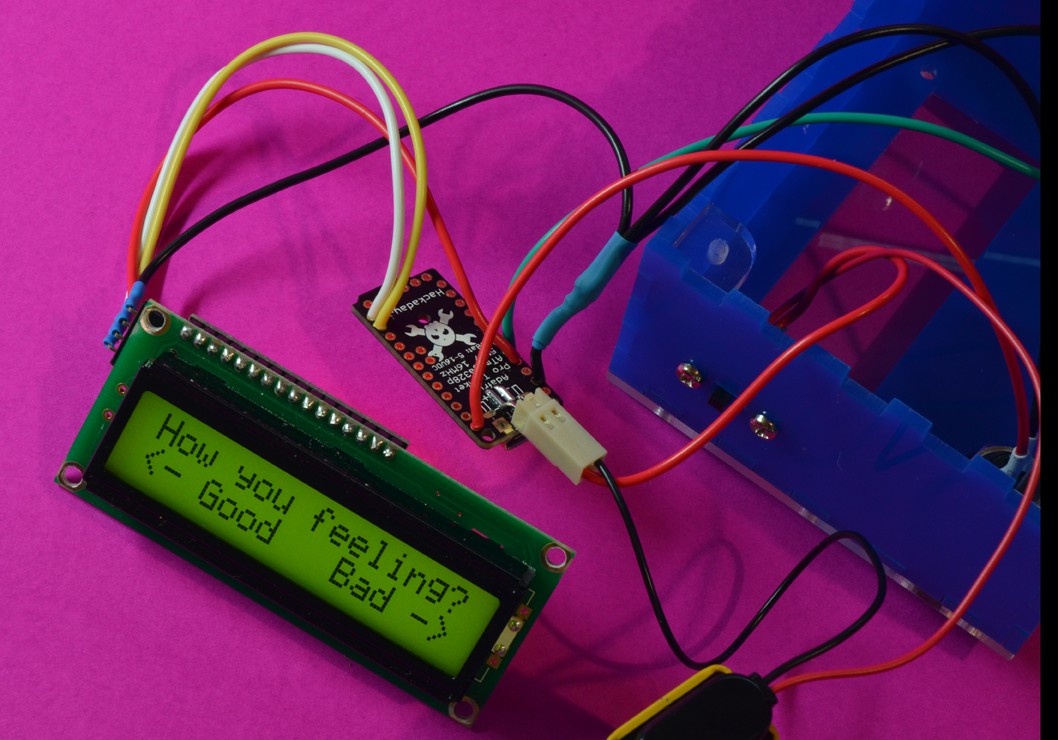
I didn't have a JST connector handy for the battery, so I used a 2-pin locking header. I bent the pins in an 'S' shape - works like a charm!
I decided that since I'm only using a few connection points I didn't need the headers, just solder straight onto the board. I created a junction for the three grounding wires (1 for the LCD and one each for the buttons) - you can see that in the image above.
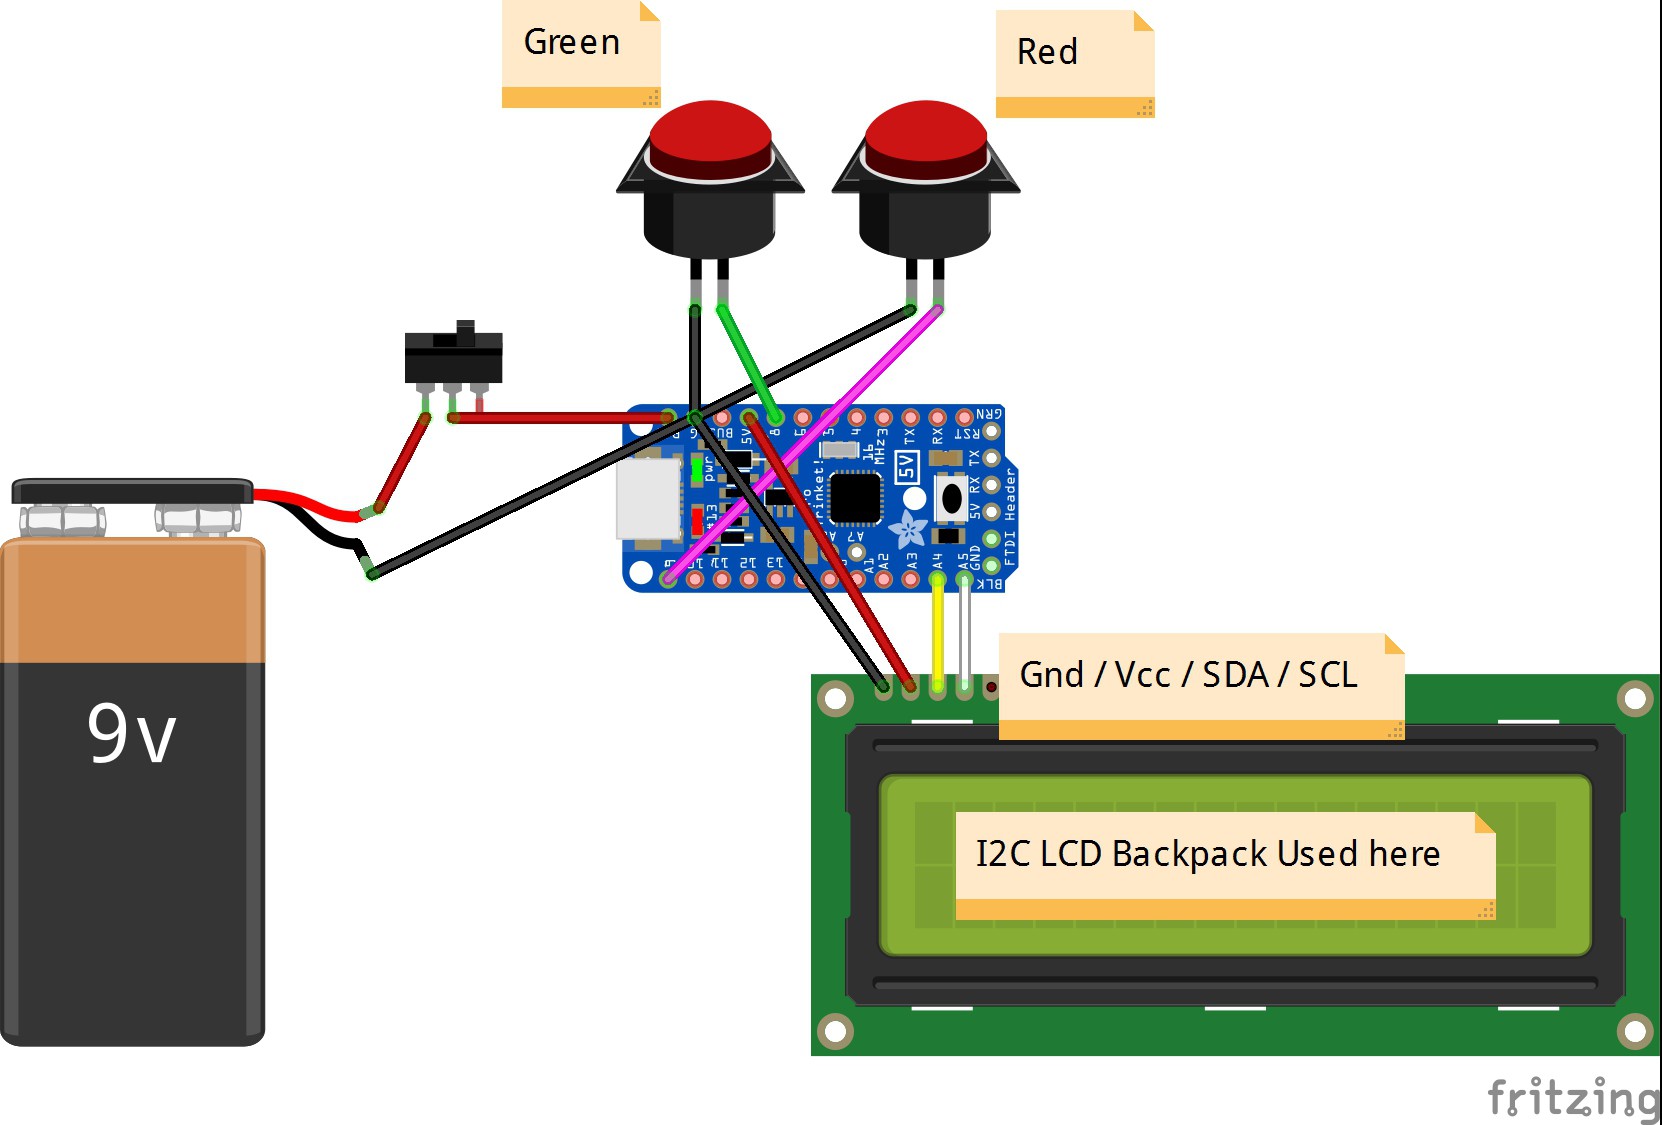
Here's the layout in Fritzing -
With everything up and running, the screen, battery and Trinket Pro were then placed into the case.
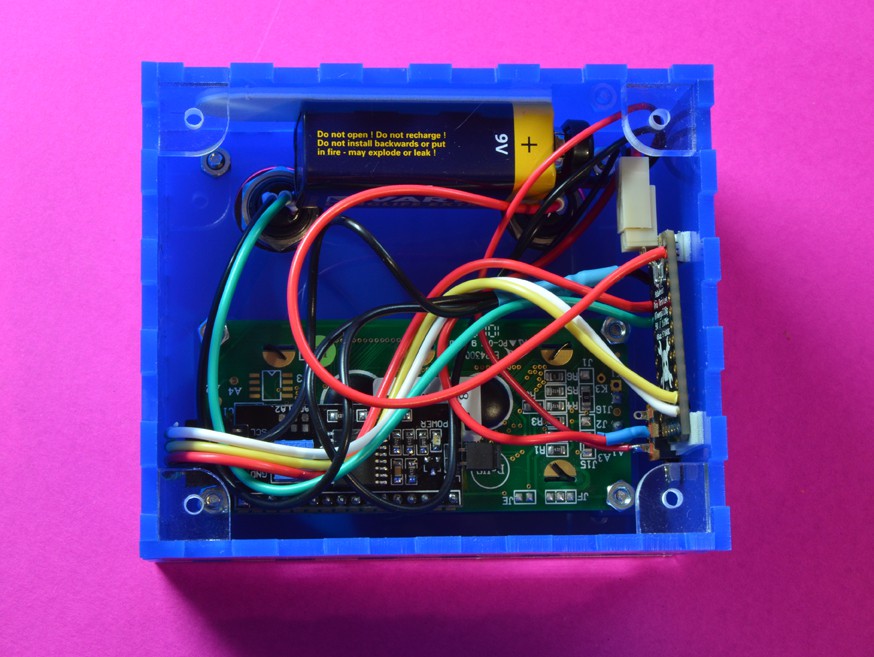
To stop the battery and Trinket Pro moving in the case, I've used some double-sided tape. Ok, so my cable management skills need some work!
The back panel was held in place by 4 M3 screws - quick and easy access to the battery when it needs to be changed.
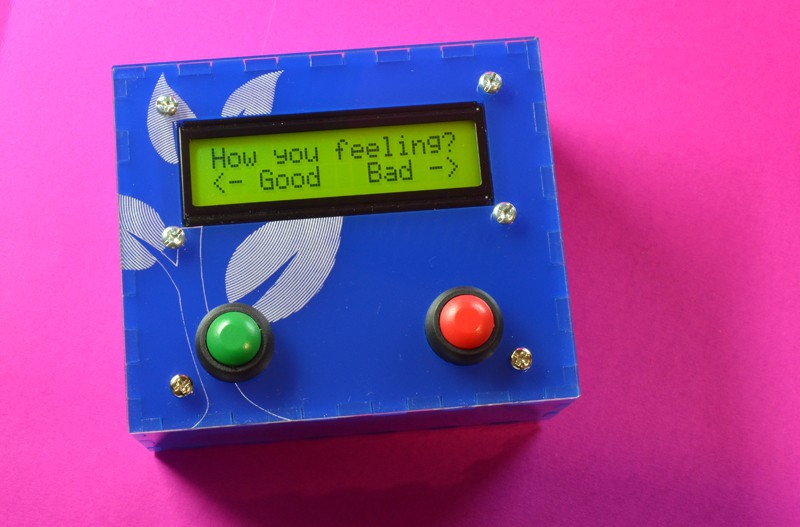
And here we go! Up and running ! Woot!!
How are you feeling? Press the Green button for Good and the Red for Bad :)
Project Complete.
How's the team going to take this? I think they'll love it! Big reveal is a week away.
Since my last update - a mere 18 hours ago - a lot has happened (little of which was sleep, but that's ok, it's the weekend!!)
First up I started by soldering wires to the switches, the 9v battery snap and the socket for the LCD screen.
Work on the box started next. Using an Acrylic glue, I assembled the front and sides.
Aw! Looks like a robot!!
To close the box up, I've attached 4 screw tabs at the back.
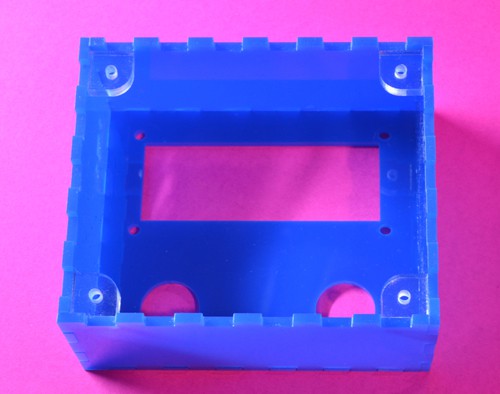
These are threaded for an M3 screw. I'm using M3 screws throughout this build as they're a good size and I have a bunch of them in different lengths :)
Next up, final assembly!
The last few evenings has been spent trying to figure out just how much space the screen, trinket and battery take up and designing an appropriate enclosure in CorelDRAW.
Well, that's done & I've now run the job in the laser :)
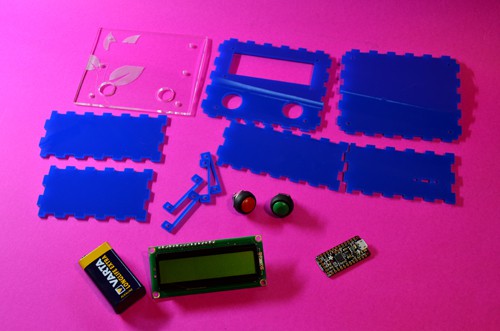
The thin pieces in the middle are to space the screen enough as to have it fit below the front clear pane.
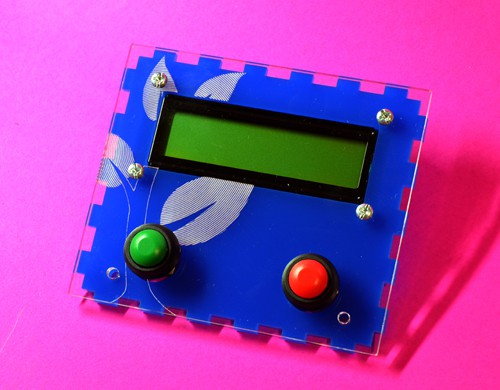
And here's the front assembled - there's a few dust spots that I'll remove before final assembly :)
The CorelDRAW file for the box is available on GitHub - https://github.com/ibuildrockets/Borrow_A_Feeling/tree/master/box_files
Next steps - glue the box together and solder up the buttons & screen. Getting close to finished now!
Testing.. Testing.. Is this thing on???
I snapped a photo of my breadboard setup and code running on a UNO
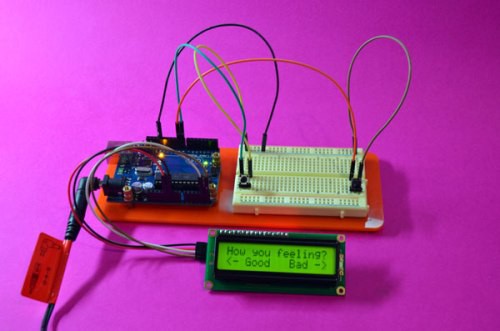
Since the Trinket Pro is Arduino compatible, I figured it was easiest to develop up my code and hardware layout this way.
Now, since everything works as it should, next step is to upload the code to my Trinket Pro, break out the soldering iron and design a case!
Good night folks, I'll be here all week!
I started the day with a trip to my local parts supplier to obtain a nice new 16 x 2 LCD since the one I've been using for development is old and fading - I don't know. You spend $5 on an LCD, shouldn't it last for ever?? Bah!
So, I picked up a Polymer LCD screen... Except that I've got no response from it - it's just dead right out of the bag. Argh! I have no idea what's going on.. Very unhappy about that. Still, I did pick up a cheapie LCD screen at the same time - $4 in the discount bin and it's working like a champ! (in fact, I might pop back some time and grab a couple more!)
Oh - I spent lunch enjoying a tour of Melbourne's largest brewery along with a tasting.

Lunch was a really yummy steak burger, but I digress!
Ok, as the title of this update states - code is now up. Go check it out - https://github.com/ibuildrockets/Borrow_A_Feeling
I've just uploaded the excel spreadsheet with the 'Good' and 'Bad' word lists to GitHub. You can find the files for the project here -
https://github.com/ibuildrockets/Borrow_A_Feeling
The first file uploaded is Master_Word_List.xlsx
Since I'm using a 16 x 2 LCD display, I wanted to centre each word. I can probably do this programmatically within the Arduino IDE - but I haven't figured that out yet, so I'm doing it in Excel :)
I need to calculate several things -
=LEN(F2)since the word is in F2
Lets use the word "excited" as an example. The result of =LEN(F2) would be 7
Next I need to work out how many spaces go before the word. For this, I use the following -
=REPT(" ",((16-J2)/2))I start by working out how many spaces I need in total - 16 - J2 (length of word)Using the example "excited" with 7 letters, I will need 9 spaces in total, but only 4.5 spaces before the word, thus the /2 divider. Since you can't have .5, Excel will insert 4 spaces.
Next I need to work out how many spaces to put after the word. I'm using the following to figure that out -
=IF(LEN(E2)*2+LEN(F2)>15,REPT(" ",((16-J2)/2)),REPT(" ",((16-J2)/2)+1)) IF (length of spaces before the word * 2 (so, total spaces) + the word itself is greater than 15, then add the same number of spaces as before. However, if not greater than 15, add the same number of spaces + 1 (so, this will result in 16 characters total)You'll find the first formula in column E and the 2nd formula in column G
Go, have a play with the excel file - see how changing the lengths of the words affect the numbers of spaces added before and after - but always resulting in 16 characters (unless, of course, you enter a word with more than 16 characters...)
I have two word lists I need to use - one being the positive feelings and the other being negative.
While in most cases, putting positive and negative things together will result in sparks, with the careful use of Excel, I've managed to create a 'master list' of words. This list holds in harmony both the positive and negative feelings as approved by the organization.
Why did I use Excel?
Due to the size of the word list, I need to push the data into PROGMEM. Each data element needs to be formatted as follows -
prog_char string_0[] PROGMEM = "A Feeling";
prog_char string_1[] PROGMEM = "Another Feeling";
I found it easiest to create this in columns and simply concatenate the result - no manually incrementing numbers here!
Work continues on the selection code....
Create an account to leave a comment. Already have an account? Log In.
Become a member to follow this project and never miss any updates