seminolemuscle
-
We've migrated to our official forum!
09/03/2015 at 14:50 • 0 commentsIf you're wondering about the lack of activity here don't worry, the project is alive and well. We've moved our project logging activities to our official squatsandscience.com build log where you can follow, interact, post questions, and even fork our build and log your own OpenBarbell. You can find all the action here.
For those of you who don't like clicking links, here's an album of some stuff we've been doing since we've been gone.
![]()
![]()
![]()
![]()
![]()
-
OpenBarbell Has Graduated from the Shoebox
06/05/2015 at 00:30 • 0 commentsThe OpenBarbell team has been busy...
![]()
![]()
![]()
![]()
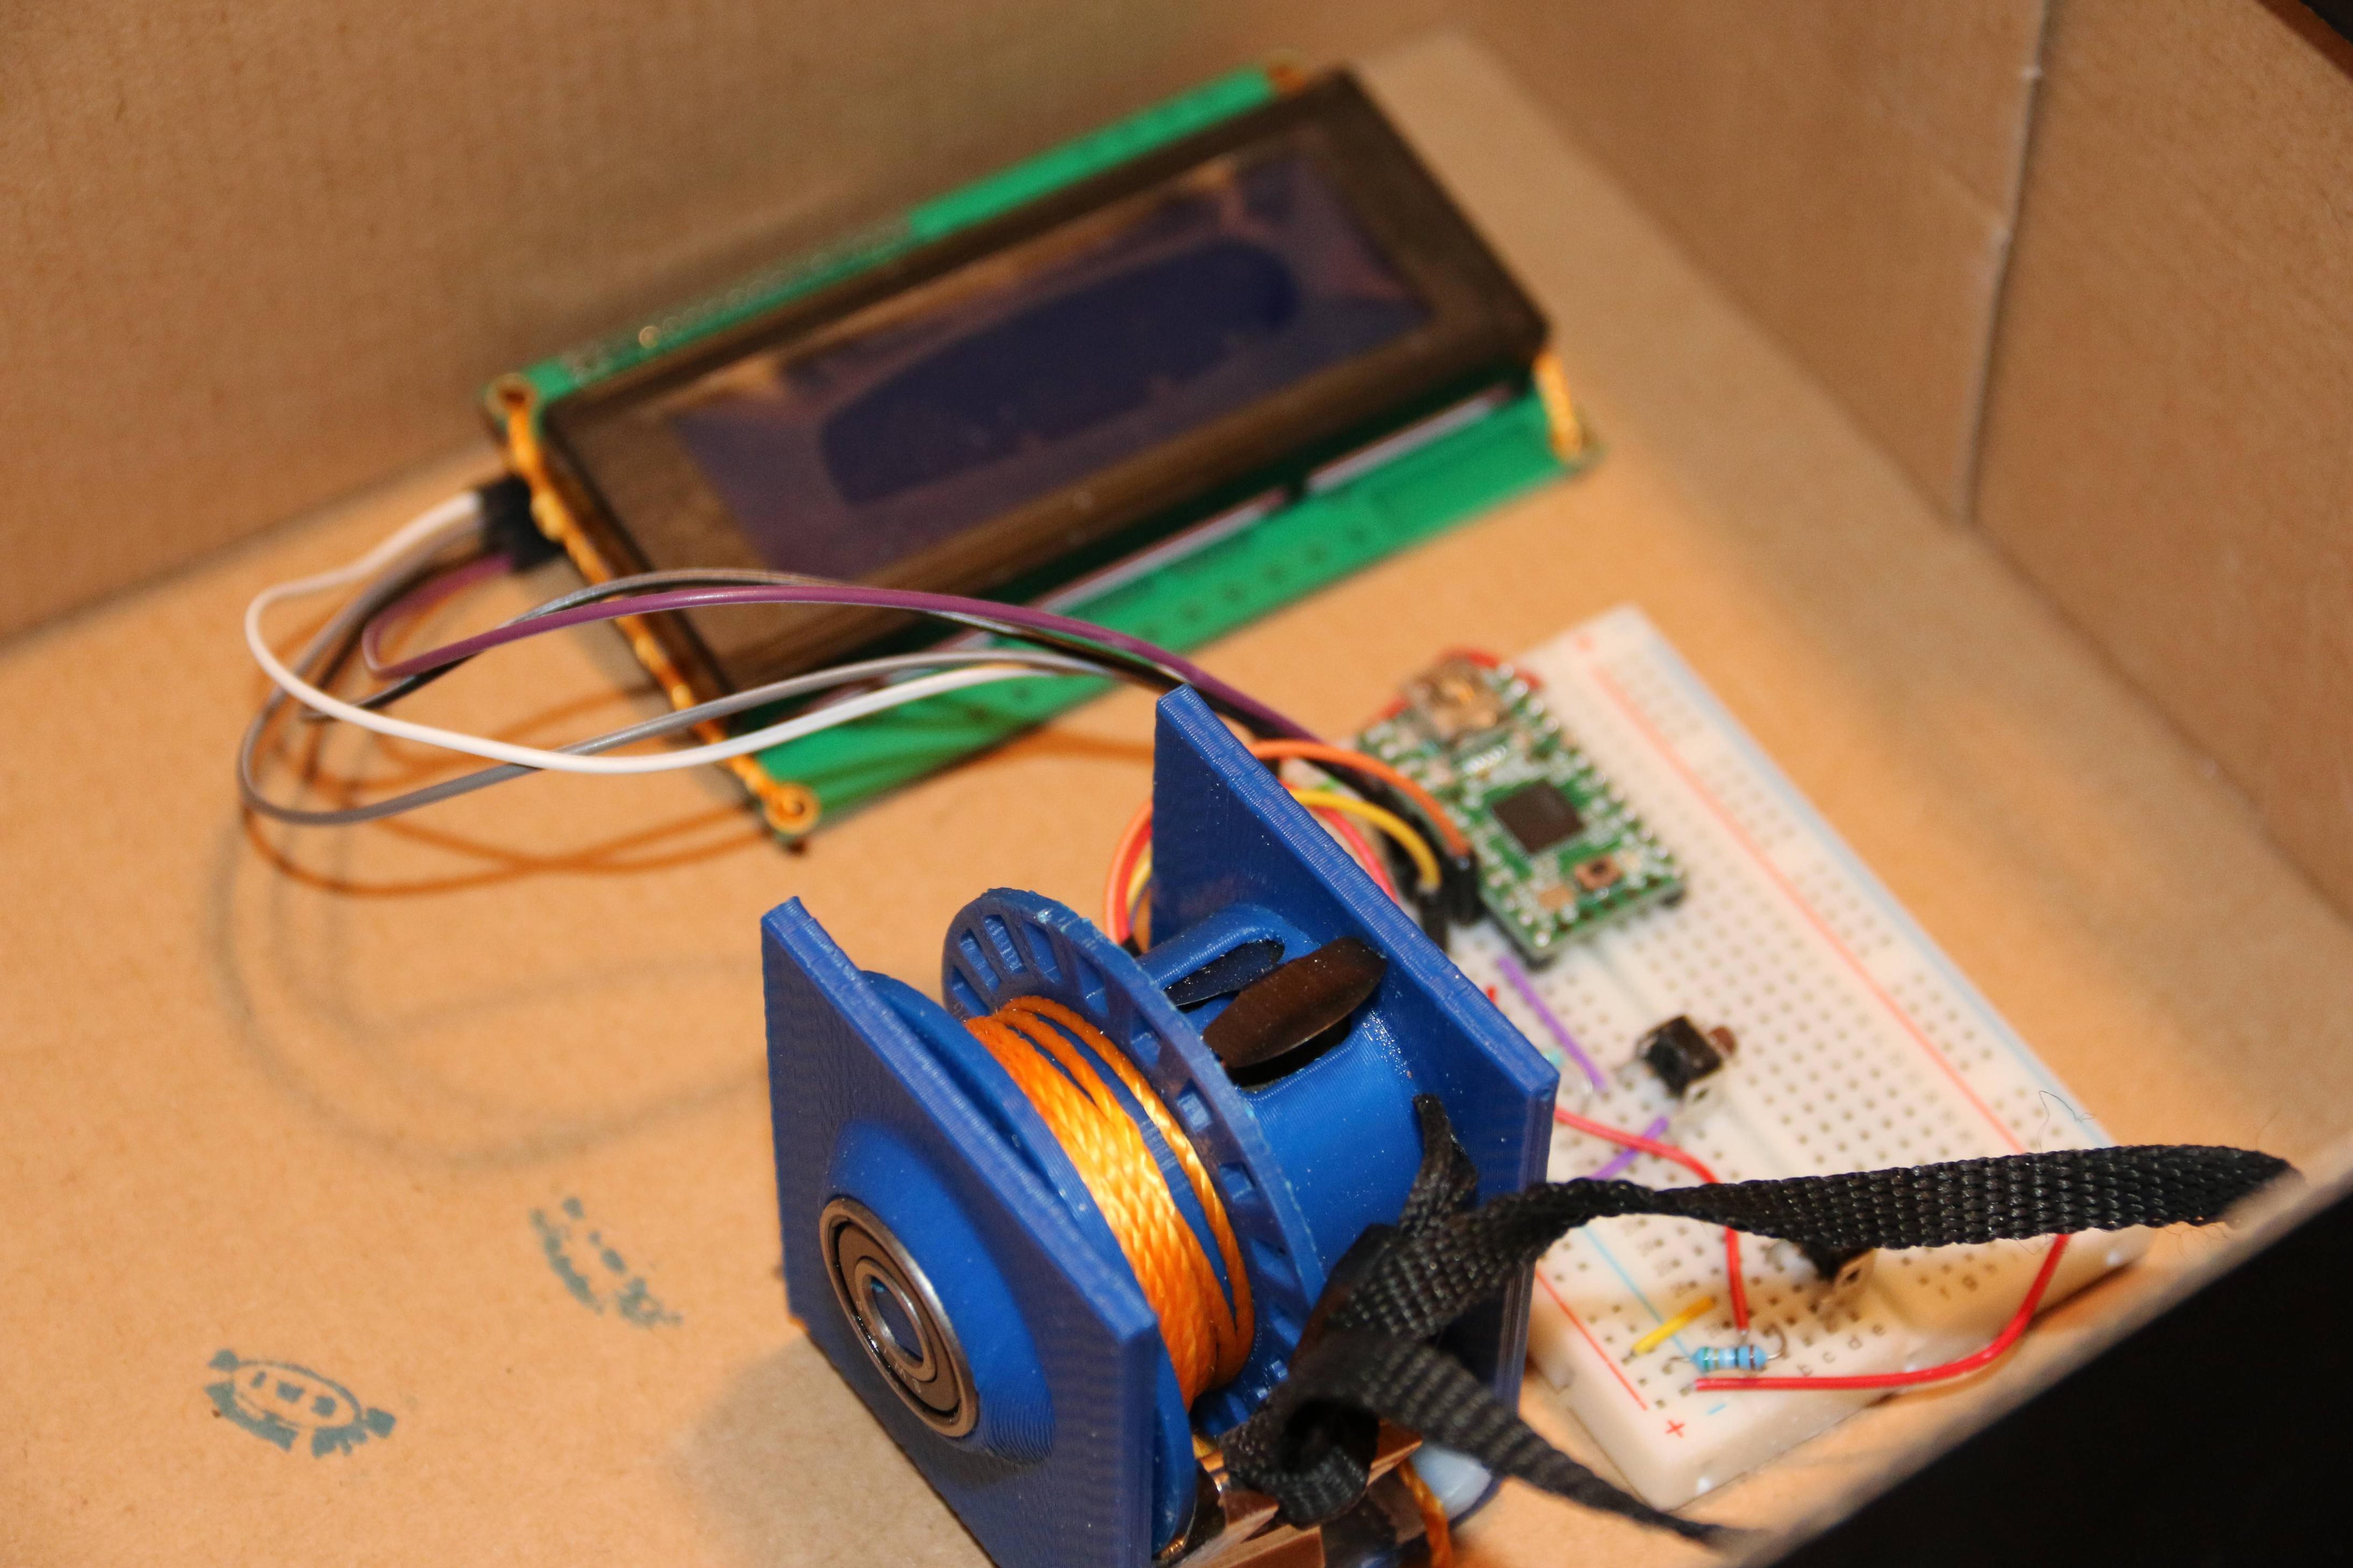
As you can see, the prototype has grown out of a shoebox and into a custom 3D printed enclosure. This means we are one major step closer to making an open-source ready project available to those who want to practice velocity based training techniques on the cheap. Some of the benefits of V0.24 are...
- Portabile
- Battery powered
- Arm processor (via Teensy-LC)
- Low power OLED screen
- 12 ft. cord (for olympic lifting)
- Improved UI
- Kevlar string
To do:
- V0.2X Enclosure improvements
- Battery optimization
- Bluetooth
- Remote display (android phone app)
- PCB
- Laser cut enclosure (V0.3)
We have also made some social media gainz with our brand new Instagram page where we will be making more consistent updates than at our hackaday page. Give us a follow and send us a message if you'd like to get involved.
-
Testing and Validation
04/01/2015 at 03:15 • 0 comments![]()
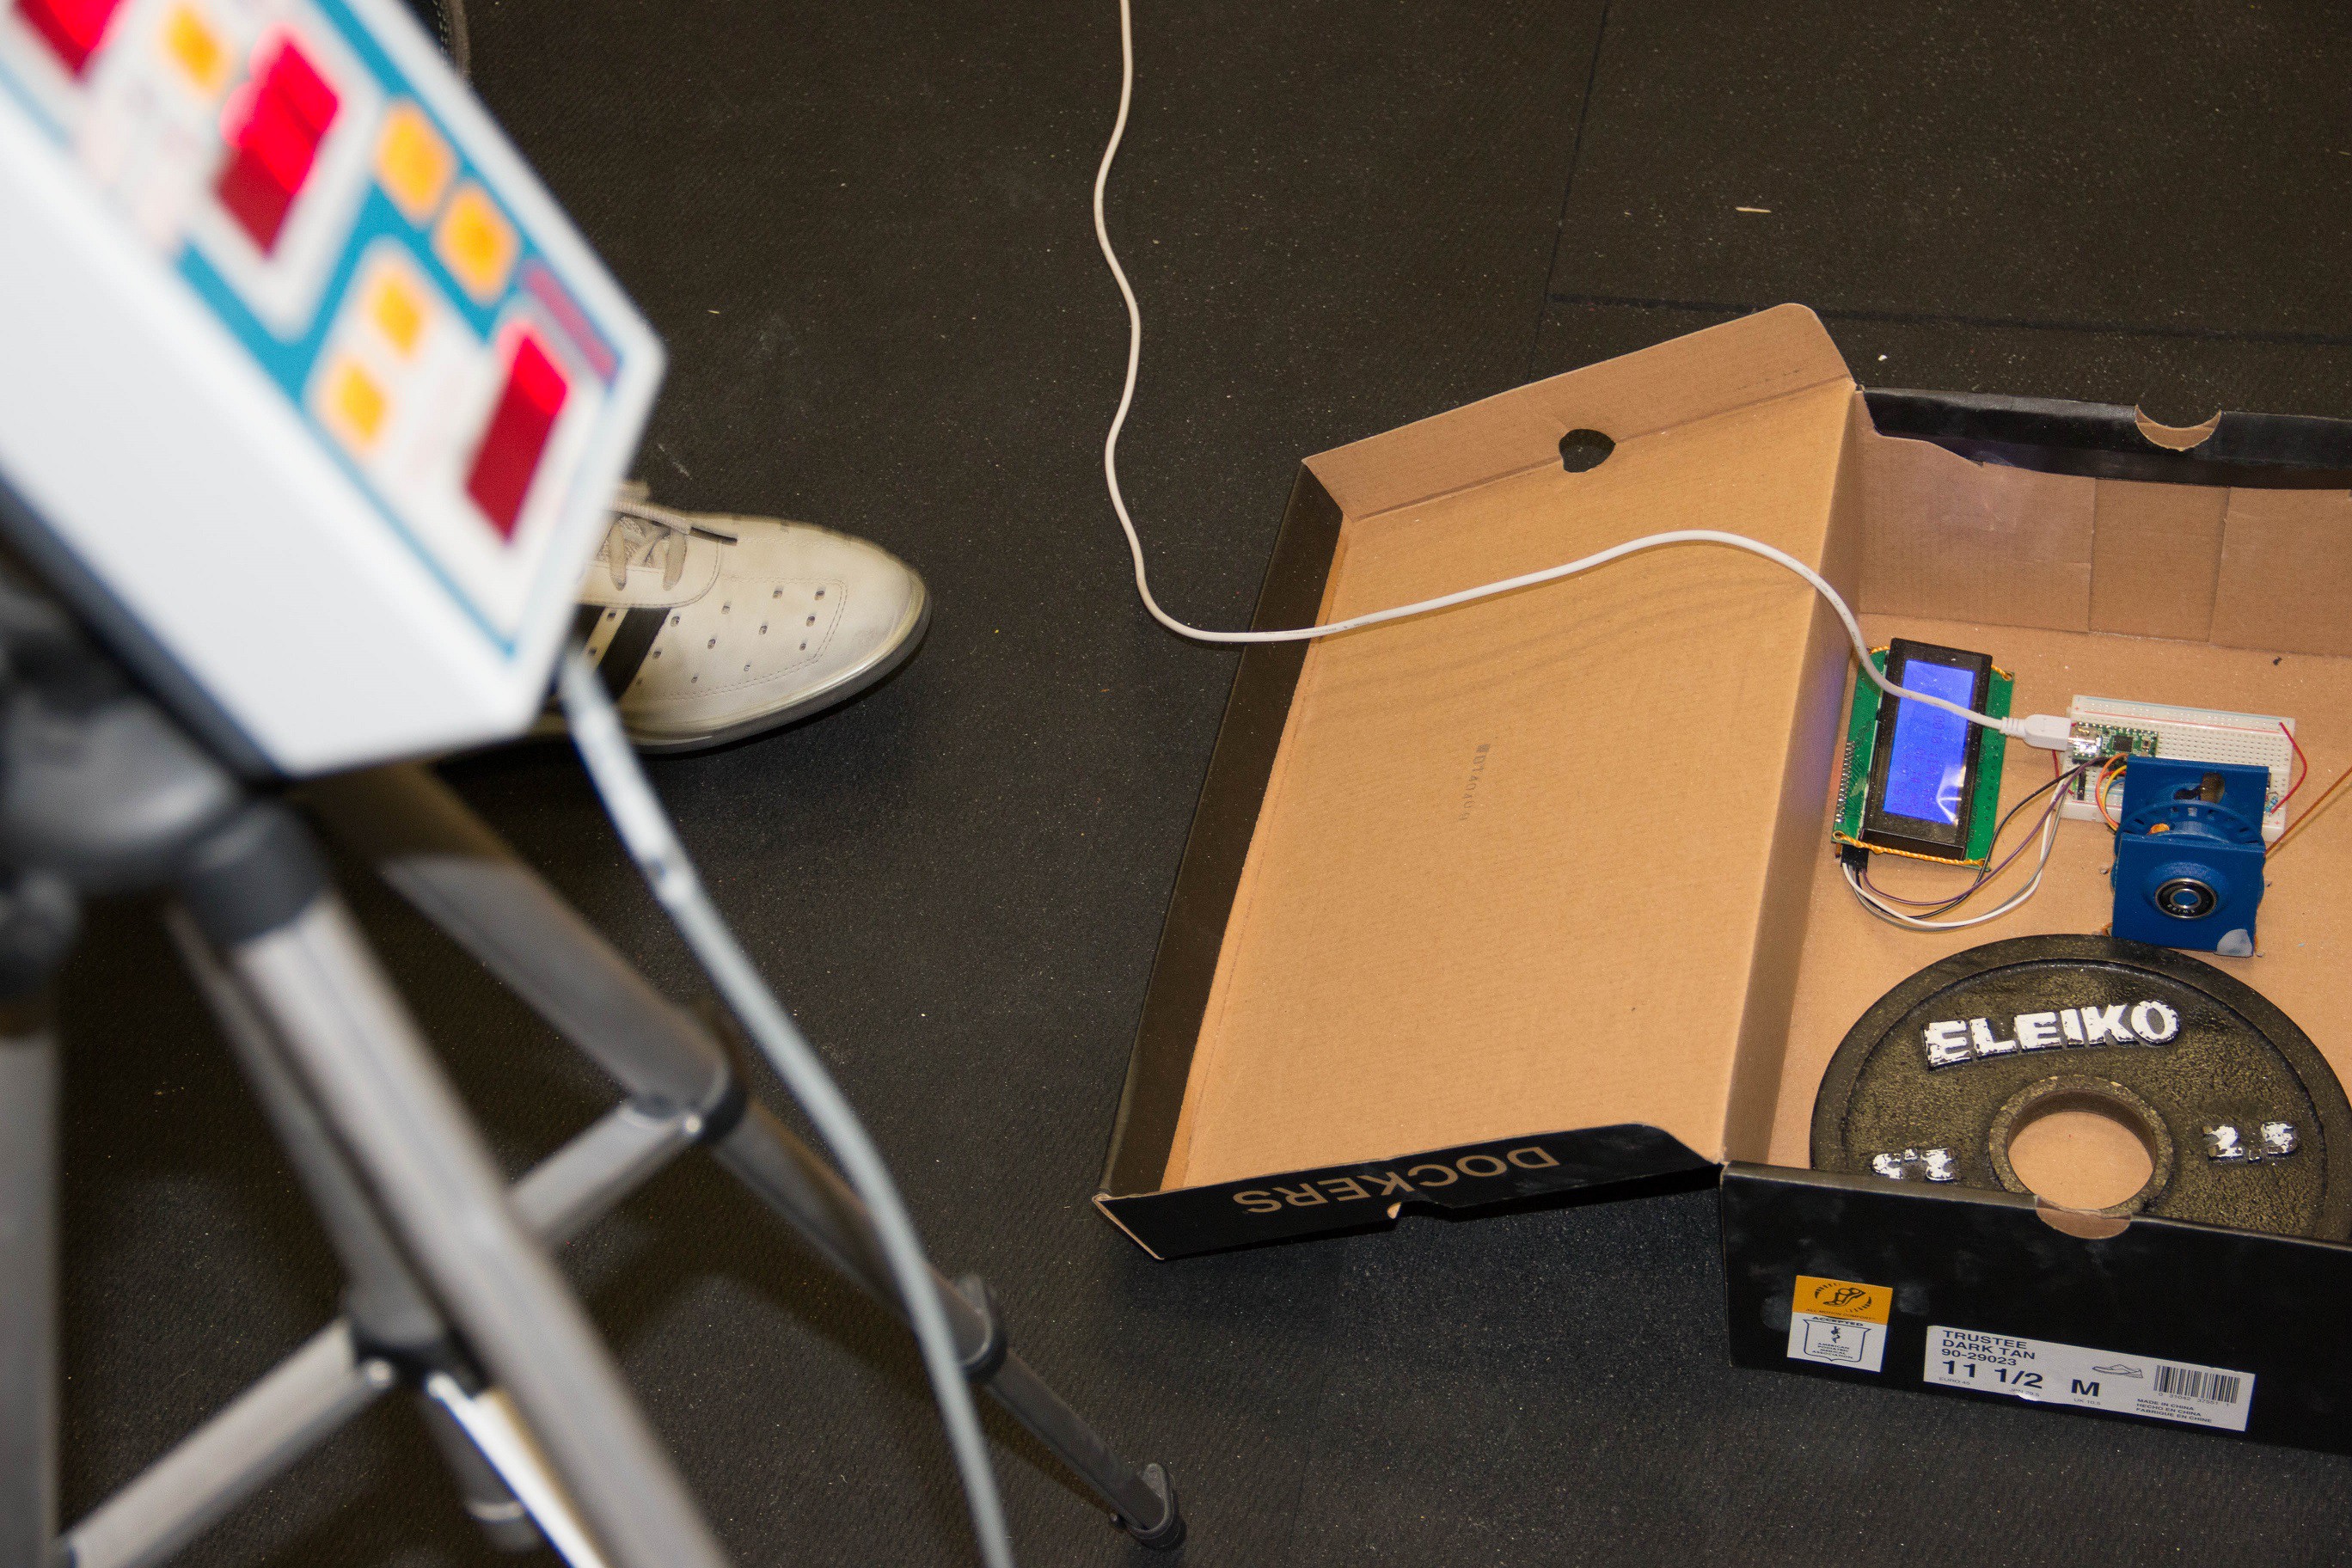
This week we were lucky enough to make it down to the Muscle Lab at Florida Atlantic University to visit Dr. Mike Zourdos, professor of exercise science and one of the few great minds in powerlifting. Dr. Z has been involved in the many incarnations of OpenBarbell since its inception and once he heard we had a working prototype he invited us over to see what it was made of.
![]()
Glamour shot of the Tendo Unit and Shoebox Prototype #1
![]()
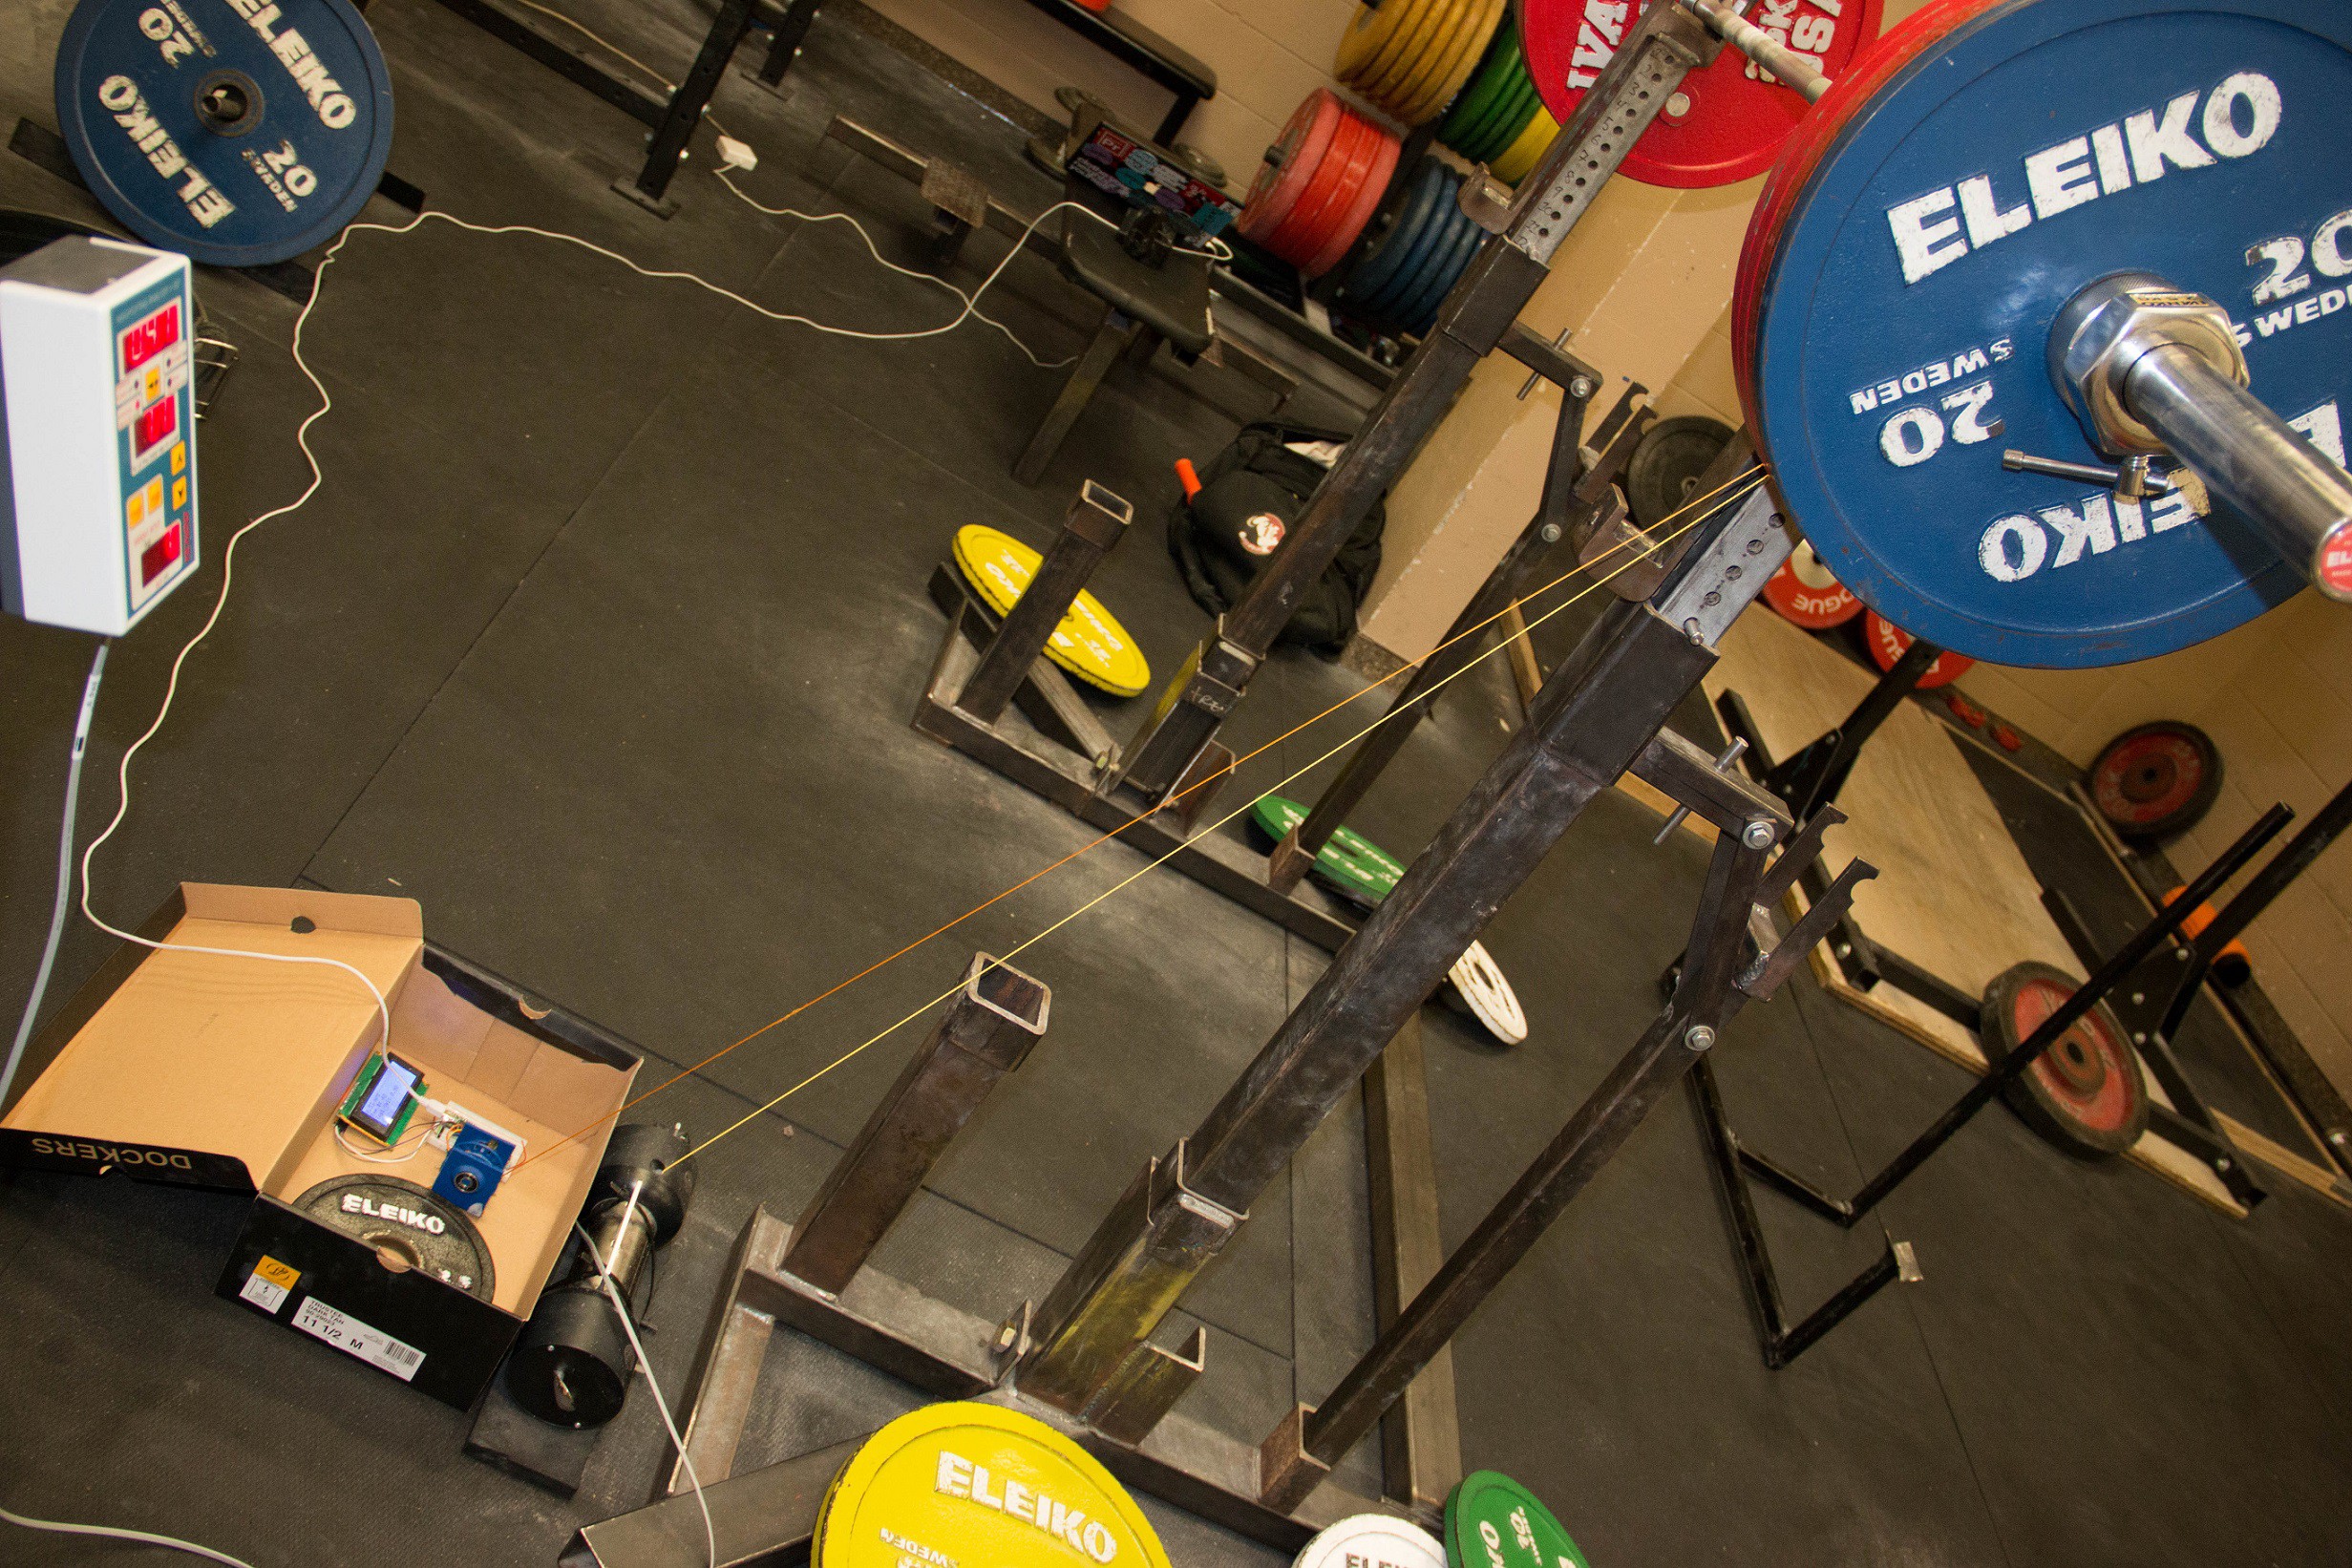
Test setup of the Tendo Unit and Shoebox Prototype #1 on a squat bar.
![]()
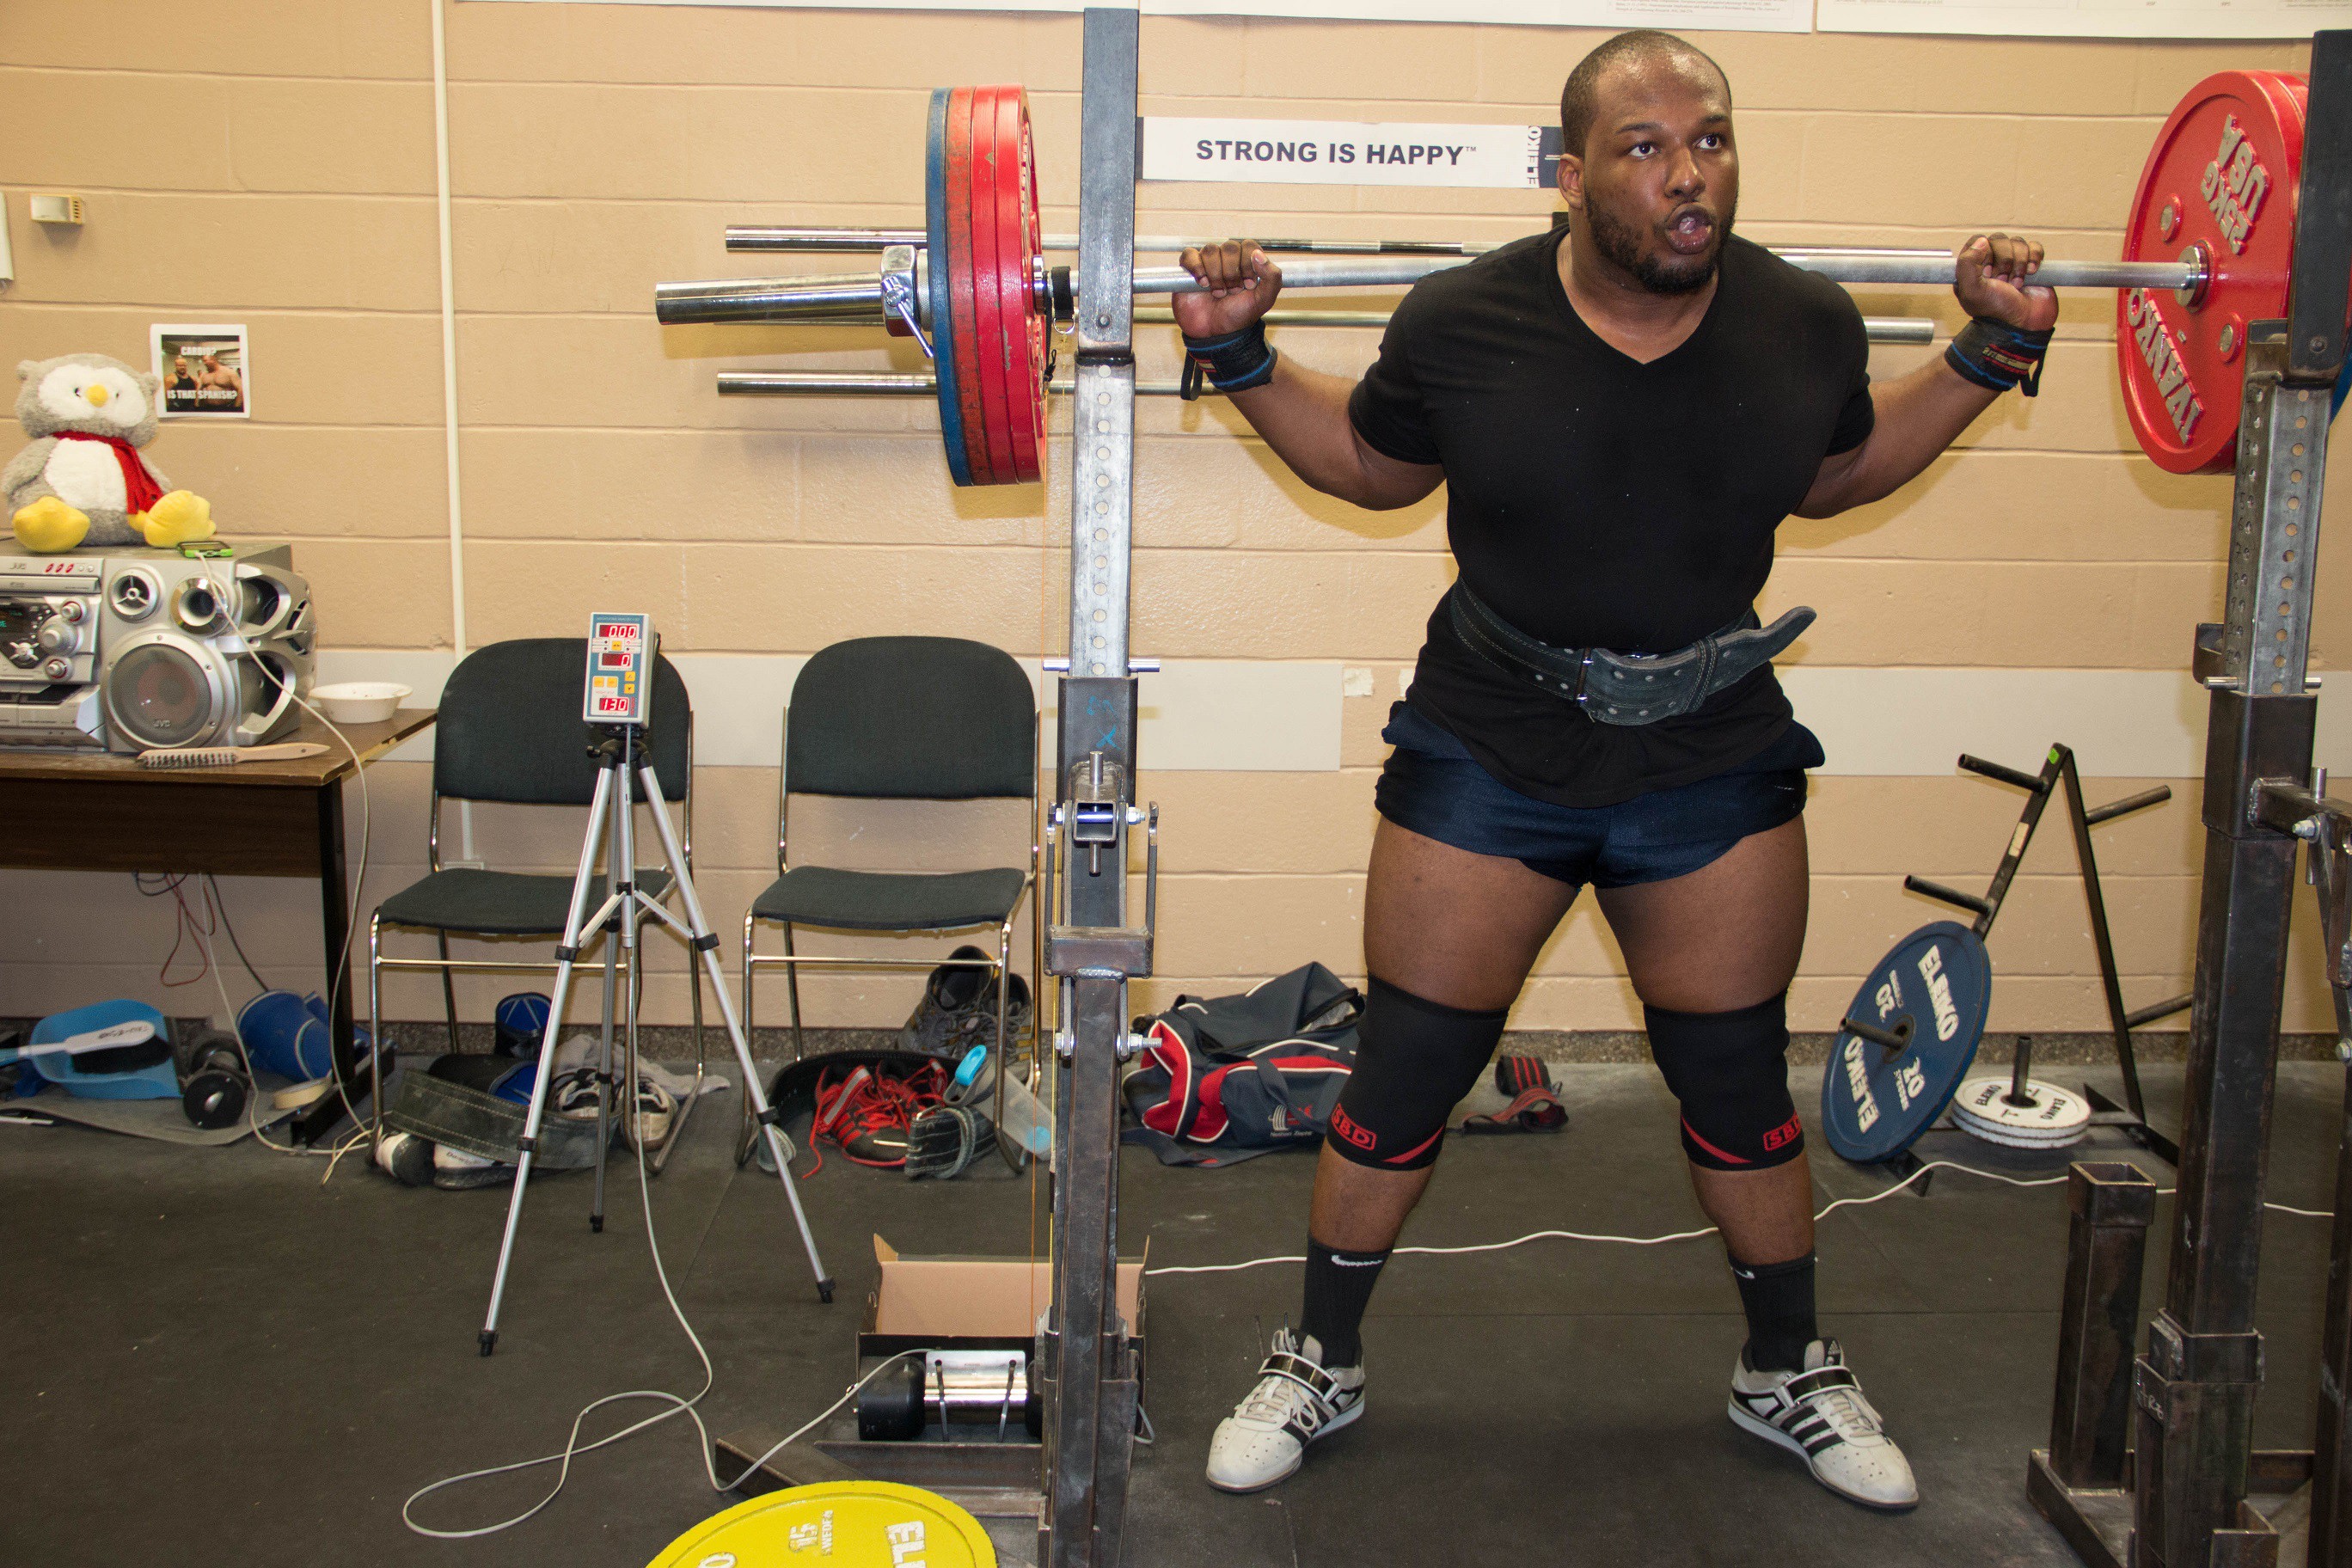
Contributor Nate 'the kid' Zephir simultaneously lifting heavy things and doing science.
The test setup was simple, we hooked up the tendo unit next to the OpenBarbell in close proximity to the inside of the right bar collar (left in the image above) and proceeded to lift all the weights. Since the Tendo unit has been used in peer reviewed publications for years, its output will be considered absolutely correct. After a couple sets, we'd analyze the output of the Tendo vs. the OpenBarbell and dig into the code to iron out kinks.
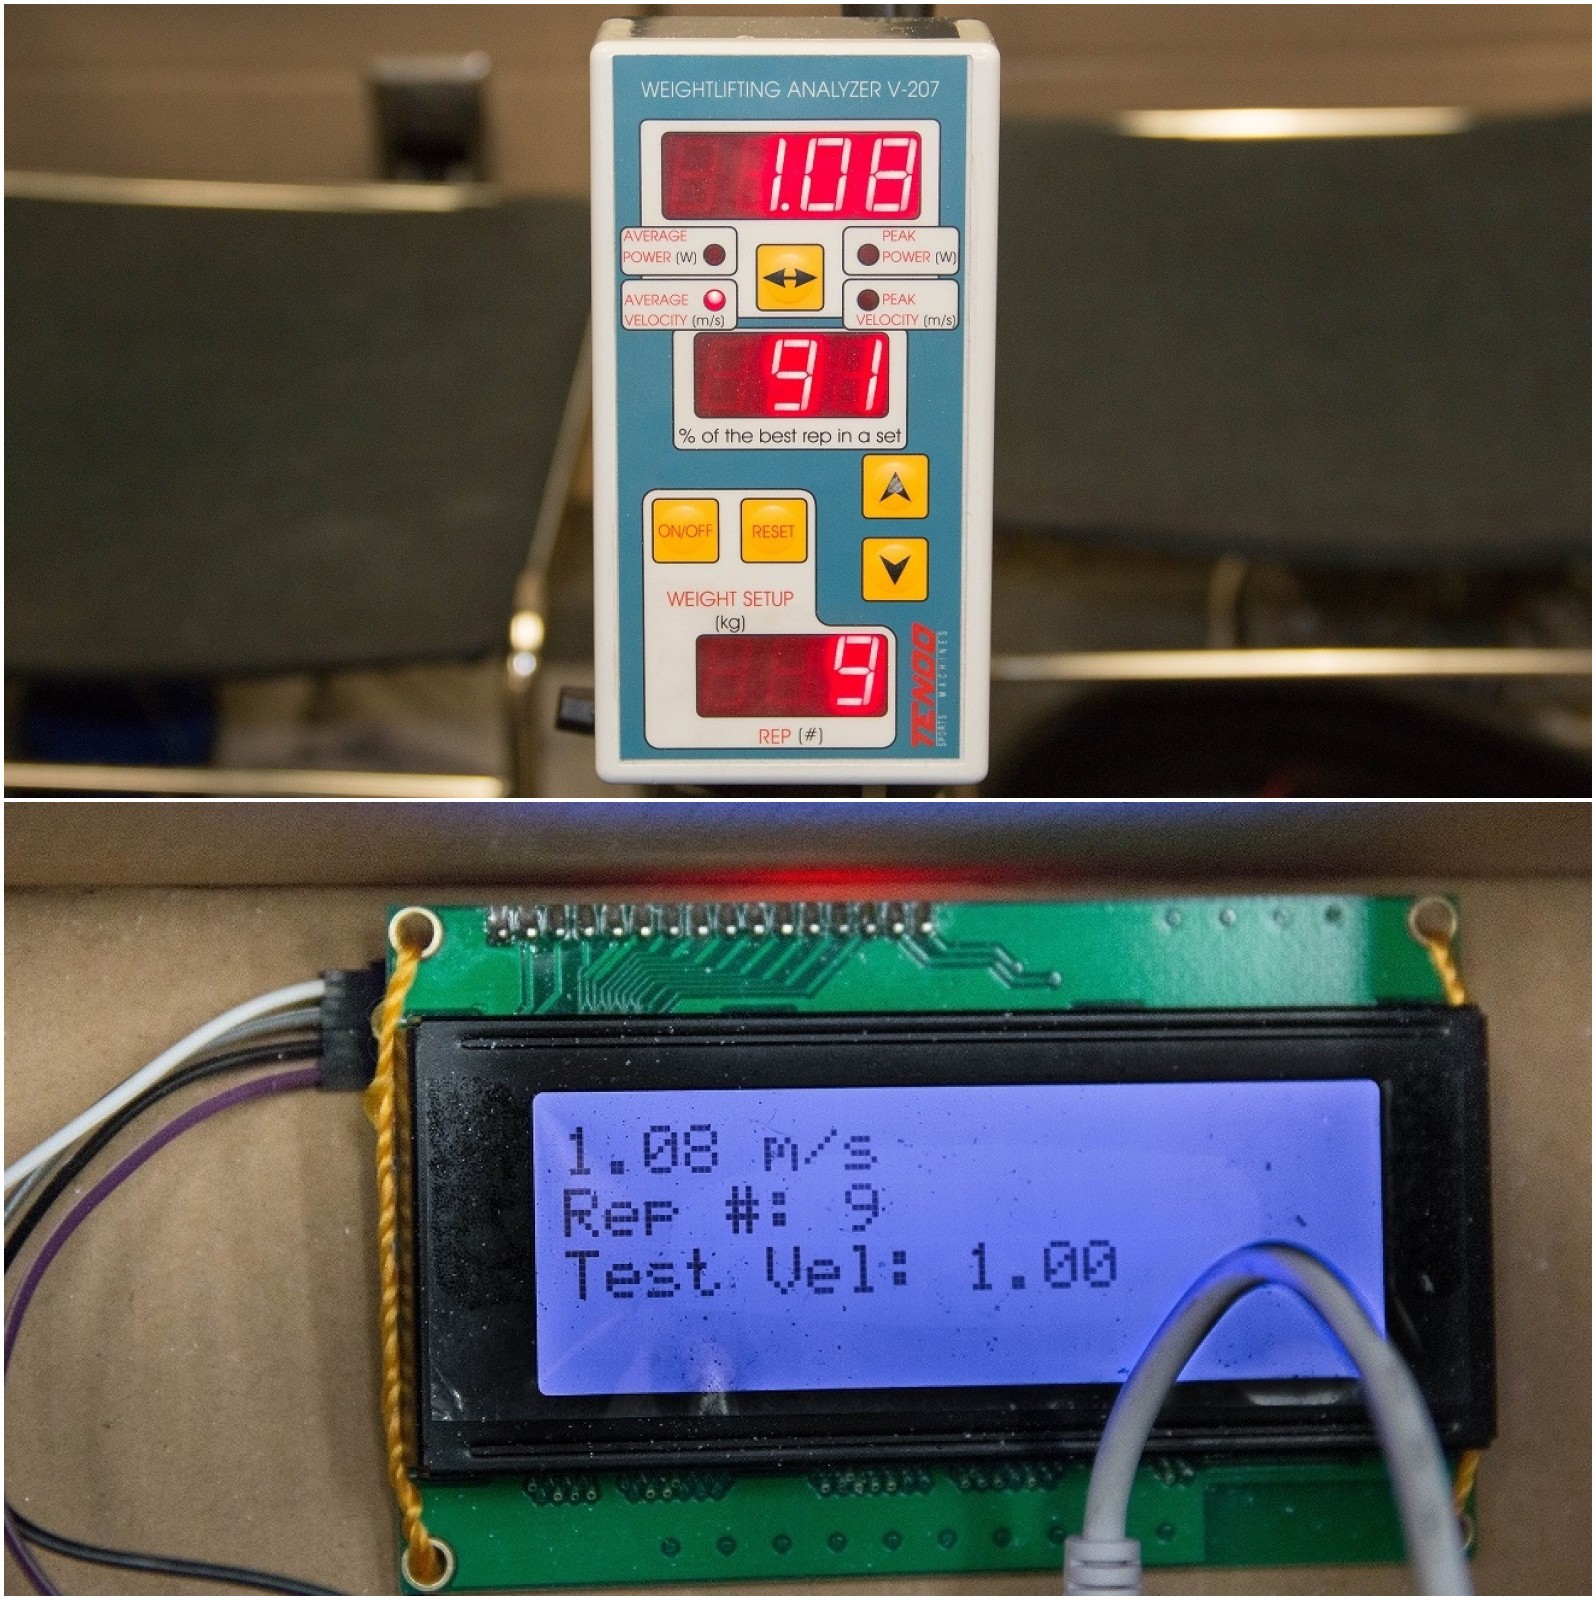
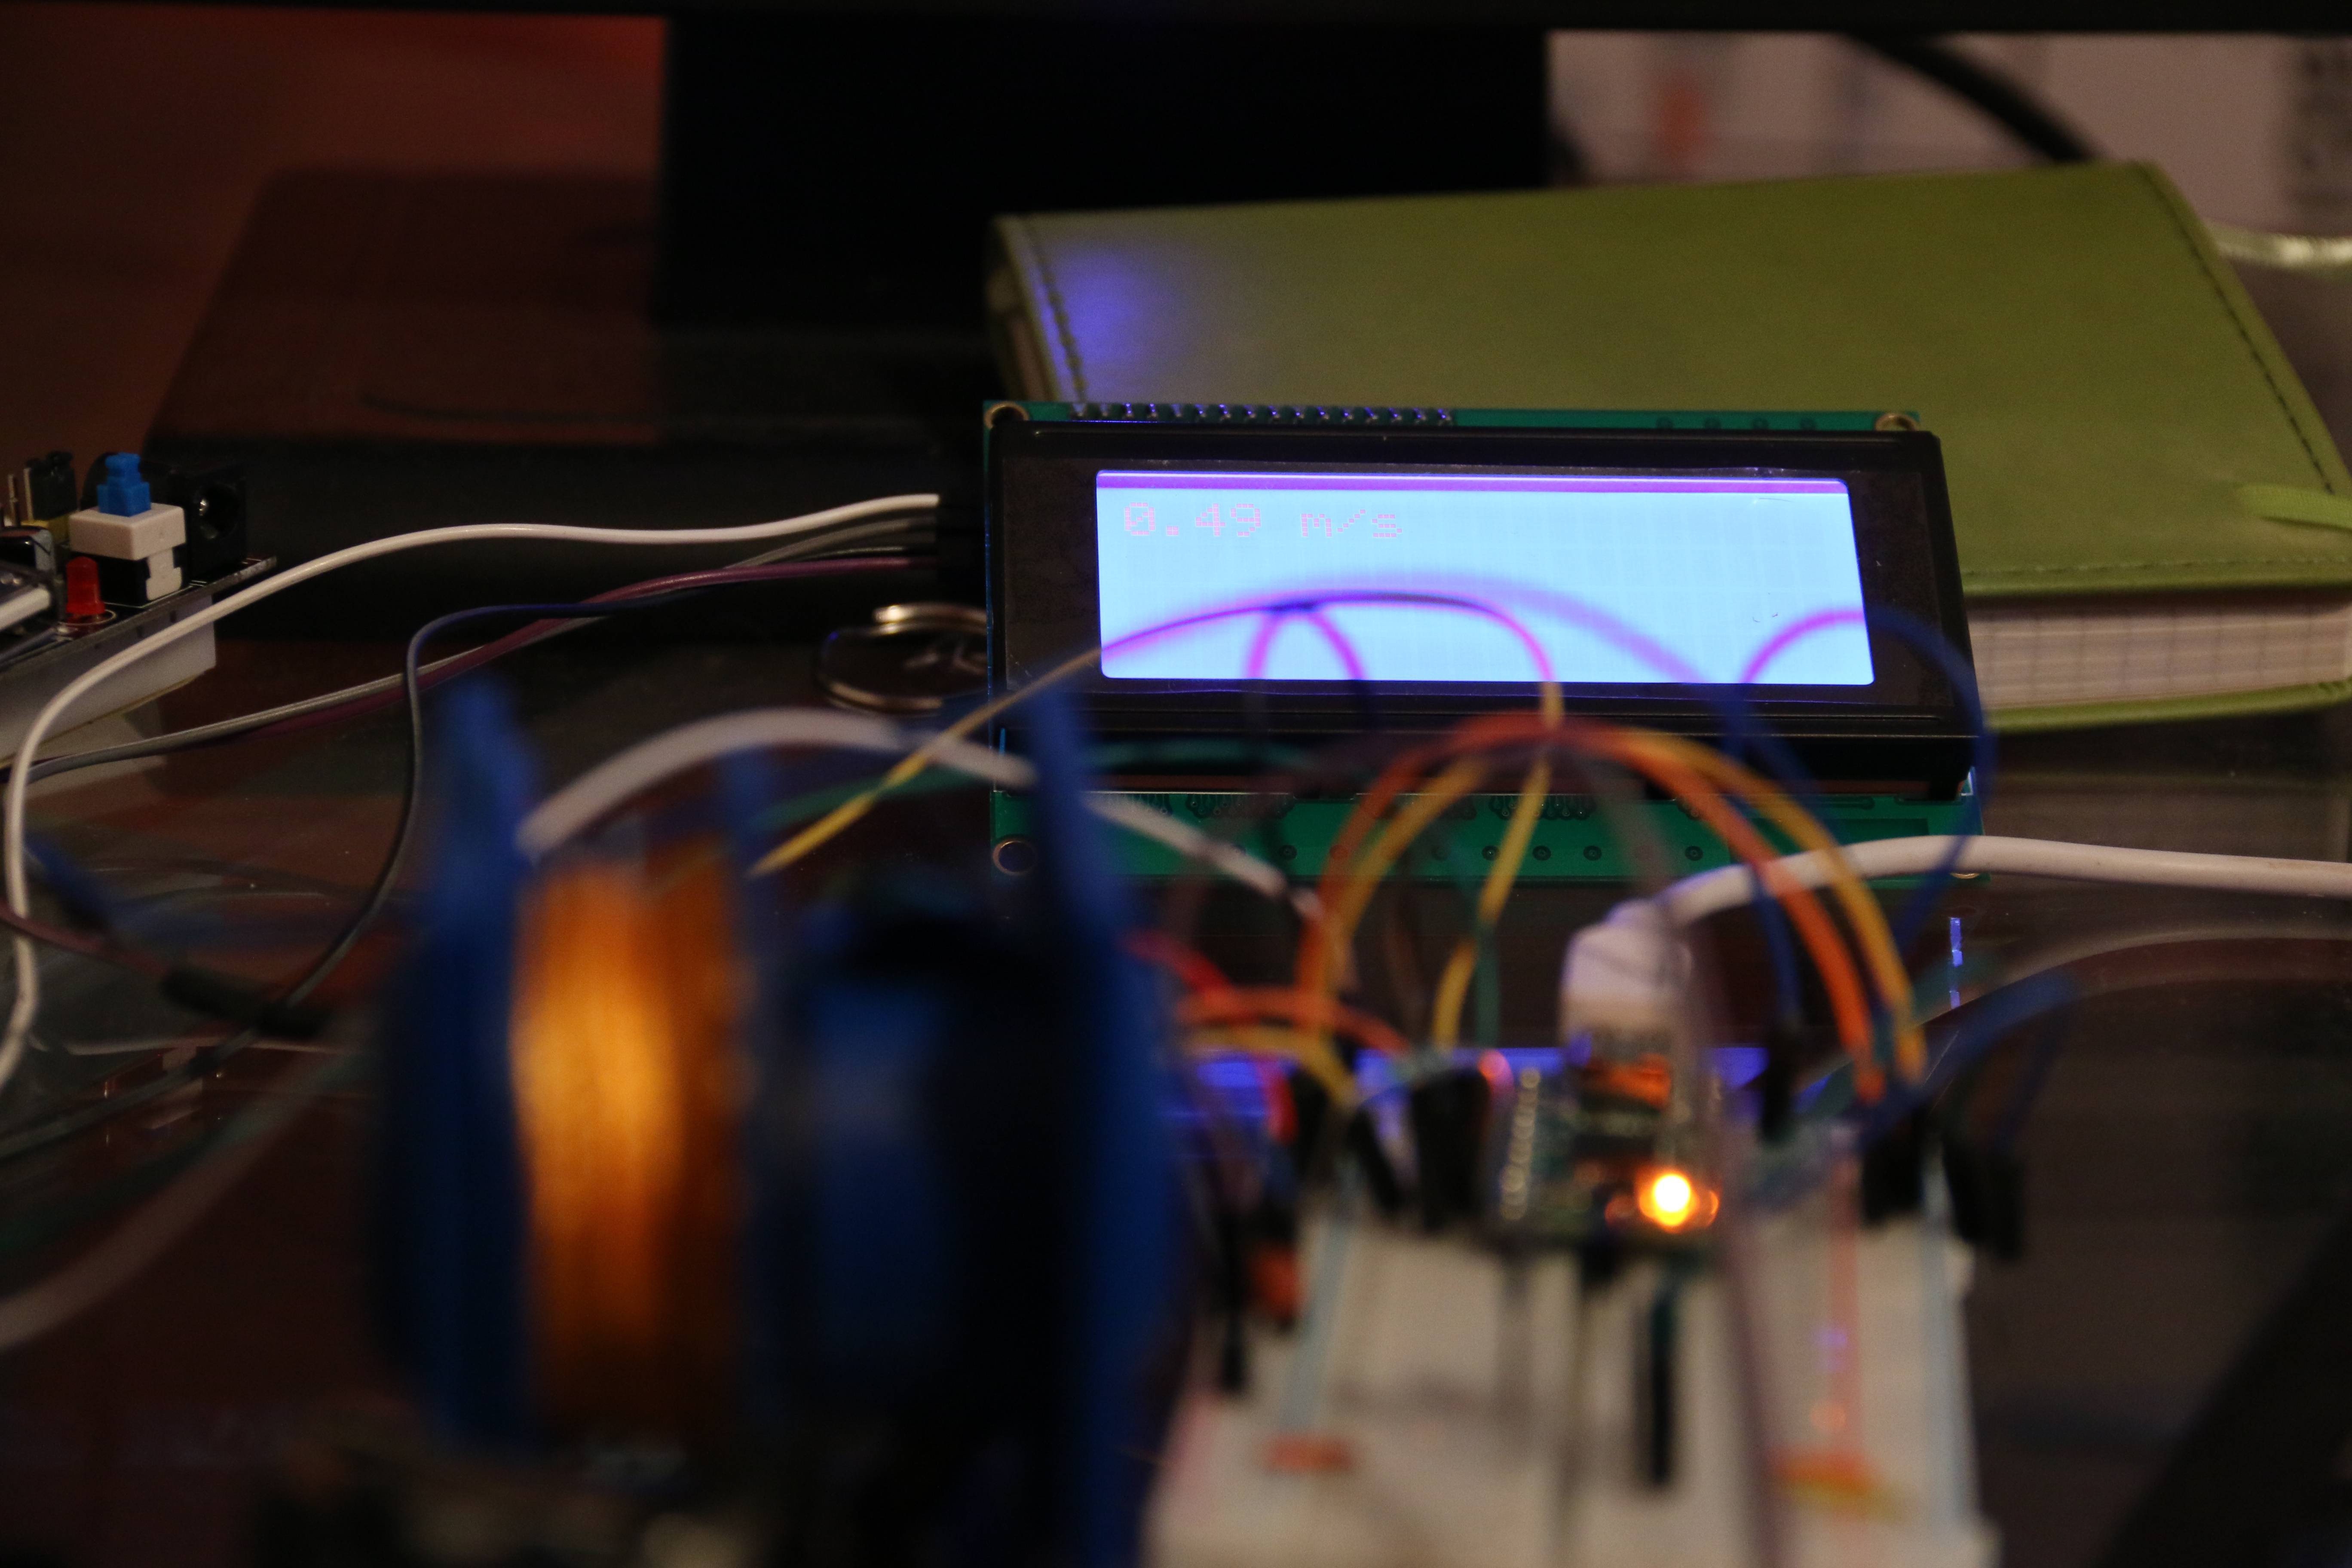
Our goal for the day was to reach parity with the Tendo Unit before we left. Our hypothesis before arrival was that our constant representing distance per tic, 2.80 mm, was slightly off and would result in a small but consistent disparity in resulting average velocities. After a few quick sets the data proved us right and we modified the constant to 2.95 mm which had great results. Some more trial and error occurred, some science happened, and we were ready to call it a night. If you're curious to find out if we accomplished our goal of Tendo Unit parity...
![]()
That's about as good as it gets. Due to a couple of physical factors such as placement of the actual units under the bar, it would be impossible for all reps to match perfectly on both units. I'd say on average, we were 0.01-0.02 m/s off of the Tendo by the time we left. It should also be noted that the Tendo Unit has a minimum measurement size of 10 mm where the OpenBarbell currently is at 2.95 mm. We do not know how fast the hardware interrupt on the Tendo Unit operates but OpenBarbell is at a brisk 4 millionths of a second. To top it off, our algorithm records the entire length of the rep, while the Tendo stops recording below a velocity threshold. Given our tech specs, we would not be surprised if our data was more accurate than the Tendo.
We had a blast at the FAU Muscle Lab, so much so that we plan on going back every Monday until we're happy with the results of the OpenBarbell. Tendo parity is nice, but we want to go further. Keep an eye out on this page for more updates.
-
It's Alive!
03/26/2015 at 04:14 • 0 commentsShoebox prototype #1 is complete!
The measurements are very consistent, and the hardware is showing great promise. There were a couple issues that will be worked out before the end of the week, but we are getting (probably) accurate velocity measurements from a device that is, wait for it, 100x cheaper than the next best alternative. We are getting closer to feeling ready to release all of our documentation and source files but like all good things, you must wait.
This is a bit unlike other open source projects, in that our goal is to appeal to a group of people that doesn't usually partake in this sort of thing. In order to do so, we need to have a device that can communicate its purpose visually without being too intimidating. Although our shoebox prototype works, it will not provide the spark VBT needs to catch on in the lifting community.
That being said, if you want your hands on one now or would like to help us expedite V1.0, feel free to leave a comment below or send me a message. We could use plenty of help to get us where we need to go!
Now for some glamour shots.
![]()
![]()
![]()
![]()
-
We haven't been sleeping...
03/12/2015 at 05:08 • 0 commentsWe haven't been sleeping...
![]()
Several prototypes have been made, a bunch of code has been written, and the goal is within reach. This week is crunch time since we set a personal goal to get this working by our competition this Sunday, but next week there will be a detailed update of our progress. There has been a lot!
-
Encoder V0.2 Is Complete!
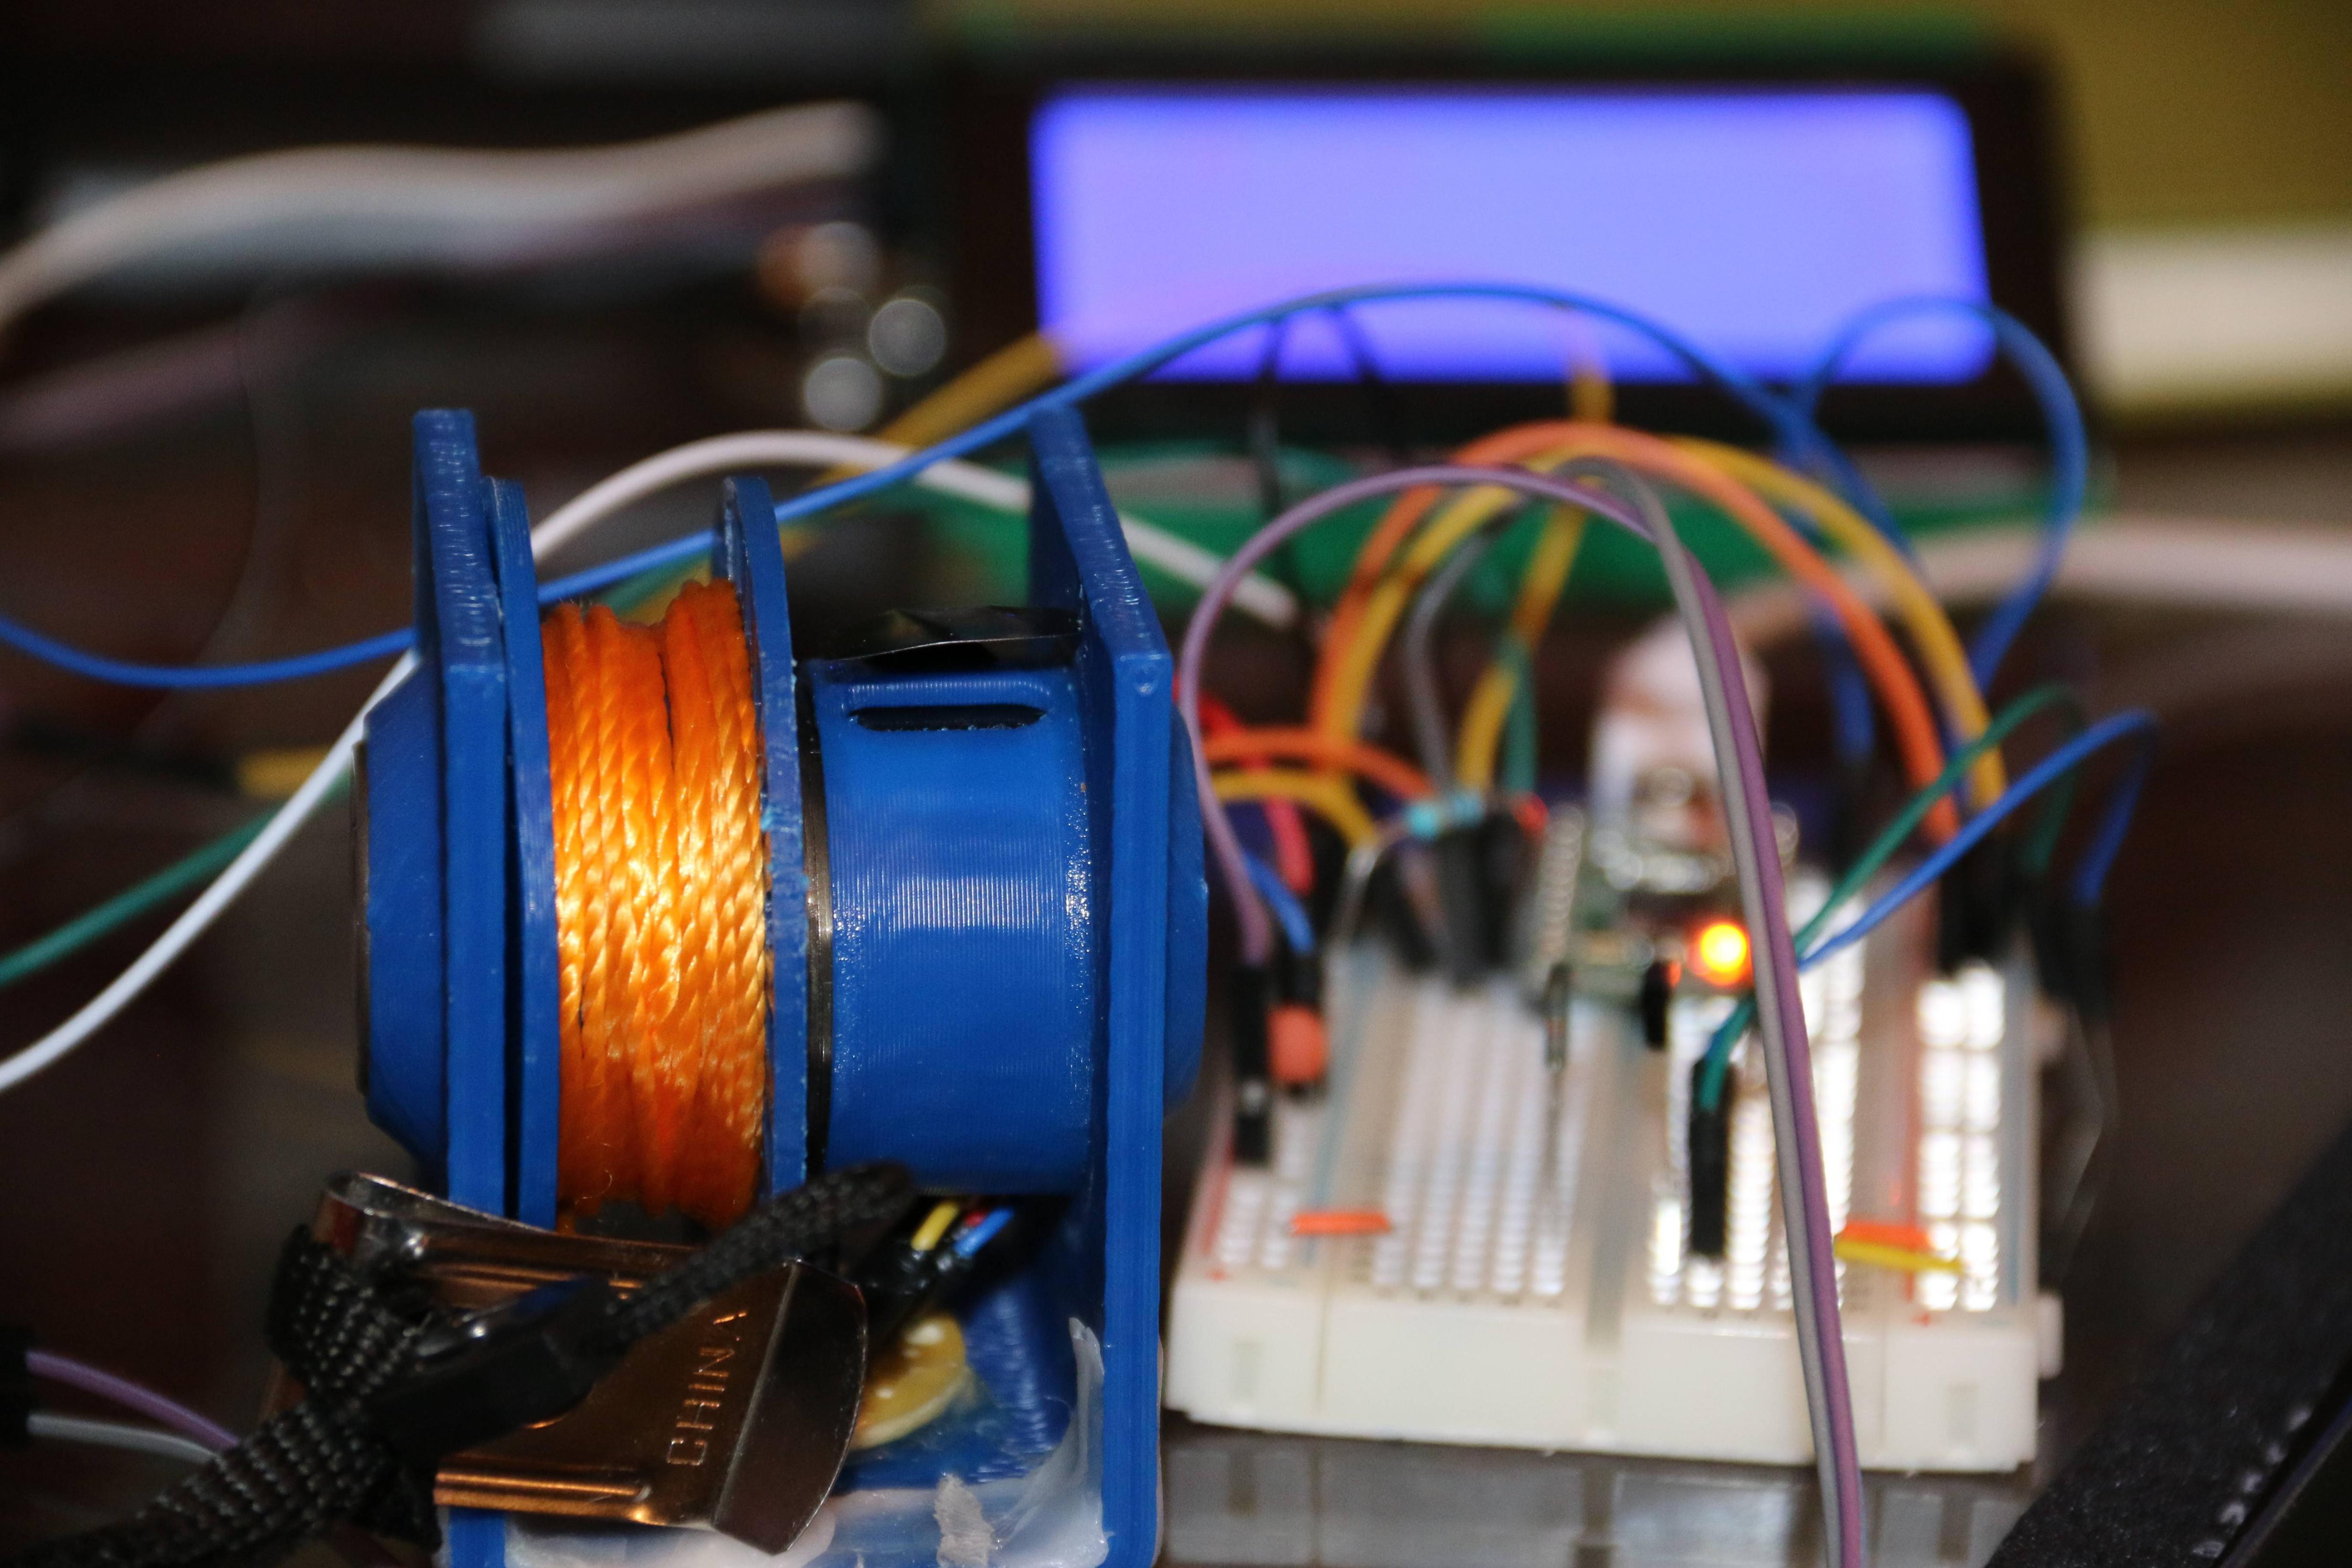
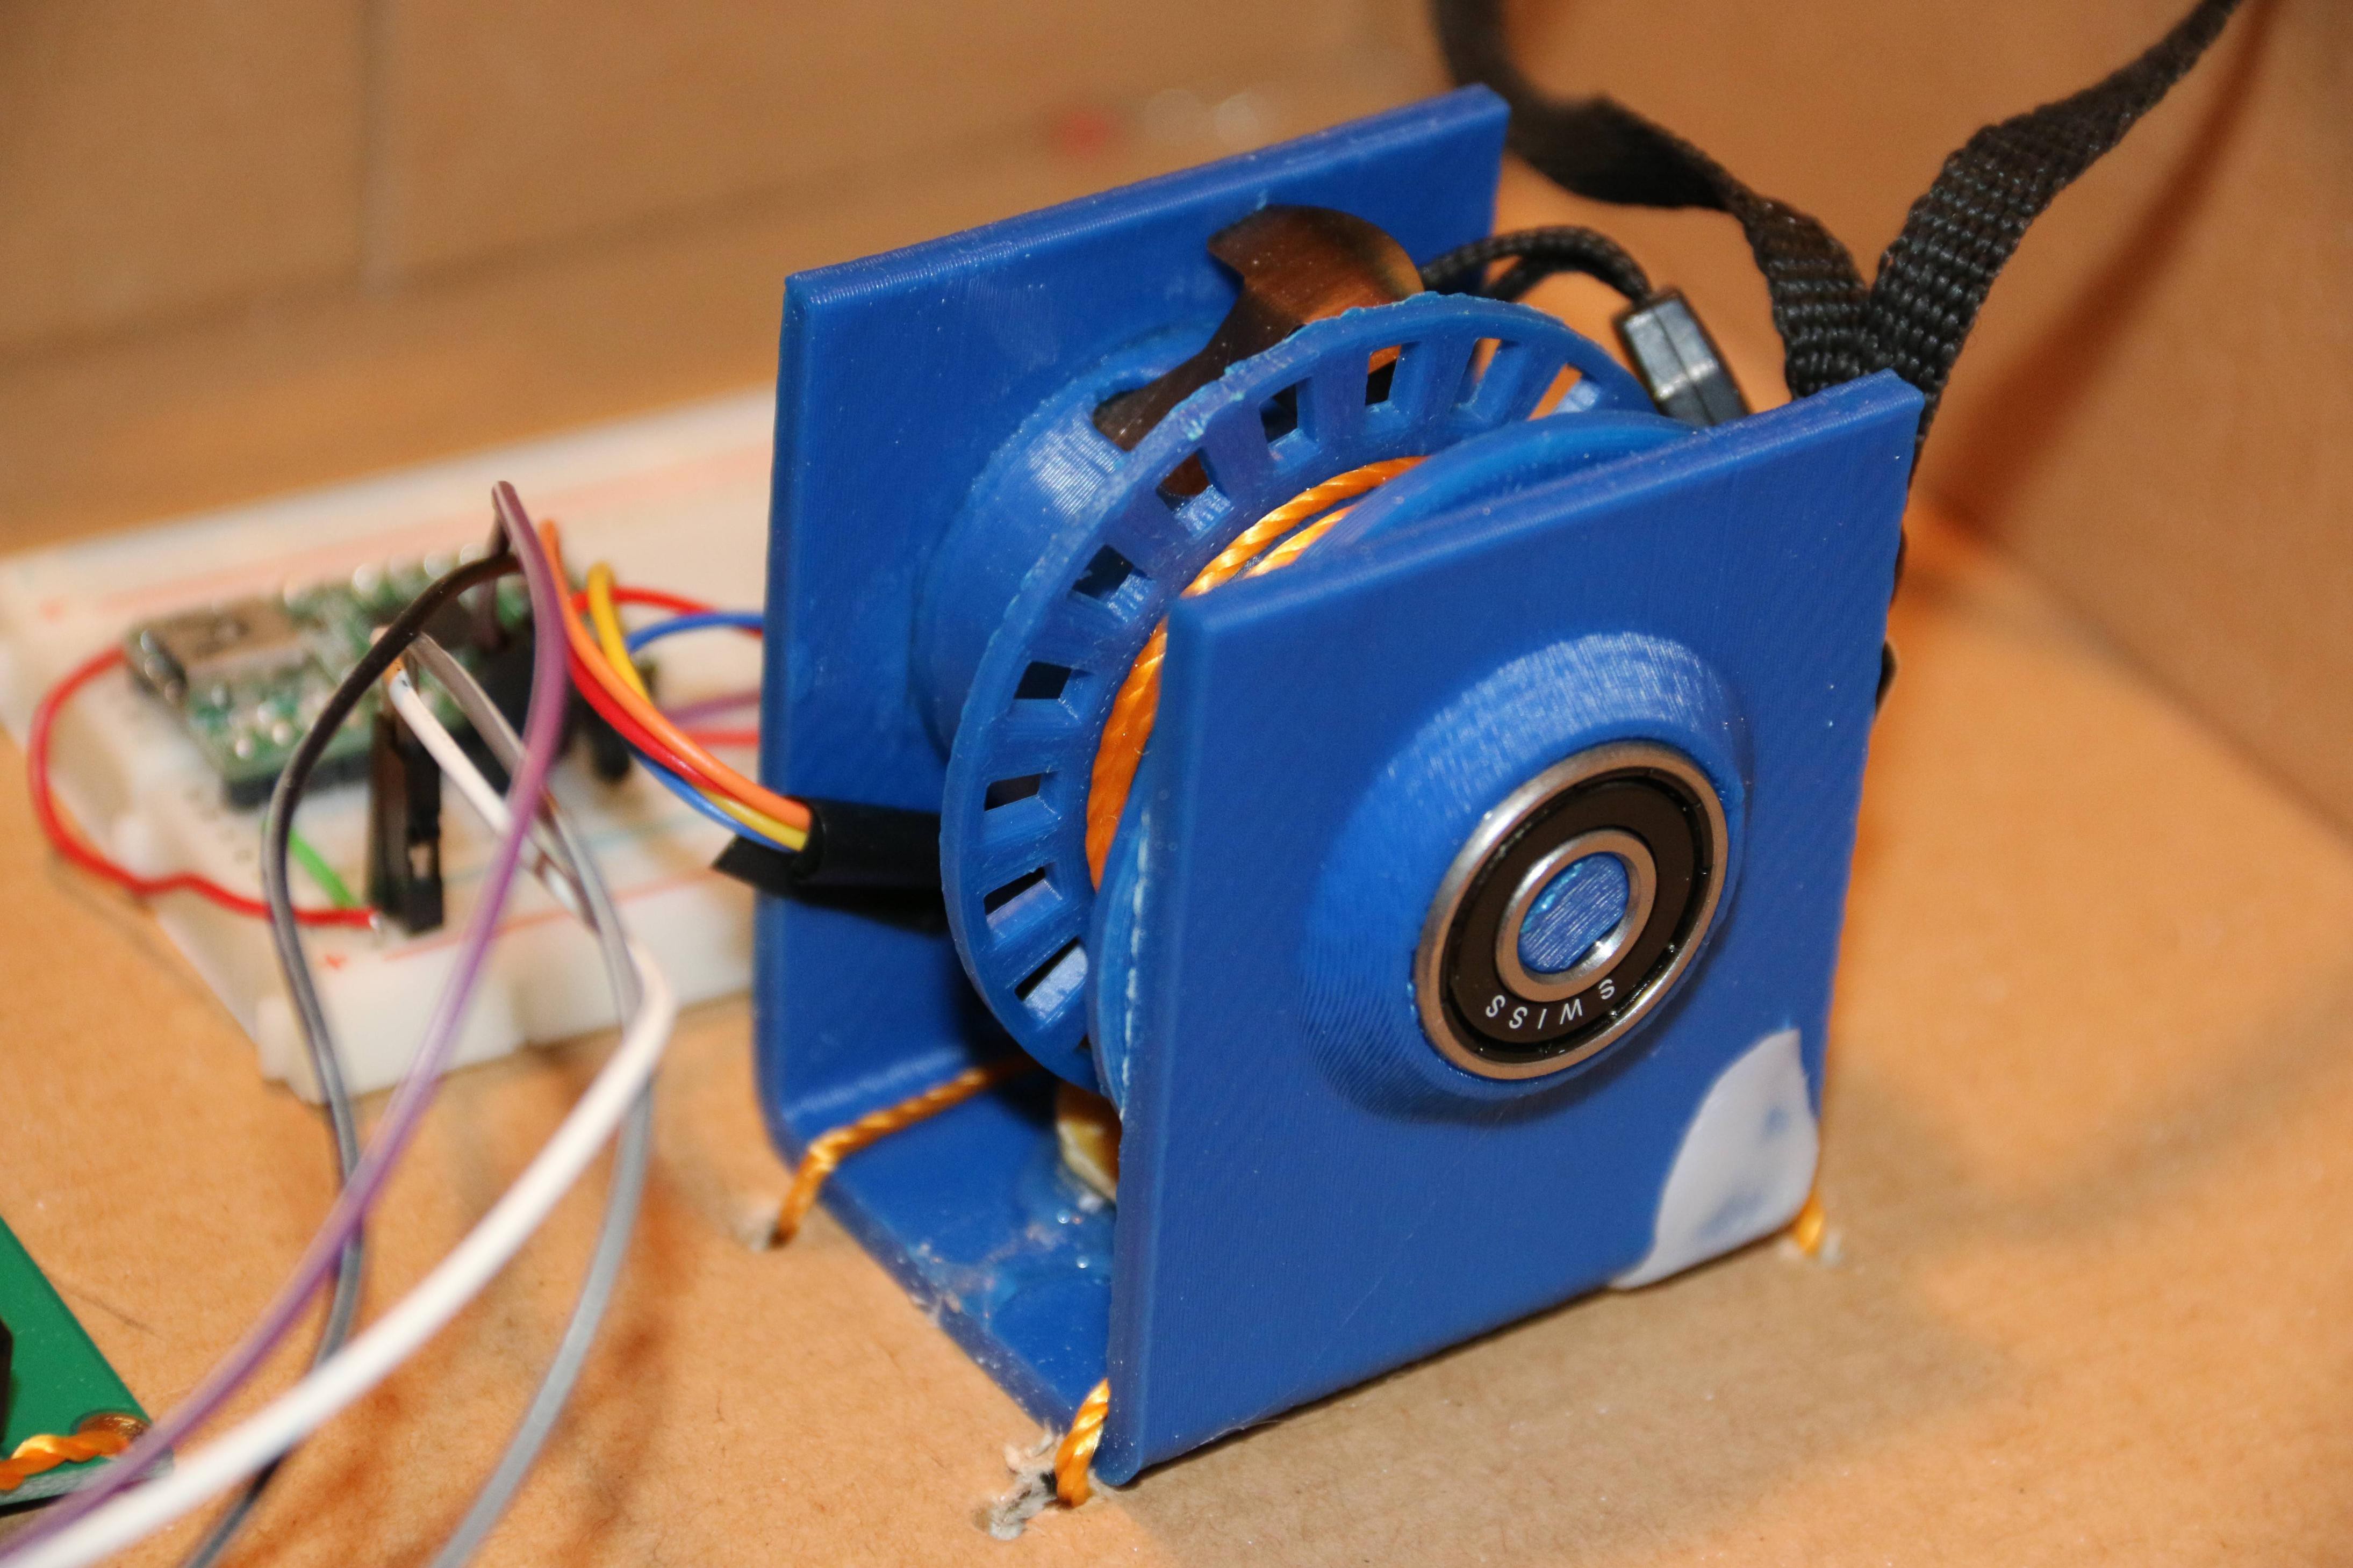
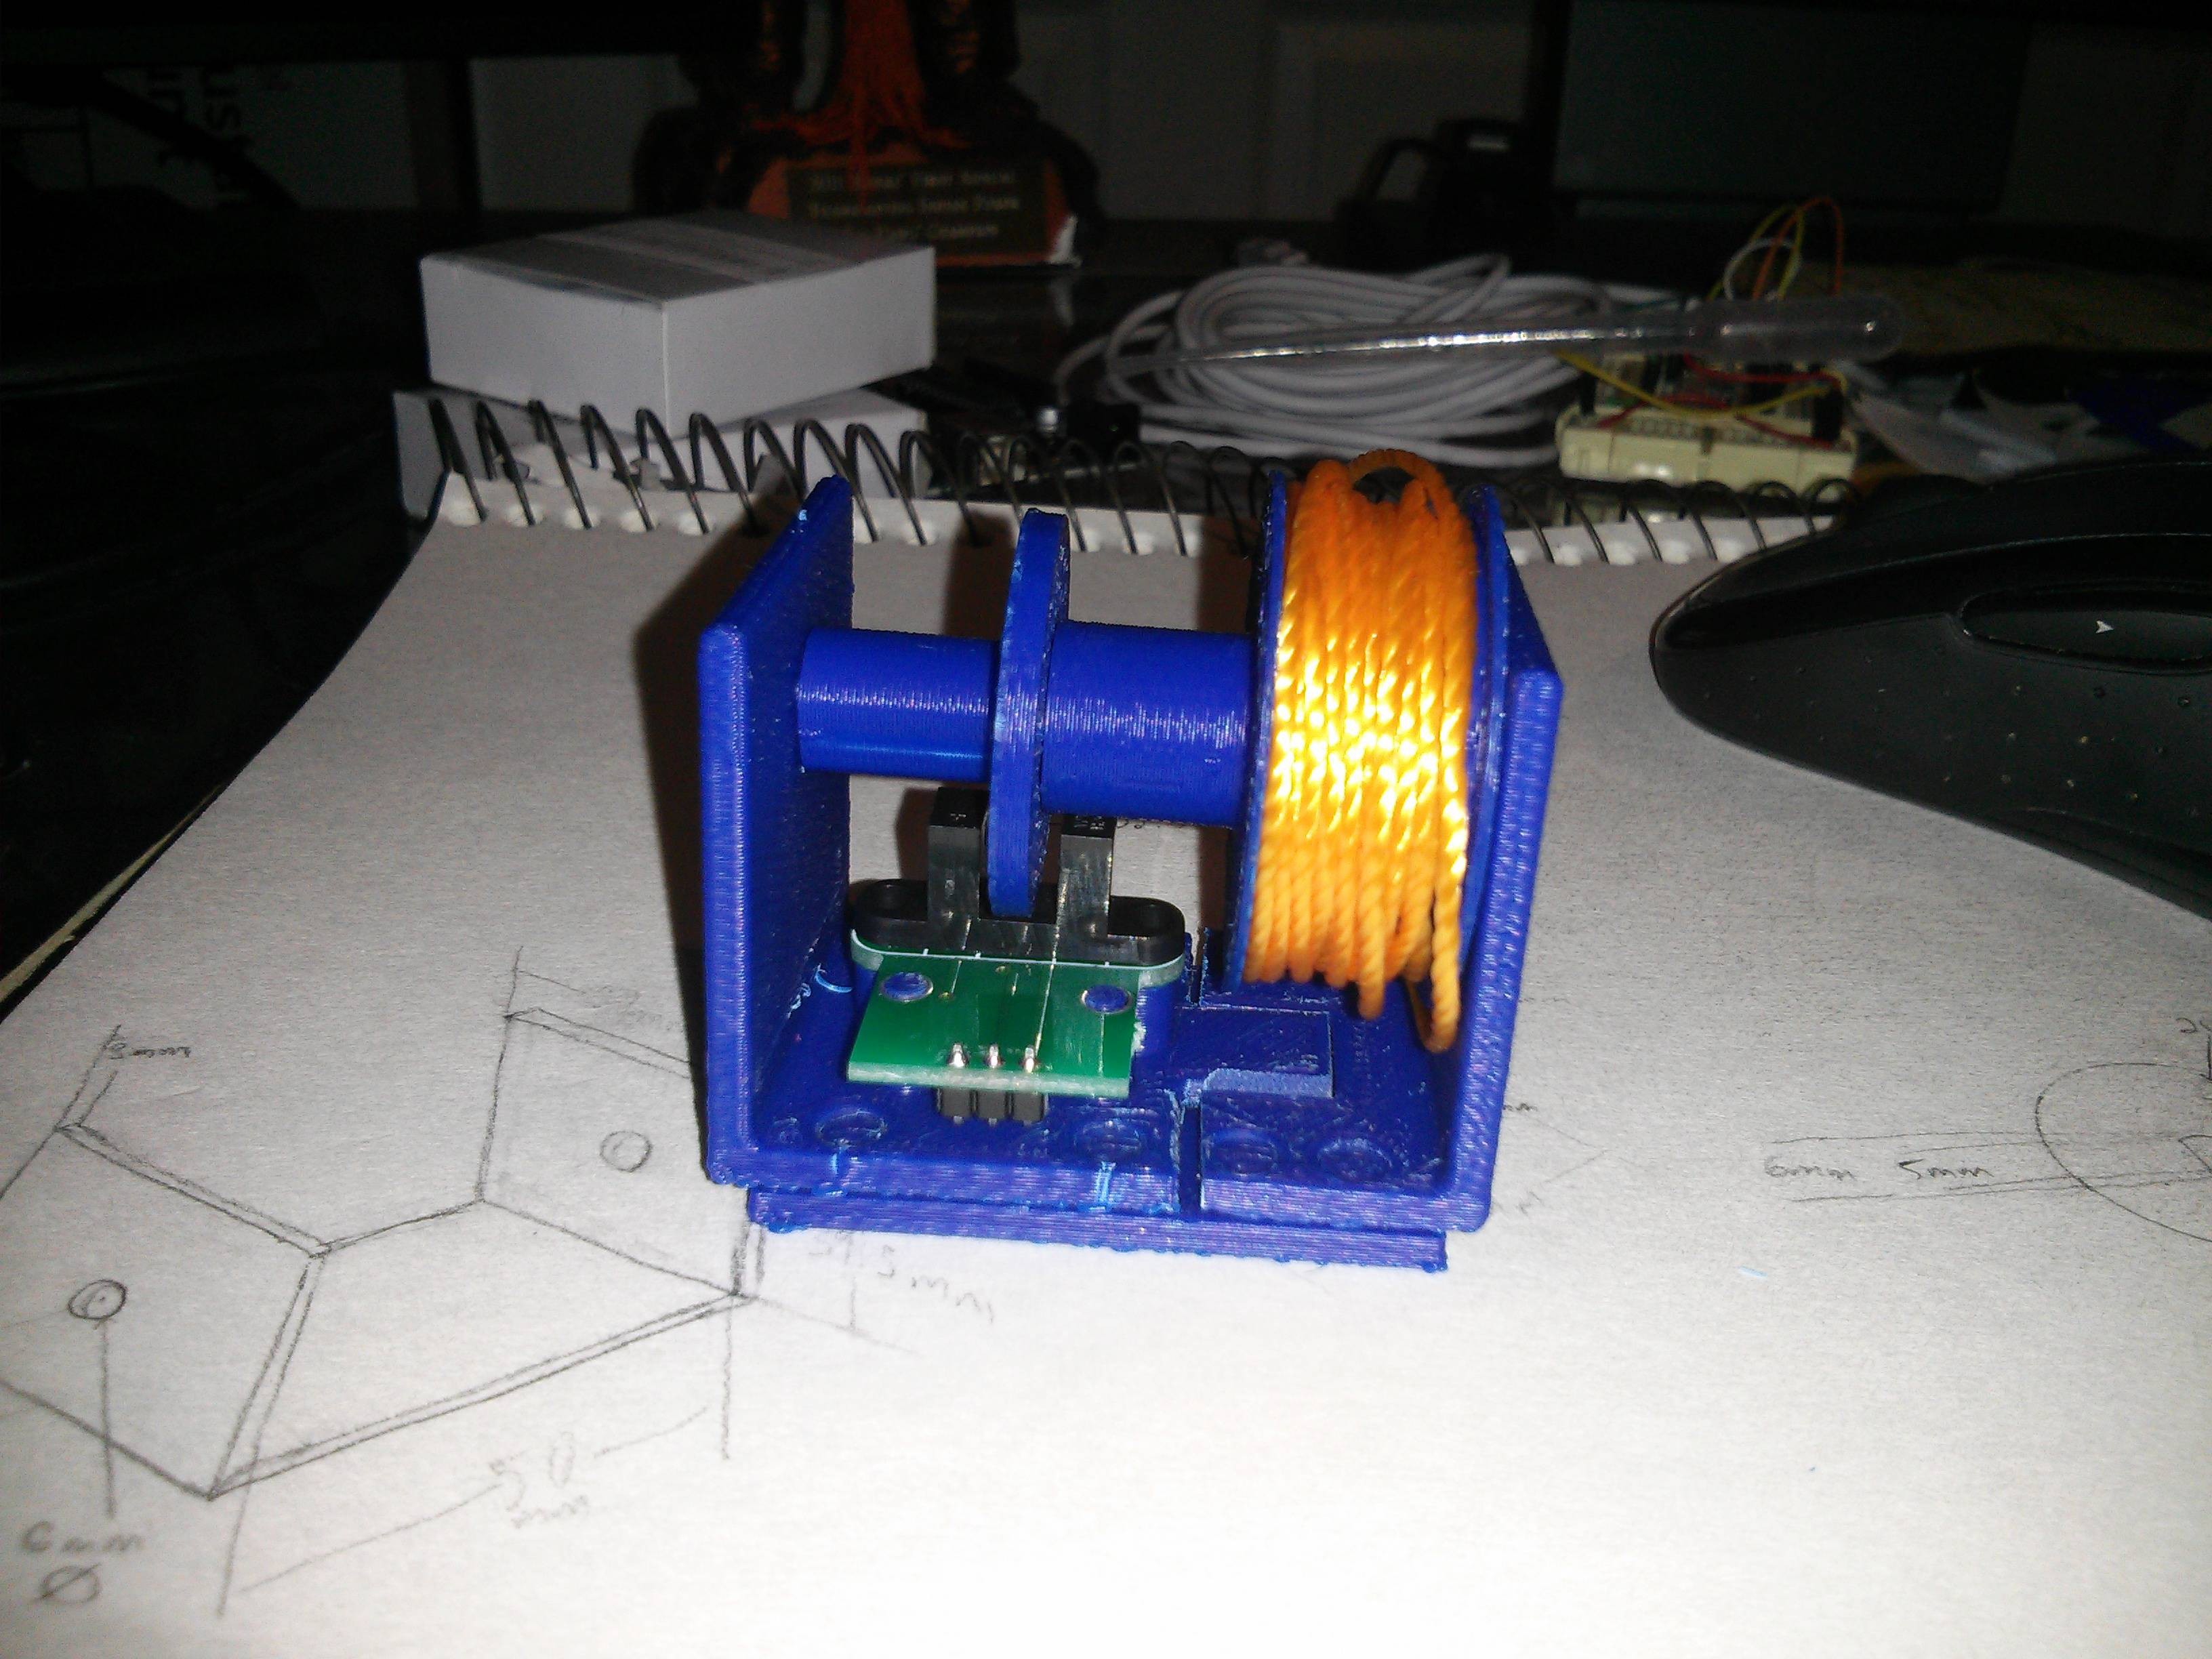
01/28/2015 at 05:25 • 0 commentsA lot has happened in the past week or so. We've gone from our first printed part, to two iterations of V0.2 (V0.2 and V0.21) of our working draw string mechanism/encoder.
V0.2
![]() V0.21 is an improvement in clearances so the 3d print needs less hand mods, and an improvement to the spindle mechanism. We also changed the spring from a 12 foot tape measure to a 6 foot tape measure to reduce resistance on the bar. V0.21 was printed but not shown.
V0.21 is an improvement in clearances so the 3d print needs less hand mods, and an improvement to the spindle mechanism. We also changed the spring from a 12 foot tape measure to a 6 foot tape measure to reduce resistance on the bar. V0.21 was printed but not shown.We're also in the midst of V0.3, which will be laser-cuttable for much faster prototype iteration (~5 hour print to ~ 3 minute laser cut). V0.3 will be very helpful in getting as many units out there as possible to OpenBarbell's various contributors.
![]()
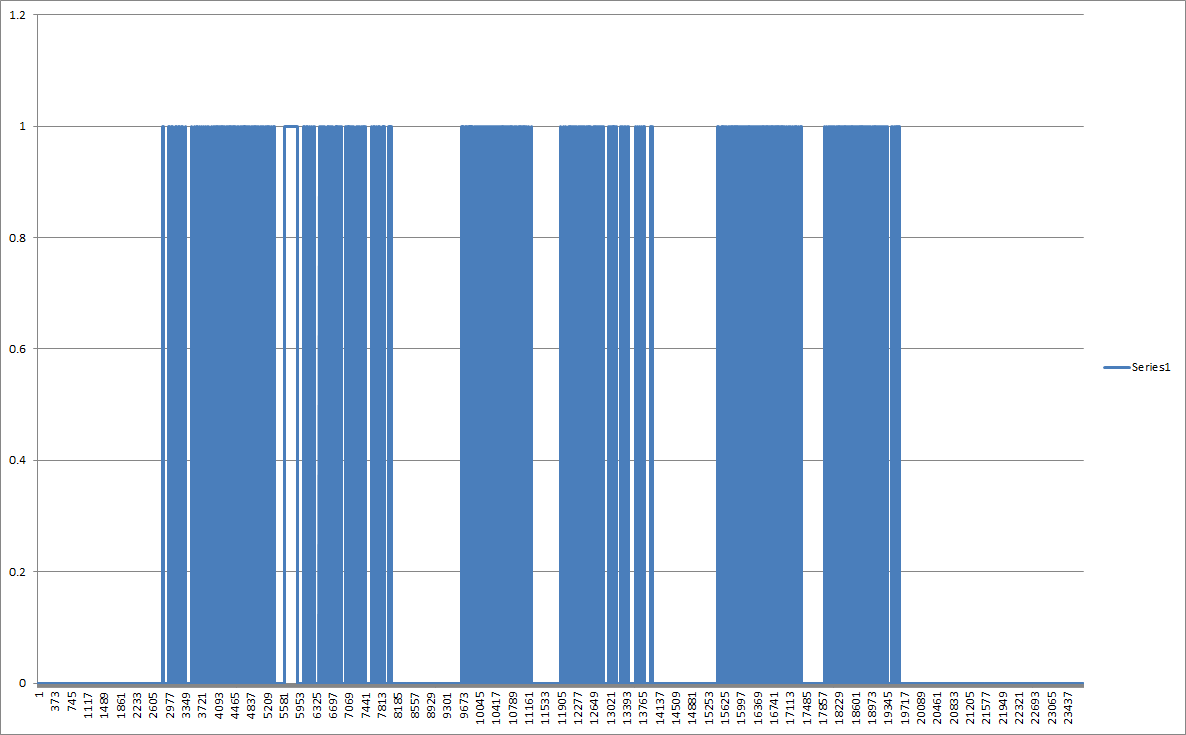
Now that the encoder is up and running, we've been able to plug it into an Arduino and take some data. The following data points were grabbed from the serial monitor at 57600 baud. We didn't even hook it up to the interrupt pins on the board, just straight digital in, so we have plenty of optimization to do before we hope to read bar velocity.
![]()
This may not look like much, but it's some of the first bits read from the OpenBarbell project. You can see the string being pulled out, slowing down, reversing direction, and retracting back into the spindle a total of three times. This data will change a lot, as currently we're polling pretty quickly, but in the future we will be getting about half a million to a million looks at the encoder every second, giving us the ability to track both the rising and falling edge of the encoder effectively doubling our resolution.
Here is the customary optimistic goals for the upcoming week:
- Improve encoder code
- Laser cut V0.3
- Measure reasonably accurate encoder displacement
- Spit out a velocity measurement
Number 4 above will the trickiest of them all, because in order to know if we're even close to an accurate velocity, we'll need something to compare it to. We know of one Tendo unit around here, so we may need to pay it a visit.
-
First Part Printed
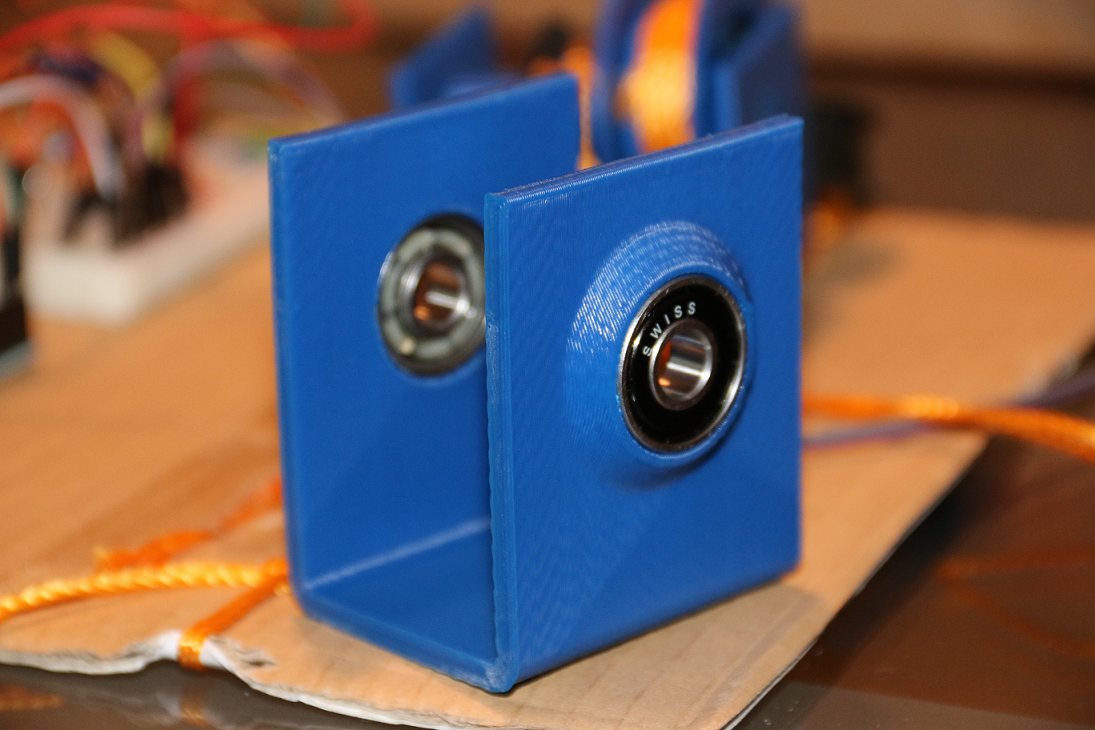
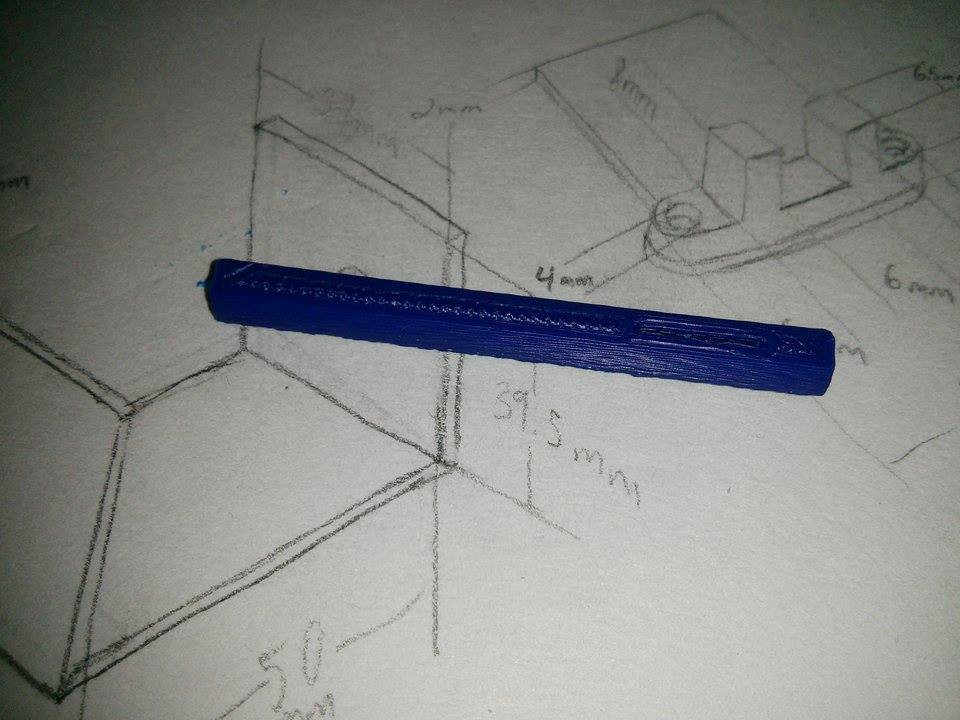
01/18/2015 at 05:40 • 0 comments![]()
It doesn't look like much, but it's a big first step to getting our hands on the first dirty prototype. You're looking at the stationary center axle that the spindle, spring and encoder wheel will spin around when the string is in movement. On the right hand side, you can see the thin slit that the reel spring will hook through to anchor itself.
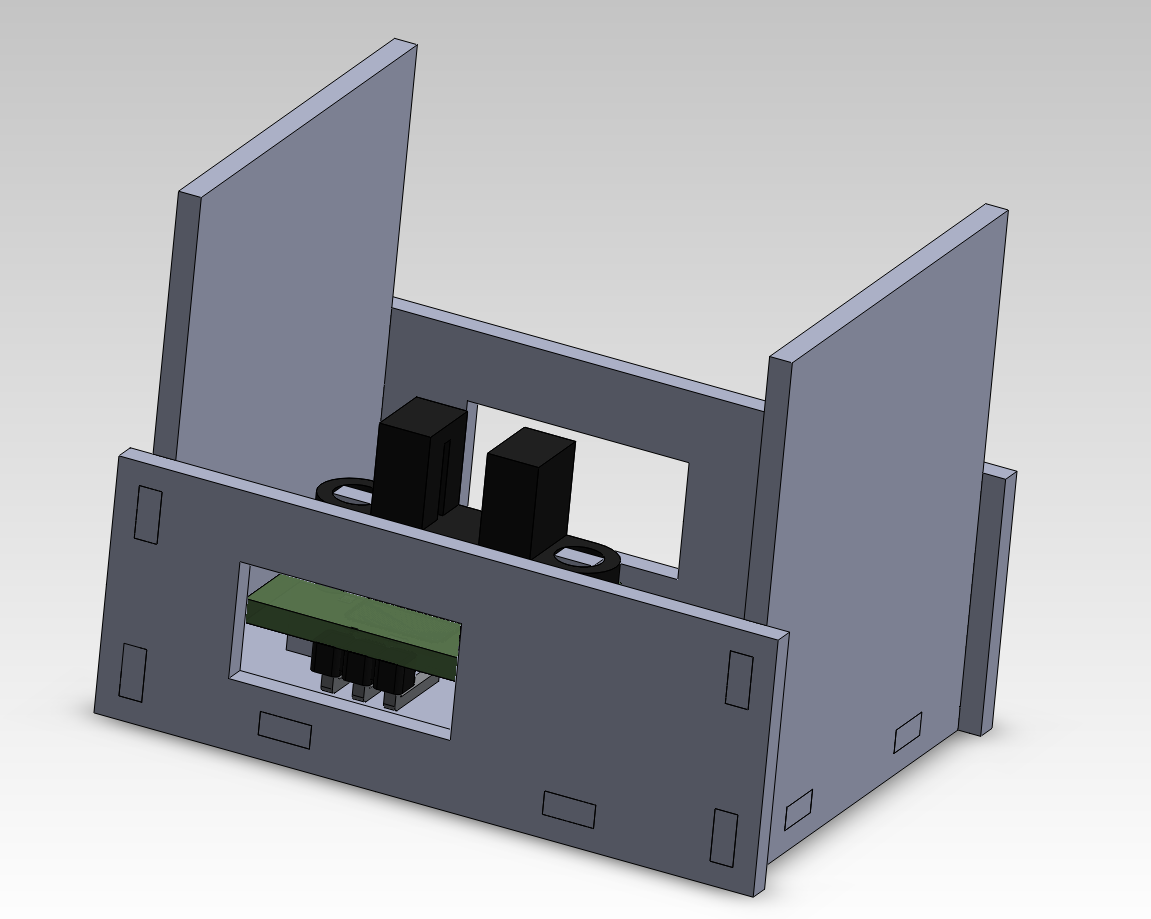
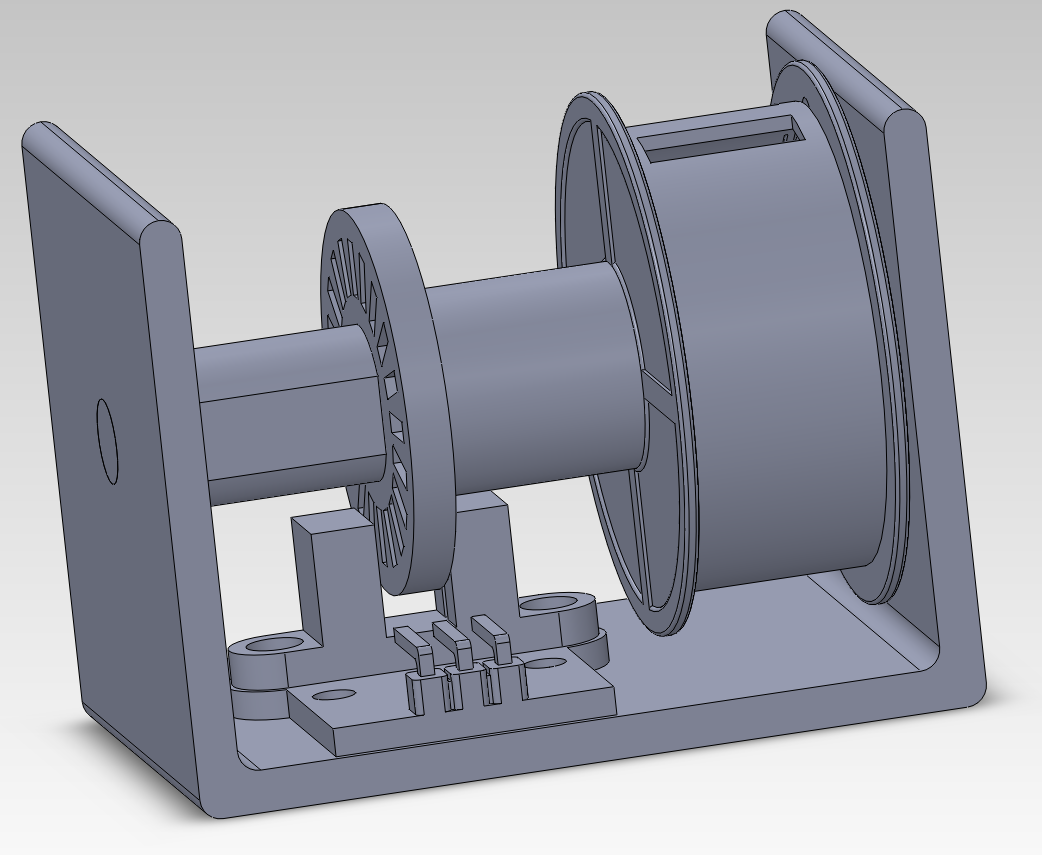
Some strides were made over the week towards a more 3D printable, and physically feasable set of parts.
![]()
In this version, you will actually be able to put together the pieces,. The U shaped housing can come apart to assemble the spindle/reel spring assembly. Odds are, the clearances are too tight for the precision of our humble Solidoodle and some hand-mods will have to be done. As long as the spindle spins and the encoder reads, we will be in business.
Full changelog:
- Added Bottom Plate
- Changed Axle shape to make it more 3D printable (not pictured)
- Enlarged Encoder Wheel
- Fixed pins on Encoder
- Added pegs for encoder mount
- Split housing into two parts for easy assembly
![]()
Let the excitement flow through you, for the days of sub-optimal training methodologies will soon be behind us. A new era of velocity based strength training shall be ushered in by one device, one device to rule them all.
-
Possible v0.1
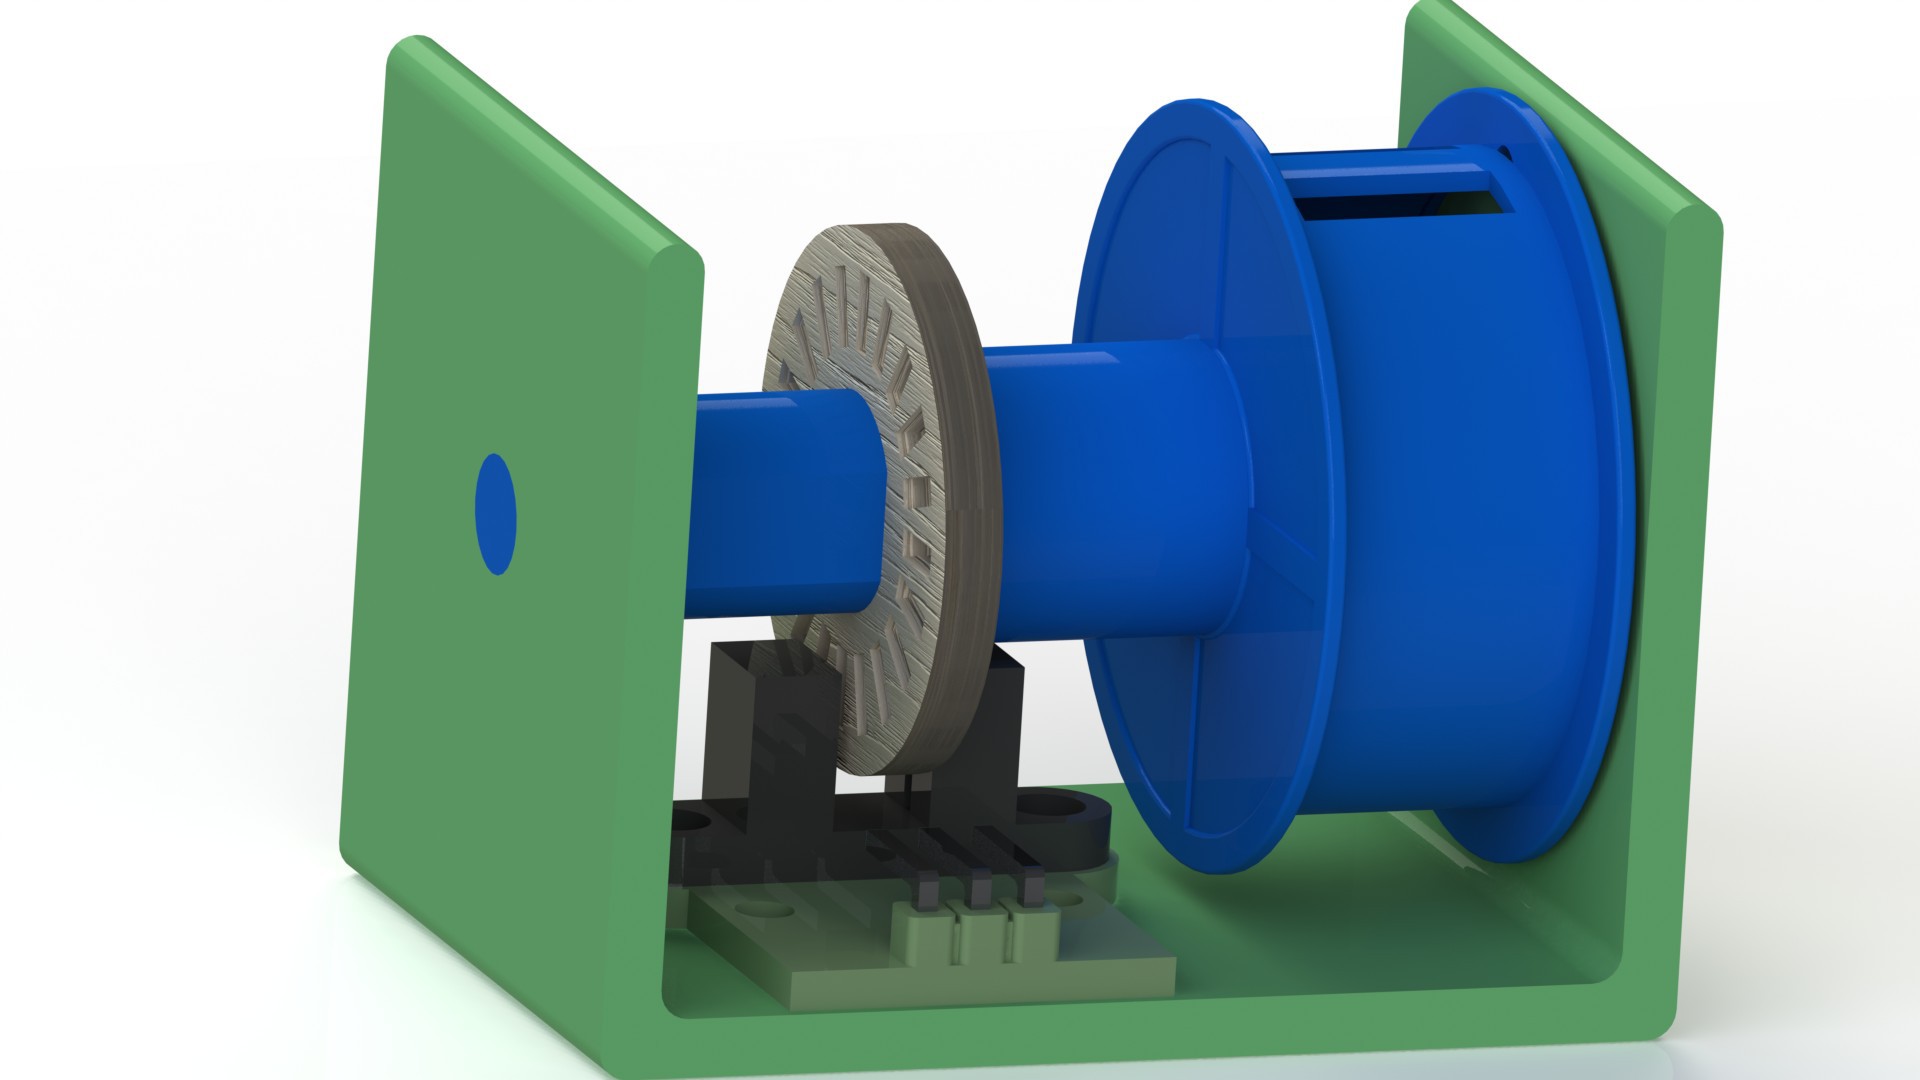
01/11/2015 at 05:52 • 0 commentsv0.1 is nearly complete. This design foregoes expensive bearings for plastic on plastic rotation. We're hoping the wear is minimal and it would lead to a lower cost device. It was also decided that the center axle should be stationary, since the spring needs something to be anchored to to create the recoil. We could either anchor it to the center axle making it stationary, or anchor it to the side of the housing, letting the axle rotate along with the encoder. It's hard to tell in the image below, but the spindle and the encoder wheel are fit tightly together and will rotate with each other around the center. Barring unforseen destractions, we should have the official v0.1 3D printed this week.
![]()
![]()
To do:
- Make parts more 3D printable
- Laser cut some encoder wheels
- Actually make battery powered encoder circuit
- Print and assemble v0.1
Plans for the future:
When we can demonstrate a working prototype (dubbed version shoebox) and can make a decent render so the community doesn't think we're going with a final version in a shoebox, we'll start blasting this page to everybody we know will appreciate it. Hopefully we can snag a few contributors, but we'll be perfectly content with some excited lifters/nerds that want to make a build. Tentative goal is second week of March.
-
The Project Has Begun
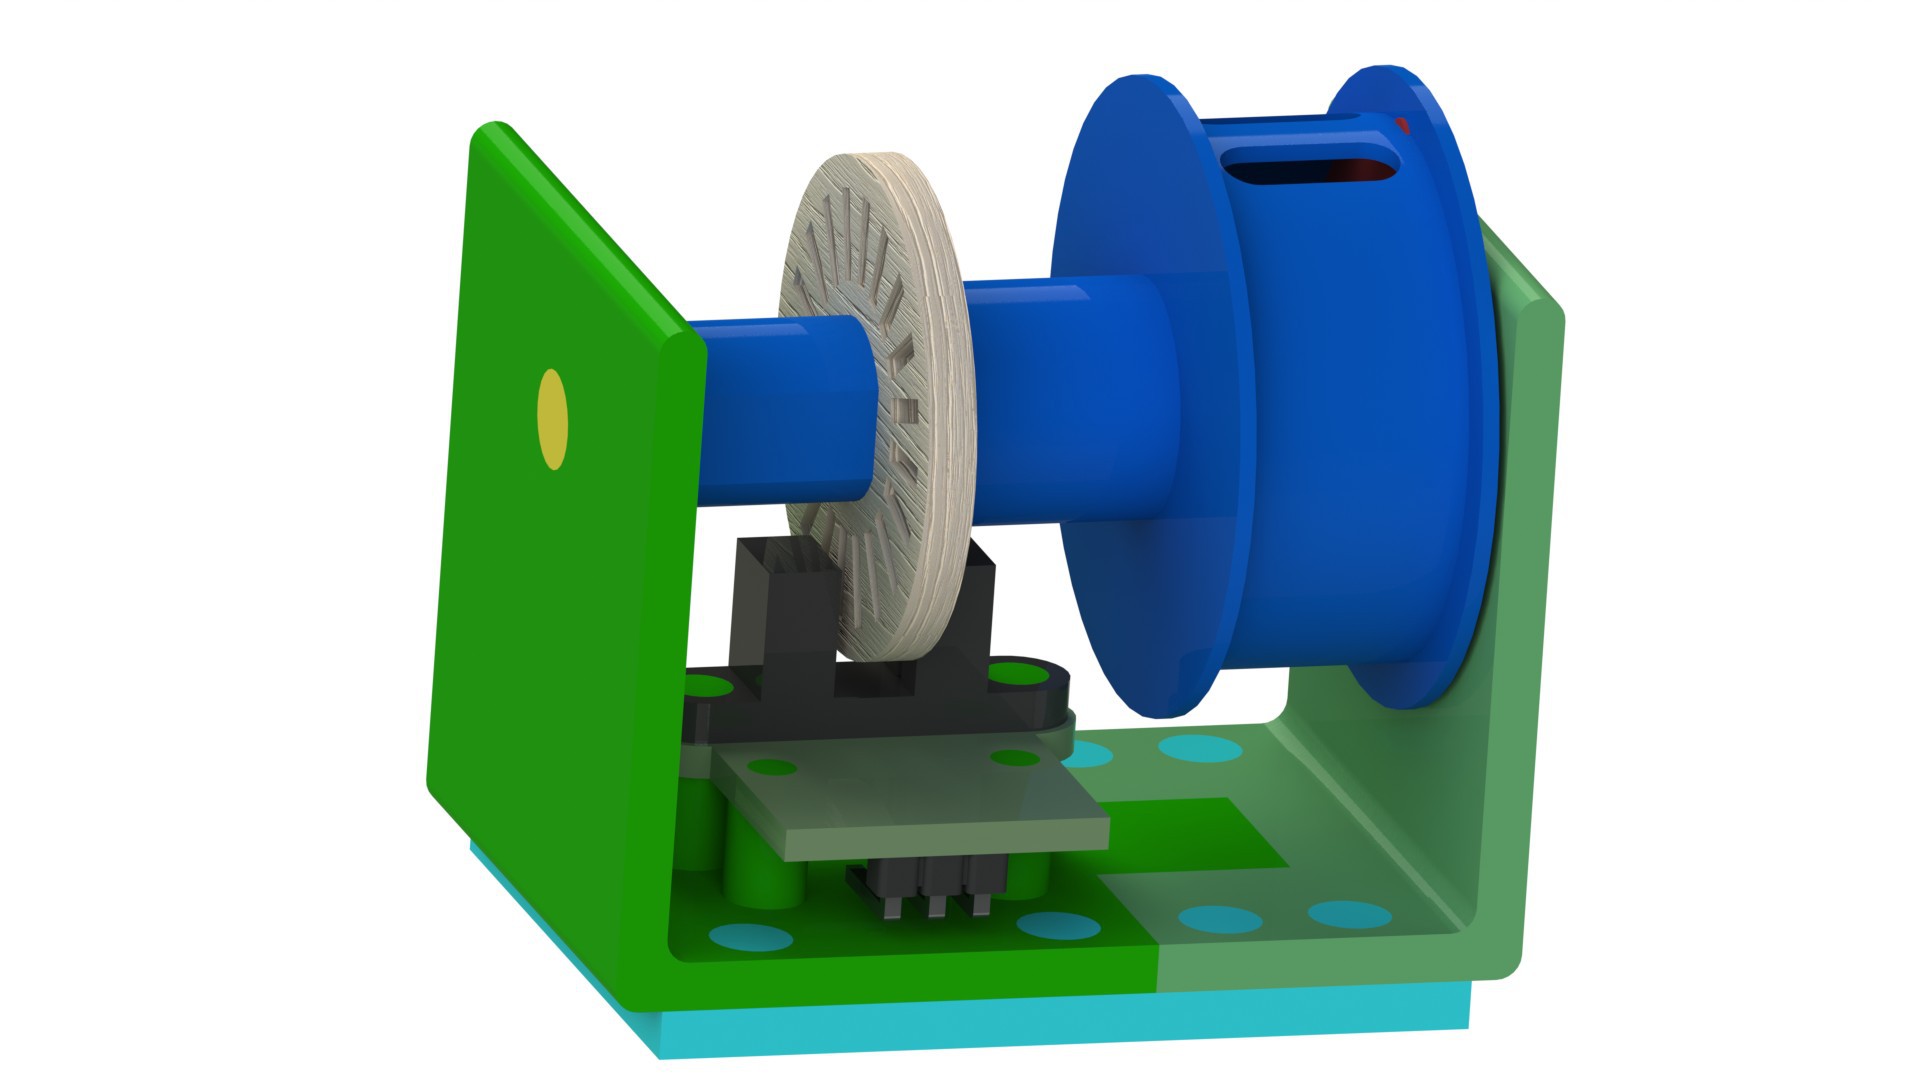
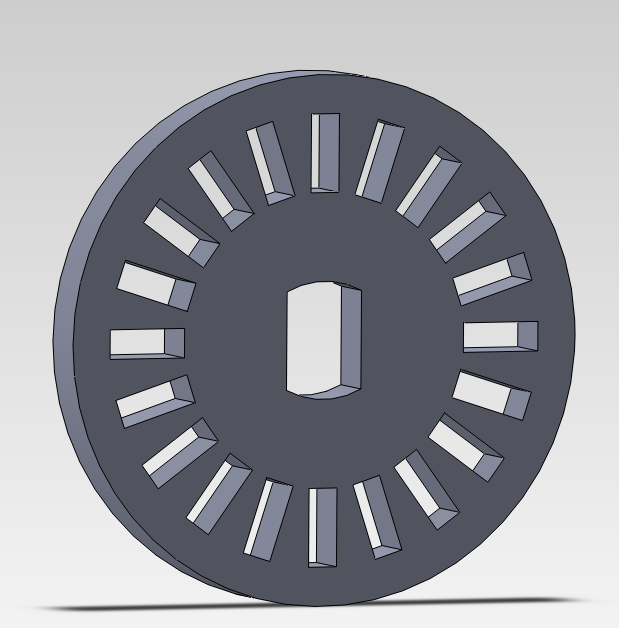
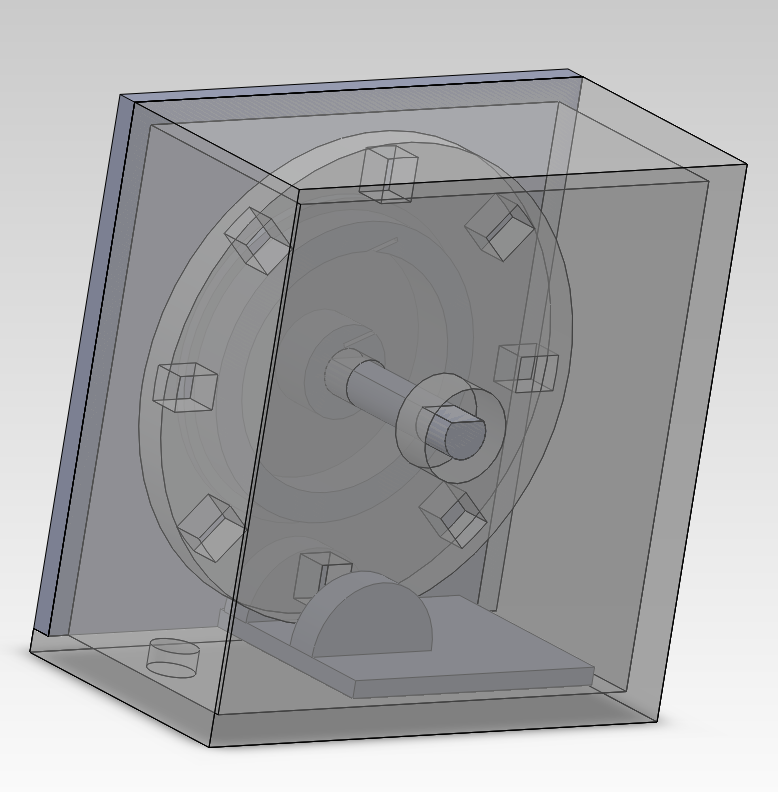
01/06/2015 at 04:17 • 0 commentsThe first CAD files have been created! The housing is a rough sketch to get the general idea across, conveying the draw-string mechanism and it's relationship to the optical encoder and the encoder wheel. Additionally, a life size encoder wheel and optical encoder are all CAD'ed up as well, ready to be used to create a 3D printable housing, expected to be ready for electronics this weekend.
![]()
![]()
![]()
To do (before the weekend):
- Finish to-scale housing for electronic components and draw string mechanism.
- Create encoder-microcontroller-Li-Ion circuit.
- Finish rough first version of draw-string mechanism.
If everything goes as planned, the next update will be for the first (rough) working prototype!
OpenBarbell
OpenBarbell was created out of a need for a low cost, accurate, & reliable platform to measure important information about barbell exercises