Portable Altimeter Logger with Display
A portable altimeter that logs the relative height with a simple display to show max and current altitude.
A portable altimeter that logs the relative height with a simple display to show max and current altitude.
To make the experience fit your profile, pick a username and tell us what interests you.
We found and based on your interests.
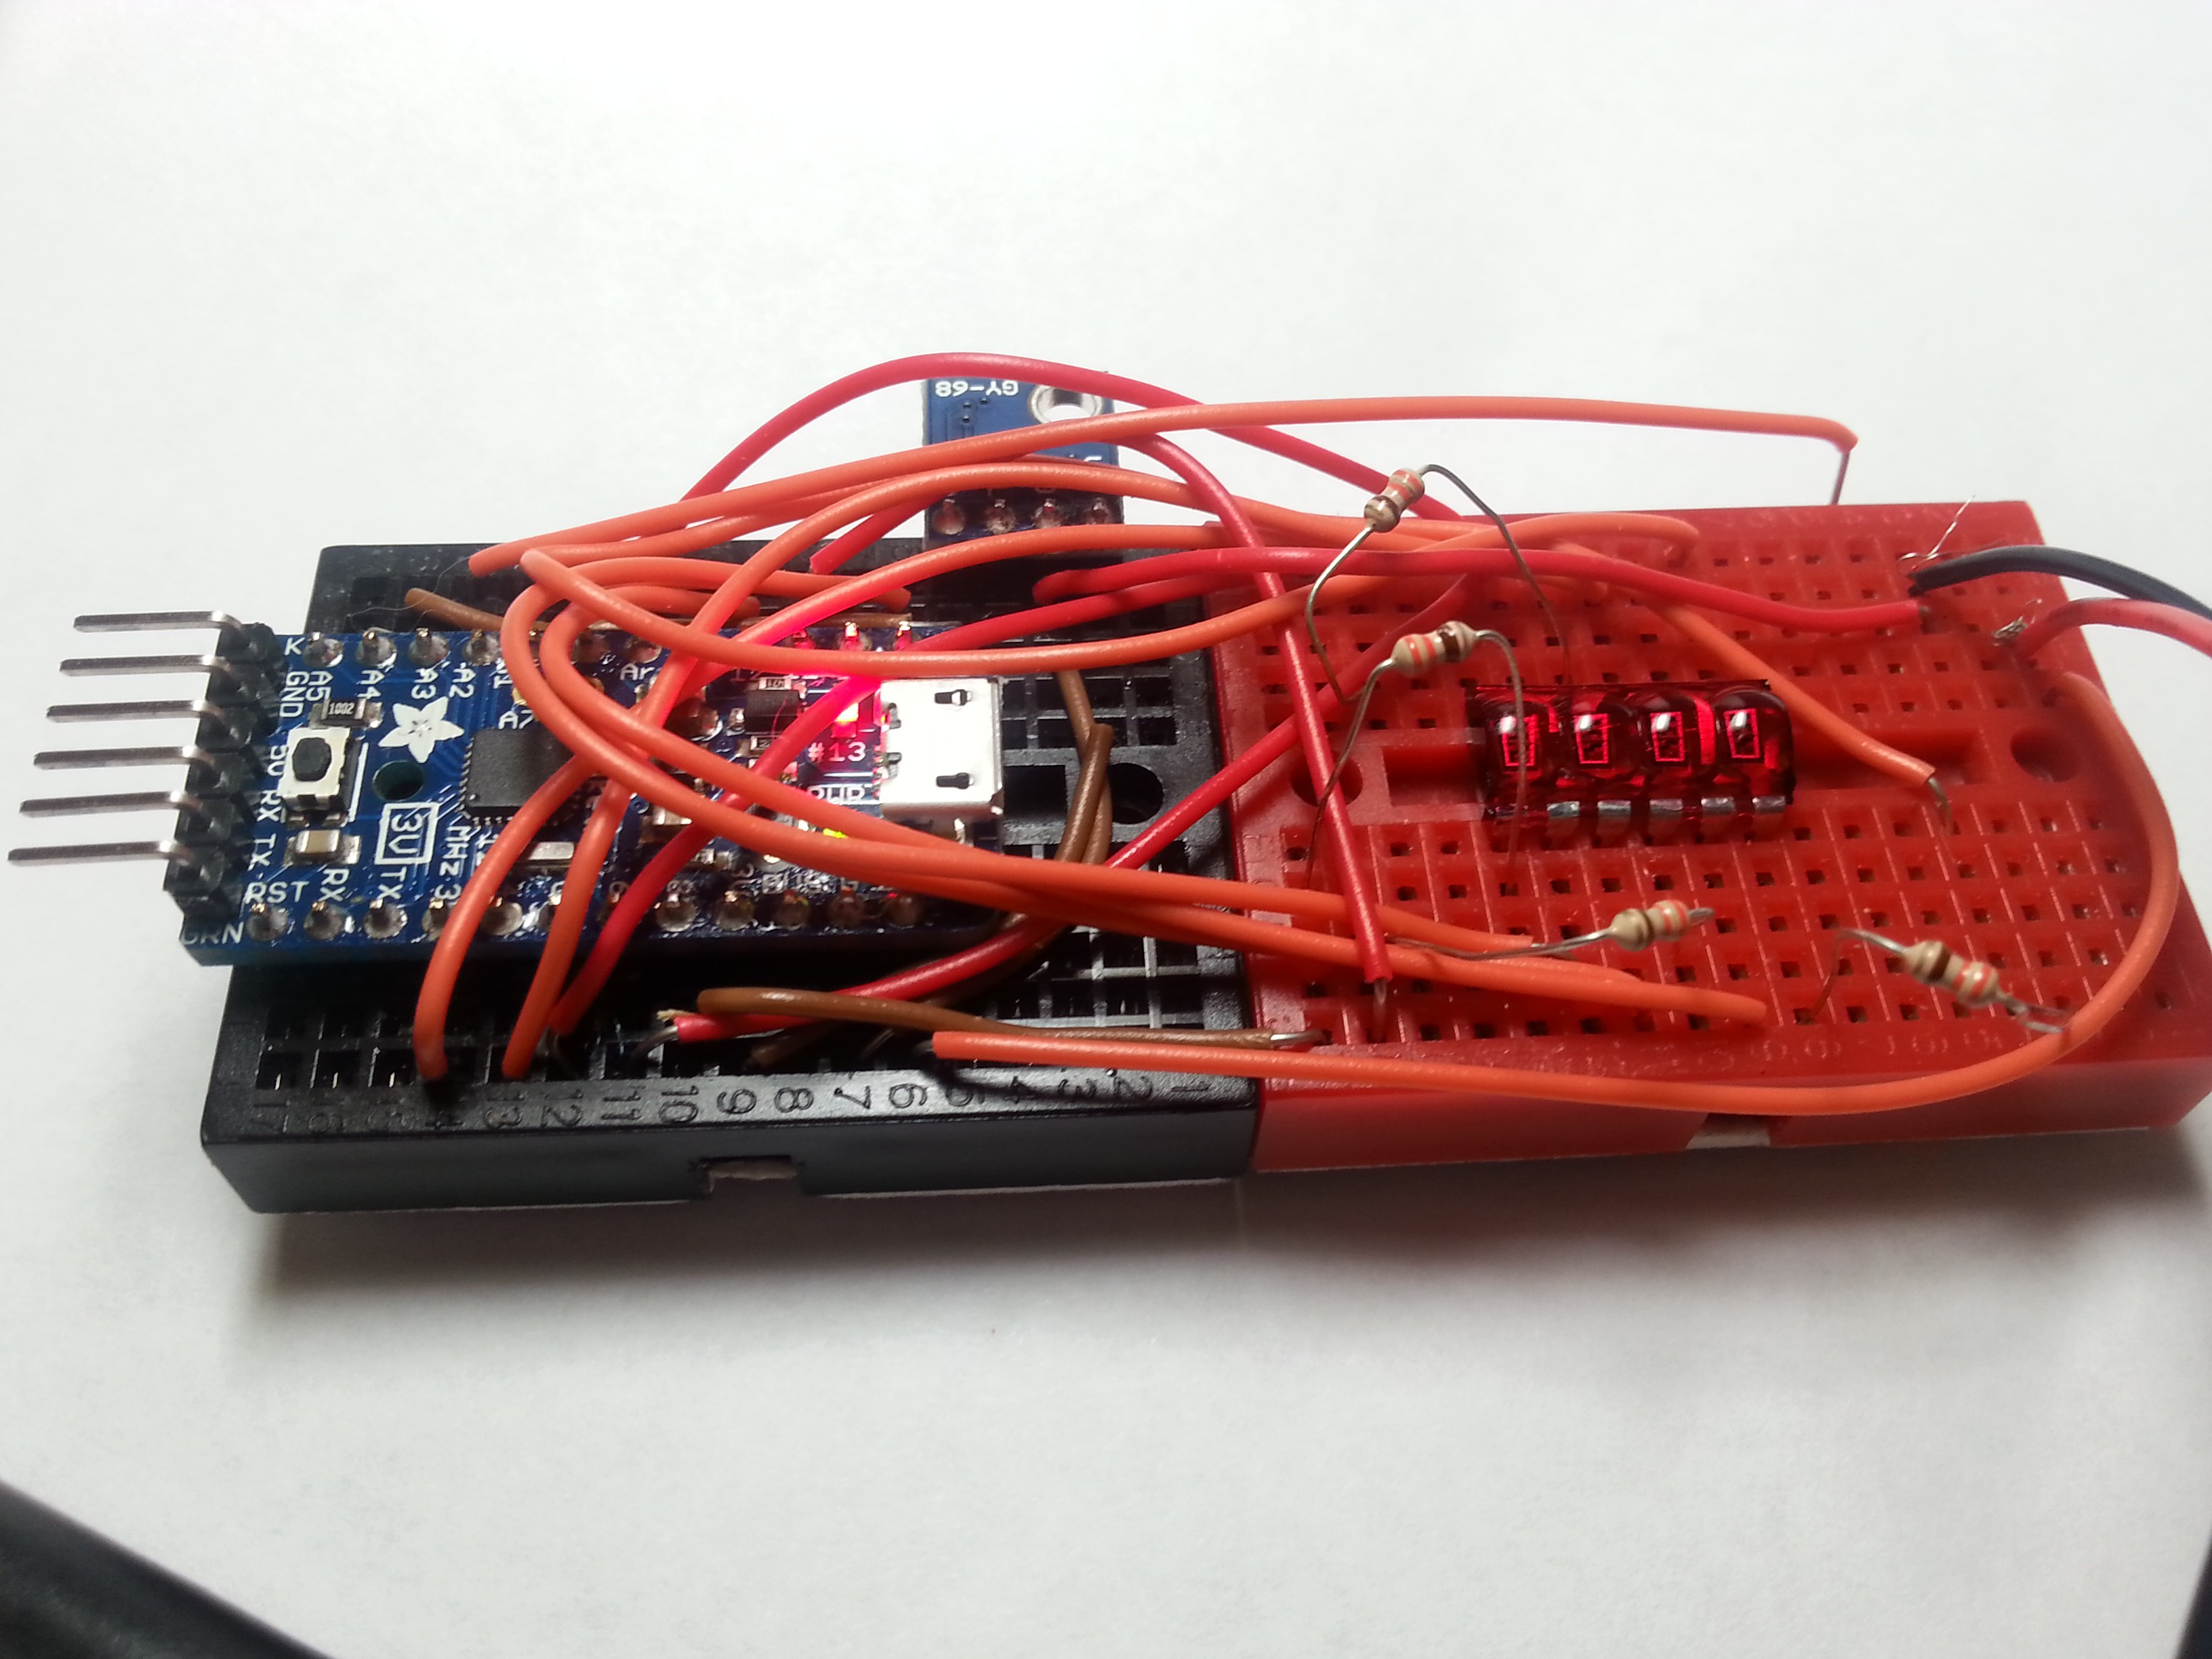
I just finished the first prototype! The display now shows the current and max altitude.
If I gently blow on the BMP 180, the altitude changes so I'm thinking that the wind from the aircraft might affect the readings. I may have to put the device in an enclosure.
Also, I'd like to verify the readings but I'm not sure if I should bring my phone up that high.
Now I'm off to charge some batteries and do some testing!
So I'm not sure if I'm supposed to be updating the project log this often but this is kind of fun so I'm doing it anyways. I got the BMP 180 to play nicely with the Pro Trinket without a problem. Storing the data was not as straightforward, however.
The chips EEPROM memory is 512 Bytes and is written 1 byte at a time. I'm using a double type form ( because its much more precise than an integer) which is 4 Bytes long. This means that in order to store a point in memory I must divide it up into four groups and then combine it when I need to read it. I thought this was going to be difficult but I found a simple functions that will help with this:
void EEPROM_Write(double *num, int MemPos)
{
  byte ByteArray[4];
  memcpy(ByteArray, num, 4);
  for(int x = 0; x < 4; x++)
  {
    EEPROM.write((MemPos * 4) + x, ByteArray[x]);
  }
}
memcpy(1,2,3) takes the destination location, adresss of source and the size of an object to move in memory. Moving it to and from an array of 4 bytes makes this process simple.
I decided to store the altitude data on the Pro Trinket's EEPROM instead of an external memory to keep it simpler. This means that I only have 512 Bytes of storage available. So here's how much data I can hold:
About 2 hours of data at 1 sample per minute
About 1 Hour of data at 2 samples per min
About 20 Minutes of data at 6 Samples per minute
I opted for the 20 minutes of data since my flights don't last more than that.
This is my first time using a Pro Trinket, I typically us a Pro Mini or an Uno.
Here are some notes to myself about using a Pro Trinket:
- 99% of Arduino Programs work on it ( except that pins 2 and 7 are not available)
- Had to drag and drop a file to get it to work on the Arduino IDE although there is an option to just download an IDE (https://learn.adafruit.com/introducing-pro-trinket/setting-up-arduino-ide)
- Analog 4 & 5 pins are broken out ( at a gain of size over the Pro Mini)
- Uses a 12Mhz crystal over a 8Mhz crystal in every Pro Mini that I've seen.
- Can be programed over micro usb - have not tried - at a loss of a bit of sketch size ( 28.6k vs 32k Bytes)
I'm sure there probably is more stuff I missed but this is what I learned from quickly skimming through https://learn.adafruit.com/introducing-pro-trinket/overview.
I'm off to write some code now!
The BMP 180 module uses the Analog 4 and Analog 5 pins. These pins on the Pro Mini are not broken out on with the other border pins (see image below). However, these two pins are broken out normally on the Pro Trinket (see image). This makes it easier for me to prototype with any chip that uses Analog 4 and Analog 5 pins such as those that use I2C protocol at a gain of overall size ofcourse.

The first thing I needed to do was to choose the components. We will need a microcontroller, a pressure sensor and a display. For the microcontroller, I had always wanted to try the Pro Trinket and I had one laying around so I thought this would be a great time to try it out. When it came time to choose the pressure sensor I had debated between the BMP 180 and the MS5611. MS5611 is much much more precise than the BMP 180 but the ladder is cheaper and I had already worked with it before. Plus the difference in precision (10 cm vs 250 cm) was not really that important to me. So I went with the BMP 180. At this point, I'm not sure which display to use. I was originally thinking of using a seven segment single digit display but while I was digging through my components I found a HP QDSP-6064 bubble display. Its a cute little DIP sized 4 digit seven segment display. Ive never worked with it before and It looks kinda cool. Hopefully it'll be visible in the daylight.
Enough talking, now I'm off to get the microcontroller and the pressure sensor to work with eachother....
First thing we need to get the components!
1. You can pick up a 3V Pro Trinket at http://store.hackaday.com/products/trinket-pro-with-black-solder-mask-and-the-hackaday-io-logo or Adafruit $10 (3v not the 5v since the BMP 180 needs a vcc of 3.3v)
2. BMP 180 Barometric Pressure Sensor https://www.sparkfun.com/products/11824 $10
3. HP QDSP-6064 bubble display https://www.sparkfun.com/products/12710 $3
4. 4 X 330ohm resistors https://www.sparkfun.com/products/11507 $1
Let's begin by making sure the Pro Trinket is correctly installed and working. Then we will install the necessary libraries to get the code to work.
1. If you are already familiar with the Pro Trinket or are planning on using an Arduino UNO or Pro Mini skip to step 3.
2. To get the Pro Trinket to work with the Arduino IDE you have two options: Either install the Adafruit IDE ( almost exactly like the Arduino IDE but automatically supports the Pro Trhinket) or add the hardware files to your Arduino folder. Download links and instructions are here: https://learn.adafruit.com/introducing-pro-trinket/setting-up-arduino-ide
3. Now on to downloading and installing the libraries used by the sketch:
I. BMP 180 library from Sparkfun https://learn.sparkfun.com/tutorials/bmp180-barometric-pressure-sensor-hookup-/installing-the-arduino-library
II. Seven Segment Display Library: https://github.com/sparkfun/SevSeg
Now on to hooking up the hardware.
for the BMP 180,
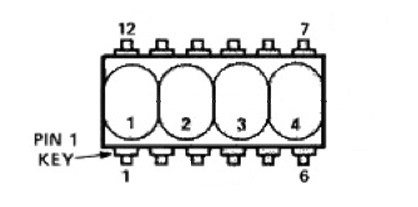
For the display,
in the format Microcontroller Pin to Bubble Display pin:
Display Pinouts:
Create an account to leave a comment. Already have an account? Log In.
I had a couple of those BMP180's arrive from Tindie right before Christmas :) Watching this with interest as I want to launch them in rockets :)
Great! They are simple and straight forward to work with. Sparkfun has a pretty good library for them also.
That sounds fun! Please keep us updated on the launches :P
Become a member to follow this project and never miss any updates
 arunmagesh
 SAYANTAN PAL
 HACKRC
http://www.nar.org/high-power-rocketry-info/filing-for-faa-launch-authorization/filing-for-faa-waiver/