doctek
-
Action Film as Promised!
01/30/2015 at 01:51 • 0 commentsSee the Syringe pushing out peanut butter:
The stl version of the parts can be found here:
http://www.thingiverse.com/thing:658781
I'll put the FreeCAD source files up on GitHub.
-
Peanut Butter!
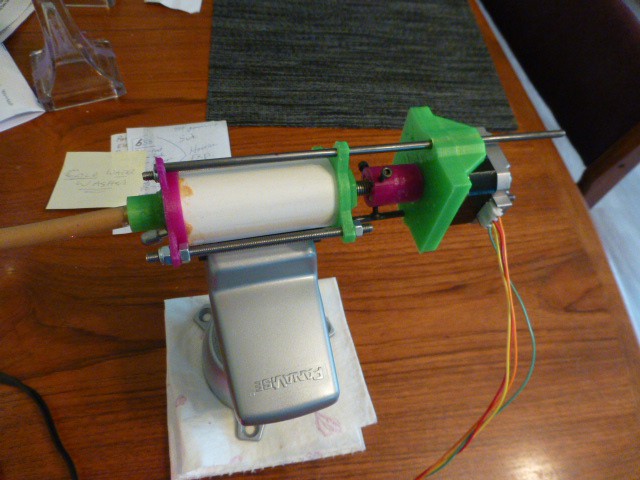
01/29/2015 at 04:54 • 0 commentsDid the big test today: Will the syringe push peanut butter through the tube? Peanut butter is selected since it is pretty viscous and reasonably easy to clean up.
Short answer: It works!
I'm making a video showing the peanut butter flowing out of the syringe, but I wanted to make this post first. So it's "film at 11" time - you have to wait.
"What took so long?" you ask. "I thought all you needed was a few bolts."
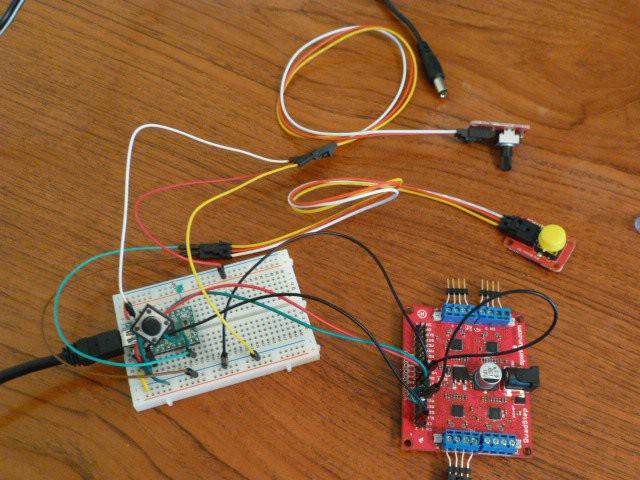
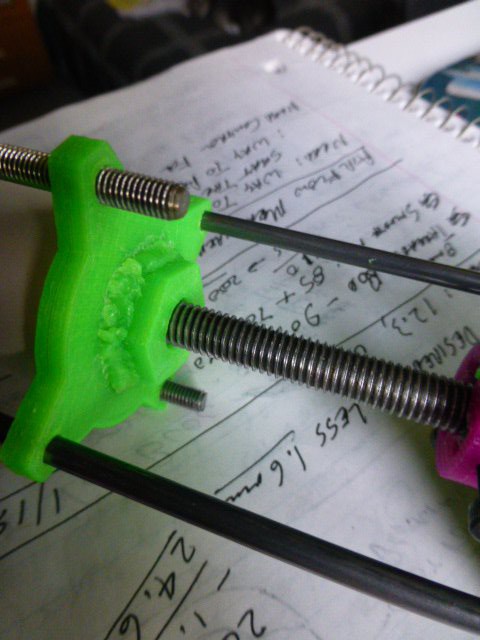
Yeah, well, I also needed to have a stepper motor controller that would run slower than 1 rev/second! So I pulled out a Teensy2 and a Quadstepper and away we go. A bit of work with the AccelStepper library and now I have a controller that will run down to Parade Rest if I want to. Here are a couple of pictures.
![]()
![]()
Wait for the video!
-
Securing the outlet tube and a little Welding
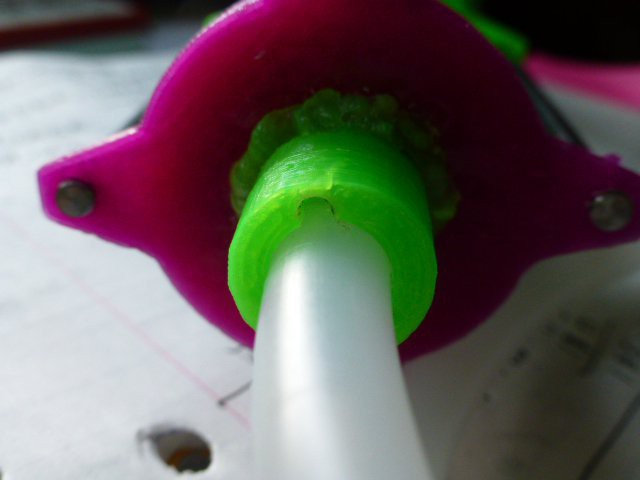
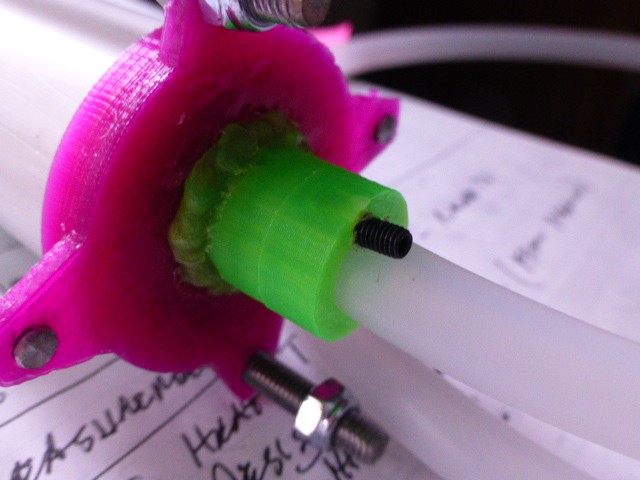
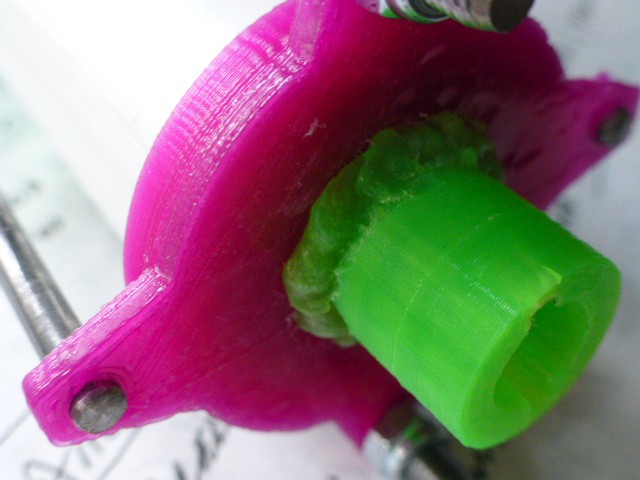
01/17/2015 at 05:58 • 0 commentsMy plan is to use a length of plastic tubing to deliver the output of the syringe to either the extruder or the mixer. That way, the syringe doesn't have to be mounted on the carriage of the printer. The thing that's always worried me is how to connect the tube securely without a big, ugly fitting. Here's the solution I've come up with. The pictures are truly worth ten thousand words in this case.
![]()
![]()
The hose fits in 10mm deep. Then a 3mm setscrew is pushed into the hole and screwed in about 5mm. I made another hole on the other side, but one set screw holds so securely, the second isn't needed. As you can see, this is a very compact way to secure the hose. It grips very strongly and makes only a tiny dent in the hose on the inside of the opening. I'm very eager to try this in operation but I think it'll work great.
The nut cover needs to be secured to the nut holder (with the 8mm drive nut inside), and the nozzle must be joined to the outlet. I used Multipurpose Plastic Pipe Cement (lots of MEK) to cement the parts and let them dry. Then I used my Dremel to weld the joints as well, as described in a recent HAD item. Very solid!
![]()
![]()
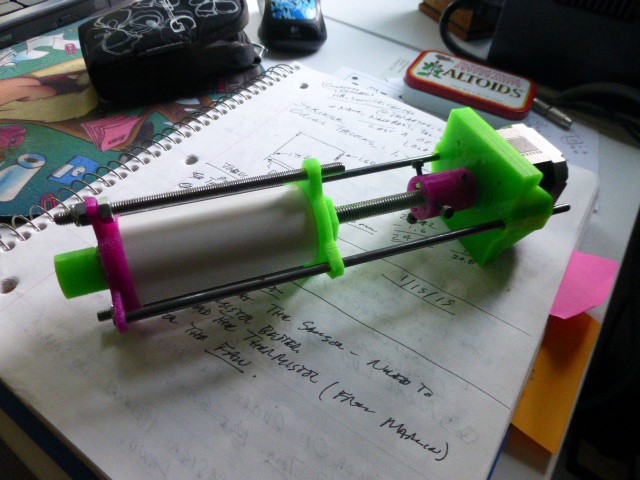
You've guessed by now that the syringe is assembled, so here's a look at it. I still need a few 5mm nuts before I can test it; just a trip to the hardware store away. Testing awaits!
![]()
-
Design Detail: Coupler
01/15/2015 at 05:55 • 0 commentsThought I'd have it all done by now, but everything takes longer than you think it will! Let's pause along the way and look at a few design details that might be innovations - maybe even useful innovations!
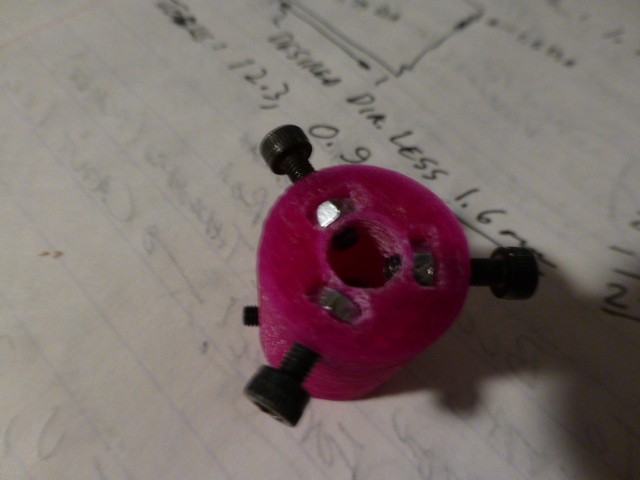
The first innovation is in the coupler that will join the drive motor to the 8mm threaded rod that propels the plunger. The end that hooks to the 8mm rod is pretty standard: just three 3mm nuts pocketed into the plastic so screws can be tightened against the rod. Clean out the pockets, drill out the bolt holes and press in the nuts. Done.
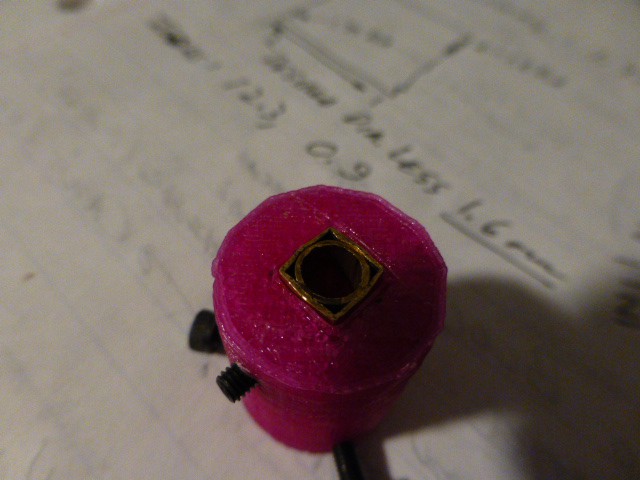
The end that hooks to the motor shaft is perhaps more interesting. I haven't seen this approach used. I cut a length of 6mm round brass tube (5mm id to fit the motor shaft) and coaxed it into a similar length of 1/4" square brass tube. The round tube fits snugly into the square tube. Slight distortion results when the round is pressed into the square, but it's minor. The square tube fits (press fit) into the coupler body and a 3mm clearance hole is drilled through the tubing and threaded. A set screw can now be tightened against the flat on the motor shaft. This provides a very secure, non-slip connection to the motor.
![]()
![]()
Next, we'll look at the method of anchoring the delivery hose to the discharge nozzle. What's need is a compact way to secure a plastic hose. Stay tuned.
-
Printing Started
01/12/2015 at 05:09 • 0 commentsWith the first parts designed, it's time to fire up the 3D printer and crank out the plastic parts. The outlet I mentioned last time with the black hole was indeed a problem. Although it passed all the checks in the FreeCAD Mesh Workbench, the stl had big problems when fed to netfabb. I had to import the stl into OpenSCAD, subtract the center cylinder, and create another stl. This worked fine and the part printed out OK.
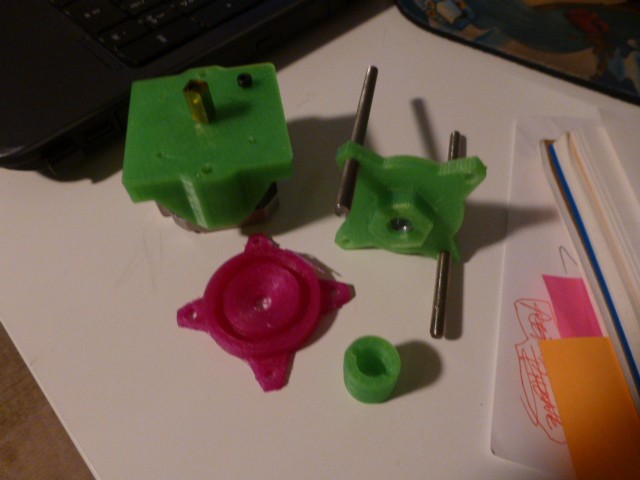
Had to change plastic in the middle of printing parts. Not uncommonly, this means a few hours characterizing the plastic and resetting parameters in Slic3r. But I got lucky this time, the new plastic uses the same settings as the old and prints perfectly. Here's a shot of some of the new parts.
![]()
Next up is to finish the design of the coupler and the plunger, then put it all together and give it a try.
-
Got the parts!
01/09/2015 at 06:46 • 0 commentsLocal hardware store had the parts I needed. The guide rods will be 4mm music wire and the side bolts will be 5mm threaded rods 100mm long. Now that I have the parts, I know what size to make the holes and can complete the design of the components. First designs are done for all the parts except the plunger. I'll print them tomorrow and see how it all fits. Then on to the plunger! I'm planning to use the plastic welding technique recently featured to do some of the assembly, so I'll see how that works also.
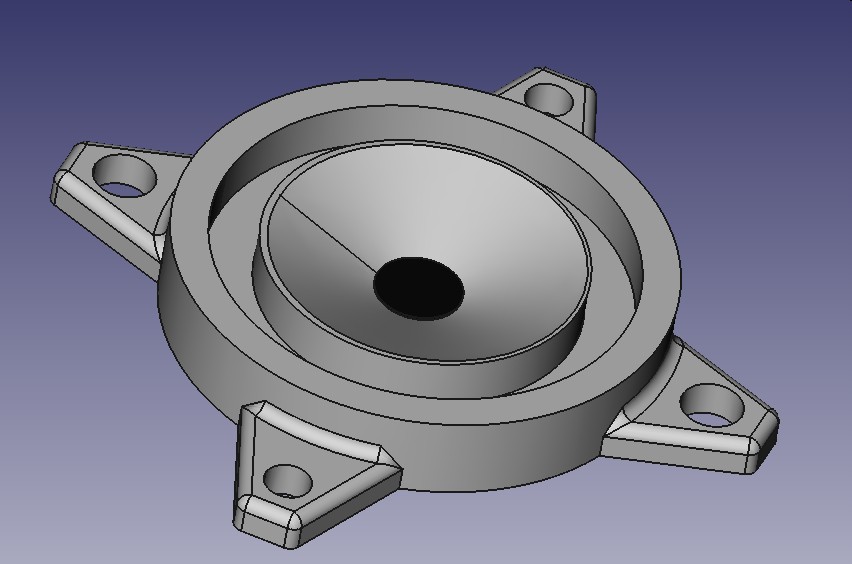
Actually, printing depends on FreeCAD producing the stls correctly. This has not been a problem in the past, but I'm using FreeCAD in ways I haven't tried before, so we'll see what happens. In the mean time, here's the outlet piece. See the black circle in the middle of it? That should just be a hole (like the other holes in the shape). That's the part I'm worried about. Will it mesh correctly? Stay tuned!
![]()
-
Off and Running
01/08/2015 at 06:33 • 0 commentsThe need for this design became obvious just a few days ago, so the design is still in process. So far, I've chosen 1" PVC for the syringe body and 1/4" plastic tubing for the delivery tube. I've started designing the parts in FreeCAD. The plunger will be driven by an 8mm threaded rod turned by the NEMA 17 motor. I need two smooth guide rods to mount along the sides of the body to guide the motor. I also need two threaded rods to hold the discharge and the drive nut holder in place at the ends of the body. A good sketch will make all this clearer and a trip to the hardware store should provide the precise parts so I can finalize the design and start printing the first version.
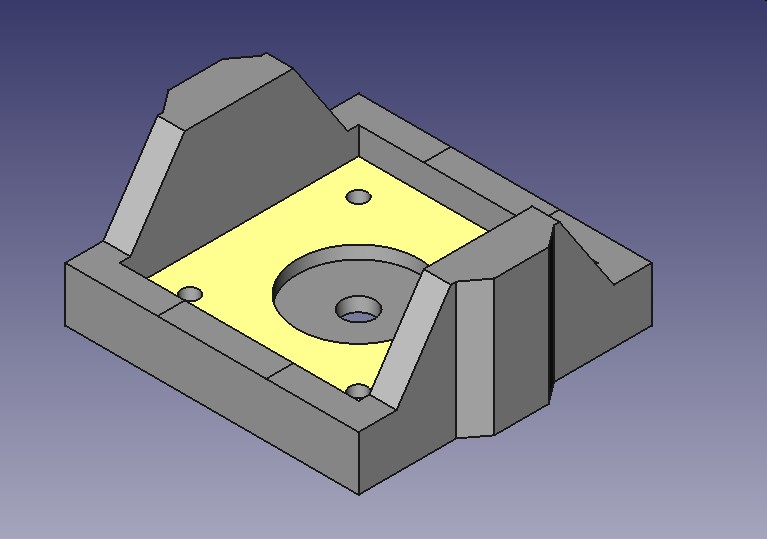
Here's the motor mount. Still pretty rough, no guide holes since I don't have the rails yet.
![]()
Syringe Pump
Goal: Create a syringe pump to feed material to the Moineau Extruder or the Oogoo Mixer.