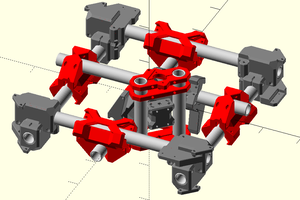
If you're a serious maker like I am, then you'll most likely have countless resistors, capacitors, and various other electronic components lying around. But there is a major problem: How does one keep track of what or how many of something they have? For this issue I created a CNC machine that gets information from a MySQL database that then goes and retrieves the item that was requested. In addition to the database back-end, I made a front-end webpage that allows for users to login and then create categories of parts, add new parts, and change the quantities of parts. This way every single item can be accounted for, just like a stock management system.
The basis of this system is to keep track of inventory. For example, if someone buys 20 Arduino Uno boards they could easily add that amount to a database table. The category would be "Arduino", name of "Uno", and a quantity of 20. For multiple people, the owner of that part would be the username of the person who added it. The part would also include data about the it's location on a grid. Whenever the part amount changes the CNC machine would then select that part and give it to the user.
2
Database
I needed a ubiquitous database that could be accessed by both Python and PHP. It also had to be easy to use with plenty of support, making MySQL the perfect database server. I began by downloading the mysql installer from https://dev.mysql.com/downloads/windows/installer/ and then ran it. I chose to install the server (of course), and also the workbench, shell, and utilities. When you choose a username and password make sure to remember it, as those same credentials are needed in all of the PHP files and the Python script. After starting the server enable it to run as a background process so it will always be active.
From here on in everything must be spelled and in the exact same order as I have it.
Next, create a new database (schema) called "components". Then add the following tables: "categories", "parts", and "users".
In the categories table add the following columns in this exact order: "id" -int(11), PK, AI; "name" -varchar(45); "owner" - varchar(45).
In the parts table add the following columns in this exact order: "id" -int(11), AI, PK; "category" -varchar(45); "name" -varchar(45); "quantity" -int(11); "owner" -varchar(45); "locationX" -int(11); "locationY" -int(11);
In the users table add the following columns in this exact order: "id" -int(11), AI, PK; "username" -varchar(45); "password" -varchar(128);
3
Setting Up Apache
The webpages I have created utilize HTML, CSS, Javascript, and PHP. Start by downloading the latest apache version from http://www.apachelounge.com/download/ and unzip it, moving the folder to the C:\ directory. Next, download PHP from http://windows.php.net/download#php-7.2 and make sure it is the Thread Safe version. Unzip it, rename it to "PHP", and move it to the C:\ directory. Then go into C:\Apache24\conf\httpd.conf and edit it. Add the following lines right below the <IfModule headers_module> section:
Then test your server by running httpd.exe located in the bin folder. Head to "localhost/" in your browser and see if the hello world page comes up. If it does, hurray, you now have a local webserver.
One of the core services offered by PTI Digital is web design and development. https://optidigital.ca/