Close
0%
0%

Drone Test Stand

A test stand to safely test vertical lift vehicles, measure thrust and record test conditions

Similar projects worth following
A test stand equipped with load cells to measure thrust, and environmental sensors to get the test conditions. A microprocessor is used to record and transmit the sensor data. The vehicle is constrained vertically and horizontally for safety

Overview

Developing a drone requires testing and data to refine the design. A useful test stand will:

  • Safely support and constrain the vehicle
  • Measure the static weight between tests
  • Measure the thrust during a test

This Drone Test Stand is designed to try to meet those requirements.
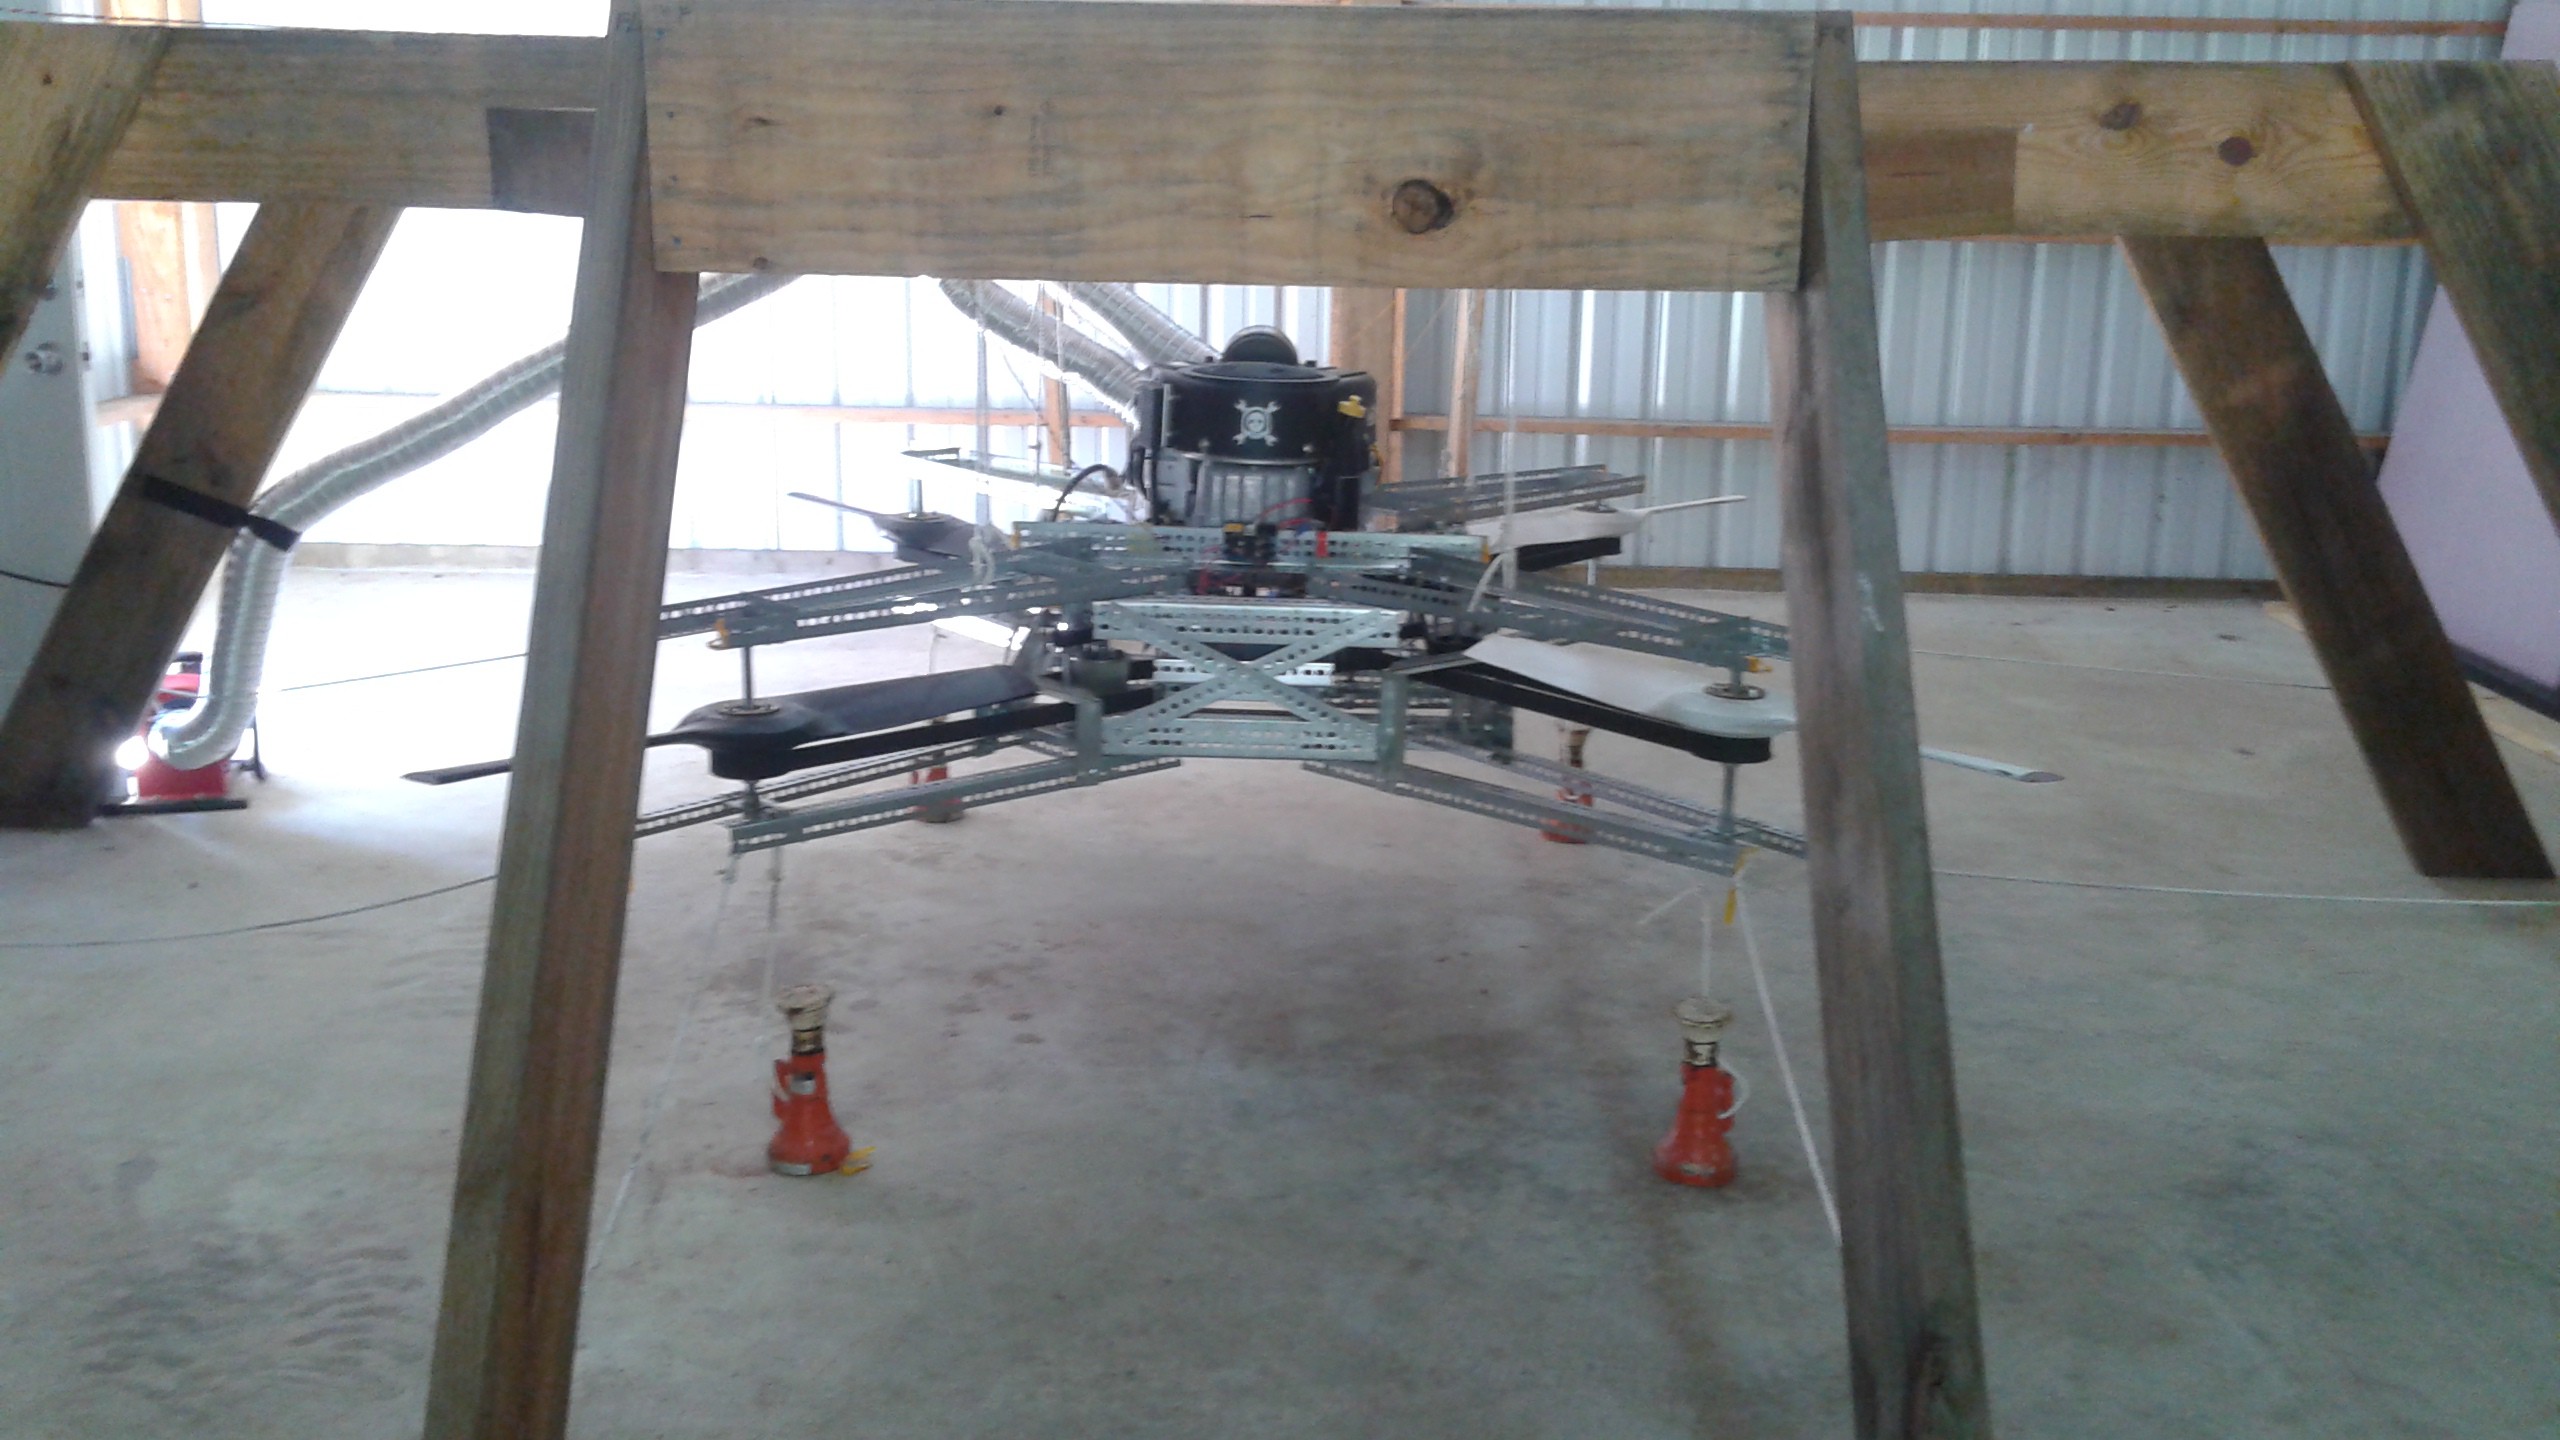
Frame

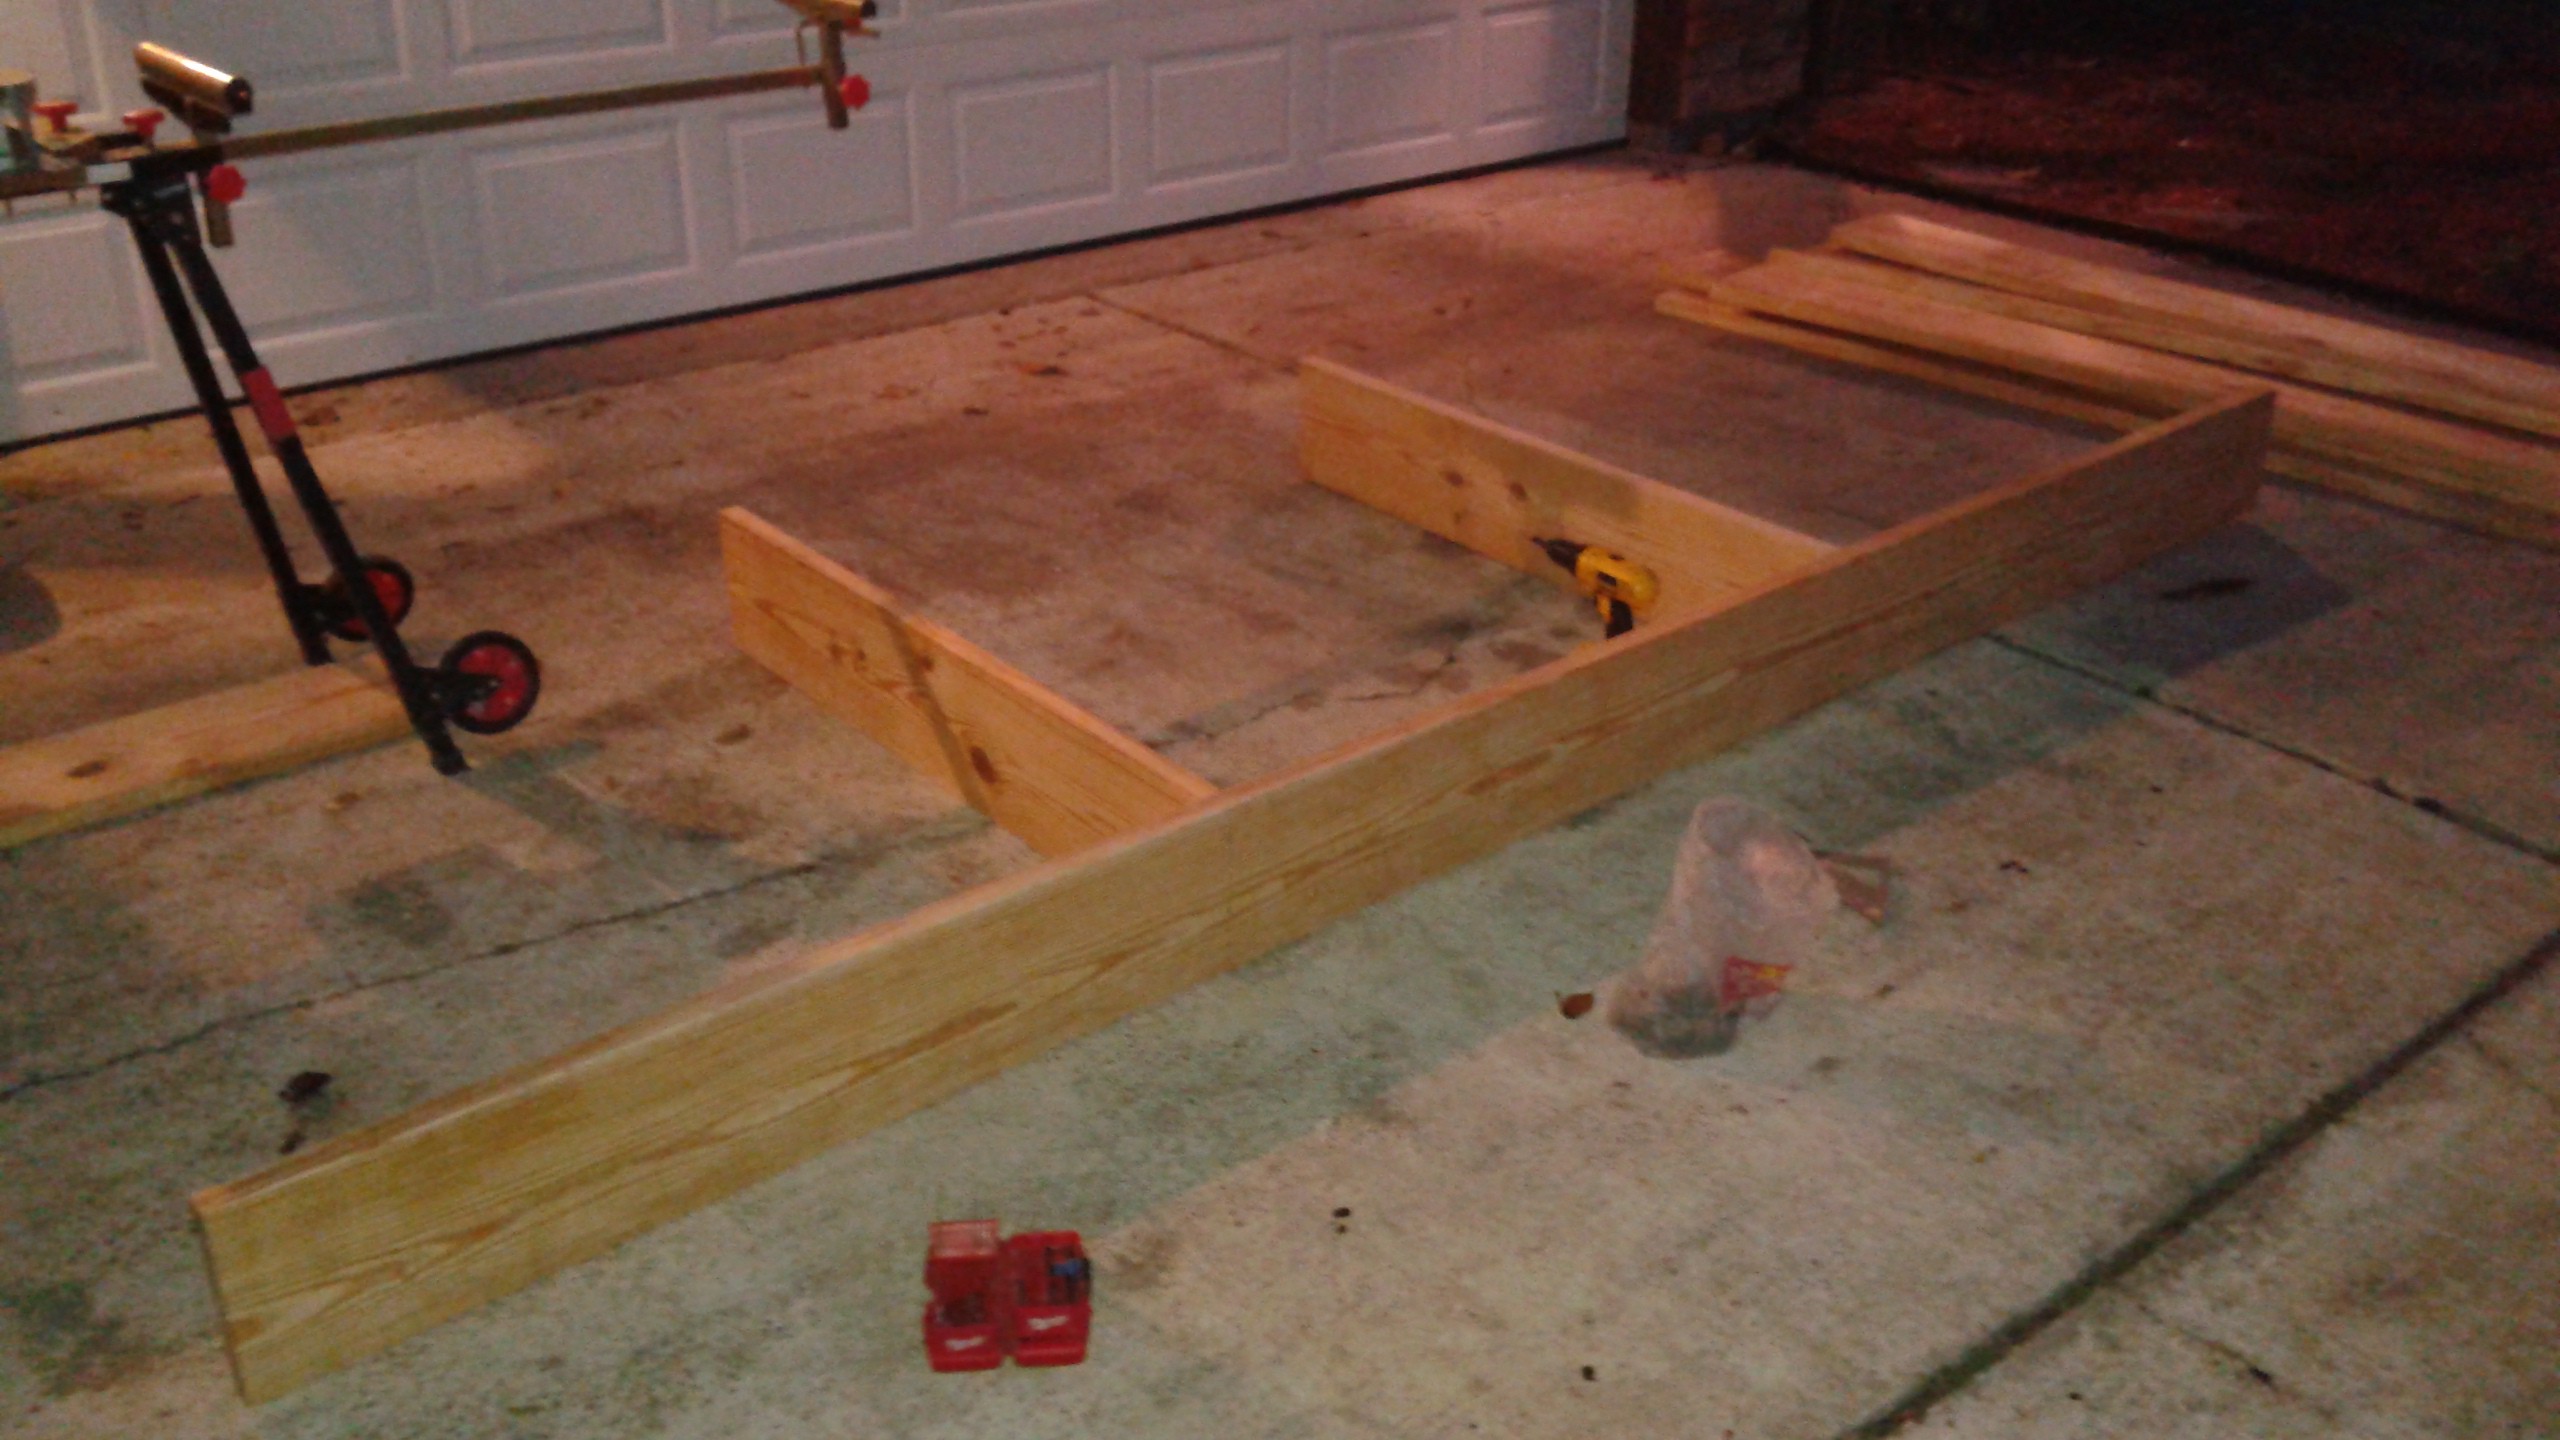
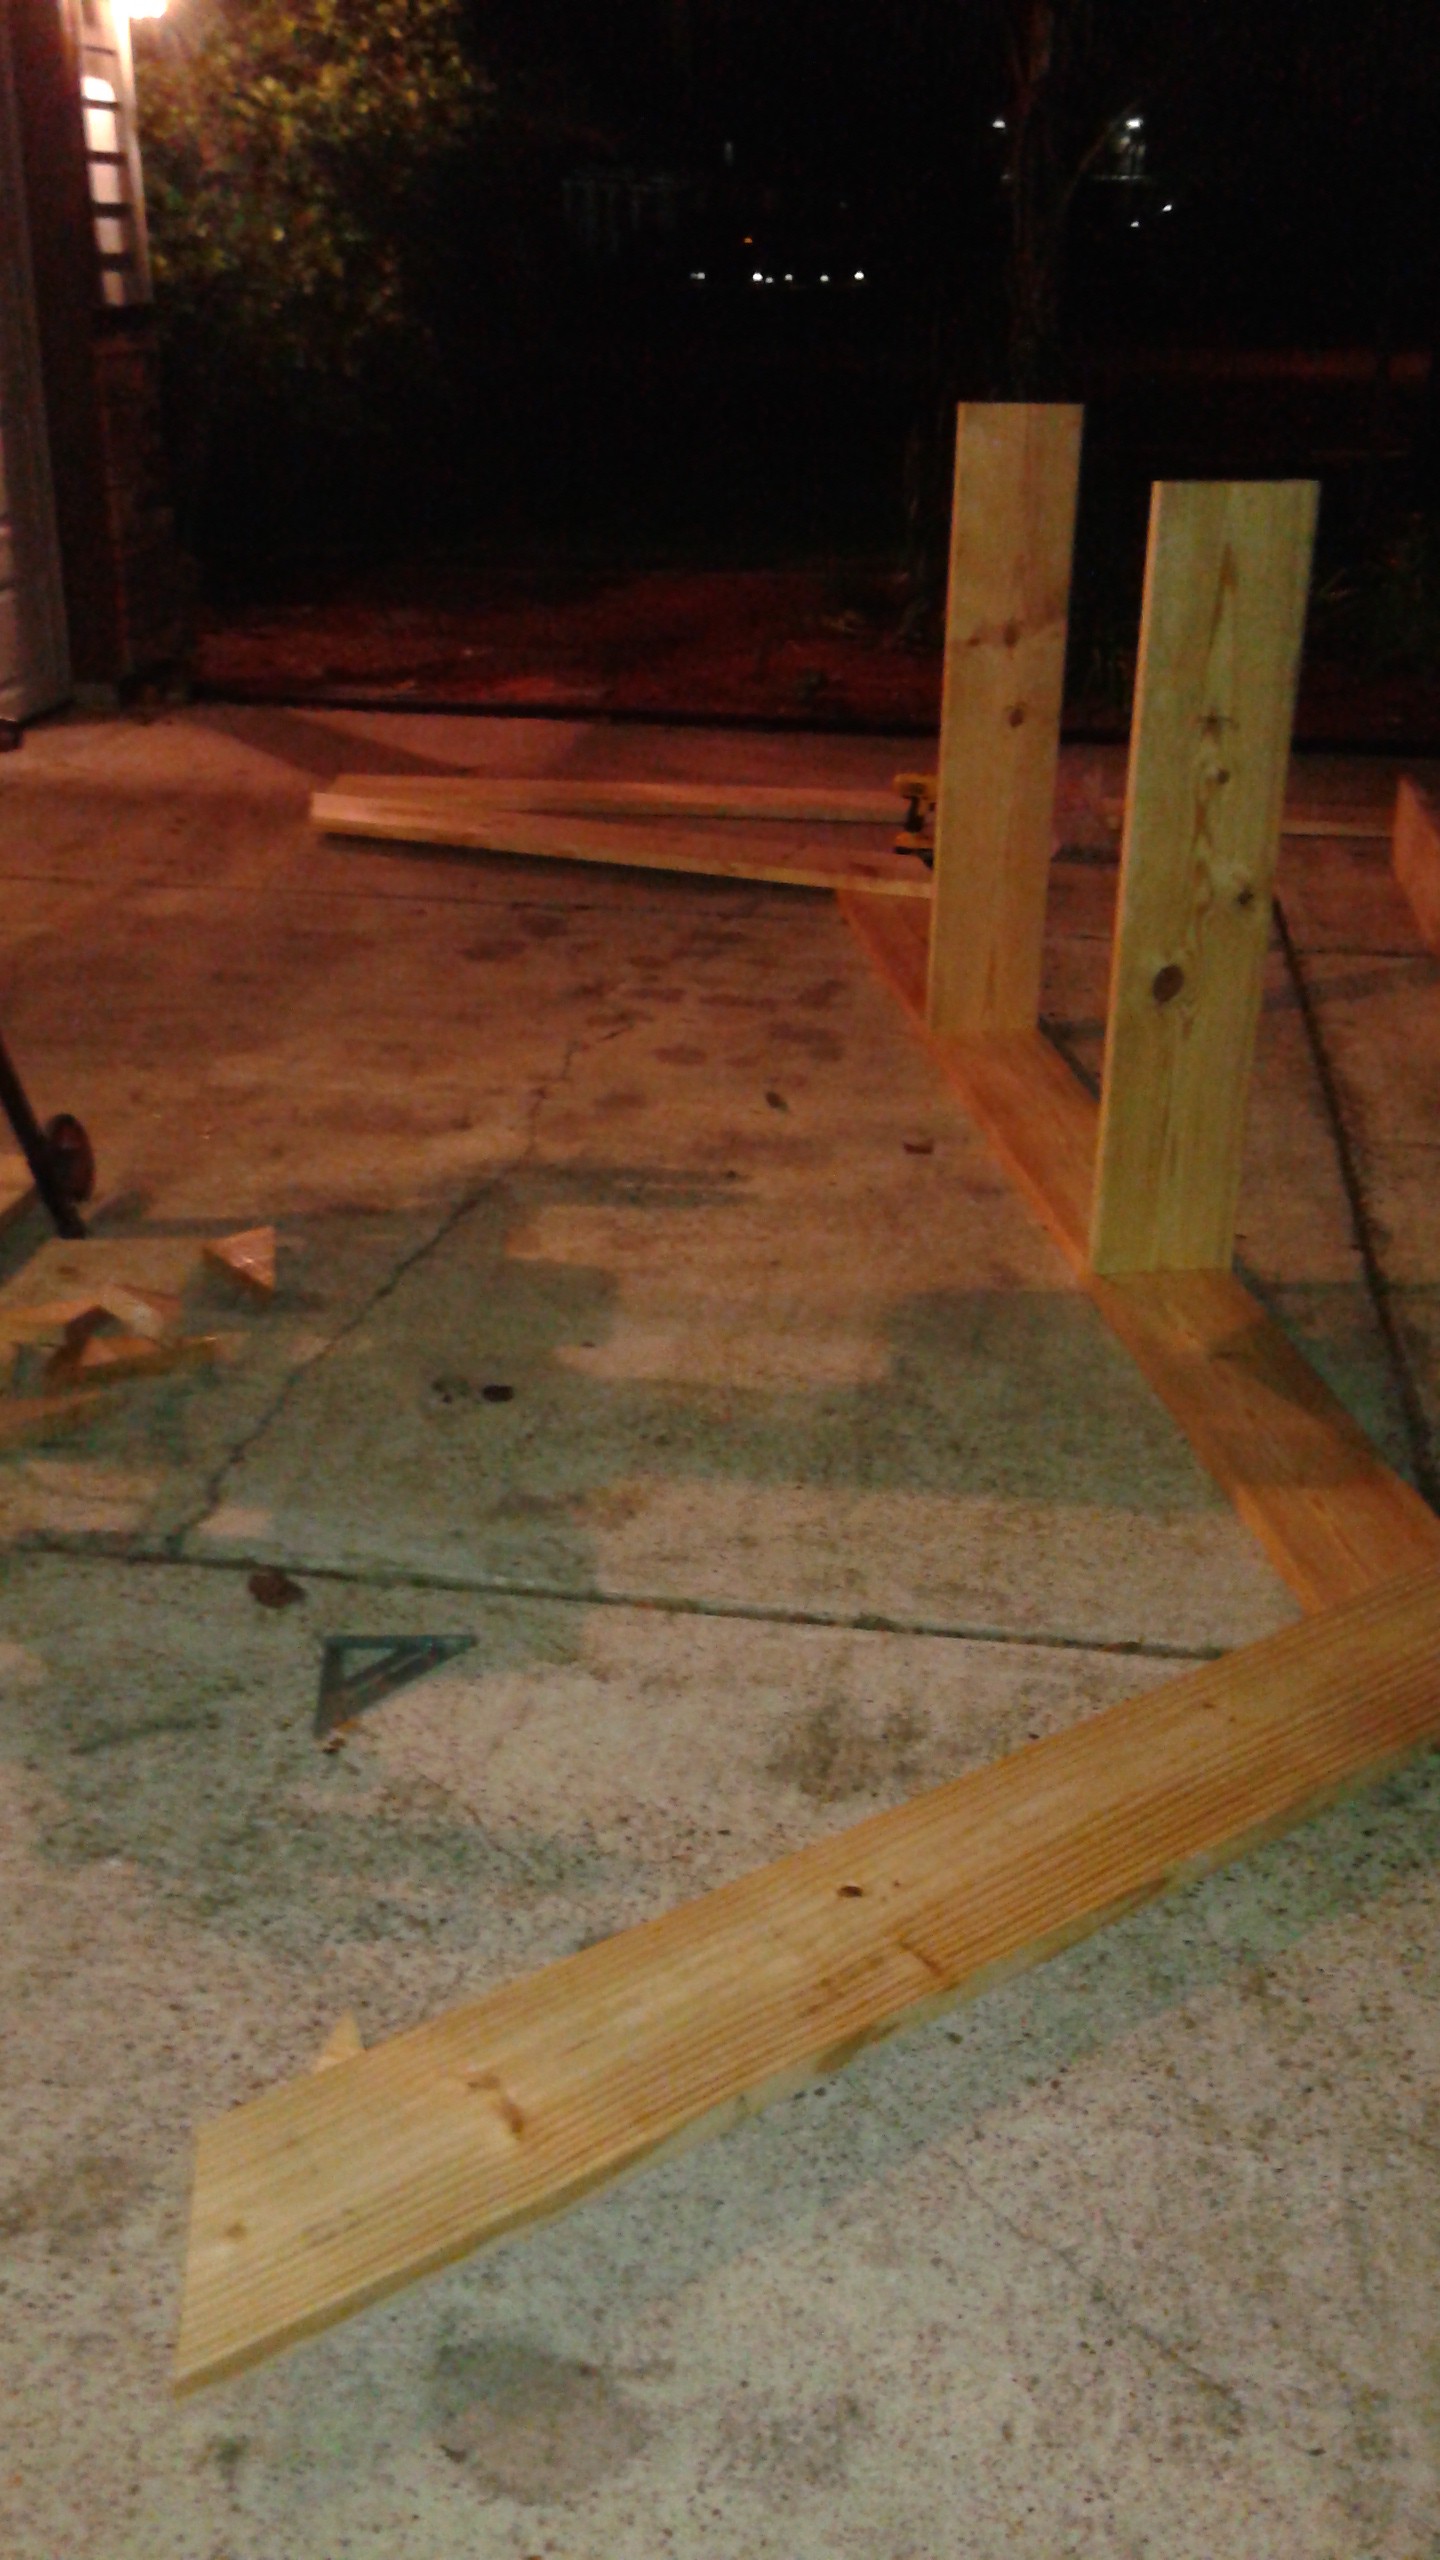
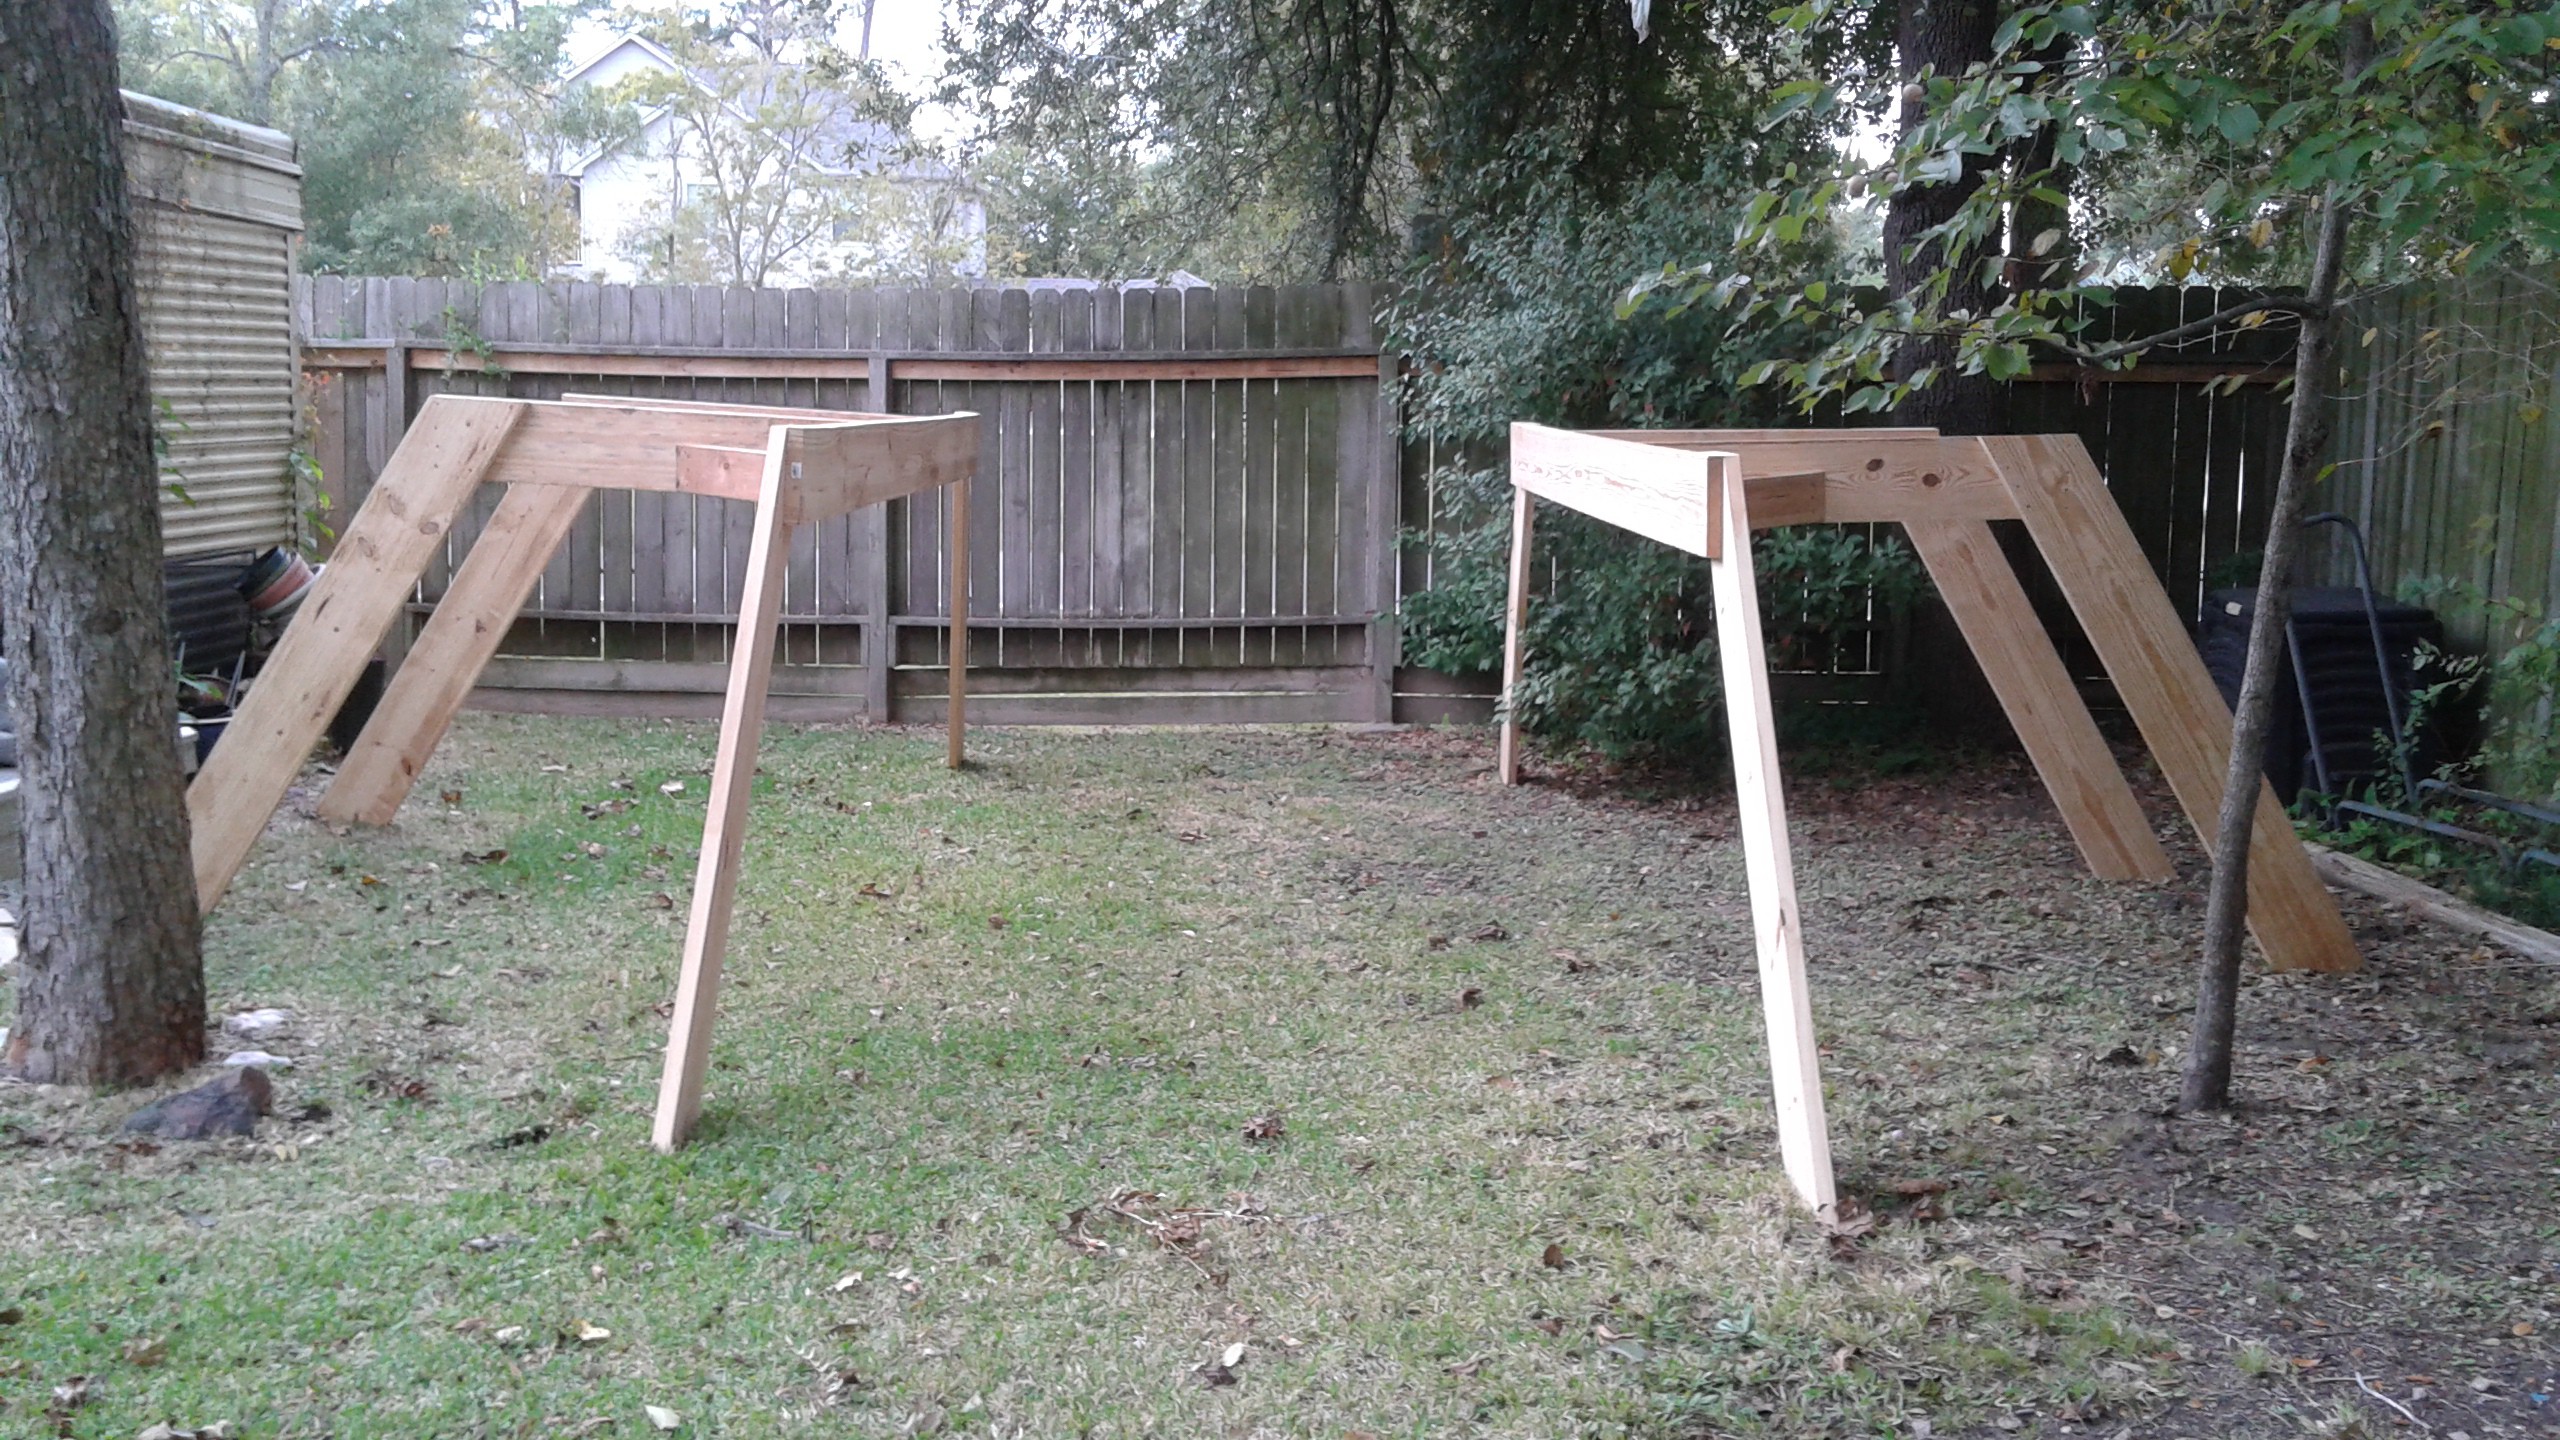
The frame is intended be in-expensive and is over engineered to ensure safety. The frame is constructed from 2" x 10" boards with joints held together with screw so that it can be disassembled easily.

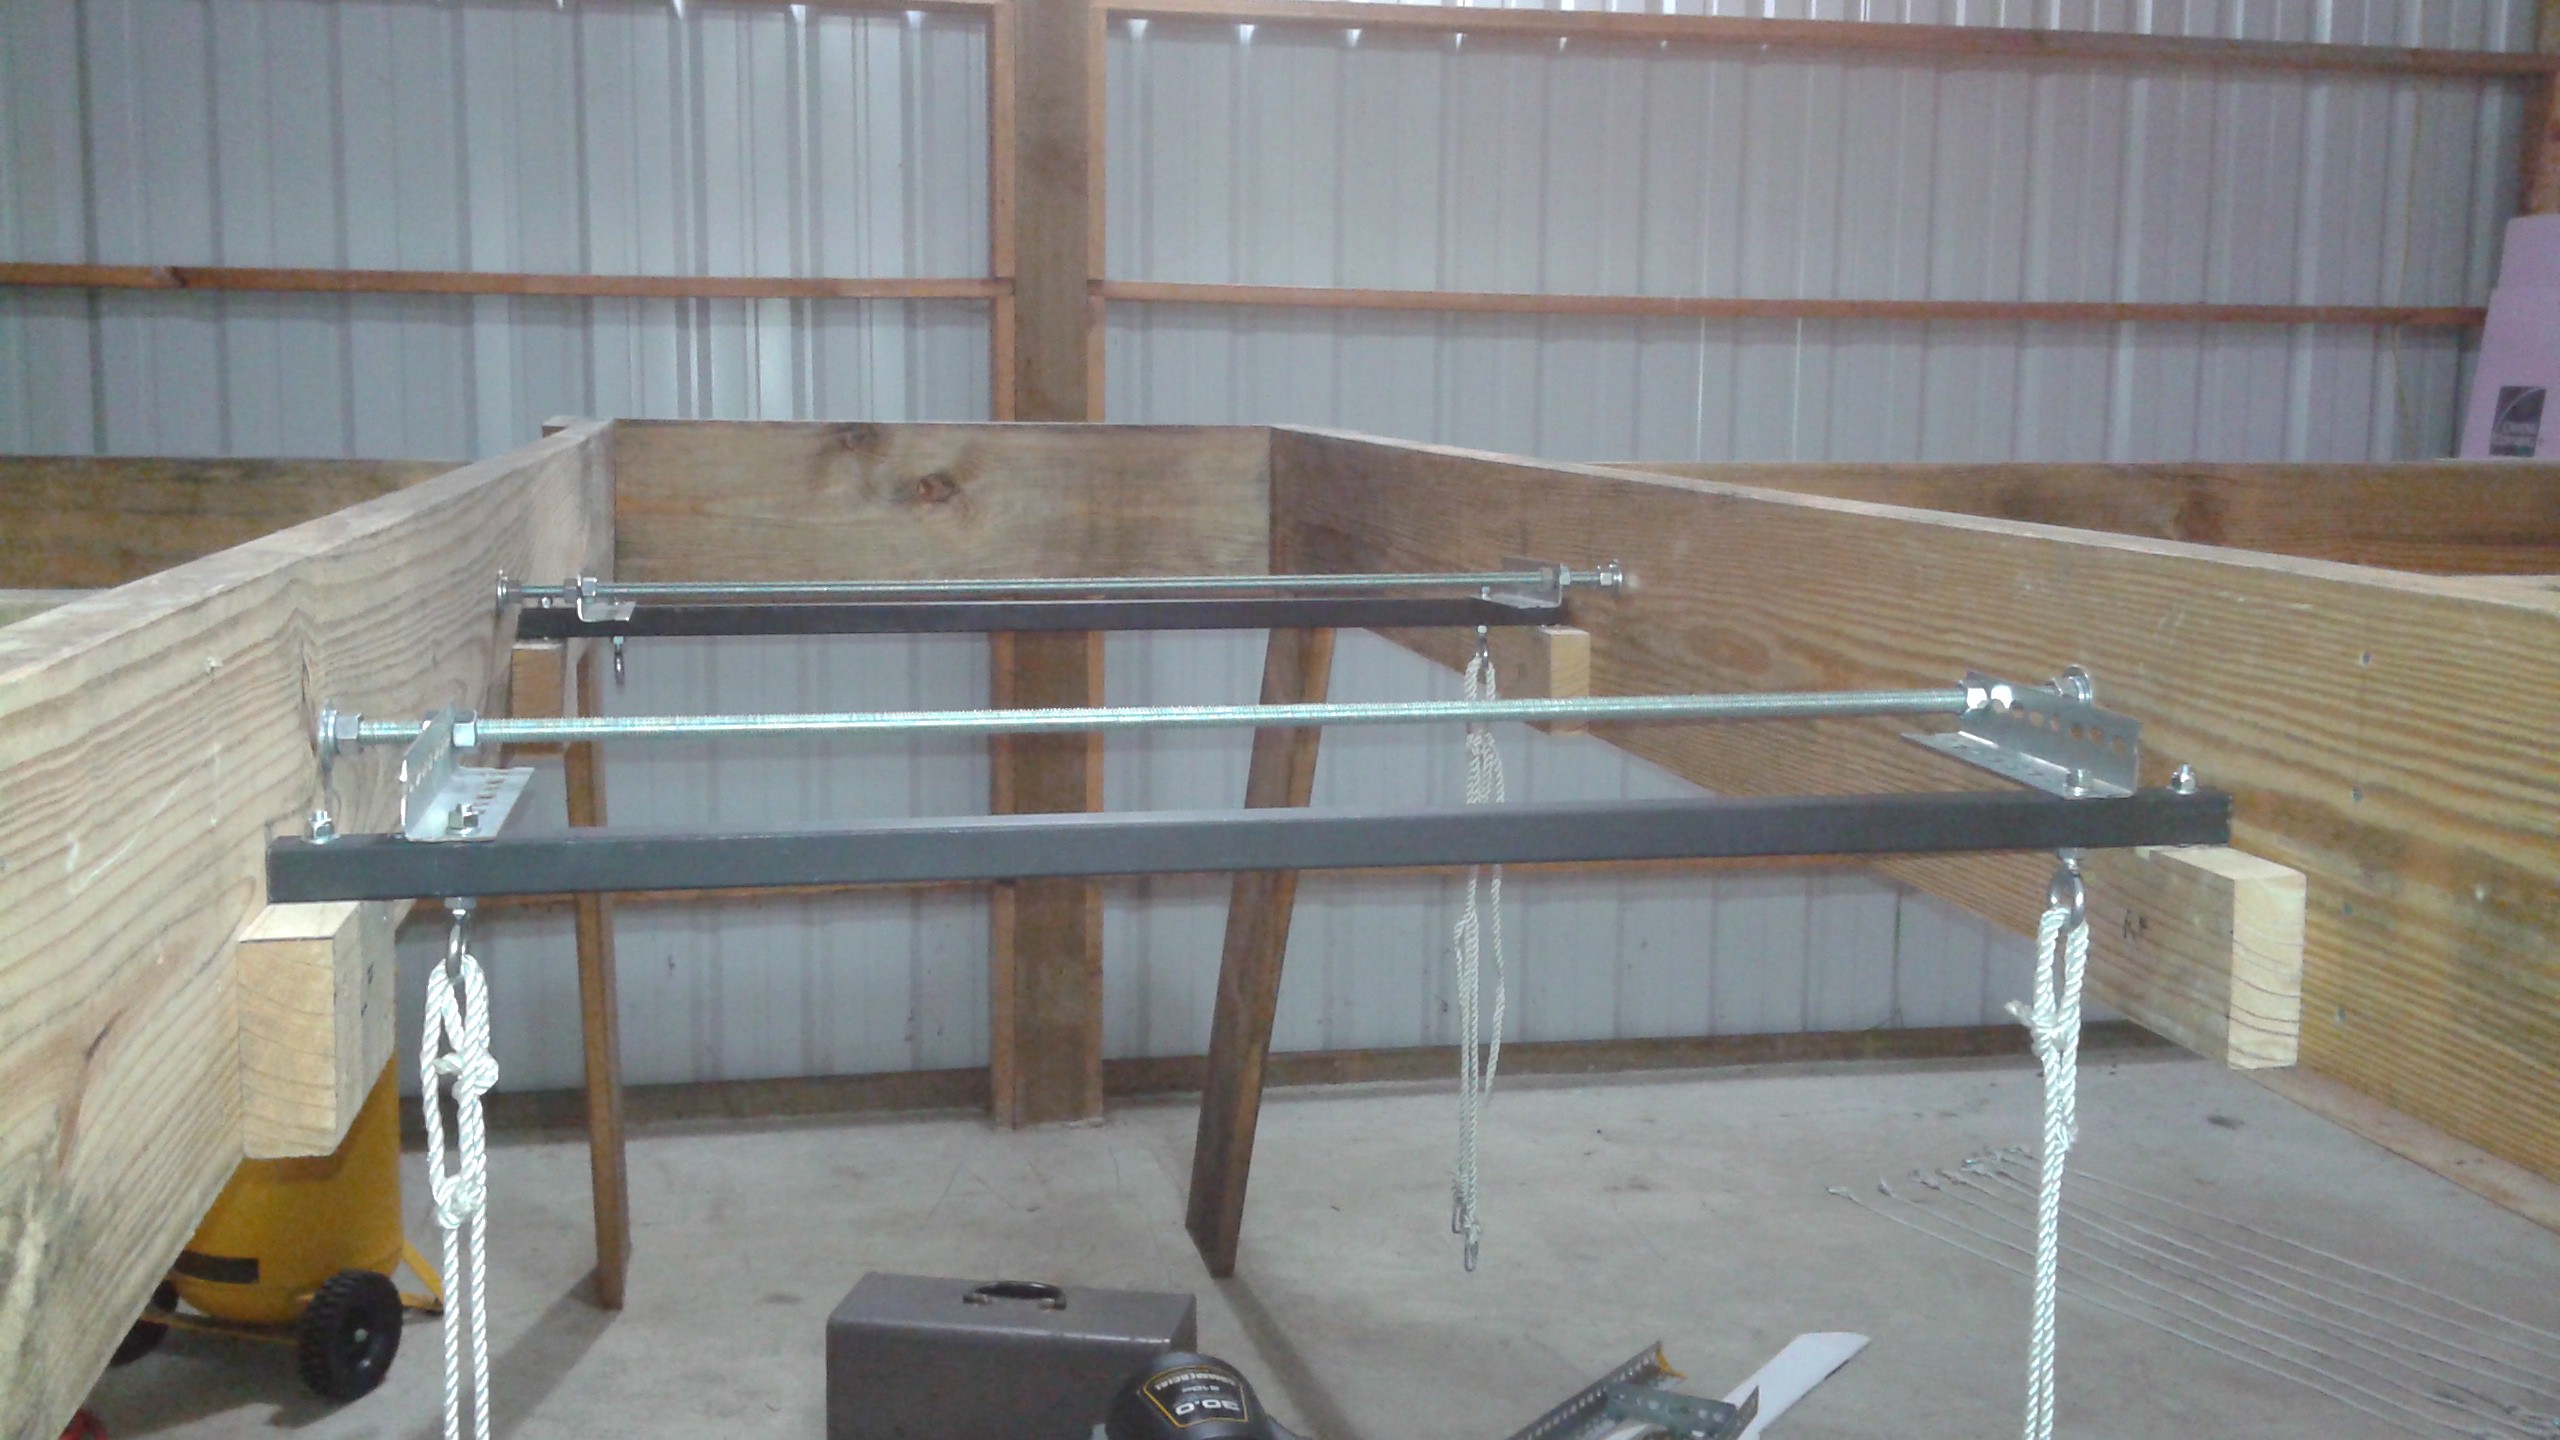
Support Bars

The support bars is where the vehicle is attached and transfers the weight of the quadcopter onto the load cells.
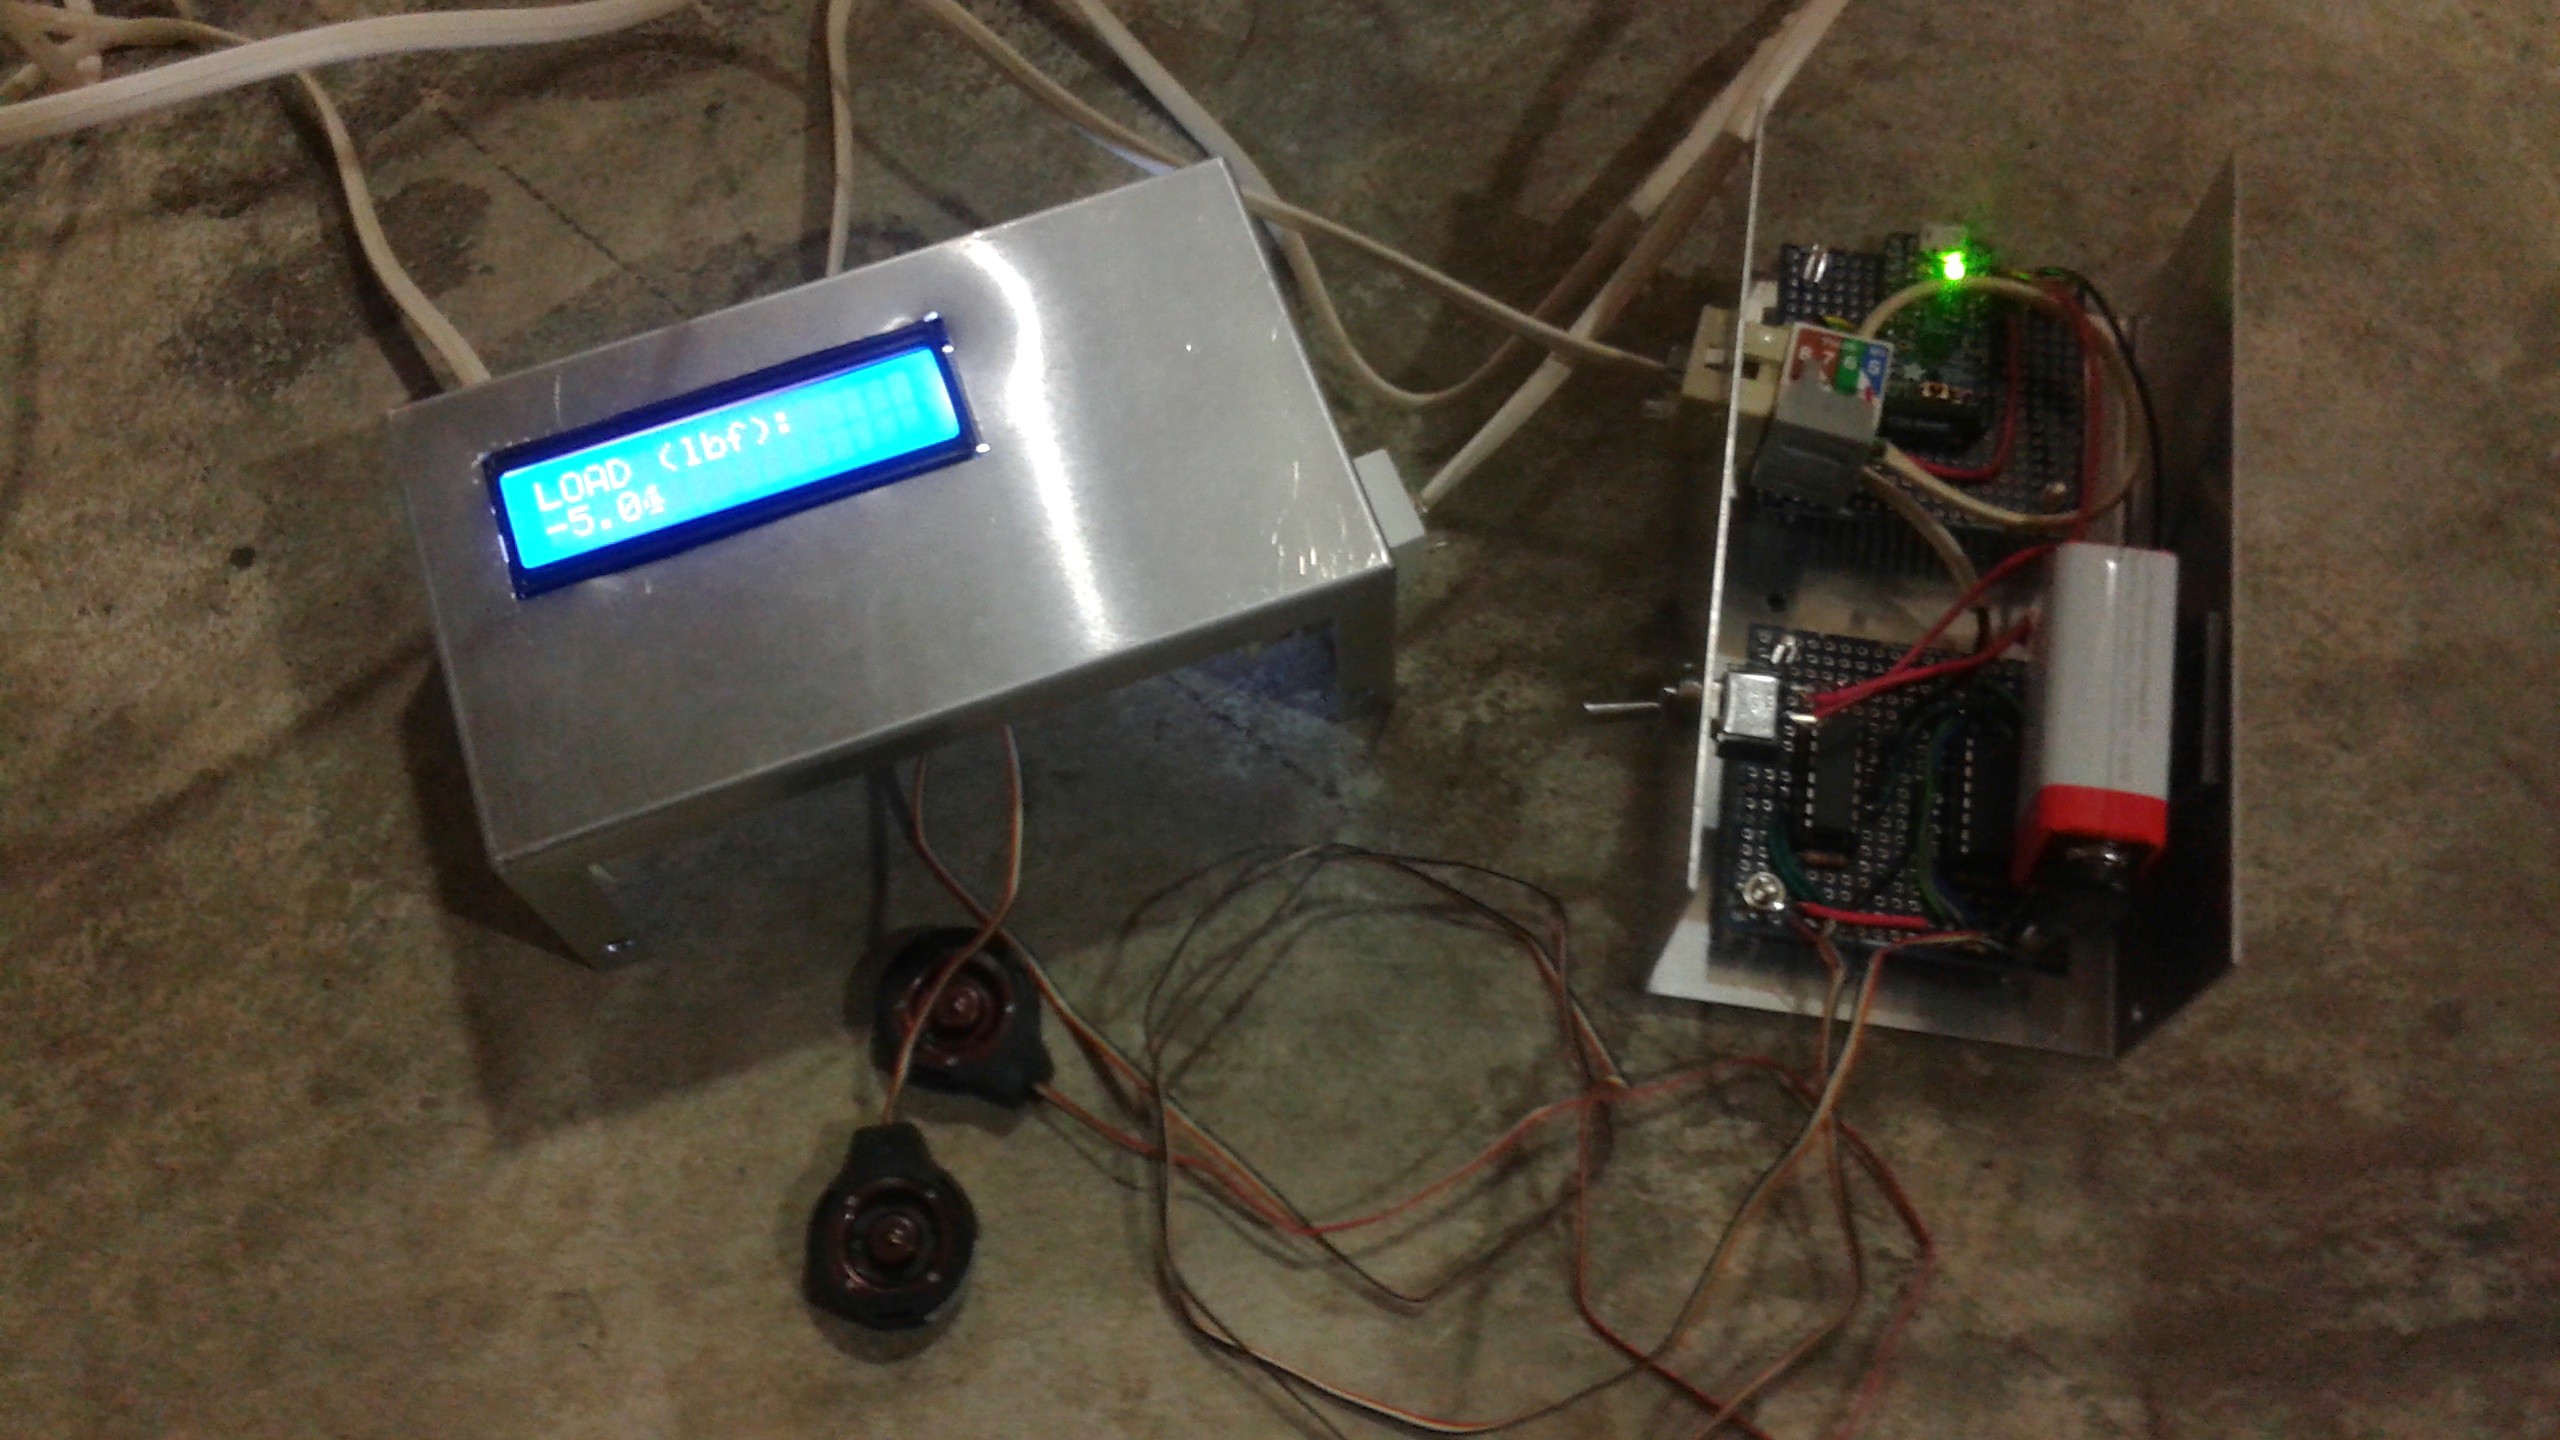
Electronics

The electronics measure the static weight of the vehicle and the thrust during the test. A 5V Trinket Pro is the microprocessor at the heart of the electronics.
Code

The Trinket Pro was programmed using the Arduino IDE

/*
 Test Stand Load Measurement Code
*/

// include the library code:
#include "Wire.h"
#include "LiquidCrystal.h"

// Connect via i2c, default address #0 (A0-A2 not jumpered)
LiquidCrystal lcd(0);

long time = 0;
int interval = 100;

// Load Cell
float fs_voltage = 0;

float loadcell_A = 0;
float loadcell_B = 0;
float loadcell_C = 0;
float loadcell_D = 0;
float loadcell_all = 0;
float total_load = 0;

float load_1 = 0;
float load_2 = 0;
float load_3 = 0;
float load_4 = 0;
float load_5 = 0;
float load_avg = 0;

// Calibration Data
float A_reading = 62.0;
float A_load = 0.0;
float B_reading = 1706.0;
float B_load = 233.0-4.0; //Scale -Blocks

void setup() {
  long time =0;
  int interval = 500; // Take a reading every 500ms
  
  // Load Cell Calibaration
  // Equation from Datasheet for reading
  //float excitation_voltage = 5; // V
  //float fs_output_span = 20; // mV/V
  //float gain = 64; //Amplifier Gain
  //fs_voltage = excitation_voltage*fs_output_span*gain;
  
  // set up the LCD's number of rows and columns: 
  lcd.begin(16, 2);
  // Print a message to the LCD.
  lcd.print("LOAD (lbf):");
  lcd.setBacklight(HIGH);
}


void loop() {
  if(millis() > time + interval) {
    // Read all Load Cells
    loadcell_A = analogRead(0);
    loadcell_B = analogRead(1);
    loadcell_C = 0;
    loadcell_D = 0;
    loadcell_all = loadcell_A + loadcell_B + loadcell_C + loadcell_D;
    total_load = ((B_load - A_load)/(B_reading-A_reading))*(loadcell_all-A_reading) + A_load; // lbf
    
    // Average Readings
    load_5 = load_4;
    load_4 = load_3;
    load_3 = load_2;
    load_2 = load_1;
    load_1 = total_load;
    
    load_avg = (load_1 + load_2 + load_3 + load_4 + load_5)/5;
    
    // set the cursor to column 0, line 1
    // (note: line 1 is the second row, since counting begins with 0):
    lcd.setCursor(0, 1);
    // print the total load:
    lcd.print(load_avg);
    time = millis();
  }
}

  • 1 × Trinket Pro (Adafruit) Arduino Based Microcontroller
  • 1 × LCD Display, 16x2 (Adafruit) 16x2 LCD Display
  • 1 × I2C/SPI LCD Backpack (Adafruit) LCD Backpack to control the display over I2C
  • 4 × Load Cell ( FX1901-0001-100L ) Measurement Specialties FX1901 Load Cell. Measurement Range of 0-100 lbf
  • 4 × Instrumentation Amplifier ( INA125P ) Burr-Brown Instrumentation Amplifier INA125P

  • Remote Load Cell Display Complete

    Peter McCloud07/03/2015 at 03:24 0 comments

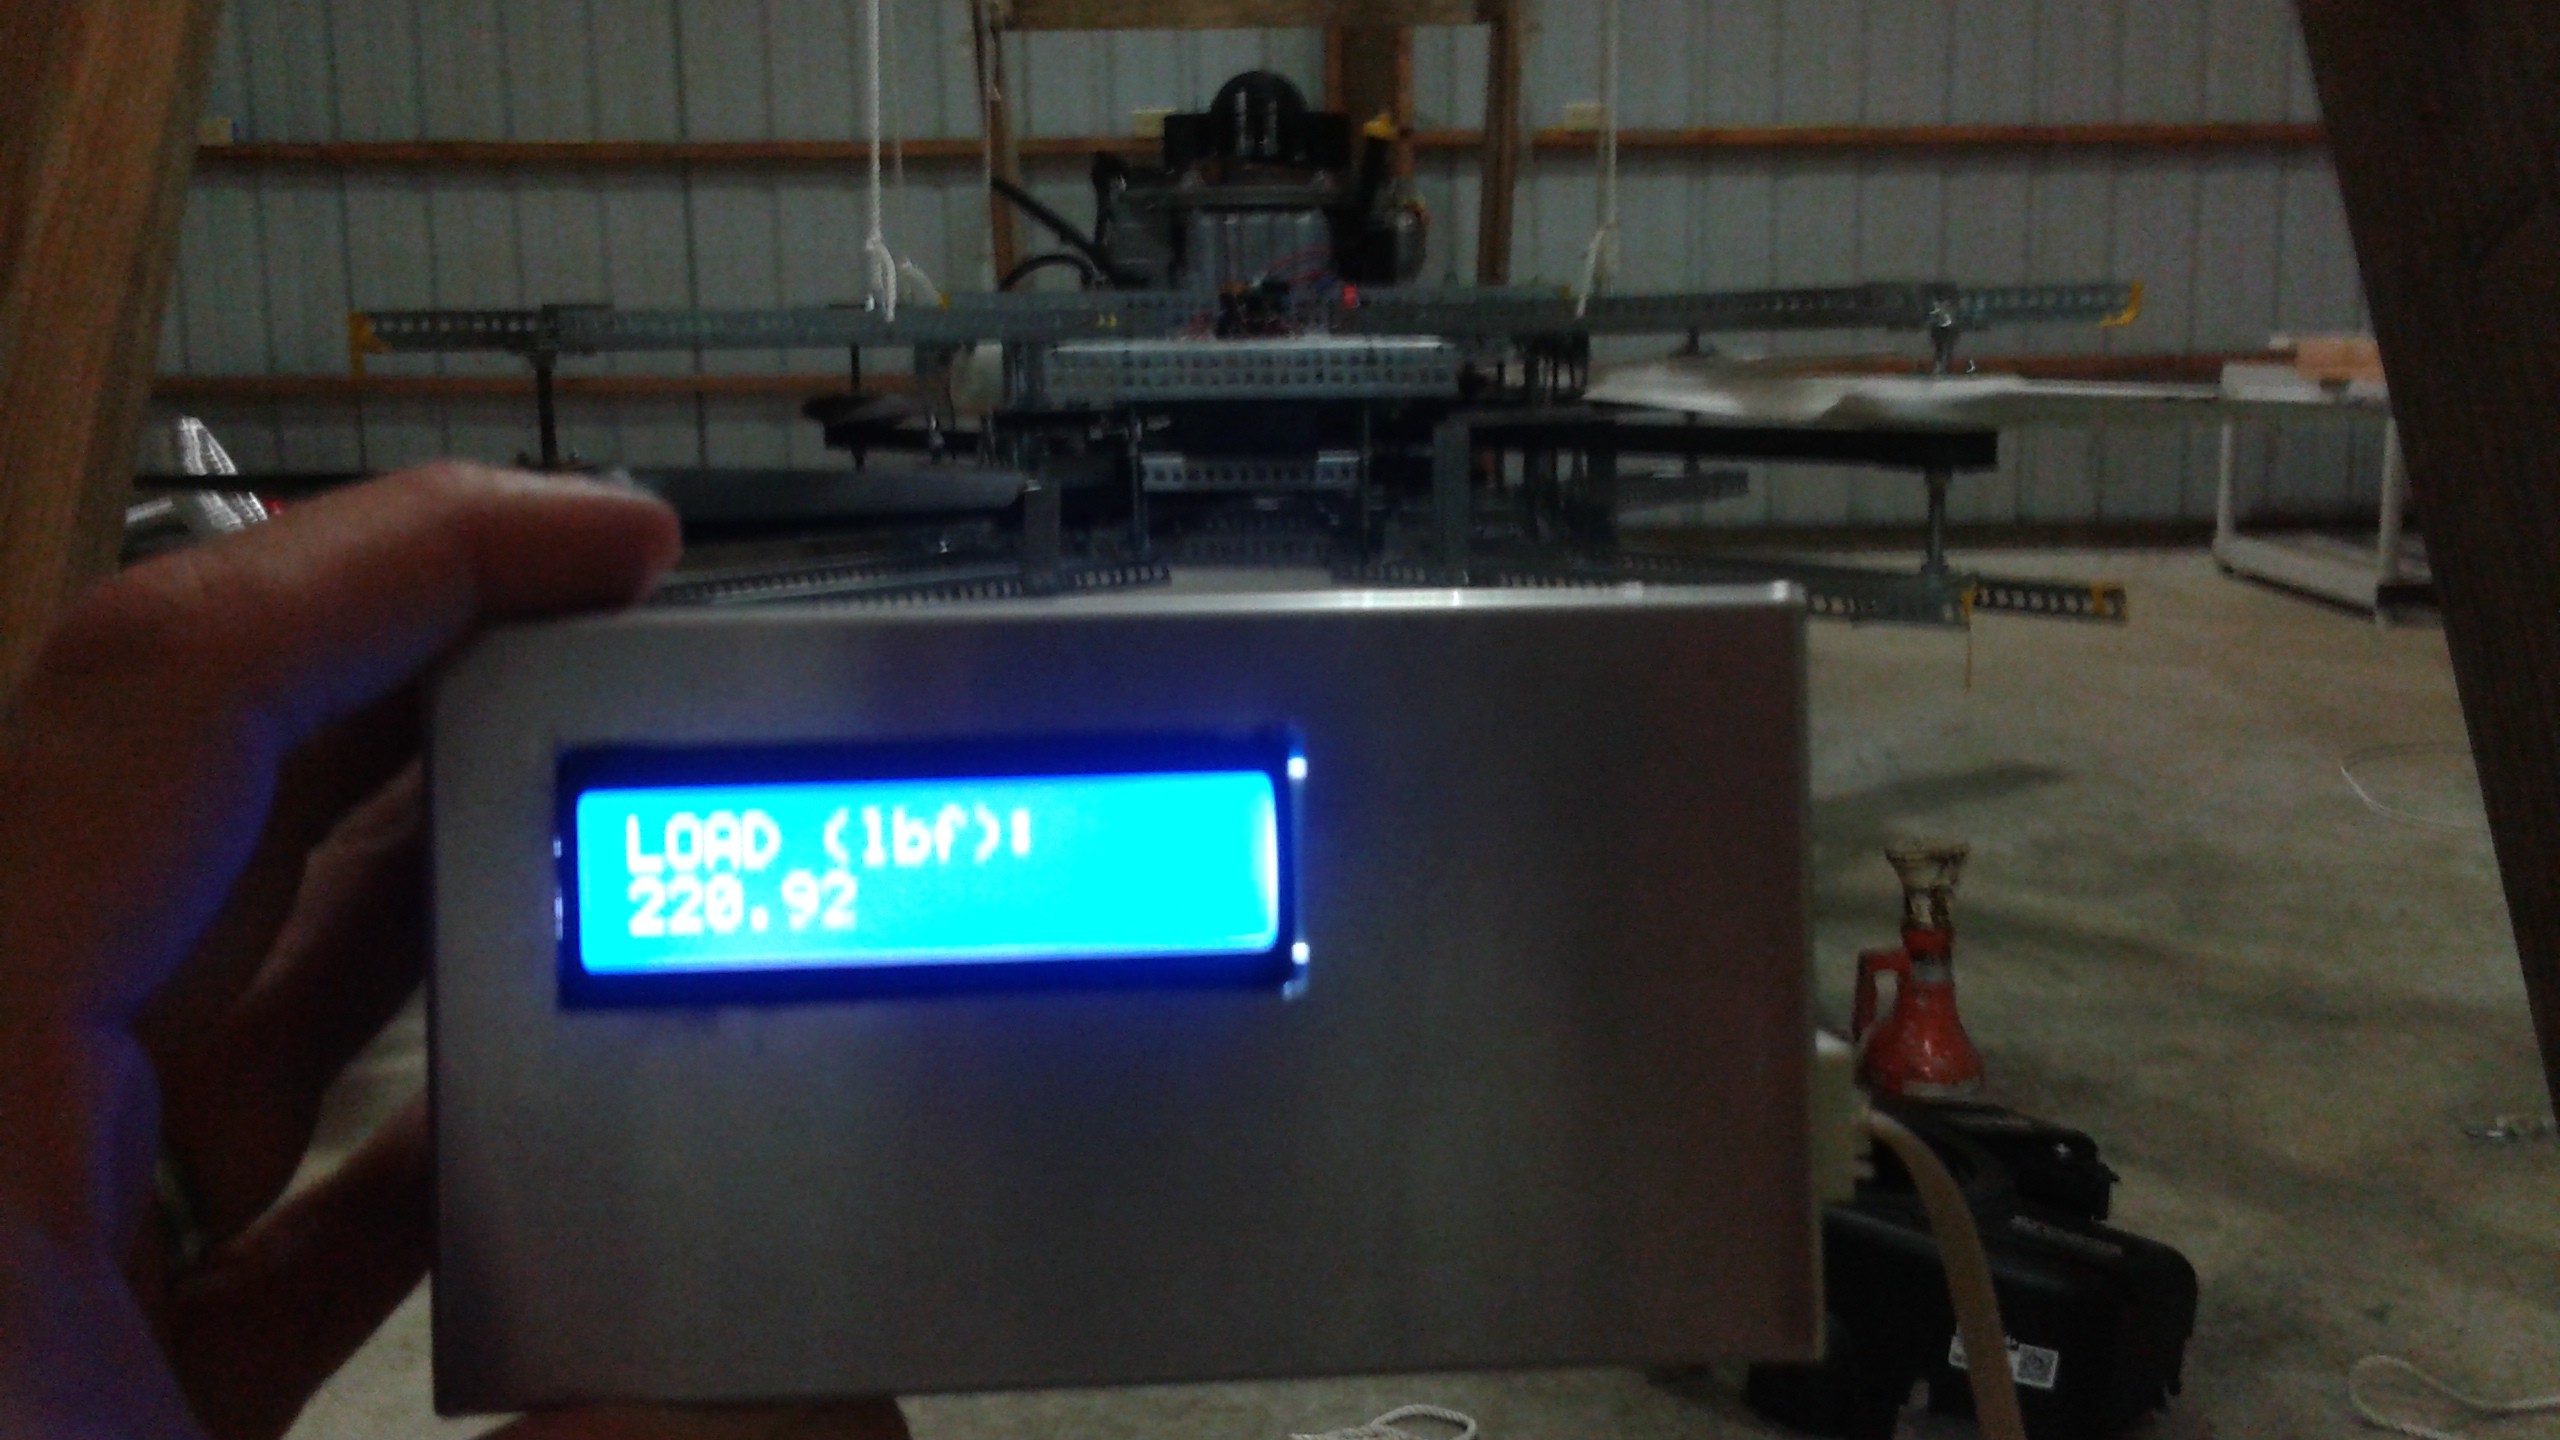
    Previously the prototype electronics for the load cells were connected and calibrated. The electronics were still in the prototype stage and in order to measure the thrust during the test, the display needs to be located remotely from the test stand. The electronics are now ready for testing and the remote display is working.

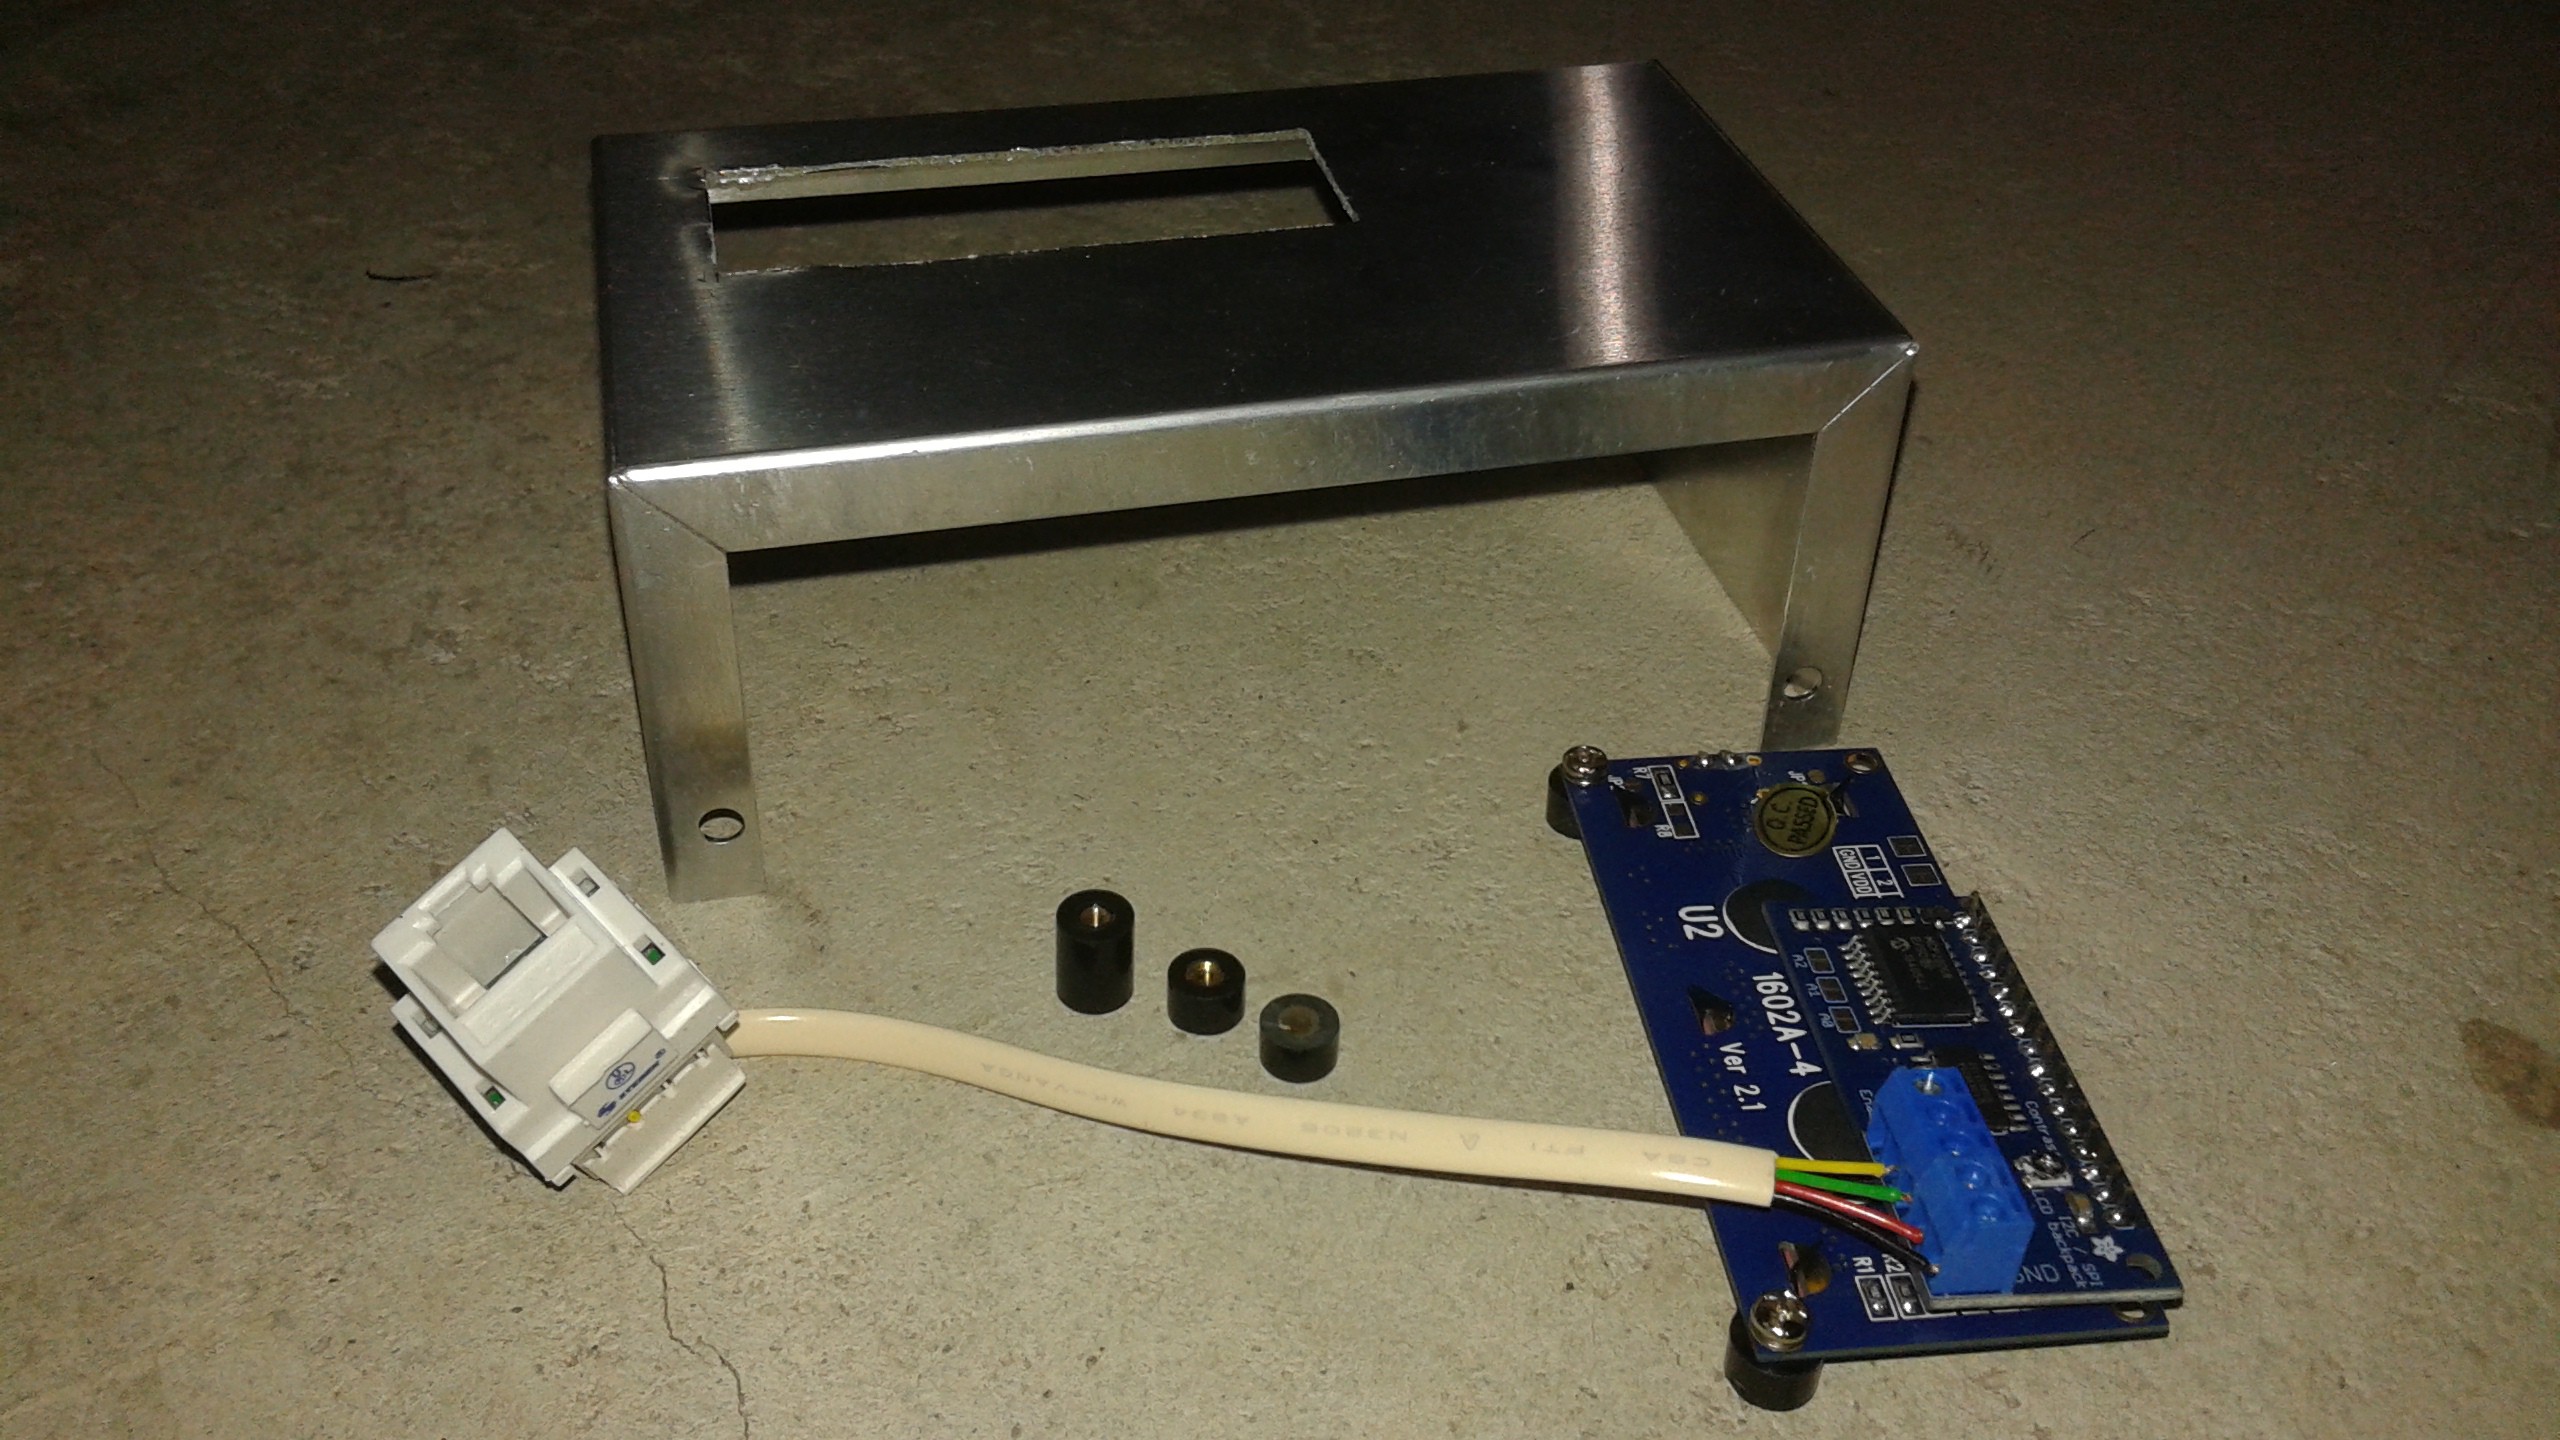
    The first step was putting the electronics into two metal enclosures from RadioShack. The first enclosure was for the display and the second is to contain the Trinket Pro and the instrumentation amplifiers. The display requires 5V, Ground and two lines for the I2C interface with the Trinket Pro. To place the display remotely, each enclosure was fitted with a Cat 5 cable jack and a phone line was used to connect the two. Below is a picture of the display enclosure with the individual components. (enclosure, display, stand offs and Cat 5 jack)

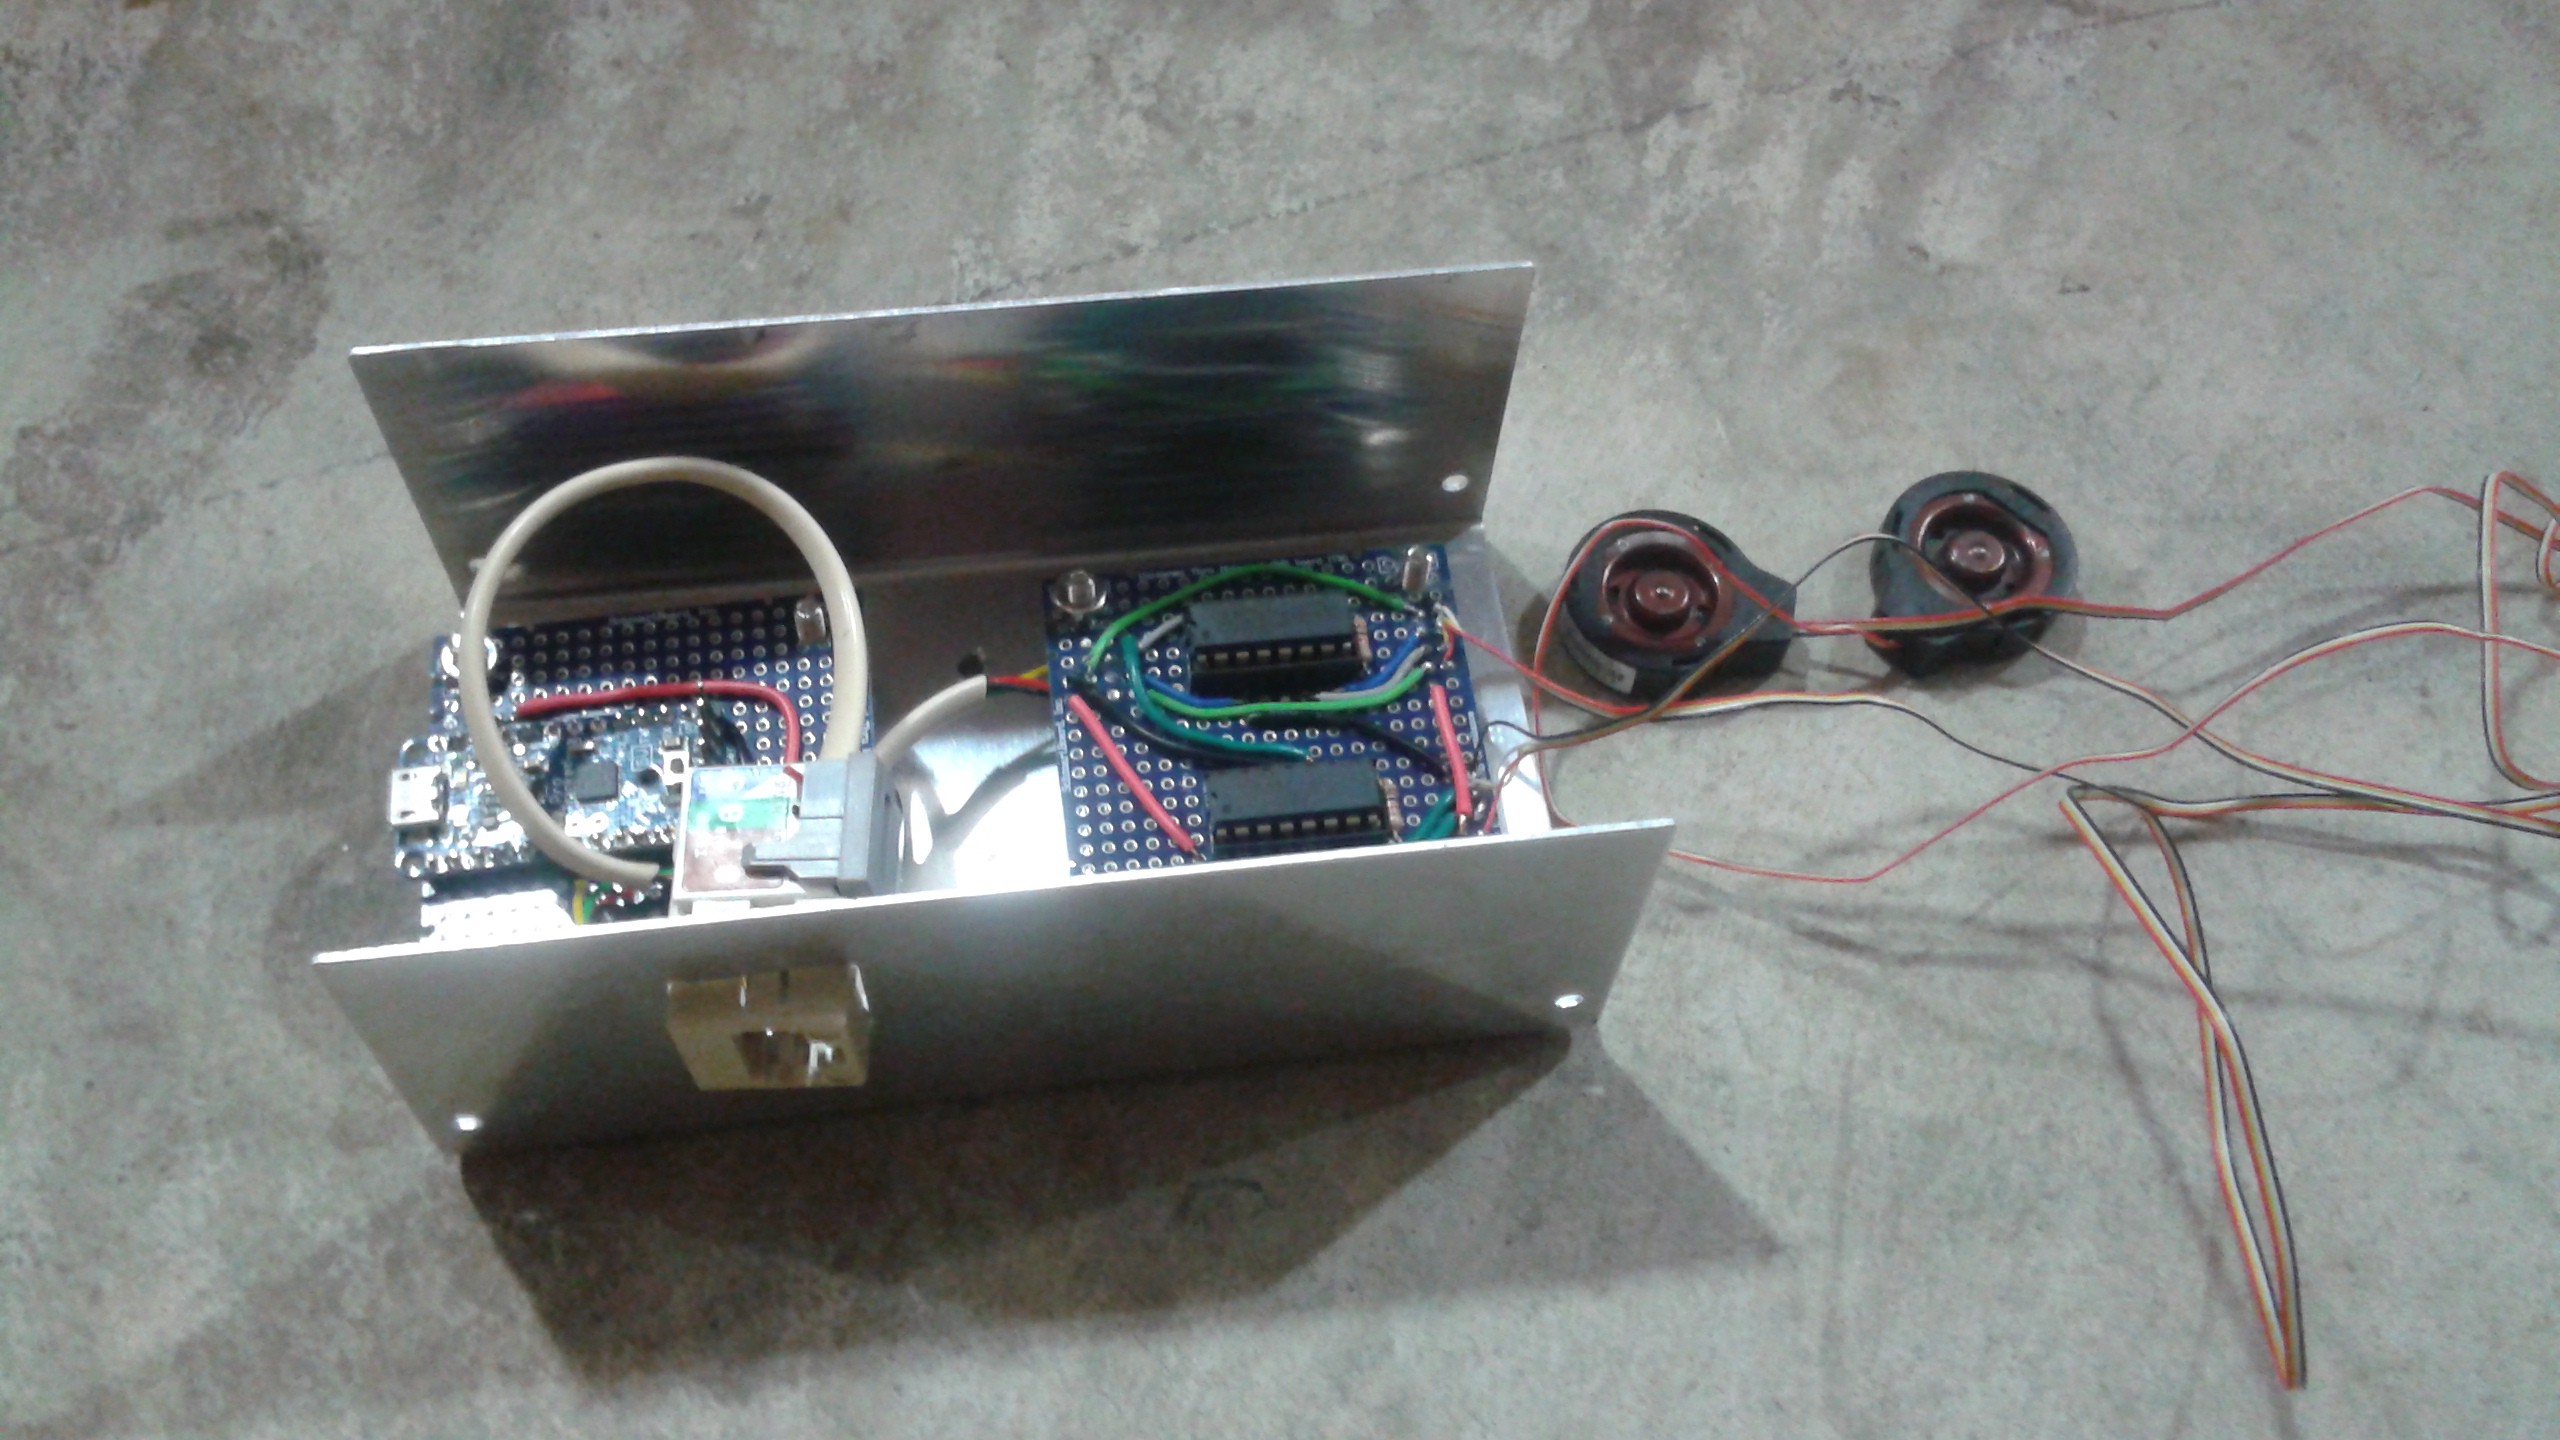
    The rest of the electronics in the second enclosure are shown below (Trinket Pro, Instrumentation Amps, Cat 5 Jack and load cells)

    Here's everything pieced together with the covers off. A 9V battery was added with a switch to provide the power source.

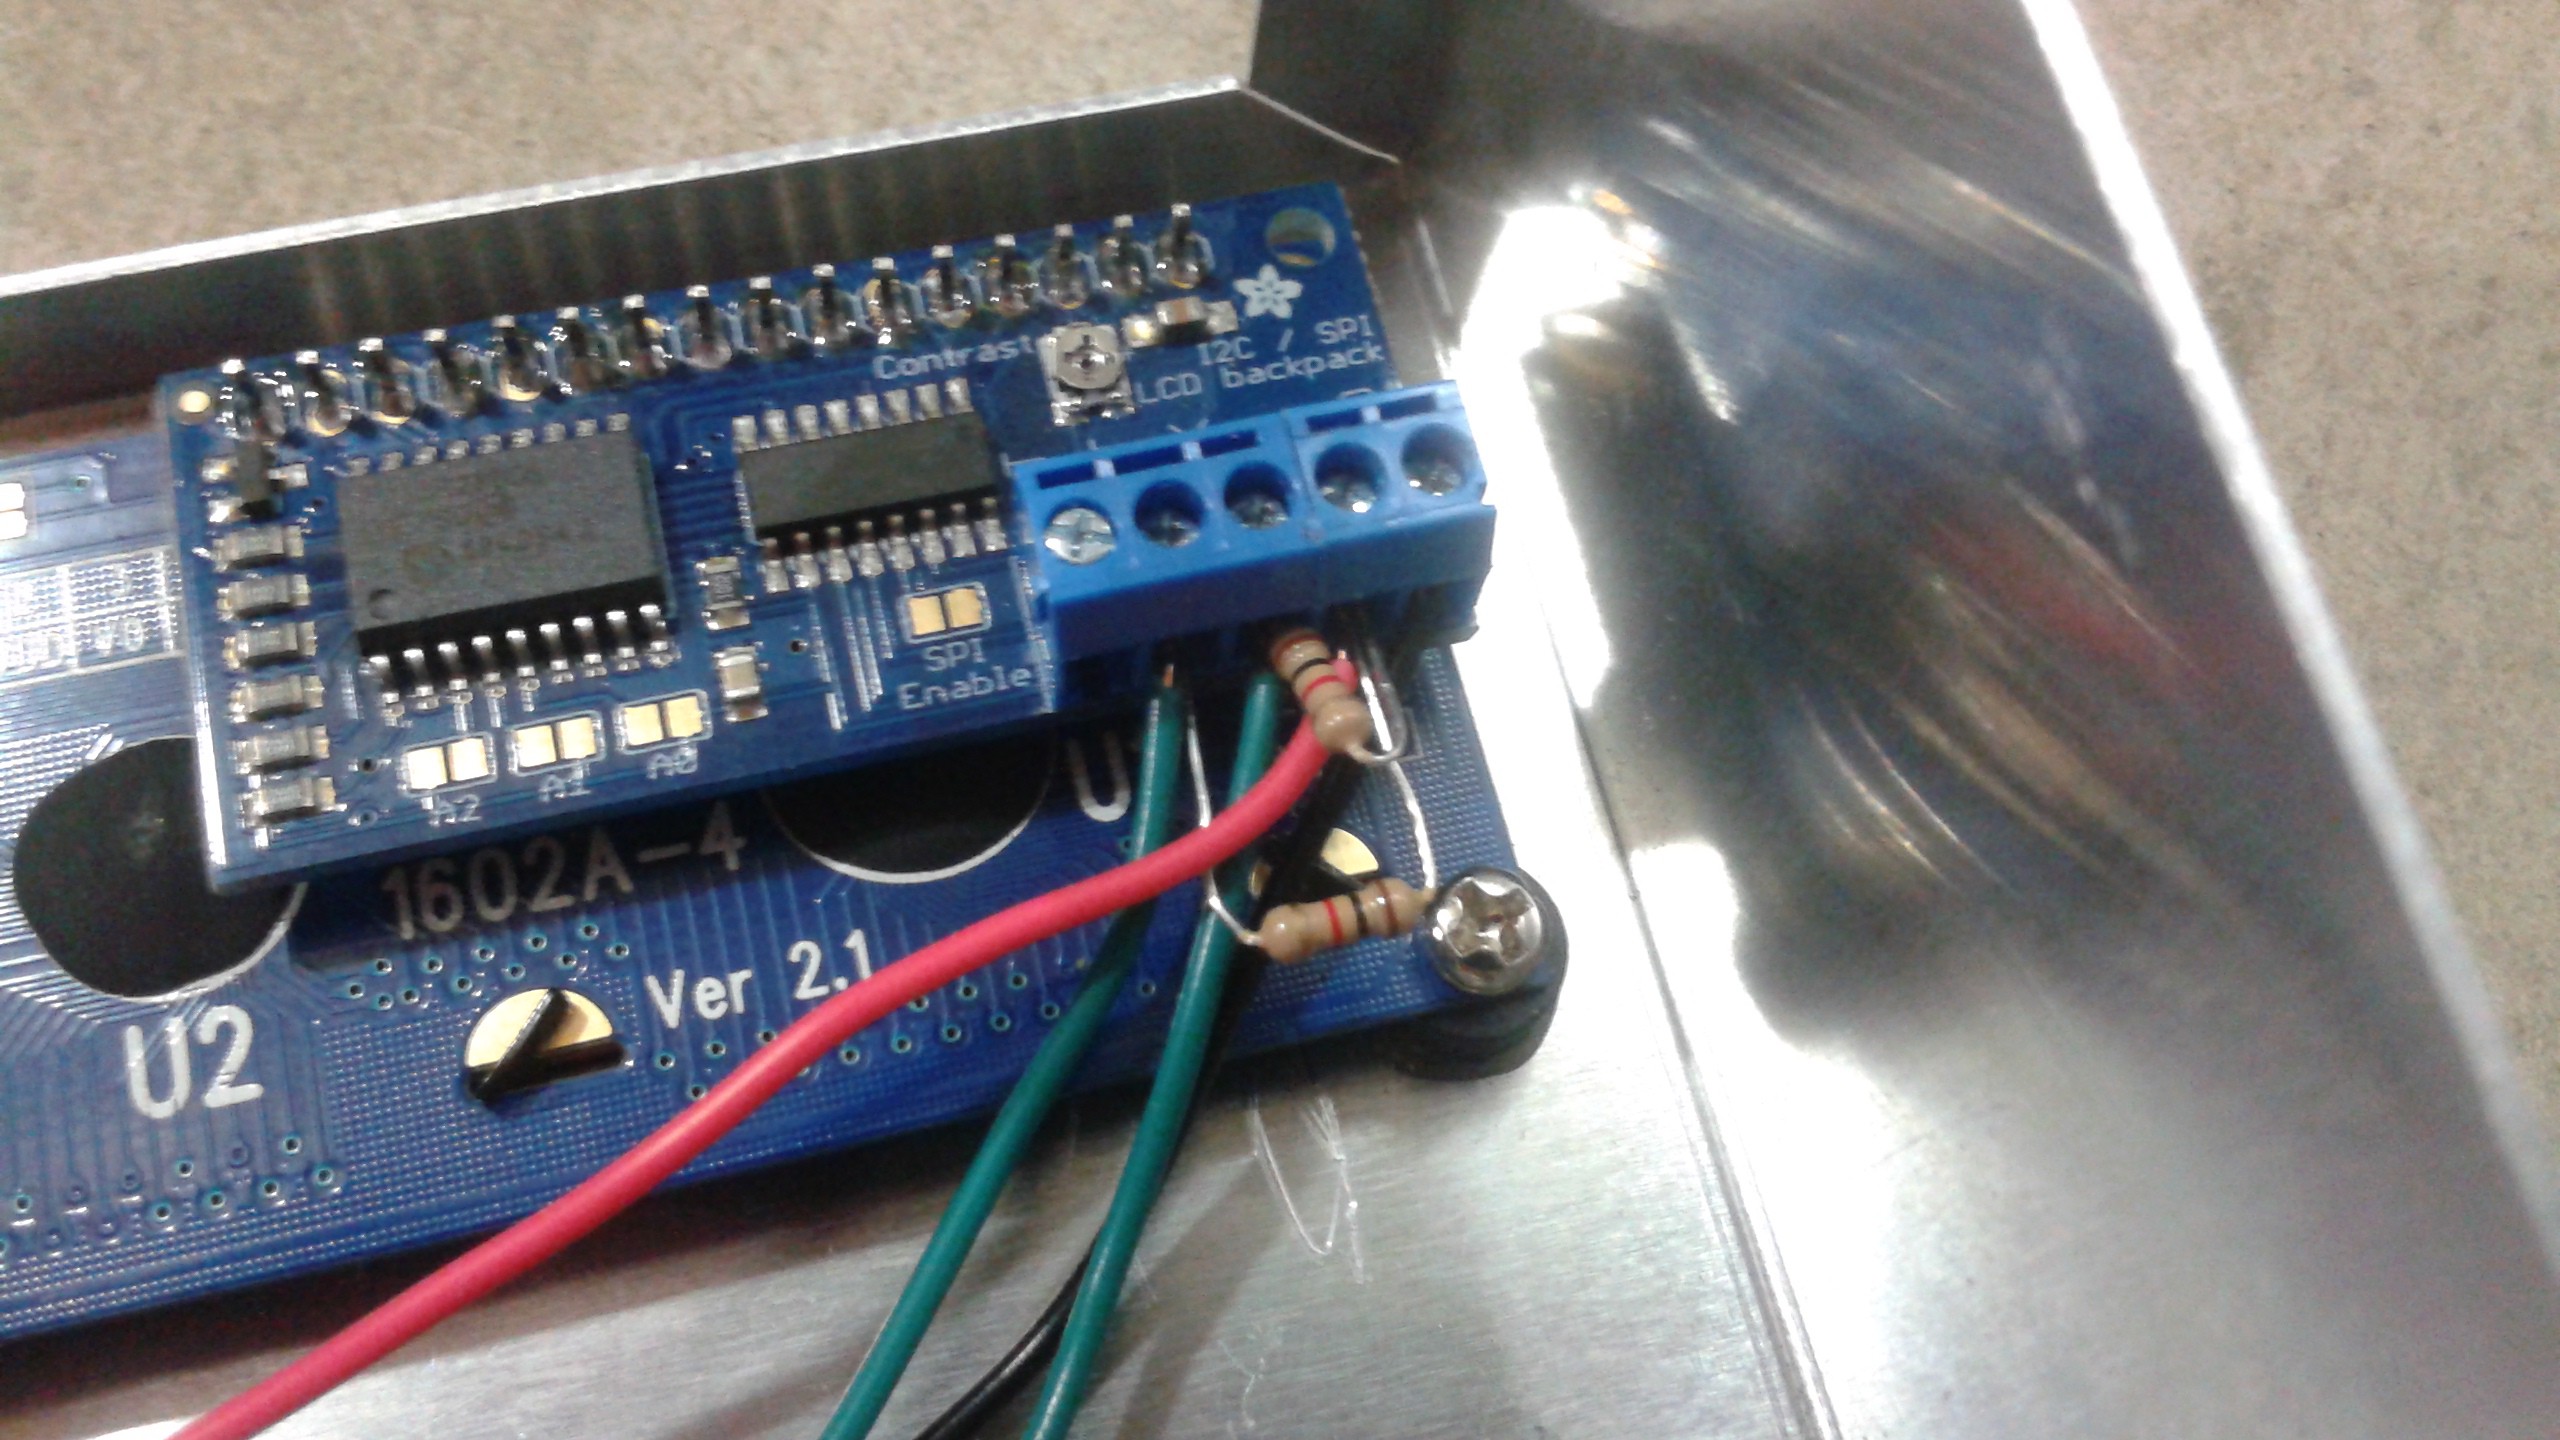
    The only issue was the length of the wire between the two enclosures. After connecting everything for the first time the display was not working. It was getting power and was grounded, so the likely culprit was that the power cord was too long for the I2C to work properly. A google search quickly turned up some suggestions on using pull up resistors between the power and the data lines to get the I2C interface to work. The easiest way to do this was to take two 1k resistors and insert them into the screw terminals on the display connectors (see below).

    After that the display came right up.

    Once Goliath is back together, the load cells will be used for the first time during a test.

  • Load Cells Hooked Up and Calibrated

    Peter McCloud06/25/2015 at 04:38 0 comments

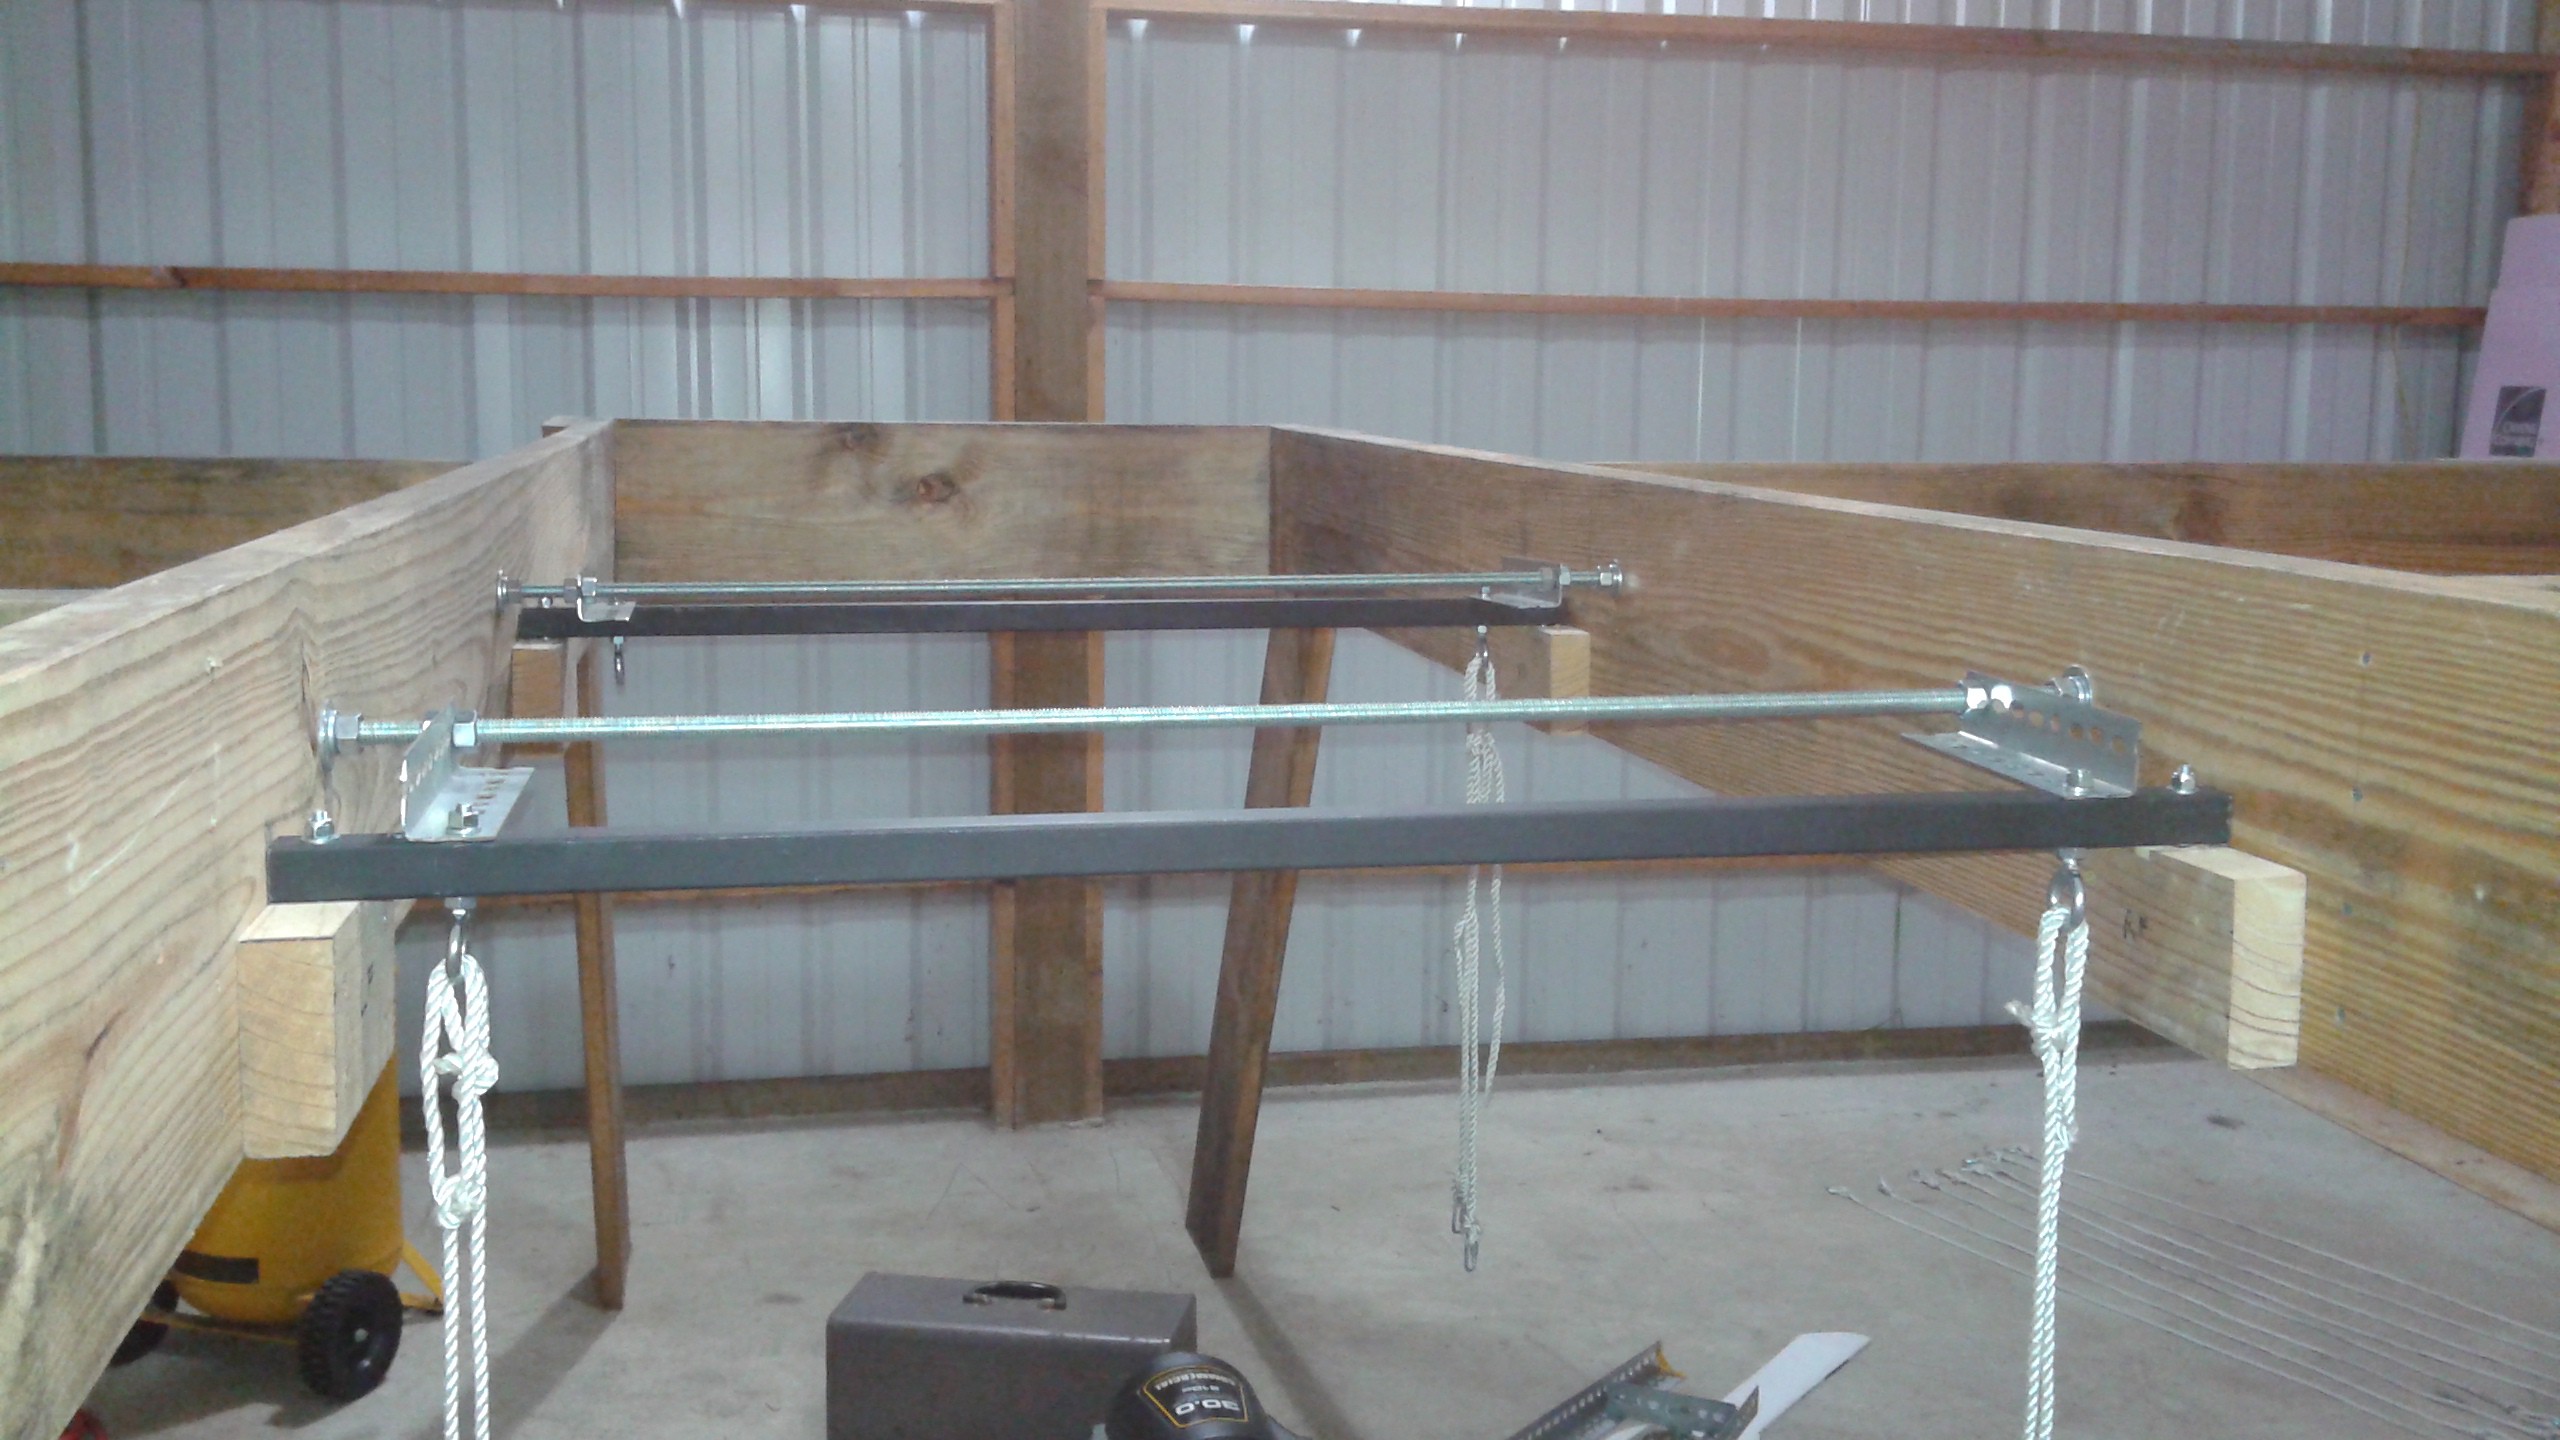
    The weight and thrust measurement portion of the test stand is almost complete. When the test stand was reassembled in the new shop the support bars were completed. The support bars transfer the weight of the quadcopter to the load cells. As described previously, the force needs to be applied to each load cell without any side forces or moments. The support bars are setup to accomplish this.

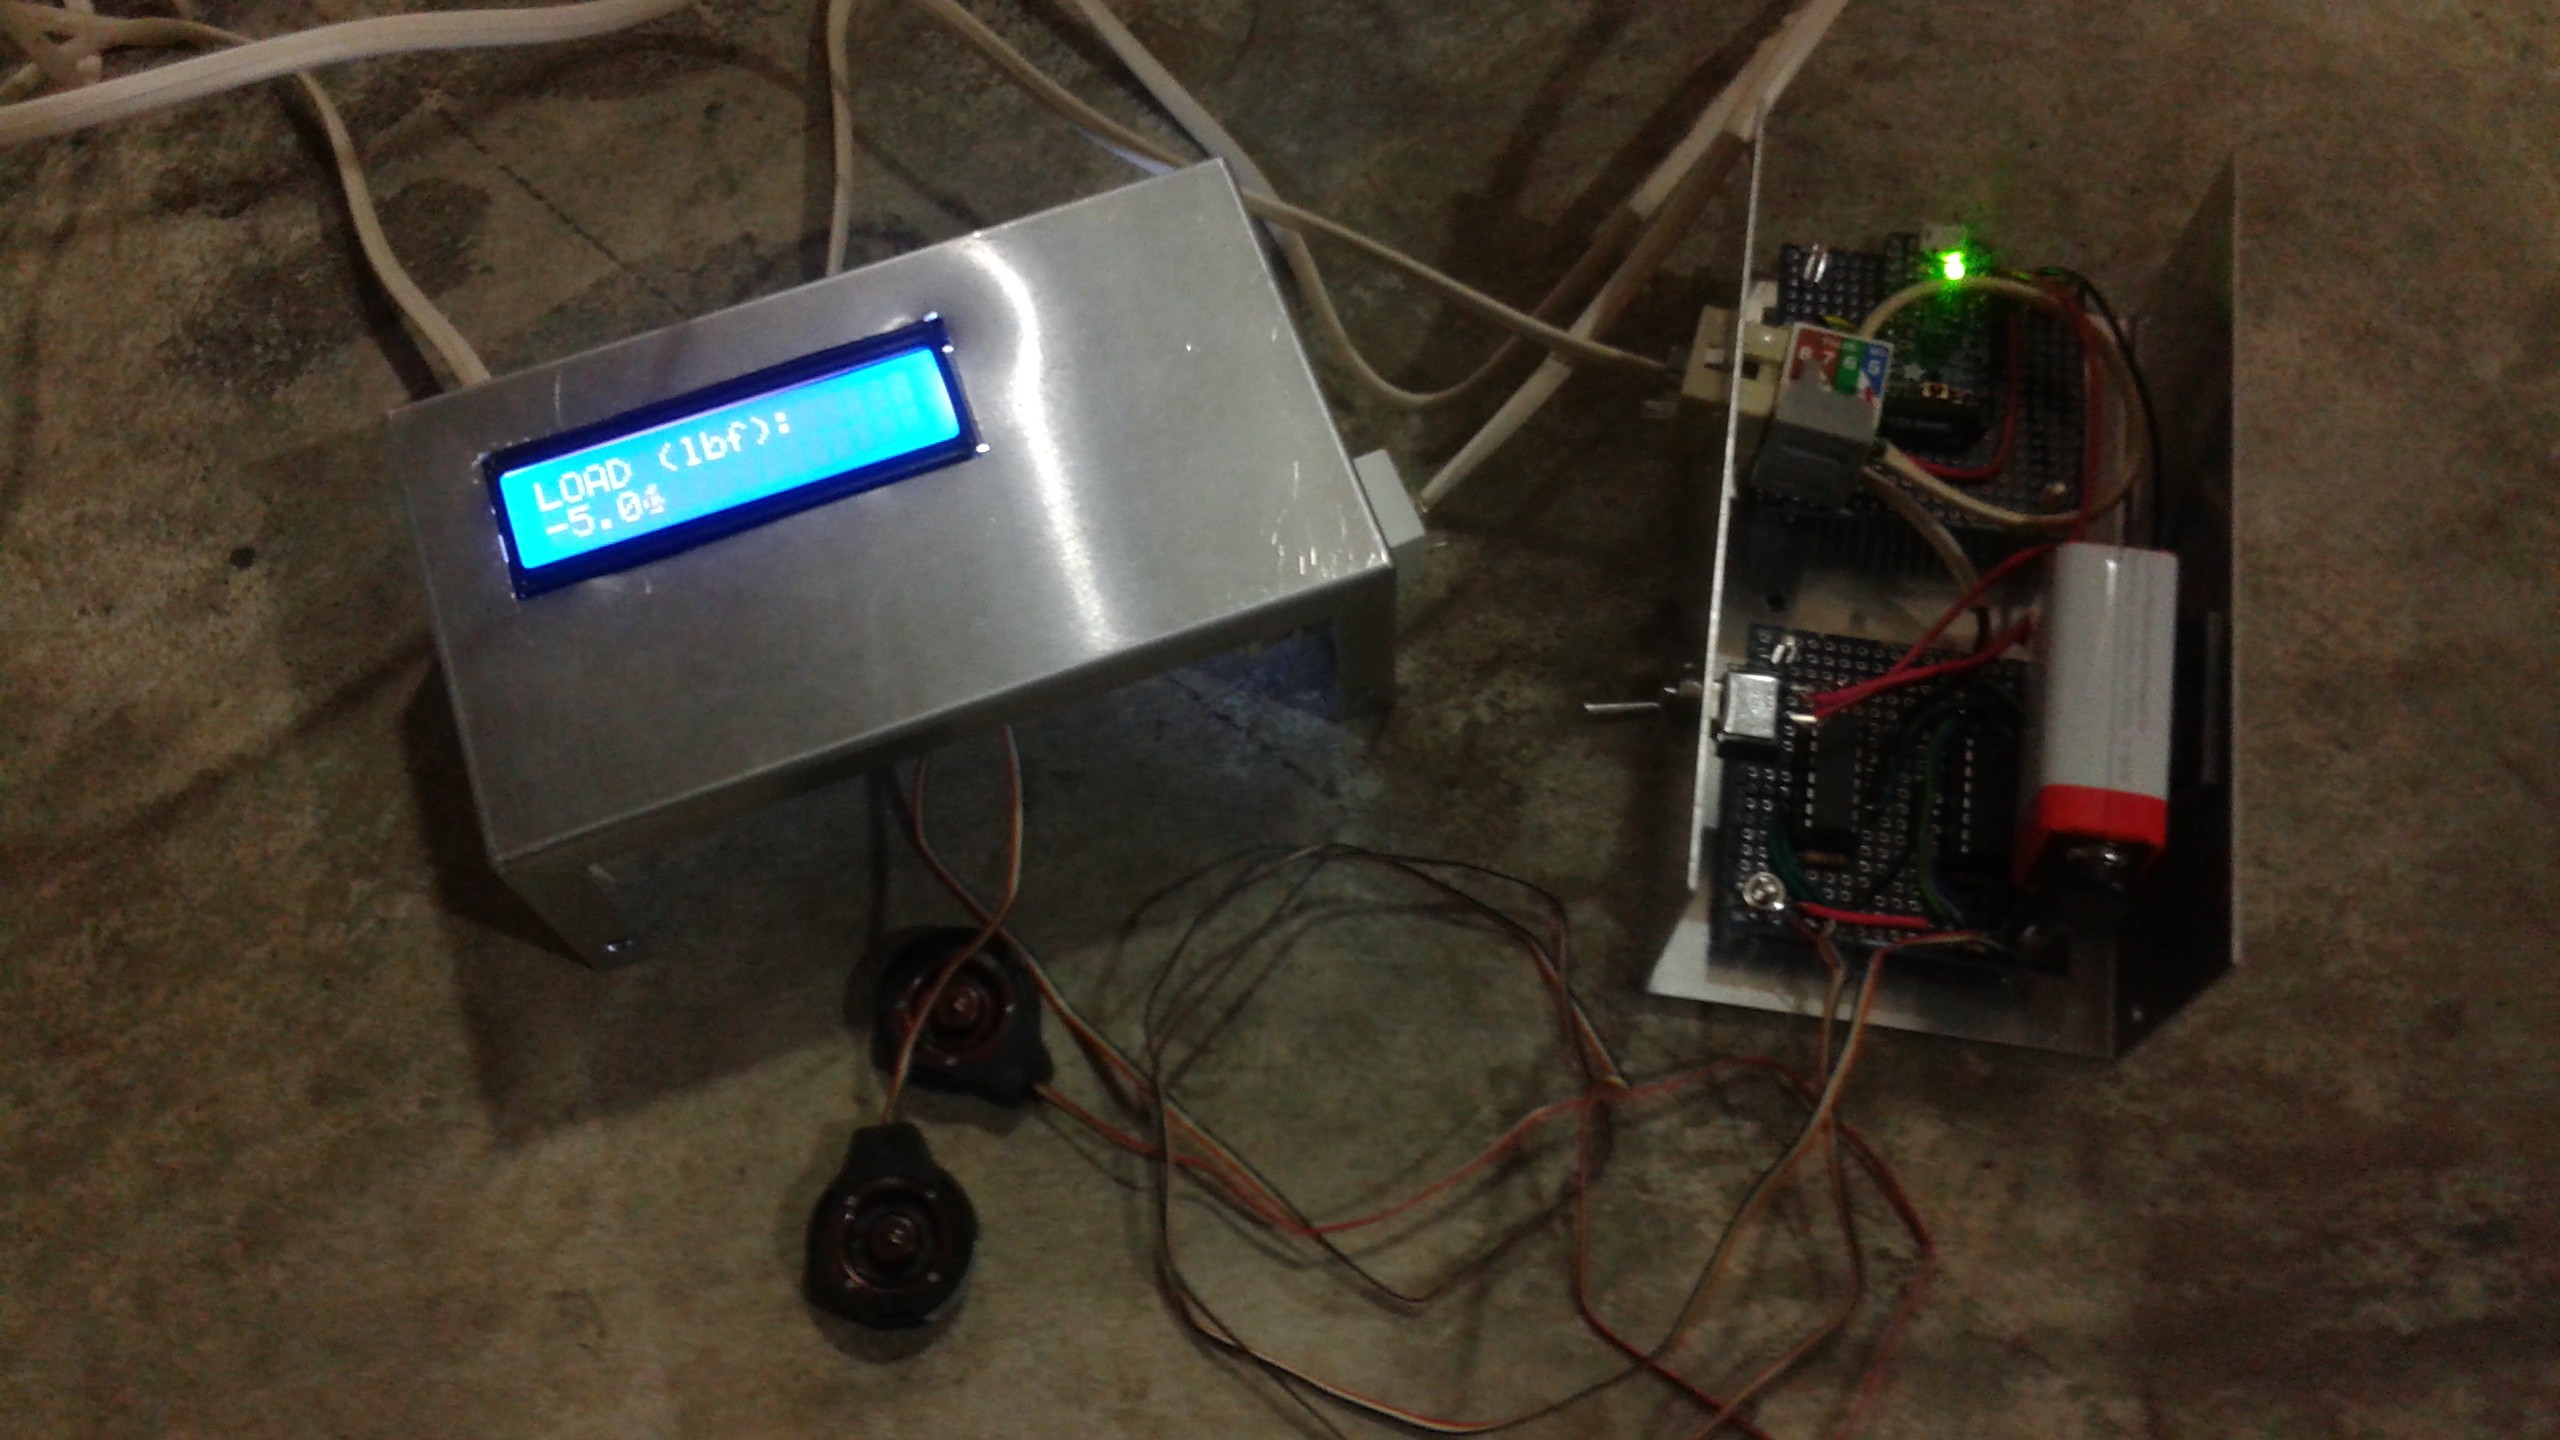
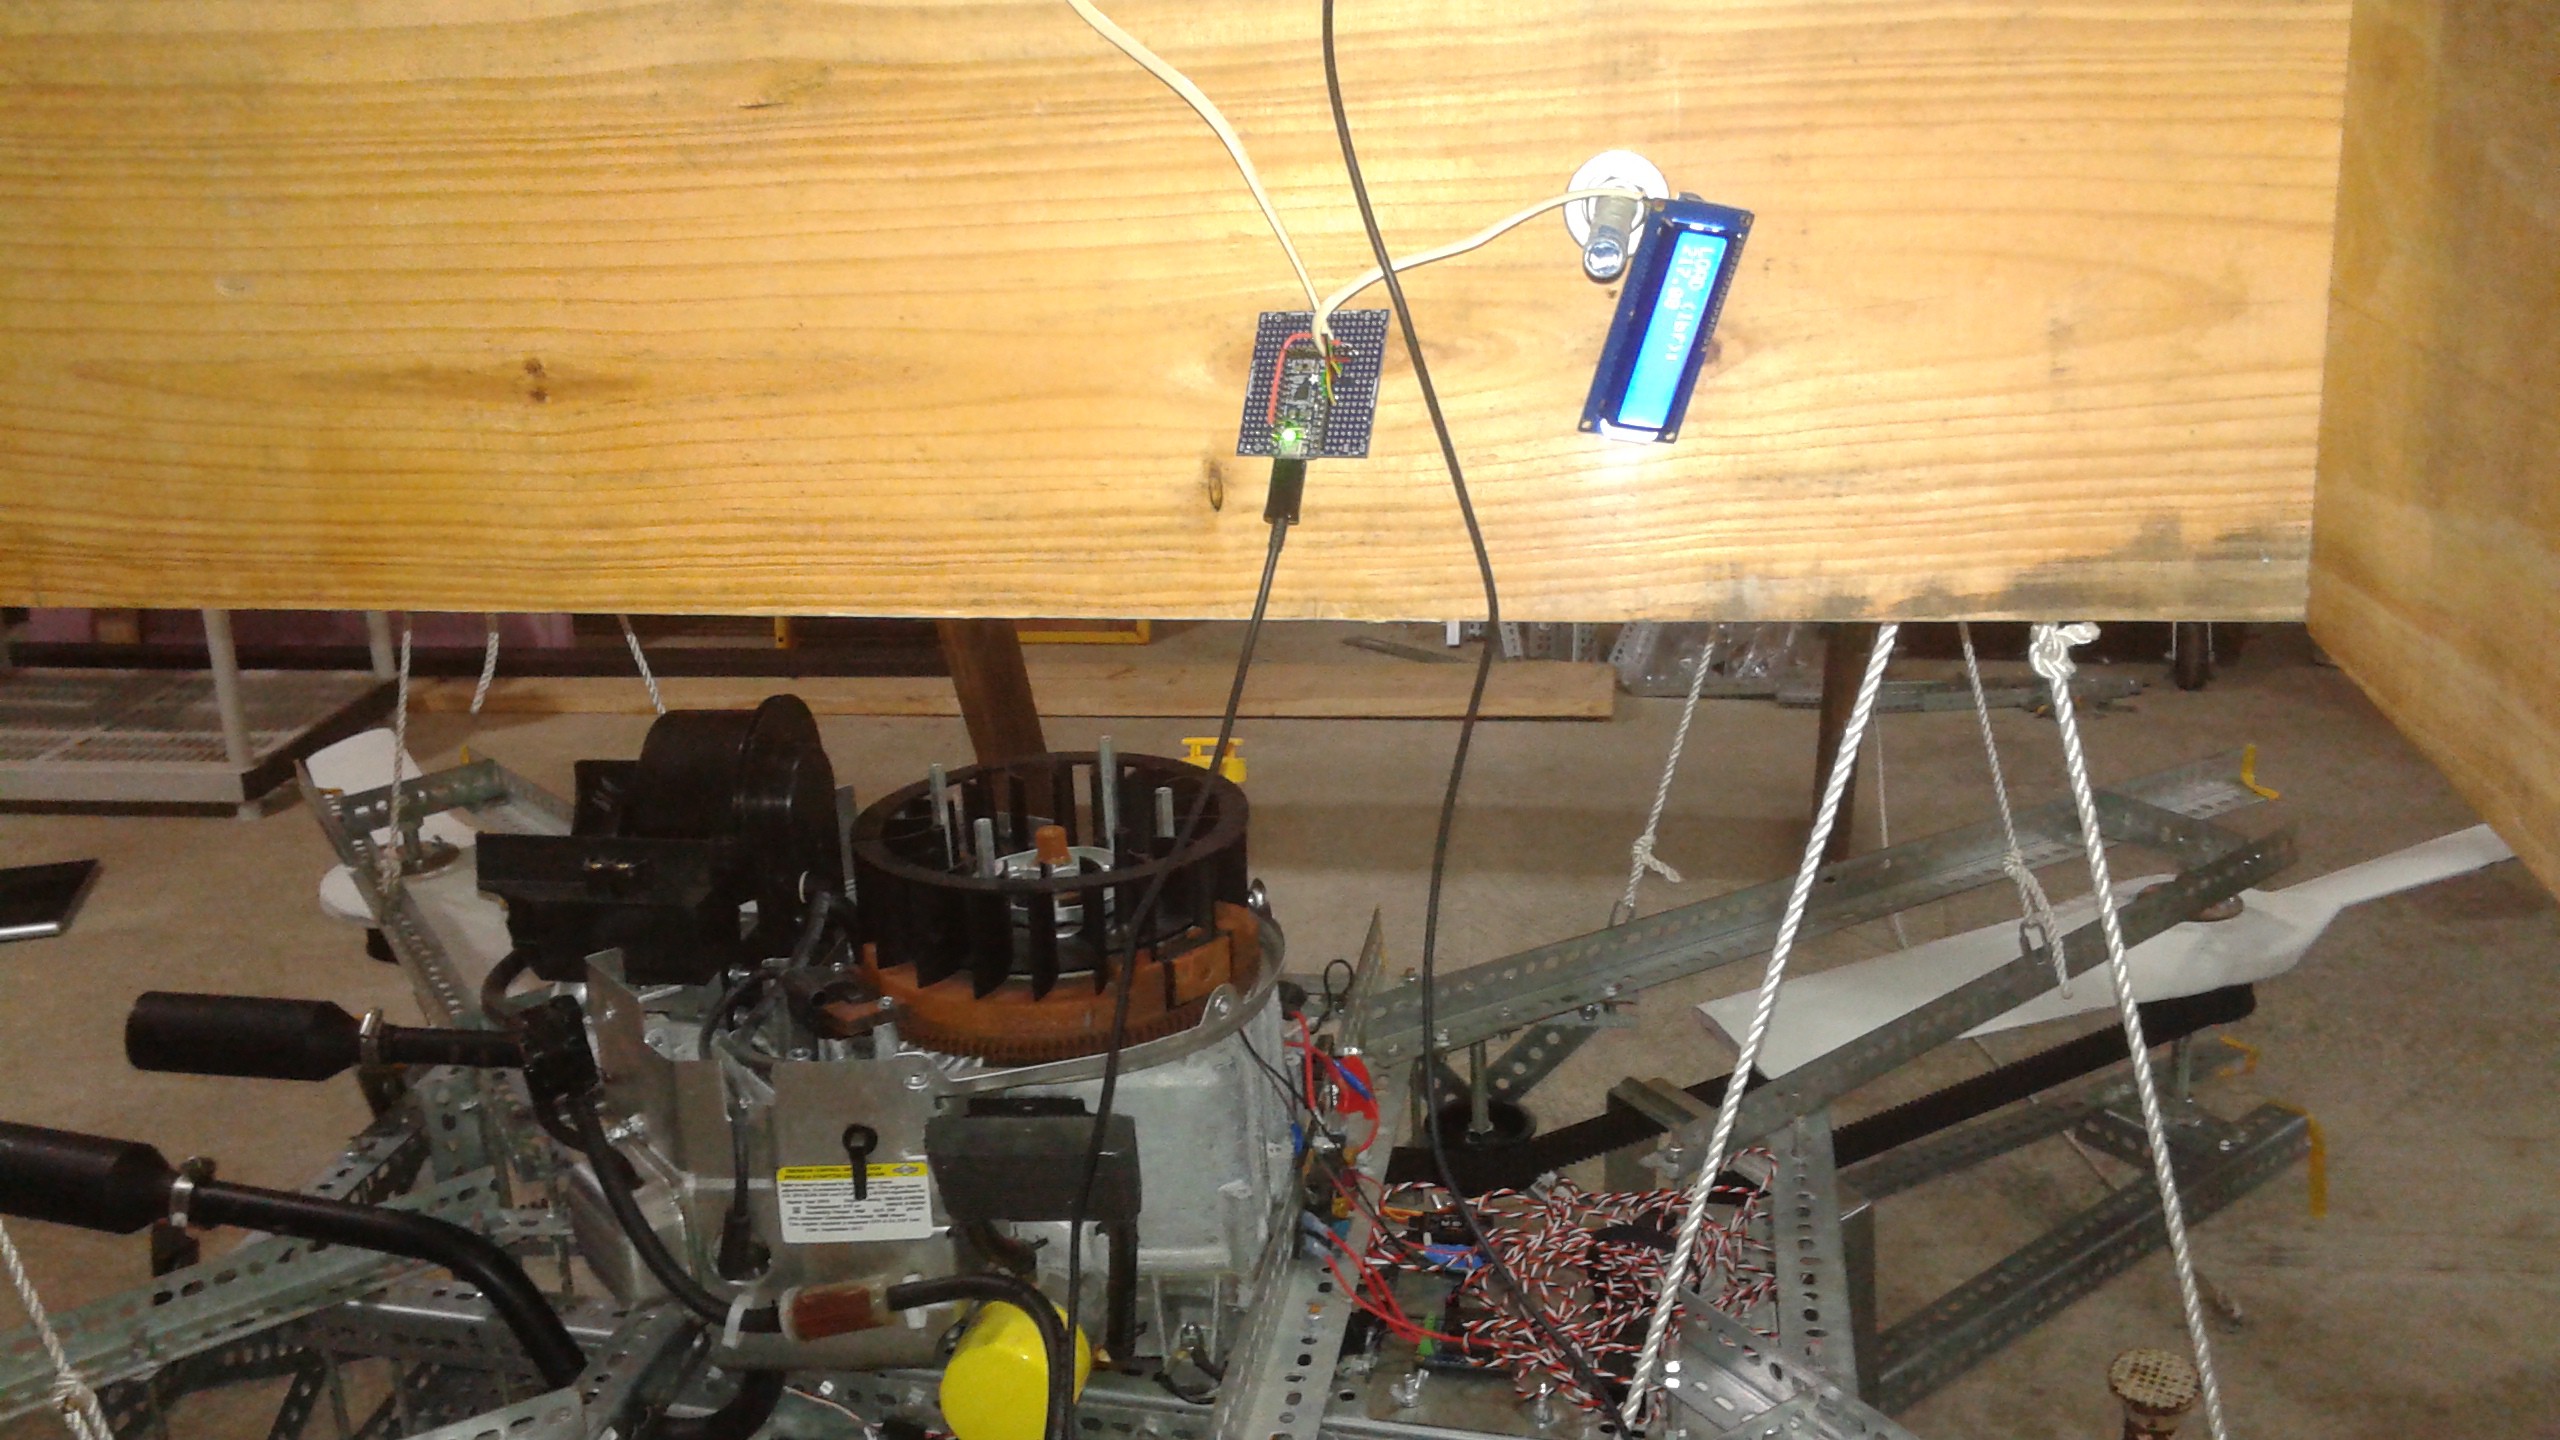
    Under the ends of each of the support bars are where the load cells are installed. Since I'm still prototyping, I decided for now to assume symmetry from left to right of the quadcopter and only hook up the load cells on the right side of the support bars. Here's a shot of the electronics connected to test stand. On the right is the LCD showing the reading and the left is the Pro Trinket that is reading the load cells and driving the LCD.

    The final step was calibrating the load cells. I modified the code on the Trinket Pro to spit out the raw readings. Once I got the reading with the quadcopter on the load cells, I then weighed the quadcopter using the scale. I also recorded the readings with no weight on the load cells. With the two readings and two weight measurements, I now have a calibrated setup where I can weigh the quadcopter and measure the thrust produced.

    The next step will be securing the hardware and making so that I can read the thrust measurement while the quadcopter is running. I'll get the cleanup code upload in a day or two.

  • Wiring Questions

    Peter McCloud04/26/2015 at 04:28 2 comments

    I'm doing some planning before getting back into doing some more testing with Goliath and trying to get everything setup to measure the thrust that Goliath is producing. I was hoping to get some feedback on how I should tackle the wiring for the load cell electronics.

    For those who aren't aware, I'm following a tutorial on using a load cell to an Arduino. It's pretty straight forward, with the load cell connected to an instrumentation amplifier which boosts the very low voltage signal to something in the range the ADC on the Arduino can pick up. I'll be using 4 load cells, and it's a matter of just summing up the measurements from all the load cells to get the total weight. The only other change is that I'm using a Pro Trinket instead of the vanilla Arduino board

    The complication is that the load cells only have 2 feet of cable and some sort of wire extension is needed to get the signals from all the load cells to the Pro Trinket. I'd need at least one or two of the sensors to have 6-8 feet of cable to reach the micro-controller. My two options are: 1) add a extension between the load cell and the instrumentation amplifier and co-locate all the amplifiers on the same board, or 2) connect the load cells to the instrumentation amplifiers as is and run cables from the instrumentation amplifiers and the micro-controller.

    I'd like to have all the chips on a single board to make life easier, but I'm concerned about running extensions with the mV level signals from the load cell. I'd love to hear from anyone who has some experience with this or has another idea.

  • Prototyping the Electronics, Part 2 and Changing the Load Path

    Peter McCloud03/19/2015 at 03:45 0 comments

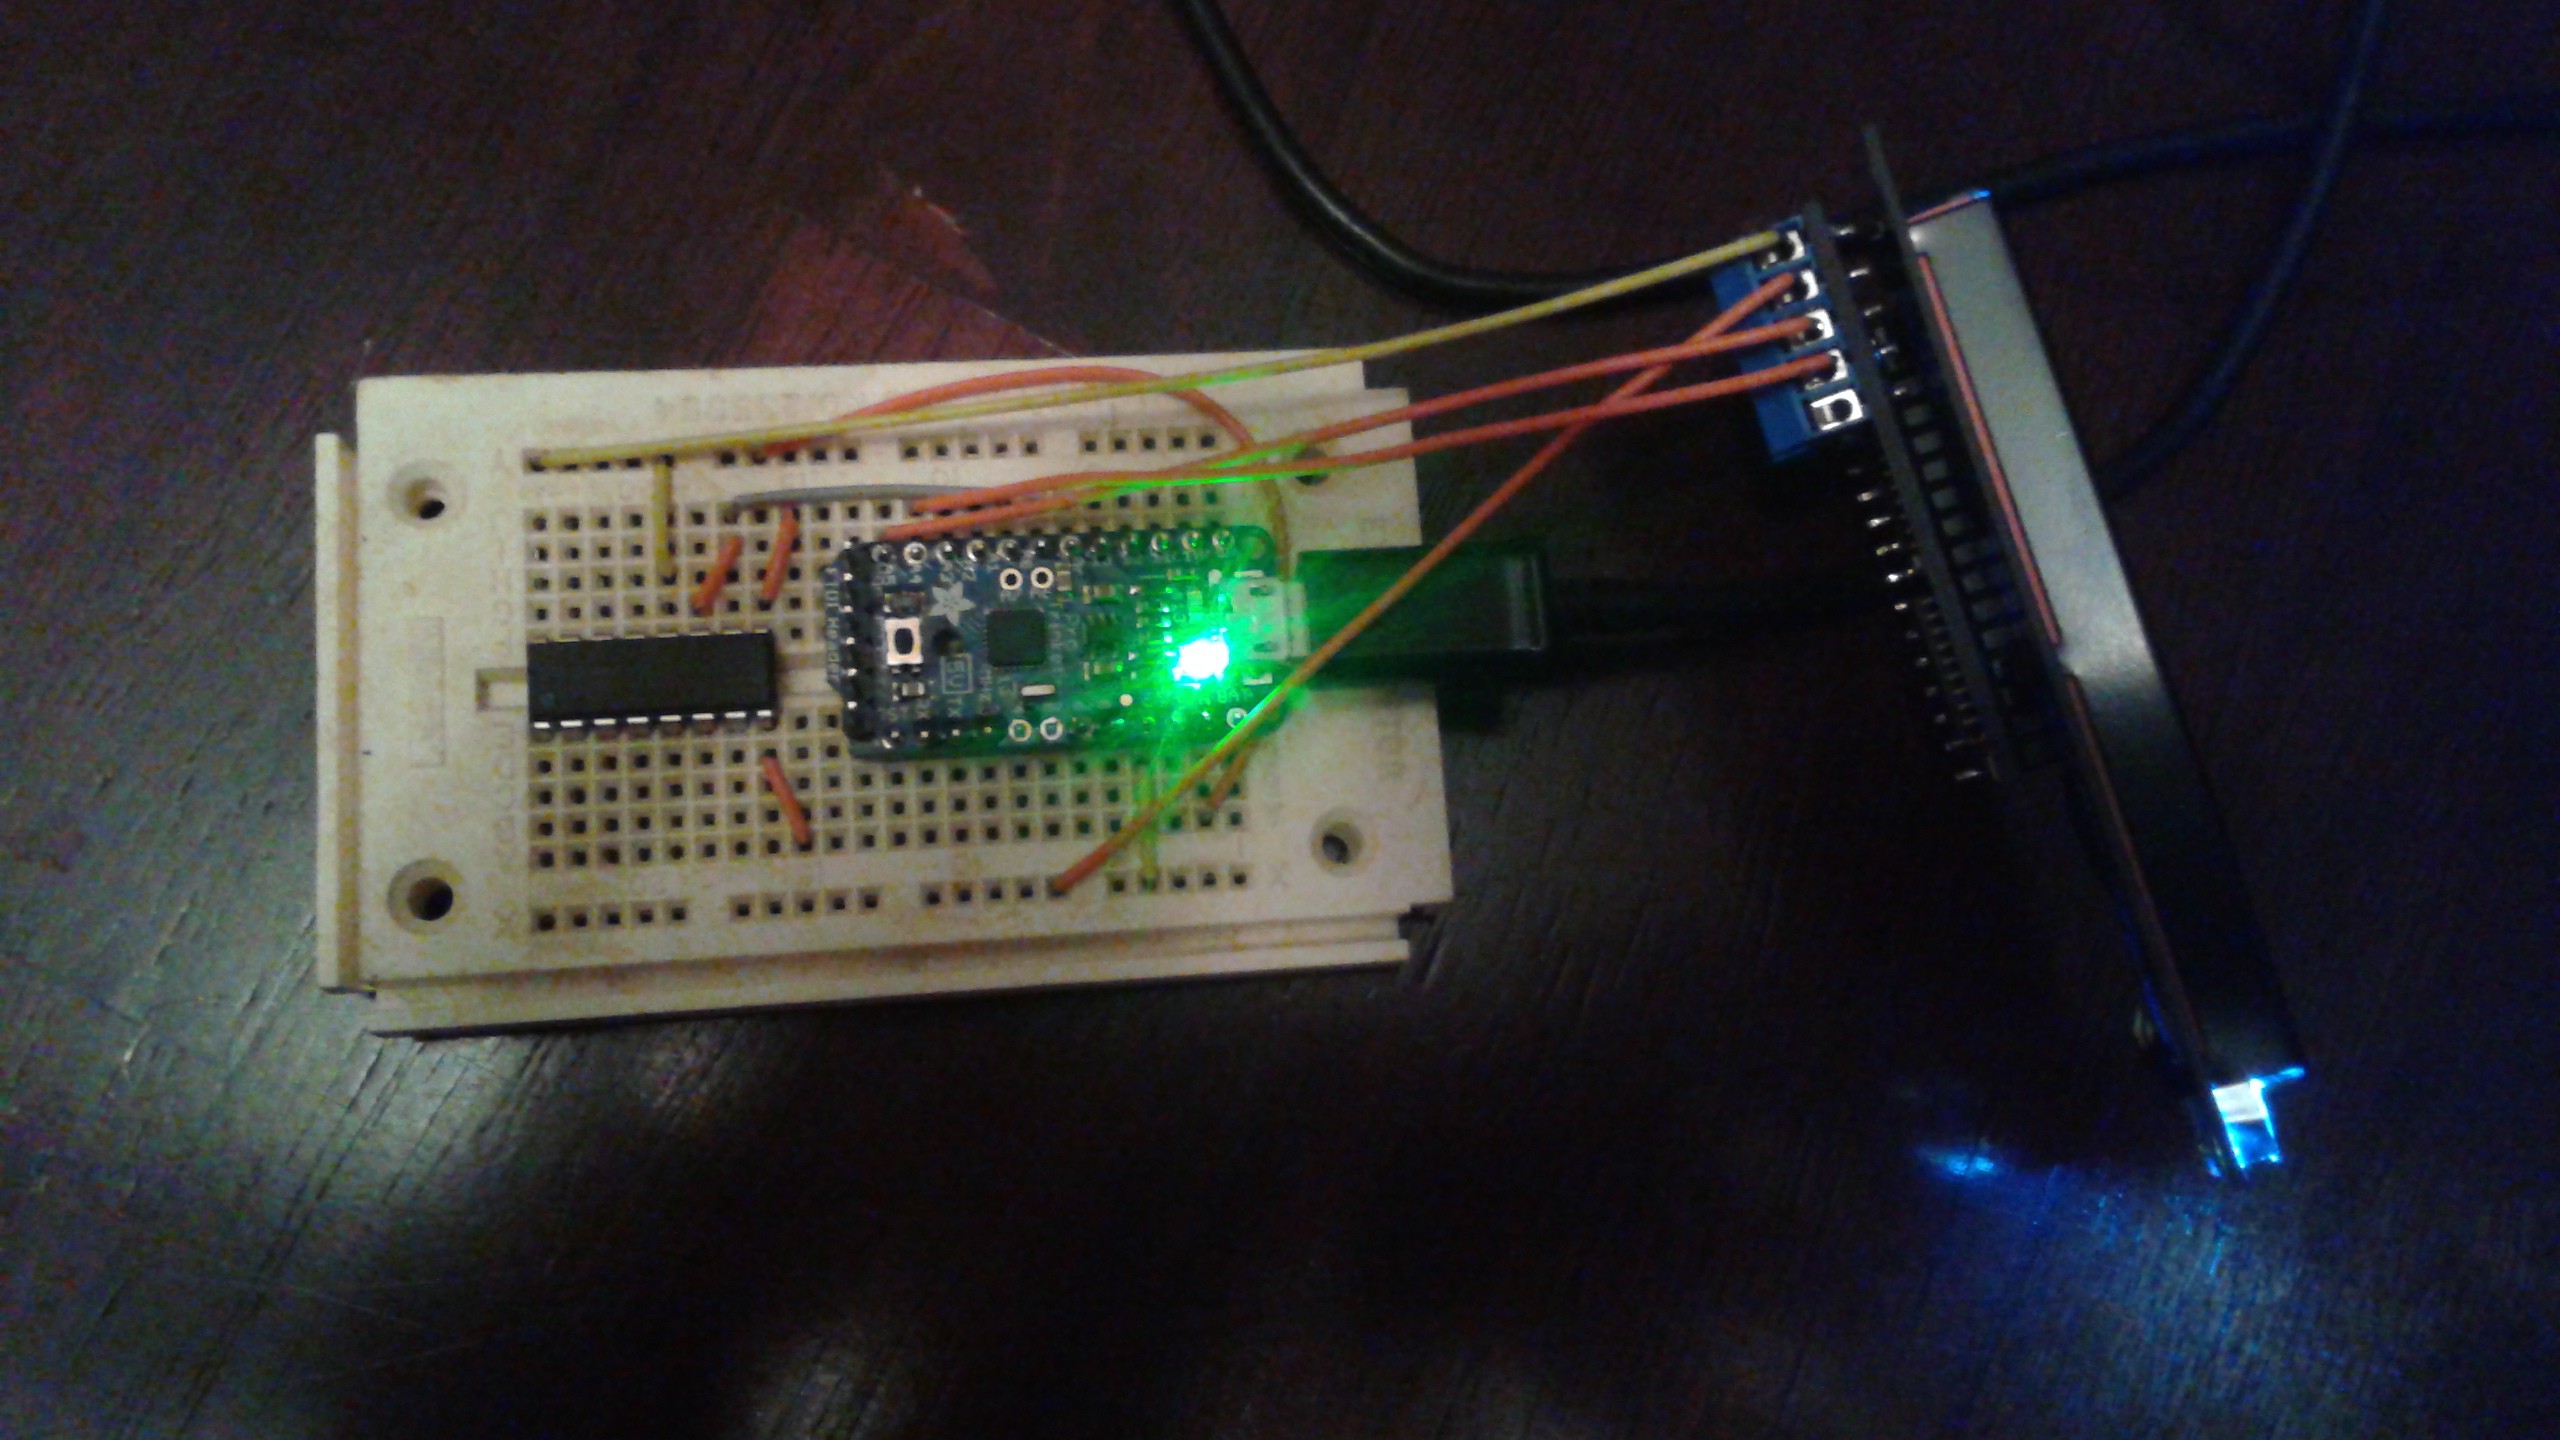
    Last time I had shown the Trinket Pro connected with the LCD. Since then I completed connecting the instrumentation amplifier (speaking of which, if you want to learn about instrumentation amplifiers check out this great hackaday article. and the load cell. Luckily it's all breadboard at this point because I forgot a lines at first, but after some trouble shooting I was able to straighten it out. Here's a picture of the hardware with one of the load cells.

    The next step with the electronics is to make a more durable electronics assembly and add the other 3 load cells.

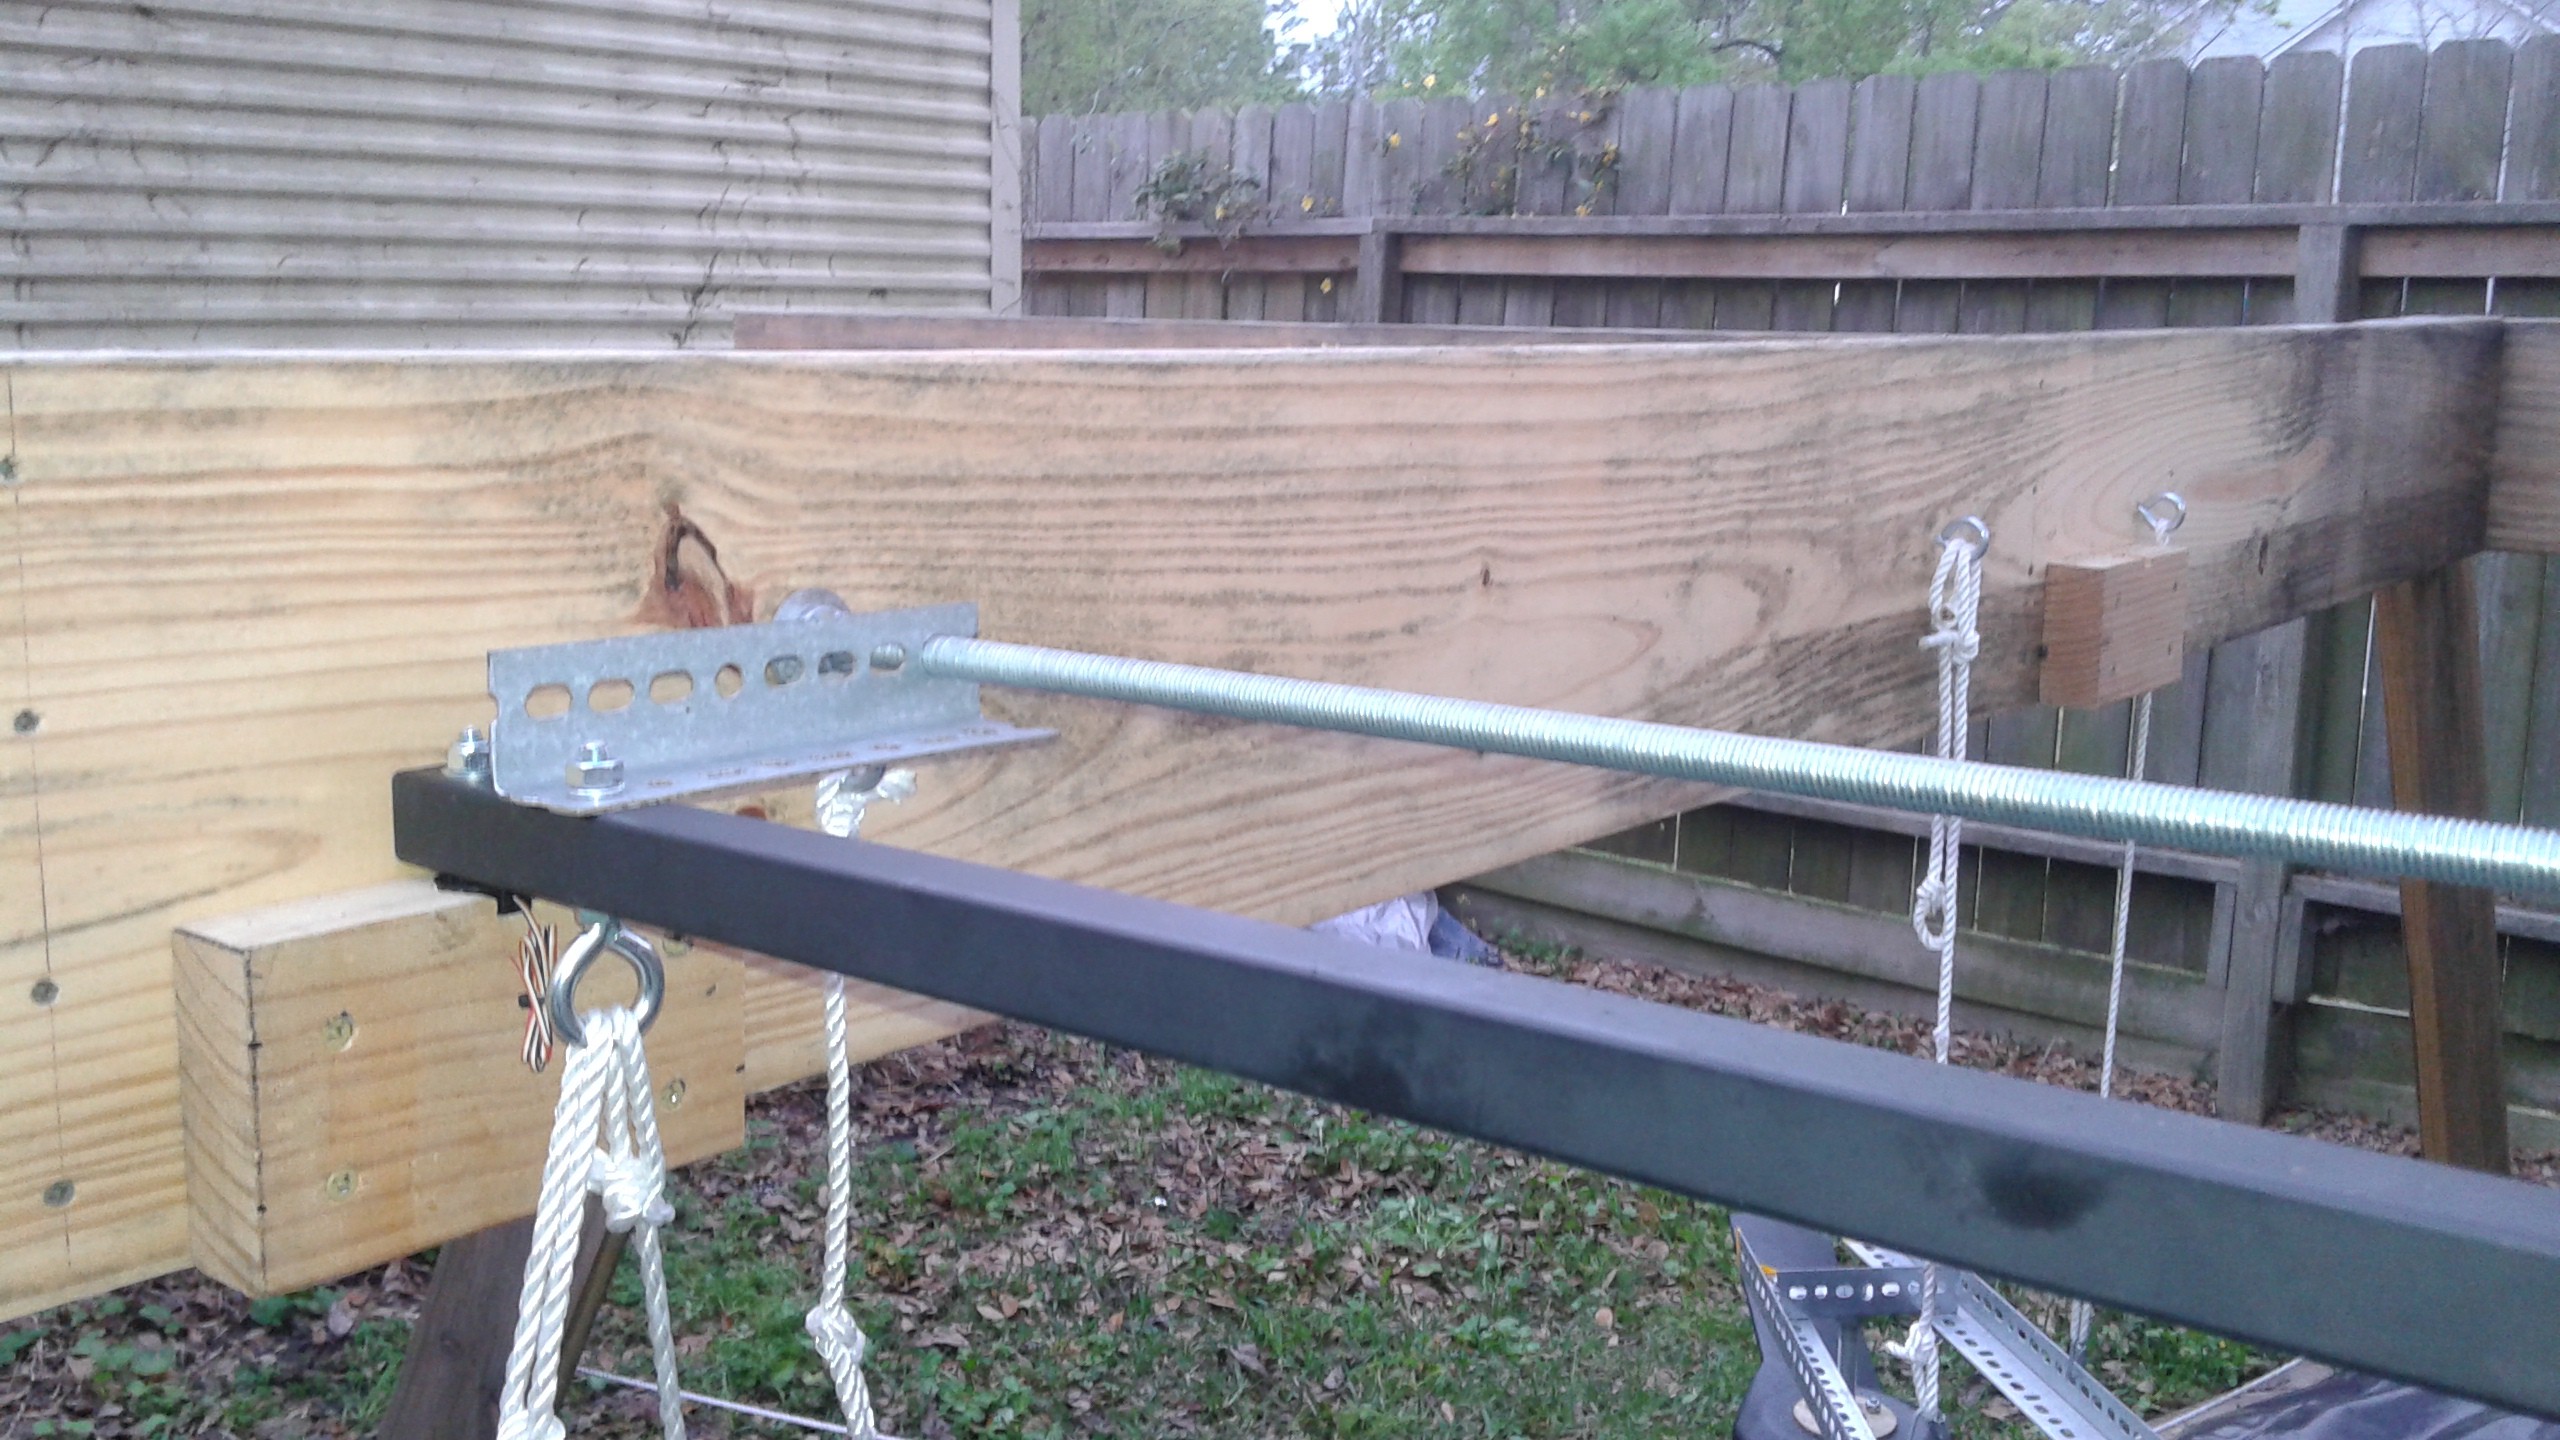
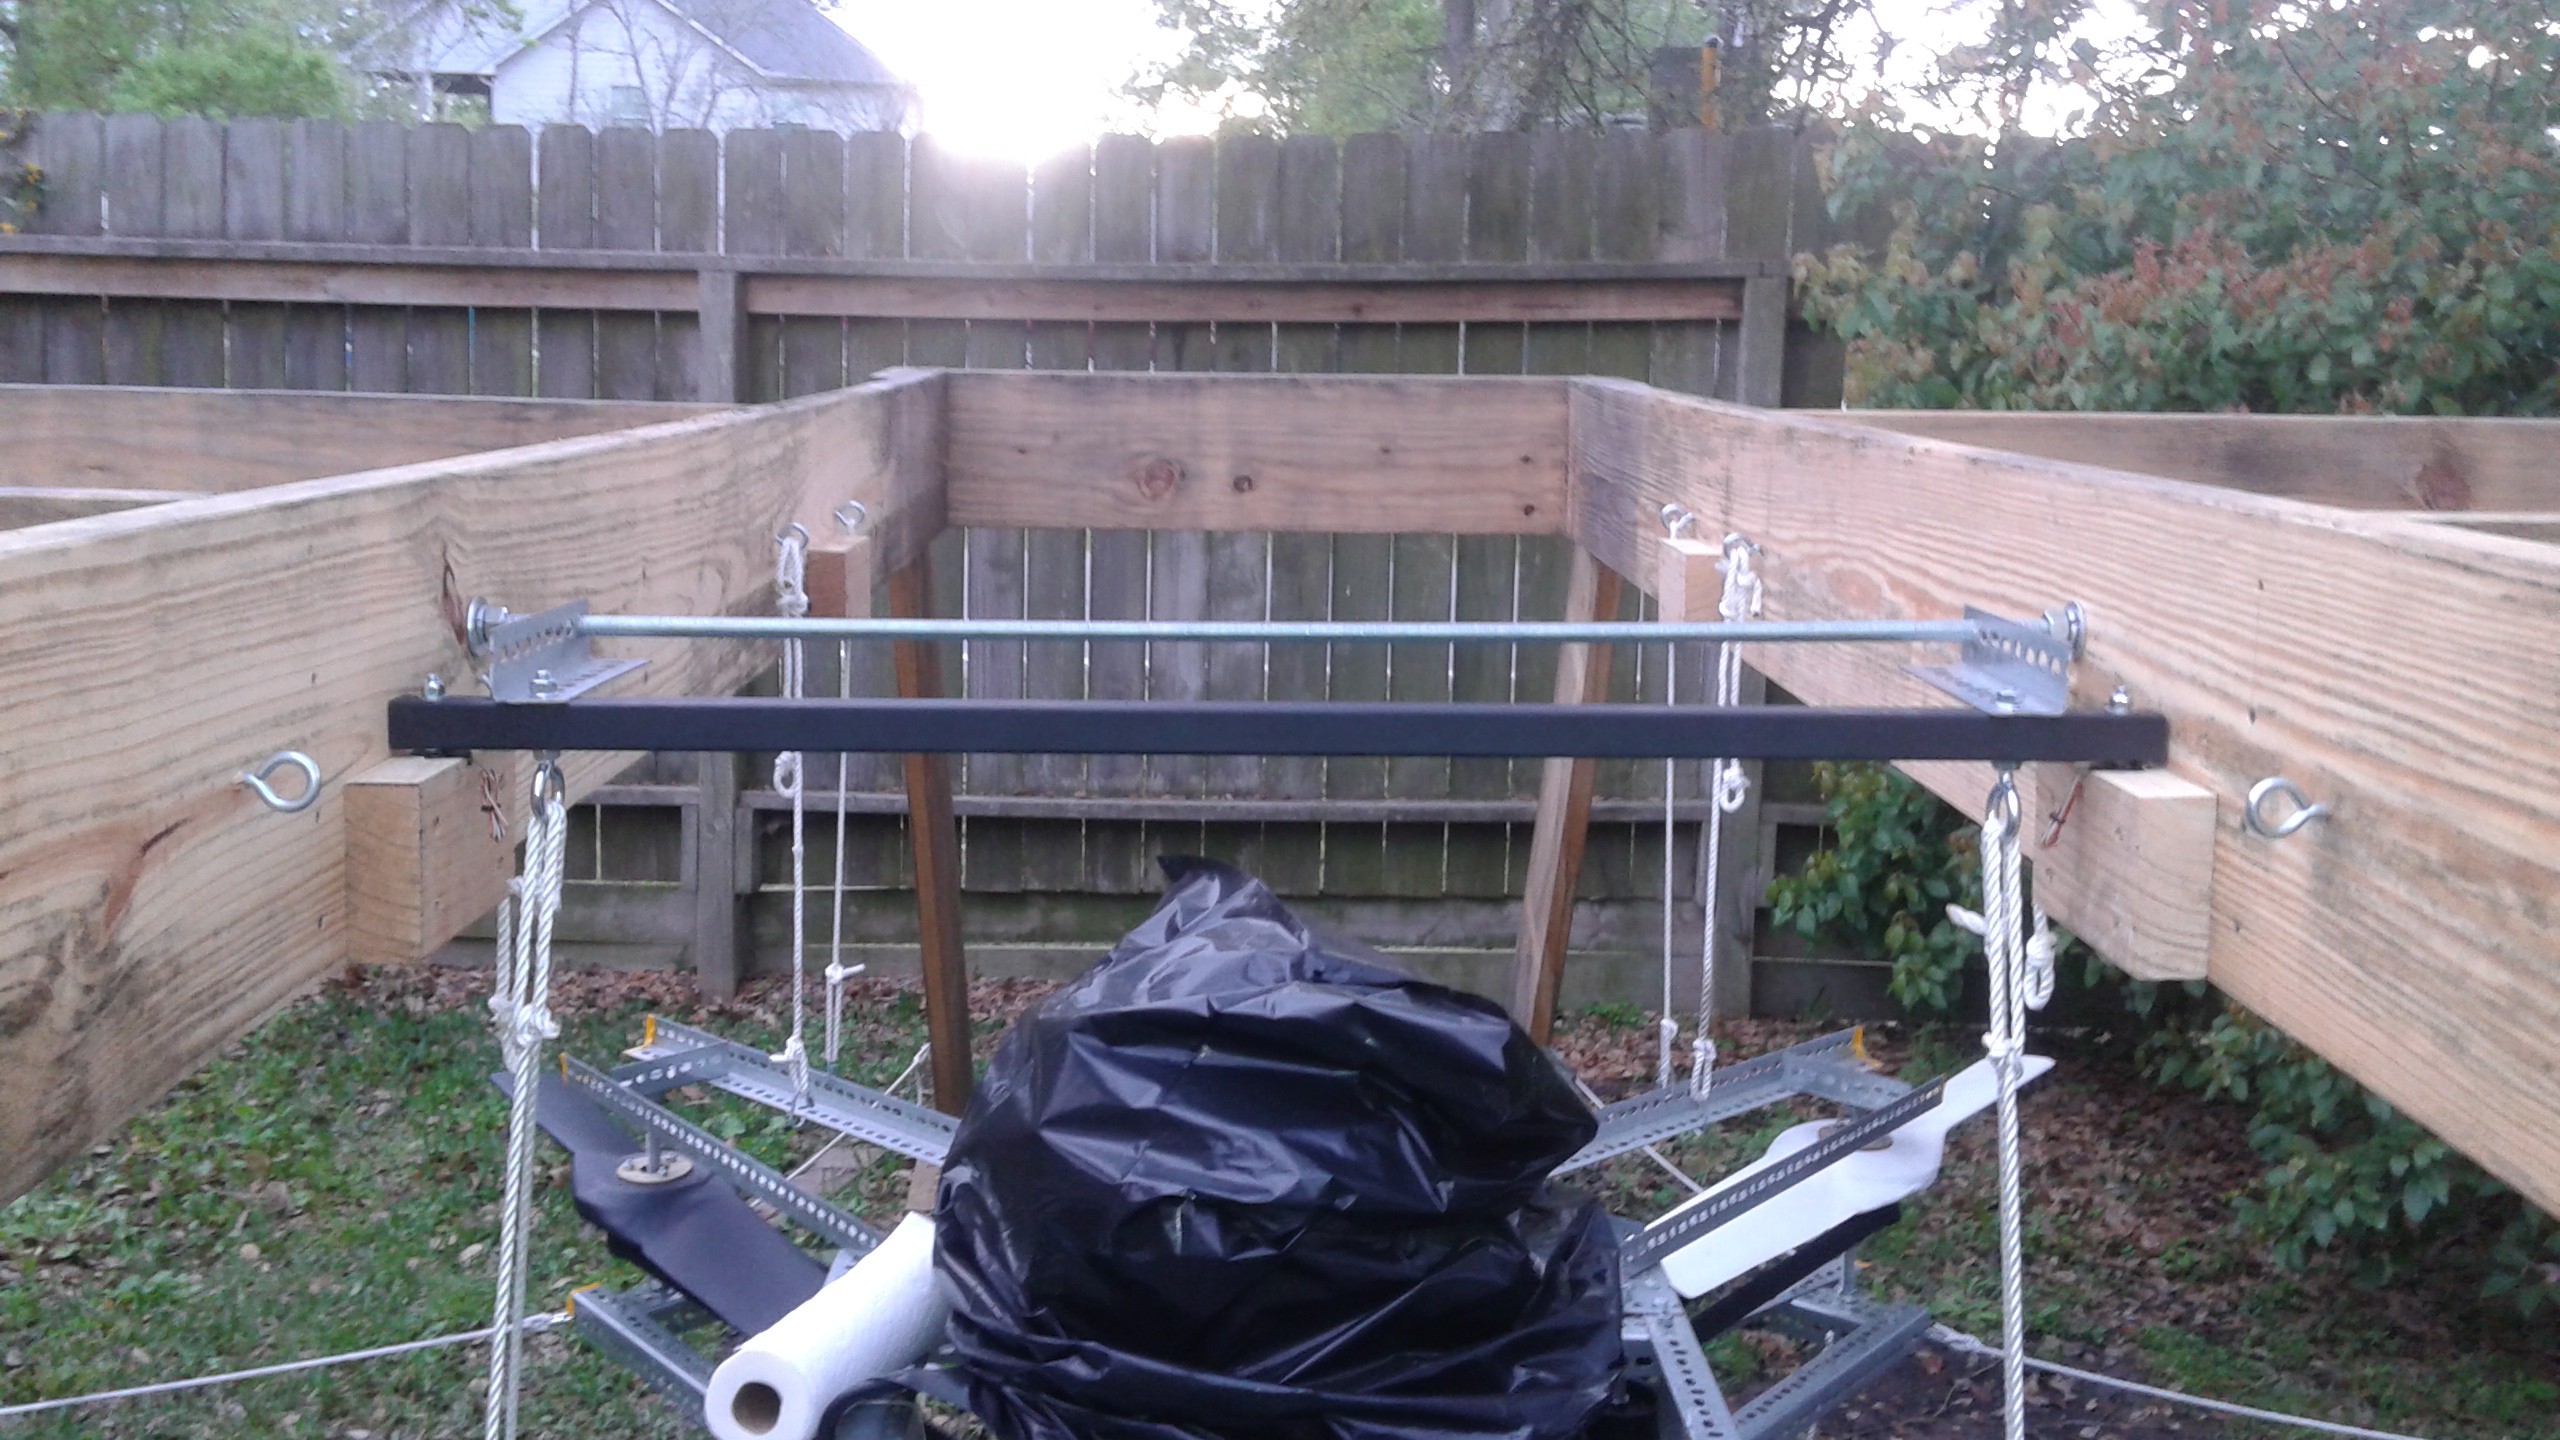
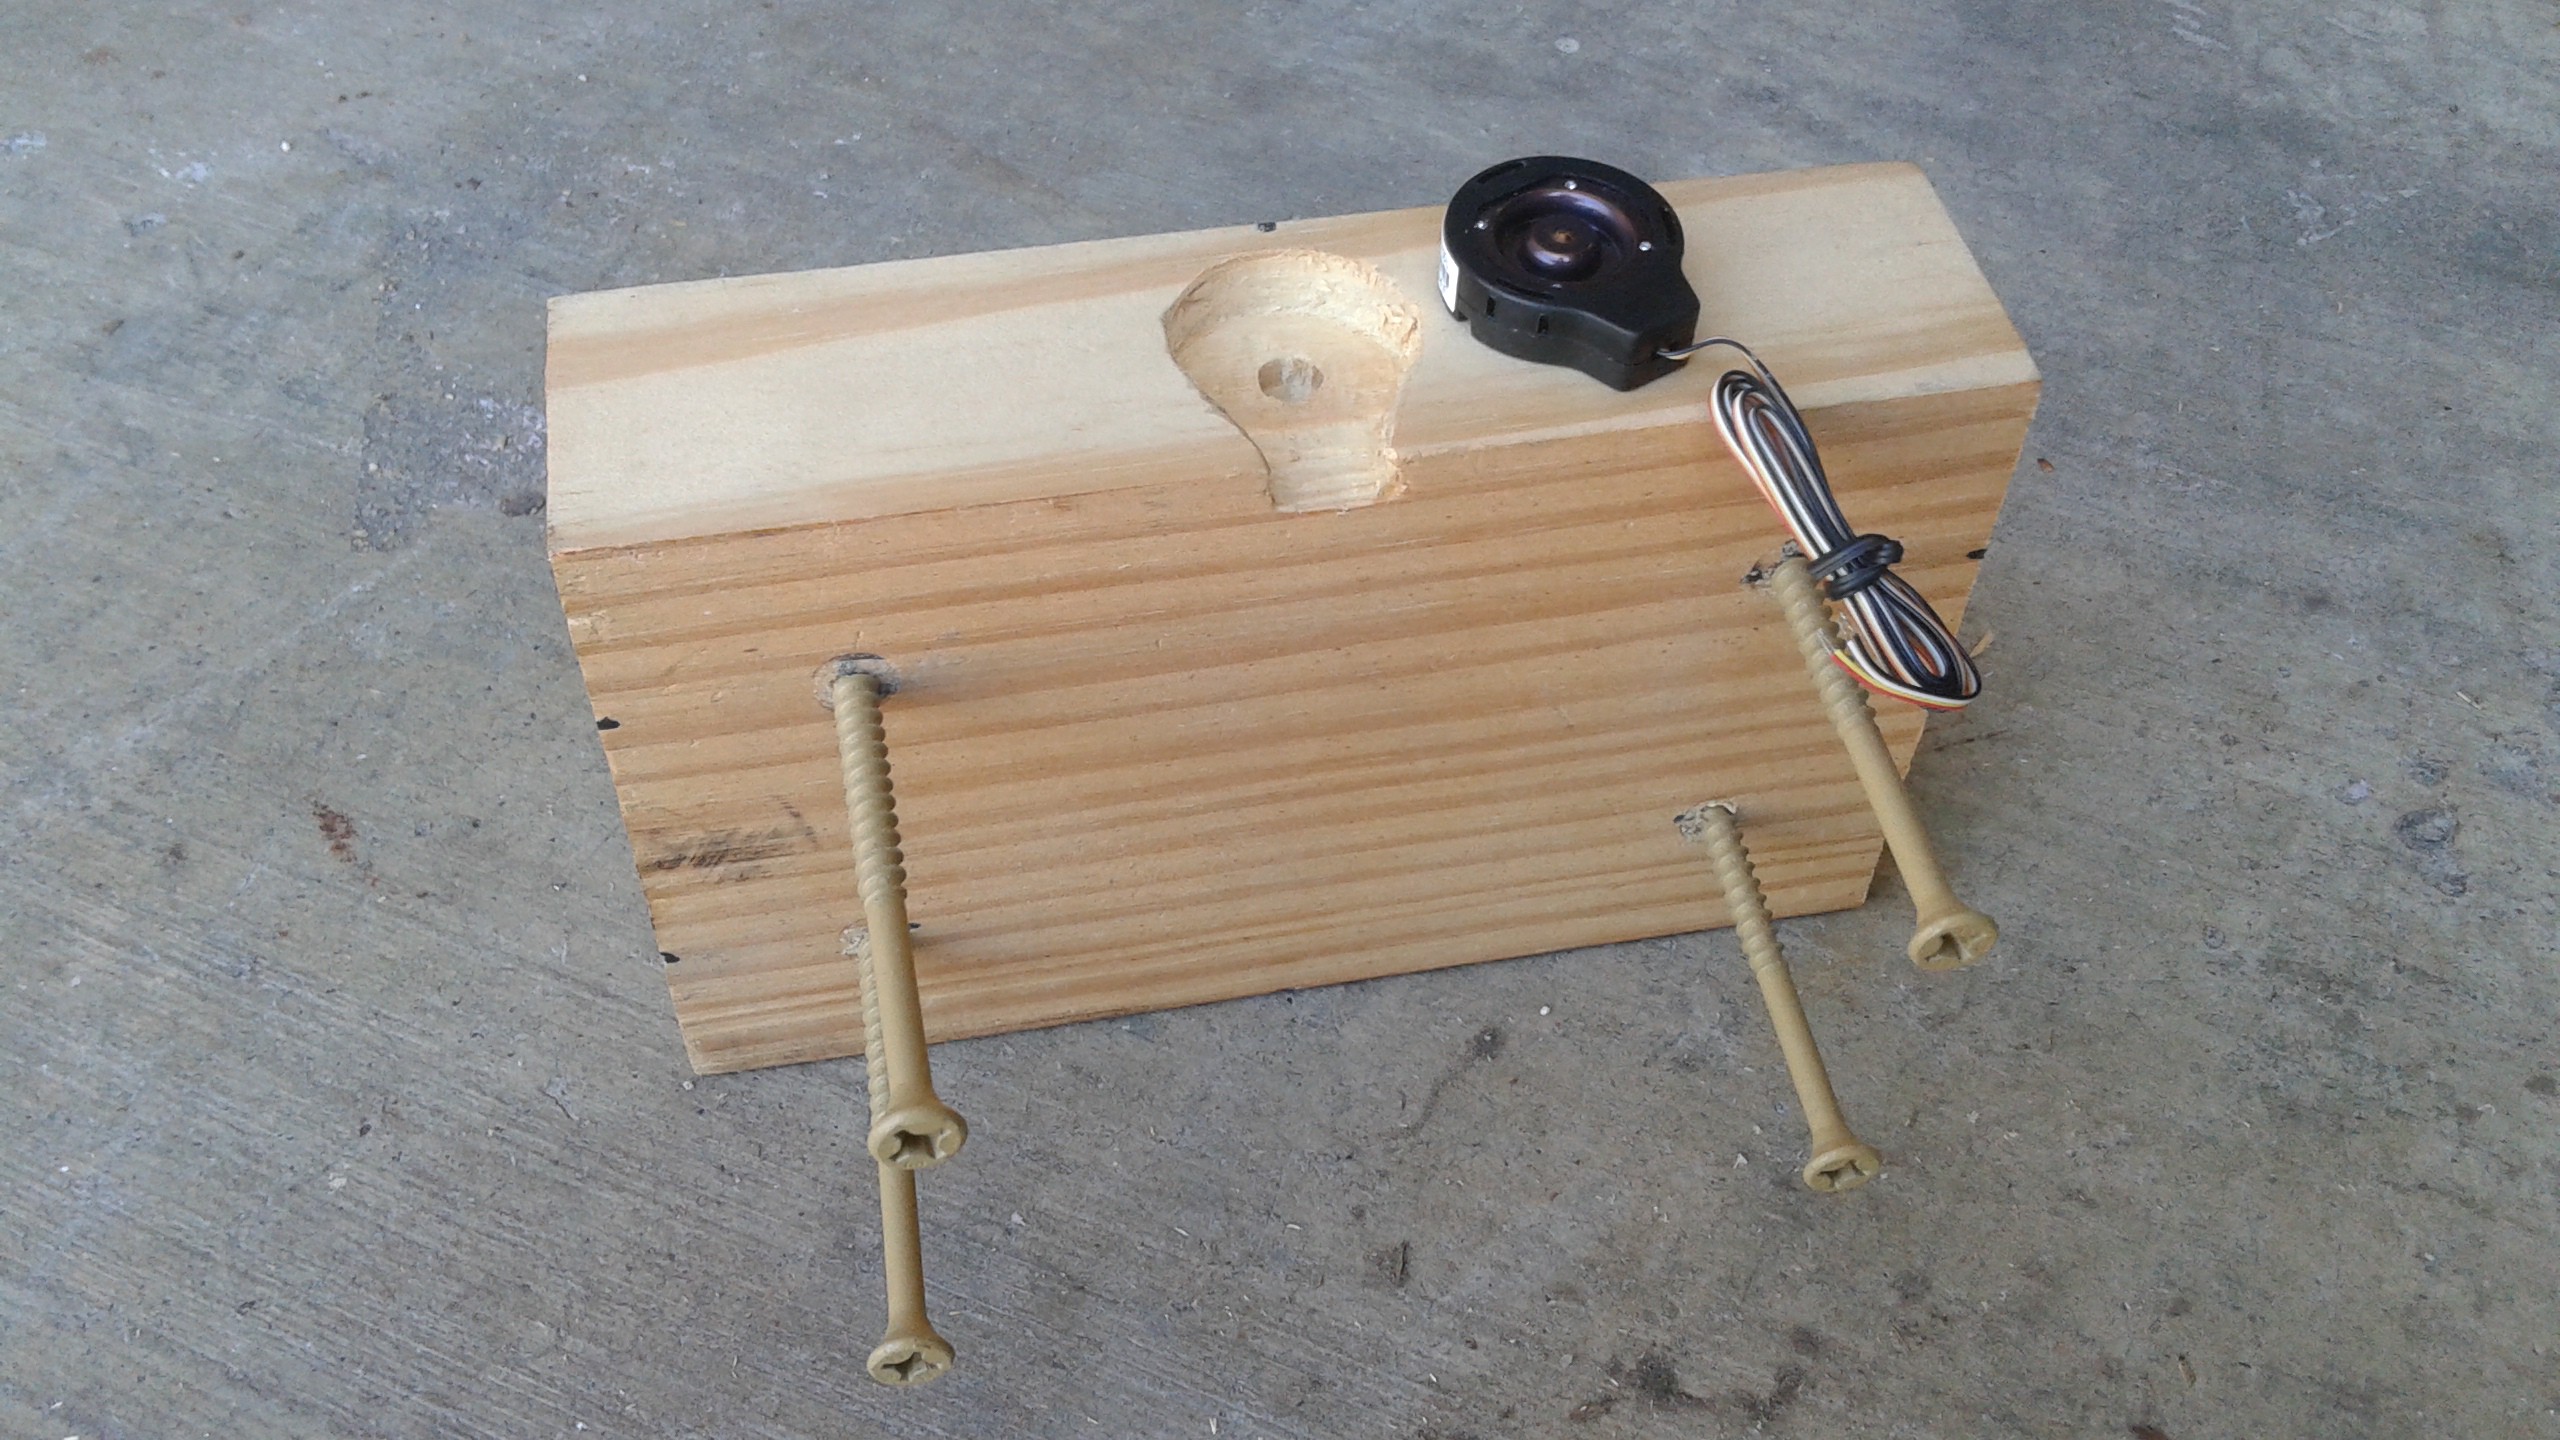
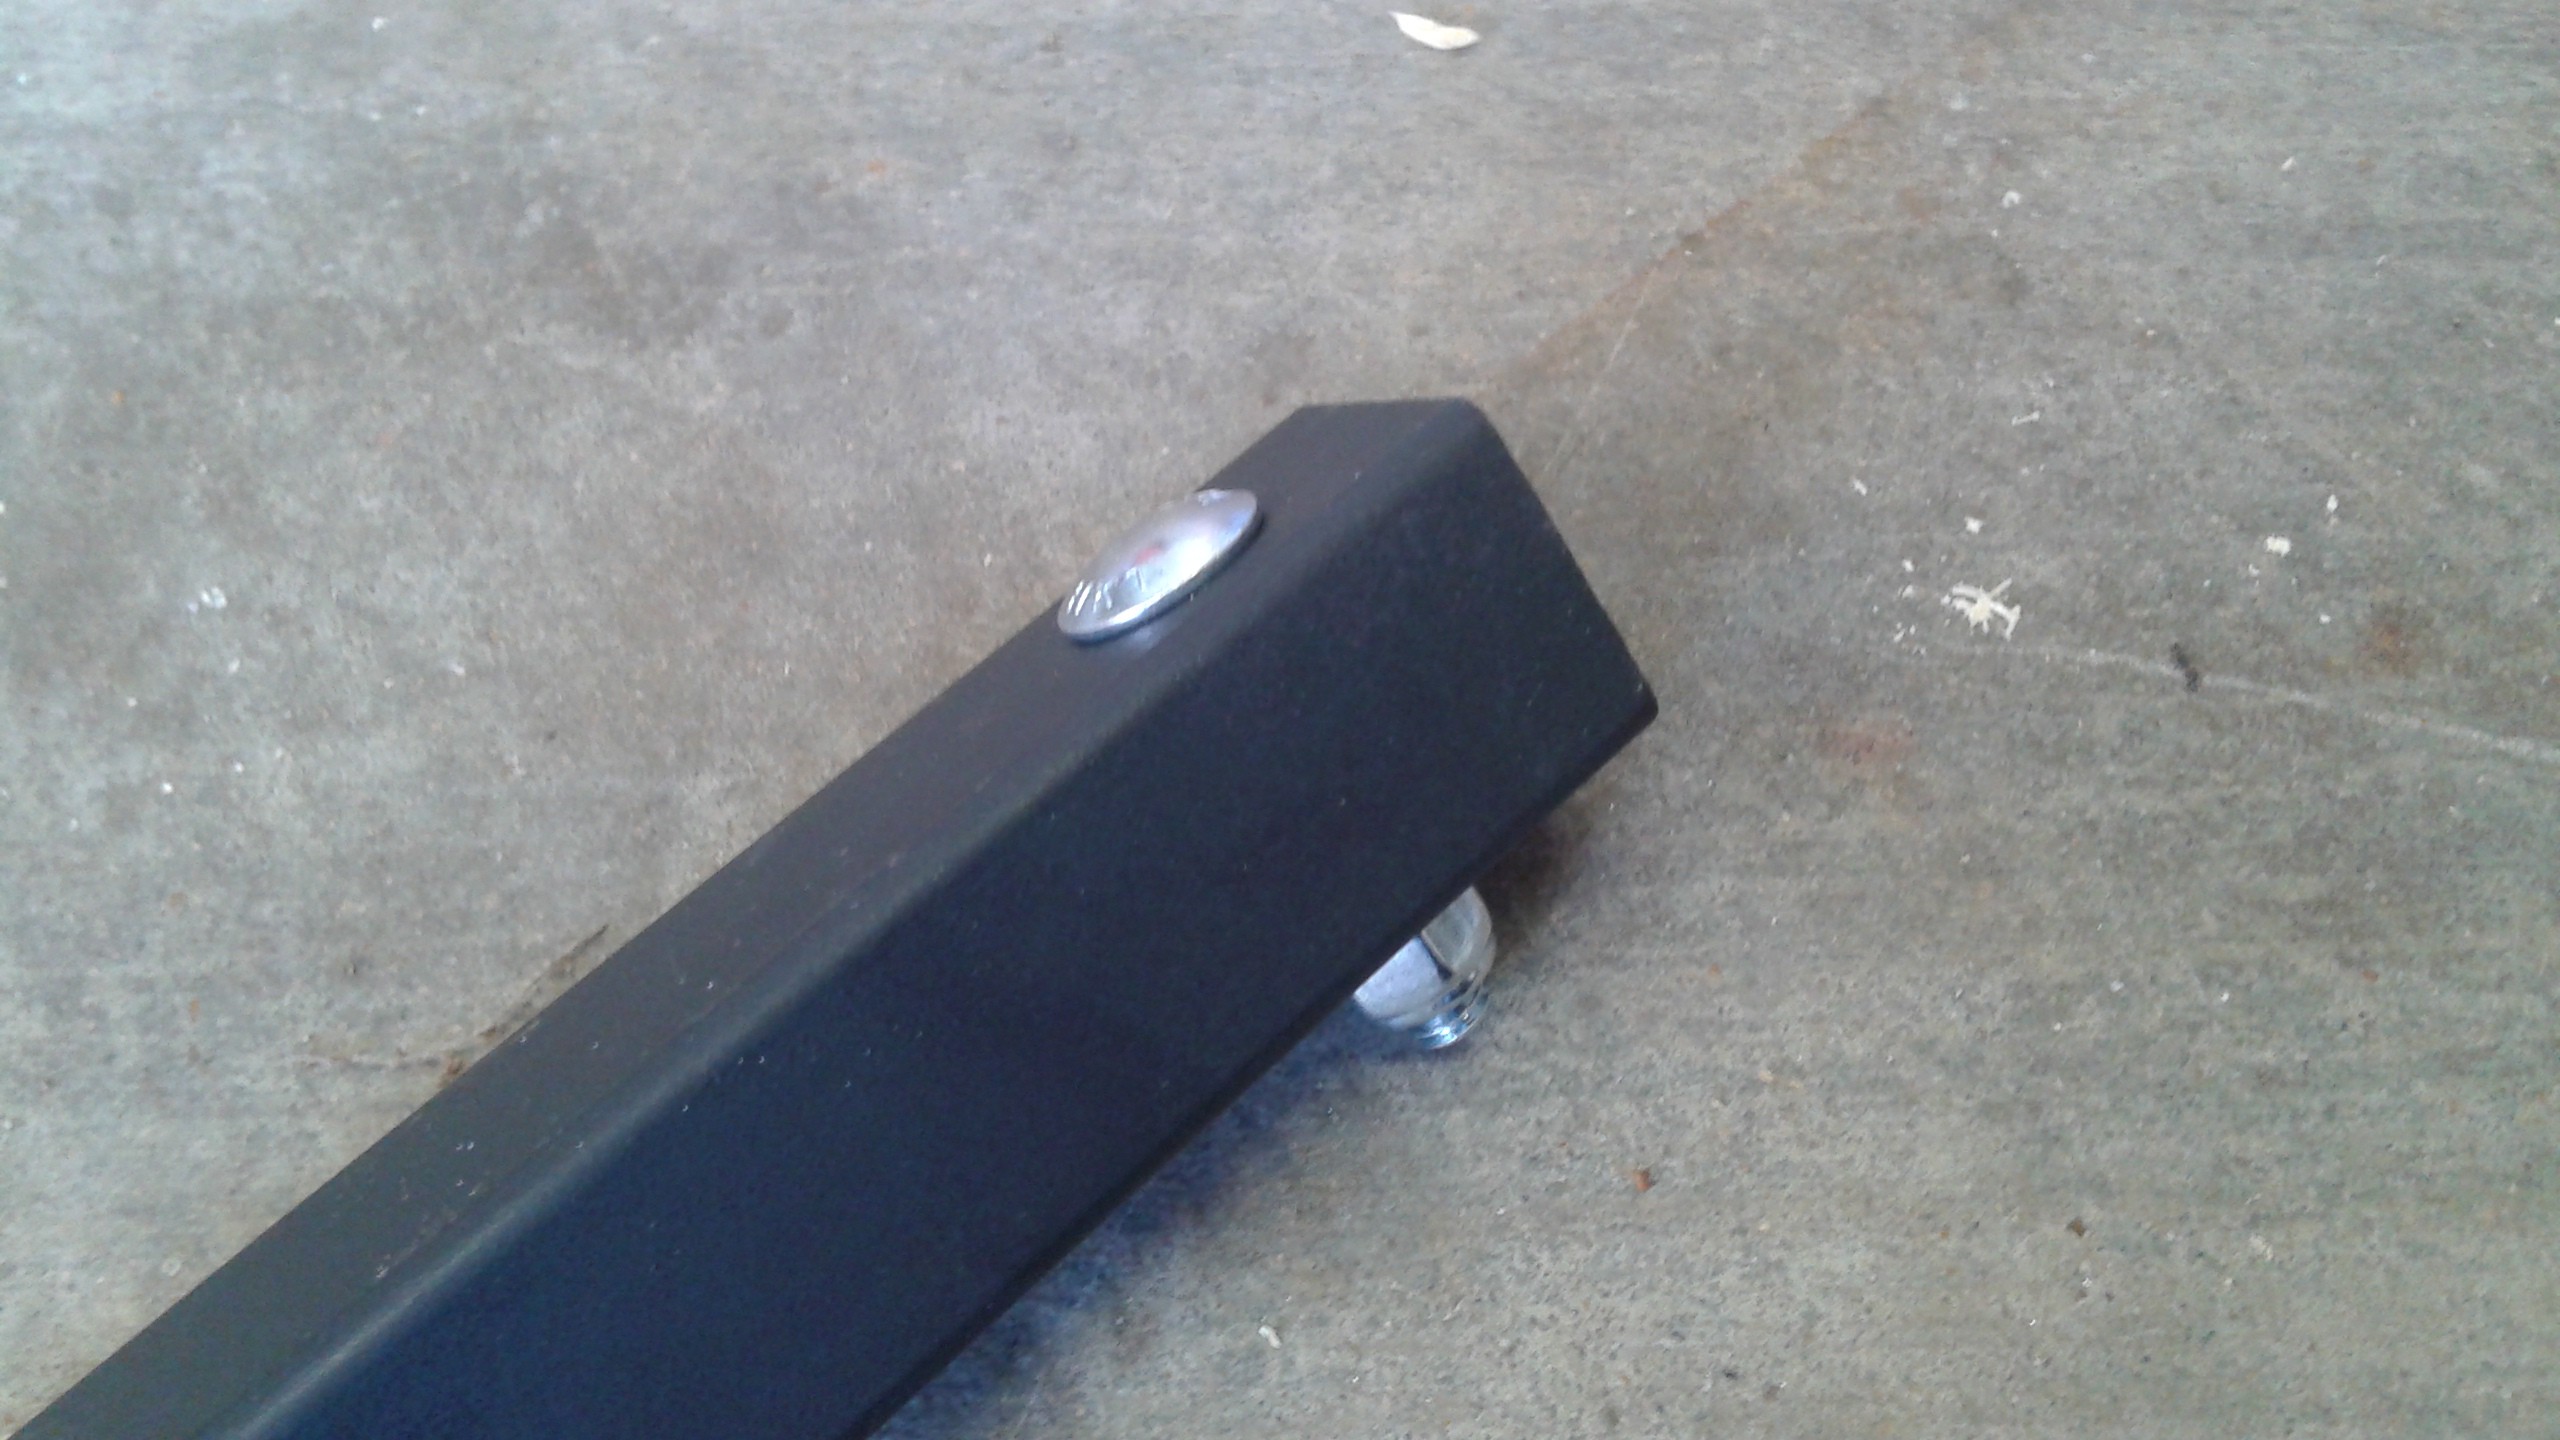
    With the electronics progressing, I've also started making the modifications to the test stand to put the load cells where the weight of the quadcopter can rest on them. Below is a picture of the new mounts on the left and the previous mounting on the right. Previously the support lines were attached to two eye bolts. The new method uses a 2x4 block attached with 4 screws on top of the block a recess was cut out for the load cell. A support bar sits on top of the load cell and the support bar has eye-bolts where the support lines are attached. We want the load on the load cells to be purely axial, so a piece of all thread was run across the test stand and the support bar is attached to the all thread with brackets. The brackets and support bar can swivel about the all-thread as one assembly. This makes it so that A) all the weight is supported on the load cells, B) the brackets keep the support bar from moving side to side and C) the ability to rotate about the all-thread eliminates any moments.

    Here is the first support bar installed and the new lines attached.

    Here's a picture showing more detail on the load cell blocks. The recess was created by drilling a one inch diameter hole and cutting out the side for the wire.

    Also to make sure the load sits in the center of the load cell, I placed two 5/16" carriage bolts on the ends. The heads of the carriage bolts are what rest on the load cells.

    Before doing the second support bar for the other half of the vehicle or actually connecting the electronics, I decided it would be good to make sure the support bar setup would stay together during testing. Late this evening I ran the test and the new support bar worked perfectly. However the rest of the test didn't go as smoothly. Nothing major, but I'll have the video posted tomorrow to show what happened.

  • Prototyping the Electronics, Part 1

    Peter McCloud03/09/2015 at 02:58 0 comments

    Since last time I decided to go with the Trinket Pro. I ordered the six pack that comes with (3) 5V Trinket Pros and (3) 3.3V Trinket Pros. The load cell measurements will use the 5V Trinket Pro and I plan on using the 3.3V Trinket Pros for yet another project for Goliath. I also decided to have a display so that I can see the vehicle weight without having to hook up a seperate device. To do that I also purchased a 16x2 LCD and an I2C/SPI backpack for the Trinket Pro communicate with the LCD display.

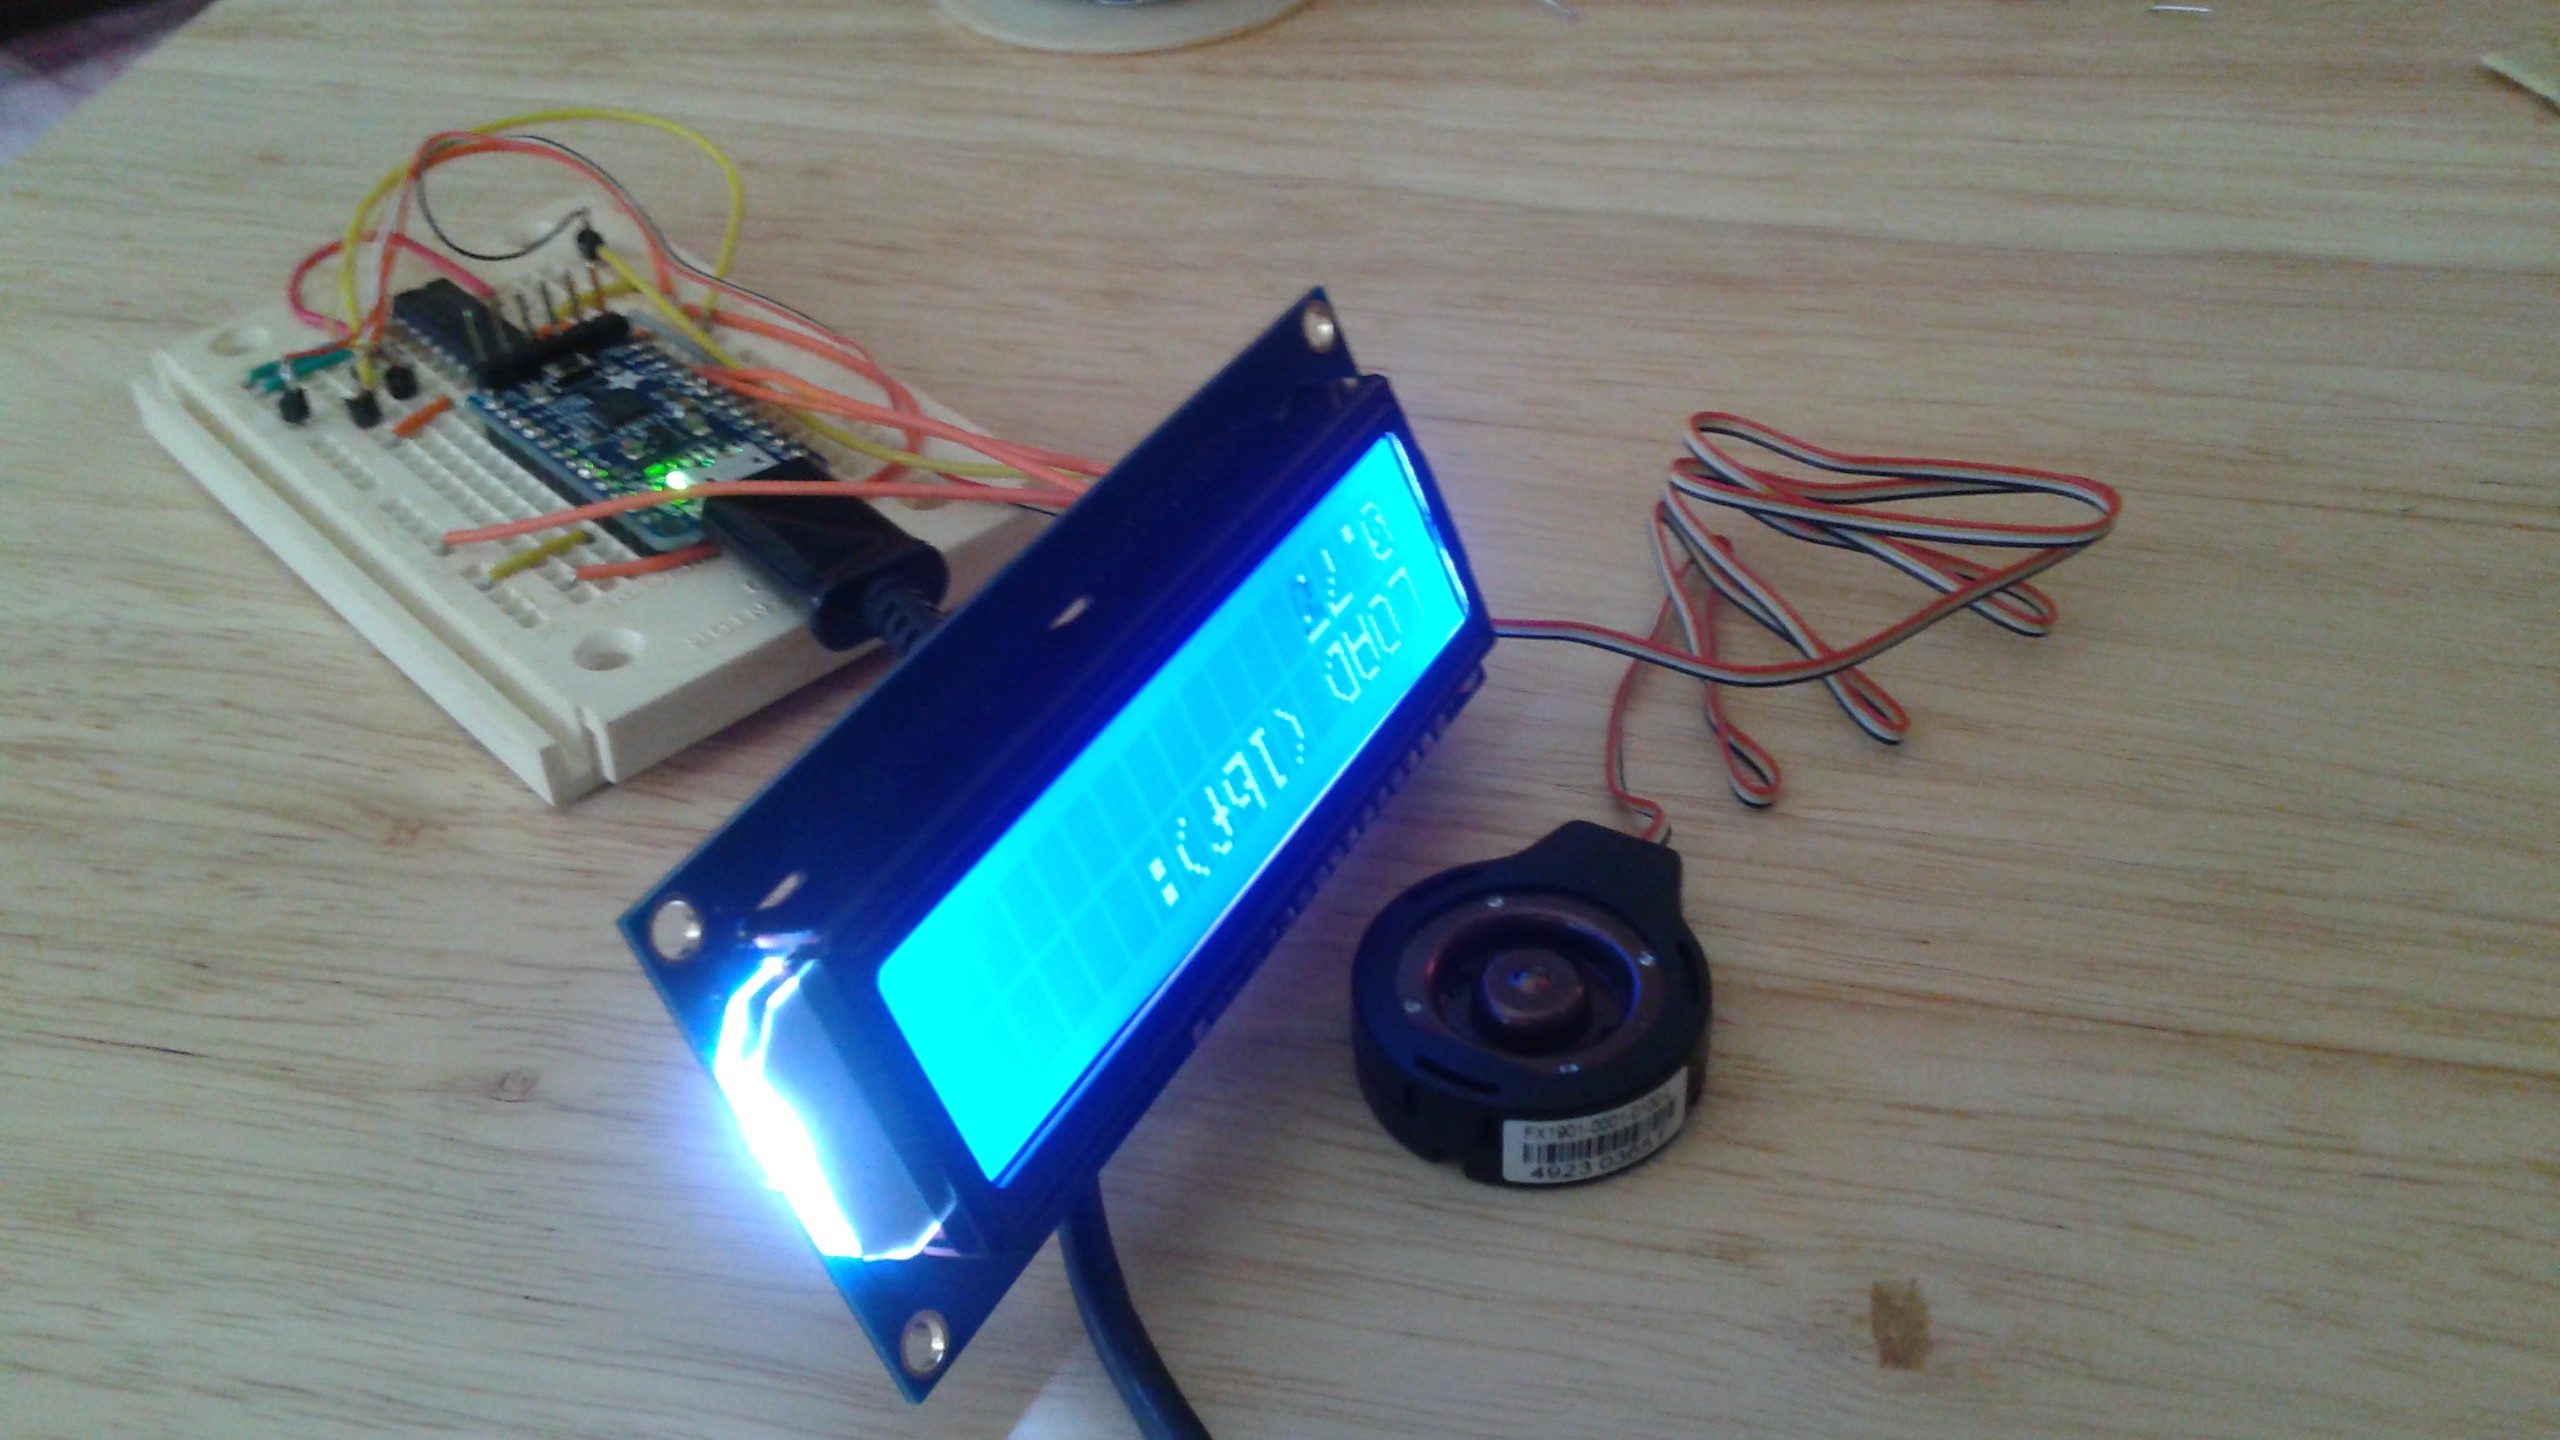
    Here's a photo of the Trinket Pro with the backpack, LCD and the amplifier (note that the amplifier is not connected yet)

    I've also started the Arduino sketch, with the basics of the code, it's on github, but here's the code I have so far:

    /*
     Test Stand Load Measurement Code
    */
    
    // include the library code:
    #include "Wire.h"
    #include "LiquidCrystal.h"
    
    // Connect via i2c, default address #0 (A0-A2 not jumpered)
    LiquidCrystal lcd(0);
    
    // Load Cell
    float fs_voltage = 0.0 ;
    
    void setup() {
      long time =0;
      int interval = 500; // Take a reading every 500ms
      
      /* Load Cell Calibaration
      TBD
      */
      // Equation from Datasheet for reading
      float excitation_voltage = 5; // V
      float fs_output_span = 20; // mV/V
      float gain = 64; //Amplifier Gain
      fs_voltage = excitation_voltage*fs_output_span*gain;
      
      // set up the LCD's number of rows and columns: 
      lcd.begin(16, 2);
      // Print a message to the LCD.
      lcd.print("LOAD (lbf):");
      lcd.setBacklight(HIGH);
    }
    
    void loop() {
      // Read all Load Cellss
      float loadcell_A = analogRead(0);
      float loadcell_B = 0;
      float loadcell_C = 0;
      float loadcell_D = 0;
    
      // Calculate load based on readings
      float load_A = loadcell_A/fs_voltage*100; // lbf
      float load_B = loadcell_B/fs_voltage*100; // lbf
      float load_C = loadcell_C/fs_voltage*100; // lbf
      float load_D = loadcell_D/fs_voltage*100; // lbf
      float total_load = load_A + load_B + load_C + load_D; // lbf
      
      // set the cursor to column 0, line 1
      // (note: line 1 is the second row, since counting begins with 0):
      lcd.setCursor(0, 1);
      // print the number of seconds since reset:
      lcd.print(total_load);
    
    }
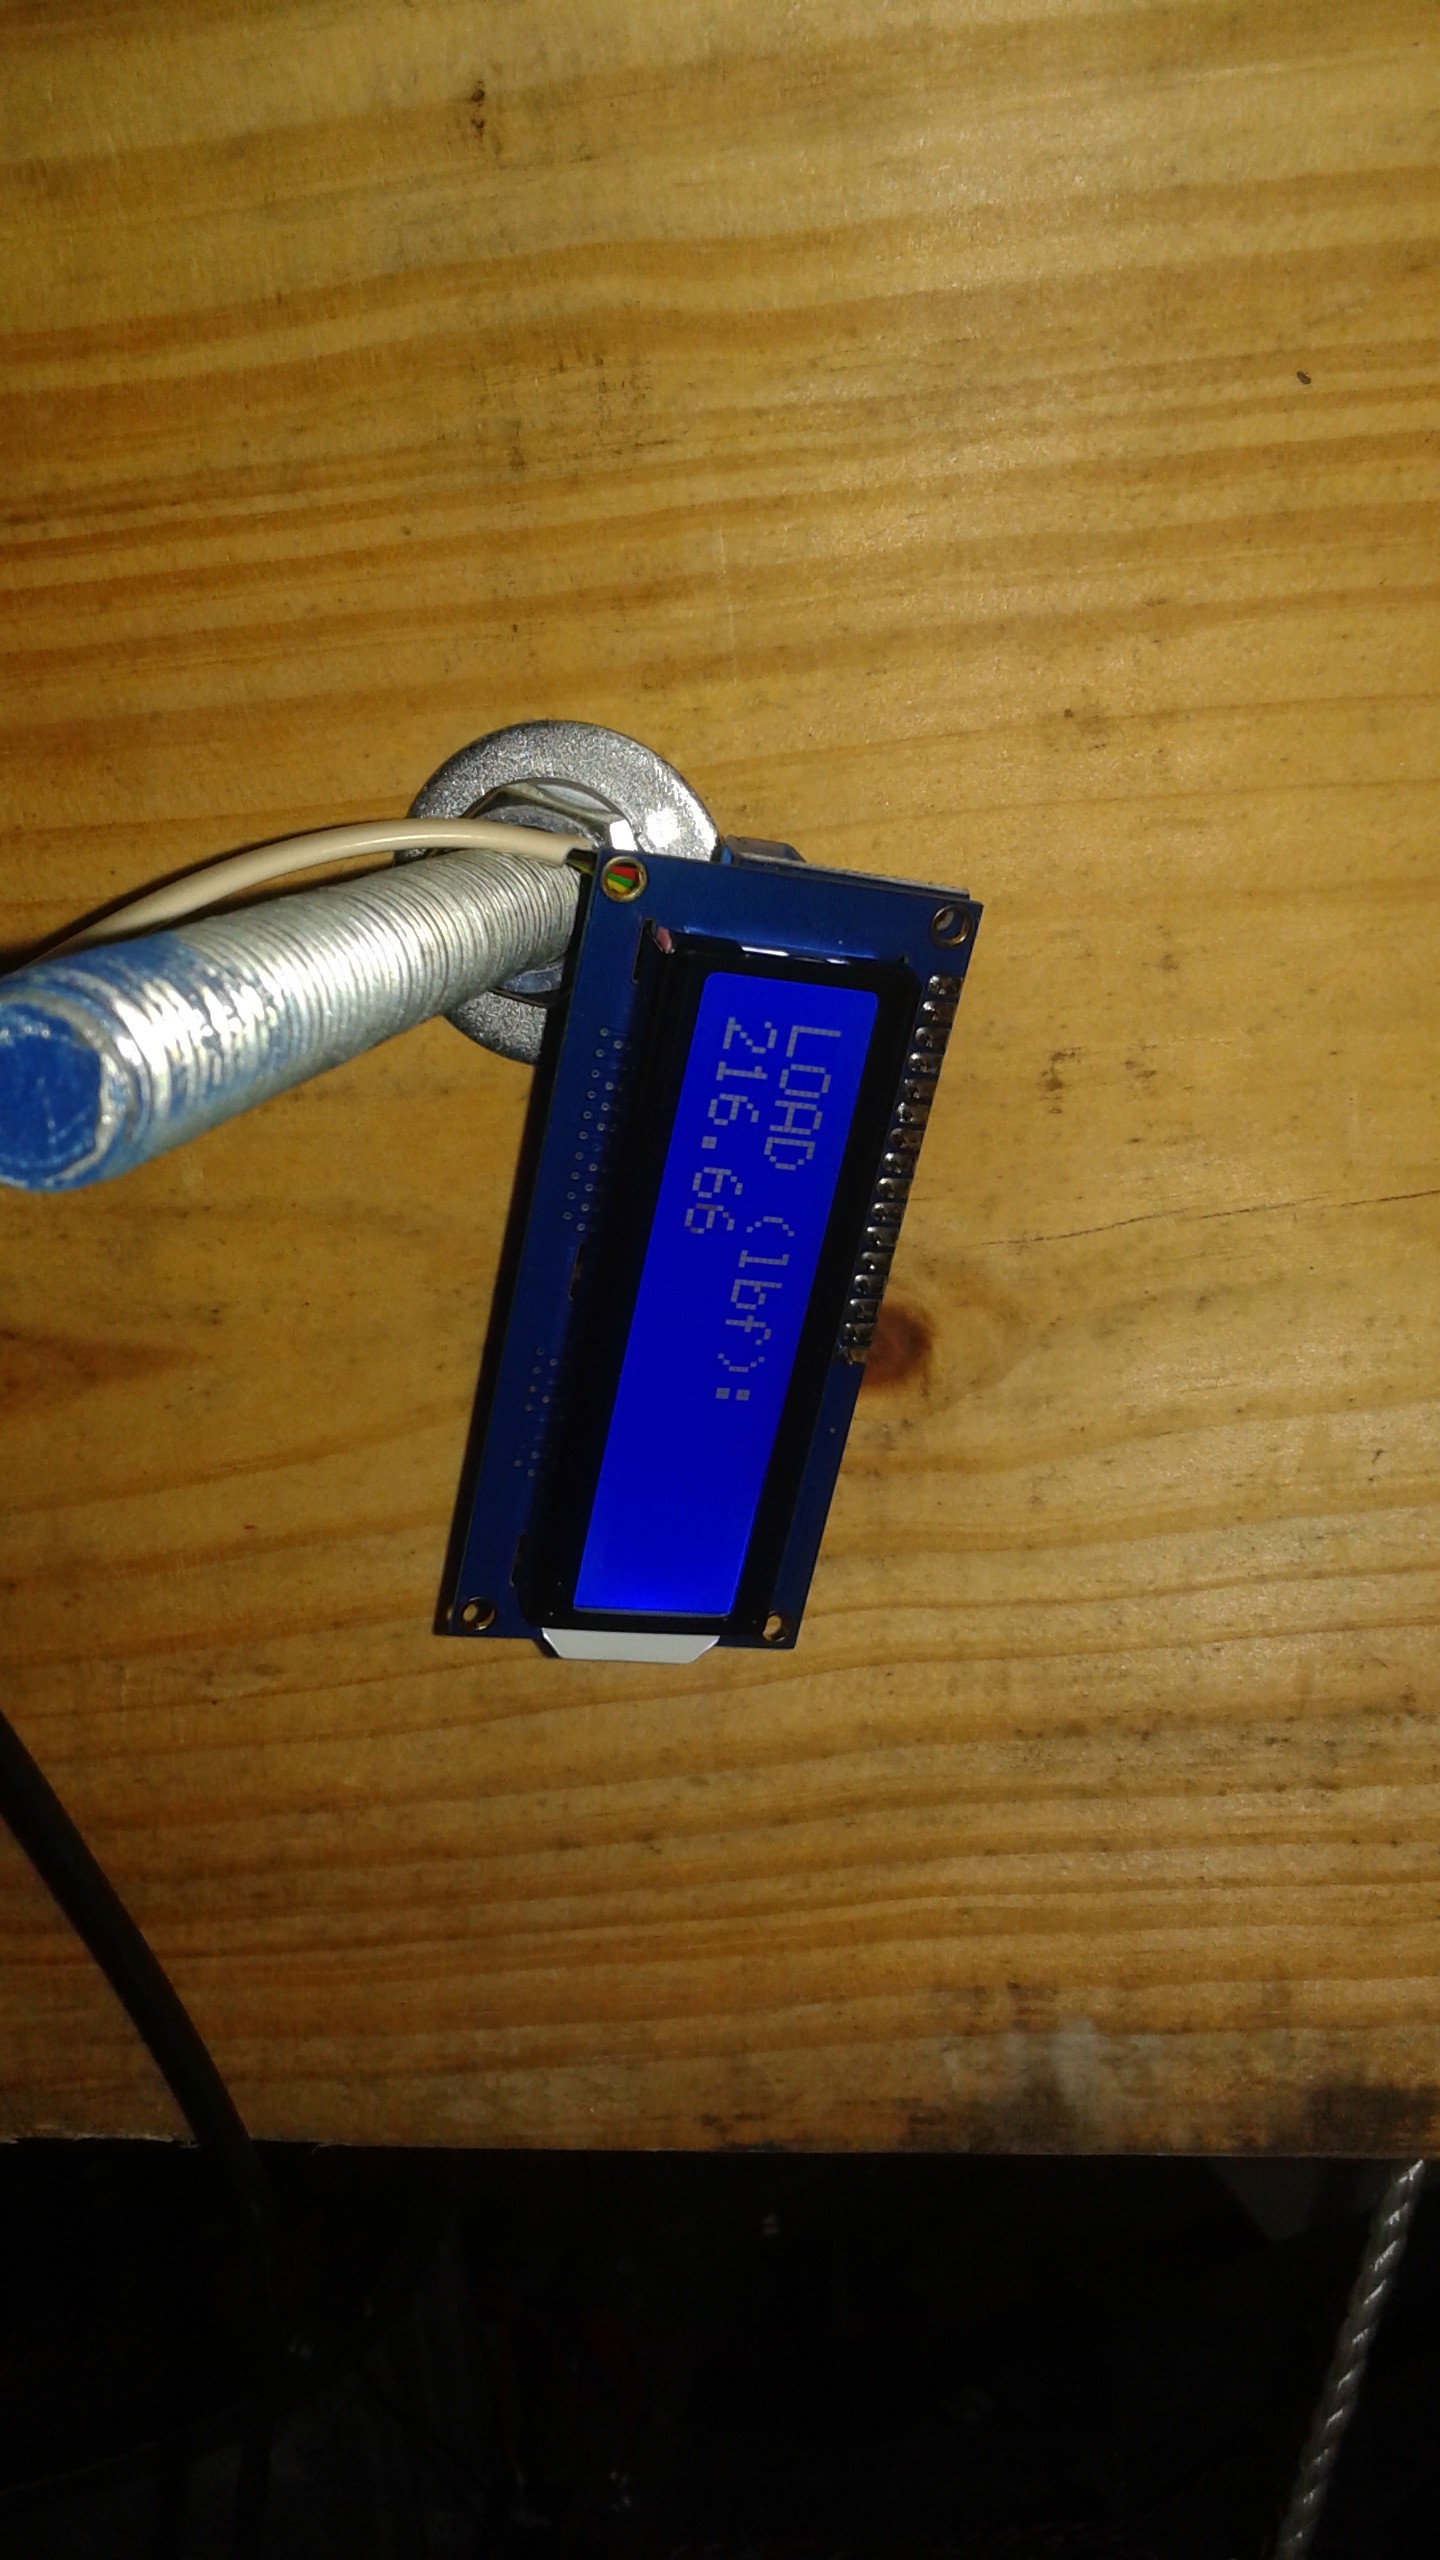
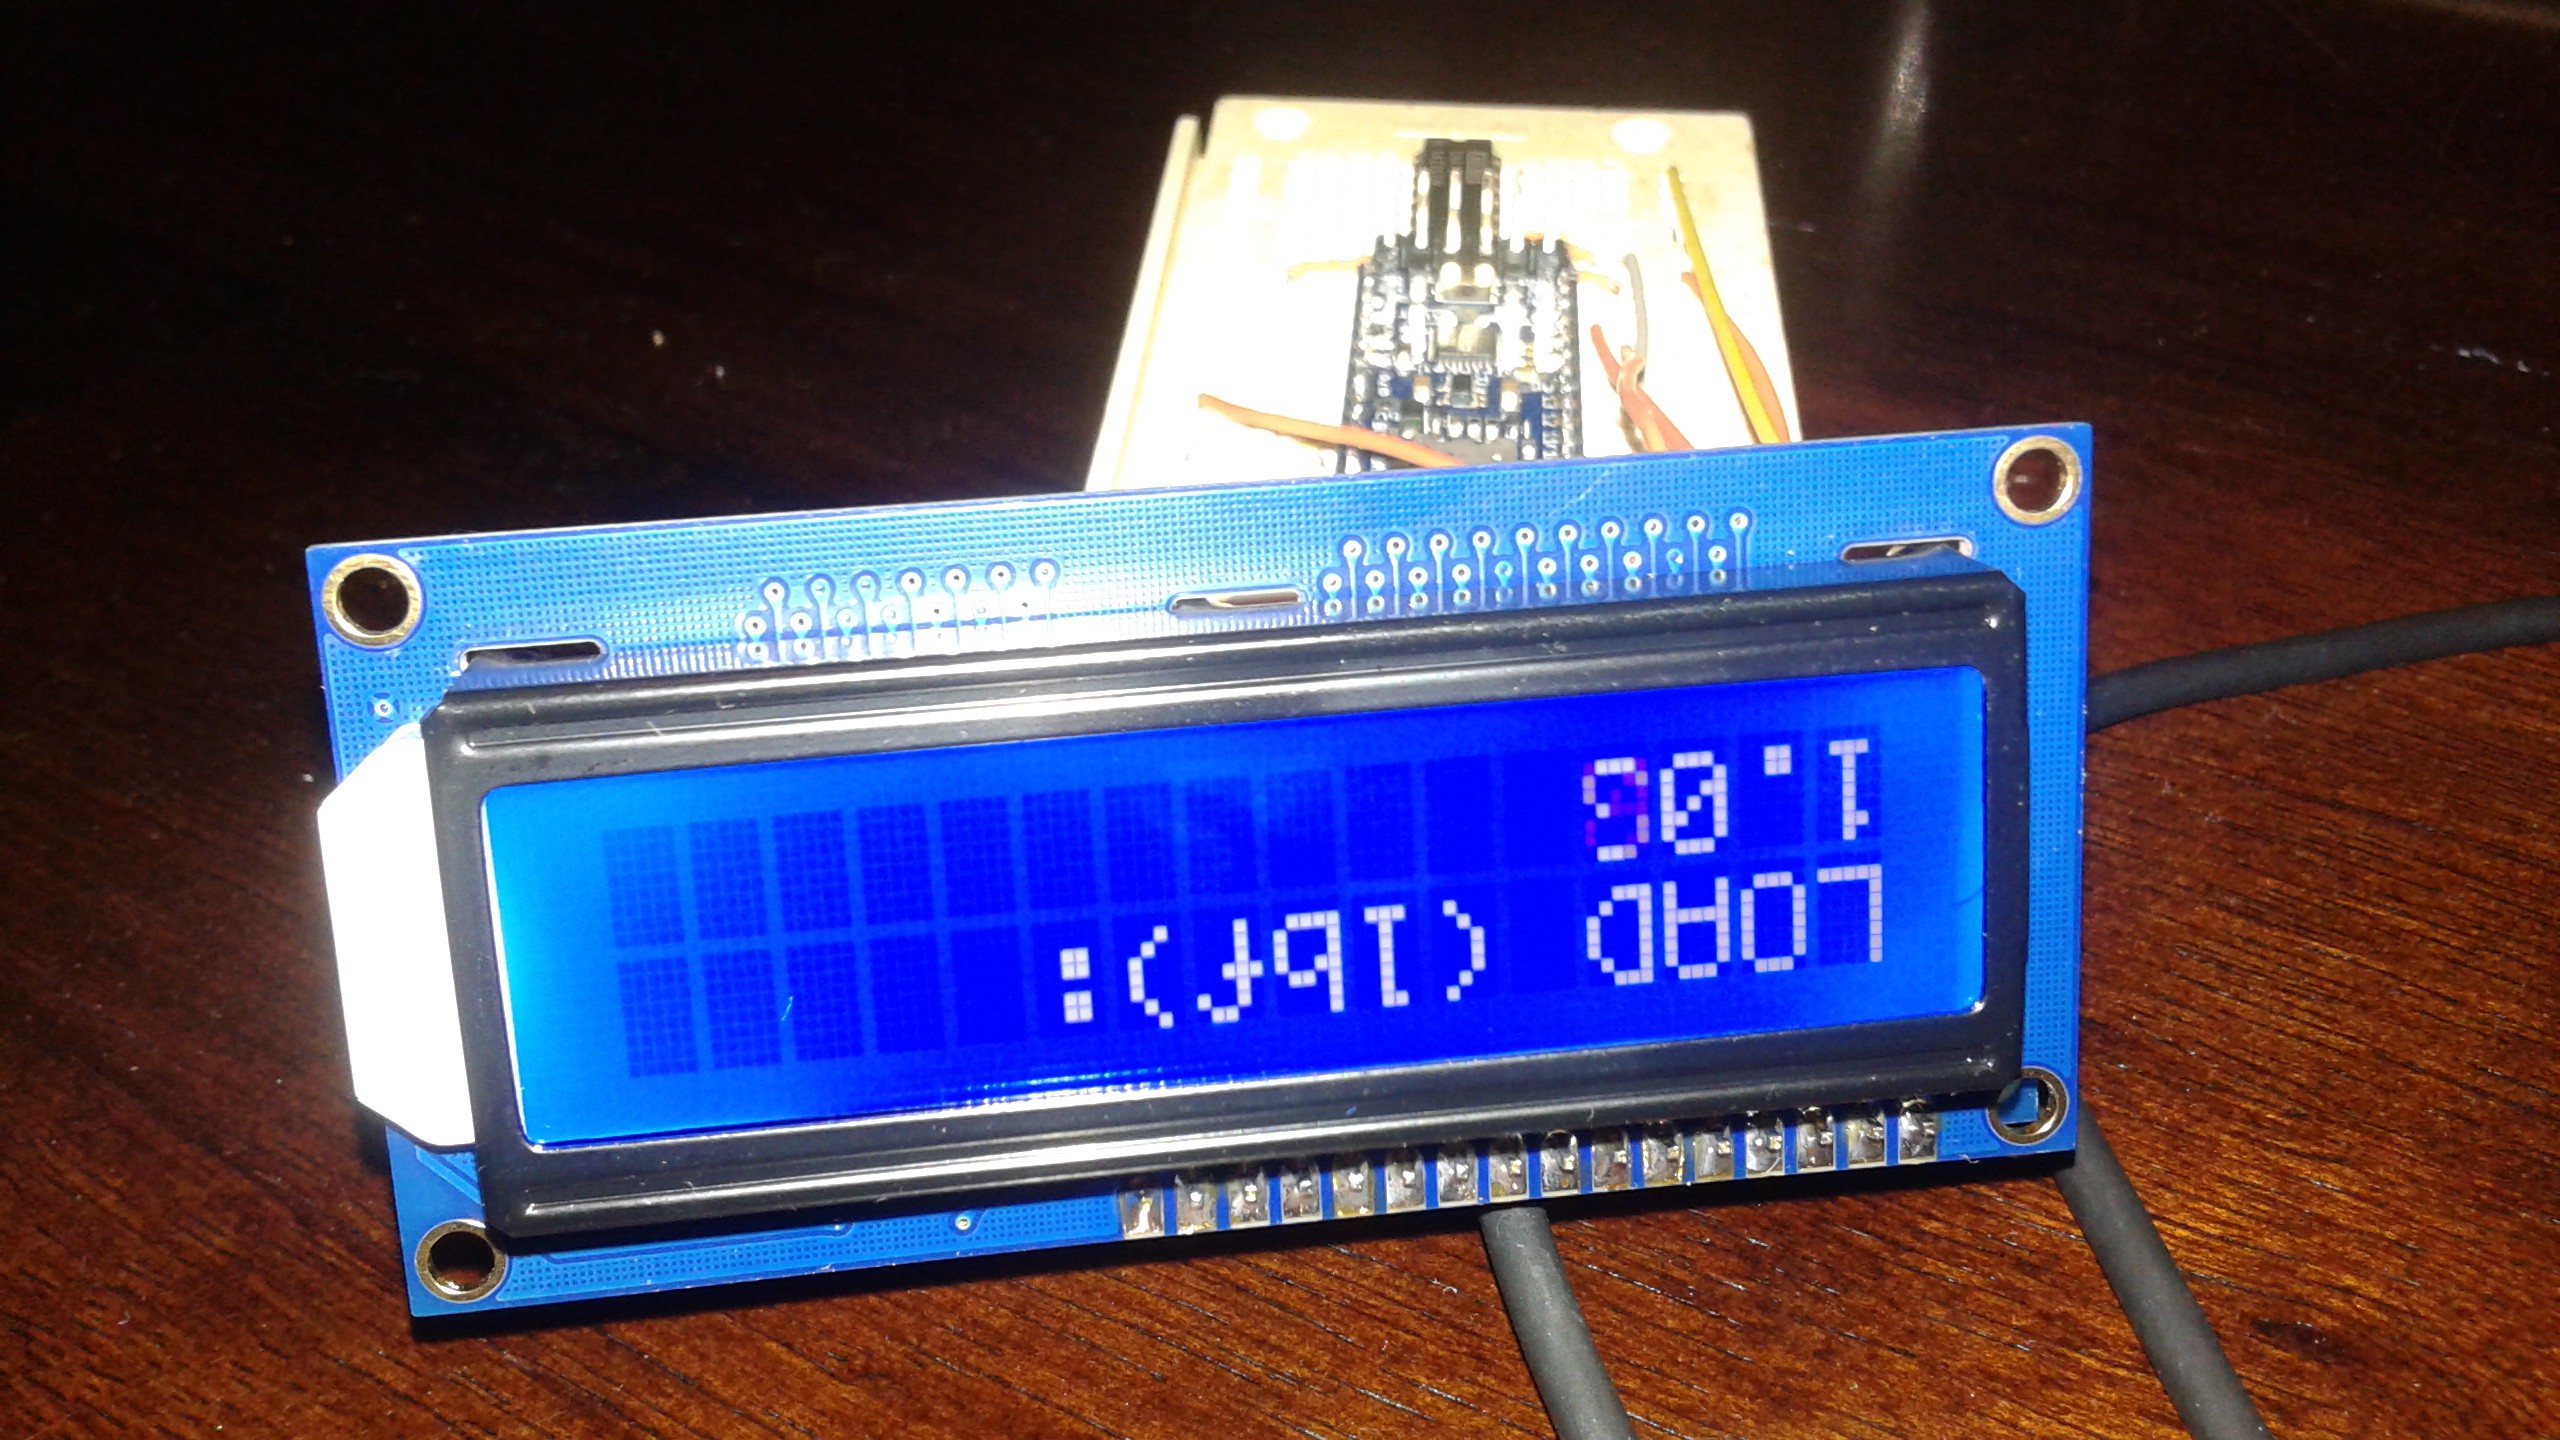
    With nothing hooked up to the analog inputs yet this is the result:

    Yes, the display is upside down. This is due to using the proto-board wires as a temporary connection. The code is doing what I want so far. Next step is the finish wiring up the amplifier and one of the load cells, make sure it works and then make a slightly more permanent board.

  • Getting Started on the Electronics Design

    Peter McCloud02/23/2015 at 05:04 0 comments

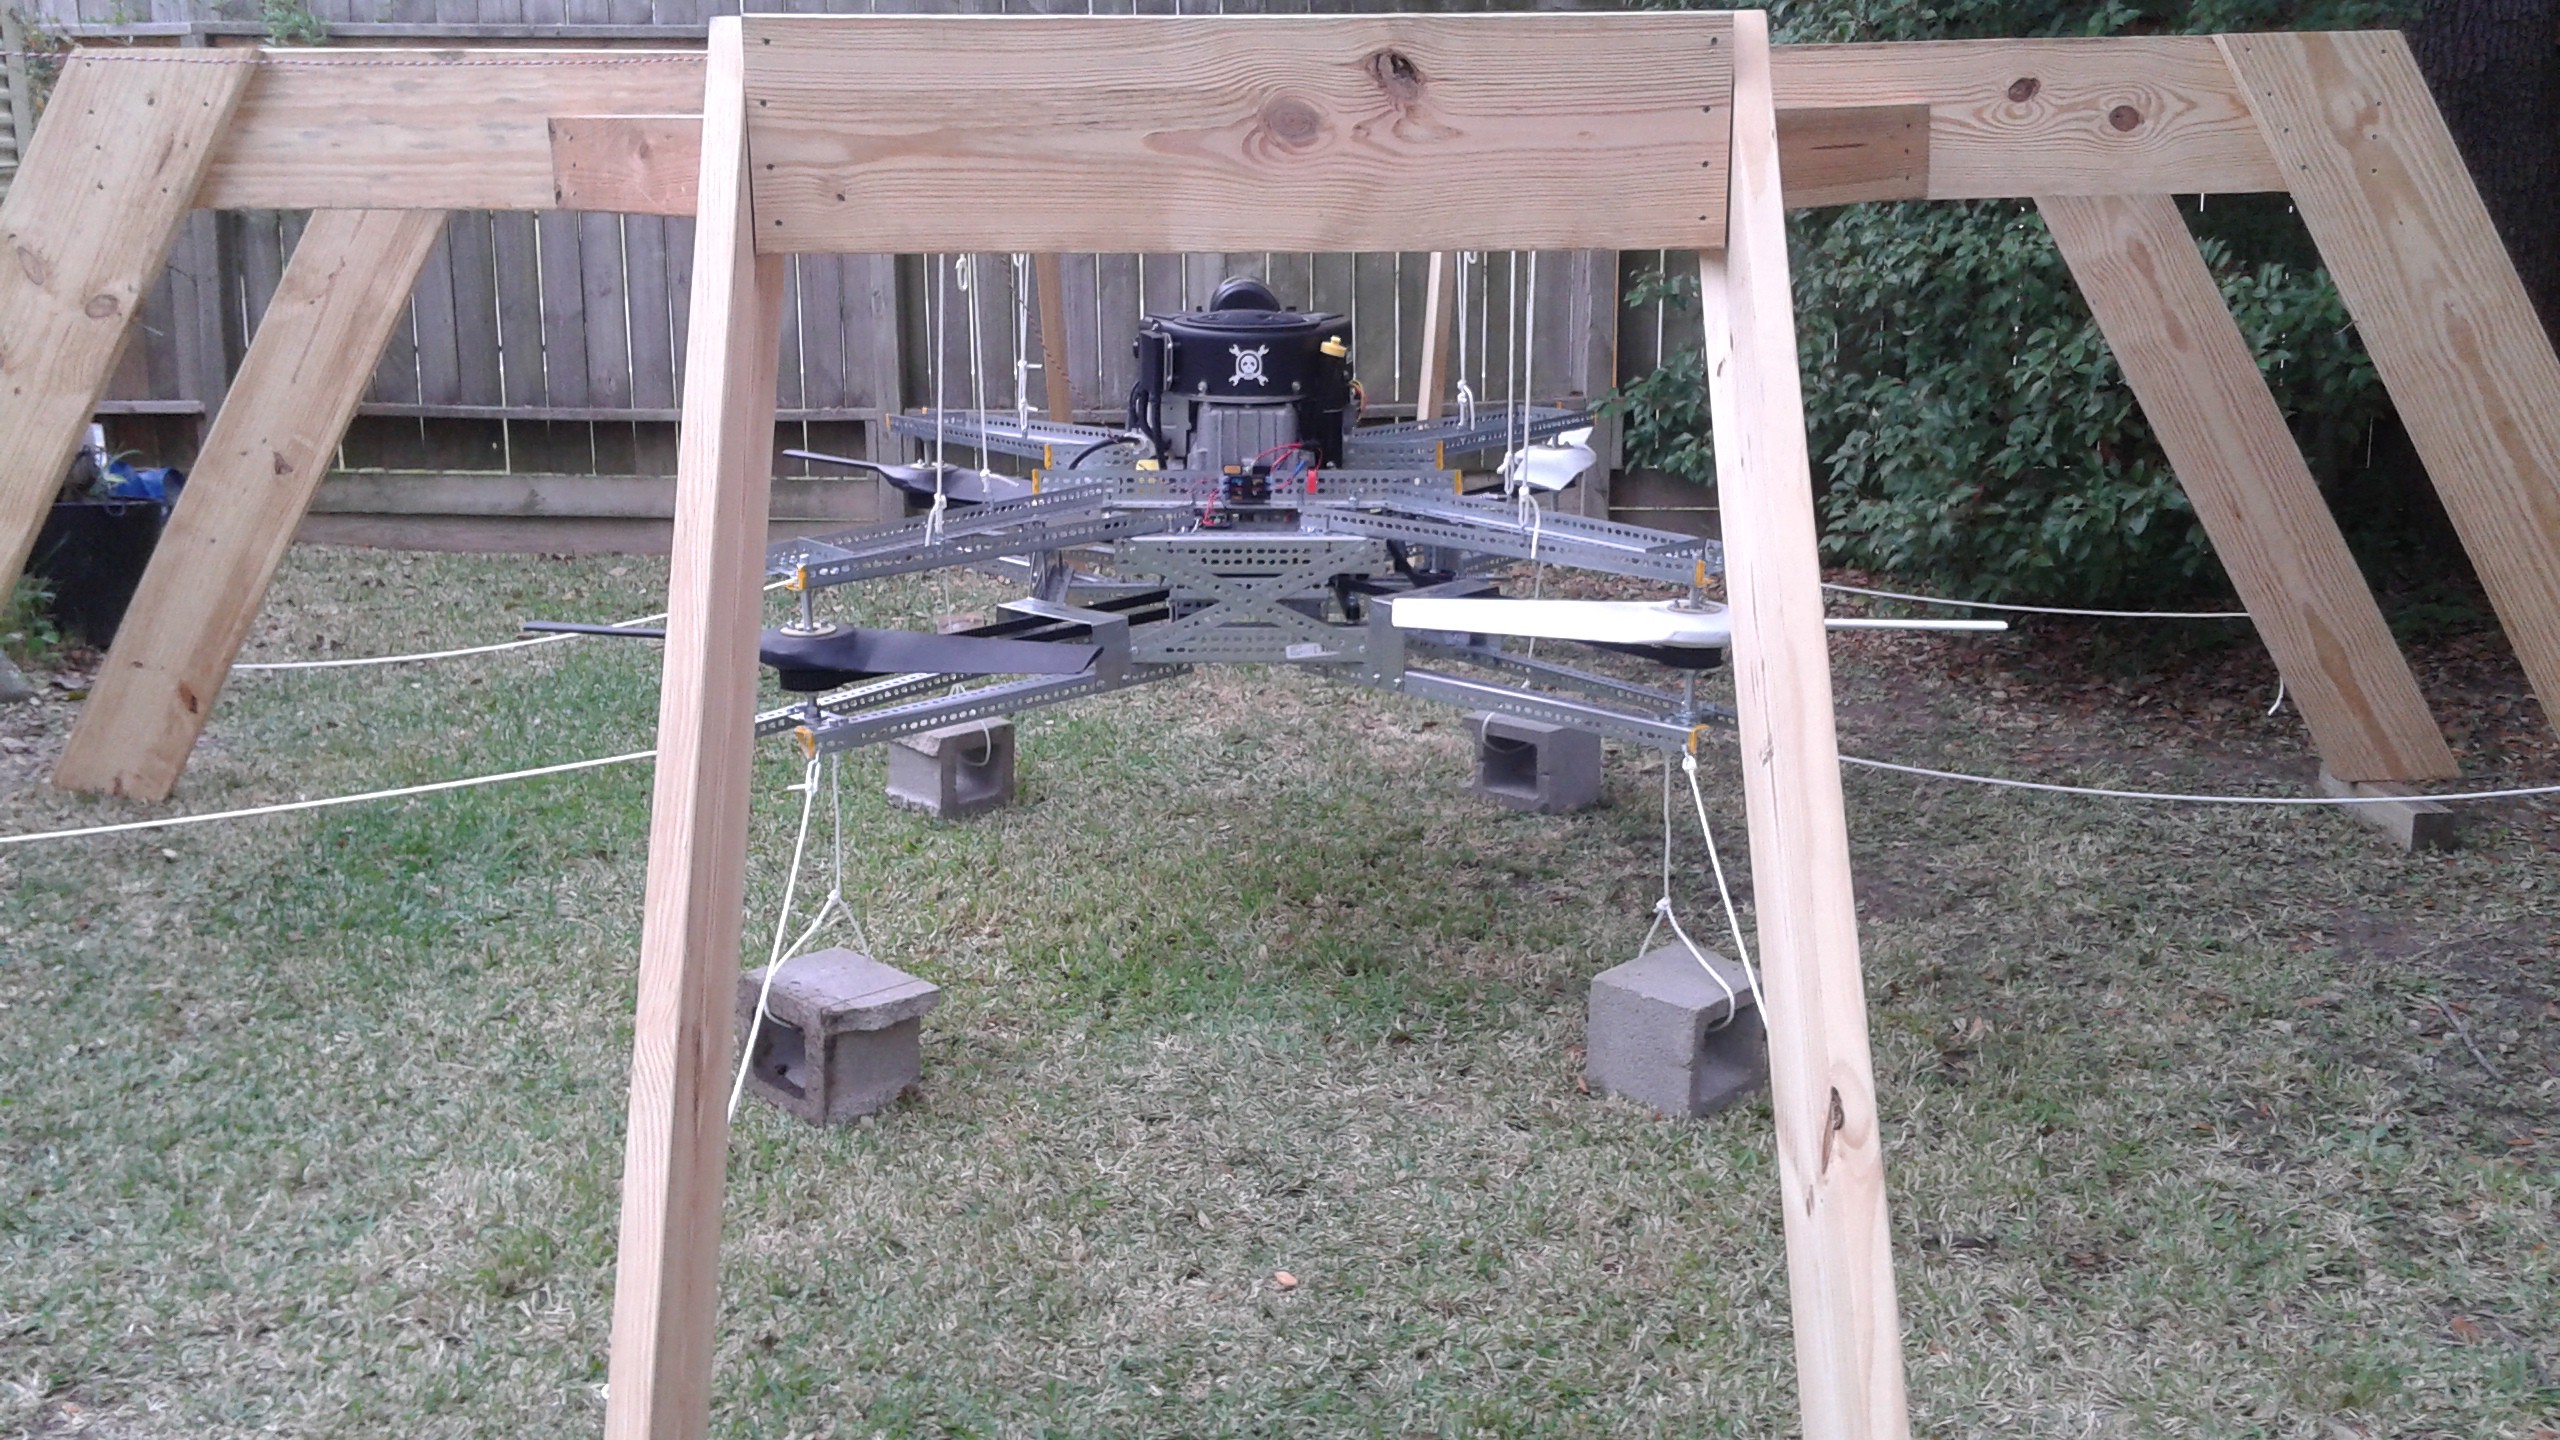
    If you've been following the Goliath Quadcopter project you've seen the test stand being used to test Goliath. It's built from 2x10s and is designed to support Goliath's relatively large mass (240 lbm). Up to now the stand has had no electronics, and the only requirement was to safely constrain the movement to safely test the vehicle, but allow 6 inches of vertical movement for hover testing. Goliath is supported from above with 8 lines, 8 more lines from the sides constrain any horizontal movement and another 4 lines are attached from below. All of the lines are taut with exception to the four below, which have 6 inches of slack in them.

    While the setup is simple, I can only tell if the the vehicle is either not-hovering if the bottom lines have slack, or hovering if the bottom lines go taut. Recently the first test was conducted at full throttle and the bottom lines stayed slack.

    Now there is a need for more data to determine what is going wrong. Two pieces of information needed are weight and thrust. RPM is also needed, but that will likely be computed on-board and be covered as part of another project.

    To do this, the vertical supports will be modified to allow weight and thrust measurement with load cells (FX1901). As @zakqwy mentioned one of the downsides to load cells is that they can be sensitive to off-axis/shear loading, so there will need to be some mechanical design considerations which I'll cover at a later point.

    Why the FX1901? Because they are relatively inexpensive and I have some Mouser credit I got during The Hackaday Prize. These specific ones measure up to 100 lbf and use a 5V supply voltage. I'll be using 4 of them together to measure the total weight, and then use them do deduce thrust as the vehicle is lifted. The other reasons I chose these load cells is because of a tutorial I found on how to wire this load cells up to an Arduino. The voltage output from the load cells are analog and low, so tutorial outlines how to use an instrumentation amplifier to amplify the signal for the Arduino.

    Since the signal is analog, reading the sensor with a micro-controller requires an Analog to Digital Converter (ADC). I have a Raspberry Pi loaned to be from a friend not being used, but apparently they don't have an ADC built in. The Raspberry Pi seems a bit overkill for this anyways, so I'm going to get a 5V based Arduino Pro Mini or a Trinket Pro (Arduino Based).

    Since I don't know much about either I browsed through some other projects on the site. I hadn't really followed the Trinket Every Day Carry (EDC) contest, but I've had a chance to look at some of them now and I have to say there were a lot of neat projects. One that seems somewhat relevant to what I'm doing is the Multi-Meter Remote Display. It uses a a pair of trinkets to remotely display the multi-meter readings. I'd like a similar function, but in my case I want the weight instead of a voltage reading.

    It may also make sense to add temperature and pressure measurements, to record the values for each test. It may also make sense to add some sort of interface to tare the weight measurement

    This will be my first arduino base project, so I've got a bit of learning to do. I've taken high school electronics and a circuit analysis class as part of my mechanical engineering degree, but it's been a while, so if anyone is looking at what I'm doing and sees something wrong, PLEASE let me know.

View all 6 project logs

  • 1
    Step 1

    Assemble the Frame

    A) Cut the Frame Pieces

    B) Put the Joists together

    C) Tilt the main joists on it's side and attach the first two legs

    D) Tilt the frame back up and attach the two legs

    E) Repeat the Process for the other half

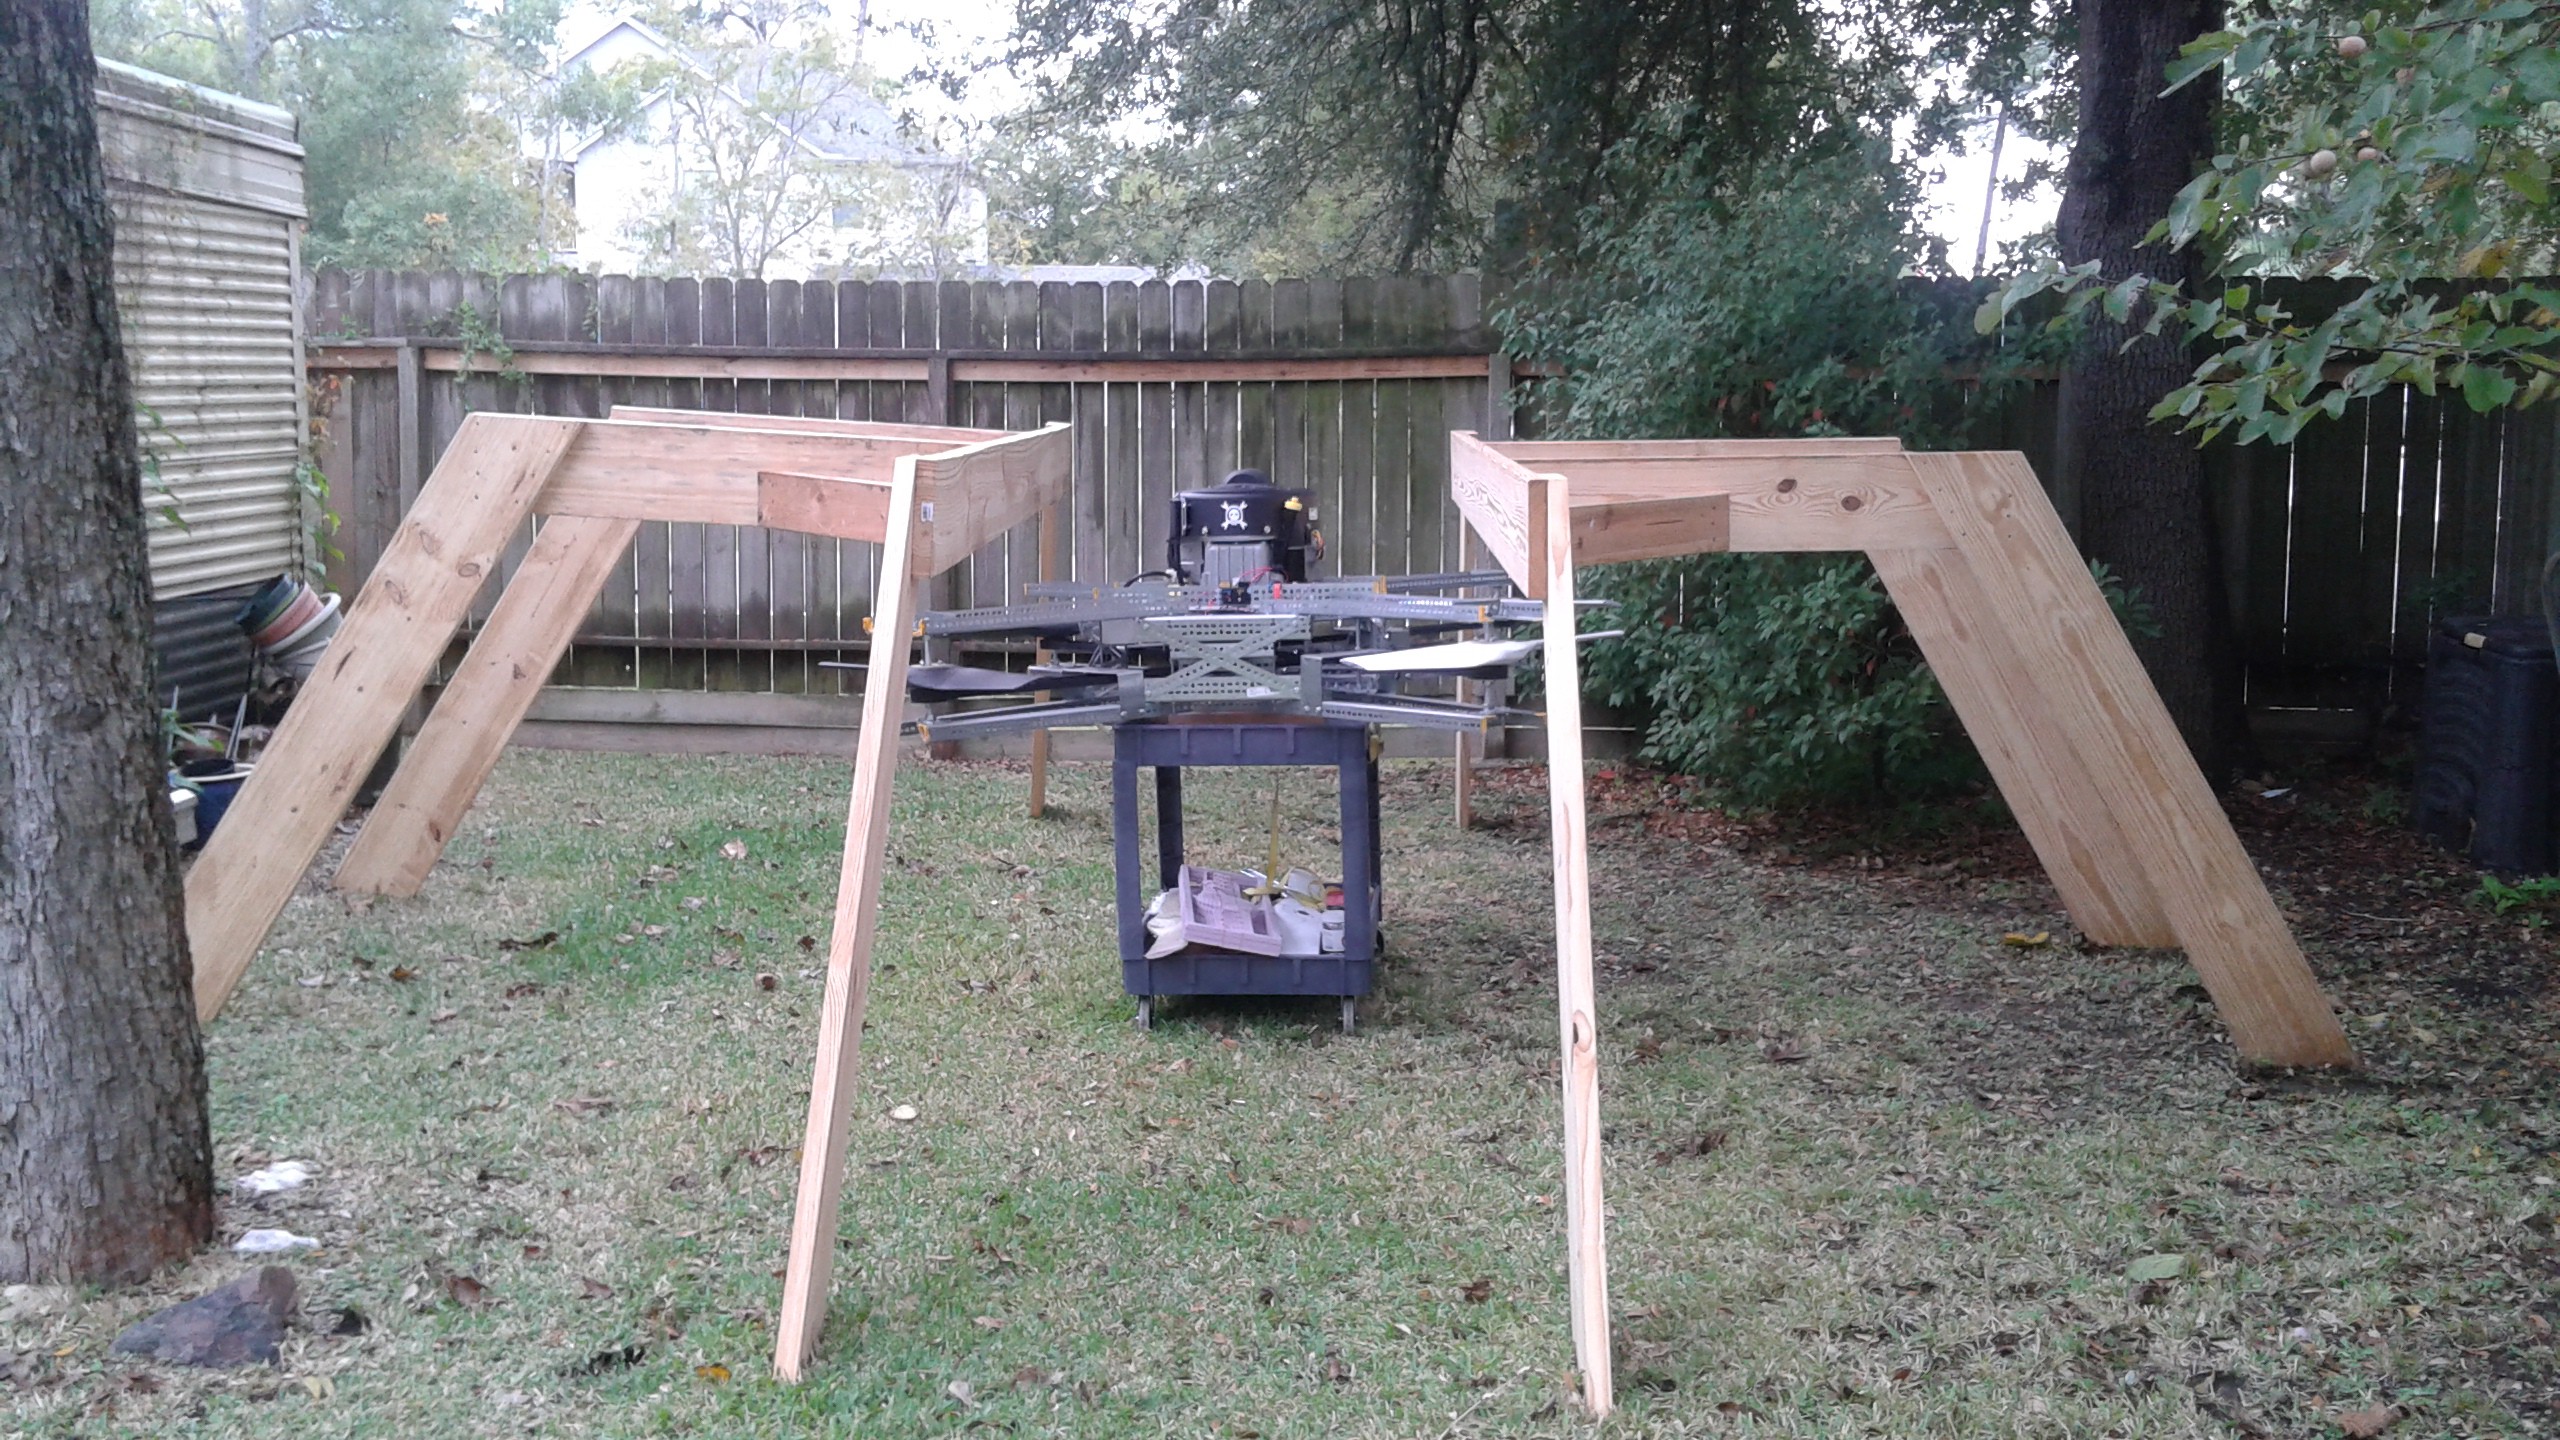
    F) If your vehicle is large (like Goliath) it may not fit in the space between the legs. If so, place the vehicle in the center and place the two halves in position

    G) Attach the cross beams to join the two halves together

    At this point the stand can be used passively for testing. Depending on the vehicle configuration lines can be connected from above and from the sides to constrain the vehicle

  • 2
    Step 2

    Adding the Thrust Measurement Hardware

View all instructions

Enjoy this project?

Share

Discussions

Jim wrote 08/01/2019 at 10:16 point

Hi, Just curious, how do control the prop speeds independently, with only one motor ? Cheers

  Are you sure? yes | no

Peter McCloud wrote 08/01/2019 at 14:38 point

Thanks for checking it the project! We're using #EVPR: Electric Variable Pitch Rotors to control the thrust at each rotor.

  Are you sure? yes | no

Jim wrote 08/10/2019 at 10:09 point

See, that's what happens when idiots like me don't read the whole article before asking stupid questions.  Keep up the great work !  Best regards.

  Are you sure? yes | no

zakqwy wrote 02/20/2015 at 03:58 point

Excited to see the load cell setup. One source of inaccuracy for load cells is off-axis/shear loading; good ones are designed with this in mind (as I'm sure you've found) and incorporate some kind of parallelogram mechanism to keep the faces in line. It's definitely nice to get actual thrust data--helped me out a ton!

  Are you sure? yes | no

Similar Projects

Does this project spark your interest?

Become a member to follow this project and never miss any updates