 Kayser-Sosa
-
1Step 1
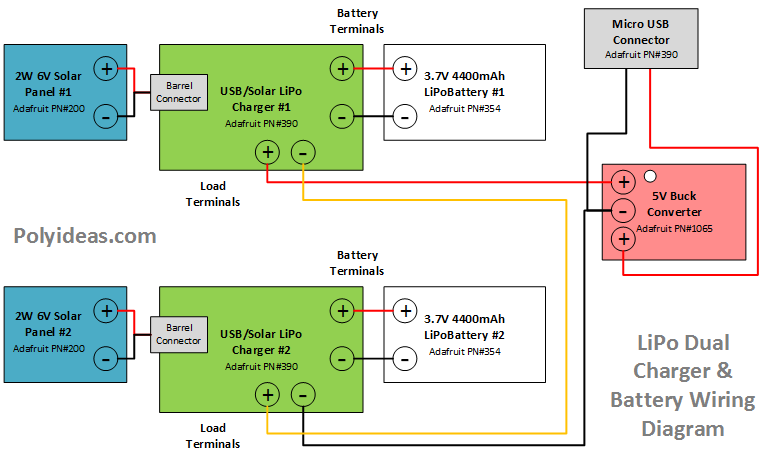
Connect everything up and verify everything works on a breadboard to power a Raspberry Pi.
![]()
Image from <http://www.polyideas.com/blog/2013/7/10/solar-powered-raspberry-pi>;
-
2Step 2
Make a cardboard template of the mounting plate, adjusting it so it will fit into the bag.
-
3Step 3
Layout the components on the cardboard template so they will fit.
-
4Step 4
Cut two pieces of acrylic using the template as a guide.
-
5Step 5
Lay out the components on the acrylic, mark and drill holes for the component boards.
-
6Step 6
Attach the solar panels to bag by unscrewing the mounts on the back of each panel. Place the unscrewed mounts through the mesh on each side of the bag and through a thin plastic plate (or other water proof item, such as a washer, to help hold them in place), and screw the mounts back in.
-
7Step 7
Measure and cut the lengths of wire required for run.
-
8Step 8
Soldier everything in place, that needs to be.
-
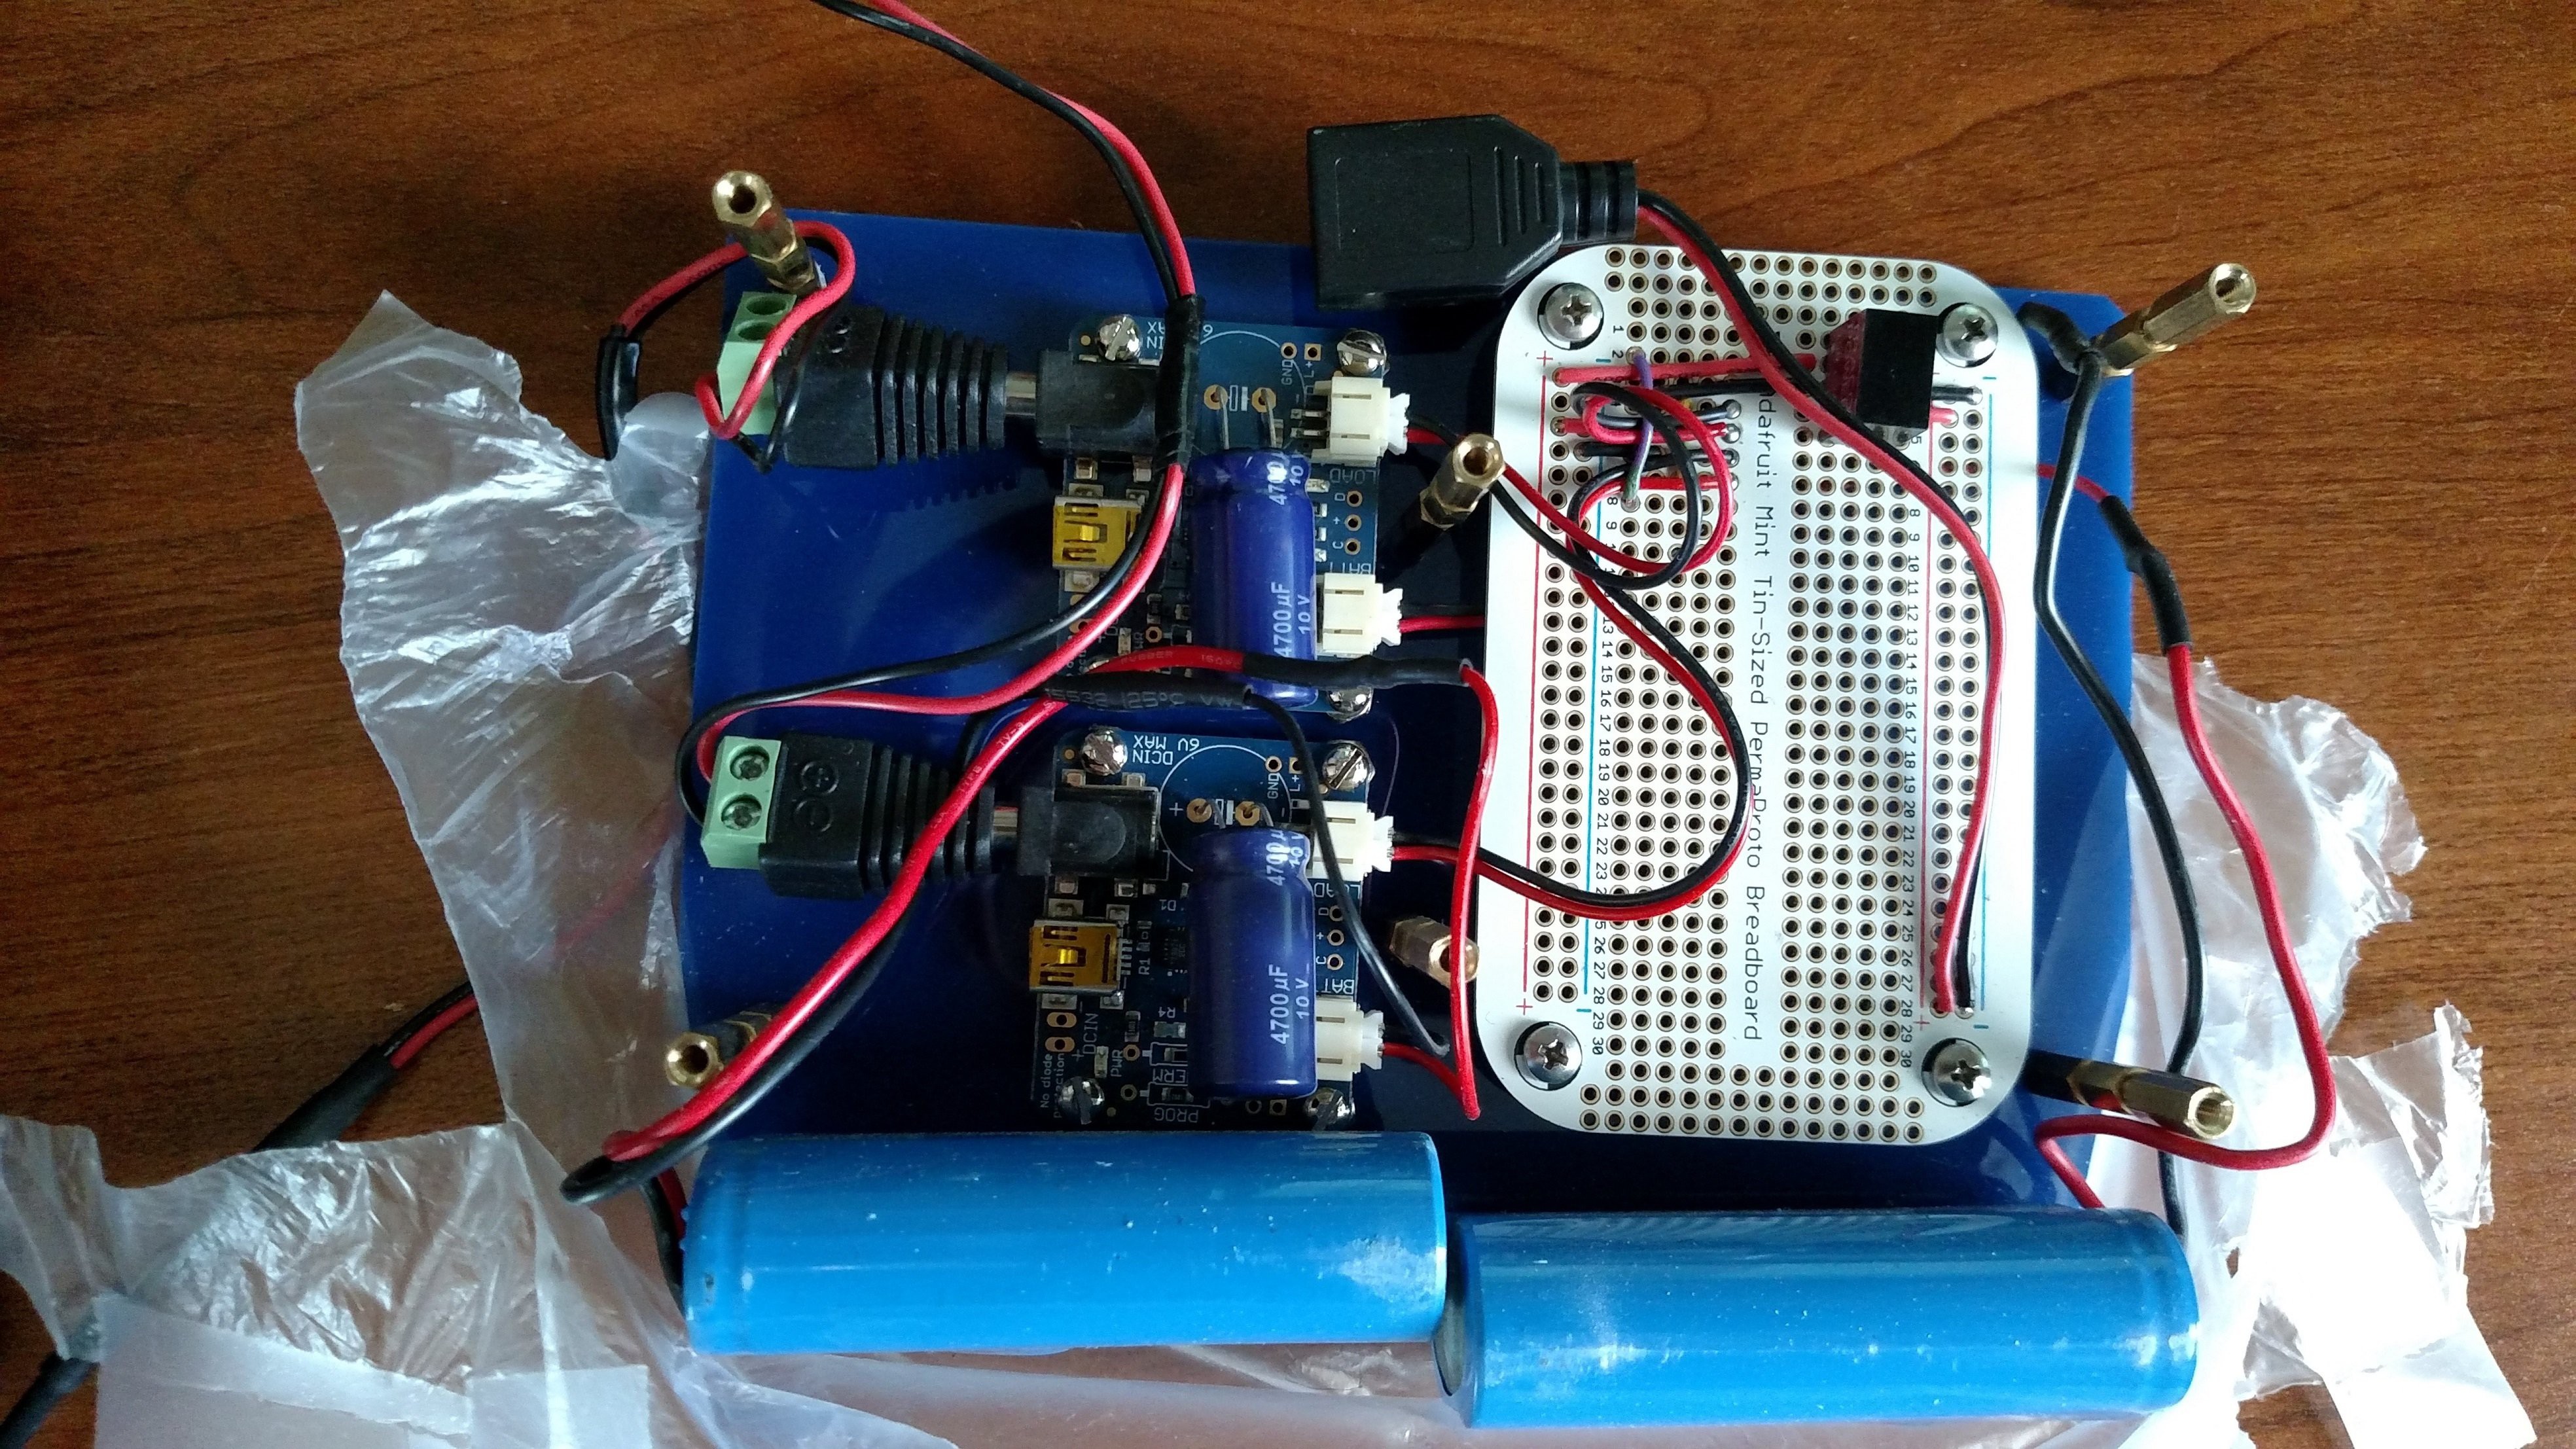
9Step 9
Mount all the components to the acrylic back plate with standoffs.
-
10Step 10
Mount standoffs that will hold the top piece of acrylic in place.
![]()
Solar Powered USB Charger
A solar powered USB charger specifically for mounting on a bicycle.
Discussions
Become a Hackaday.io Member
Create an account to leave a comment. Already have an account? Log In.