MasterOfNull
-
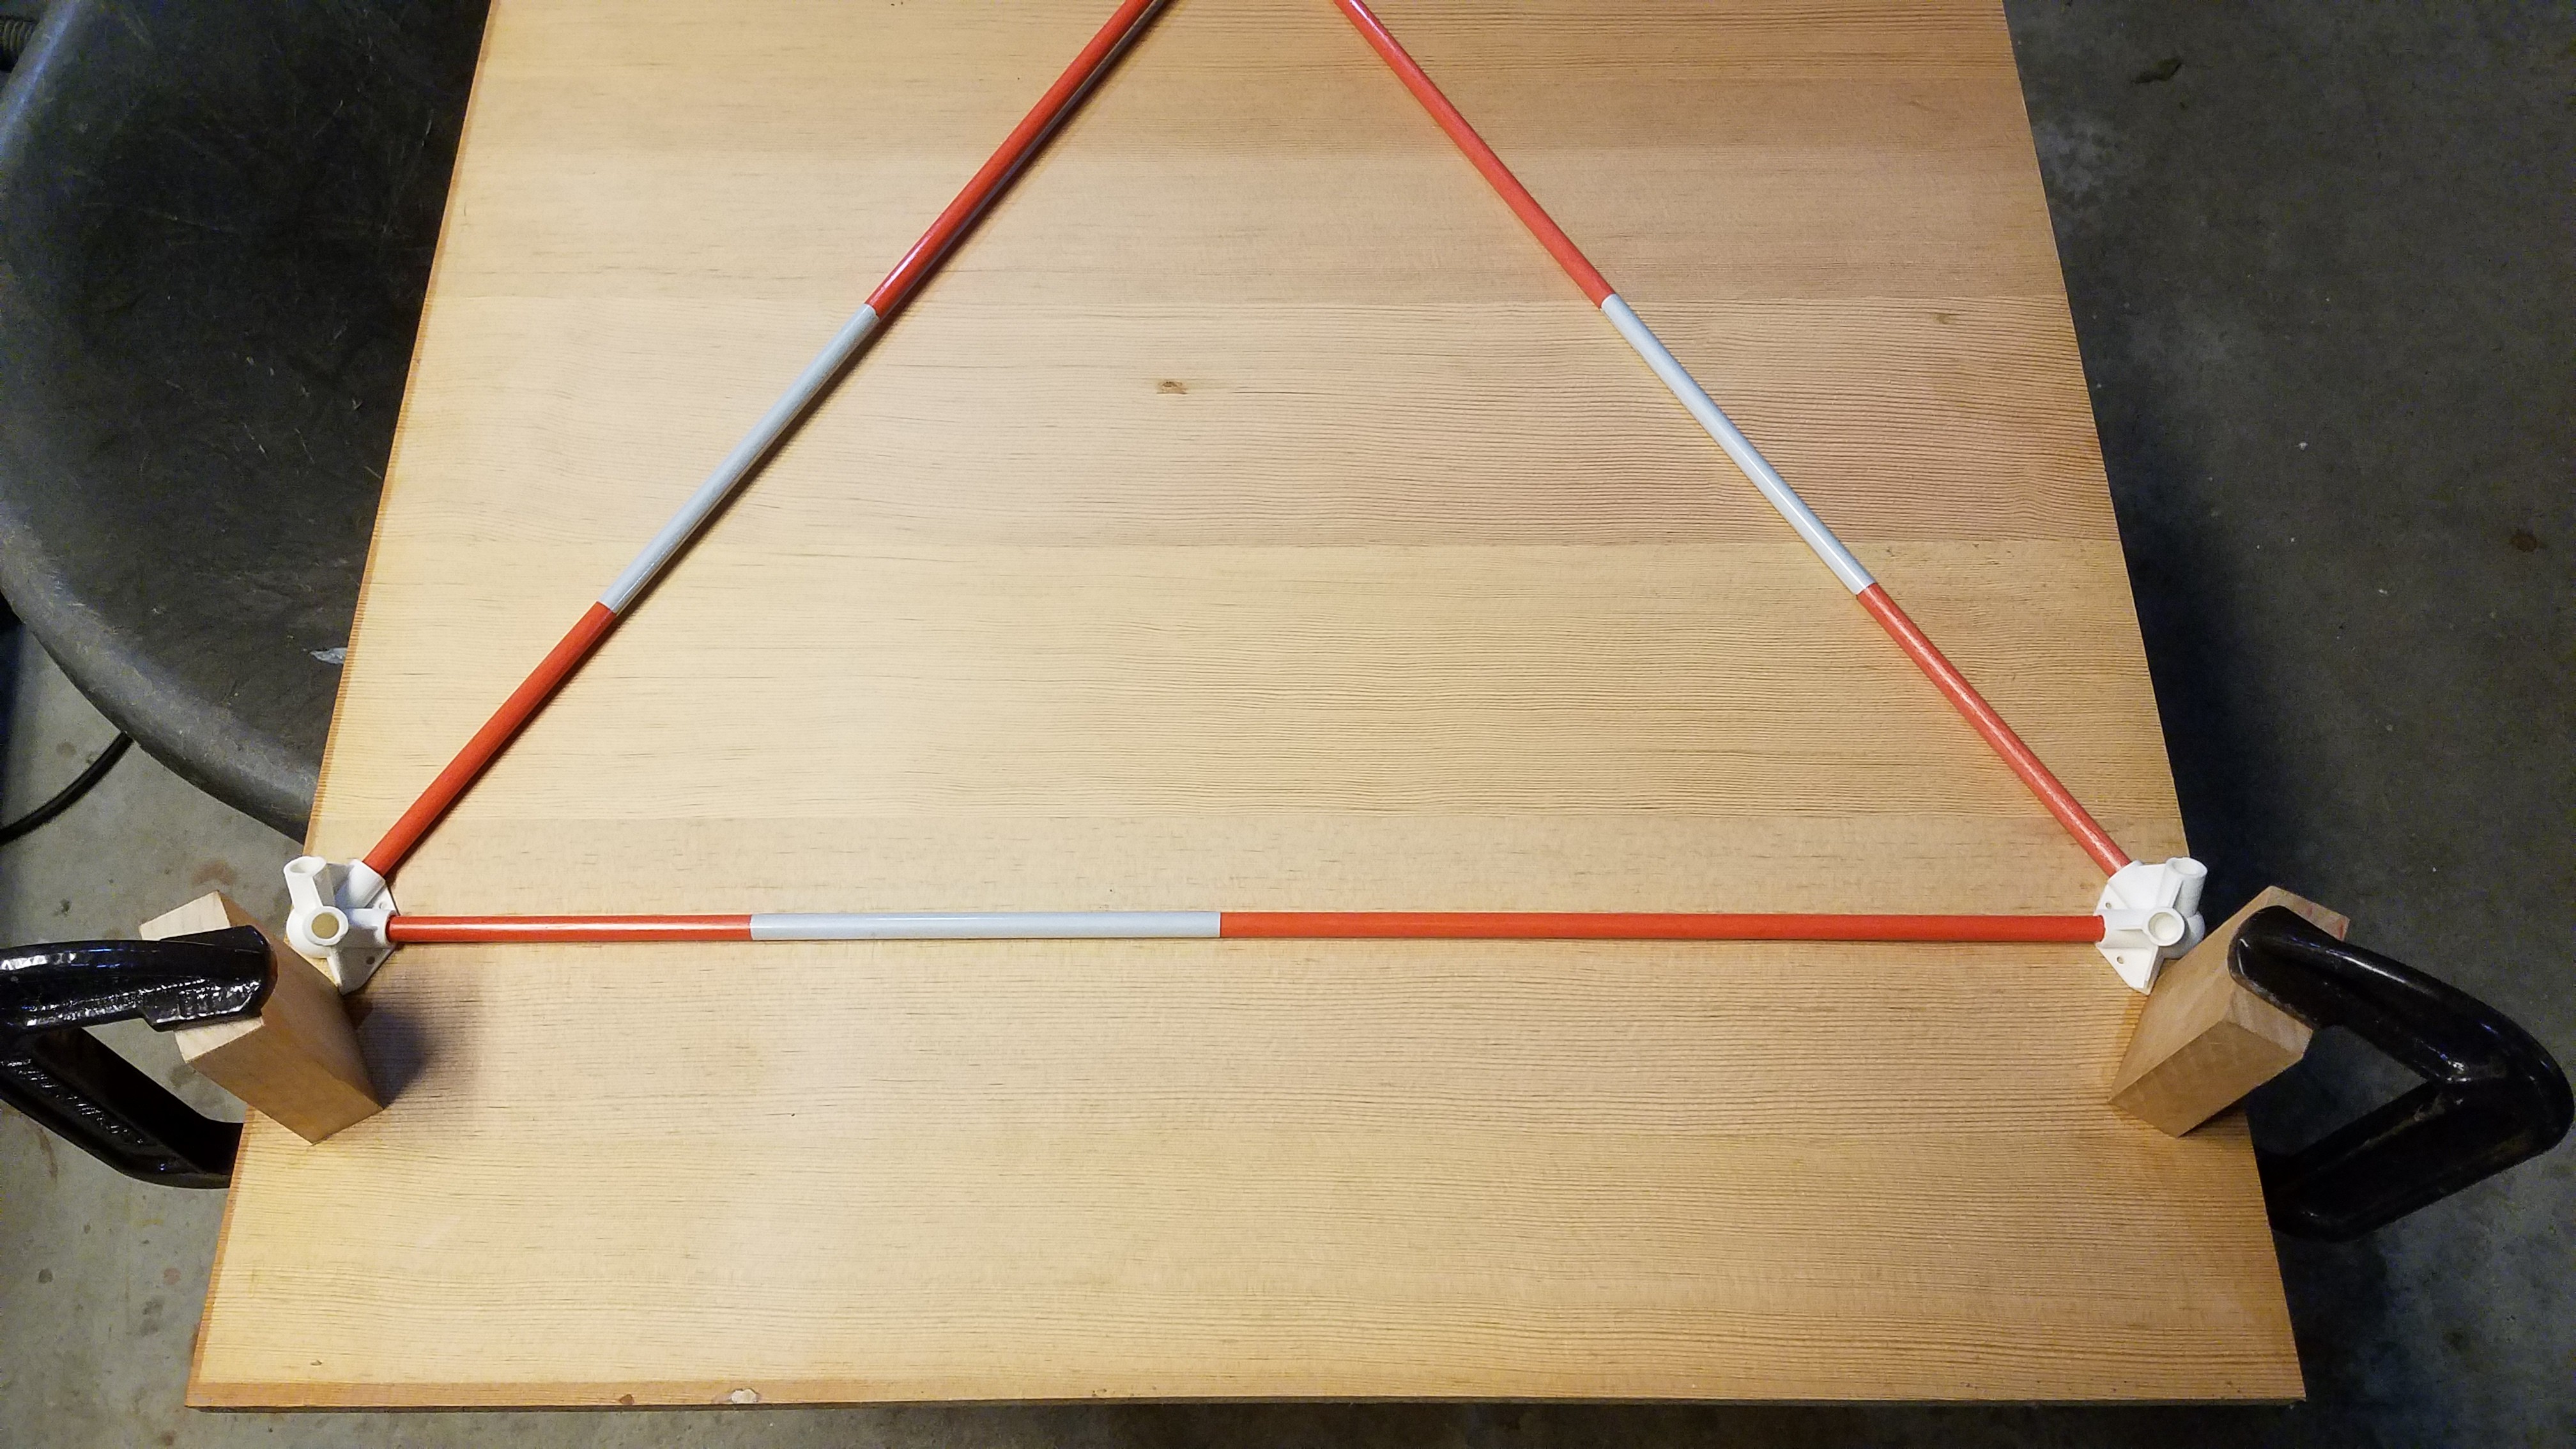
Fold yourself 3 times.
08/09/2018 at 20:52 • 0 commentsI liked the new angle. I think it will work.
As I was laying it down after trying the parts, I had a little brainstorm and realized how to make it fold basically flat.
I've implemented it. :)
![]()
I now have to print 12 different parts though.
-
Cat toy.
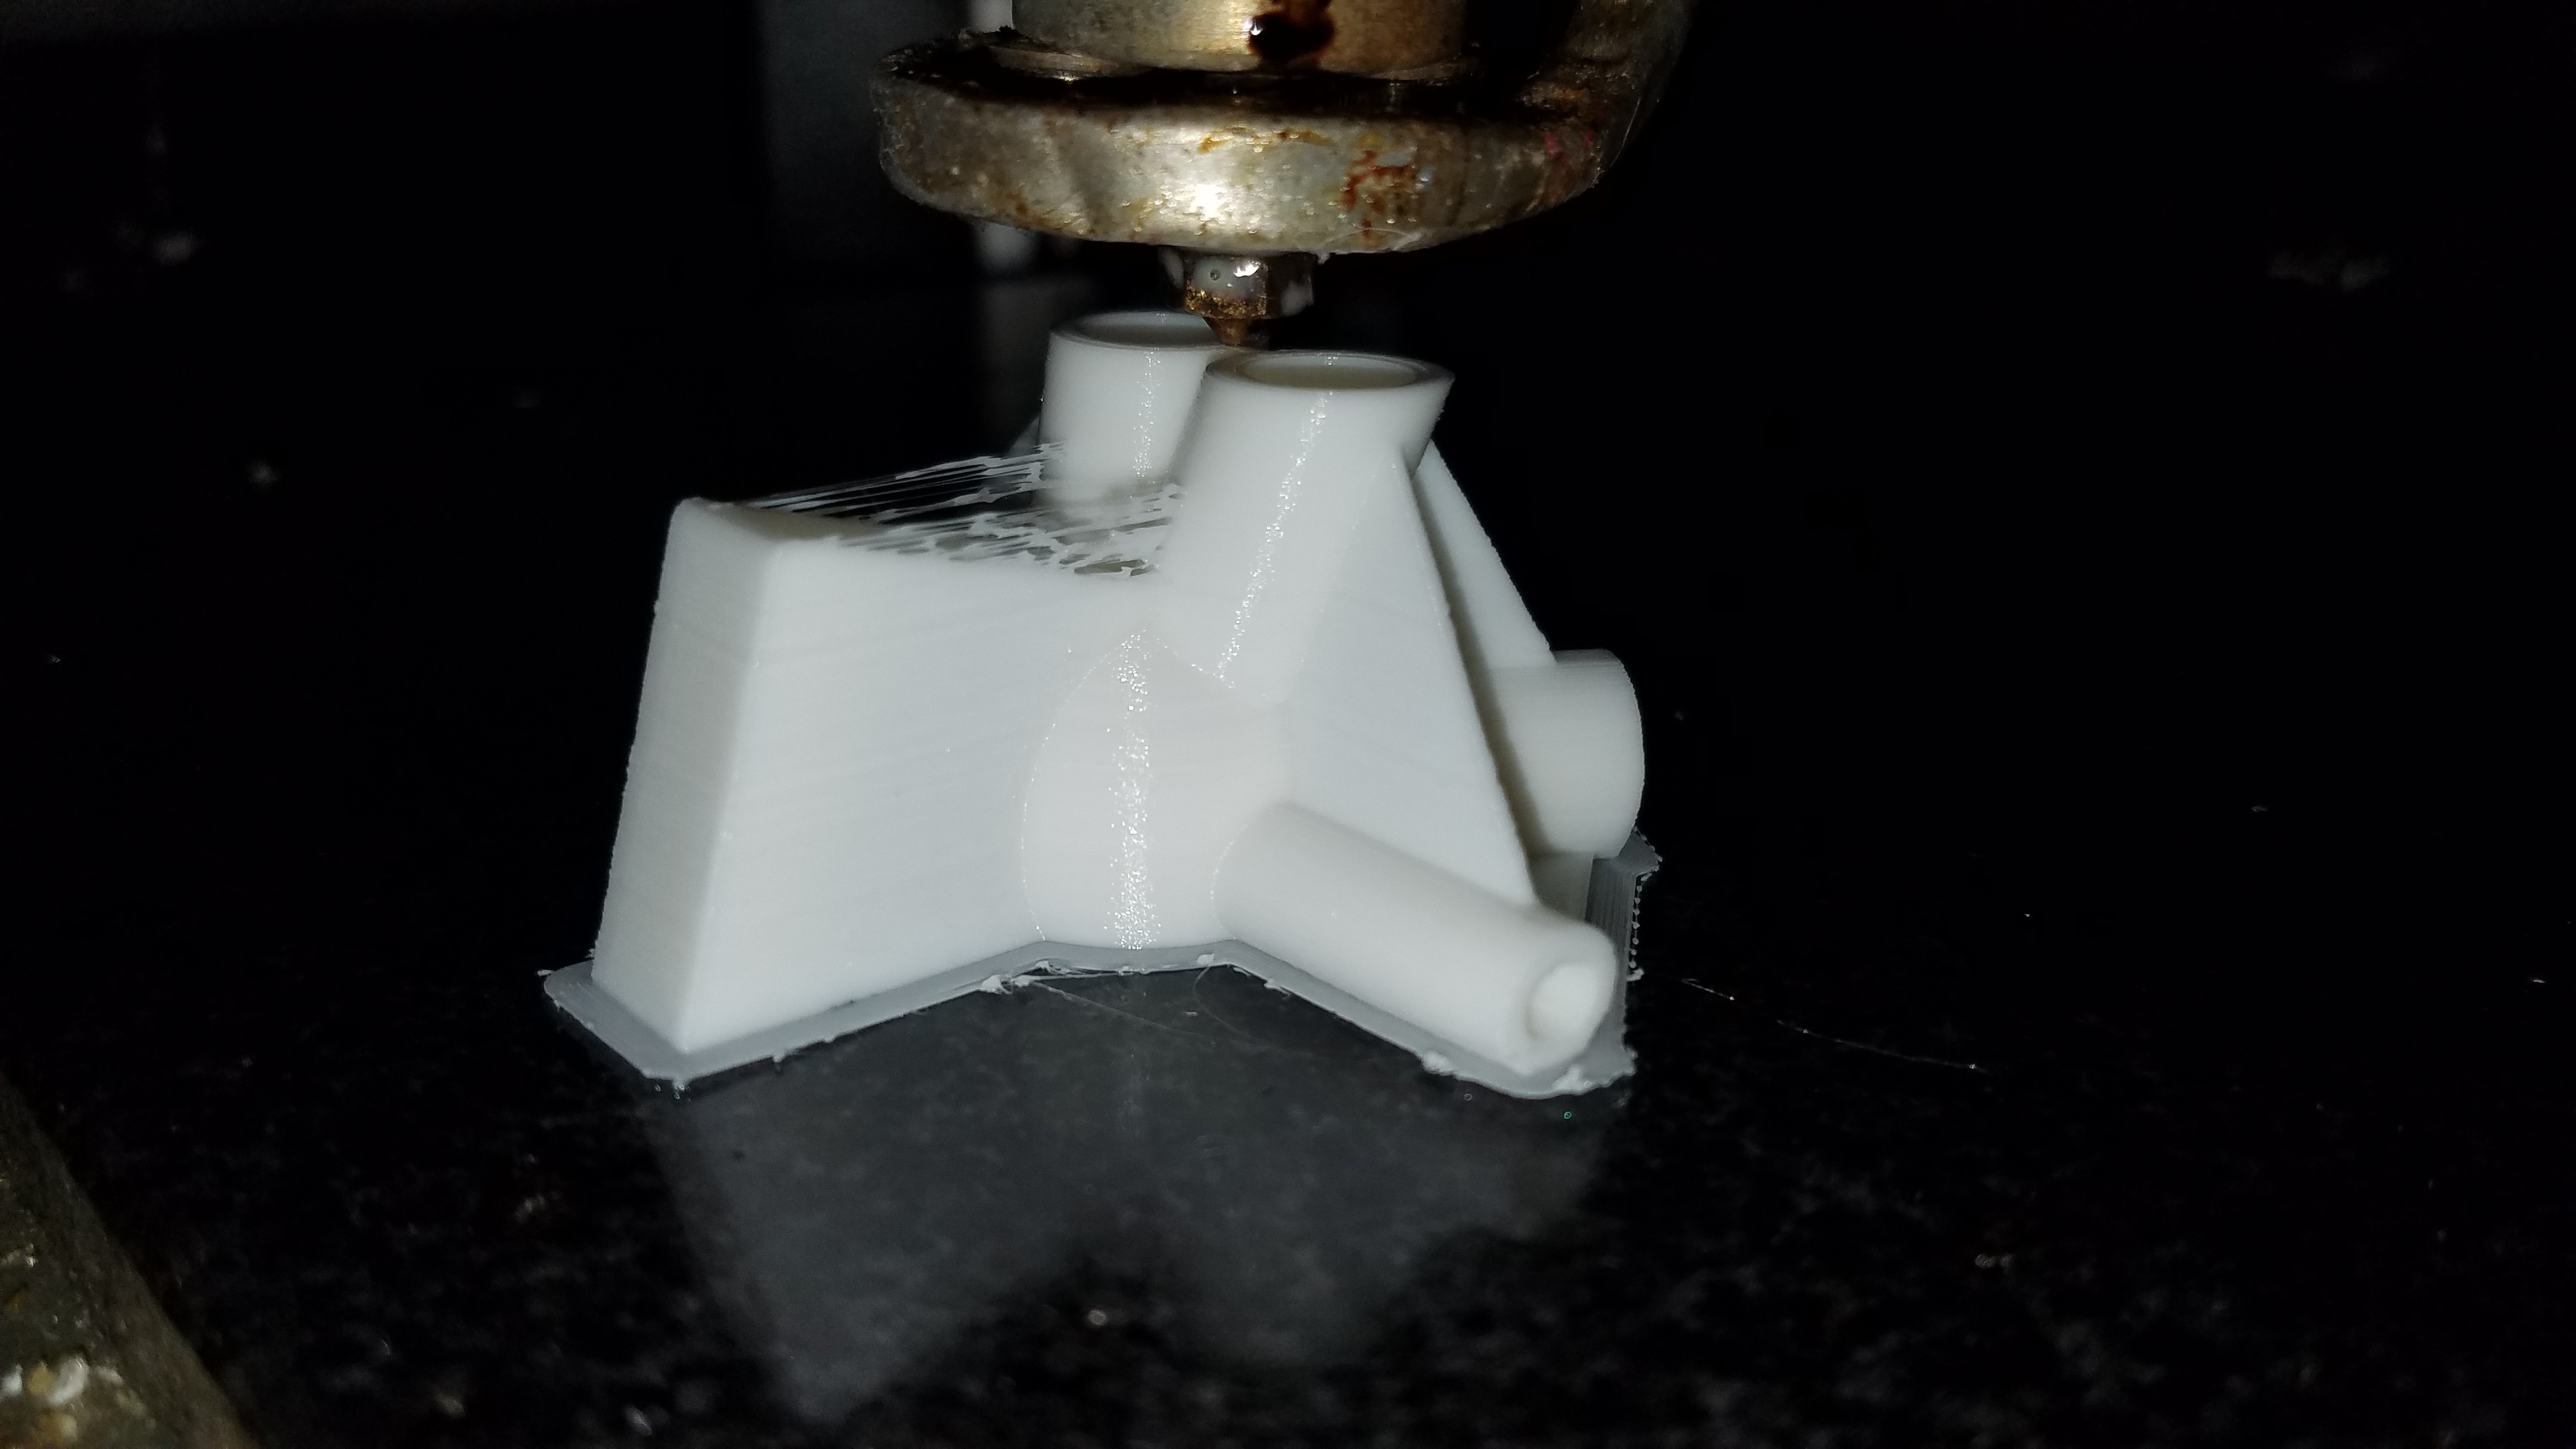
08/09/2018 at 14:31 • 0 commentsI finished my changes to get back a bit more rigidity and was reprinting the parts last night.
However, one of my prints must have caught the print head early on, let loose, and I ended up with a ball of extruded filament instead of a part. Thankfully the springy TPU filament I use on the connecting rods did it's job and lifted the head away from the other parts when this happened, so just the one got ruined.
Reprinting.
EDIT: Reprint of the most time consuming print almost done.
![]()
Six more smaller parts to print yet till I can try my new angle compromise.
-
Telescopic pushrod.
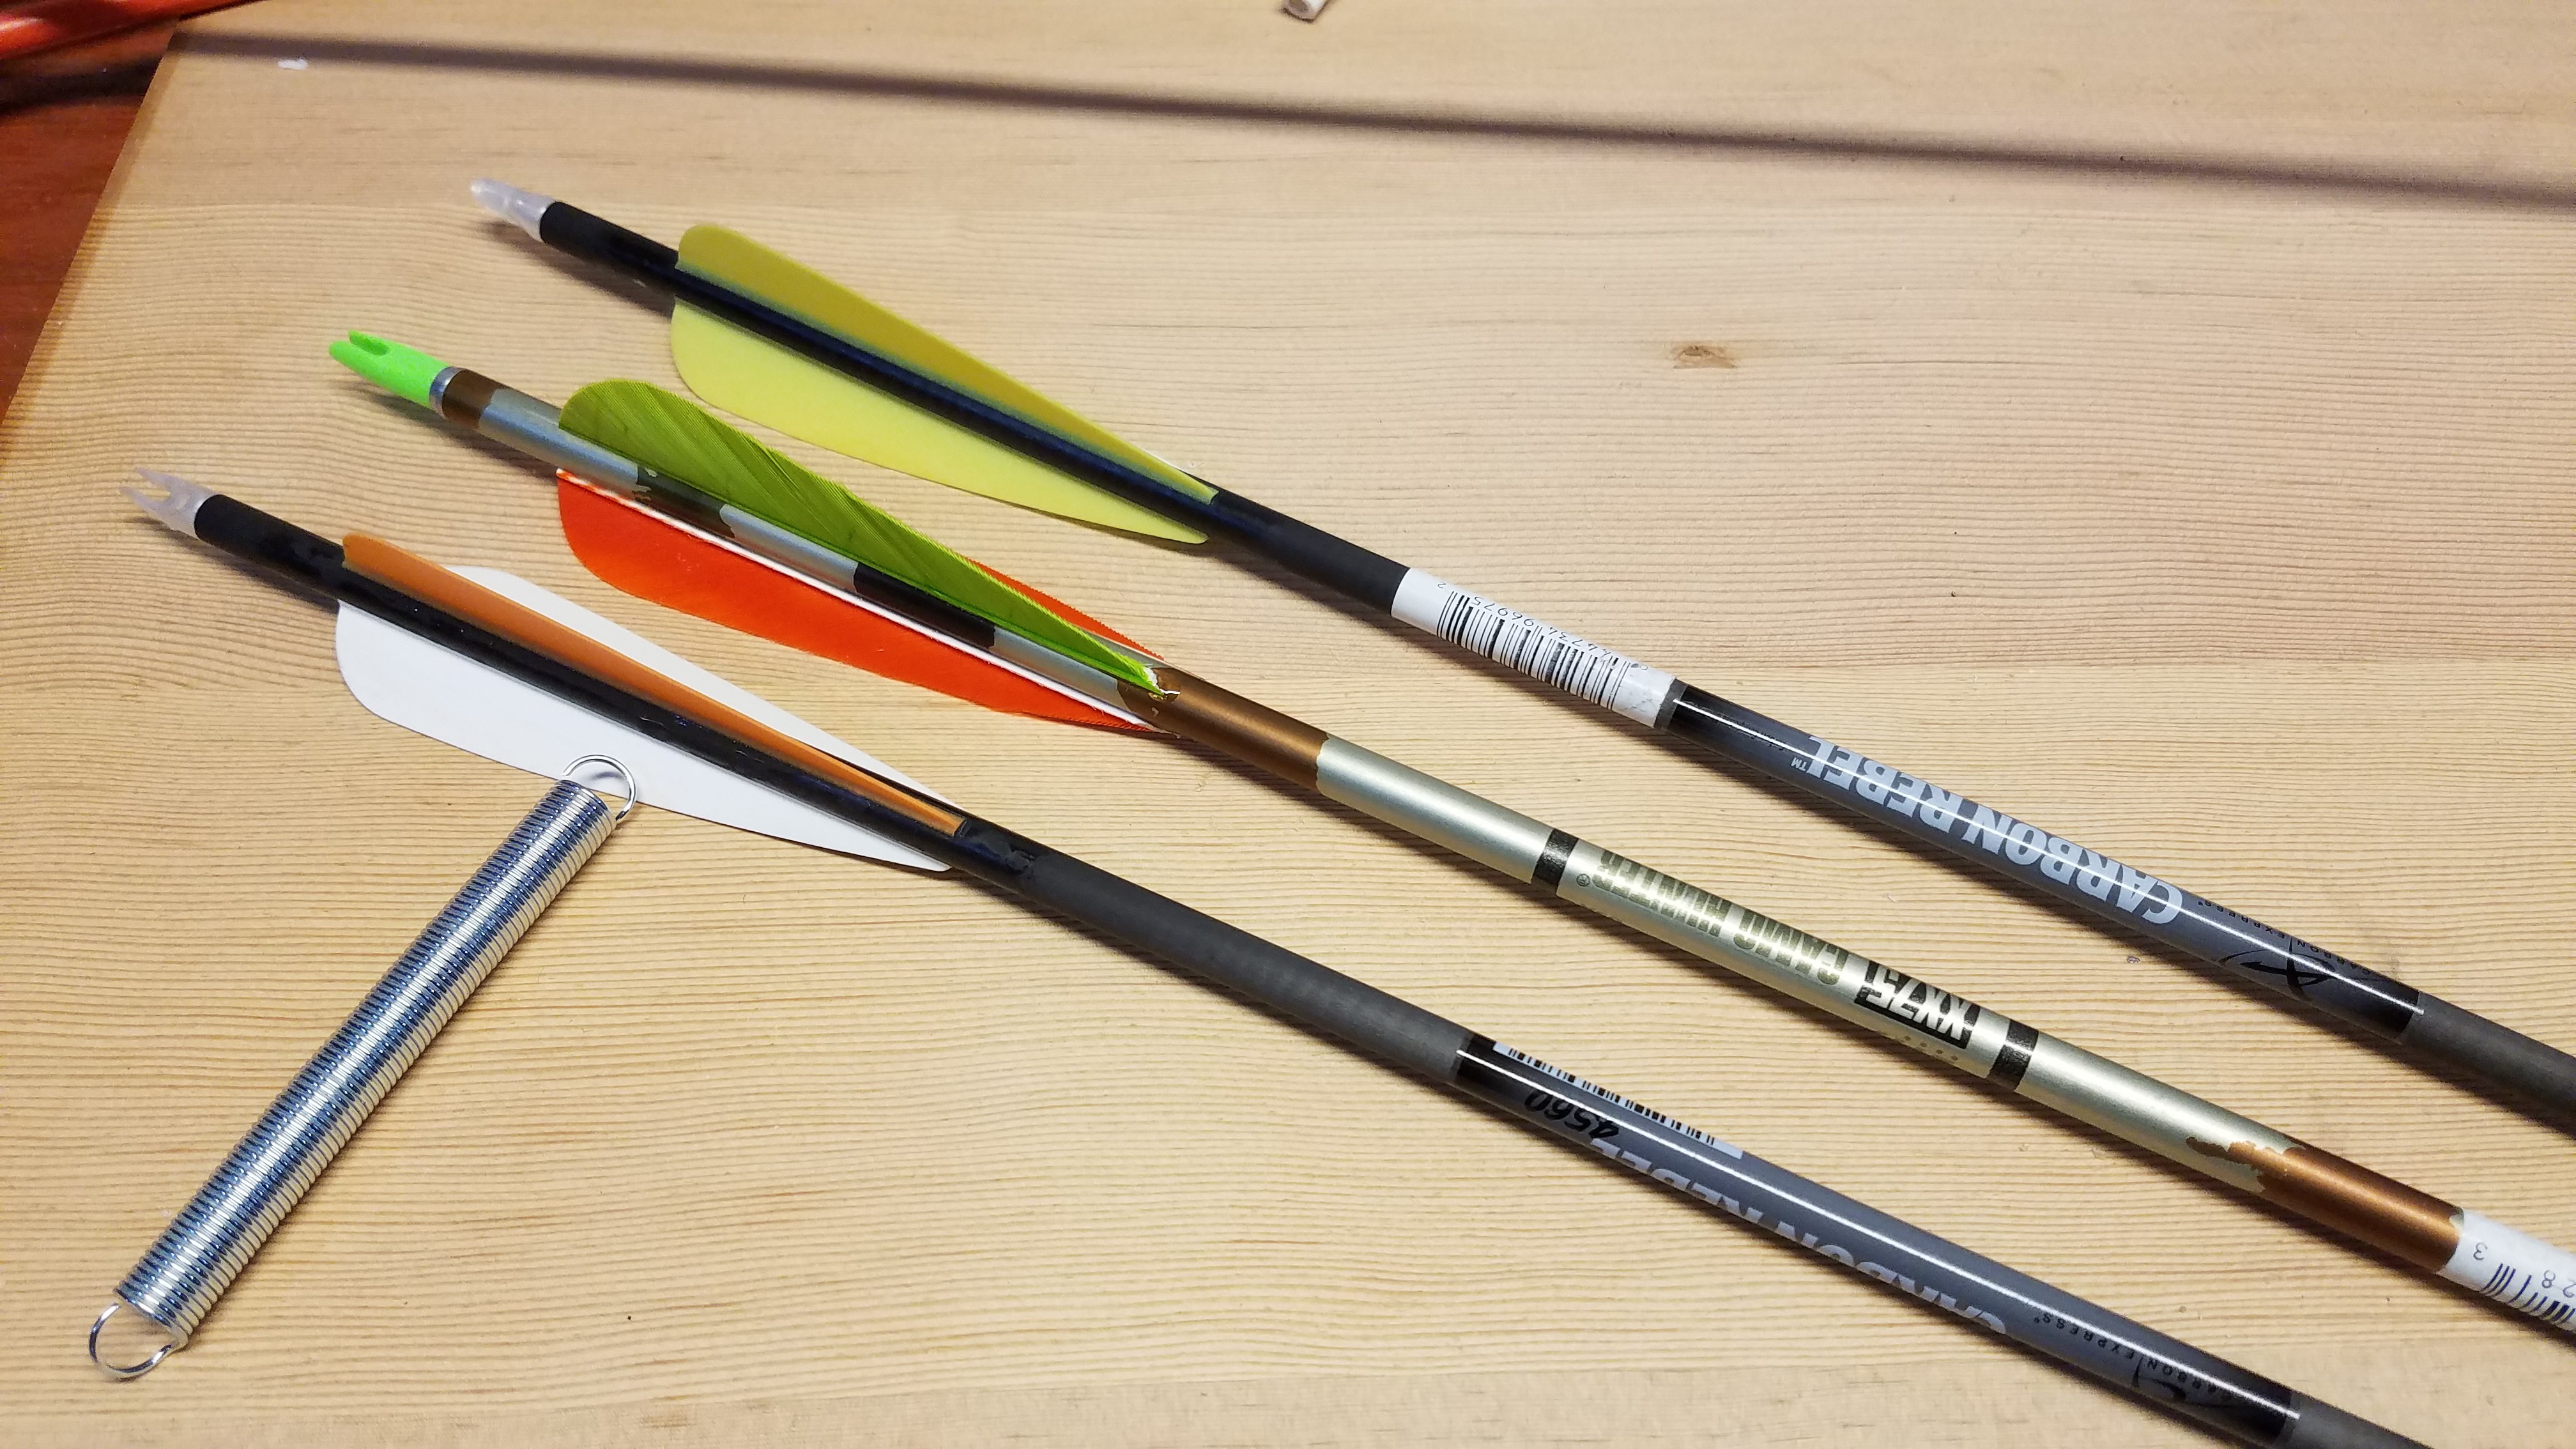
08/09/2018 at 03:53 • 0 commentsWhile I was waiting for the next set of prints to finish, I took a look at the pushrod.
The garden stake I had previously used was getting rusty. I went looking for a replacement and locally sourced a few carbon fiber rods and some AL tubing on clearance.
![]()
Only found an extension spring of the right inner diameter, but it quickly became a compression spring with some excessive force.
This telescopic combination let me move the weight of the spring from the top of the pushrod to the middle, where it's mass will now be closer to the center point of rotation for the tripod kinematics. In other words, it won't move as much, and so it's inertia will be less of an influence on the head.
-
Even better idea..
08/08/2018 at 02:35 • 0 commentsI was trying out the new configuration and figuring out how much working area I would lose to my uprights.
Then I realized how to get nearly all of it back. I'm going to modify the C1, probably so much it won't be the C1 anymore.
I'm changing the angles for the uprights, and moving the bottom mounts to be part of the stepper and spool mounts.
Let the math begin..
EDIT: Math done. I realized I can't totally negate one of the angles as I will lose structural integrity, but I picked a good value in between. It will still be better than it is now.
Printing the first three parts.
EDIT 2: Assembled. I lost a whole lot more structural integrity than I had bargained for. Thinking about it..
-
This sucks, I got a better idea.
08/08/2018 at 00:24 • 0 commentsAfter two days of avoiding gluing the other 6 stilts I would need on the board, I had a better idea.
![]()
I'm going to move the steppers to the bottom of the board instead, and pass the drive 'cables' up through holes.
The feeders, frame, and PCB mounts can just get mounted to the top of the board then, and everything else like the majority of the support electronics and wiring can all be on the bottom. Much cleaner look too.
Better plan. Doing it.
-
Snake people wanted.
08/07/2018 at 17:26 • 0 commentsThe current code supporting tripodkins for the C1 is in Machinekit, and targeted at the Beaglebone.
I'm going to need the Pi for vision anyway, and I really didn't want a second single board computer in the design. That and the Beaglebone I have spare for this is a Green Wireless, which would then lend itself to needing a wifi interface between the Pi and the Green. That would suck. They tend to fail at Maker Faires I've found.
So I was looking at implementing Klipper as my motion controller. It has inferior trajectory planning, but then everything will all run on one board and I get to offload the hardware step and PWM generation to an Arduino.
This is also much more likely to be the existing hardware used by a good majority of the target audience.
I really wish I could have Machinekit on the Pi controlling a Klipper-ized microcontroller. Best of both worlds then, and I can run it on the Pi. I looked into this and some other ideas along these lines and have asked MachineKoder to do the same.
So to get moving forward again until that can happen, I'll need to port the existing tripodkinematics C code from Machinekit to be a kinematics module for Klipper in Python. One caveat.. as written the tripodkins code in Machinekit assumes you are extending above the build plane. You need to invert Z for a hanging version.
Any Python people willing to help out with that task, I would really appreciate it.
I'm pretty sure I've said all this before.... but this is where I'm at right now.
Other minor roadblocks:
- I've consumed all my DRV8825 and Allegro modules. I have a tendency to order in bulk with no pins, and solder them directly into projects. I do have some spare AMIS-30543 ones, but I haven't written the SPI configuration code for them and they are destined for another project anyway. I'm going to desolder some old modules, from old projects I think.
- All my available steppers don't have wires anymore. Again, with the 'hey I'll just solder directly to it' mentality biting me later.
I think I've got the rest of the bases covered.
All the Python people in the house whose first name begins with an "L" who isn't Hispanic, walk in a circle the same number of times as the square root of your age times ten! (and then take a look at the above task please)
Thank you.
-
Remote work.
08/07/2018 at 02:29 • 0 commentsMy stilts that I'm building the C1 on are oak. The holes I modeled to mount to the standoffs, and already printed 9 of 12 parts like that for, are 3mm. In other words, I need #4 screws, and short.
I only had #6 and up screws. So... I made the 25 minute drive to the nearest town with 'screws' today.
Did I mention my household internet connection involves the use of a 90 foot pine tree? This is not a technology friendly location, unless I brought it here myself.
But.. I do have to say, this place is really great for maintaining focus. Perhaps I should do that now.
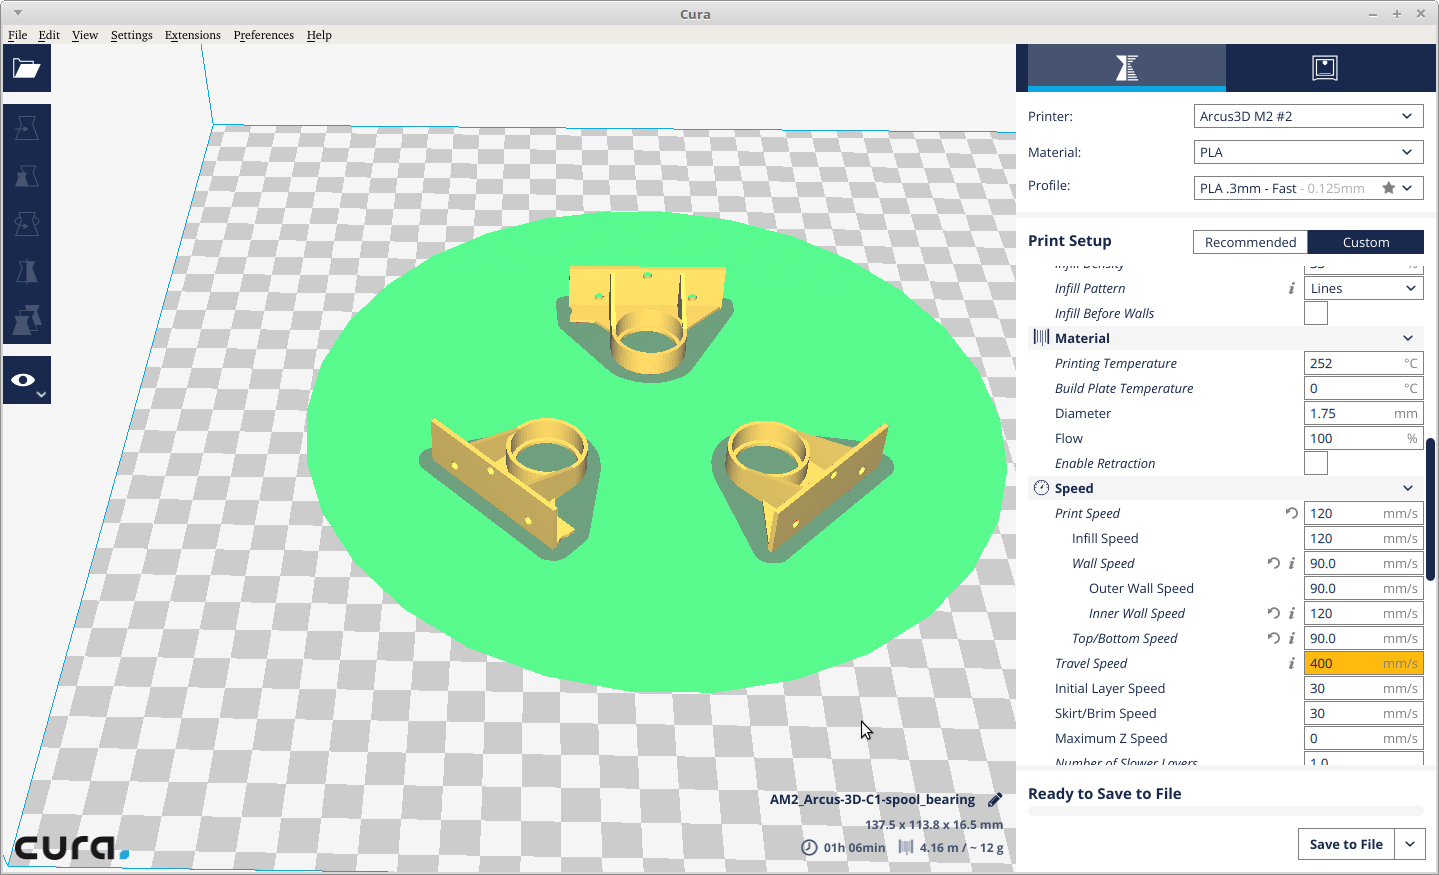
I spent a good deal of time revising the parts for the C1 to consume less filament, print faster, and not lose any strength in the process. These would have taken 3 hours before... now, an hour.
![]()
Nine of 12 parts done. These three more, then I'll have something to show you.
-
We can't stop, we have to slow down first.
08/06/2018 at 18:01 • 0 commentsPart number 6 of 12 just completed printing, and the Spaceballs references continue.
The printer slows down at the end here as at less than 10 seconds per layer, my single source of cooling can't keep up.
I have the air pump in the M2 limited to 75% duty cycle as I'm running a 12V pump from 18V. It's been 15 months running it like that, so I think that worked.
-
Got wood?
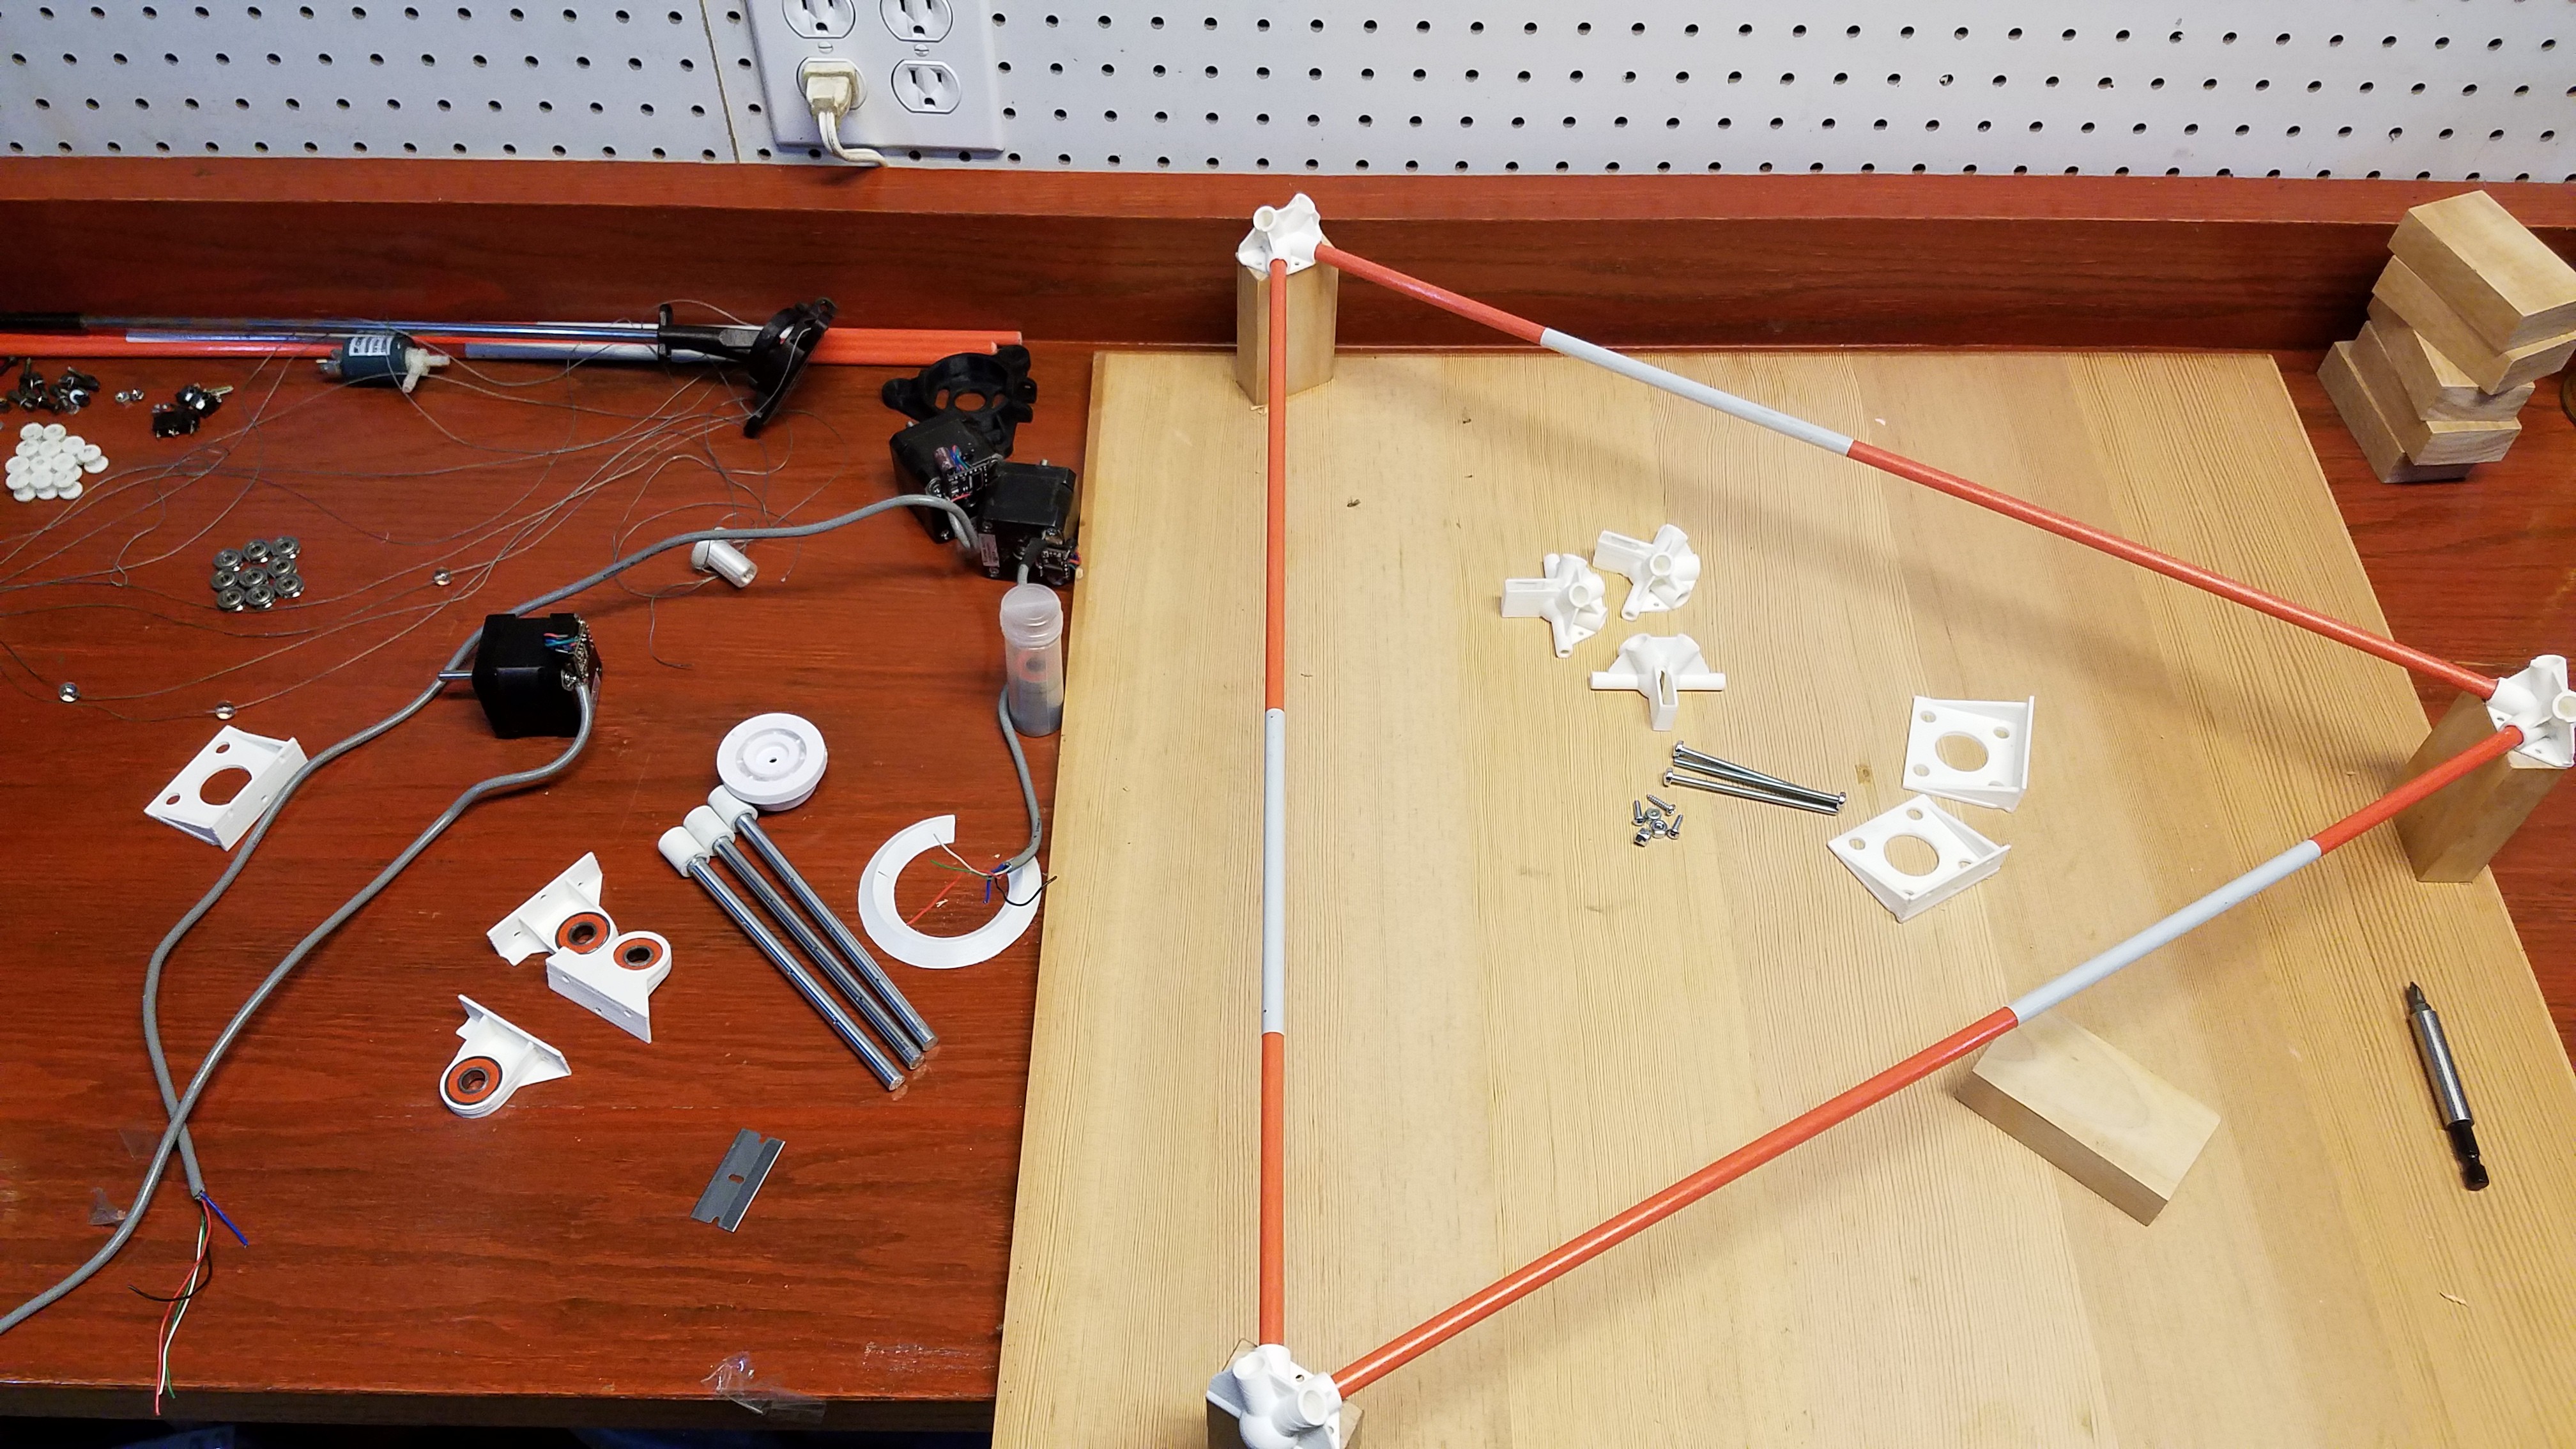
08/06/2018 at 09:29 • 0 commentsSo, the basic plan is this: Build the C1 on stilts.
I cut off 9 identical blocks of oak a little taller than my tape feeder on the chopsaw, cleaned them up, and set them aside.
I put my freshly 3D printed bottom triangle together, marked off where the corners ended up on a ~2ft square bit of plywood I had (it's not even flat, yet), and glued down the first three blocks.
![]()
Step one complete. Now I wait.
-
Ludicrous speed.
08/06/2018 at 06:52 • 0 commentsI've figured out how I can use the C1 as the platform for this, and so have started printing the parts for building another one. I have a lot of parts to print, and I'm impatient.. Ludicrous speed!
Arcus-3D-P1 - Pick and Place for 3D printers
Open source, mostly 3D printable, lightweight pick and place head for a standard groove mount