For still more clear understanding and "SOURCE CODE" please check below links
http://www.instructables.com/id/Robot-Using-Raspberry-Pi-Bridge-Shield/
http://armtronix.net/bridge%20shield.html
https://www.youtube.com/channel/UCI82oeXayervd8nsMVYUWwg
What does it have?
10 DOF IMU.
Temperature Sensor. Dual Bridge motor driver which can drive motors up to 1Amp.
8 channel Servo Motor Diver which works on I2C.
RTC with coin cell backup provision.
Open 5V-3.3V bidirectional voltage level converter.
Level Shifting for SPI, I2C, UART between Arduino Uno & Raspberry Pi.
Attiny85 micro-controller loaded with Arduino boot loader.
Header for ESP8266 Wi-Fi Module.
Header for HC-05 Bluetooth Module.IR Sensor for wireless remote control.
USB to UART Module.
Single input source of 12V which power Pi and Arduino Uno It has one variable voltage regulator of 3A, a 5V/3A voltage regulator and a 3.3V/1A voltage regulator.
Two cell Lithium Ion battery charger with led and signal pins to monitor battery charge status.
Intensity variable LED controlled through I2C.
Its mechanical construction makes it compatible with most of the stack able Arduino Uno and Raspberry Pi shields.
Note: The above are the specification of second generation
What have we made with it ?
We've built some pretty cool projects like
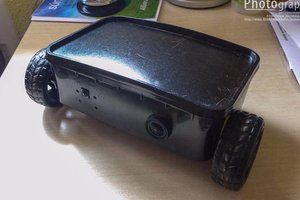
- A robot controlled via the internet
- Home automation to control anything that can go into an electrical outlet
- An IP Camera
- A battery backed Pi which could be a mobile computing solution
What can you do with it ?
By combining an arduino and raspberry pi you can make some amazing projects. It is up to you how you want to use our board – our main aim is that you have fun doing it. Some examples that we can think of are:
- To build an autonomous or a self-balancing robot
- Make your own drone (Use responsibly! Disclaimer: We are not responsible for your neighbor's loss of privacy)
- Automate your home using our sensor array. Most of our sensors work on I2C and on board motor drivers will help you trigger actuators like servo, DC and stepper motor.
We have completed the first prototype and are presently testing it. We promise that you will be even more amazed by the second generation's features. To know more on what we have done you can watch the videos on our website and YouTube channel.
In the following steps we will be showing you a simple way to use the Bridge Shield and make a remotely controlled (via the internet) robot and if you are still hungry for more we've added an optional part where we will show you how to do some basic home automation using the Bridge Shield and an ESP8266 wifi module.
So let's get cooking people!!


 Juan M. Casillas
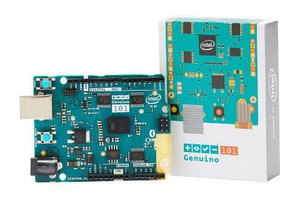
 Basanta Bhattarai
 Derrick Bommarito
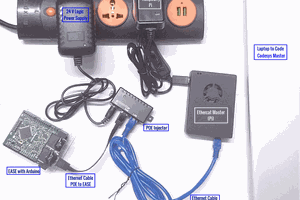
 Esmacat
Very cool bridge! Is it compatible with both original Raspi's and the B+ /Raspi 2 style with 40 pin headers?