Completing the Build
This concludes the build of the Muffsy Phono Preamp. Soon you'll be spinning records like never before.
A short recap is in order. So far we've:
- Soldered the phono preamp
- Found a suitable enclosure
- Decided on a power supply
- Built a back panel
- Mounted the parts in the enclosure
- Wired the power
- Chosen the input impedance
- Set the gain
We have even learned a lot of stuff along the way, and should be able to change the circuit to suit our needs.
We're not completely finished yet, we need to input the sound from the turntable and output the amplified and equalized signal.
These are the parts involved:
- The phono stage
- Shielded audio cable
- Back panel with:
- Two female RCA panel connectors for input
- Ground screw for input
- Two female RCA panel connectors for output
Back Panel - Grounding
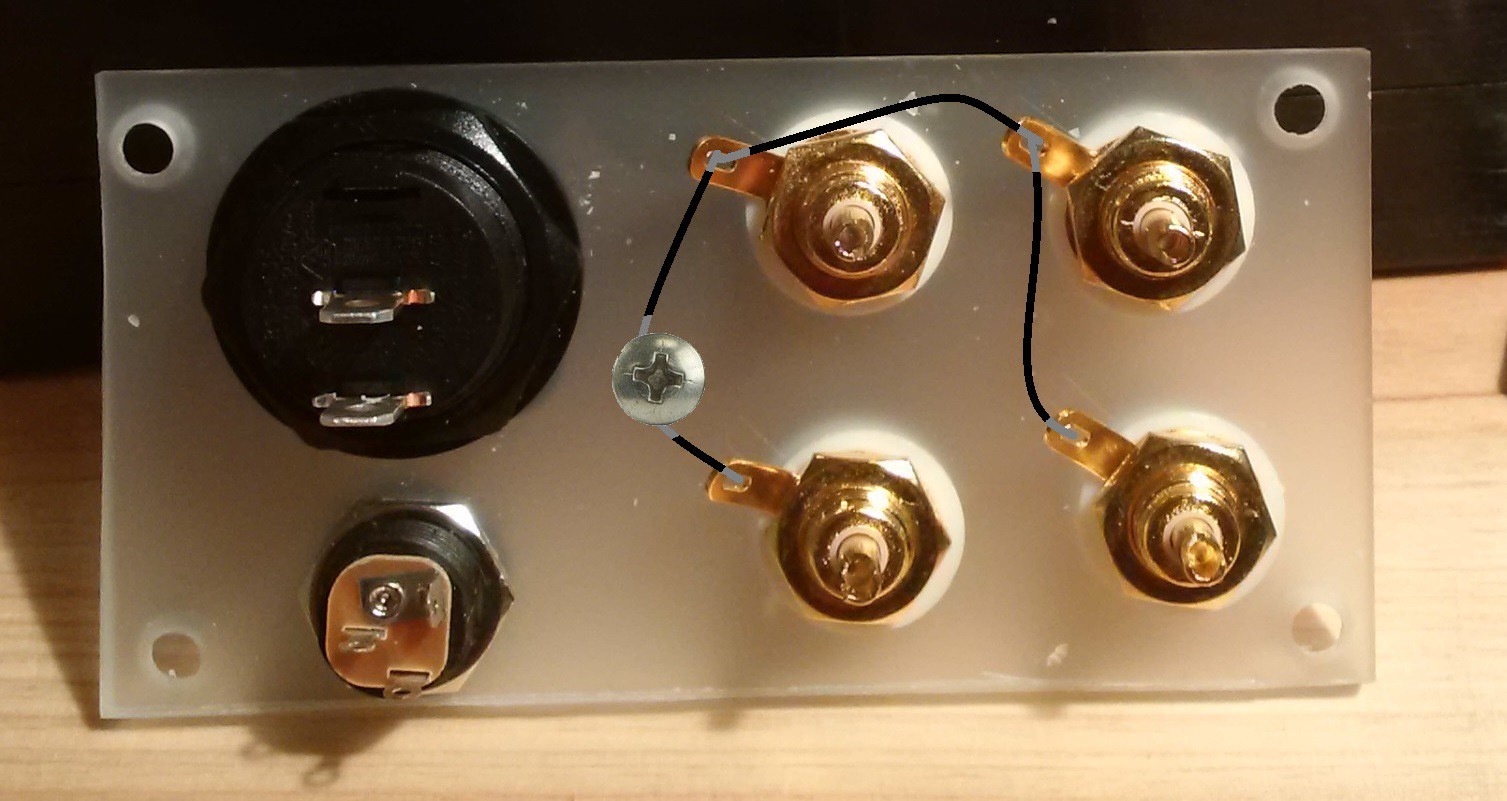
The first thing we'll do is to make sure all the grounds are the same for every RCA connector and the ground screw. Connect them all together as shown in this picture:
Back Panel - Input and Output
These are the cables that connects the phono stage. The best choice will be to use a shielded phono cable, especially for the input.
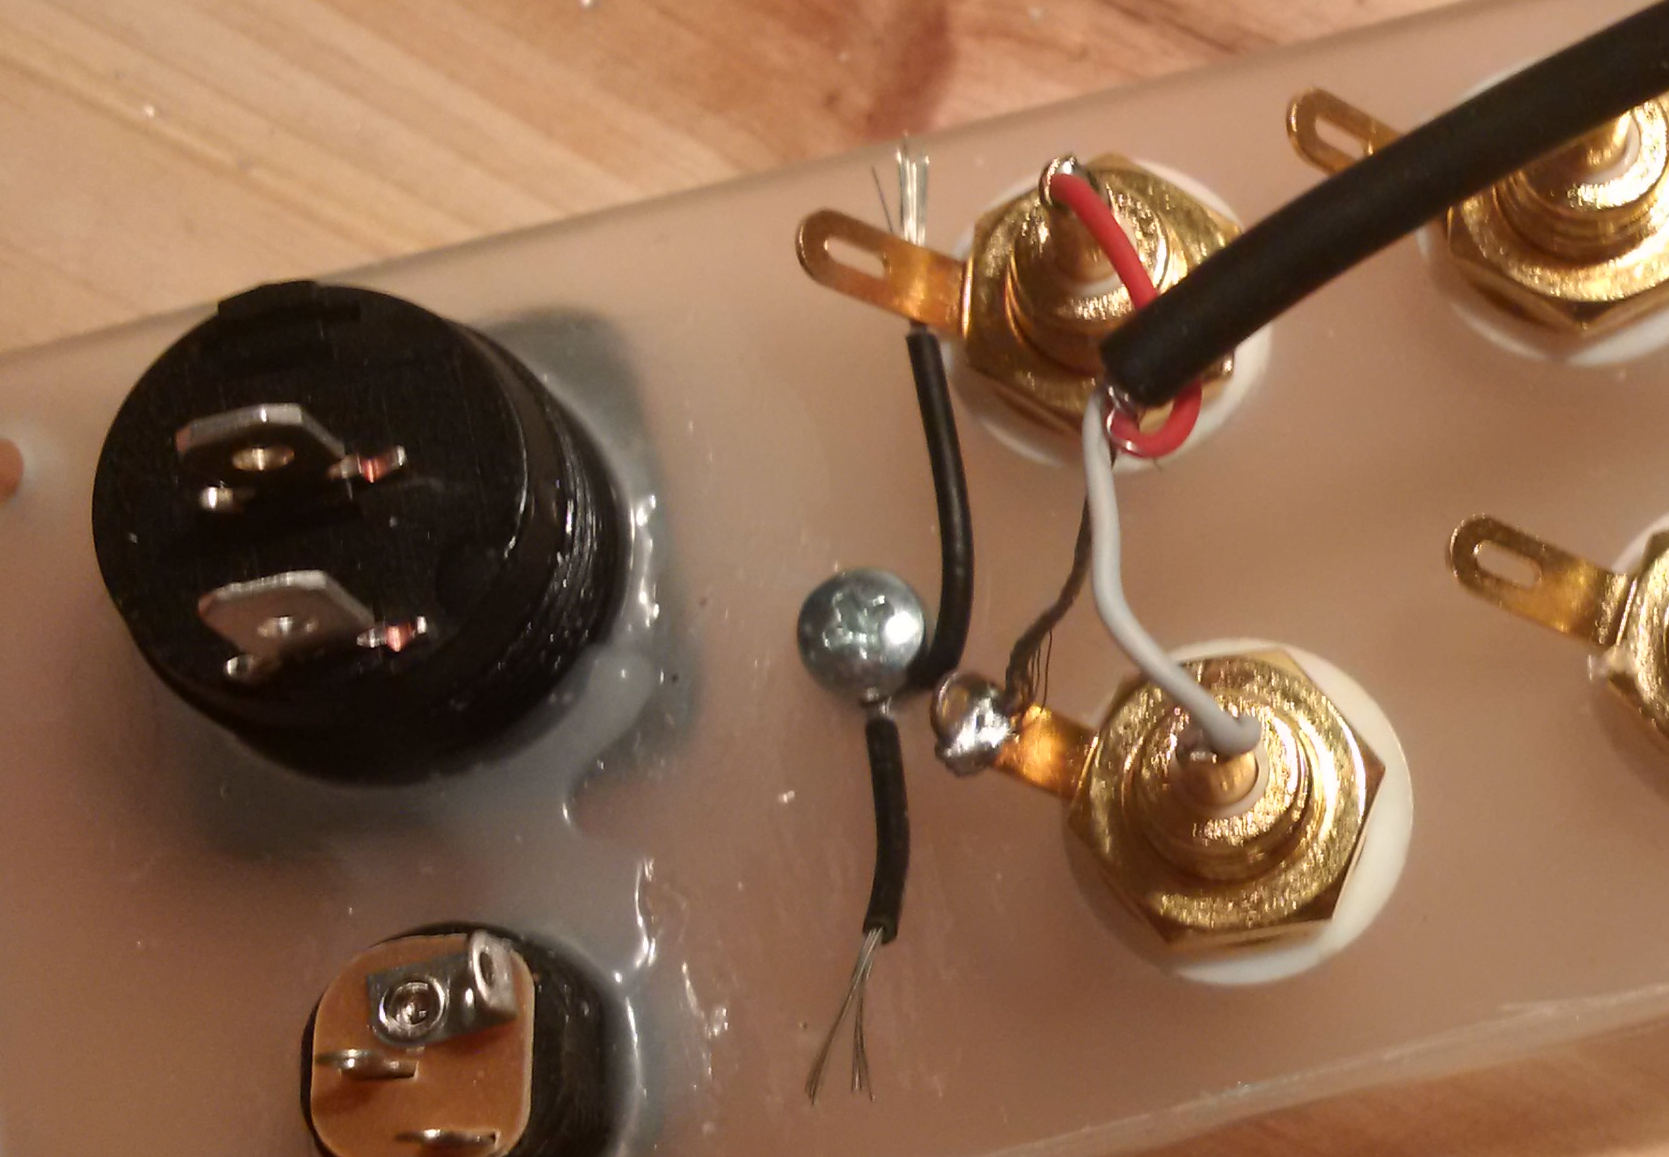
Here's how the input cable is connected to the RCAs. Connect another cable to the output, which is the two remaining RCA connectors, and the back panel is done.
Phono Stage - Input and Output
The two audio cables, input and output, that connect to the back panel must also be connected to the phono stage.
The picture below shows how to hook up the phono stage, using two-lead shielded audio cable:
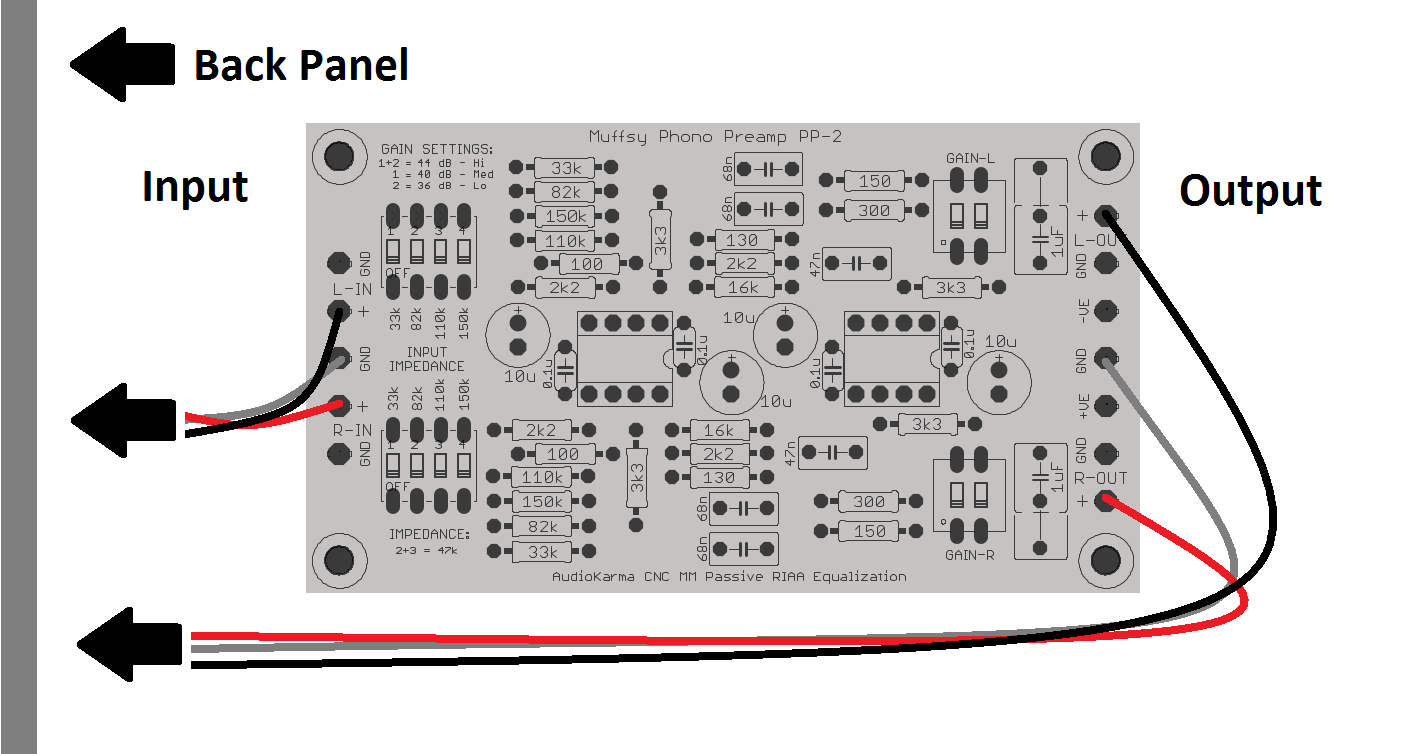
The left side of the board is the input (from your turntable), the right side is the output (to your amplifier). They were connected to the back panel in the previous step, and this is where they attach to the phono stage itself.
NOTE:
Make sure that the input is closest to the back panel. You will want the input signal cable to be as short as possible. Both to keep the cabling capacitance down and to avoid unnecessary interference.
Here's a picture of a two-lead shielded audio cable:
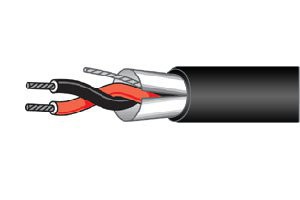
The RED cable is always the RIGHT CHANNEL.
The GREY cable represents GROUND. It will be the shield on your shielded audio cable.
The BLACK cable is the LEFT CHANNEL. Depending on the cable, it can also be white.
Other Cabling Options
Cables can have one lead, two leads, two leads with shield, four leads (with or without shield) and many other variations. The Muffsy Phono Preamp can accomodate all these types of cables.
For the input and output, there are two connections per channel (+ and GND), with a GND connection in between. This makes it easy to find a proper way to cable your phono stage.
Completeness :-)
This actually completes our build, congratulations!
Now, go play some records!
Discussions
Become a Hackaday.io Member
Create an account to leave a comment. Already have an account? Log In.