MechaTweak
-
Environmental Considerations
04/01/2015 at 03:00 • 0 commentsRecently, Ryan H commented on this project. He asked why not simply use a hot water recirculation system. As I had never heard of such a thing, I started doing a little research. These systems are basically comprised of a pump (installed at the water heater) and a loop/check valve installed between the hot and cold supply lines at the furthest faucet. Multiple loops and valves are needed for each branch in the plumbing. The pump forces the water through the hot water supply line and back into the heater tank through the cold water side. The user gets instant hot water. No wait time, no water waste. So at first glance, it appears that this system does the things I was trying to do, and probably better.
I was seriously considering stopping the project, but as I thought about recirc systems, a thought occured to me. I takes a lot of energy to heat water. These systems have to reheat the water everytime they cycle water back into the tank. After some more research, it turns out that the better recirc systems have built in timers. This way, the user can set the times that the pump operates. This helps a lot, but can we do it better? What has a larger environmental impact: reheating the water, or just pouring it down the drain? How do you compare the impact of water vs power?
I found this really good resource about the carbon footprint of water: http://www.csu.edu/cerc/researchreports/documents/CarbonFootprintofWater-RiverNetwork-2009.pdf
It's worth the read. One interesting piece of information was that the average power to treat and pump water to a residence ranges from 1050-36200 Kwh/MG. With common values ranging from 1250-6500 Kwh/MG. In my area, we use ground water, and since I have a septic system, my water energy cost (not including heating) is probably around 2000 Kwh/MG. The average power used for heating water (for a shower specifically) is 148,832 Kwh/MG. That's 74.4 times more power to heat the water than to treat it and pump it to my house. Another staggering number is that 58% of all water related carbon emmisions come from residential water heating.
I'm sure someone could make the case that if you set the timers perfectly on a recirc system, and showered at exactly the same time everyday, you would not waste very much energy. My reality is that I have four young kids. The messes they make are rarely on any kind of schedule, and impromtu showers/baths are a common occurance. If I used a recirc system, I would probably want to have it on at least 12 hours a day. That is a lot of wasted power. Maybe someone could figure out a way to only turn on the recirc pump whenever hot water is needed. I can't figure out a way that would be cheap or practical enough (maybe an app where you could manually activate the pump a few minutes before using hot water?)
Taking all this into consideration, I think my idea still has merit. I think I can save water and tip the carbon scales in the right direction.
-
Valve Testing
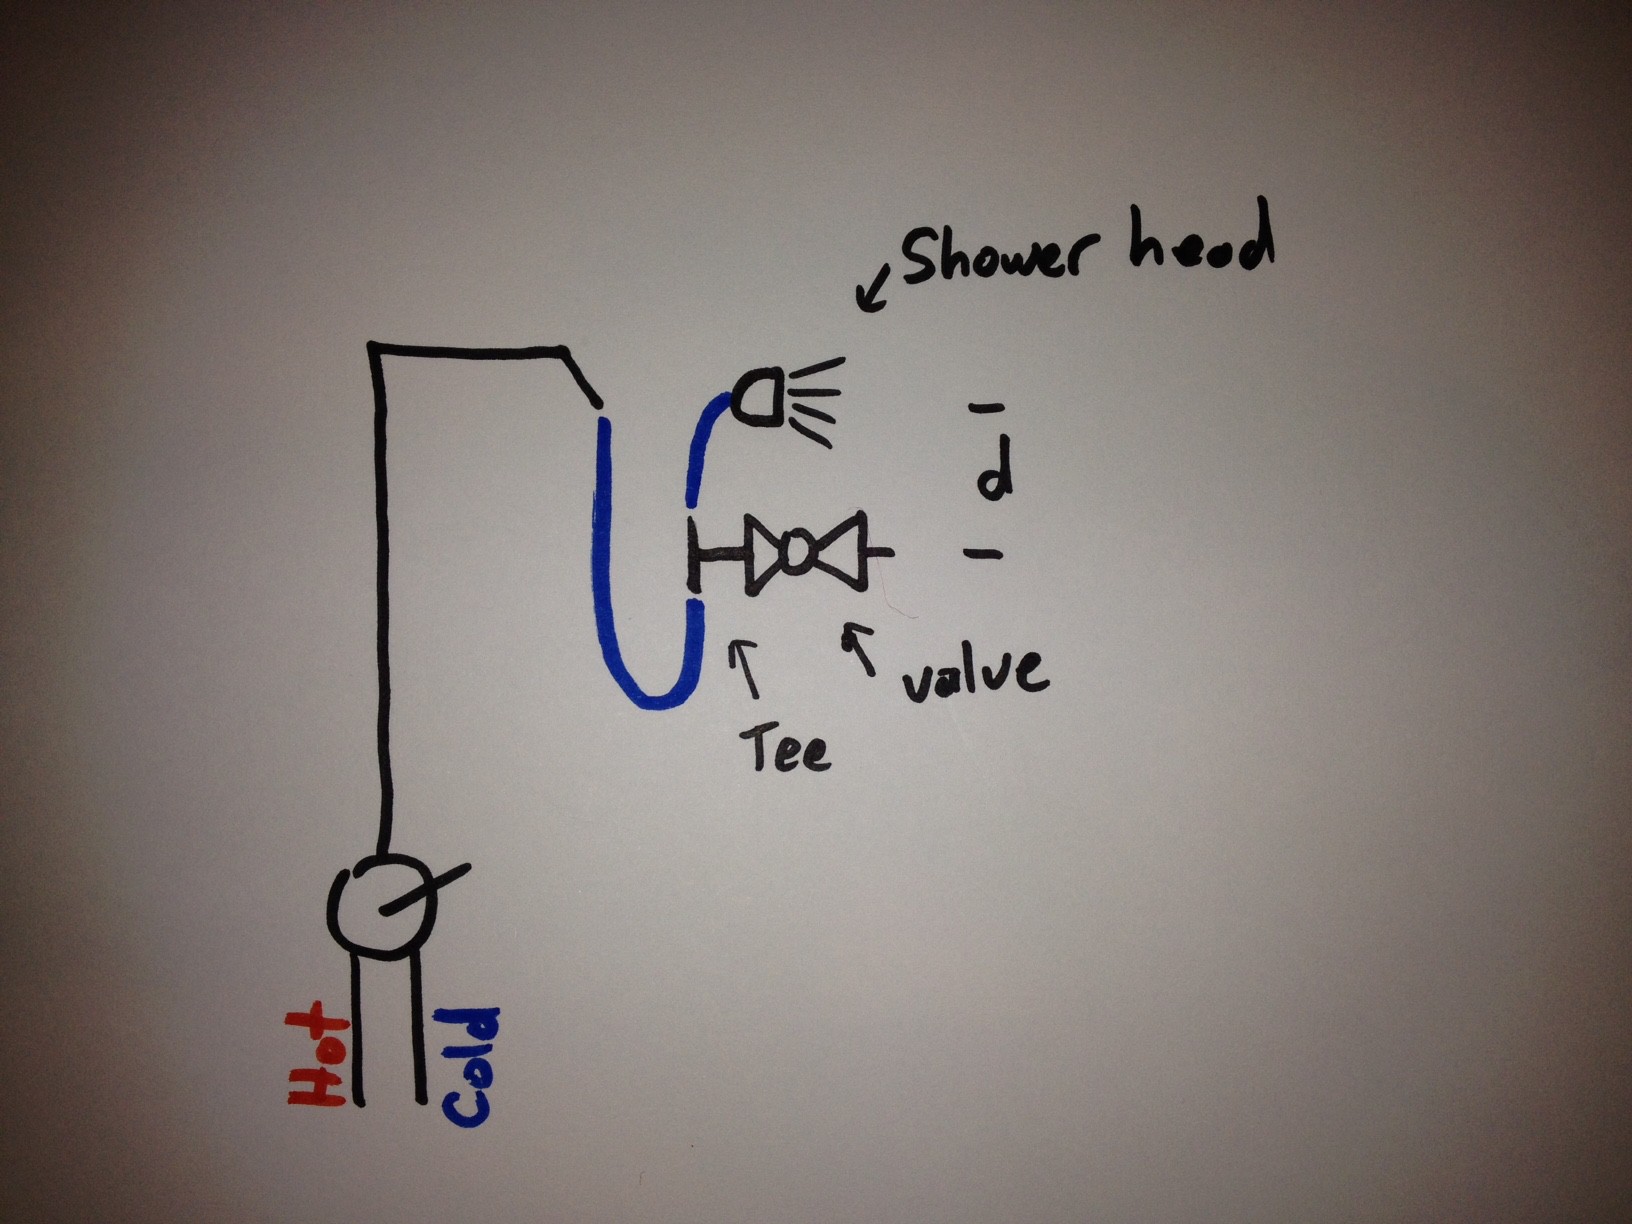
03/26/2015 at 01:19 • 0 commentsMy initial pseudo-schematic showed a 3-way valve to divert the water to the holding tank. After a little research, it became obvious that this would be an expensive piece. I thought I would test another method to see if I could save some money. The thought was to simply use a 2-way valve on the back side of a tee...
![]()
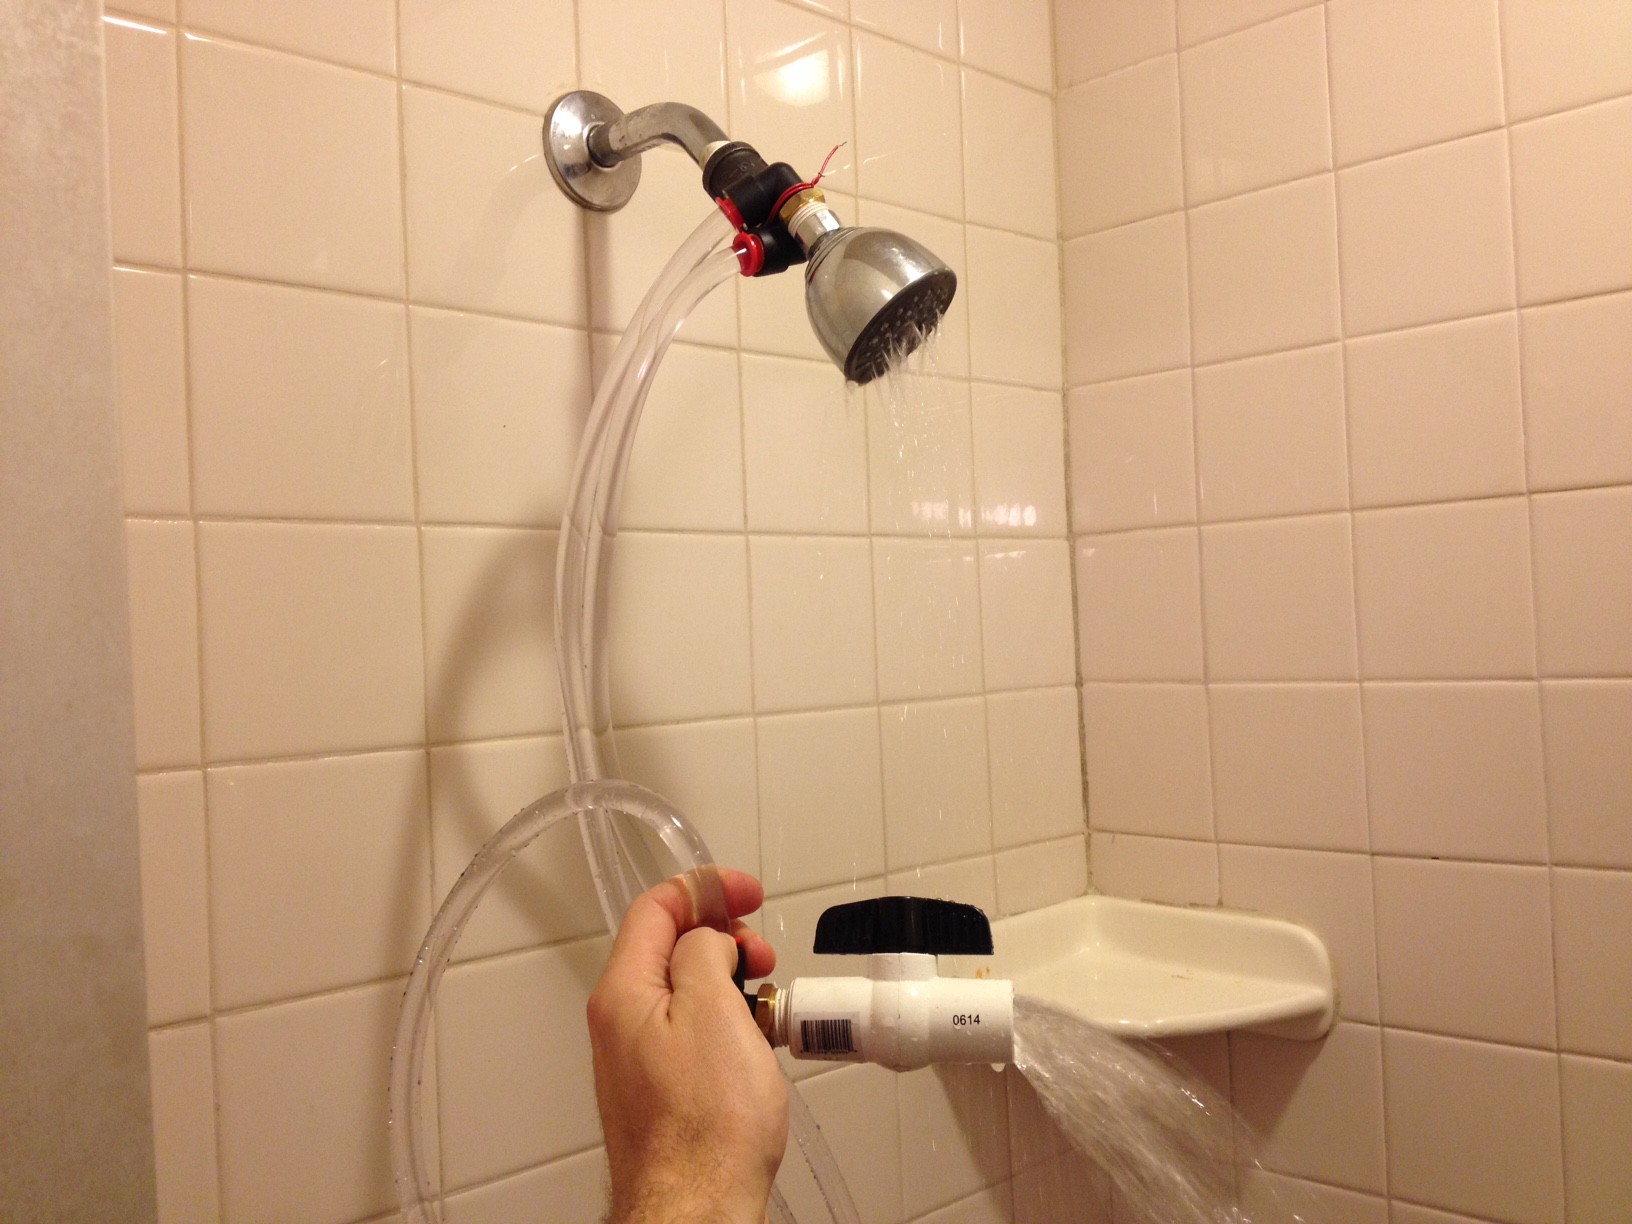
My concern was that water may come out of both the shower head and the open valve. I assumed that the distance "d" would have an effect on how much water came out of the shower head. So I ran a little test.
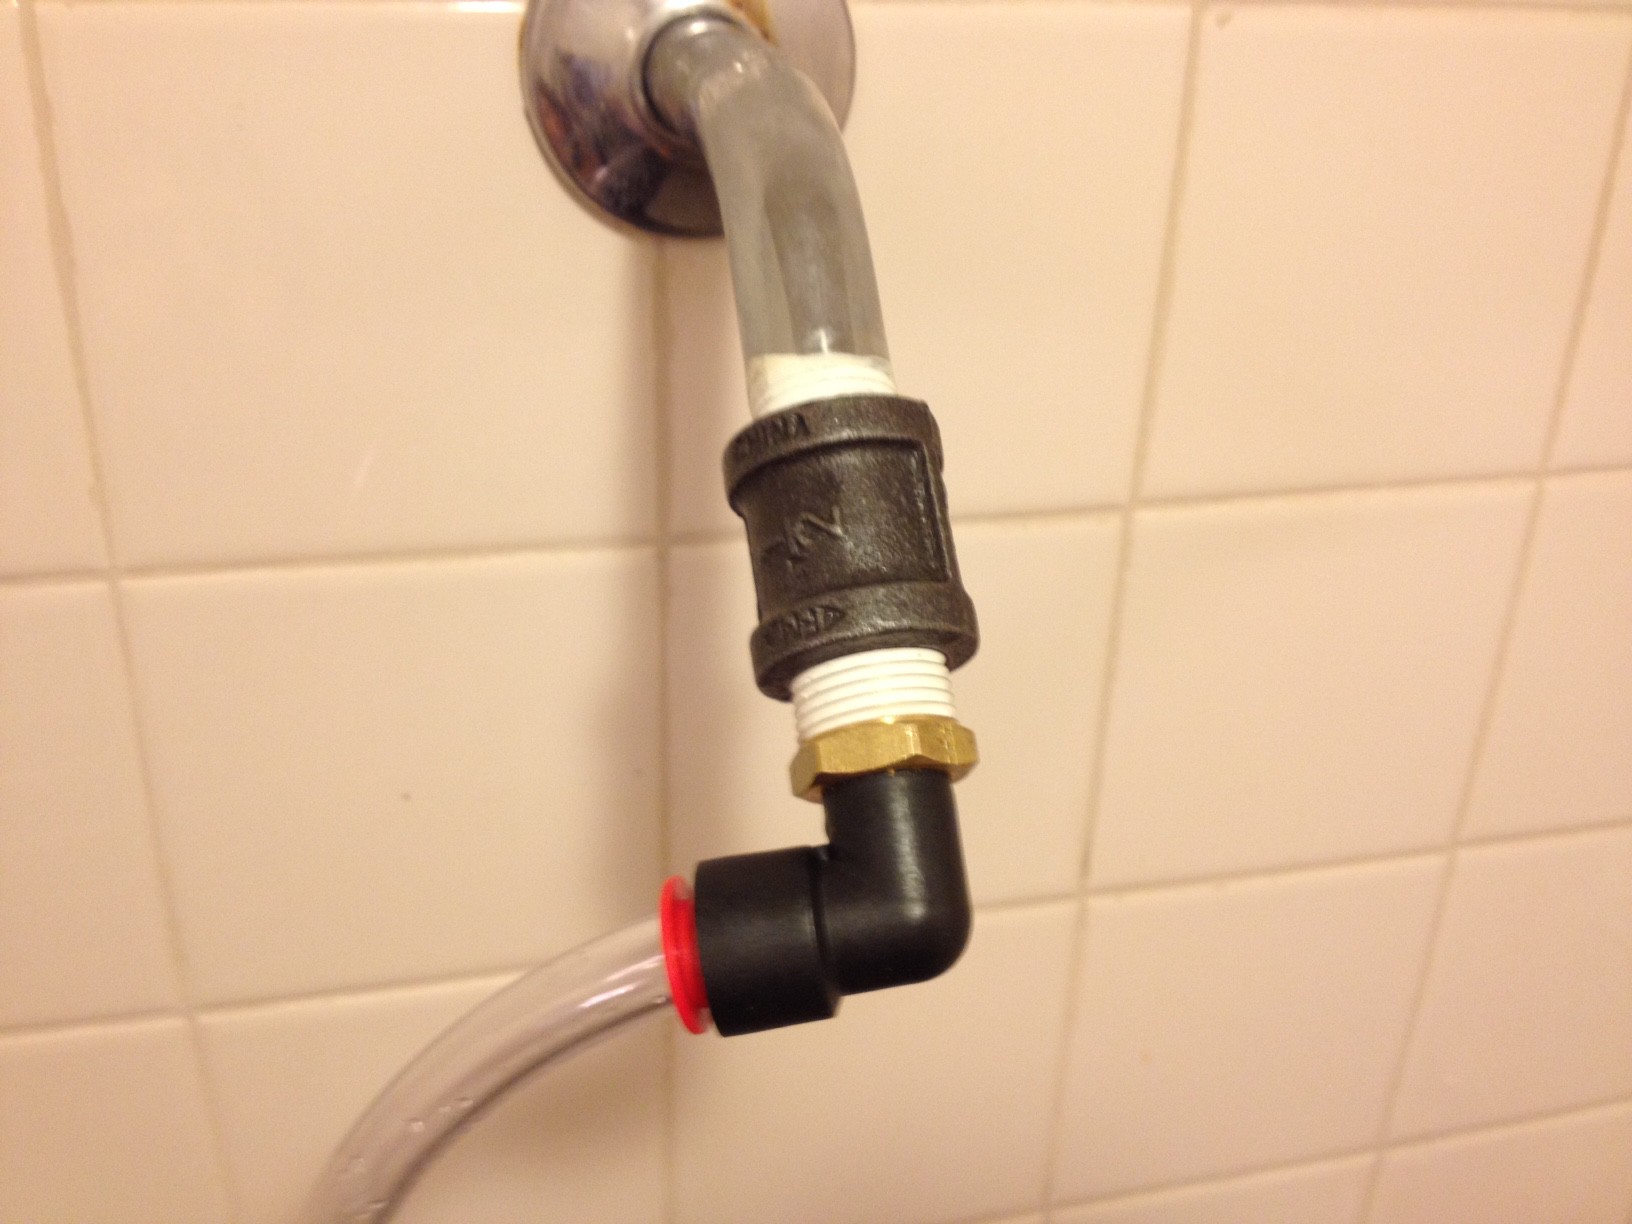
First I removed the shower head, and adapted the 1/2" npt threads to some 1/2" flexible tubing.
![]()
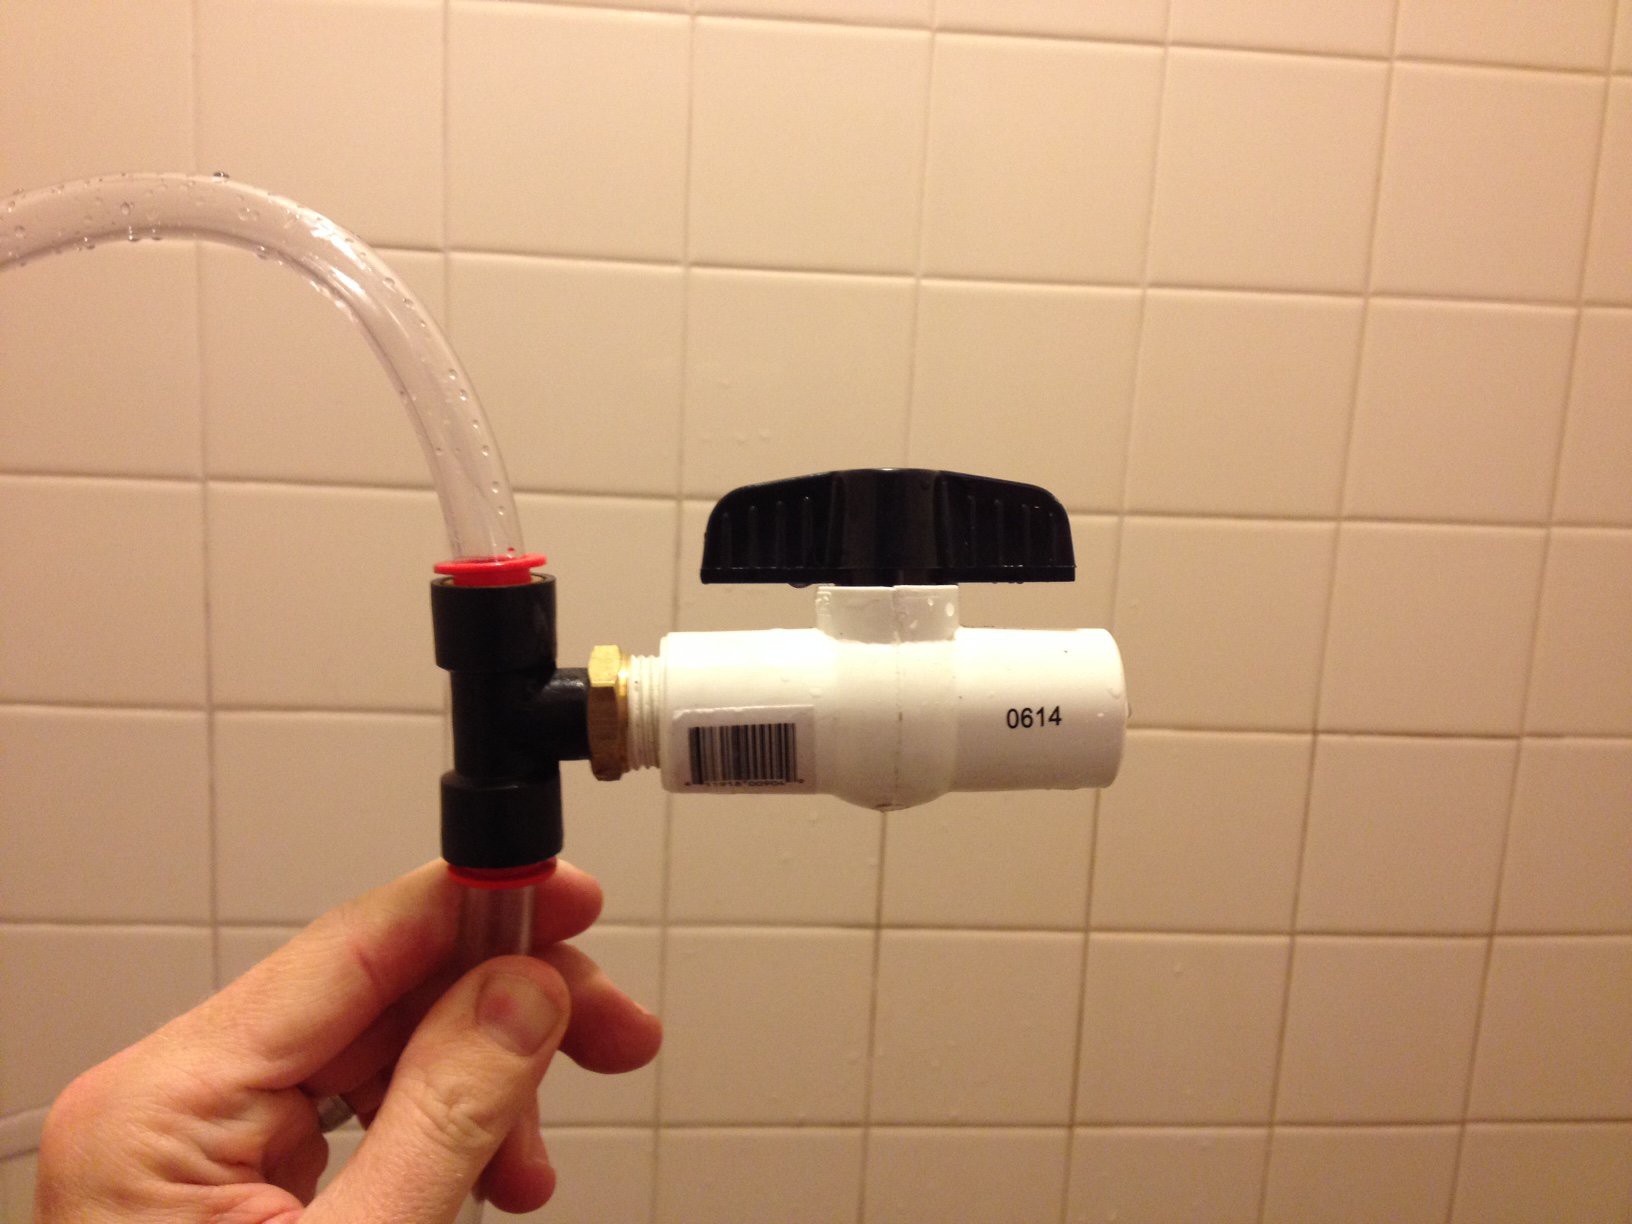
The tubing ran to a tee fitted with a valve....
![]()
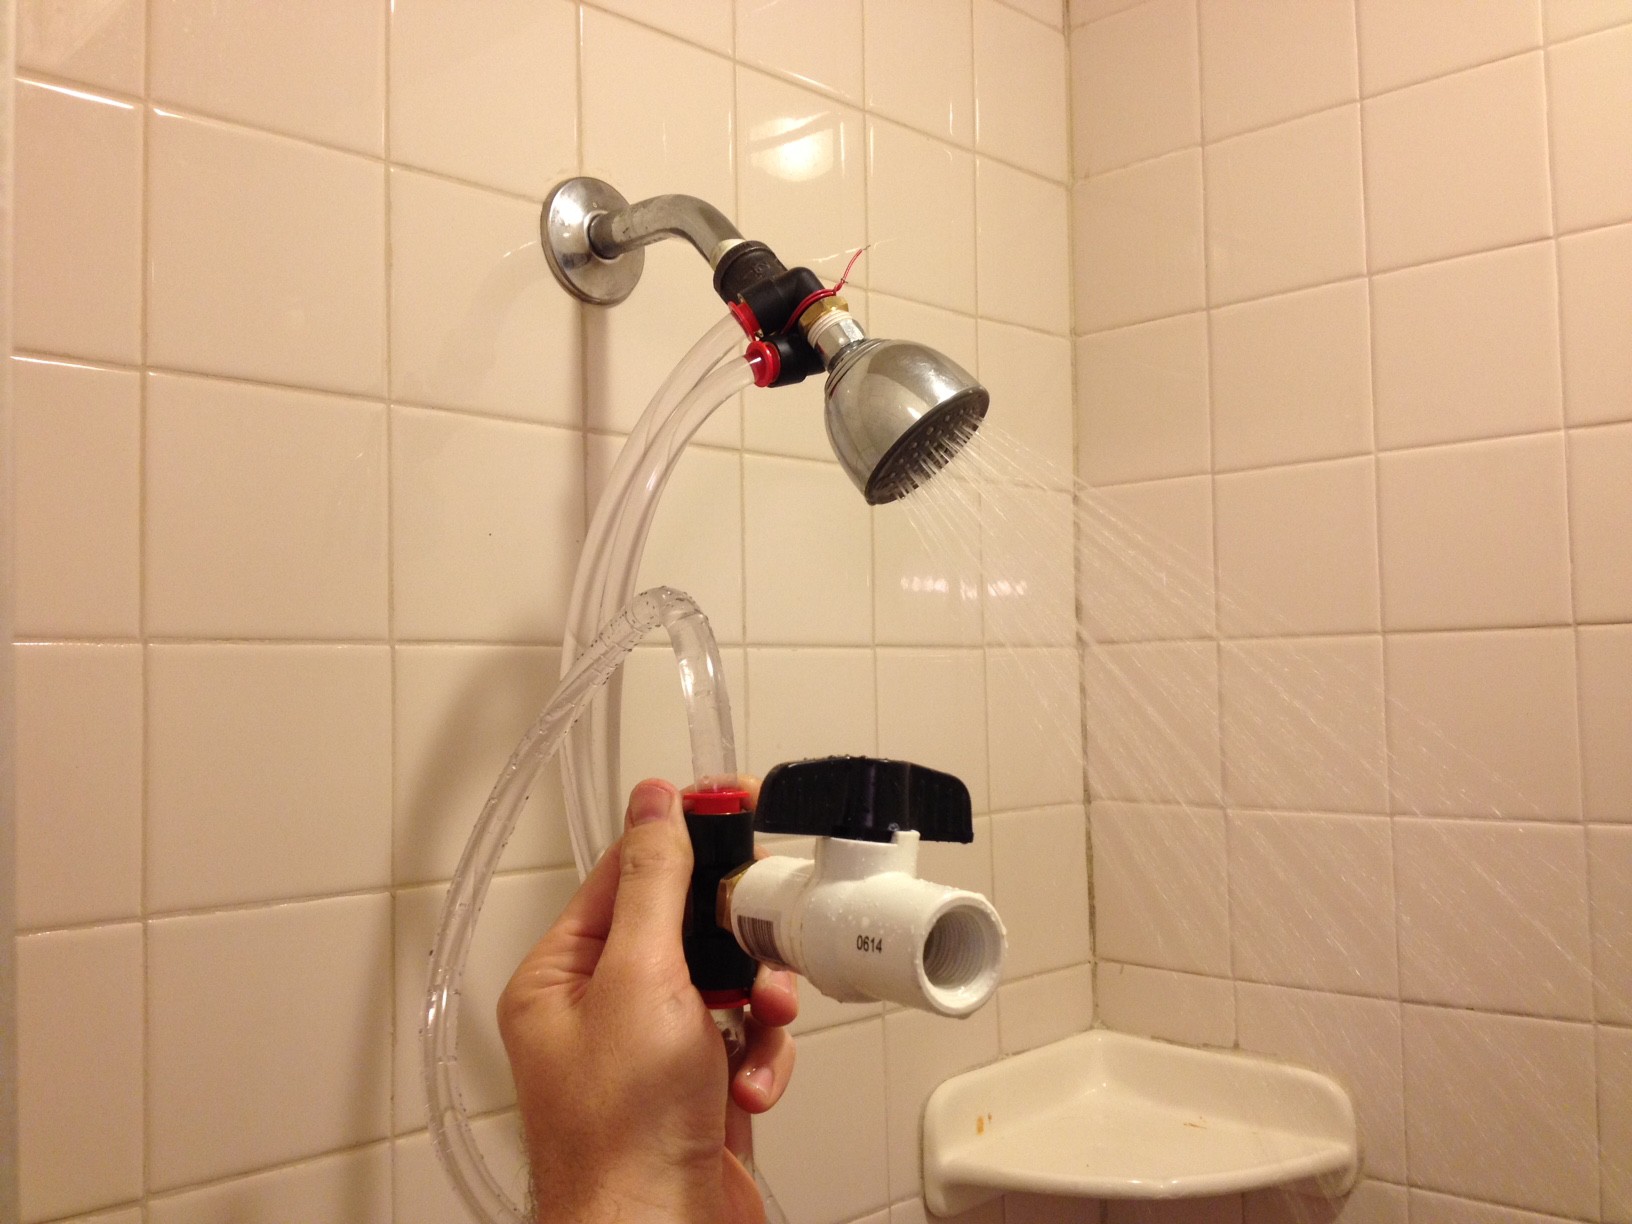
then back to the shower head (yes that is electrical wire holding the head on).
![]()
When the valve was closed, the shower operated normally.
When the valve was open, most of the water came out of the valve.
![]()
As I varied distance "d", more or less water would come out of the shower head. I had to put the valve 3 feet below the head to stop the flow altogether. This means that my reservoir should be as low as possible (but still above the toilet tank) to save as much water as possible. This testing also varified that a 1/2"valve should work fine.
The next step will be to get some solenoid opperated 2-way valves and start automating the process.
-
Tank Level Sensing
03/23/2015 at 04:00 • 0 commentsPart of the problem with getting people to care about water saving is that water is so cheap. At less than a penny/gallon you really have to save a lot of water to make any device seem worth while. Of course the ideal scenario would be to have a system that would eventually pay for itself. If this could be achieved, consumers wouldn't have to care about conservation. They would want the system simply because it would save them money. I know that this build will never pay for itself, but the hope to prove the concept. Maybe in a mass production environment, a version of this device could be produced for cheap enough to make economic sense for the average consumer.
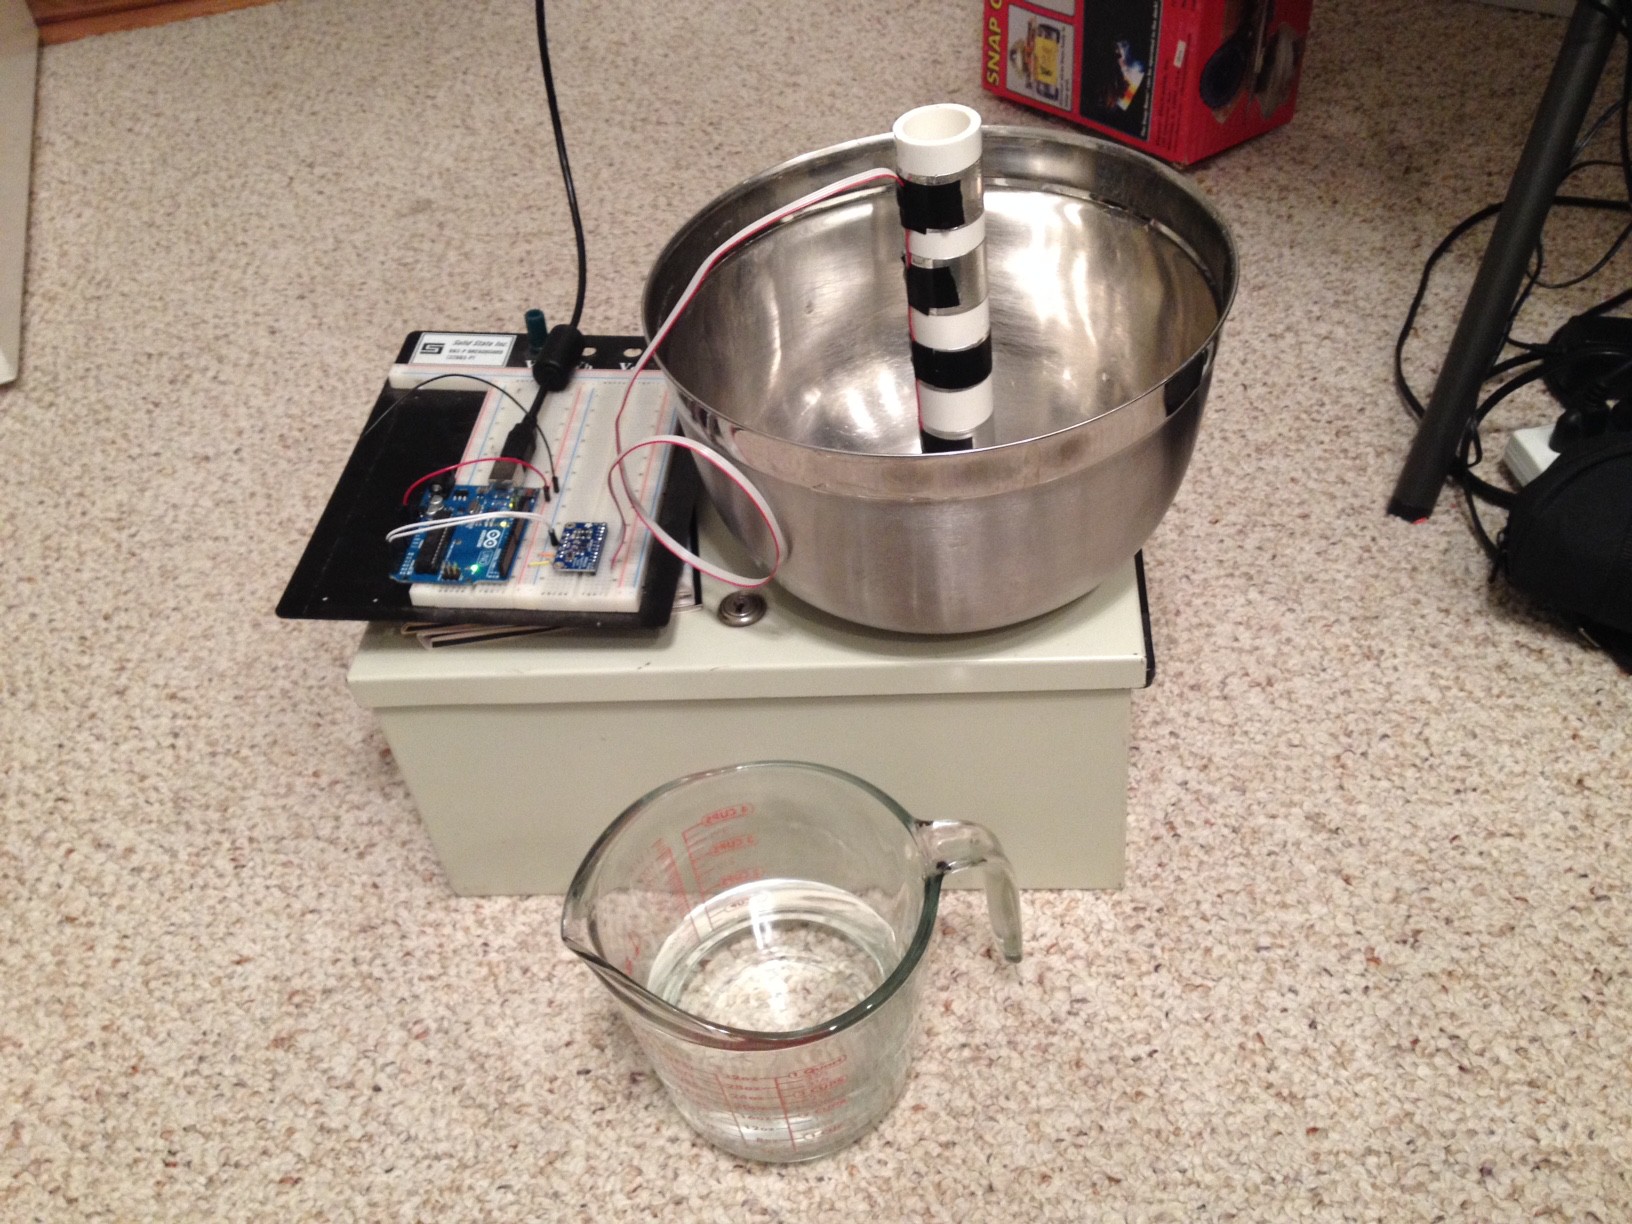
With this in mind, I will be attempting to make this build as cheaply as possible. One of the first parts I started researching was float switches/liquid level sensors. I think that both the holding tank, and the toilet tank will have to have a level sensor of some kind. These will help prevent overflows and let the system know when to refill the toilet. The low end float switches were around $10 (automation direct) I would need two. The low end level sensors were $40 (adafruit). After doing a little digging, I found that some people had been using capacitive touch sensors to read liquid levels. I had an arduino and an adafruit MPR121 on hand so I ran the following test:
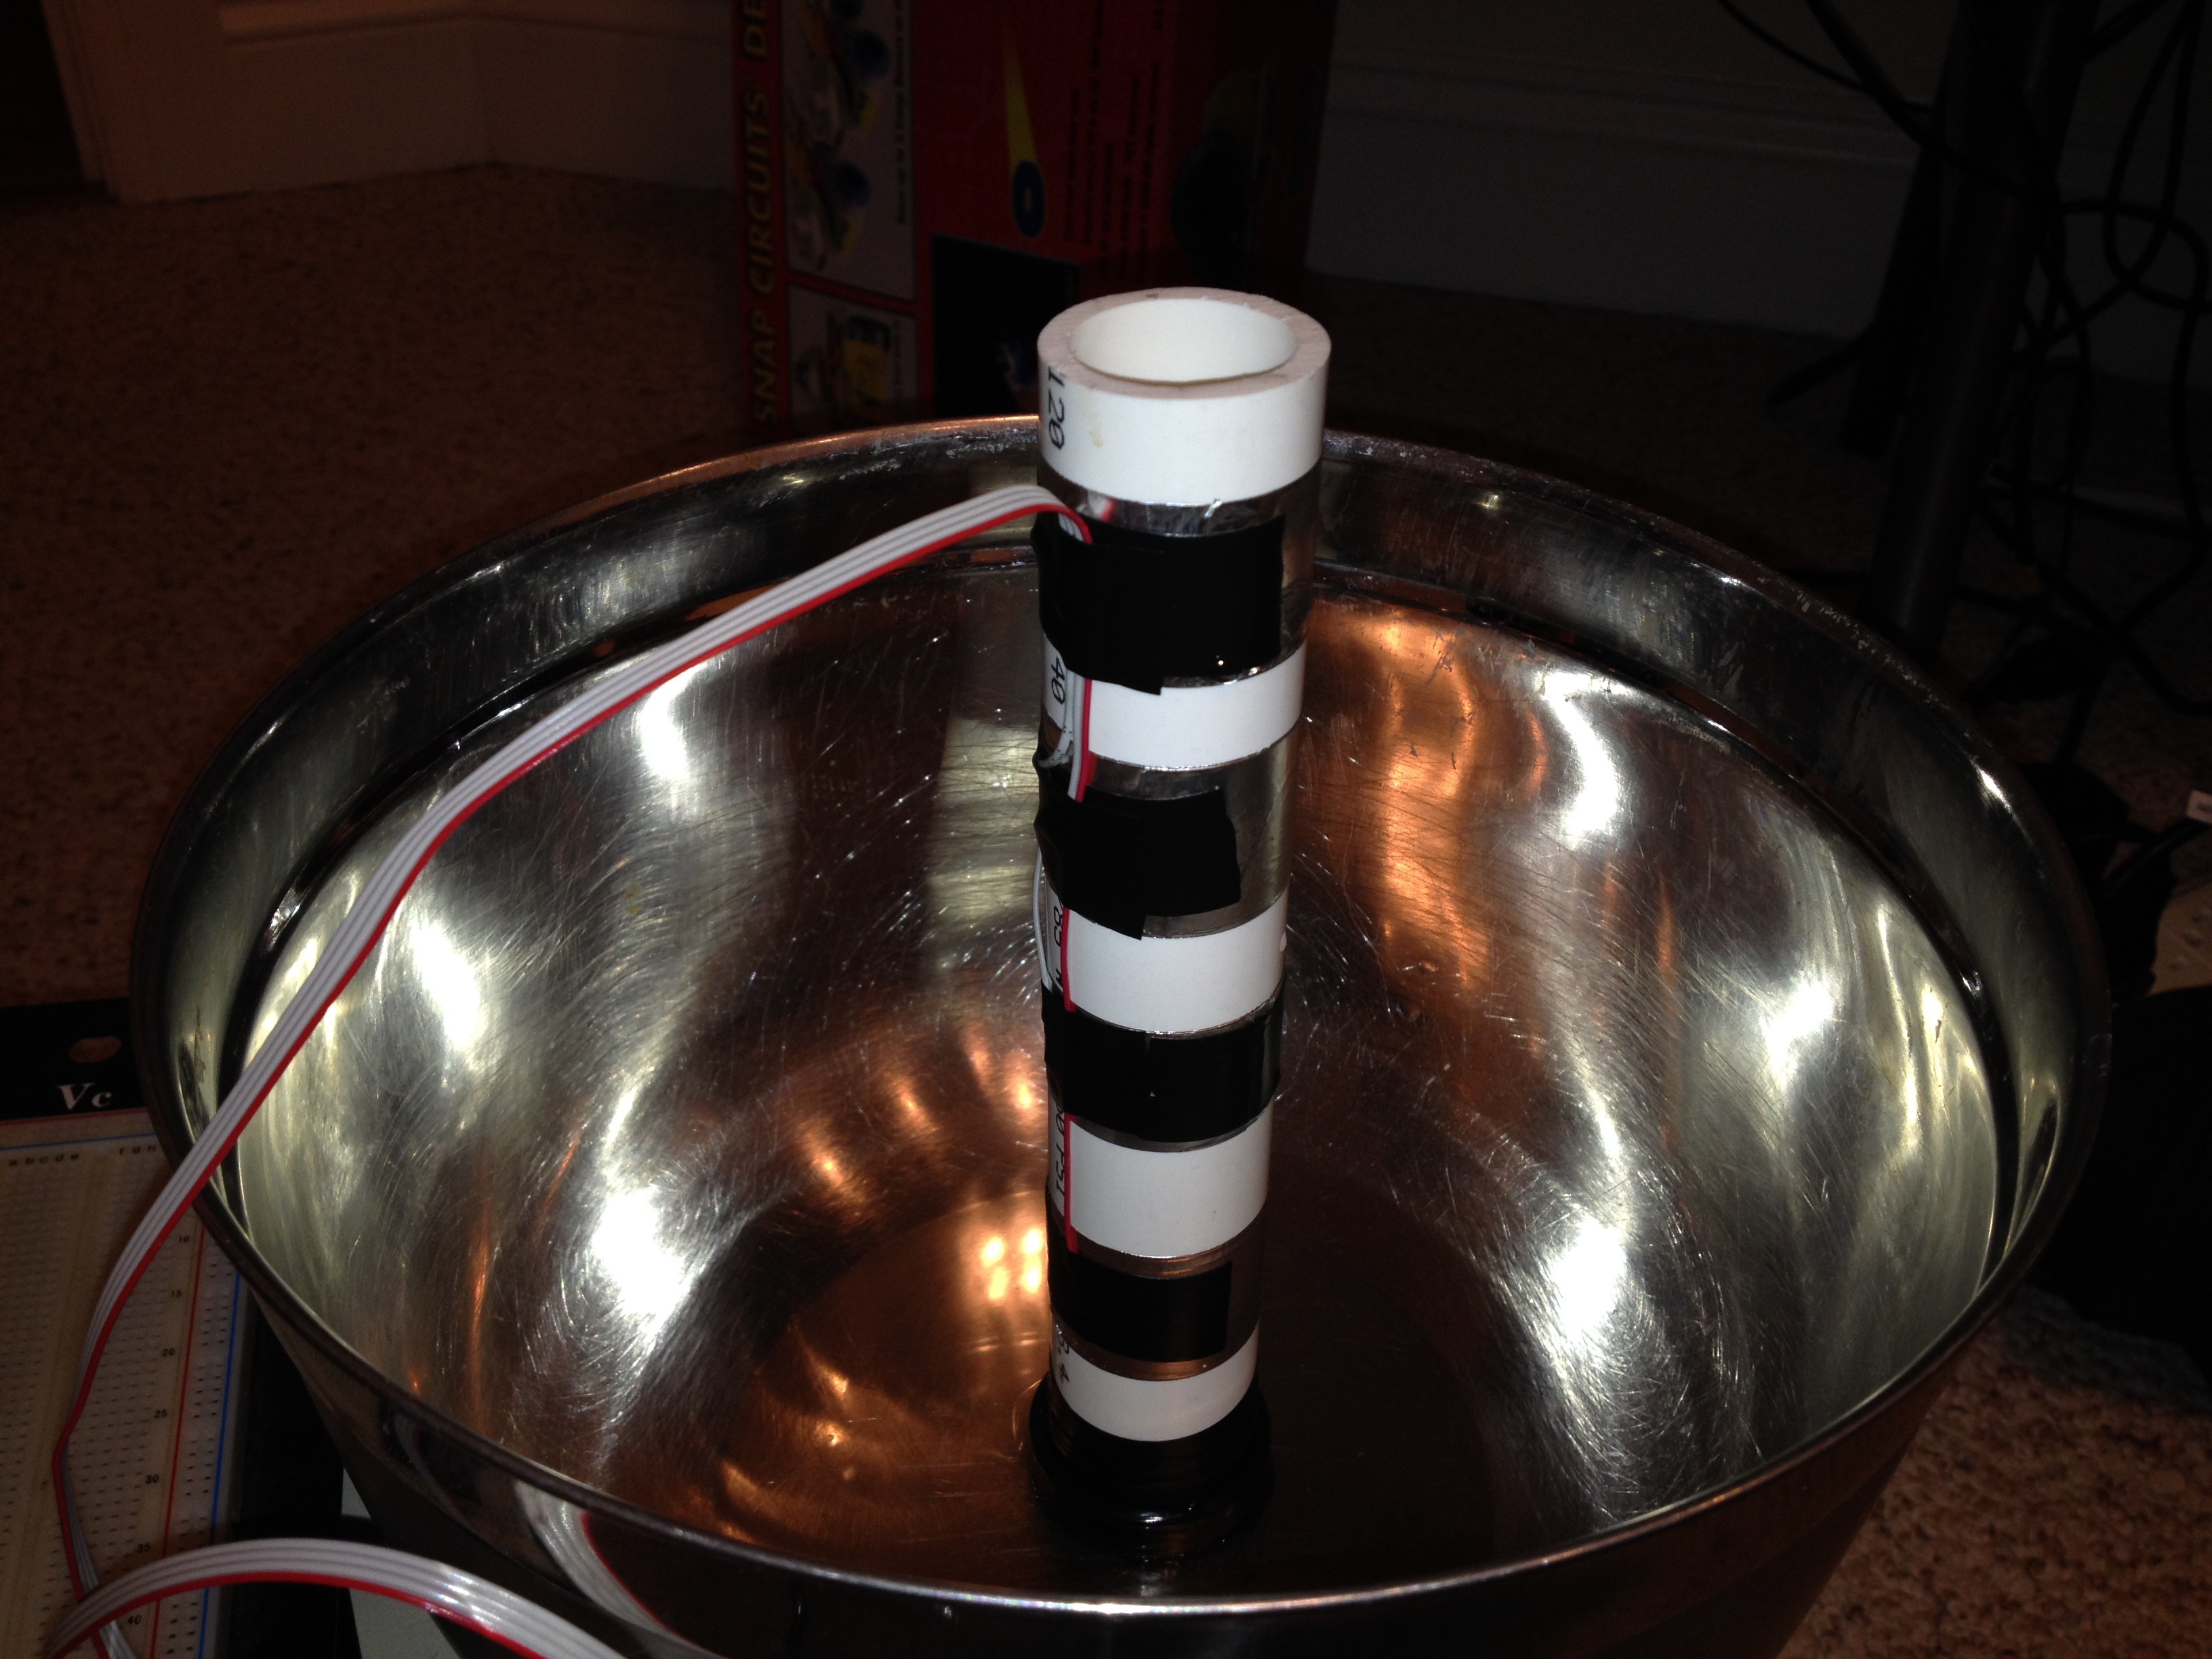
I wrapped a plugged PVC pipe with four 1" strips of tin foil. Each strip was taped on, and roughly placed at quarter, half, three quarter, and full positions. I then soldered wires onto each strip and connected them to the MPR121 inputs.
![]()
I then wrote some code to test the sensor. At first I used the example code from Adafruit, this worked fine for my hand touching the strips, but did not sense water in the column. Even after I set the MPR121 for maximum sensitivity, it didn't register water as "touches". I then set the MPR121 to output the raw data, and noticed that a change was noticeable. All I had to do at this point was record the empty values and full values and write the code to look for these. It worked like a charm. Right now the plan is to use a 4" (maybe 6") pvc pipe as the holding tank. This would have foil sensors wrapped around it for level checks. For the toilet level check, I am going to try to do the same thing, but inside out. A dry-on-the-inside tube with the foil on the inside lowered into the water. Thats all for now....
![]()
-
Initial testing
03/20/2015 at 01:20 • 0 commentsI just did some testing to establish a baseline for this project. The results are as follows:
Time for running shower to reach comfortable (not full) temperature: 45 seconds
Volume of water used (wasted): 19 cups (1.2 gallons).
Time for shower with head removed to flow 1.2 gallons: 22 seconds.
These results are encouraging. It seems this idea should be able to save more than a gallon per shower and half the time I have to stand naked and shivering with my hand under the cold water. My calculated flow rate is 3.24 gal/min which is reduced to 1.6 gals/min with the shower head.
I would love to hear from any readers what your shower warm up time and volumes are! Testing should be done several hours after the last shower use (first thing in the morning would be great). Run water into a bucket and time how long it takes to reach a temp where you would step into the shower. Then measure the volume. It would also be interesting to hear about your various setups (shower only, tub shower combo, independant or single/mixing valve, etc). My test was done on a shower stall with a mixing valve.
Shower water saver
An attempt to recycle the water wasted during the warm-up period at the start of a shower.