MatterHackers
-
LASERS
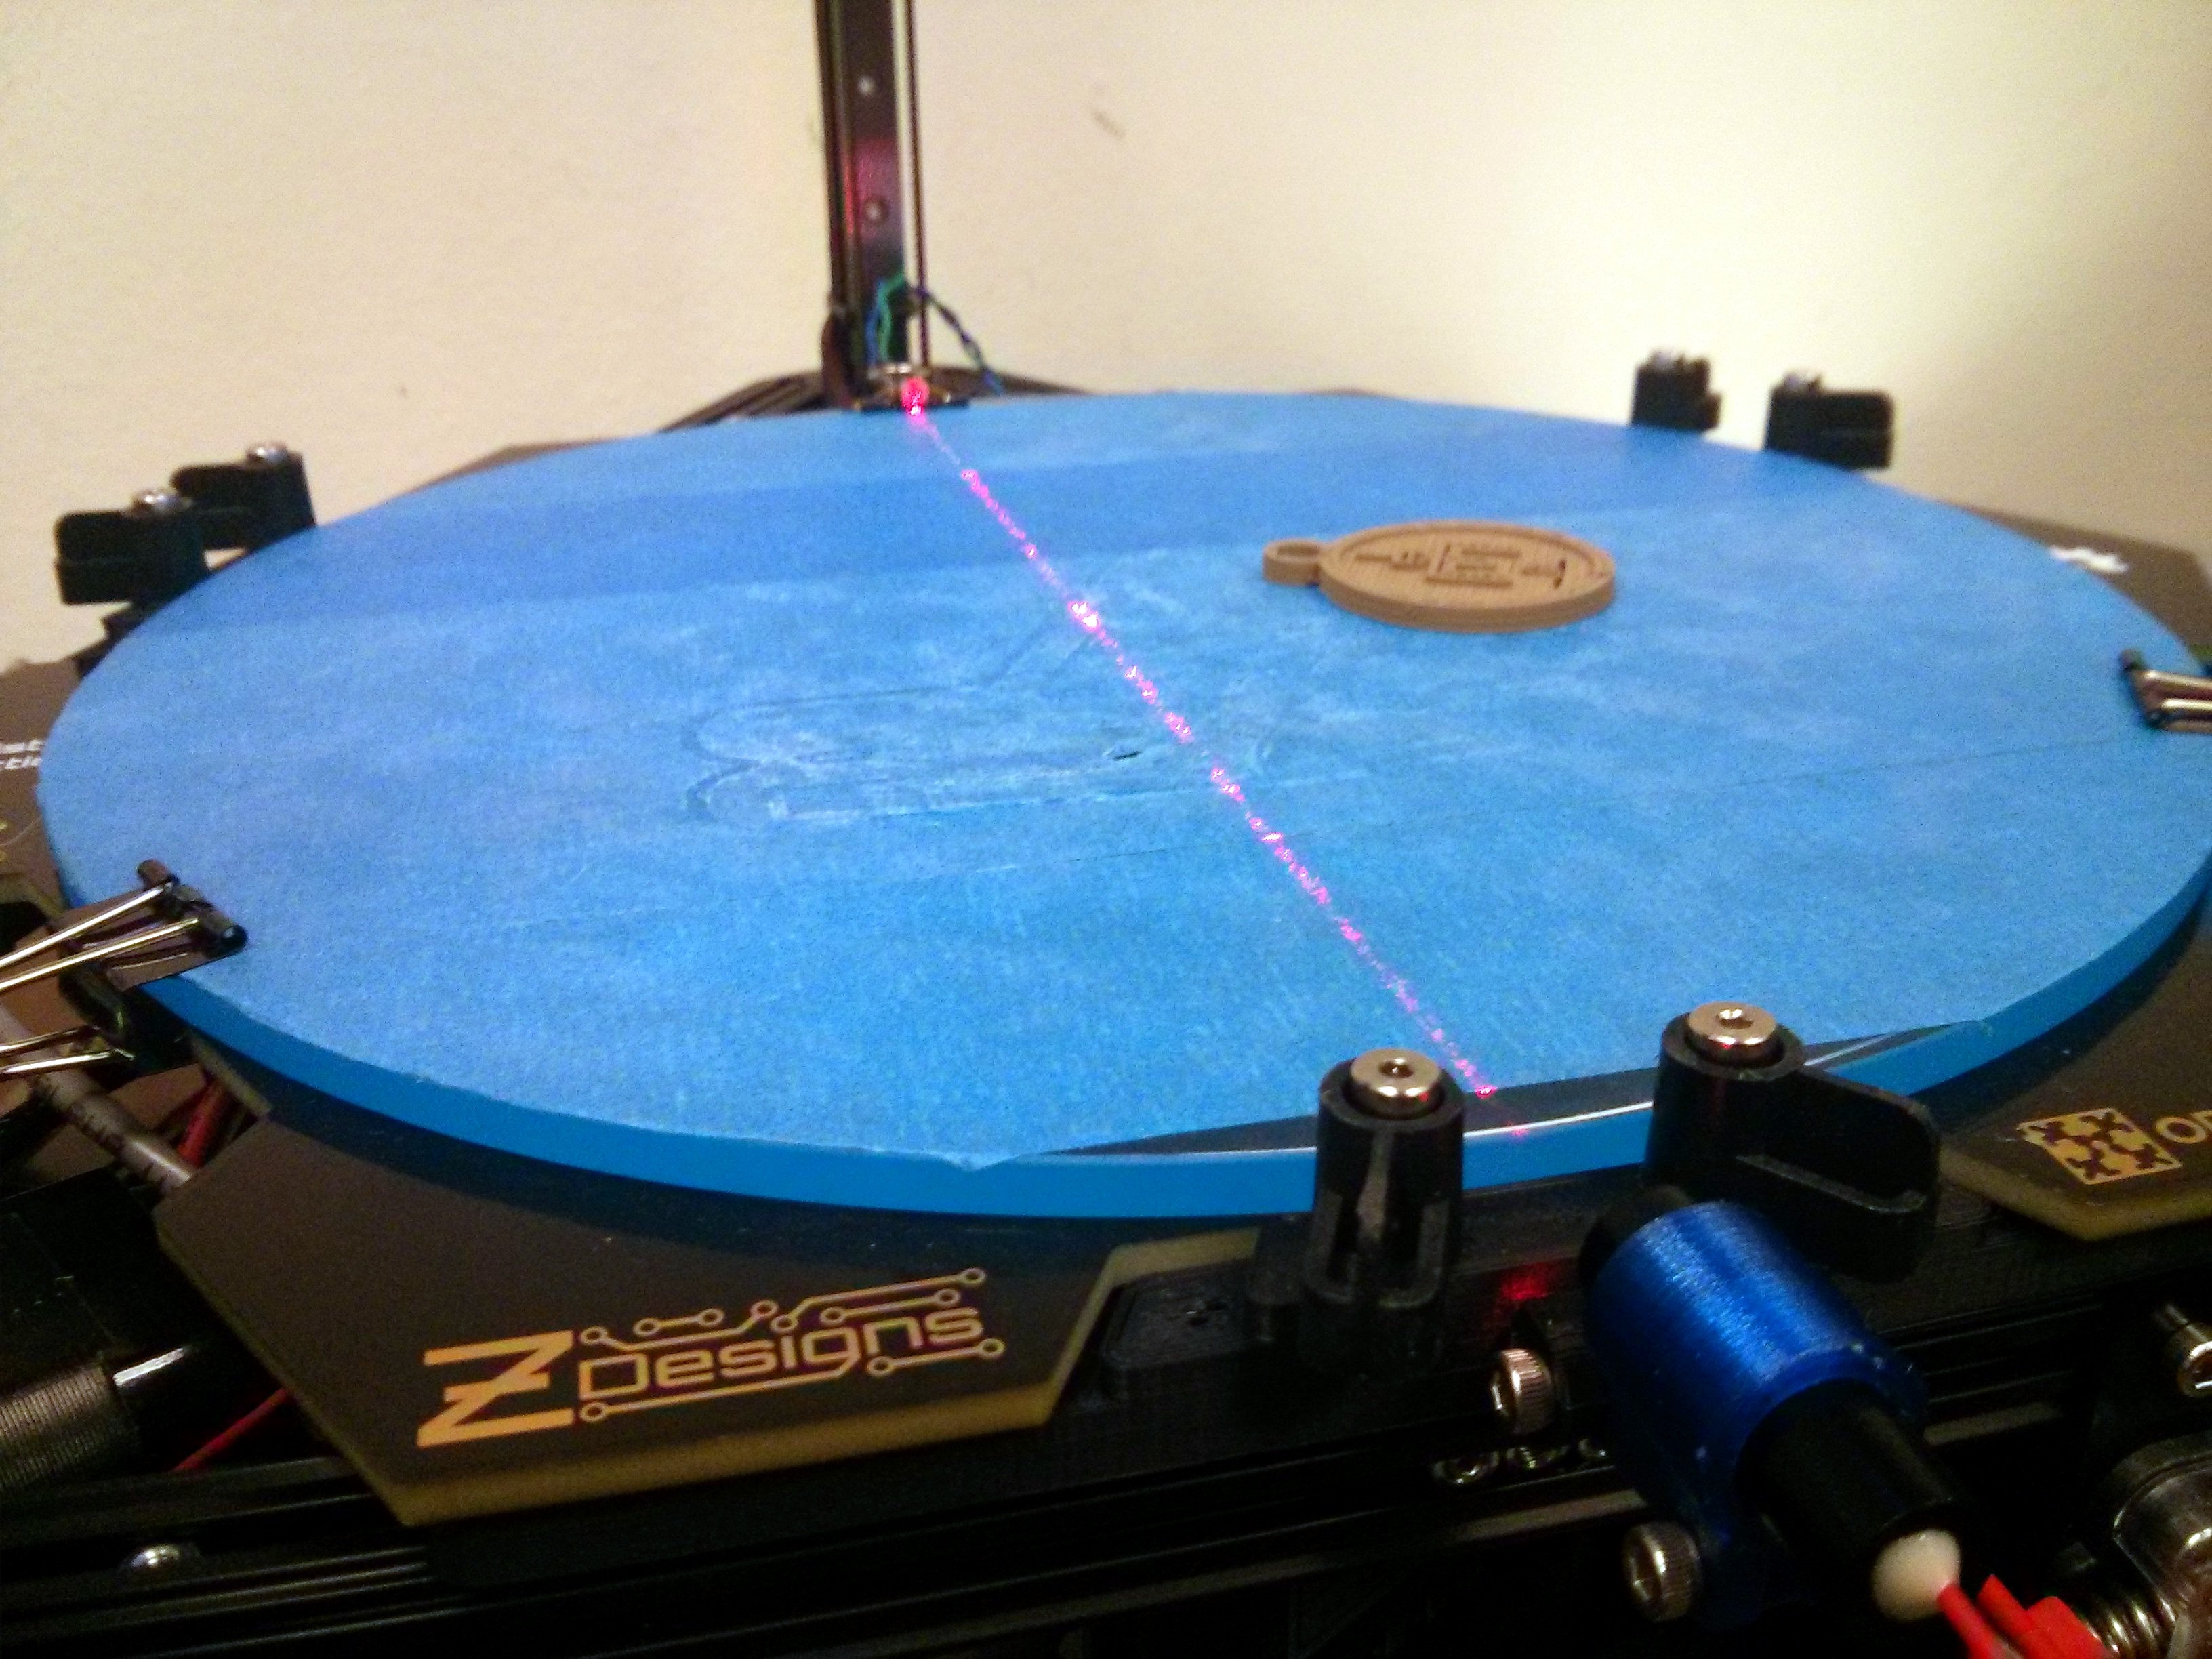
09/05/2015 at 22:44 • 0 commentsGood news, everyone. The boxing glove is now laser guided. This means it can detect when the object has been successfully removed, and automatically start the next print!

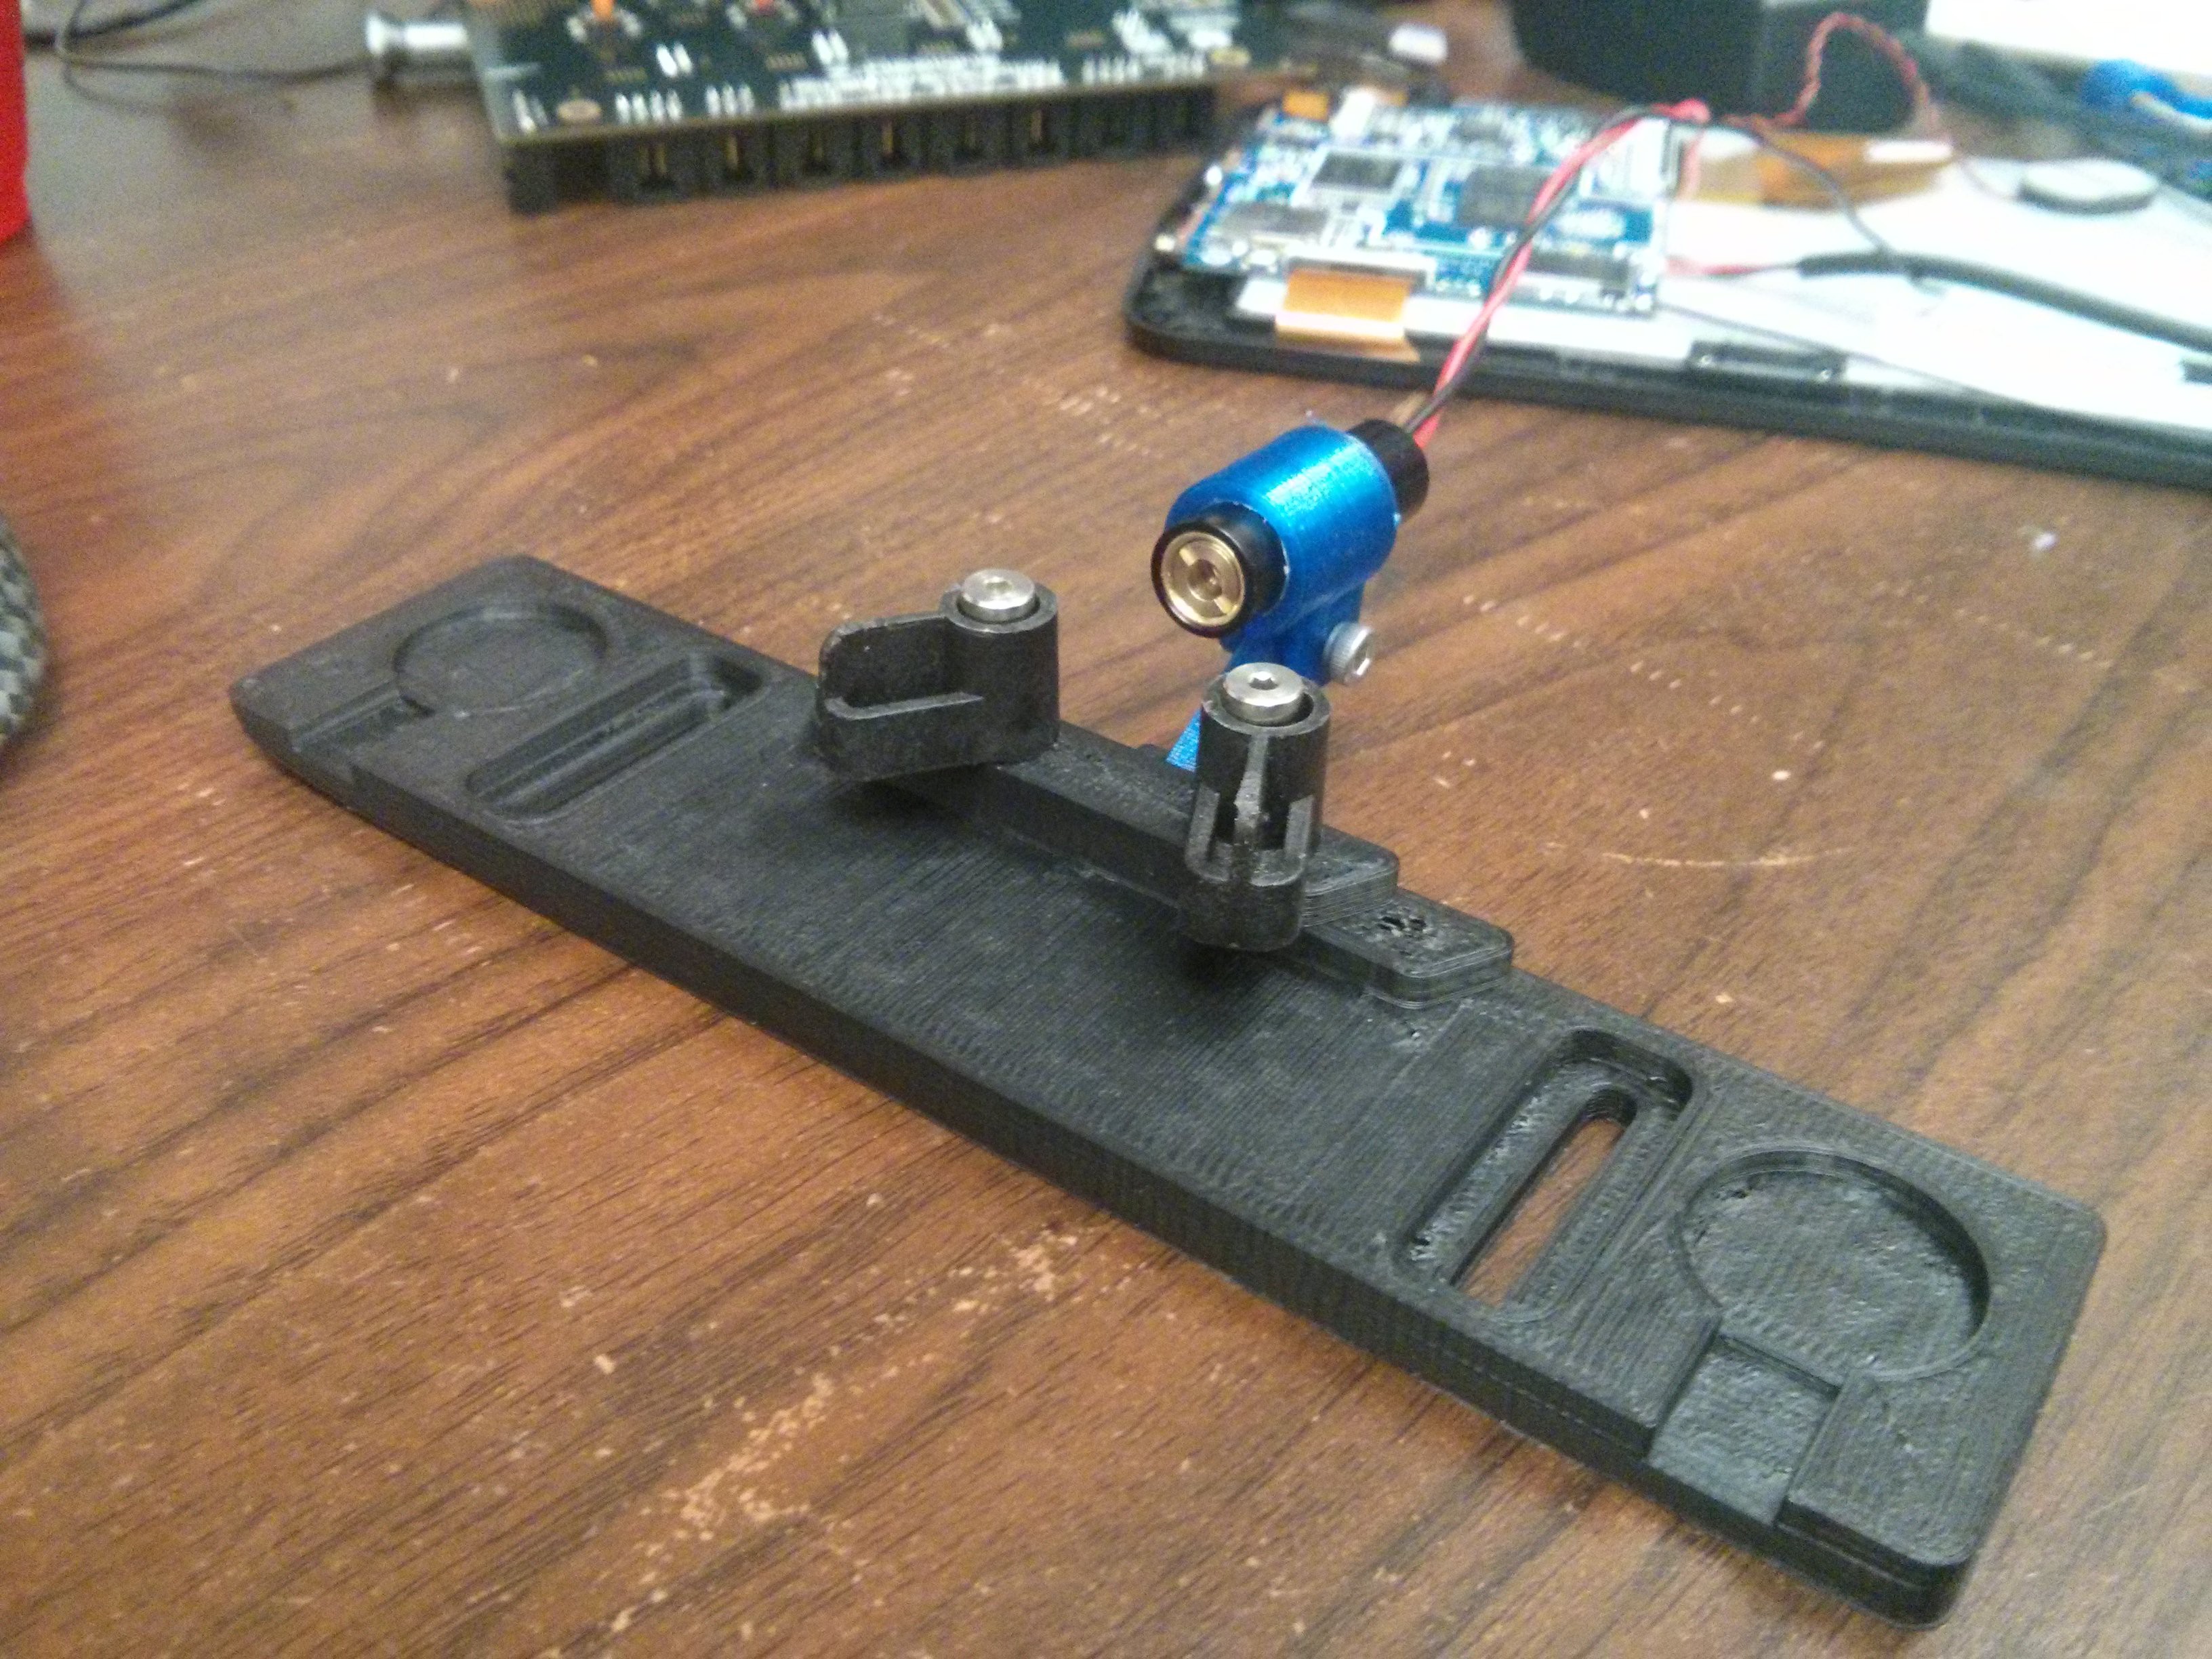
I added an attachment to one of the bed clamps to hold the laser diode. The little arm lets you adjust the height and angle, so you can get the beam perfectly parallel to the surface. This bed clamp also includes our modifications for mounting FSRs. As usual, designs are on Thingiverse.
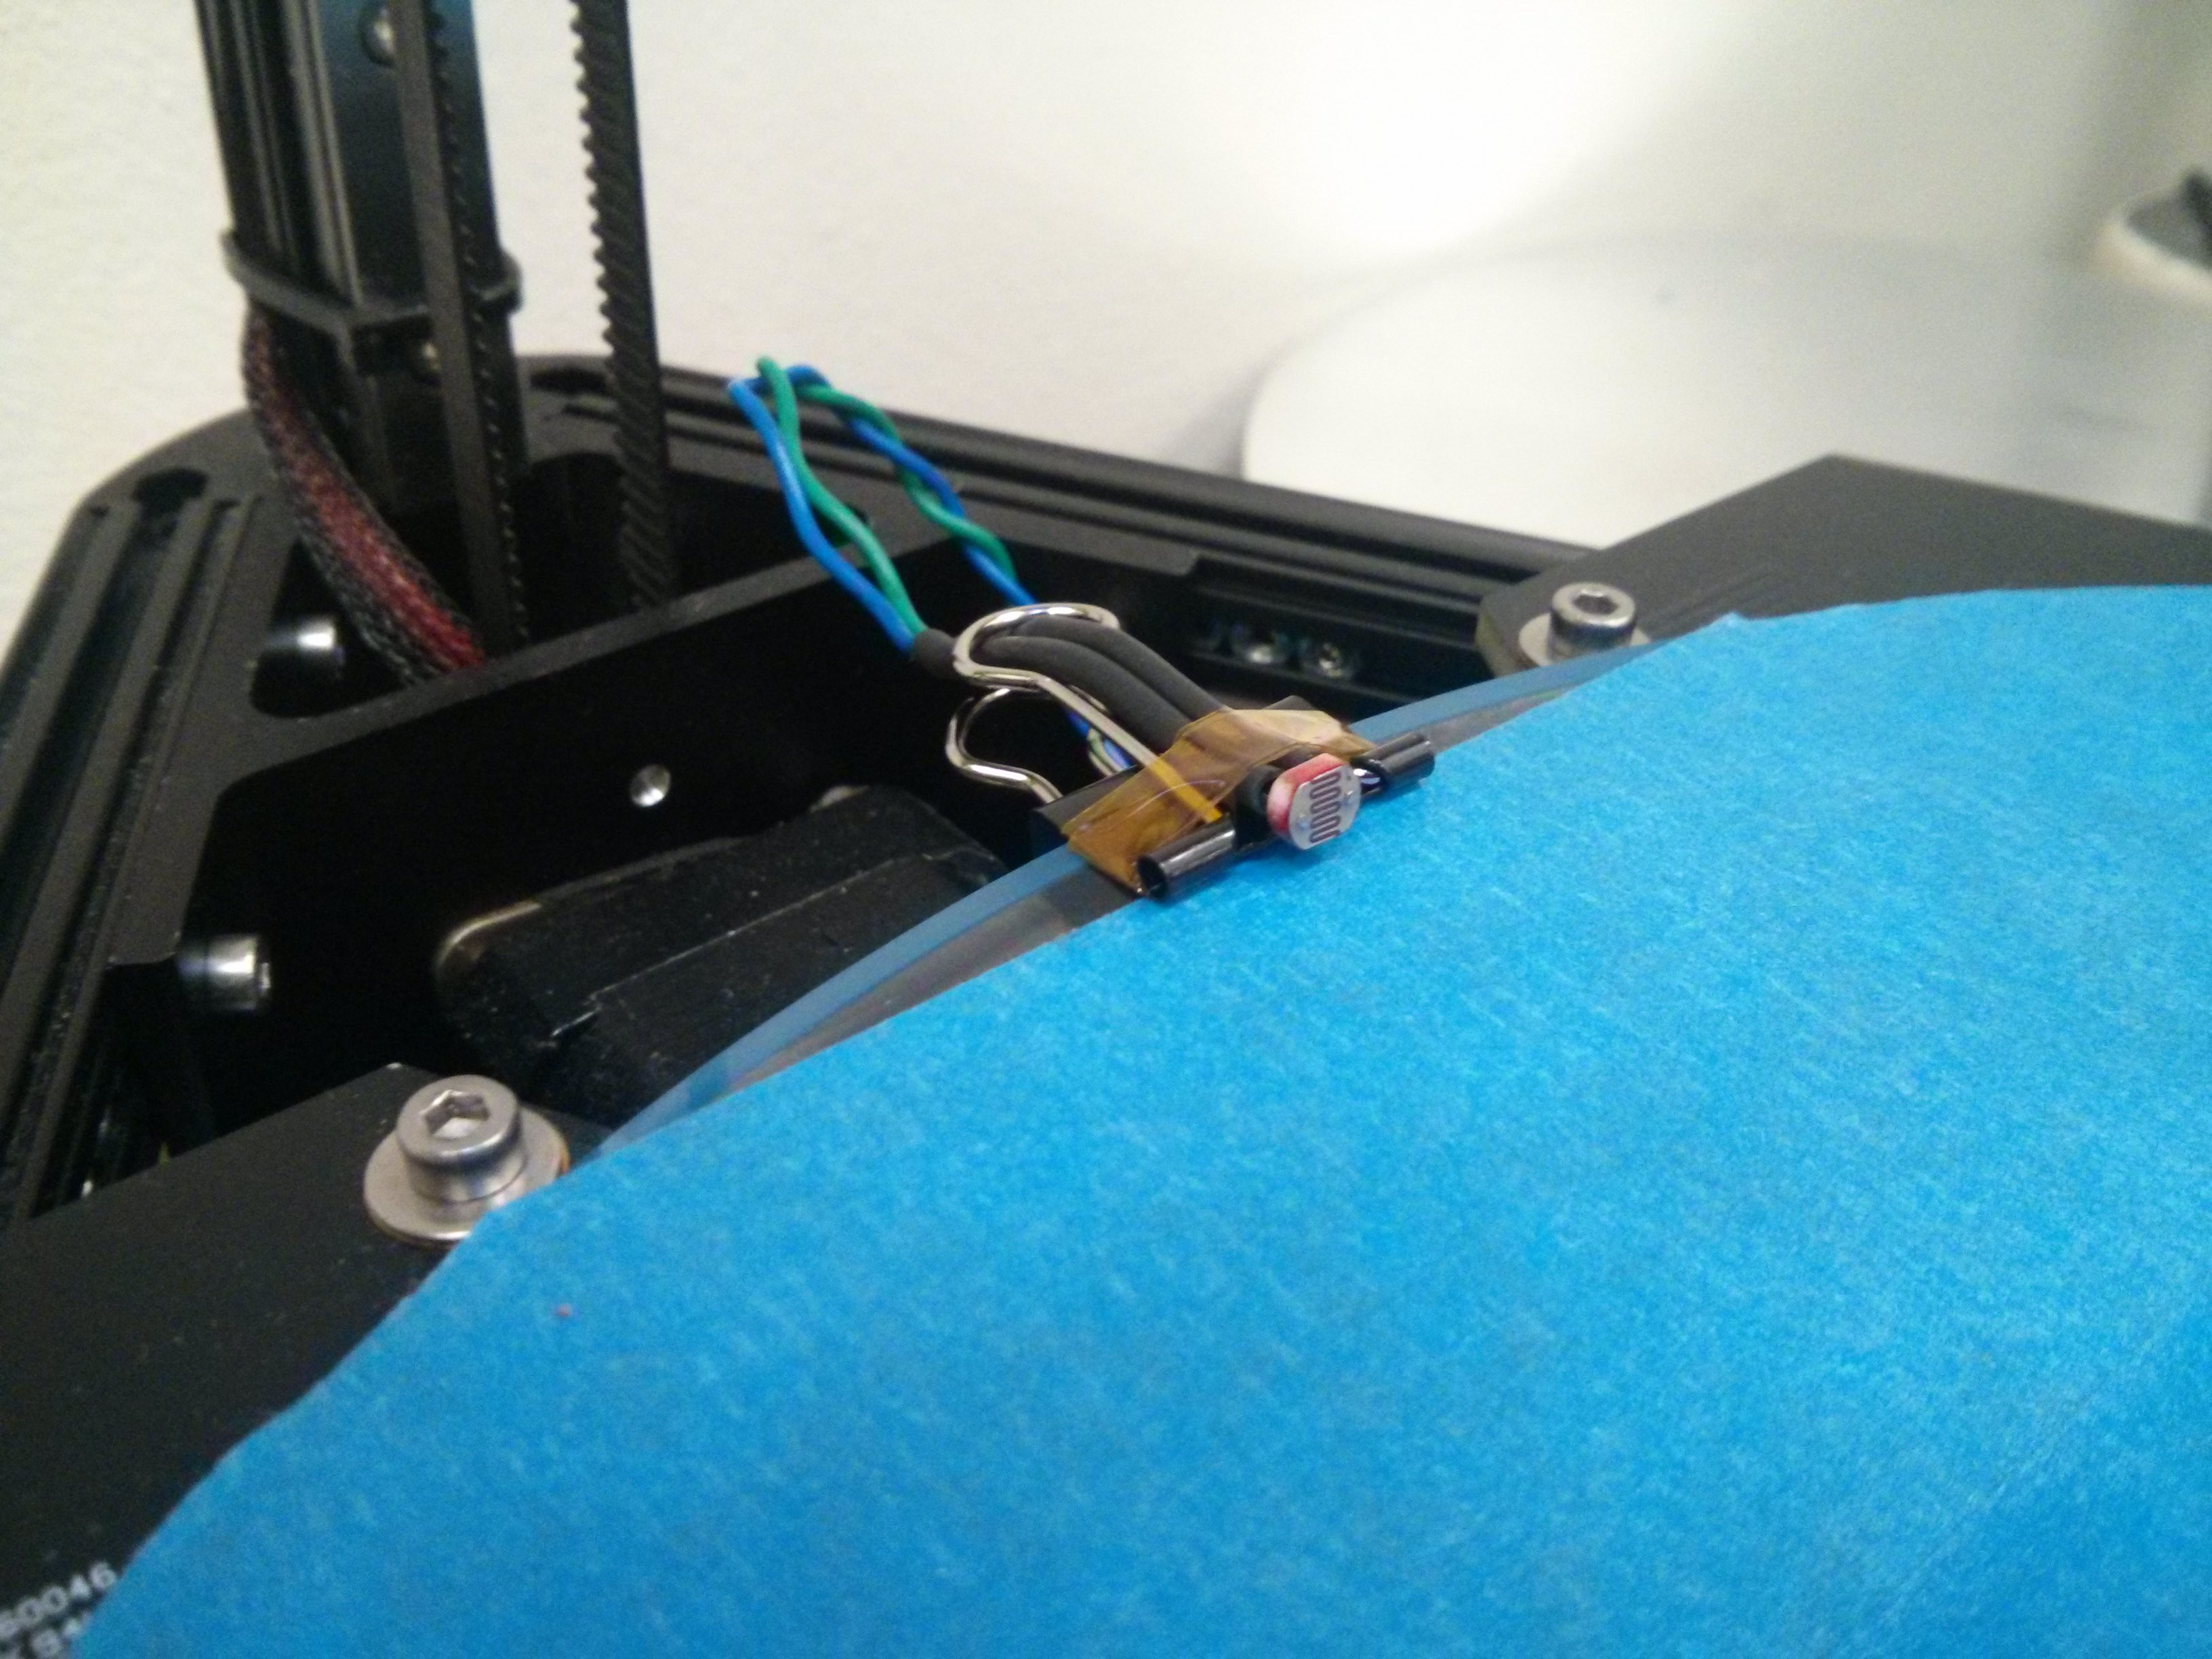
On the other side is the photo cell, taped to binder clip. If the laser hits the photocell, we know that the object is gone.
The laser is wired directly to one of the auxiliary 5 volt power pins on the Brainwave, so it runs continuously. In the future I might want to hook it up to a digital output so it can be turned on and off as needed. The photo cell is hooked up to the spare thermistor connector on the Brainwave.
Parts
Code
Two new gcode commands have been introduced. M809 is for testing. It simply reads the analog value from the photo cell. G43 is the fun one. It tries a couple times to punch the part off. If it succeeds, the print continues. If not, it gives up and waits for the user to take action. Heres the interesting part of the code:
// Punch repeatedly until object is ejected, or give up after a while and pause printing
void punchAndLaser(int punchCount, float speed)
{
  int x = 0;
  bool bedClear = false;
  while (x < punchCount and not bedClear) {
    punch(speed);
    x++;
    if (analogRead(TEMP_1_PIN) < LIGHT_THRESHOLD) {
      bedClear = true;
    }
  }
  if (bedClear) {
    SERIAL_ECHOLN("Success!");
  } else {
    SERIAL_ECHOLN("Failure :(");
    Stop();
  }
}
Usage
Add the following line to your custom end gcode. G43 accepts 2 parameters. C is the number of times it will attempt to punch before giving up. F is the punch speed, the same as G42.
G43 C3 F300
To chain several prints together, you will need to generate gcode files for each and concatenate them together. This is easy enough from the command line.$ cat object1.gcode object2.gcode > object1and2.gcode -
Fixed Mounting Angle
08/15/2015 at 18:55 • 0 commentsMinor update, I finally designed some proper 60 degree brackets for mounting to the side of the Kossel Pro. This way, things are not punched directly into the tower on the opposite side. It also gives more room so that the fist doesn't get in the way of the end effector. Files are on Thingiverse. Heres pictures.
Automatic Print Ejector
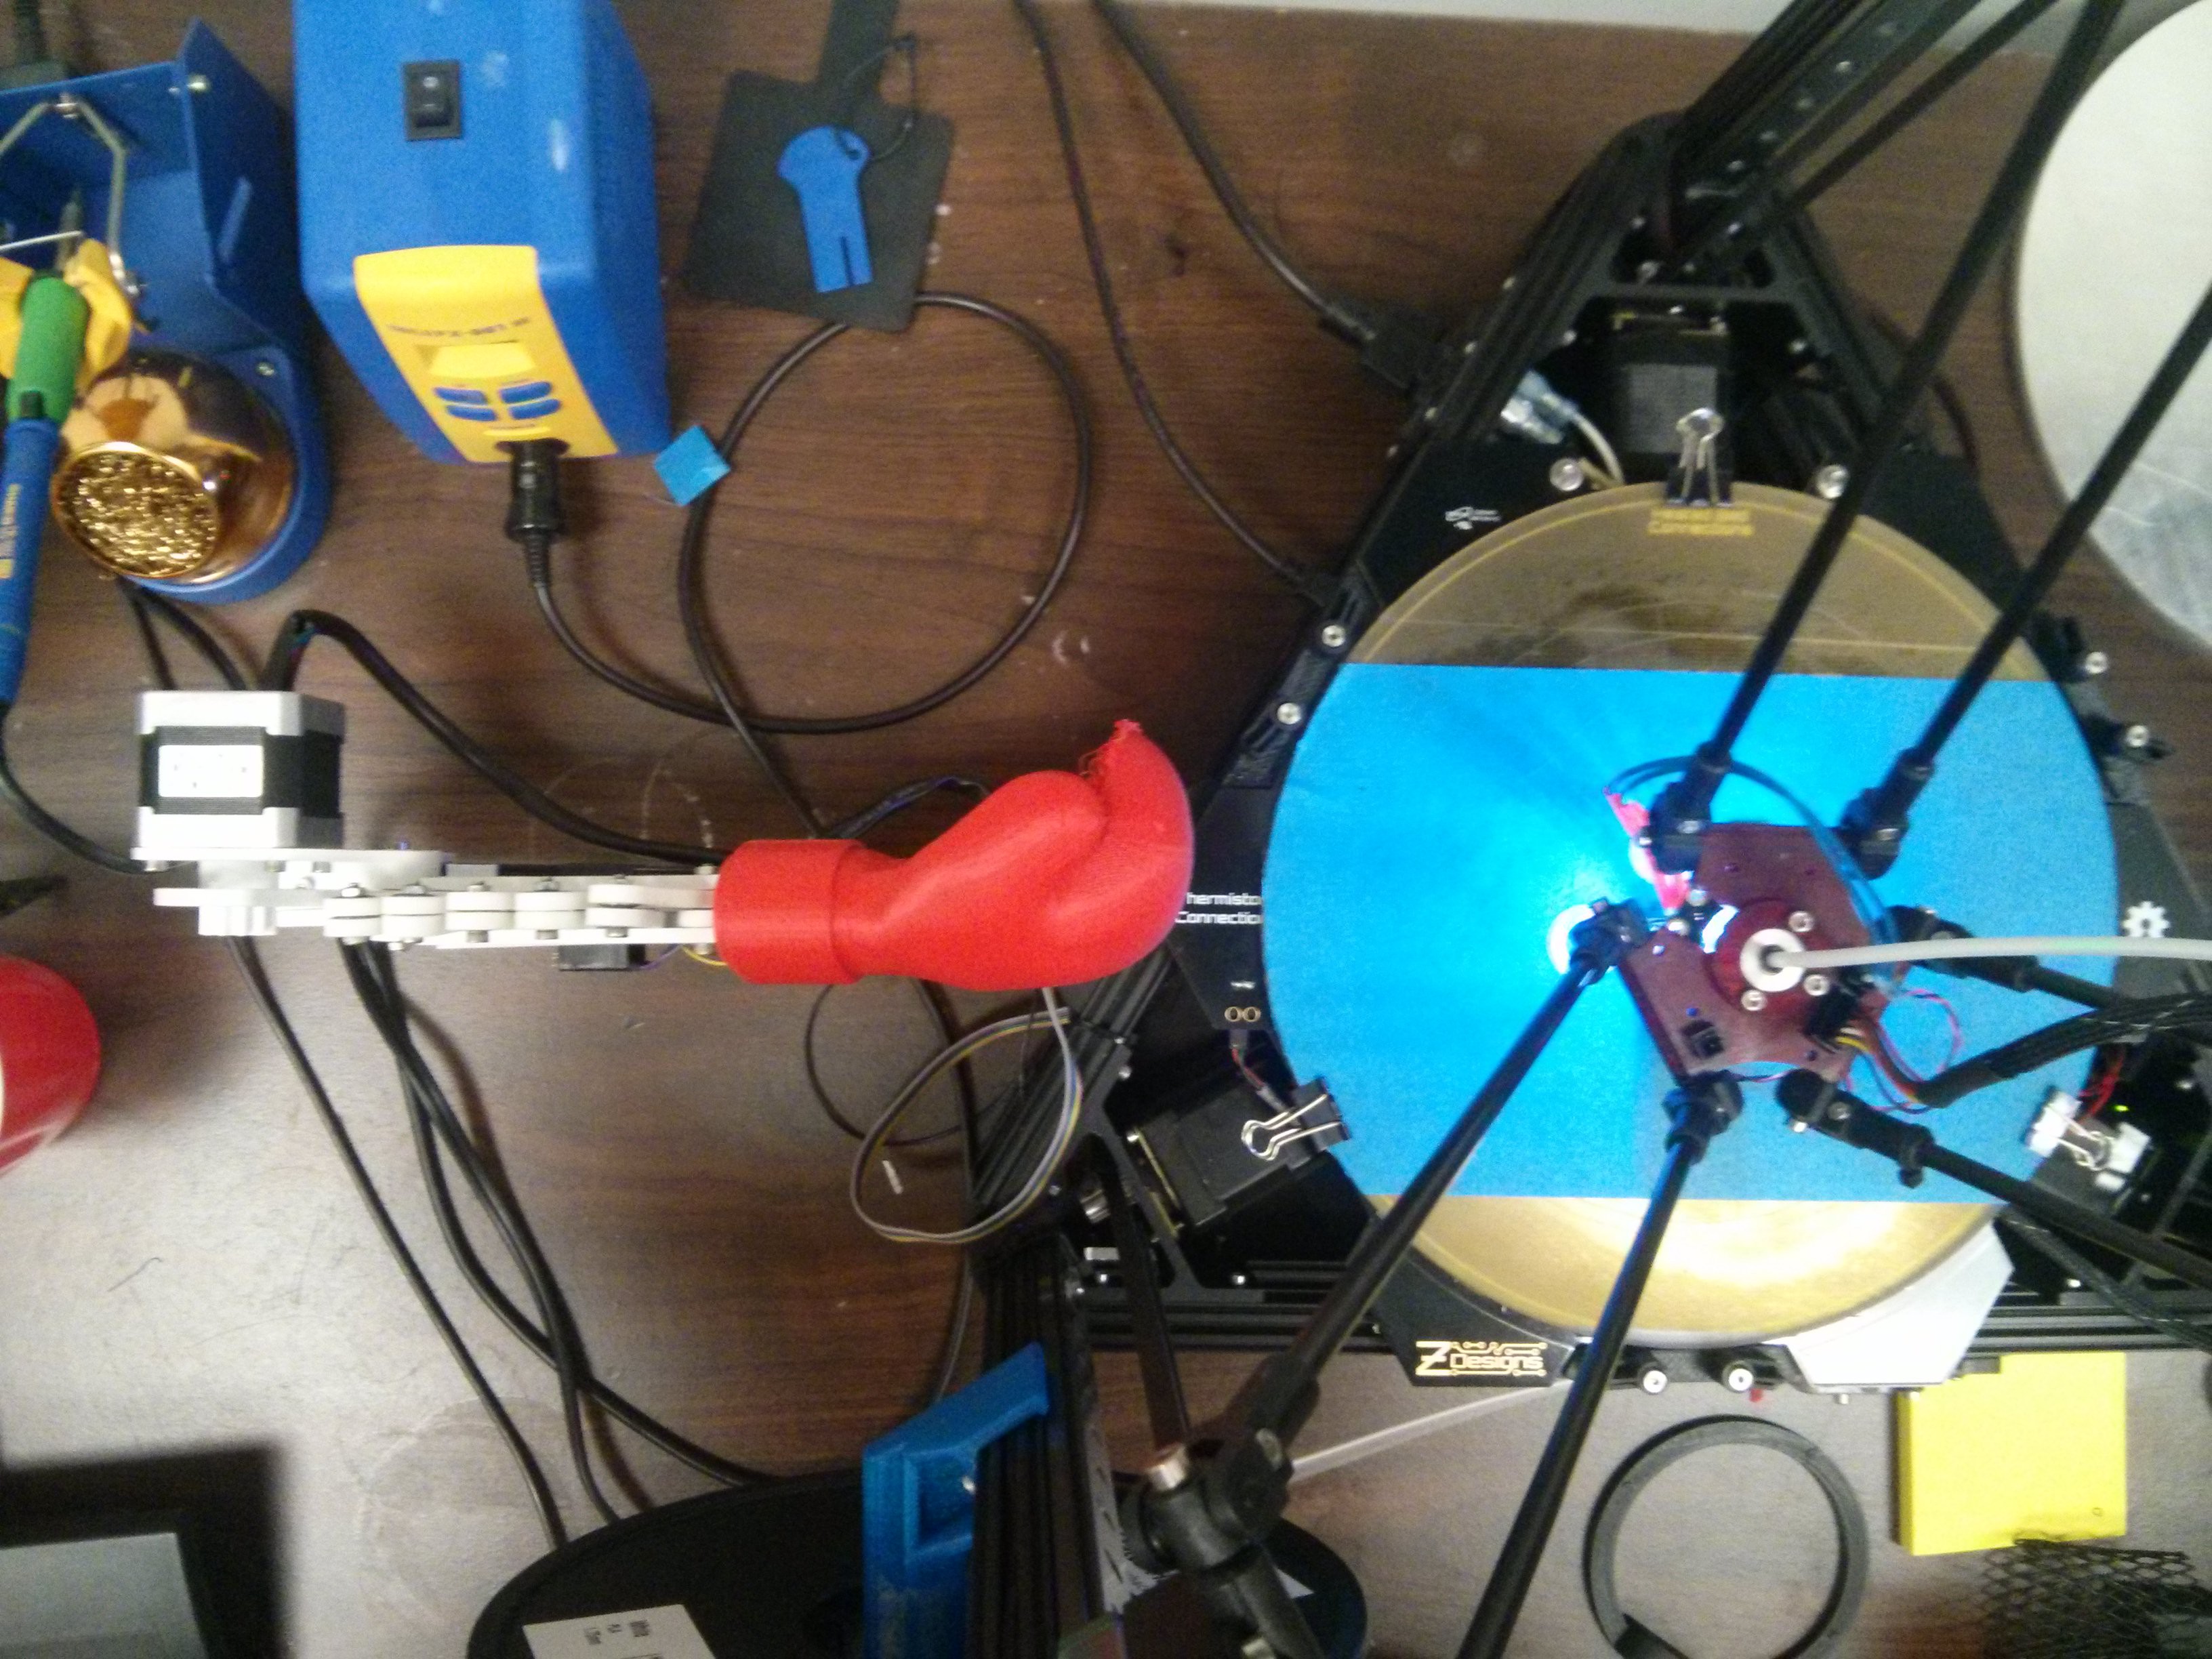
A device for removing your completed prints by punching them with a boxing glove