Sorry for the delay on instructions for this project. I have been too busy to finish. I hope to have it complete by the end of May.
$100 Toaster Hack
A Quick Approach To A Home Soldering Oven
A Quick Approach To A Home Soldering Oven
To make the experience fit your profile, pick a username and tell us what interests you.
We found and based on your interests.
Sorry for the delay on instructions for this project. I have been too busy to finish. I hope to have it complete by the end of May.
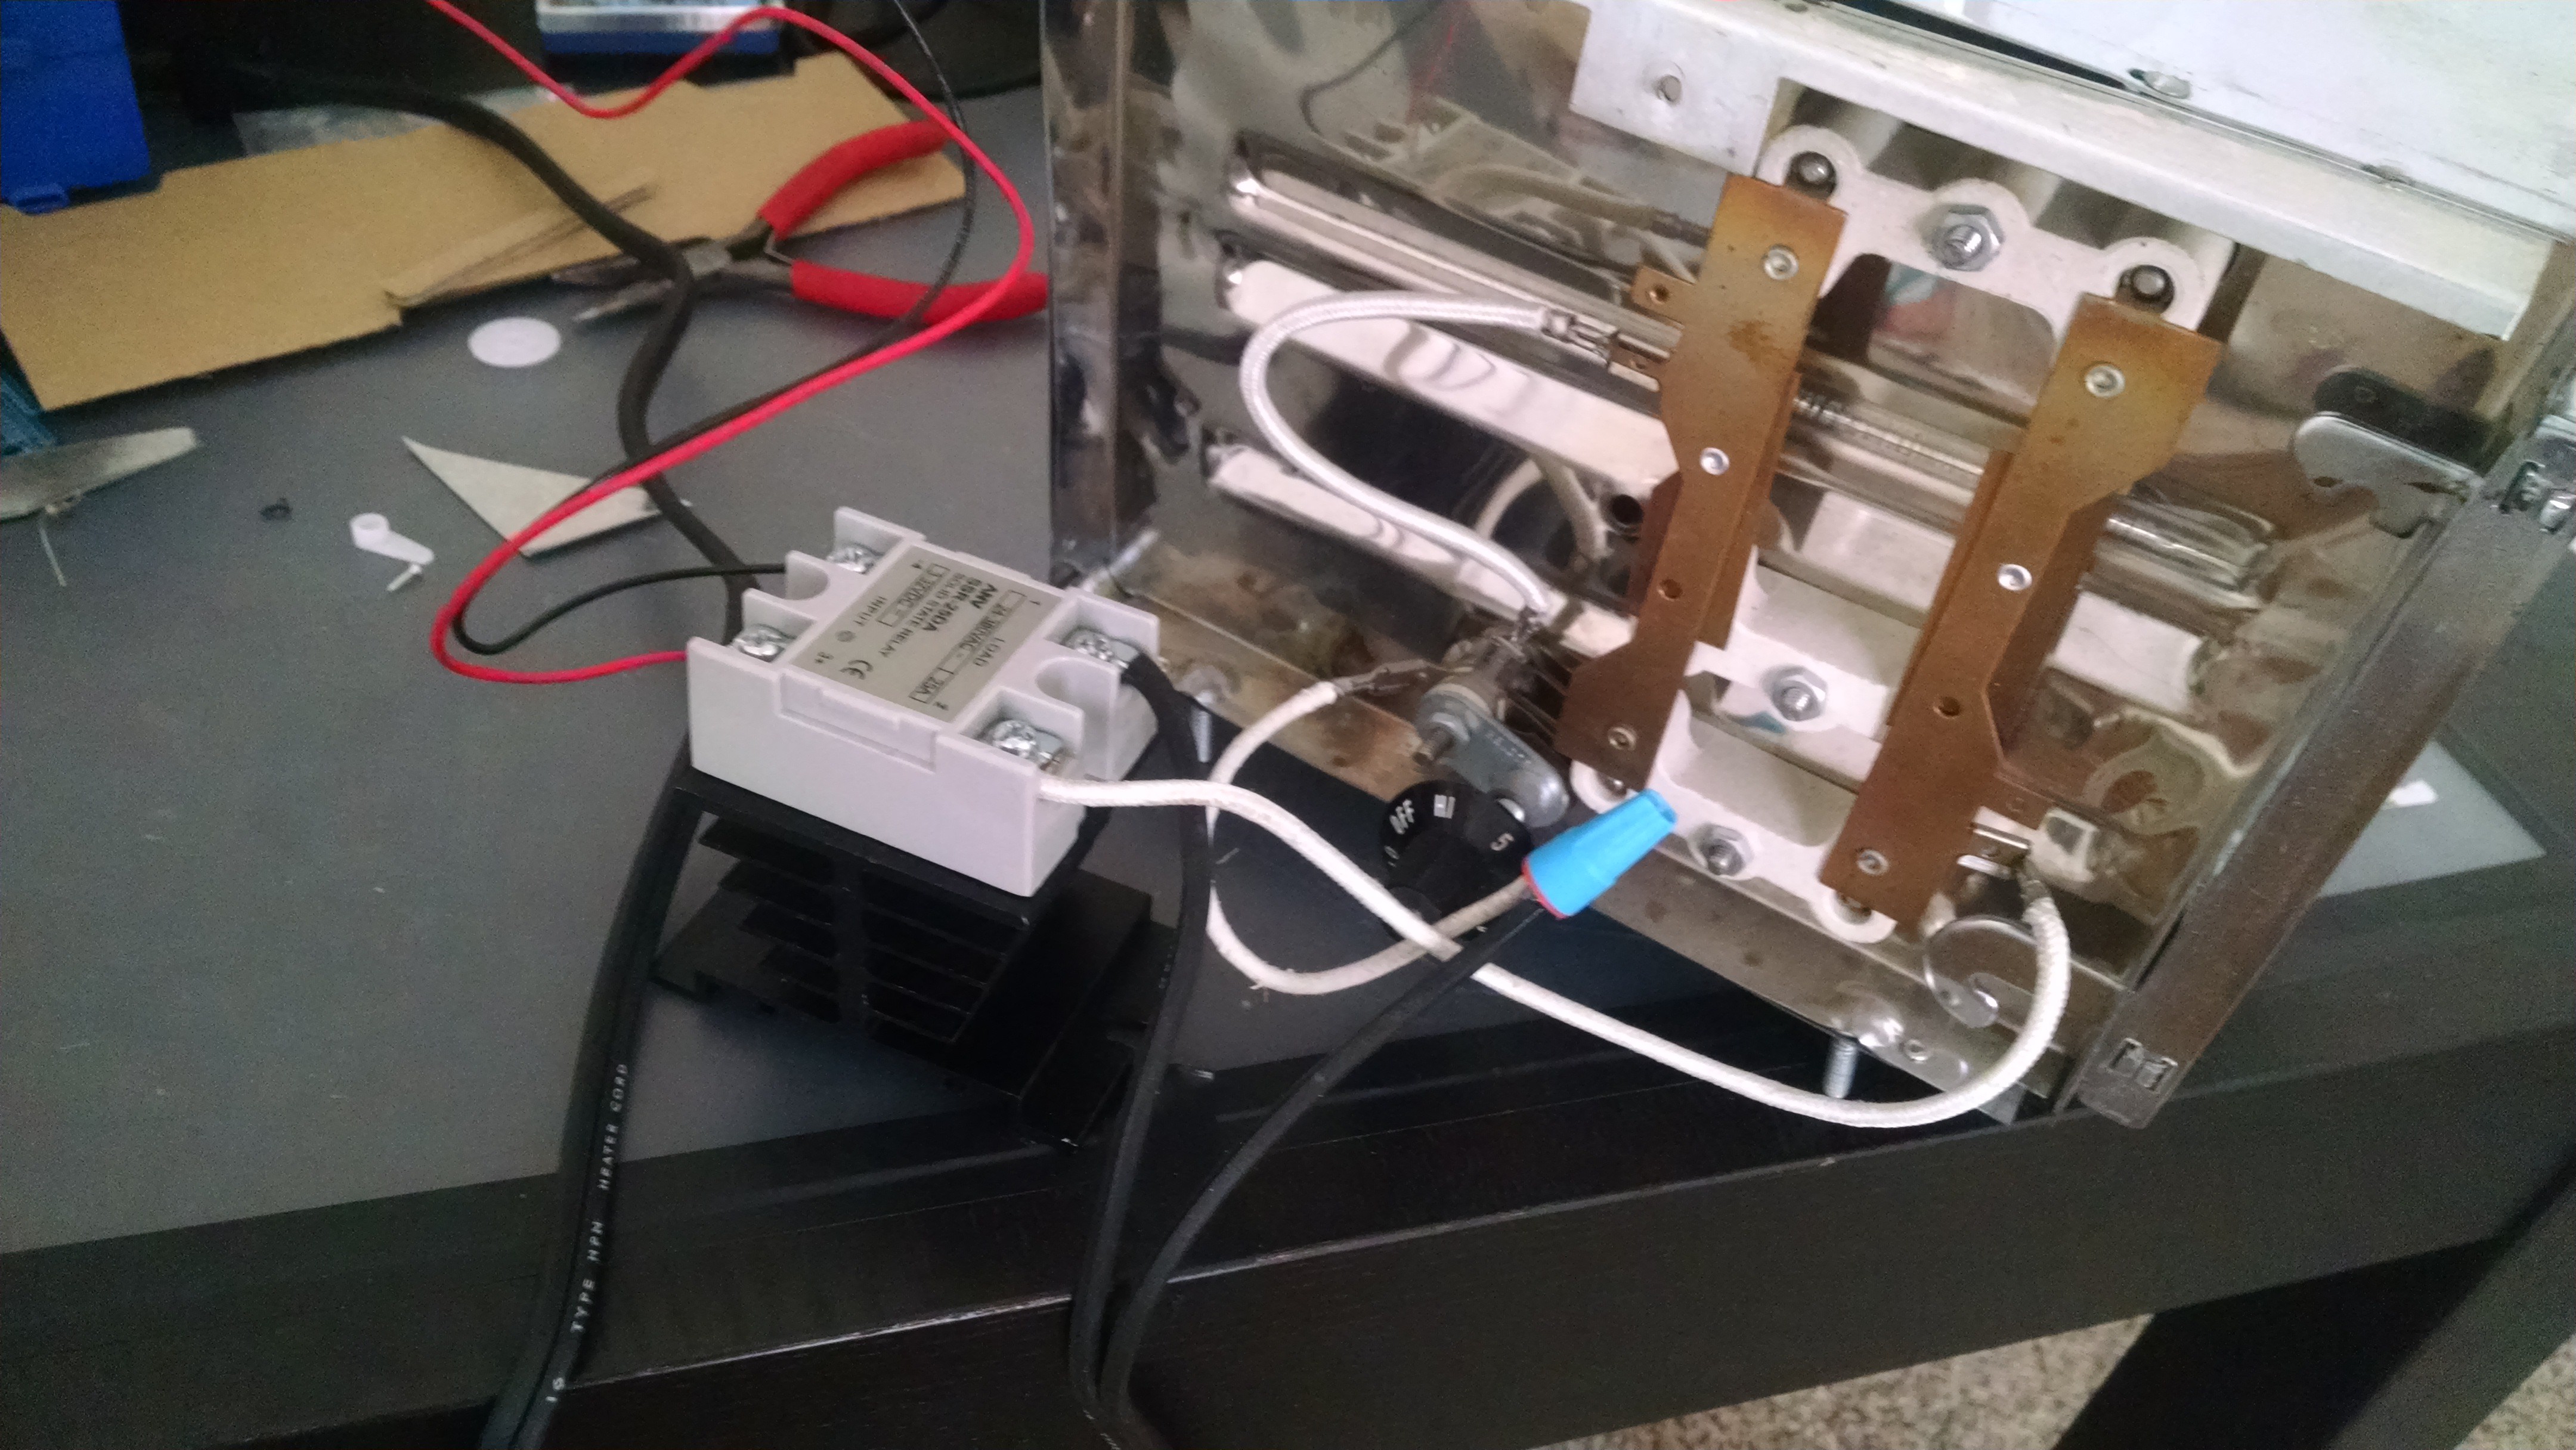
Hack your toaster! While this will be different for everyone, the common denominator is that your are looking to remove the toaster casing that will get you to the main power line. I was lucky as my toaster was so old that its wiring was really simple.

Wire toaster to Relay.
As you can see from the picture in step one...this is pretty simple. There were two white leads from the toaster connected to the main power line. I simply completed the same circuit with the inclusion of the relay. If you are already familiar controlling relays from an Arduino, now is probably a good time to test if this circuit will work:
1. Plug in the your toaster to mains power. It should not turn on as you have not activated the relay.
2. Connect the input end of your relay
a. Black (-) to Ground on Your Arduino
b. Red (+) to 5V on Your Arduino
3. Apply 5V to your Arduino and the toaster should turn on. If you do not see the red light on your relay, then something did not work.
You now should be able to turn the toaster on and off by simply powering your Arduino.
Wire the amplifier
1. Connect a wire from the 5V pin on your Arduino to the positive rail on your breadboard.
2. Connect a wire from the Gnd pin on your Arduino to the negative rail on your breadboard.
3. Wire the Amplifier
a. Solder the pins to the amplifier (Here is a good soldering tutorial if you are new)
https://learn.adafruit.com/adafruit-guide-excellent-soldering/tools
b. Place the amplifier in your breadboard.
c. Connect the V+ pin on the amplifier to the 5V rail.
d. Connect the first Gnd pin to the ground rail.
e. Connect the pin labeled "out" to pin A0 on your arduino
f. Connect the second Gnd pin to the ground rail.
Create an account to leave a comment. Already have an account? Log In.
This is a neat project! I've never made a soldering oven, but I did cook a laptop motherboard in an oven at a high heat one time. Stunk up the place lol, but the laptop worked afterward :) Anyway, if you need a toaster to toast some toast now, check out my guide here: Best 2 Slice Toasters for 2021
Become a member to follow this project and never miss any updates
By using our website and services, you expressly agree to the placement of our performance, functionality, and advertising cookies. Learn More
You can use the After Tax UK government’s tax calculator to get an estimate of how much tax you would pay on £200 per week. It would be also wise to consult a tax advisor or accountant for more accurate information.