alusion
-
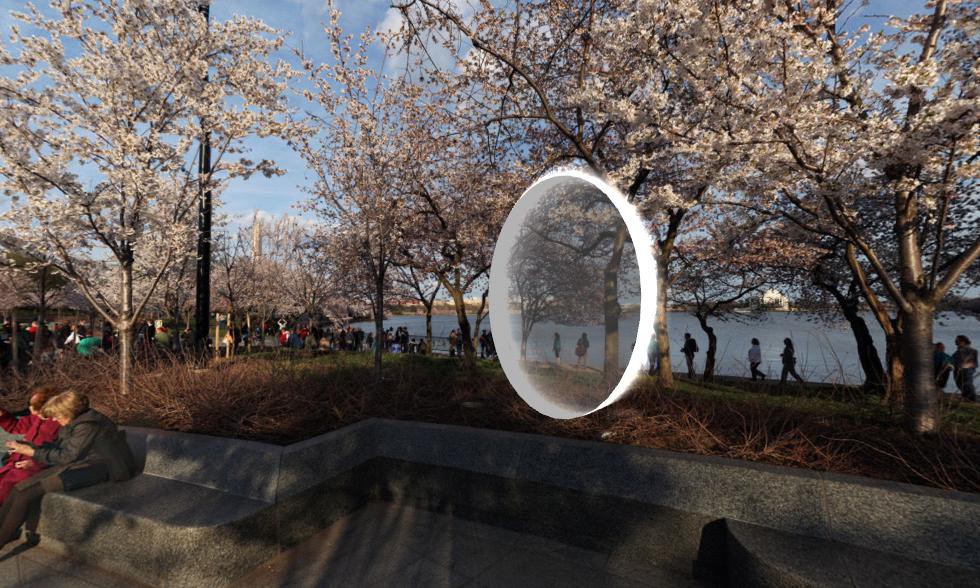
Sky Fall
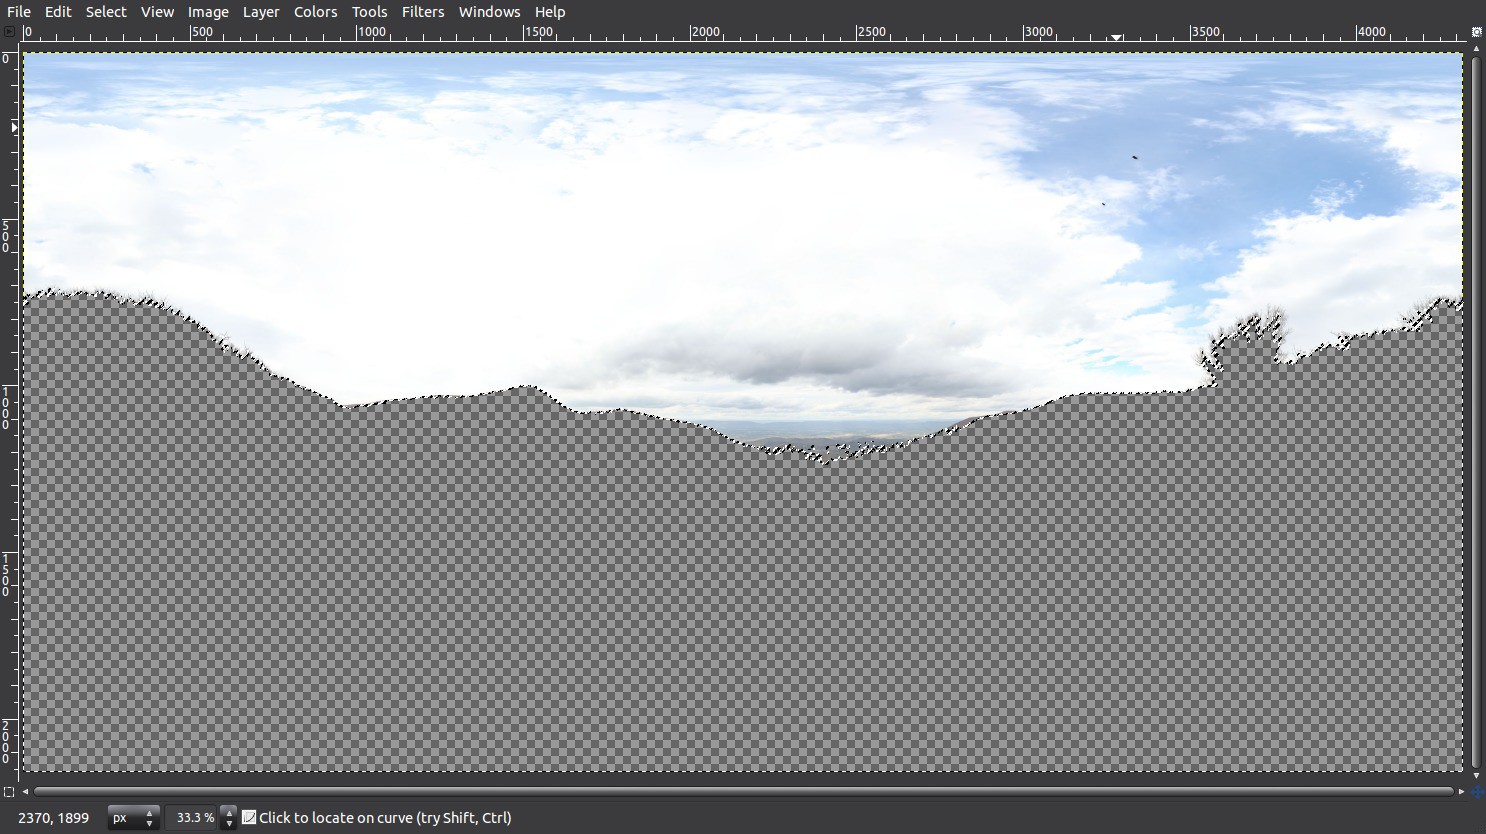
04/06/2015 at 06:24 • 0 commentsI opened up a 360 photosphere image into Gimp and created a new layer from visible, started to mess with the curves and contrast until the sky was blanketed white, and then applied edge detection in order to select and remove the inverse of the mountains and valley -- leaving only the sky. The original picture was not properly exposed but I'll work with what I got.
![]()
I exported a copy of the transparent png and opened up Pixel-Drifter, a powerful pixel-sorting tool that is written in Java. Don't try to process the picture right now because the resolution is still set much too high. The first step you want to do is to mogrify the image to 50% and reduce the size of the png file. If your image is still too large, resize it again but keep in mind that its now 25% of the original size and you must resize it 400% when you're done glitching it. The command is part of Imagemagick suite.
mogrify -resize 50% image.png
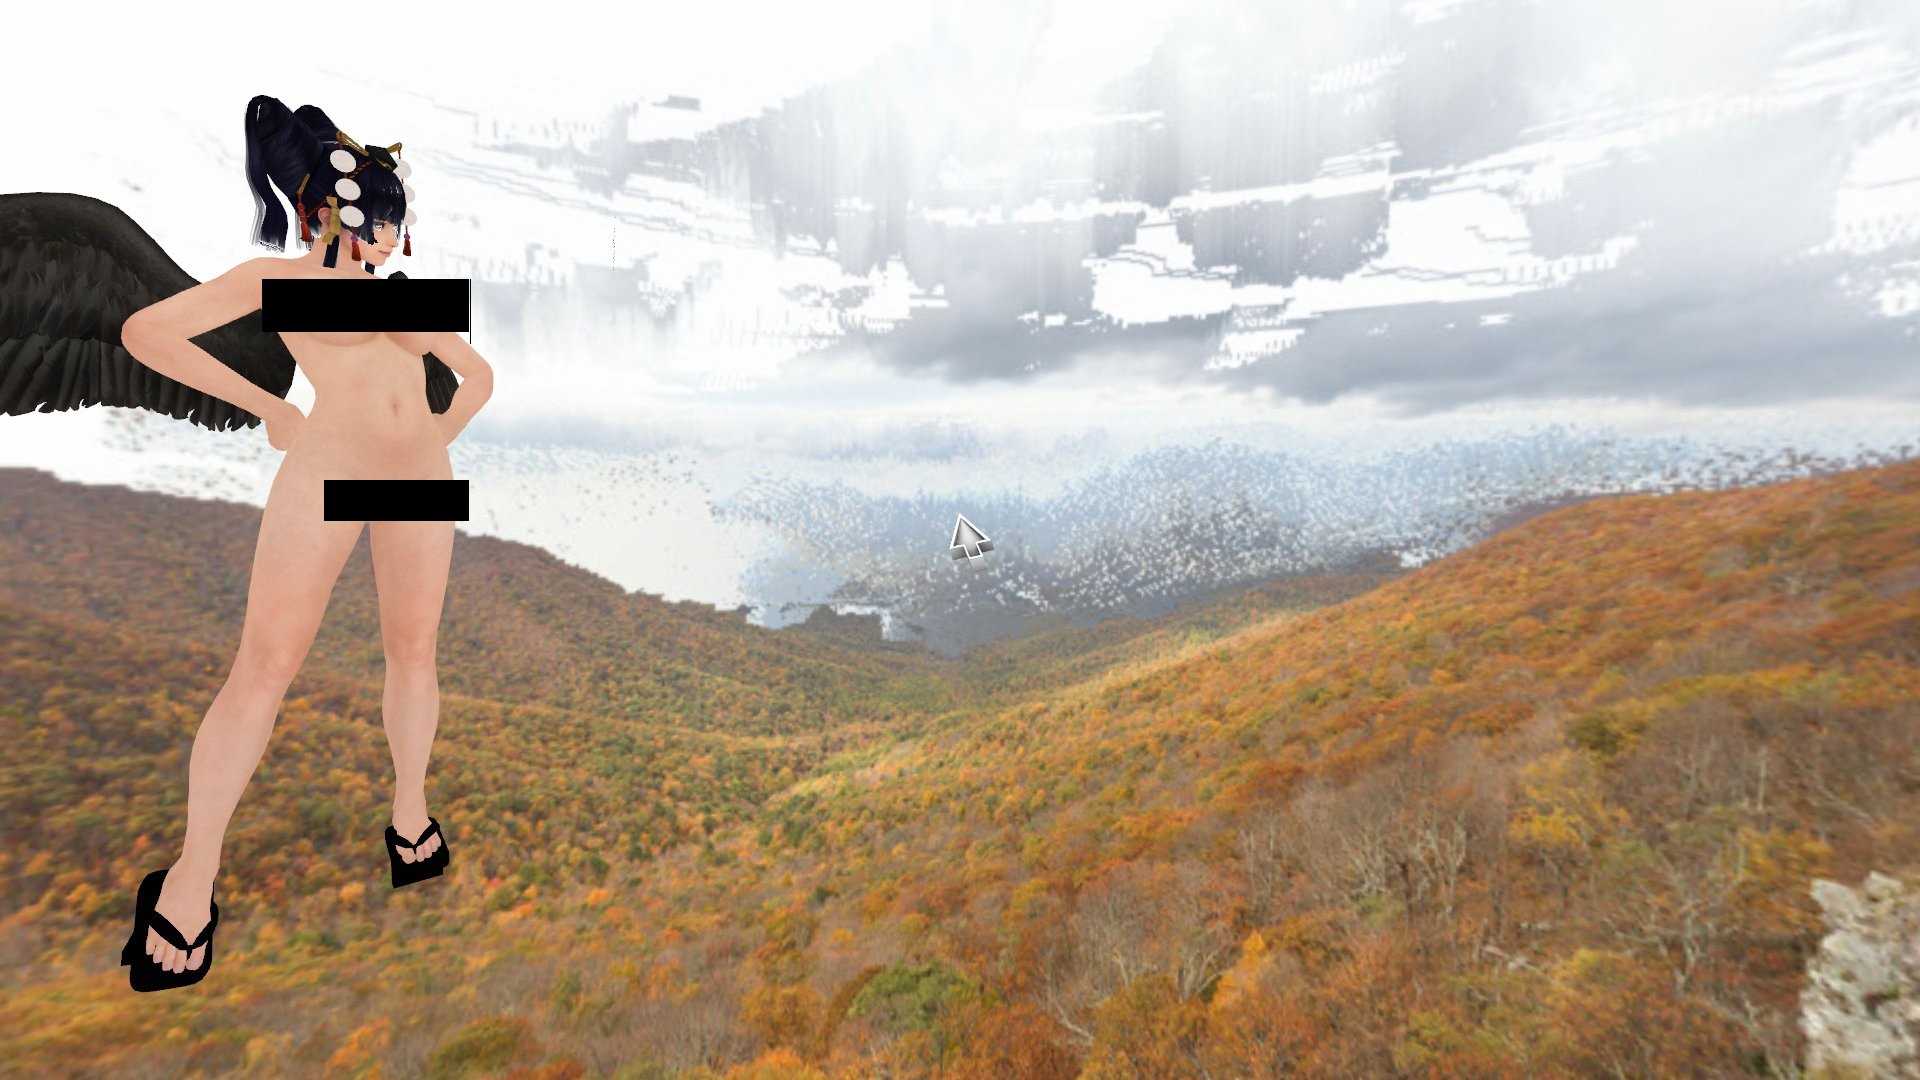
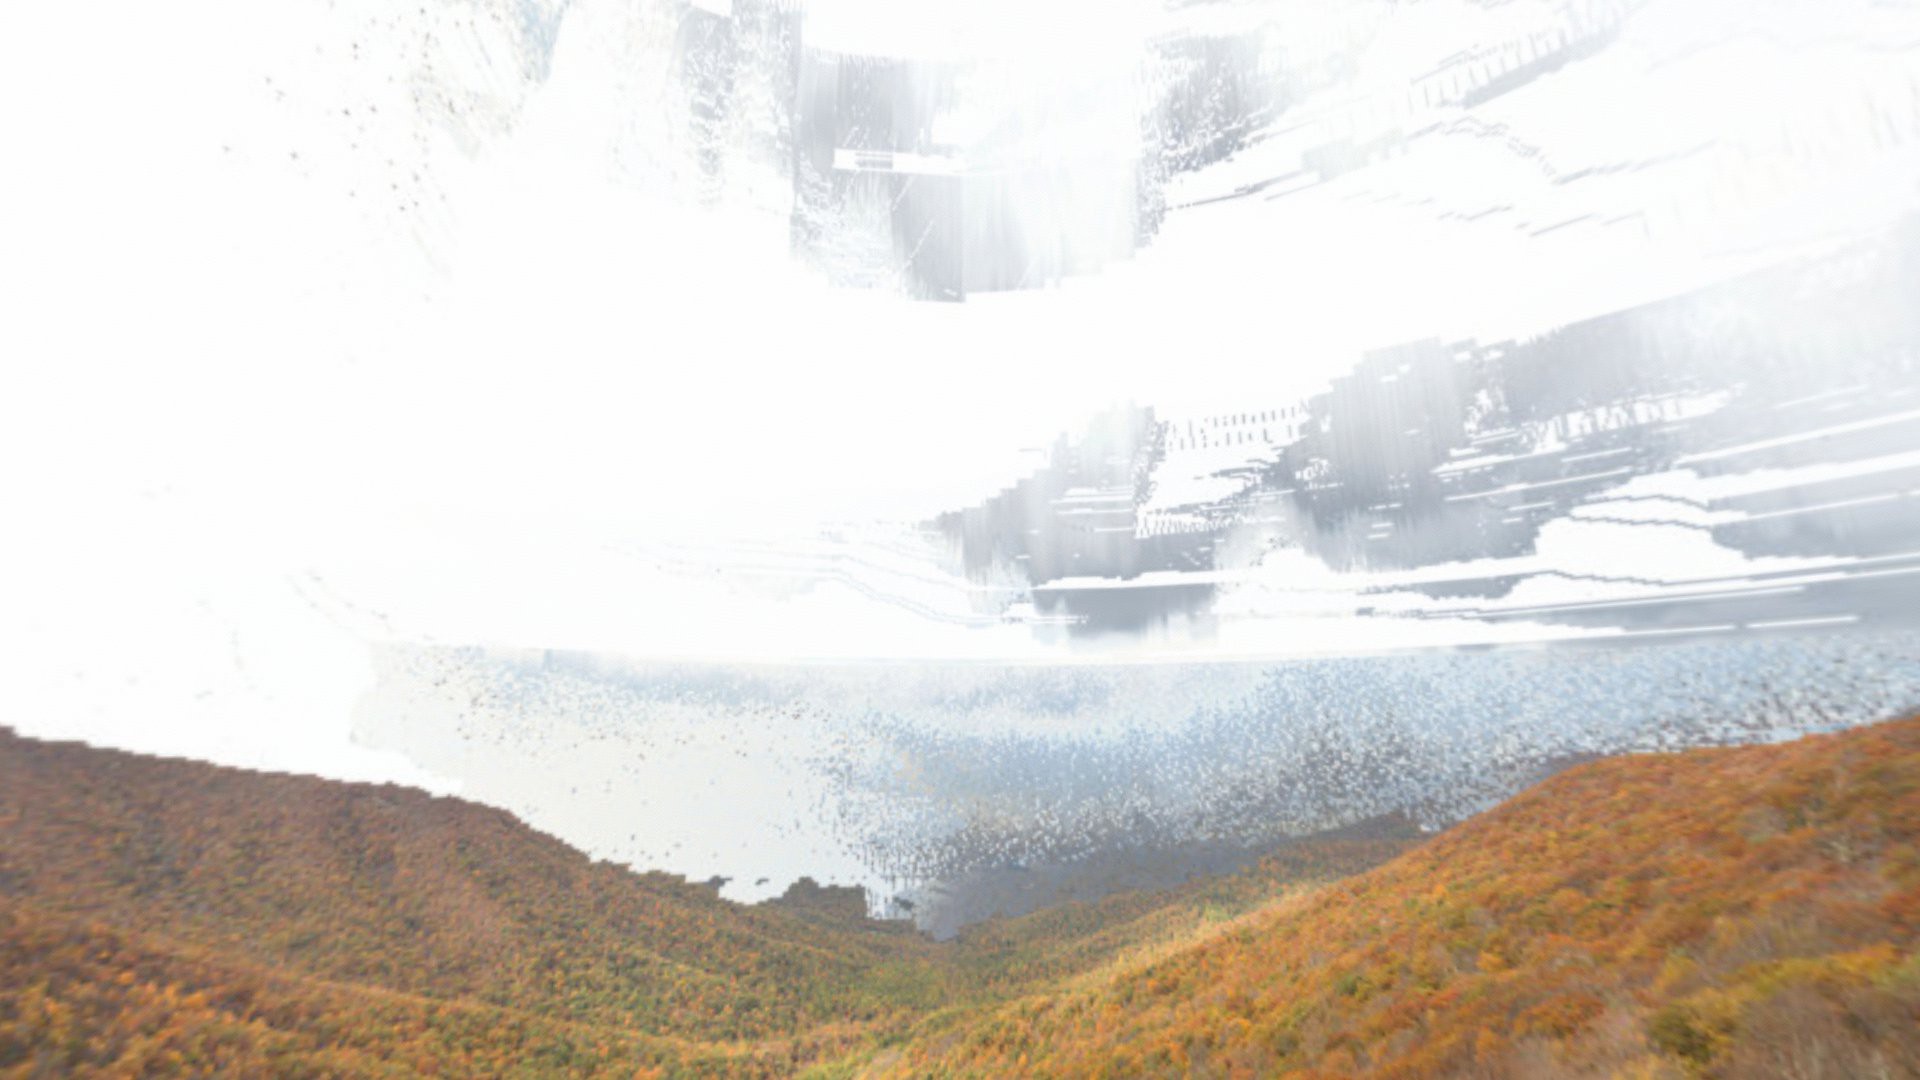
I opened the image in drift and set the program to auto-save frames every 2%, tweaked the sorting, then I hit Ctrl-T and let it rip. It's going to generate a lot of frames. You can watch in real-time as the sky falls apart. Hit ctrl p anytime to pause, tweak settings, and let it play further if you want to change the way its drifting. Resize back them back now:
mogrify -resize 200% frame*
In order to composite the pixel distorted effects back into the background of our original photograph, we'll use a for loop:
for f in frame*; do convert $f -channel Black -separate +channel original.jpg +swap alpha Off -composite new-$f; doneThese files are still huge, so in order to fix that you would first convert them all to jpg:mogrify -format jpg *.png
From here you can preview using animate command or ffmpeg to combine the frames into a video like so:
ffmpeg -start_number 1 -i out-%3d.jpg -vcodec mpeg4 test.avi
cat *.jpg | ffmpeg -f image2pipe -r 1 -vcodec mjpeg -i - -vcodec libx264 out.mp4
If you want to add audio you just need to include it into the command with -i music.mp3.
![]()
![]()
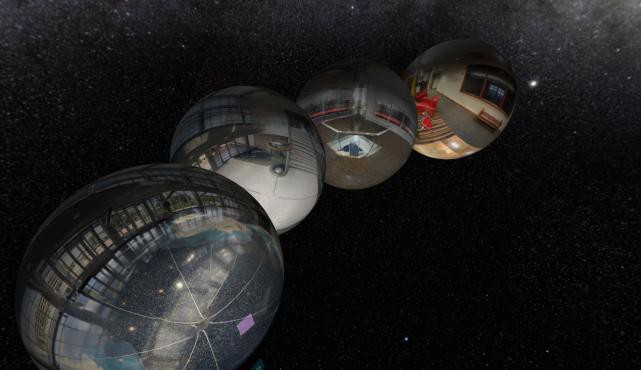
Now its a matter of taking these newly edited photospheres and either creating a 360 videosphere out of them or putting them inside of a Janus skybox. I don't recommend the skybox option because it took people a long time for them to load the images. The best option might be to just load a different photo every hour but not all at one time. I'm going to experiment with this technique further so keep an eye out for what's down the line ;)
-
Hacking within VR Pt. 2
04/04/2015 at 04:39 • 0 commentsAll I can say right now is that a good nights rest and a clean desk did it for me. I was up late talking to Source and we opened up a demo server of shellinabox and to our surprise it just worked! [ even though it was only a BASIC interpreter, the proof was there that this was just within ourreach.
I started up VirtualBox, configured the network settings to Bridged Adapter, and booted a fresh Debian based Linux VM. I created a new user and updated / upgraded my packages and installed shellinabox from the package manager. Then I grabbed my IP and configured the daemon at /etc/default/shellinabox to change the default IP and disable SSL (Testing purposes only, do not leave this on in production!).
# apt-get update && apt-get upgrade
# apt-get install shellinabox
/* Grab IP */
ip a
/* edit default port and edit last line to SHELLINABOX_ARGS="--no-beep -t" */
sudo vi /etc/default/shellinabox
sudo /etc/init.d/shellinabox start
Now if you go to 192.168.X.X on your web browser, you should see the shell prompt asking for your login. Great, it works in a regular browser -- start Janus and open a portal to http://192.168.X.X:XXXX where X is your ip and the port you chose in the configuration file. You should see that the web surface is now displaying the login prompt.![]()
Other than the noticeable latency, it's practically flawless. I could forget about sleeping at this point.
It's time to get this babby online. To do the demo, I booted a Kali Linux liveUSB on a netbook I had lying next to me. Connect to your network and repeat the steps above to update and install shellinabox. After that, you can change the default port again in the /etc/default/shellinabox file and temporarily disable SSL once more. At this point you should see that you can access it locally from within Janus. You need to forward that port on your router and have your public IP address to access the room. On Linux, I just use curl ifconfig.me and forward the ports on the router's admin page. Your room should now be accessible on the web but don't plan on keeping it open for the sake of security; this is just a proof of concept!
![]()
Perspective:
![]()
People are now able to access the shell but the session is not synced. It's acts like a mainframe computer where users can have their own shell account. Interesting! I verified this by creating a user for aussie and with both of us logged in I was able to send a message to him in the terminal.
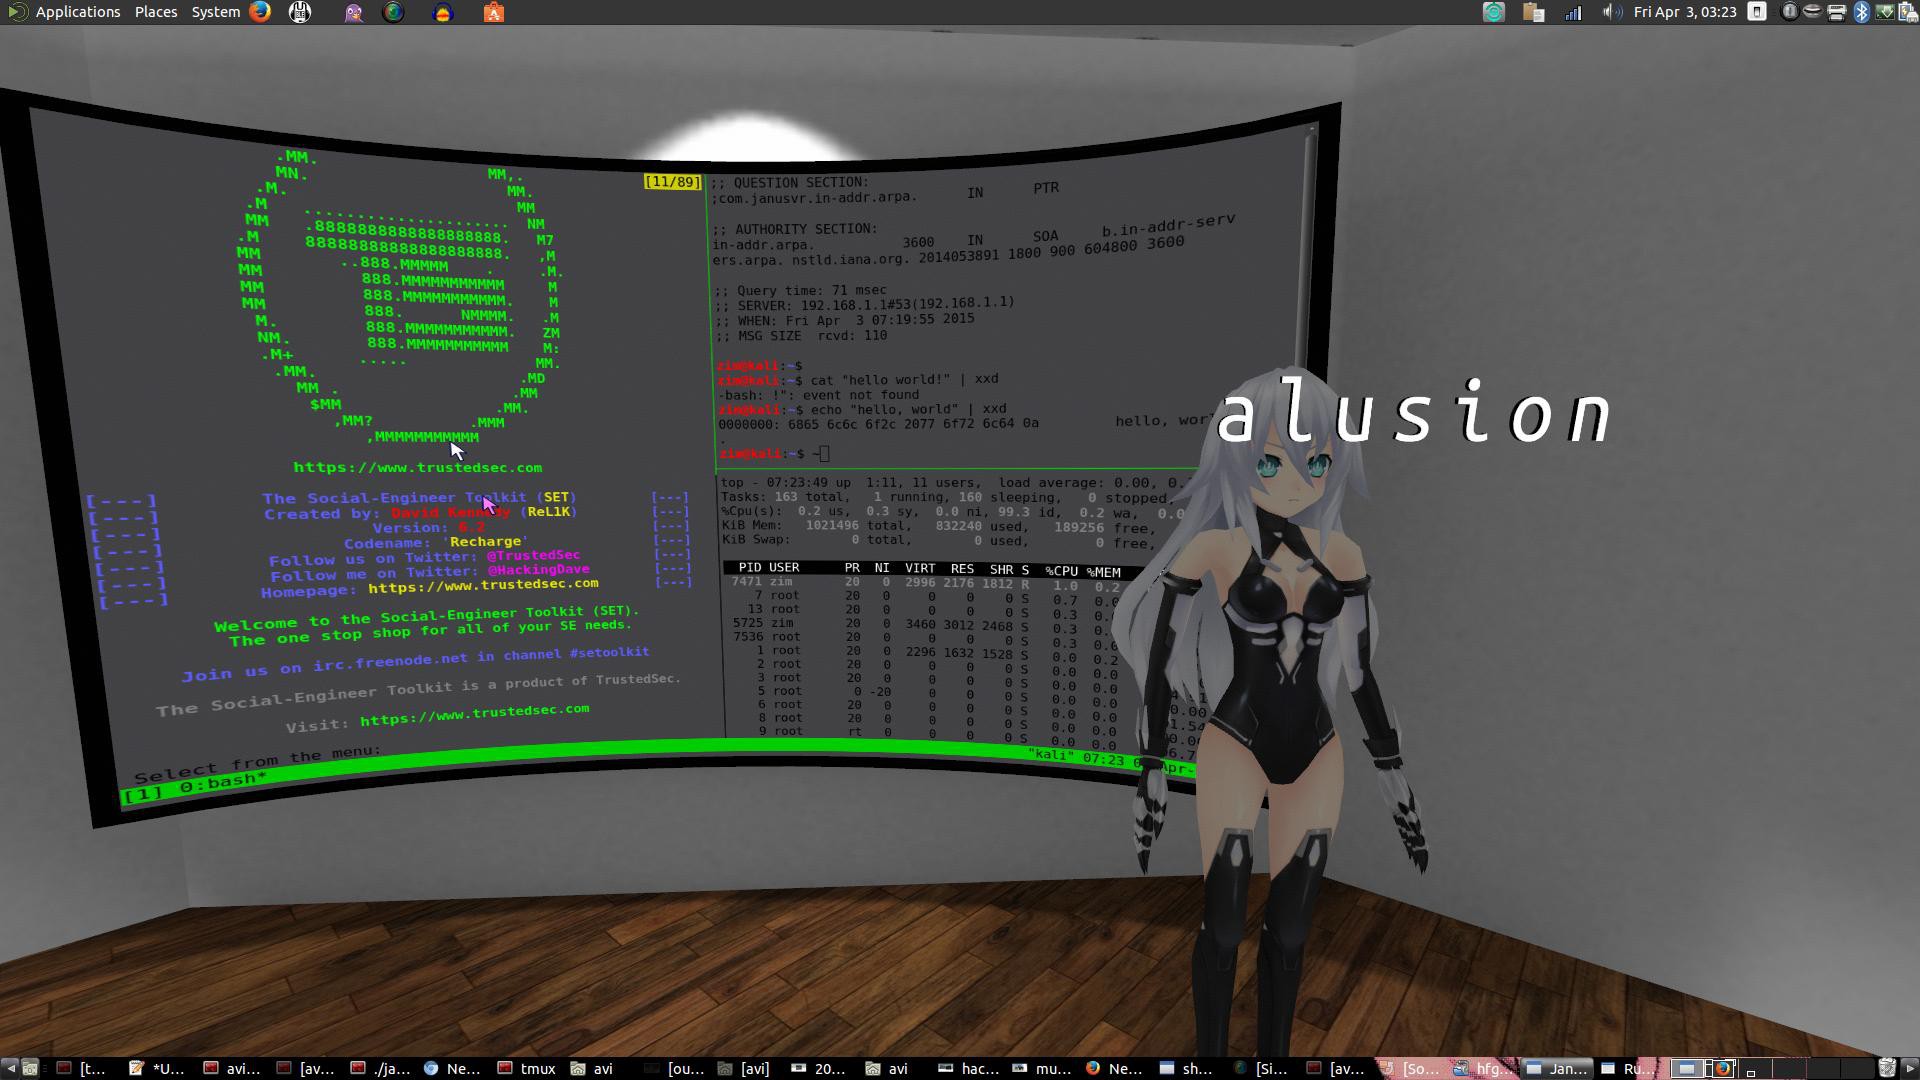
Soon we'll be able to design the ultimate hacker hangout inside the Metaverse. With blackjack, and waifus.![]()
-
Hacking within VR
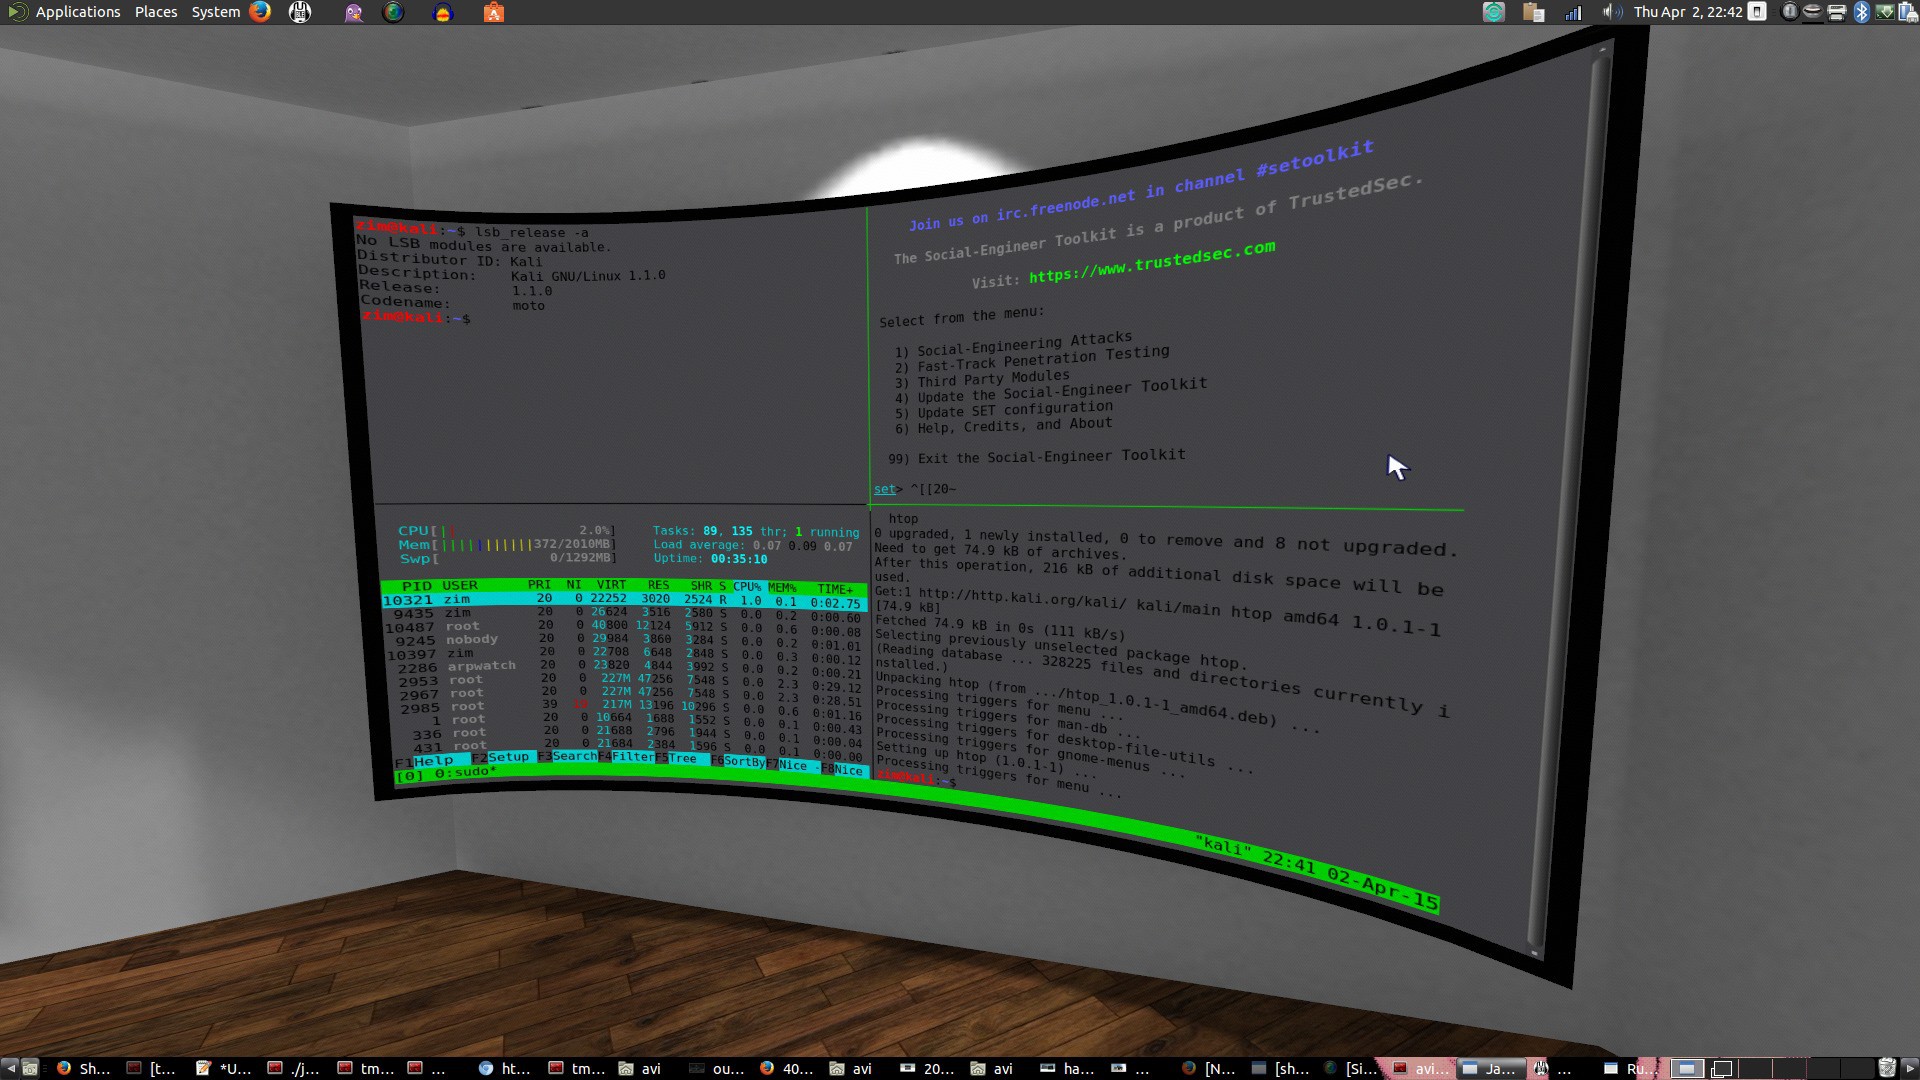
04/02/2015 at 23:25 • 0 commentsWith full 2D support for the web inside Janus, it would be an incredibly useful feature to have a web access terminal to SSH into remote Linux servers. I dream of creating the ultimate operations and command center inside VR. It's more than just having your crazy multiscreened office wherever you go, it's about having other people join you in that space and do cool stuff together. Grab models, view and edit them directly inside Janus, create rooms on the fly, hack all the things. Lets get into it then.
![]()
Janus uses the AssetWebSurface to define an interactive surface that provides the 2D web view. This can be placed on an object by specifying a websurface_id that matches theAssetWebSurface's id.
id - id of the AssetWebSurface (note that the corresponding Object should have its "websurface_id" attribute set to this value)
src - website to use for the AssetWebsurface
width - texture width for rendering the AssetWebSurface height - texture height for rendering the AssetWebSurface<AssetWebSurface id="google" src="https://www.google.com" width="1920" height="1080" /> ... <Object id="plane" websurface_id="google" />Here's an example I pulled from a room, notice the websurface_id being used to tag those objects you wish to map the surface onto:
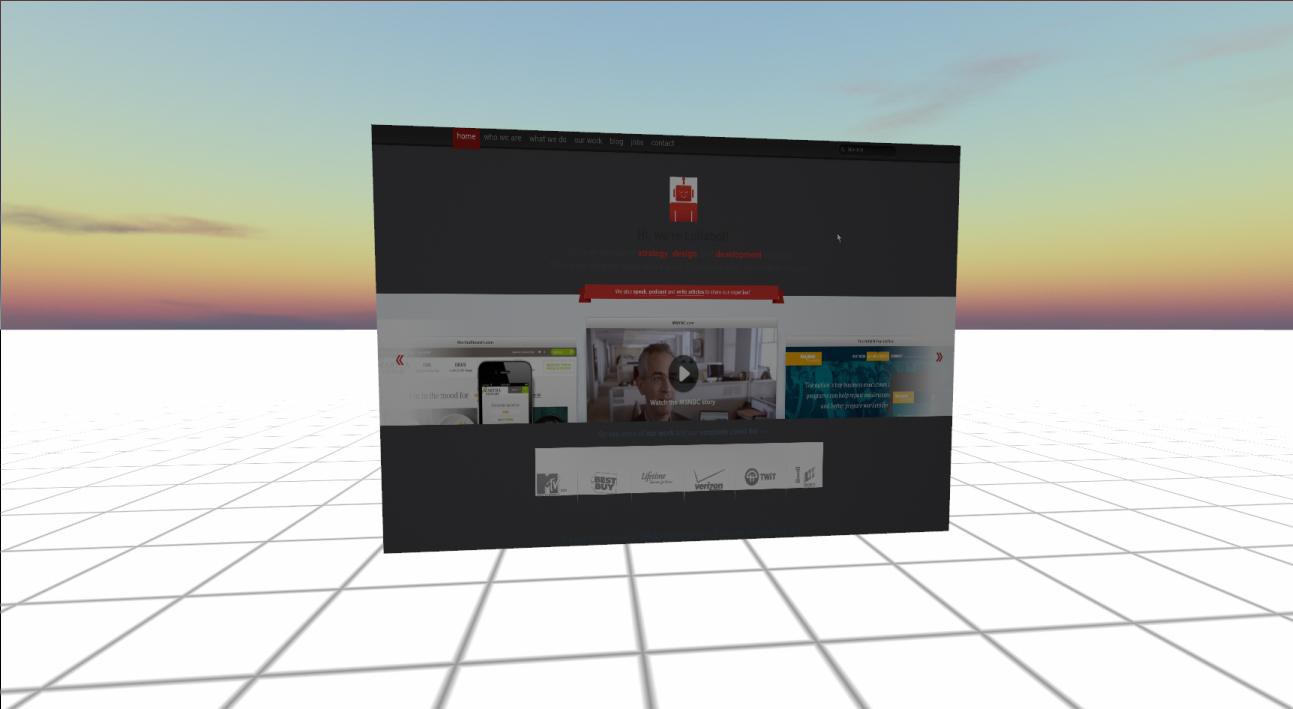
<!-- Written with Janus VR.  URL: http://bitgrid.io/lullabot.comVR/index.html -->
<html>
<head>
<title>Lullabot loves you!</title>
</head>
<body>
<FireBoxRoom>
<Assets>
<AssetObject id="plane" src="plane.obj" />
<AssetWebSurface id="dotcom" src="https://www.lullabot.com" width="1920" height="1080" />
</Assets>
<Room use_local_asset="room_plane" pos="0.000000 0.000000 0.000000" xdir="1.000000 0.000000 0.000000" ydir="0.000000 1.000000 0.000000" zdir="0.000000 0.000000 1.000000" col="1.000000 1.000000 1.000000" default_sounds="false">
<Object id="plane" js_id="1" pos="1.000000 1.000000 5.000000" ydir="0.000 0.000 1.000" zdir="0.000 -1.000 0.000" scale="25.600000 3.900000 17.800001" websurface_id="dotcom" />
</Room>
</FireBoxRoom>
</body>
</html>
This is what the code looks like inside Janus. The obj is just a slab like a tablet that can be resized / positioned / rotated any which way.
![]()
In order to do live editing inside of Janus, I recommend turning off cache (delete the folder too; don't worry it'll respawn) and enable editing mode. Any changes that you make inside the room can be saved by pressing ctrl+s to copy the HTML source to clipboard. Btw, the js_id's will change all the time, just ignore that variable.
![]()
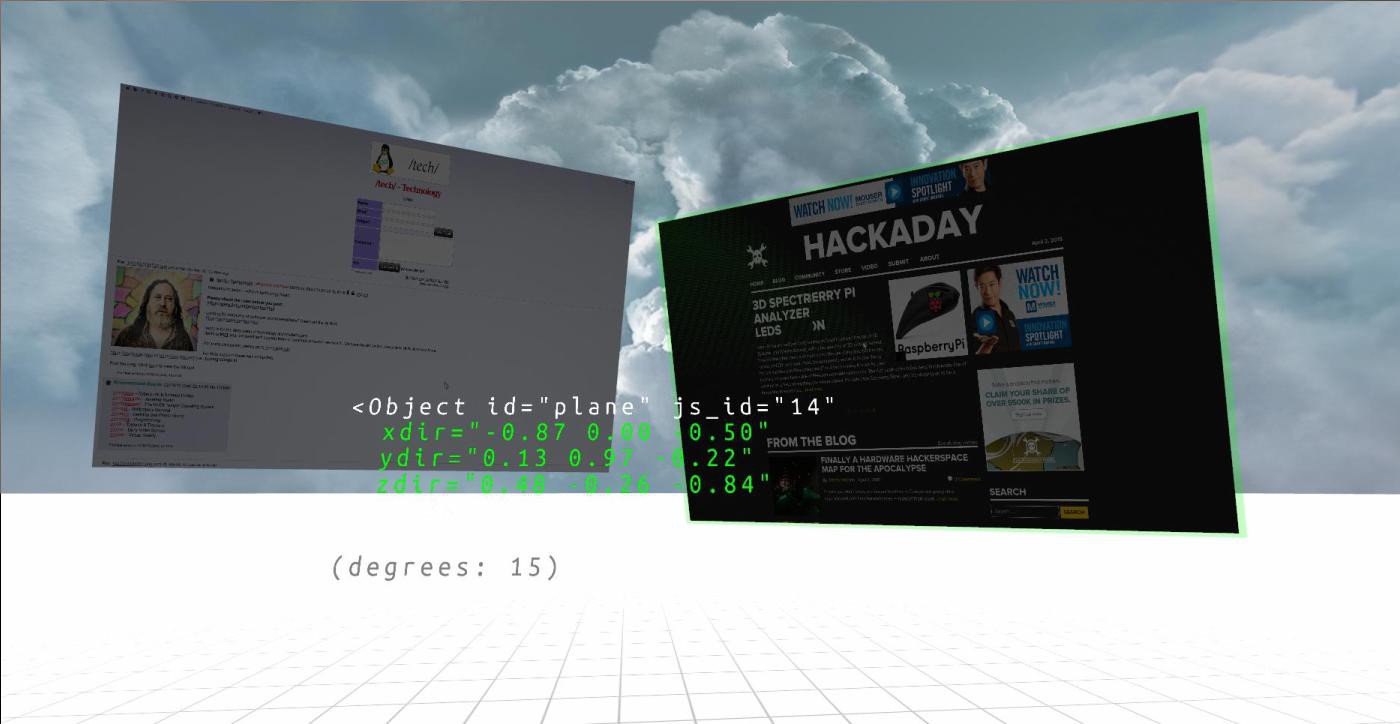
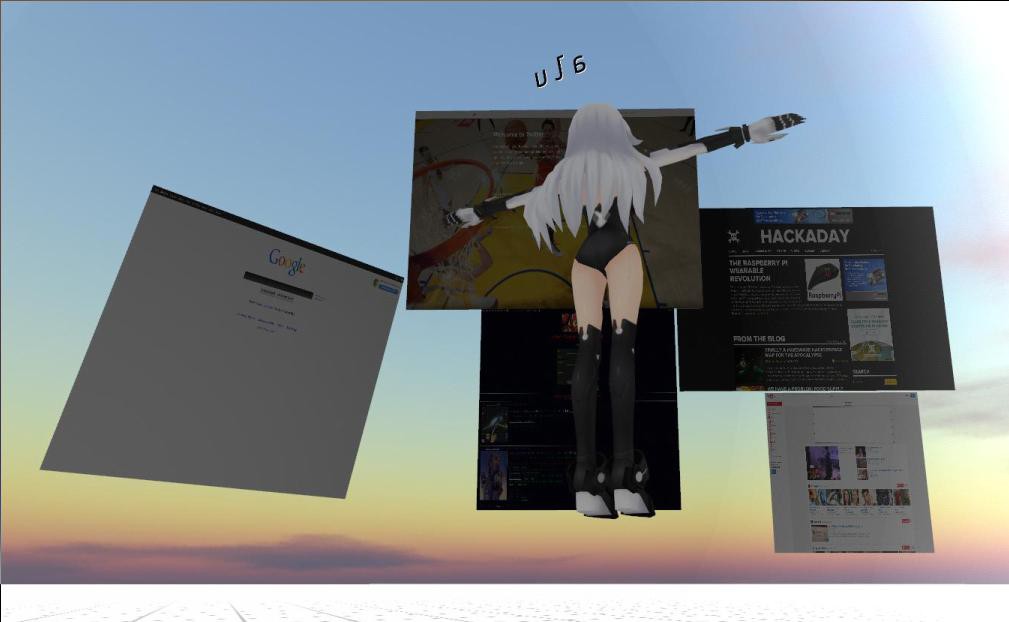
You can add as many screens as you want and position them inside Janus. Here's an example of a multi screen environment:
<!-- Written with Janus VR. URL: http://alusion.net/snacka.html --> <html> <head> <title>Snackaday</title> </head> <body> <FireBoxRoom> <Assets> <AssetObject id="plane" src="plane.obj" /> <AssetWebSurface id="twitt" src="http://www.twitter.com" width="1920" height="1080" /> <AssetWebSurface id="hacka" src="http://www.hackaday.com/" width="1920" height="1080" /> <AssetWebSurface id="utube" src="http://youtube.com" width="1920" height="1080" /> <AssetWebSurface id="dyne" src="http://dyne.org" width="1920" height="1080" /> <AssetWebSurface id="goog" src="http://www.google.com" width="1920" height="1080" /> <AssetWebSurface id="stack" src="https://stackoverflow.com/" width="1920" height="1080" /> </Assets> <Room use_local_asset="room_plane" pos="0.000000 0.000000 0.000000" xdir="1.000000 0.000000 0.000000" ydir="0.000000 1.000000 0.000000" zdir="0.000000 0.000000 1.000000" col="1.000000 1.000000 1.000000" default_sounds="false"> <Object id="plane" js_id="14" pos="-6.200000 2.700000 4.800000" xdir="-0.866 0.000 -0.500" ydir="0.129 0.966 -0.224" zdir="0.483 -0.259 -0.837" scale="3.700000 2.600000 2.000000" websurface_id="hacka" /> <Object id="plane" js_id="15" pos="10.000000 1.000000 5.000000" xdir="-0.866 0.000 -0.500" ydir="0.129 0.966 -0.224" zdir="0.483 -0.259 -0.837" scale="2.000000 2.000000 2.000010" websurface_id="dyne" /> <Object id="plane" js_id="16" pos="-10.000000 1.000000 5.000000" xdir="-0.866 0.000 -0.500" ydir="0.129 0.966 -0.224" zdir="0.483 -0.259 -0.837" scale="2.000000 2.000000 2.000001" websurface_id="utube" /> <Object id="plane" js_id="10" pos="1.000000 1.000000 5.000000" xdir="-0.866 0.000 -0.500" ydir="0.129 0.966 -0.224" zdir="0.483 -0.259 -0.837" scale="2.000000 2.000000 2.000001" websurface_id="goog" /> <Object id="plane" js_id="11" pos="-5.000000 1.000000 5.000000" xdir="-0.866 0.000 -0.500" ydir="0.129 0.966 -0.224" zdir="0.483 -0.259 -0.837" scale="2.000000 2.000000 2.000001" websurface_id="stack" /> <Object id="plane" js_id="12" pos="-2.300000 3.100000 5.000000" xdir="-0.866 0.000 -0.500" ydir="0.129 0.966 -0.224" zdir="0.483 -0.259 -0.837" scale="3.300000 2.400000 2.000000" websurface_id="twitt" /> </Room> </FireBoxRoom> </body> </html>![]()
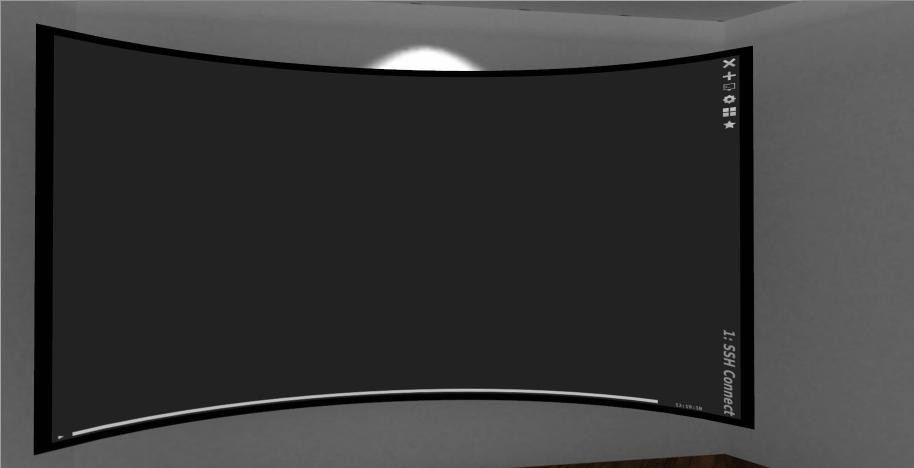
Nice view. But what if you wanted to edit text files from inside Janus? Shellinabox is a web-based SSH terminal to access remote Linux servers. It has a built in web server that runs as a web based ssh client on a specified port and prompt you a terminal emulator using any AJAX/JavaScript and CSS enabled browser. Sweet, my VPS is running Debian so all I had to do was to simply apt-get install openssl shellinabox. I changed the default port, initiated the daemon, and opened up a web browser:
![]() Yes it works! That was almost too easy. I went into Janus and opened a portal to my site but was greeted with blank gray screens. Janus is only going to allow 80/443 through afaik and shellinthebox uses port 4200 by default; I should try routing the traffic through a webserver proxy. I followed instructions to setup an always available Linux terminal for the Raspberry Pi here:
Yes it works! That was almost too easy. I went into Janus and opened a portal to my site but was greeted with blank gray screens. Janus is only going to allow 80/443 through afaik and shellinthebox uses port 4200 by default; I should try routing the traffic through a webserver proxy. I followed instructions to setup an always available Linux terminal for the Raspberry Pi here: I installed Lighttpd web server and configured it to provide a proxy service to route a web request on a specific url to another port.
Add in /etc/lighttpd/lighttpd.conf file the item "mod_proxy" in the server.modules section:
server.modules = (
    "mod_access",
    "mod_alias",
    "mod_accesslog",
    "mod_compress",
    "mod_redirect",
    "mod_proxy"
)
Add these lines at the end of /etc/lighttpd/lighttpd.conf
proxy.server = ( "/shell" => ( ( "host" => "127.0.0.1", "port" => 4200 ) ) )~# /etc/init.d/lighttpd restartSo when I go into my browser I type http://mydomain.com/shell instead of http://mydomain.com:4200. It worked inside my browser but inside Janus I still get blank grey screens. After some trial and error I also ran into 404 File Not Found. Sleep is lost.
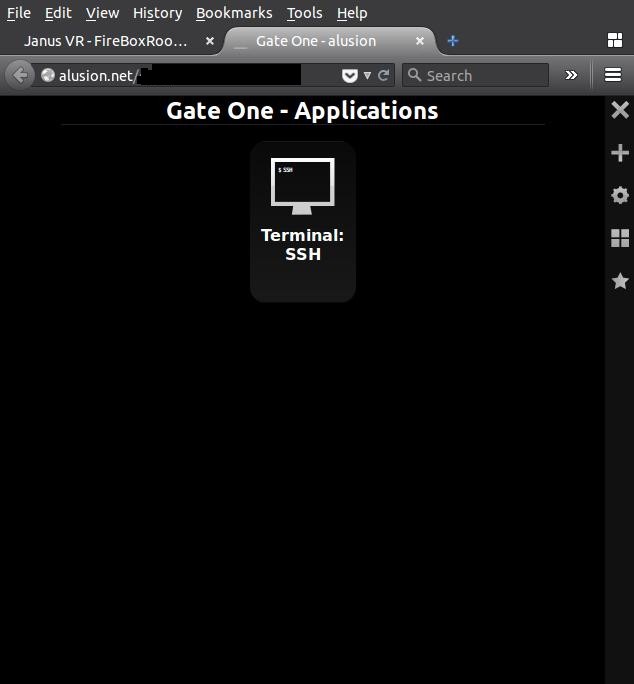
After some more research I learned about GateOne through a comment. It's an HTML5-powered terminal emulator and SSH client that's loaded with features:
Support for Multi-users and multi-terminals, image and PDF support, fancy text, natural copy paste, logging, embedding into any web application via JavaScript, multi-factor auth, playback plugin to rewind and play back connected sessions in real time, and no browser plugins required.
![]()
The setup is as easy as 1, 2, 3:
git clone https://github.com/liftoff/GateOne.git
python setup.py install
sudo gateone
The configuration files are in sudo nano /etc/gateone/conf.d/10server.conf. For testing I disabled ssl and named a url_prefix. For production it'd be wise to purchase a SSL certificate. Here's what it looks like in a browser.
![]() Integrating it into Janus is tricky. For most of the night the web app failed to initalize. I went through the documentation and remembered that I needed to embed some JavaScript into my page in order to make it work. The documentation inside the repo is updated. ~/GateOne/gateone/tests/hello_embedded/static. I created an <AssetScript> and pointed that to the gateone.js file found in the directory.
Integrating it into Janus is tricky. For most of the night the web app failed to initalize. I went through the documentation and remembered that I needed to embed some JavaScript into my page in order to make it work. The documentation inside the repo is updated. ~/GateOne/gateone/tests/hello_embedded/static. I created an <AssetScript> and pointed that to the gateone.js file found in the directory.I opened up the JavaScript support documentation for JanusVR to see if there was something I could do to initialize the web app and came up with this: [change the url]
room.onload = function() {
        GateOne.init({url: 'http://yourdomain.com/gateone'});
}
I stuck that into the header of my Firebox HTML file. After many trial and errors, still no dice. File not found, blank page, it wasn't initializing for me. The closest it got was displaying the UI:
![]()
I decided to get some rest and see if I could go at this again with a fresh mind in the morning.
-
3D PhotoSpheres
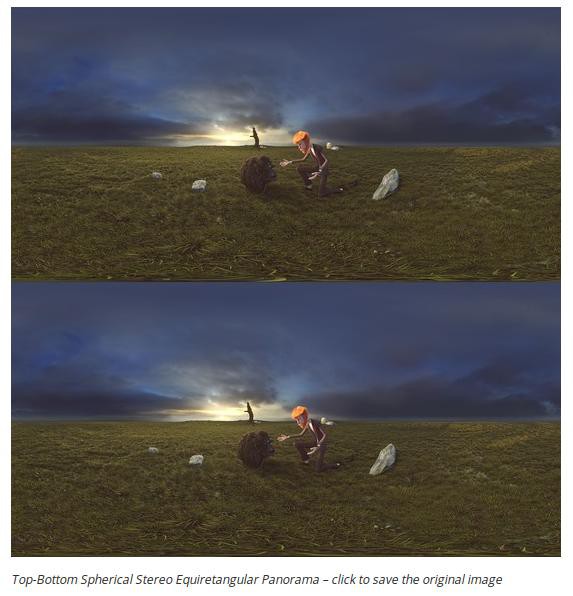
04/02/2015 at 05:50 • 0 commentsGooseberry Panorama Inspired by this article, the mad scientists of Janus set out to incorporate the Spherical Stereo Equiretangular Panorama's with a great deal of success!
This is an example of a cubemap, used to create the background imagery in your world. Here's a handy online script to help slice your image into the format: http://gonchar.me/panorama/
![]()
In the article, Dalai created a Top-Bottom 360 Stereo Panorama. There are multiple ways to adjoin the images, I used an Imagemagick script adjoin to easily combine the images.![]()
This way can be setup in the future to automate the process, always a good thing.
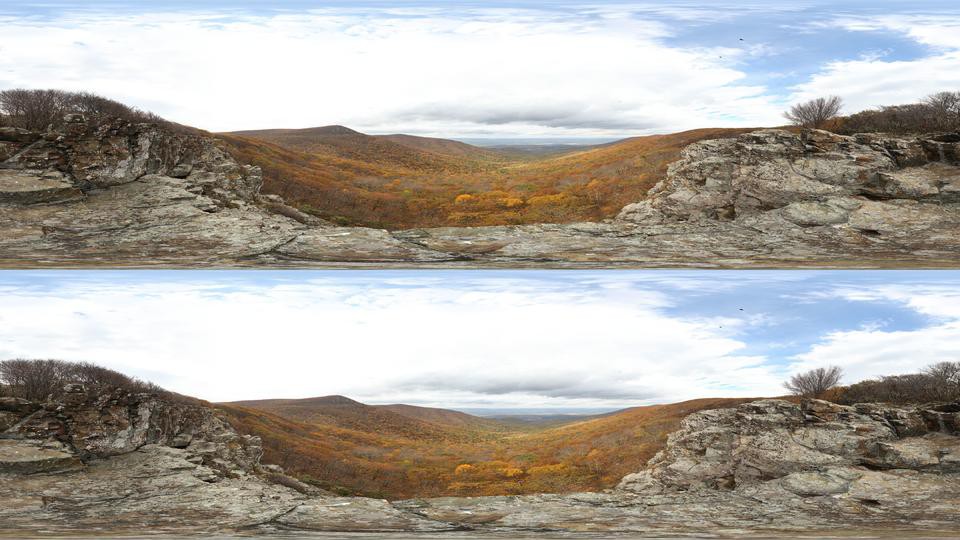
# Combine the two images horizontally into stereo format adjoin -m horizontal -g center image_A.jpg imageA.jpg image_out.jpg![]()
Just replace the -m horizontal flag with -m vertical to stack it up!
![]()
Geometric_Panorama From here you can download a great selection of obj's to texturize onto. I used the latlongSphere_mesh.obj as my src for the AssetObject.
![]()
Reminder to keep all your files in the same folder when you're doing this. What this JavaScript code does is allow you to click through the images in the room. Make sure to change the counter depending on how many total images you have. When you put it in your Janus HTML file it will go under <Assets> as <AssetScript src="steadysphere.js" />
count = 1;
totalimages = 8;

room.onClick = function(){
        room.objects["sphere_screen"].image_id = "image" + count;
        print(room.objects["sphere_screen"].image_id);
        if (count < totalimages){count++;}
        else {count = 0;}

}

room.update = function(){
        if (player.url == room.url){
        room.objects["sphere_screen"].pos = translate(player.pos, player.eye_pos);
}
}
Make sure to enable sbs3d="true" (side-by-side 3d). You might notice that my url looks funny in these pictures, that is because the pictures are hosted on a raspberry pi web server that's connected to my LAN. Check out arkos for a dummy proof raspberry pi webserver + more.
<!-- Written with Janus VR. -->
<html>
<head>
<title>Gallery</title>
</head>
<body>
<FireBoxRoom>
<Assets>
<AssetObject id="sphere_screen_360" src="http://arkos/latlongSphere_mesh.obj" tex0="http://arkos/home.jpg" />
<AssetImage id="image1" src="http://arkos/image1.jpg" sbs3d="true" />
<AssetImage id="image2" src="http://arkos/image2.jpg" sbs3d="true" />
<AssetImage id="image3" src="http://arkos/image3.jpg" sbs3d="true" />
<AssetImage id="image4" src="http://arkos/image4.jpg" sbs3d="true" />
<AssetImage id="image5" src="http://arkos/image5.jpg" sbs3d="true" />
<AssetImage id="image6" src="http://arkos/image6.jpg" sbs3d="true" />
<AssetImage id="image7" src="http://arkos/image7.jpg" sbs3d="true" />
<AssetImage id="image0" src="http://arkos/image0.jpg" sbs3d="true" />
<AssetScript src="steadysphere.js" />
</Assets>
<Room use_local_asset="room_plane" visible="false" pos="0.000000 0.000000 0.000000" xdir="1.000000 0.000000 0.000000" ydir="0.000000 1.000000 0.000000" zdir="0.000000 0.000000 1.000000" col="0.400000 0.400000 0.400000" far_dist="1000.000000">
<Object id="sphere_screen_360" js_id="sphere_screen" locked="true" pos="-192.279266 -130.473099 41.809456" scale="450.000000 450.000000 450.000000" lighting="false" />
</Room>
</FireBoxRoom>
</body>
</html>
Now as you fly around, the image stays comfortably in the background of your scene, and it always looks stunning with a Rift on!
Click and the image will change. (perhaps can add fade?)![]()
It'd be quite enjoyable to have music playing in each of the scenes. See my previous log on how to add that with AssetVideo or go here.![]()
-
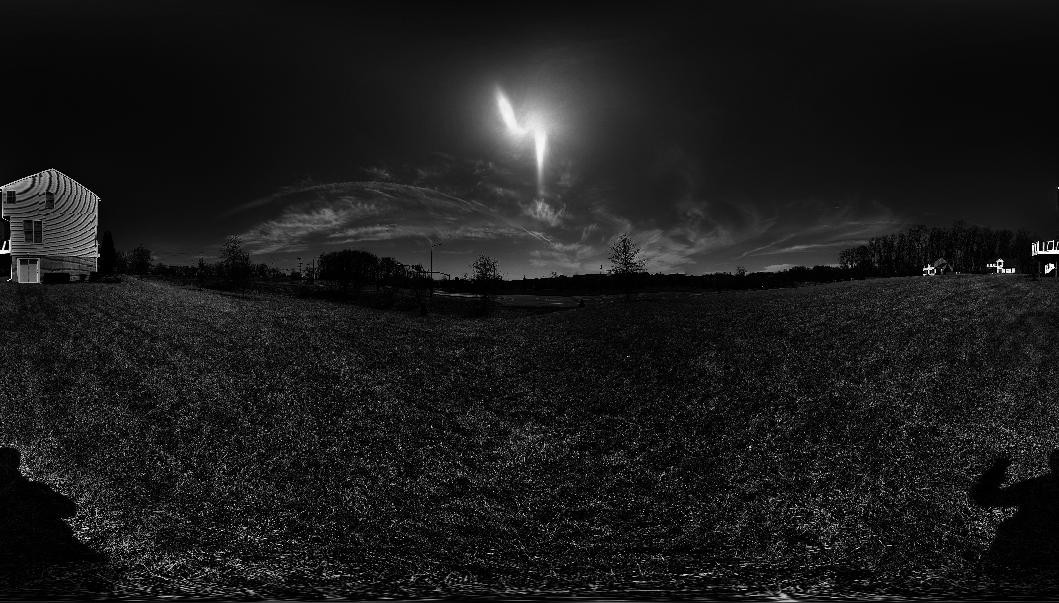
360 PhotoSpheres
04/02/2015 at 04:04 • 2 commentsI needed a way to view the 360 PhotoSpheres. Here's the 360 panoramic image that I took using Google Camera, filtered and grayscaled for privacy reasons:
![]()
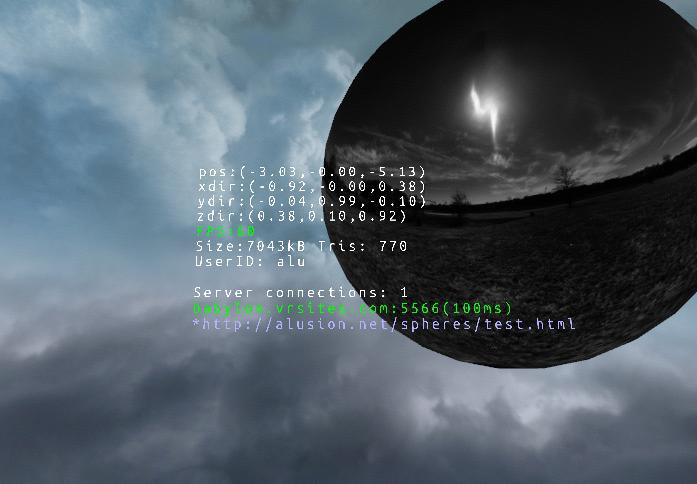
Janus uses HTML-like codes in making content specific to JanusVR. Here is what it looks like, note that the portal is centered in the creation of a new room at (0 0 0). If you start Janus with a URL, it will not create the portal:
./janusvr "http://alusion.net/spheres/test.html"
![]()
This was taken with debug enabled (Hotkey = / ), it helps when designing rooms to know how objects look from where you stand. The actual HTML looks like this:
<!-- Written with Janus VR.  URL: http://alusion.net/spheres/test.html -->
<html>
<head>
<title>PhotoSphere Experiment</title>
</head>
<body>
<FireBoxRoom>
<Assets>
<AssetObject id="PhotoSphere" src="http://alusion.net/spheres/PHOTOSPHEREinFacing.obj" tex0="http://alusion.net/spheres/bw.jpg" />
</Assets>
<Room use_local_asset="room_plane" visible="false" pos="-1.500000 0.000000 0.000000" xdir="-1.000000 0.000000 0.000000" ydir="0.000000 1.000000 0.000000" zdir="0.000000 0.000000 -1.000000" col="1.000000 1.000000 1.000000" near_dist="0.010000" far_dist="10000.000000" walk_speed="2.500000" run_speed="10.000000">
<Object id="PhotoSphere" js_id="5" pos="-3.100000 3.700000 3.500000" scale="4.000000 4.000000 4.000000" lighting="false" />
</Room>
</FireBoxRoom>
</body>
</html>
You can edit from inside Janus by pressing esc and enabling editing mode and changes are copied into clipboard that you can use to update the room or create a new page. The obj is the "canvas" that the tex0 (texture) maps onto. You can create a new sphere by right clicking anywhere and press d to cycle objects until your photosphere appears. Through this exercise you can observe a closer look into the power behind Janus together. [ https://webmshare.com/5xVKb ] Photospheres can be enjoyed with other people inside your room which I think makes the experience more special than viewing 360 photos alone.
In order to add sound to the photosphere, I used ffmpeg to combine the photosphere with an audio track. I used mpv to test it works since the video measures 7168x3584 pixels.
# Extract audio from the video ( i = input, ab = bitrate (128kb), vn = no video output, ac 2 = 2 channels, ar 44100 indicates sampling frequency ) ffmpeg -i video.flv -ab 128k -ac 2 -ar 44100 -vn audio.mp3 # Combine audio with single image ffmpeg -i audio.mp3 -i image.jpg out.mp4![]()
![]()
![]()
Video of multiple PhotoSpheres as seen above: [ https://webmshare.com/vgzyd ]
I highly recommend these resources for more info:
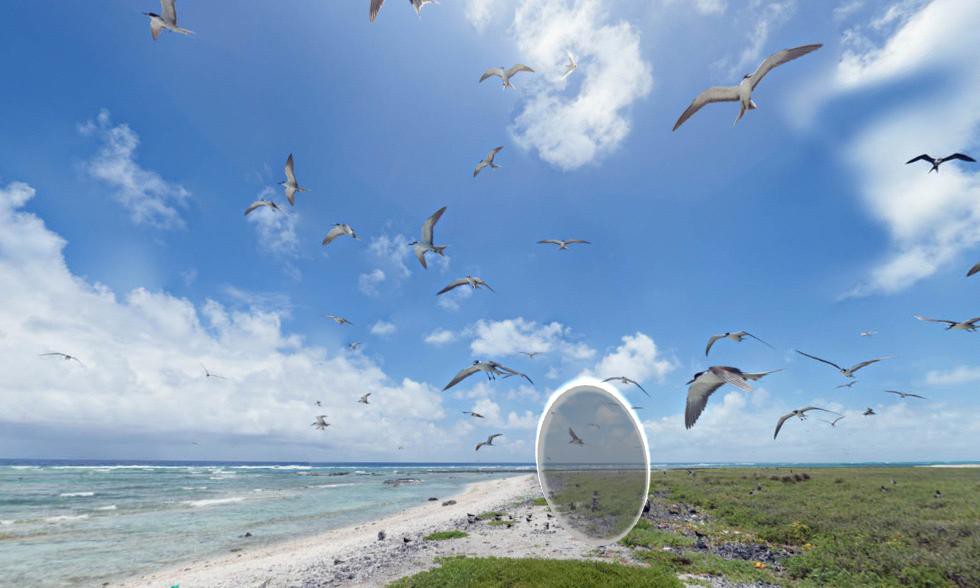
Looks great!! The 4K panoramic resolution sweeps you and its a true pleasure to behold. I've been looking into buying 360 cameras to make the process more seamless and upload the photos into Janus directly. I found a setup that I can use this year to create 360 video at 4K resolution for under $1000 using a curved mirror and a Go-Pro black. The power of exponentials is insane, such a rig would of been completely out of my budget a few years ago.
Metaverse Lab
Experiments with Decentralized VR/AR Infrastructure, Neural Networks, and 3D Internet.


 Yes it works! That was almost too easy. I went into Janus and opened a portal to my site but was greeted with blank gray screens. Janus is only going to allow 80/443 through afaik and shellinthebox uses port 4200 by default; I should try routing the traffic through a webserver proxy. I followed instructions to setup an always available Linux terminal for the Raspberry Pi here:
 Integrating it into Janus is tricky. For most of the night the web app failed to initalize. I went through the