Jayda Van
-
The Github Repo is Up
08/17/2015 at 04:39 • 0 commentsI'm finally finished cleaning up the code code that runs iPython Notebook. It's called Malti-View. It's a super simple minimalist qt browser that runs outside of X. I'm also, excited to announce that hardware repo. All of the design work is done in Kicad I'm going to try something a little bit different. Hopefully I can open up the hardware development process a little. I'll post the details as I go.
-
Malti Interface Demo
08/16/2015 at 21:45 • 0 comments -
Prototypes Shipped
08/16/2015 at 07:26 • 4 commentsWell guys we did it. Our prototypes are on their way to Pasadena. Here's a breakdown of what we've done so far. Despite delays with our revised board design our software has been moving along quiet well. Malti's interface is built on top of iPython Notebook. To get it working with the Raspberry Pi we've implemented a miniature web browser using Qt Webkit that runs at start-up. Because Qt Needs OpenGL to run Webkit and we're running our display over the SPI interface we had to trick the Pi into running OpenGL buy using frame buffer copy. Right now I'm diligently working to get all of the code cleaned up and on Github.
Until then we've added a video of our prototype. We've had this for a while but haven't had a chance to edit it.
~~Jeremy
-
What a Night!
08/14/2015 at 22:28 • 0 commentsJeremy and I just pulled an all-nighter getting last-minute details ready for Malti to ship for Best Product. I was babysitting a bunch of 3D printed cases (and of course a couple of 3D printed catastrophies), and Jeremy was tweaking the software. He’s been hard at work on getting Malti ready in time for Best Product, but we found last night that we need a lot more activity on our page! We were so concerned with actually making the best product that our attention was diverted from updating the page.Get ready to be bombarded, hackers! We will be making posts like crazy for the next few days. You’ll see at least a couple videos and quite a few posts. Maybe we’ll even post a picture or two of our crazy, last-minute selves! Thank you all so much for your patience with us updating the page. We know this is an exciting project, and we really appreciate all the support we’ve gotten over these past months.
-
Pictures!
05/13/2015 at 20:55 • 0 commentsWe're still working on a demo video but here's some pictures of our prototype. What's next:
On the hardware side I'm modifying the battery charging circuitry to have proper load balancing. I'm also implementing a soft shutdown for when the charge is low.
Rita is hard at work writing an application launcher in Python.
![]()
![]()
![]()
-
Chicago Northside Mini Maker Faire Recap
05/05/2015 at 07:07 • 1 commentFrom the Desk of Rita:
Jeremy and I would like to extend a big THANK YOU to everyone who came to our table at the Chicago Northside Mini Maker Faire this Saturday! We had a great time, and we're thrilled by the positive response Malti received.
While we were there, we asked what all of you wonderful makers would do with Malti if you had one. Quite a few teachers said they would love having a tool like Malti to use in their classrooms. Another suggested starting a coding club for avid young programmers. One maker thought using Malti to make a tricorder from Star Trek would be pretty neat. We got an overall fantastic response from our young audience. Several aspiring makers said they wanted to make a "homework machine" out of Malti, and one particularly ambitious young maker said she wants to make an alarm to keep her sister away from her stuff (but a quiet alarm, so her sister doesn't know about it).
Besides the contest, we had a blinky demo set up to show just one of the many virtues of using iPython—teaching kids. I was absolutely shocked and awed at the positive response from the elementary school aged makers that came by. With just a touch of guidance, they were able to answer age-appropriate comprehension questions posed to them. They were very excited to have understood so quickly—almost as excited as I was to see them understanding! They seemed to legitimately enjoy the demonstration, and some asked if we could teach them more!
So what's next? All of your support has certainly motivated us to work even harder on getting Malti nailed down. We're putting our noses to the proverbial grindstone, so we can get Malti in your hands as soon as possible! Jeremy's working on revising the PCB to accommodate SMD buttons for the keyboard, along with working on that finicky power circuitry. I'm going to delve into the wild world of software development, starting with an efficient application launcher for a small touchscreen.
A very special thanks goes to the fantastic team at the Chicago Northside Mini Maker Faire for all their help, and for letting us come show off! Thank you to all the Makers who showed up and offered such positive words of encouragement. We hope you will continue to follow Malti as we develop it!
-
It Lives!
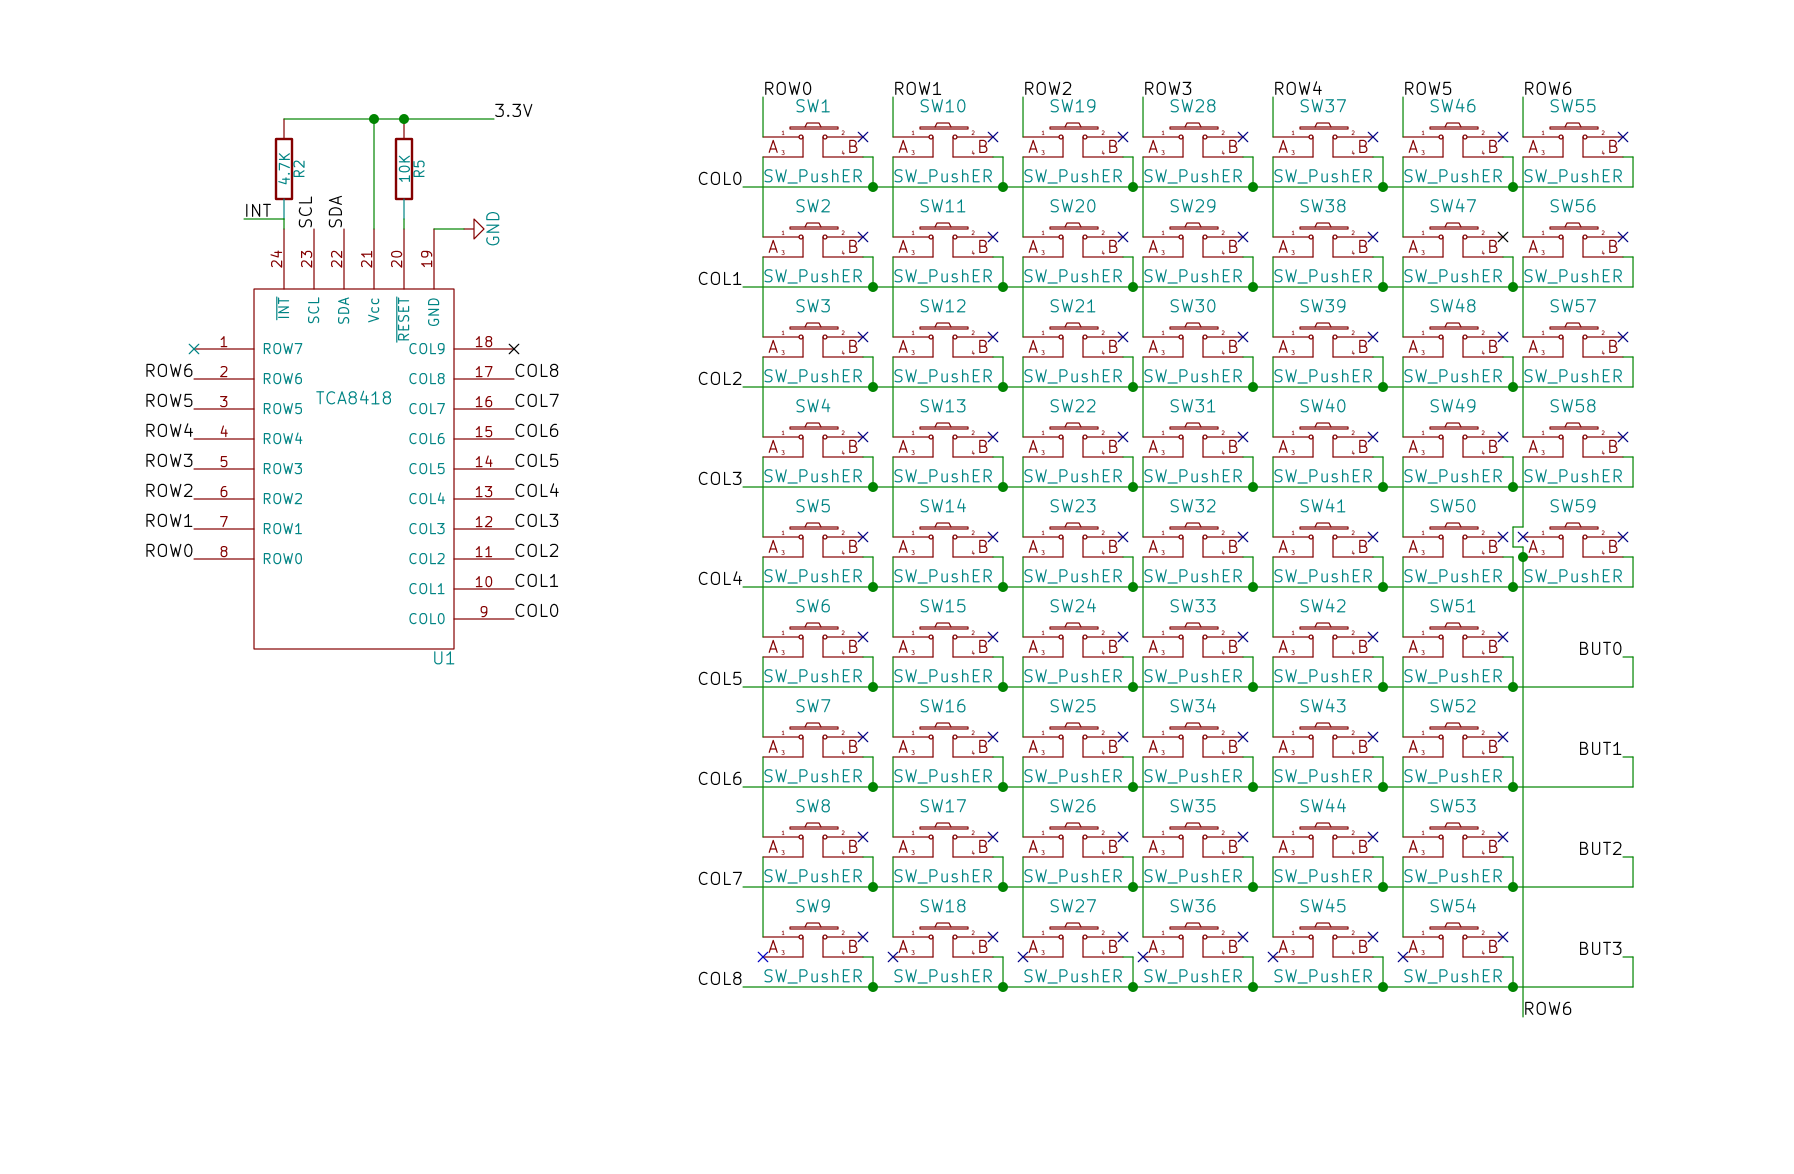
04/28/2015 at 12:31 • 0 commentsThe first prototype is assembled and working. The power circuitry is being a little finicky but the keyboard works great. Here's the schematic for it:
![]()
To get the keyboard working with the Raspberry Pi A+ (what we're using for our current prototype):
3.3v --> Pin 1
SDA --> Pin 3
SCL --> Pin 5
GND --> Any GND Pin
INT --> ***Is Not Connected
On the software side of things we compiled a custom Kernel with the TCA8418 Driver. By far the easiest method I found for cross compiling the Kernel is found Here. The total compilation time was only about 20mins. The tricky part was getting the device tree overlay working. Take a look at the Raspberry Pi device tree documentation.
Here's the overlay:
/dts-v1/;
/plugin/;


/{

compatible = "brcm,bcm2708";

fragment@0 {
	target = <&i2c1>;
	__overlay__{
		tca8418@34 {
	        compatible = "ti,tca8418";

	        reg = <0x34>;


	    irq-gpio = <&gpio 11 0x2>; /* IRQF_TRIGGER_FALLING */
            interrupts = <11 2>; /* high-to-low edge triggered */
            interrupt-parent = <&gpio>;
            interrupt-controller;

			keypad,num-rows = <8>;
	        keypad,num-columns = <10>;
	        linux,keymap = <
	    /* row | column | key-code  ex: 04,08,0010 q key*/

	            0x04080010
				0x04070011
				0x04060012
				0x04050013
				0x03040014
				0x03030015
				0x03020016
				0x03010017
				0x03000018
				0x02000019
				0x0507001e
				0x0506001f
				0x05050020
				0x05040021
				0x04040022
				0x05030023
				0x04030024
				0x05020025
				0x04020026
				0x0603002c
				0x0602002d
				0x0601002e
				0x0501002f
				0x04010030
				0x04000031
				0x05000032
				0x0201000e
				0x0600001c
				0x0508000f
				0x0308002a
				0x00070008
				0x00060009
				0x0005000a
				0x0004004e
				0x00030069
				0x00020067
				0x0001006a
				0x0000006c
				0x01070005
				0x01050007
				0x01060006
				0x0104000c
				0x02070002
				0x02060003
				0x02050004
				0x01030037
				0x0306000b
				0x03050034
				0x02040035
				0x06040039
	        >;
			};
		};
	};

};
You can find the keycodes in /linux/include/input.h just convert them to hex.
Here's a couple of sites with additional information:
http://xillybus.com/tutorials/device-tree-zynq-1 Not Raspberry Pi Specific but Has Great Info On The Device Tree
https://aababilov.wordpress.com/2012/10/09/setting-up-the-keyboard-in-linux/ Good Info on How Keyboards Work in Linux
Now that we have the keyboard working the next step is get the PCB re-printed with modified power circuitry once we figure out exactly what went wrong.
That's all for now. We're posting a video of Malti running soon so stay tuned. Also, if you want to get your hands on our prototype check us out at the 2015 Chicago Northside Maker Faire.
![]()
-
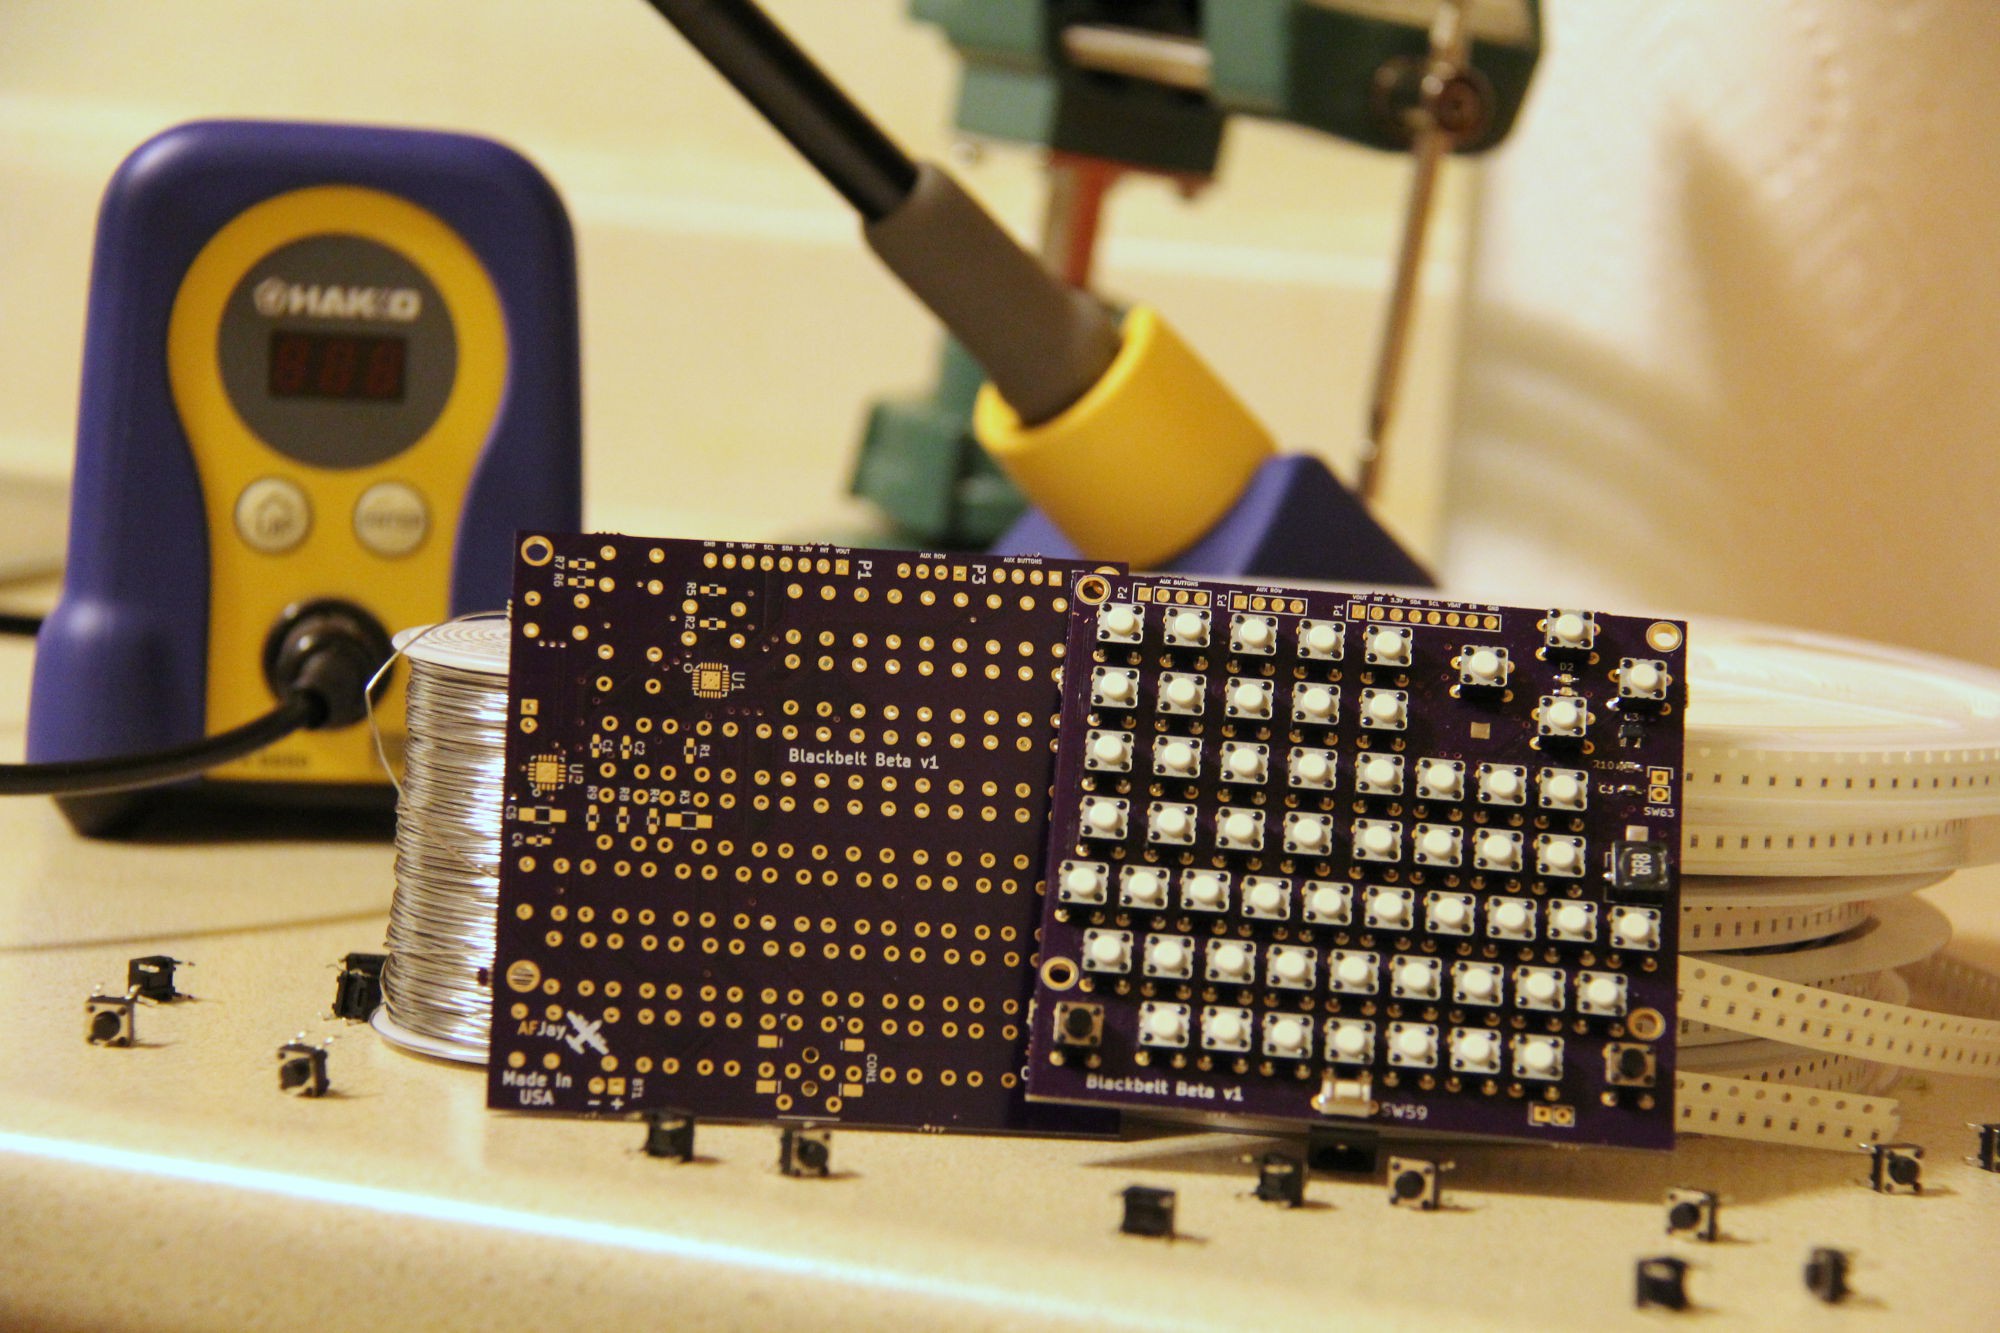
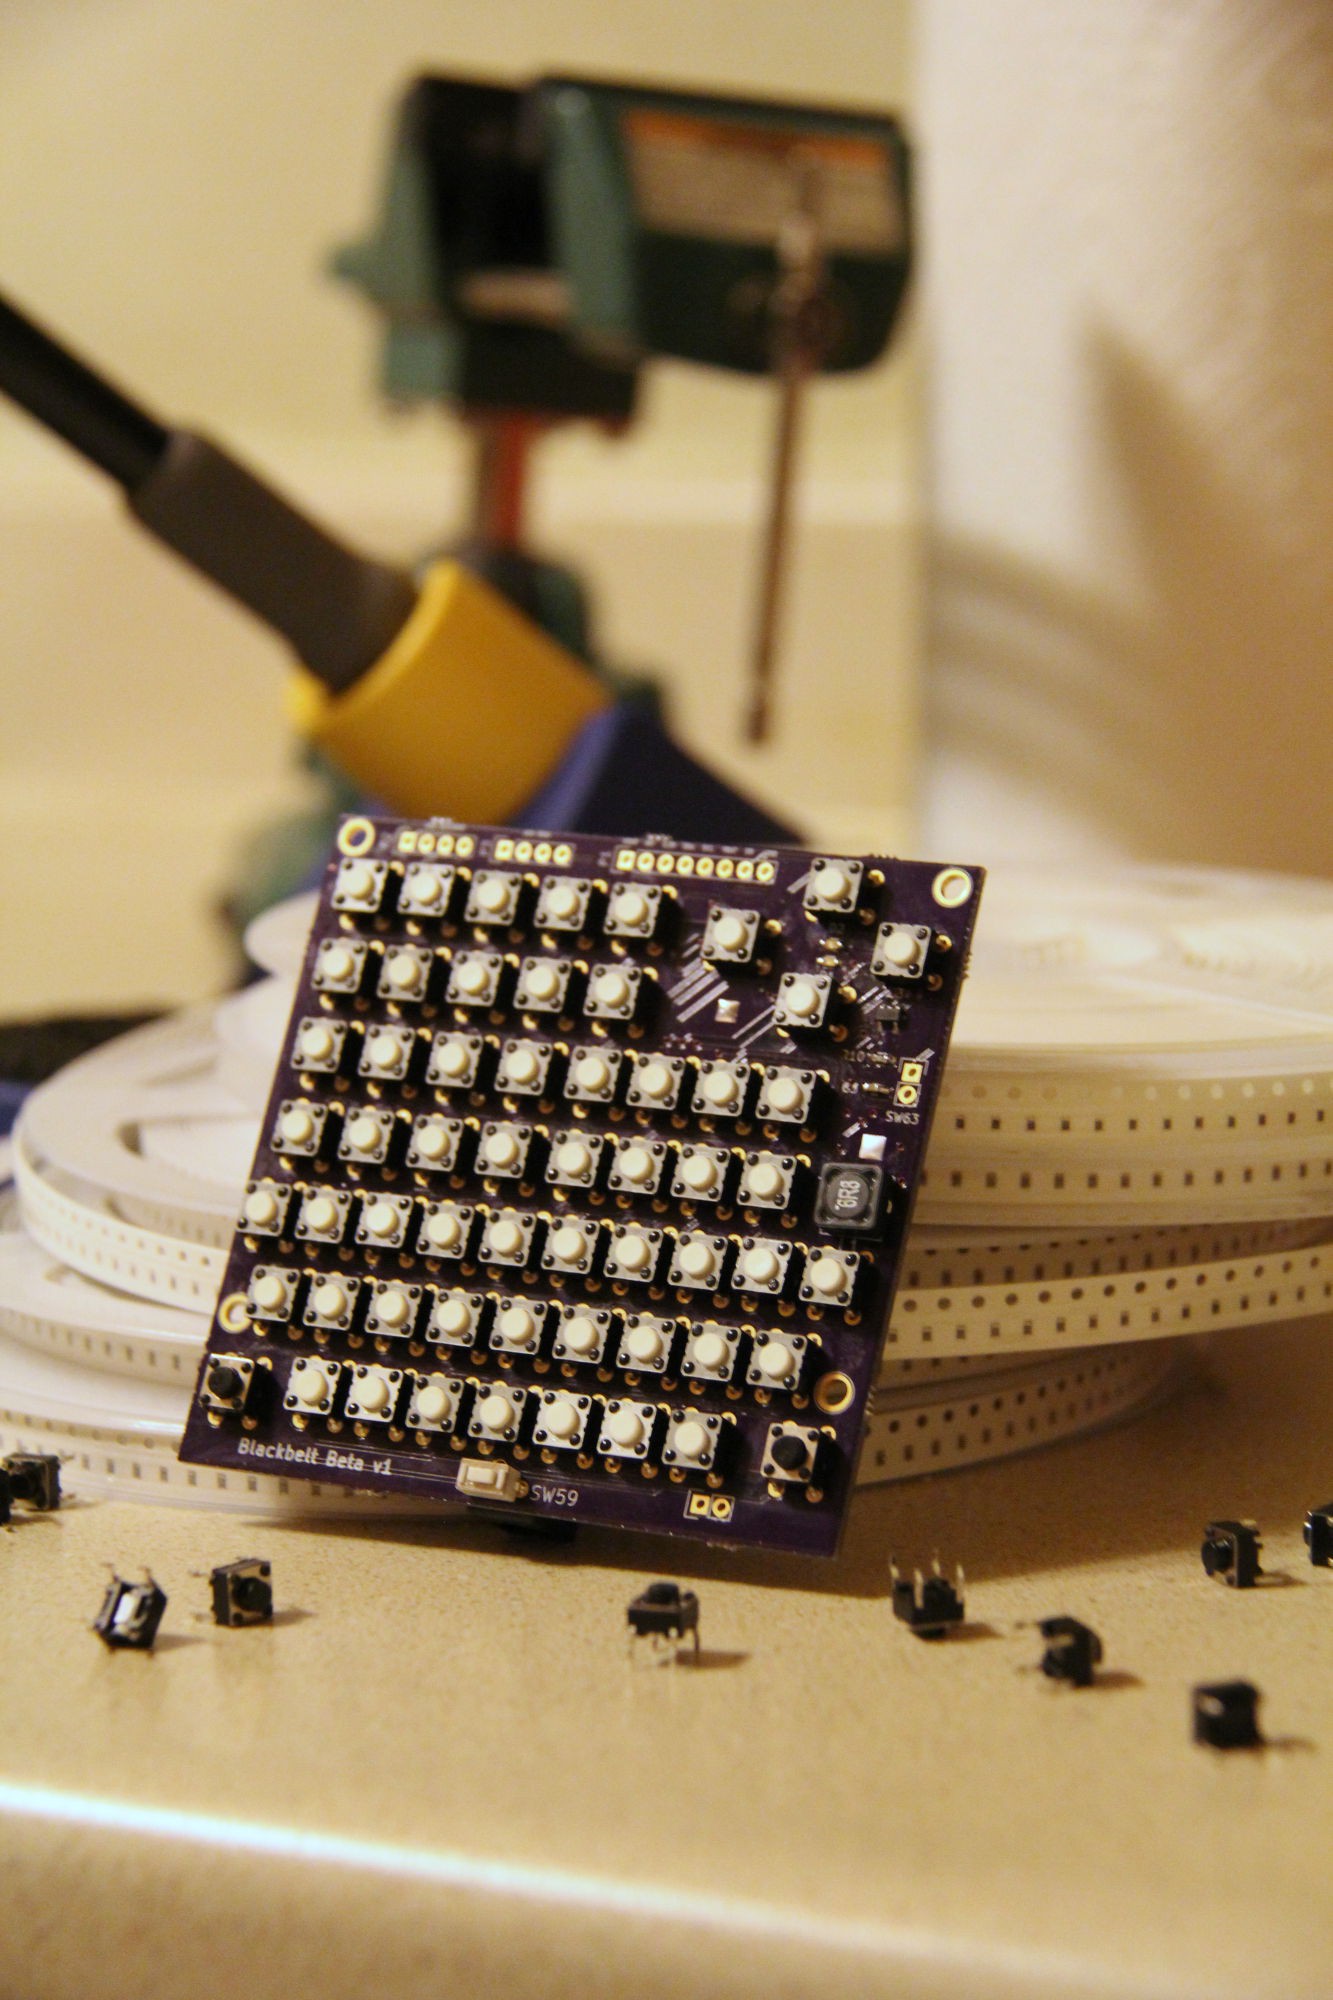
First Prototype Board Assembled
04/10/2015 at 12:31 • 2 commentsOur board finally came from OSHPark! After a night of SMD soldering it's finally done.
![]()
Note: The original name for this project has changed thanks mostly to Rita.
![]()
What's Next:
We're using this prototype board to start work on driver support for the TCA814. This neat little chip controls all 59 keys in matrix configuration and takes care of the debouncing for us. Also, we have the battery charging circuit and voltage regulator on the same PCB so we can get a realistic estimate of battery life.
Malti
Malti is a low cost open source handheld Linux platform that makes experimenting with and learning about electronics easier