This project starts the way many of my projects do, with free broken stuff, and me saying "I can fix that" A couple of years ago, I got a pair of snowboard bindings at a garage sale for free, to replace my current pair. They were free because one of the ladders for the toe was missing, and one of the ladders for the ankle was broken. I was able to easily replace the Ankle ladder as the attachment was simple, and any general ladder would work as long as it was long enough and the right thickness.
The toe ladder proved much harder. As can be seen in the picture above, it featured a wide and thick design that mounted via a cylinder on the bottom that was one piece with the ladder itself. My first attempt involoved grinding a different brand of ladder to smooth the bottom and drilling it to place a small metal rod for a anchor point. Unfortunately the plastic proved too thin, and the rod ripped right through. The only fix that held for any length of time was a Burton ladder that was too narrow. It held well enough, but it had the rather severe issue where after about a single season of wear, it began to slip under stress. Since with that particular binding was most stressed during a jump, it started coming loose or completely free in mid air. This was obviously a problem since control is required for a safe landing.
When I got my 3D printer, I realized that this might be a solution to my problem. My first attempt was made with ABS. The length of the print was a problem. ABS shrinks a lot as it cools, and it tended to pull away from the bed, it was also very inflexible. So I turned to TPU or Thermoplastic Polyurethane. TPU is very flexible and is very strong. My first step was to test its strength. To that end I created a basic model to be used in tension tests, and one for shear tests since the binding would experience both types of stress. The two Pictures below show the tension test model, and the Shear stress model. All Dimensions are in Millimeters.
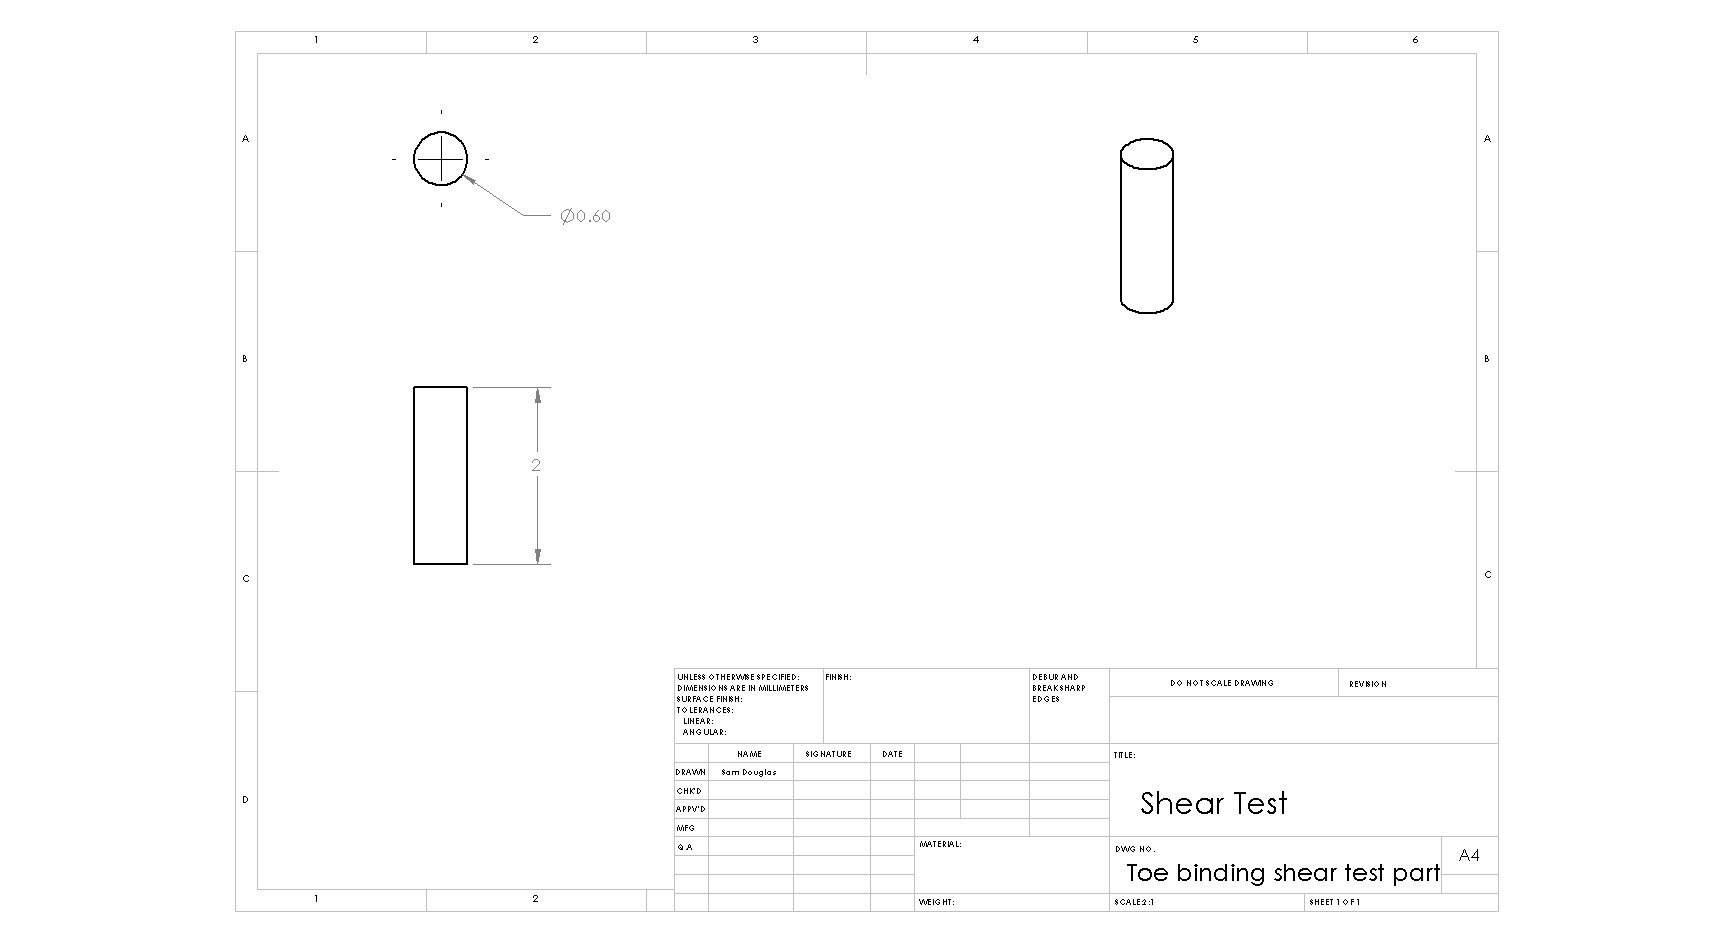
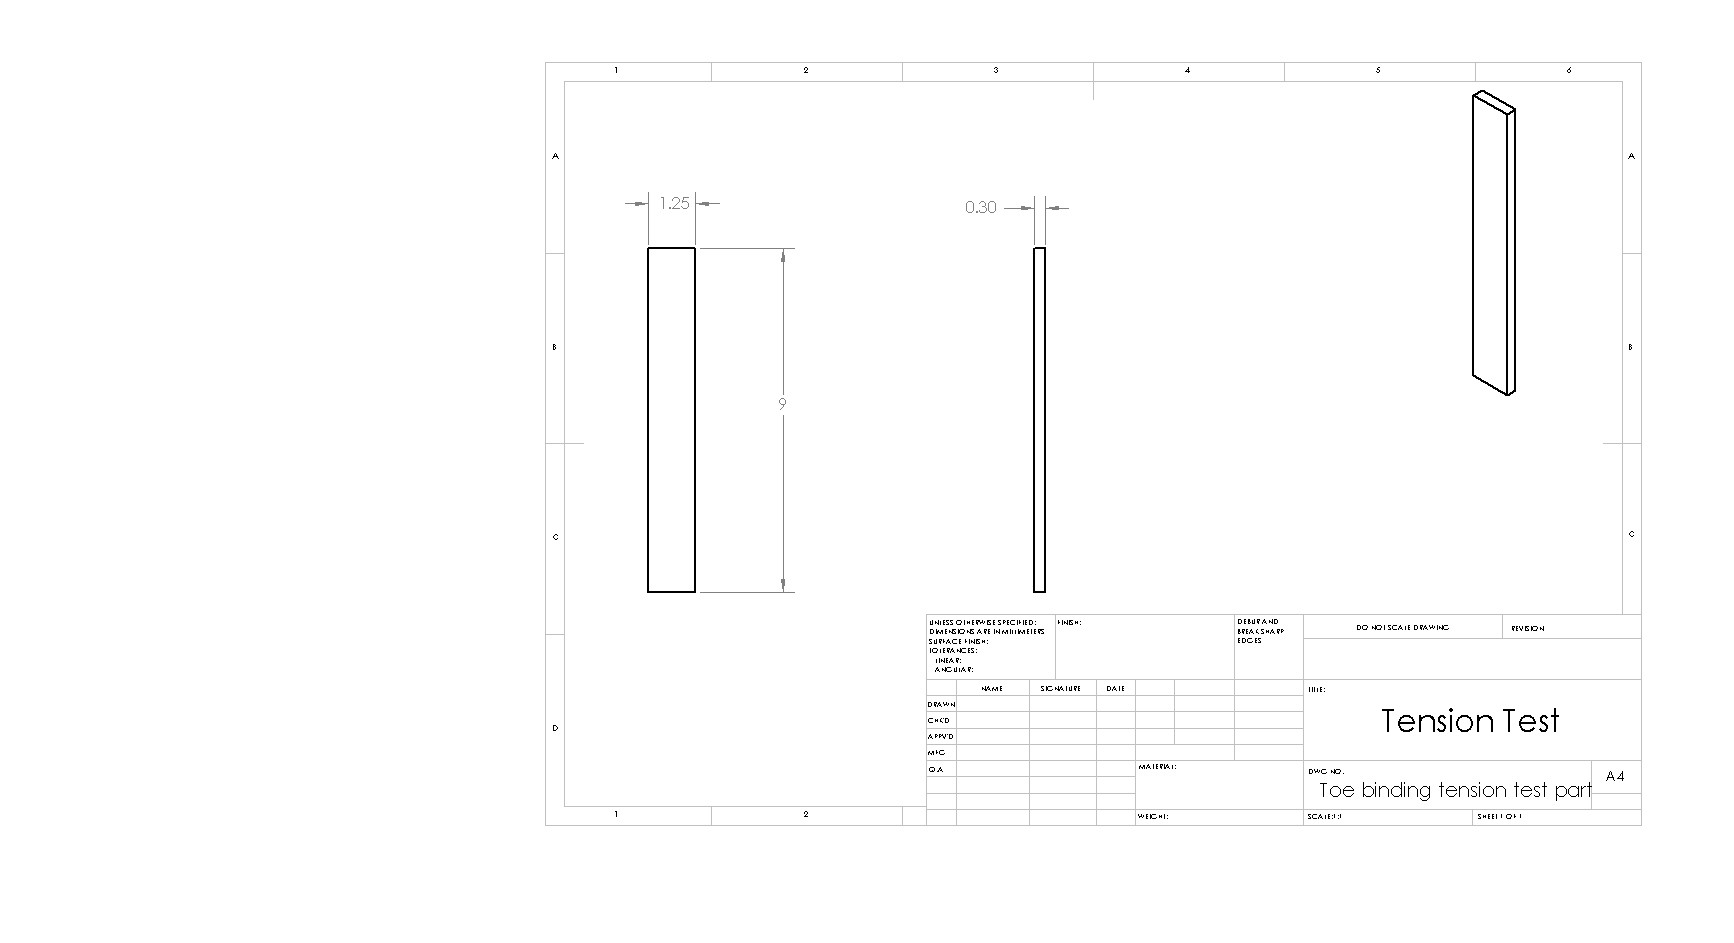
To test the samples, I printed four of each type. Two I tested at room temperature, and two I tested at 0 degrees F to simulate conditions similar to real life. The samples were also smaller both in thickness and width. My testing apparatus consisted of two pairs of vice grip pliers and rope that allowed me to hang the samples from the ceiling and attach dumbbell weights to them. My max load was 46.2lbs. I observed no layer separation under prolonged loads in tension. I did notice a plastic deformation along the Z axis.
| Type | Infill &% | Weight (lbs) | Elongation (mm) | Permanent Deformation (mm) | |
| Room Temp | Tension | rectilinear 100% | 8.8 | 0 | 0 |
| Room Temp | Tension | rectilinear 100% | 17.6 | 0 | 0 |
| Room Temp | Tension | rectilinear 100% | 23.1 | 2 | 1.2 |
| Room Temp | Tension | rectilinear 100% | 28.8 | 2.85 | 2.5 |
| Room Temp | Tension | rectilinear 100% | 46.2 | 6 | 3.2 |
| 0 deg. F | Tension | rectilinear 100% | 8.8 | 0 | 0 |
| 0 deg. F | Tension | rectilinear 100% | 17.6 | 0 | 0 |
| 0 deg. F | Tension | rectilinear 100% | 23.1 | .4 | 0 |
| 0 deg. F | Tension | rectilinear 100% | 28.8 | 1.4 | .5 |
| 0 deg. F | Tension | rectilinear 100% | 46.2 | 1.9 | .8 |
After testing to make sure it could handle the load, I modeled and printed the first version. Due to measuring issues, My first run had 42 teeth instead of 27. Curiously enough, that still matched the gear spacing on the crank, and held nicely. I tried several other tooth counts, but only the 42 would hold any force at all. Due to the timing of getting the printer, I did not have much time to experiment before the season ended. When the next season picked started, I immediately remodeled the ladder using all the experience I had accrued over the summer. I got a version that easily matched the 27 toothed original.
| Date | Runs | Temperature Low | Temperature High | Time of Day | Duration of time on mountains | Jumps | Average time per run | Riding style | Max Speed | average speed |
| 21-Dec | 6 | 18 | 26 | Night | 6-8pm | 5 | 8 min | Regular | 25mph |
| 12/22/2017 | 7 | 10 | 22 | Day | 9:30-12:30Am-pm | 12-15min | 90% regular, 10%goofy | 38mph... |
 Brett
Brett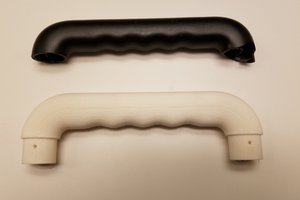
 MasterOfNull
 julio perez