-
Parts
06/23/2015 at 08:40 • 0 commentsSince my last update, I've ordered and received the controller parts that I will be using for the controller. For this project I made it simple an ordered a 2-player starter pack from ArcadeWinkel based in the Netherlands. I don't have any experience with starter kits, or arcade parts for that matter, but the quality of the kit seemed nice enough for this first project :-)
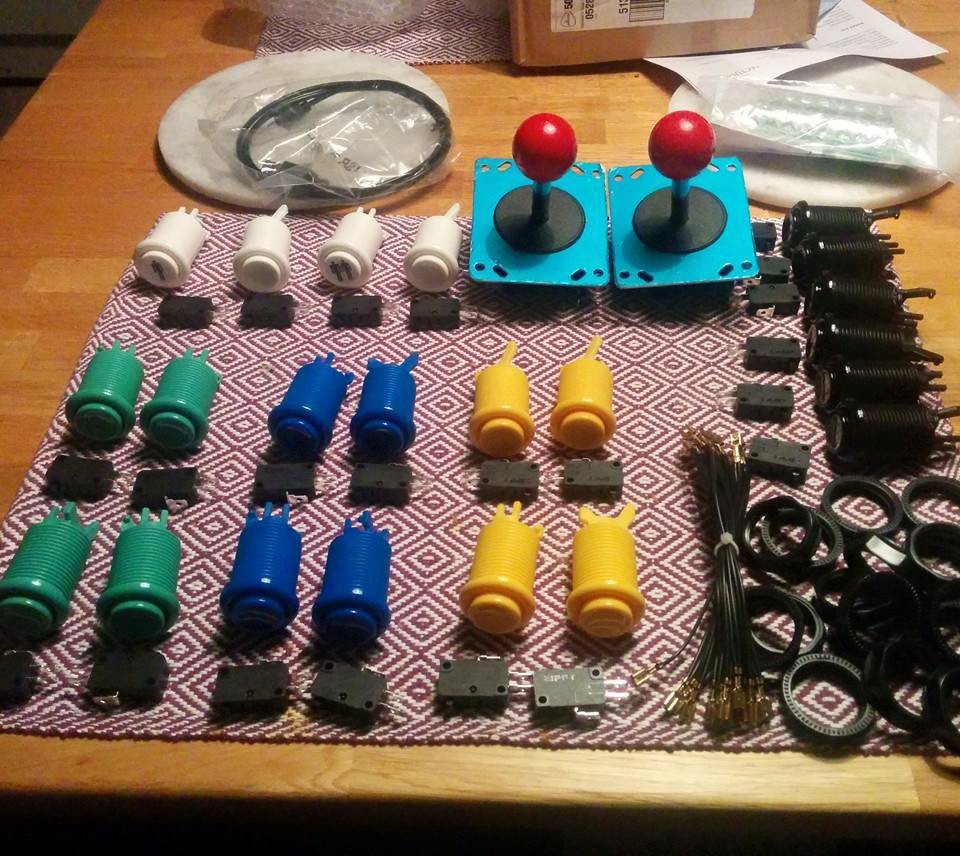
The kit arrived in the first week of May, so I've had the parts lying around for a while now. Here's a nice picture of everything lined up on my kitchen table:
![]()
The kit contains (copied from the store page):
- 2x Balltop Arcade Fighter Joystick (top mount)
- 20x Concave classic push button (6x button layout + 2x pinball+ 4x service / menu / PC + 2x insert coin)
- Start player 1 push button
- Start player 2 push button
- iPac 2 player with USB cable (New 2015 version!)
- GND cable (.187 connectors)
- Microswitches
Now I just have to get around to building the actual enclosure, for which I've bought all the materials I'm going to need. I'm hoping to get the build done in the next few weeks, and then start with the electronics and software configuration.
-
Control Panel
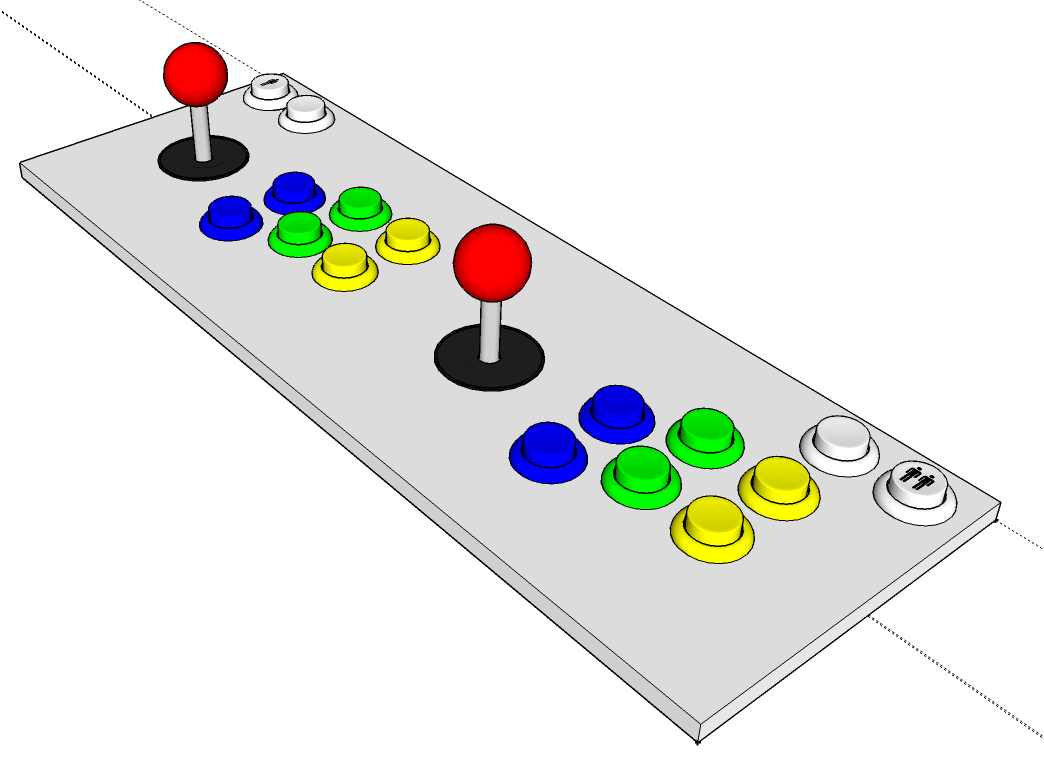
04/27/2015 at 17:56 • 0 commentsA few weeks ago, I joined the Project MAME group on Facebook. If you're the least bit interested in building your own arcade cabinet and/or controls, I suggest you join! Looking at some nice bartop cabinet builds posted in the group, I got in contact with one of the members who shared a two-player control panel layout with me in PSD format. Using this, I made a 3D sketch of what my panel will look like (using SketchUp):
![]()
The dimensions are 525 mm x 185 mm x 10 mm, and in my real build it will likely be in MDF. I'll need to route some mounting holes so that the buttons and sticks, but that's a later issue.
That's it for now! :-)
-
About parts
04/27/2015 at 15:54 • 0 commentsHow quick the weeks go by: it's already been three weeks since my last update. Since I made my mockup I've done a lot of research on control panel layouts, and been looking at other DIY desktop controllers to get inspiration. I've not yet decided on how I should make mine, except that it will be a two-player panel with six buttons for each player in a Capcom-style layout.
As for components, I ordered the parts today! I'm going with ball top joysticks and concave pushbuttons. I'll be using the iPac keyboard encoder for two players. Even though I'm planning to have an internal Raspberry Pi I'm still going with an encoder, mainly because they are easy to use but also so that I can easily connect the controls to a regular PC.
Speaking of the Raspberry Pi: I'm probably going to go with a Model 2 B as it seems to be the most powerful one. I'm been toying with the idea of having an internal Mini-ITX motherboard and just run Windows 7 on the thing, but I'll most likely go with the RPi because it's a heck of a lot cheaper.
-
Very first mockup
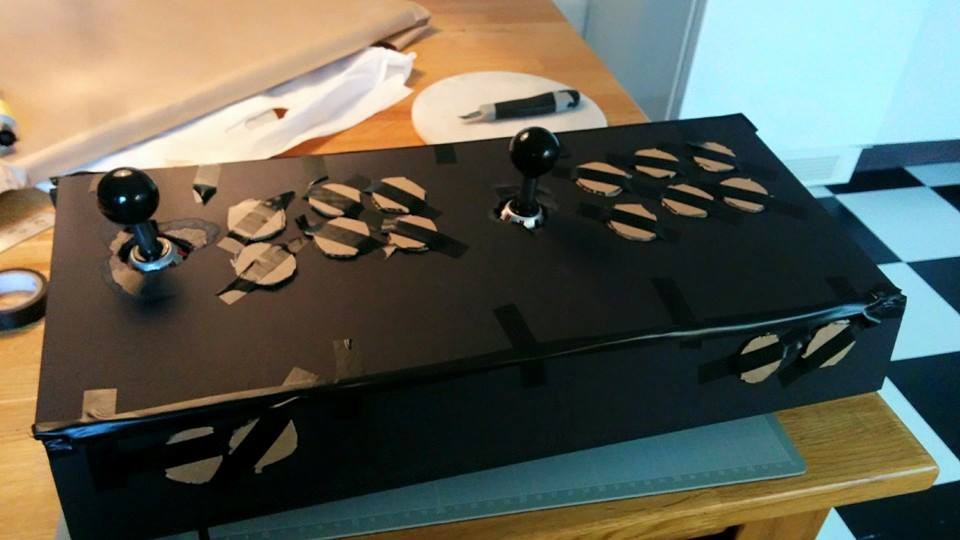
04/06/2015 at 16:34 • 0 commentsWhile I haven't made any design sketches yet, I wanted to quickly make a prototype so that I could get a feel of the size of the control panel and placement of the buttons and sticks. I threw something together under an hour using foamcore, cardboard and tape. I also had two Tac-2 joysticks that I used as a reference for the sticks.
![]()
I'm quite happy with the mockup actually! I found that its length was a tad too short so that the panel felt crowded when two people were using the sticks and buttons, but this will be addressed in the next iterations.
-
Introduction
04/06/2015 at 16:26 • 0 commentsI love old games. They remind of simpler times when games where games, and not Hollywood-blockbuster-wannabes like Call of Duty and the like. For a long time I've wanted to have an arcade cabinet, but I just don't have any space for a full cab. There are bartops and the like, but they're not very portable with their built-in screens and you can't hide it away if you need the space for something else.
Enter the Minicade. It's meant to be roughly the size of an X-Arcade Dual joystick, but with a built-in computer (Raspberry Pi most likely) that runs a frontend and emulators. On the back there will be connectors for connecting the Minicade to a regular TV using HDMI (and also power jack, Ethernet, additional USB ports...). This means that the Minicade will be a standalone device that you could bring to your friends when you want to play some classic arcade games!
Minicade
A portable arcade controller with built-in software for two players that plugs into a TV or display
 Tobias Eriksson

