Close
0%
0%

Outside Air Temperature Display

Simple digital thermometer that measures the outside temp with a wired probe and displays in Celsius or Fahrenheit.

Similar projects worth following
233 views
The last time we moved we lost the nifty little outside temp display that sat on our kitchen windowsill. We were amazed at how difficult it is to find such a simple thing; there's plenty out there but they come with a bunch of stuff we don't want / need.

This is an easy weekender project with real utility. In fact it will probably take longer to mill the case than to assemble the PCB.

Specs:

  • Display:  2 1/2 digit LCD
  • Units:  user selectable Celsius or Fahrenheit
  • Range:  -40C (-40F) - +50C (122F)
  • Accuracy:  +/- 2C
  • Batteries:  2 x AAA
  • Expected battery life +1.5 years

The design is very straightforward.  The PIC16LF19155 was chosen for reasonable pin count, ease of soldering, and the integrated LCD controller.  I would have like to have used a larger LCD but this was the largest available on Digikey.  Now that I have it in use I've found it okay.

The temperature sensor is the trusty Microchip MCP9700A in the TO-92 package.  It's a great little sensor that draws only a few microamps and uncallibrated is accurate to about +/- 2C across it's measurement range.  In fact, I decided to not compensate it since in the 0 - 40C range it is actually more accurate without (and only marginally less so down to -25C)!  See Microchip's application note AN1001 if you want to understand the details behind this.  Regardless, this makes the math code very simple.

The PIC16LF19155 is a new release from Microchip and features a new 12-bit ADC.  For those of you familiar with Microchip's 8-bit line they have featured rudimentary 10-bit SAR ADCs for some time that perform reasonably well for low-accuracy work.  The 12-bit is a nod to the importance of high accuracy / speed data acquisition these days.  It looks & smells more like a low-end Sigma-Delta (it has a rudimentary DSP but they don't call it that).

But those features aren't used in this design since the data acquisition rates are very low and it's essentially dealing with DC signals and a low noise footprint.

When powered up the PIC configures the LCD & ADC modules along with pins and supporting peripherals.  It then enters the run loop:  wake-up, power-up the temp sensor, check the switch setting for C/F, do several acquisitions of temp signal, power down temp sense, average, calculate degrees Celsius, convert to Fahrenheit if selected, update display, and go back to sleep.  That's it!

The watchdog timer wakes the PIC about every eight seconds; so this is the maximum rate at which the display will update.  The LCD drive remains on full-time.
oat_2-0..X.zip

MPLab source code for v2.0.

Zip Archive - 218.94 kB - 10/09/2018 at 02:07

Download

oat-mplab.zip

MPLab source code files (XC8 compiler).

Zip Archive - 8.16 kB - 02/19/2018 at 01:00

Download

oat-enclosure.pdf

measurements for display cut-out in Polycase enclosure.

Adobe Portable Document Format - 211.64 kB - 02/18/2018 at 21:35

Preview

oat-eagle.zip

Eagle board & schematic files.

Zip Archive - 49.96 kB - 02/18/2018 at 21:34

Download

  • 1 × U2 Microchip PIC16LF19155 controller, Digikey #PIC16LF19155T-I/SOCT-ND
  • 1 × LCD1 Lumex LCD-S301C31TR LCD 3 DIGIT .31" REFLECTIVE TN, Digikey #67-1788-ND
  • 1 × C1 1uF, 1µF ±10% 25V Ceramic Capacitor X7R 0805 (2012 Metric), Digikey #1276-1066-1-ND
  • 2 × C2, C3 100nF, 0.1µF ±5% 50V Ceramic Capacitor X7R 0805 (2012 Metric), Digikey #1276-1090-1-ND
  • 1 × R1 200Ω, RES SMD 200 OHM 1% 1/8W 0805, Digikey #P200CCT-ND

View all 8 components

  • Upgrade

    Brian Cornell10/09/2018 at 02:06 0 comments

    After the initial battery replacement at six months the second set lasted only a month.  When I tested them one was shorted so I figured I had a bum battery.  But after the third set died in less than a month I realized something was wrong.

    Connected to the bench supply & amp meter showed an idle current draw in excess of 3mA - magnitudes higher than it should be.  There isn't much to go wrong but it actually took some time to figure out.  I reloaded the code, removed the temp sensor and its Vdd decoupling capacitor - nada.

    Measuring the current with a Vdd down to 1V showed a calculated impedance of 700Ω - well below what it should be.  This also eliminated the LCD & MCU as possible culprits since the minimum operating Vdd is 1.8V.  The only thing left was the MCU's decoupling capacitor and, sure enough, removing it fixed the problem.

    This seemed like a really strange failure for a 100nF 805 package MLCC.  Likely one of two things happened:

    1. I assembled with lead-free solder and perhaps a tin whisker shorted it
    2. As mentioned in a previous post the battery clips are junk and when dropped the batteries can come out - perhaps they damaged the cap's layers

    I didn't inspect it that closely and finished the replacement.  Instead I took the opportunity to improve the design, many to improve battery life:

    • Left the temp sensor Vdd decoupling cap out to reduce on-time current draw (noise shouldn't be a concern in this design)
    • Optimized code to minimize on-time of the temp sensor and unit select
    • Reduced the settle time at the start of read cycle on-time
    • Added code to display the version # when batteries are installed
    • Added code to display 'Lb' when low battery voltage is detected
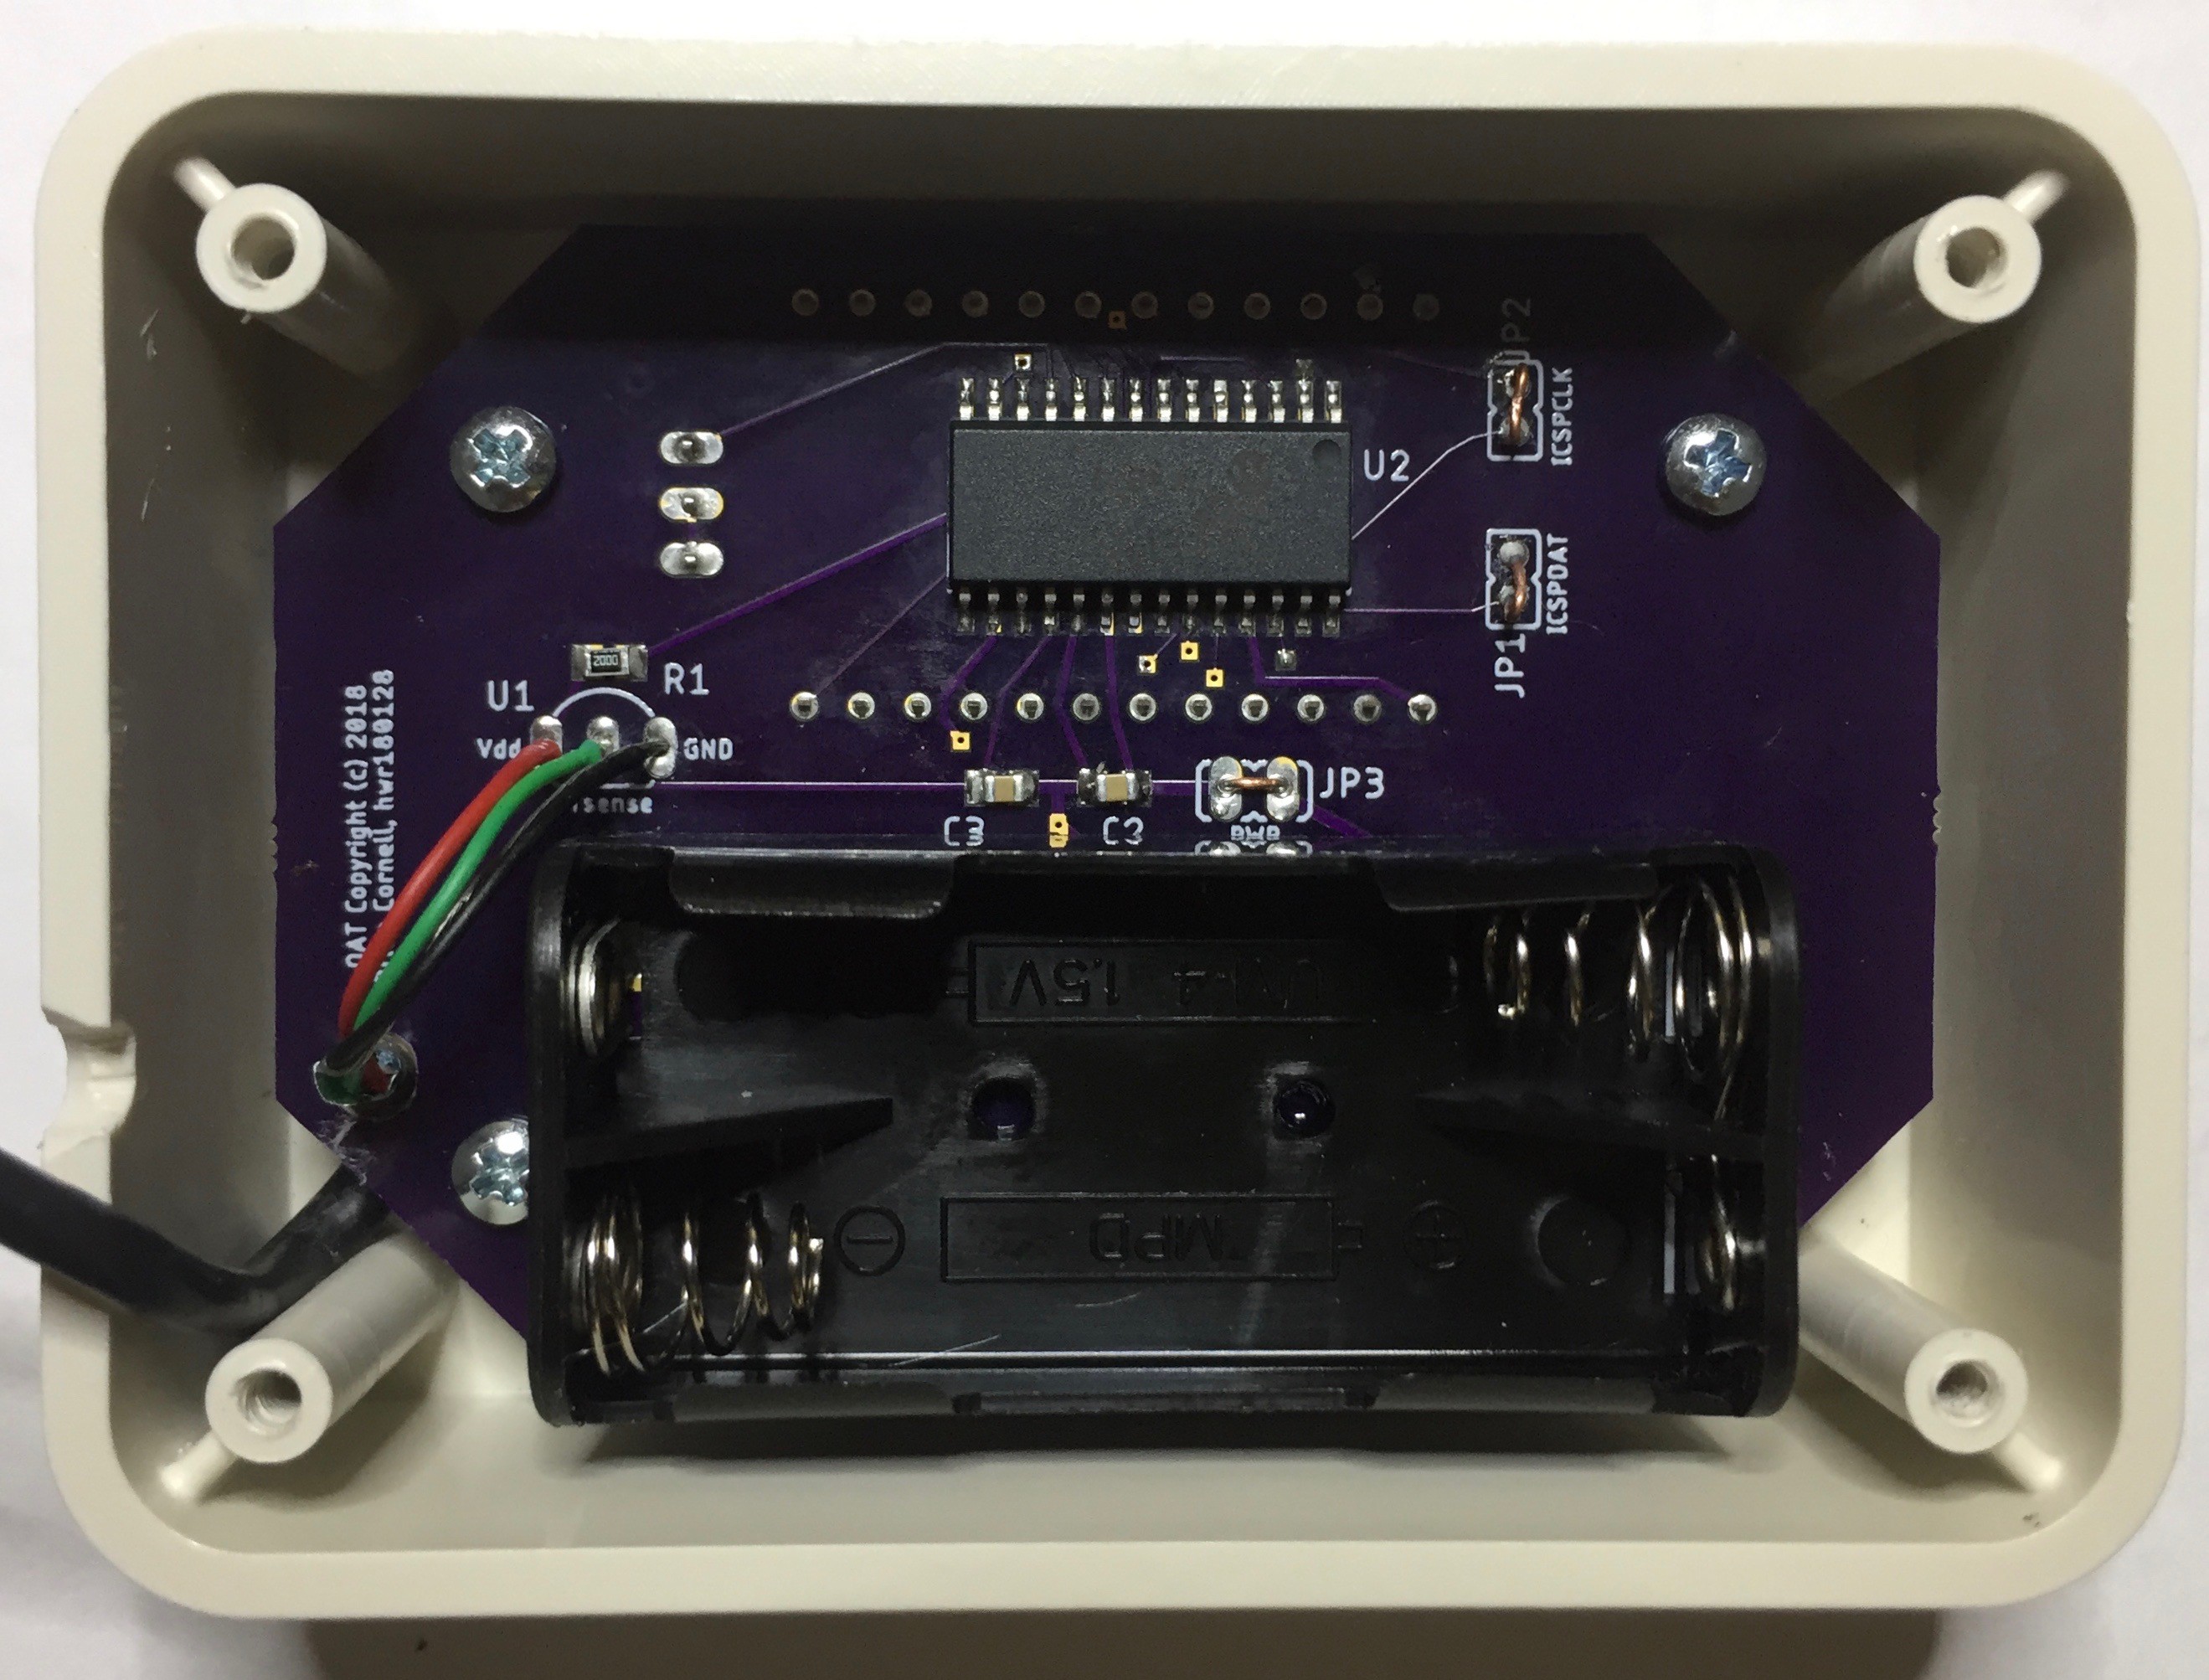
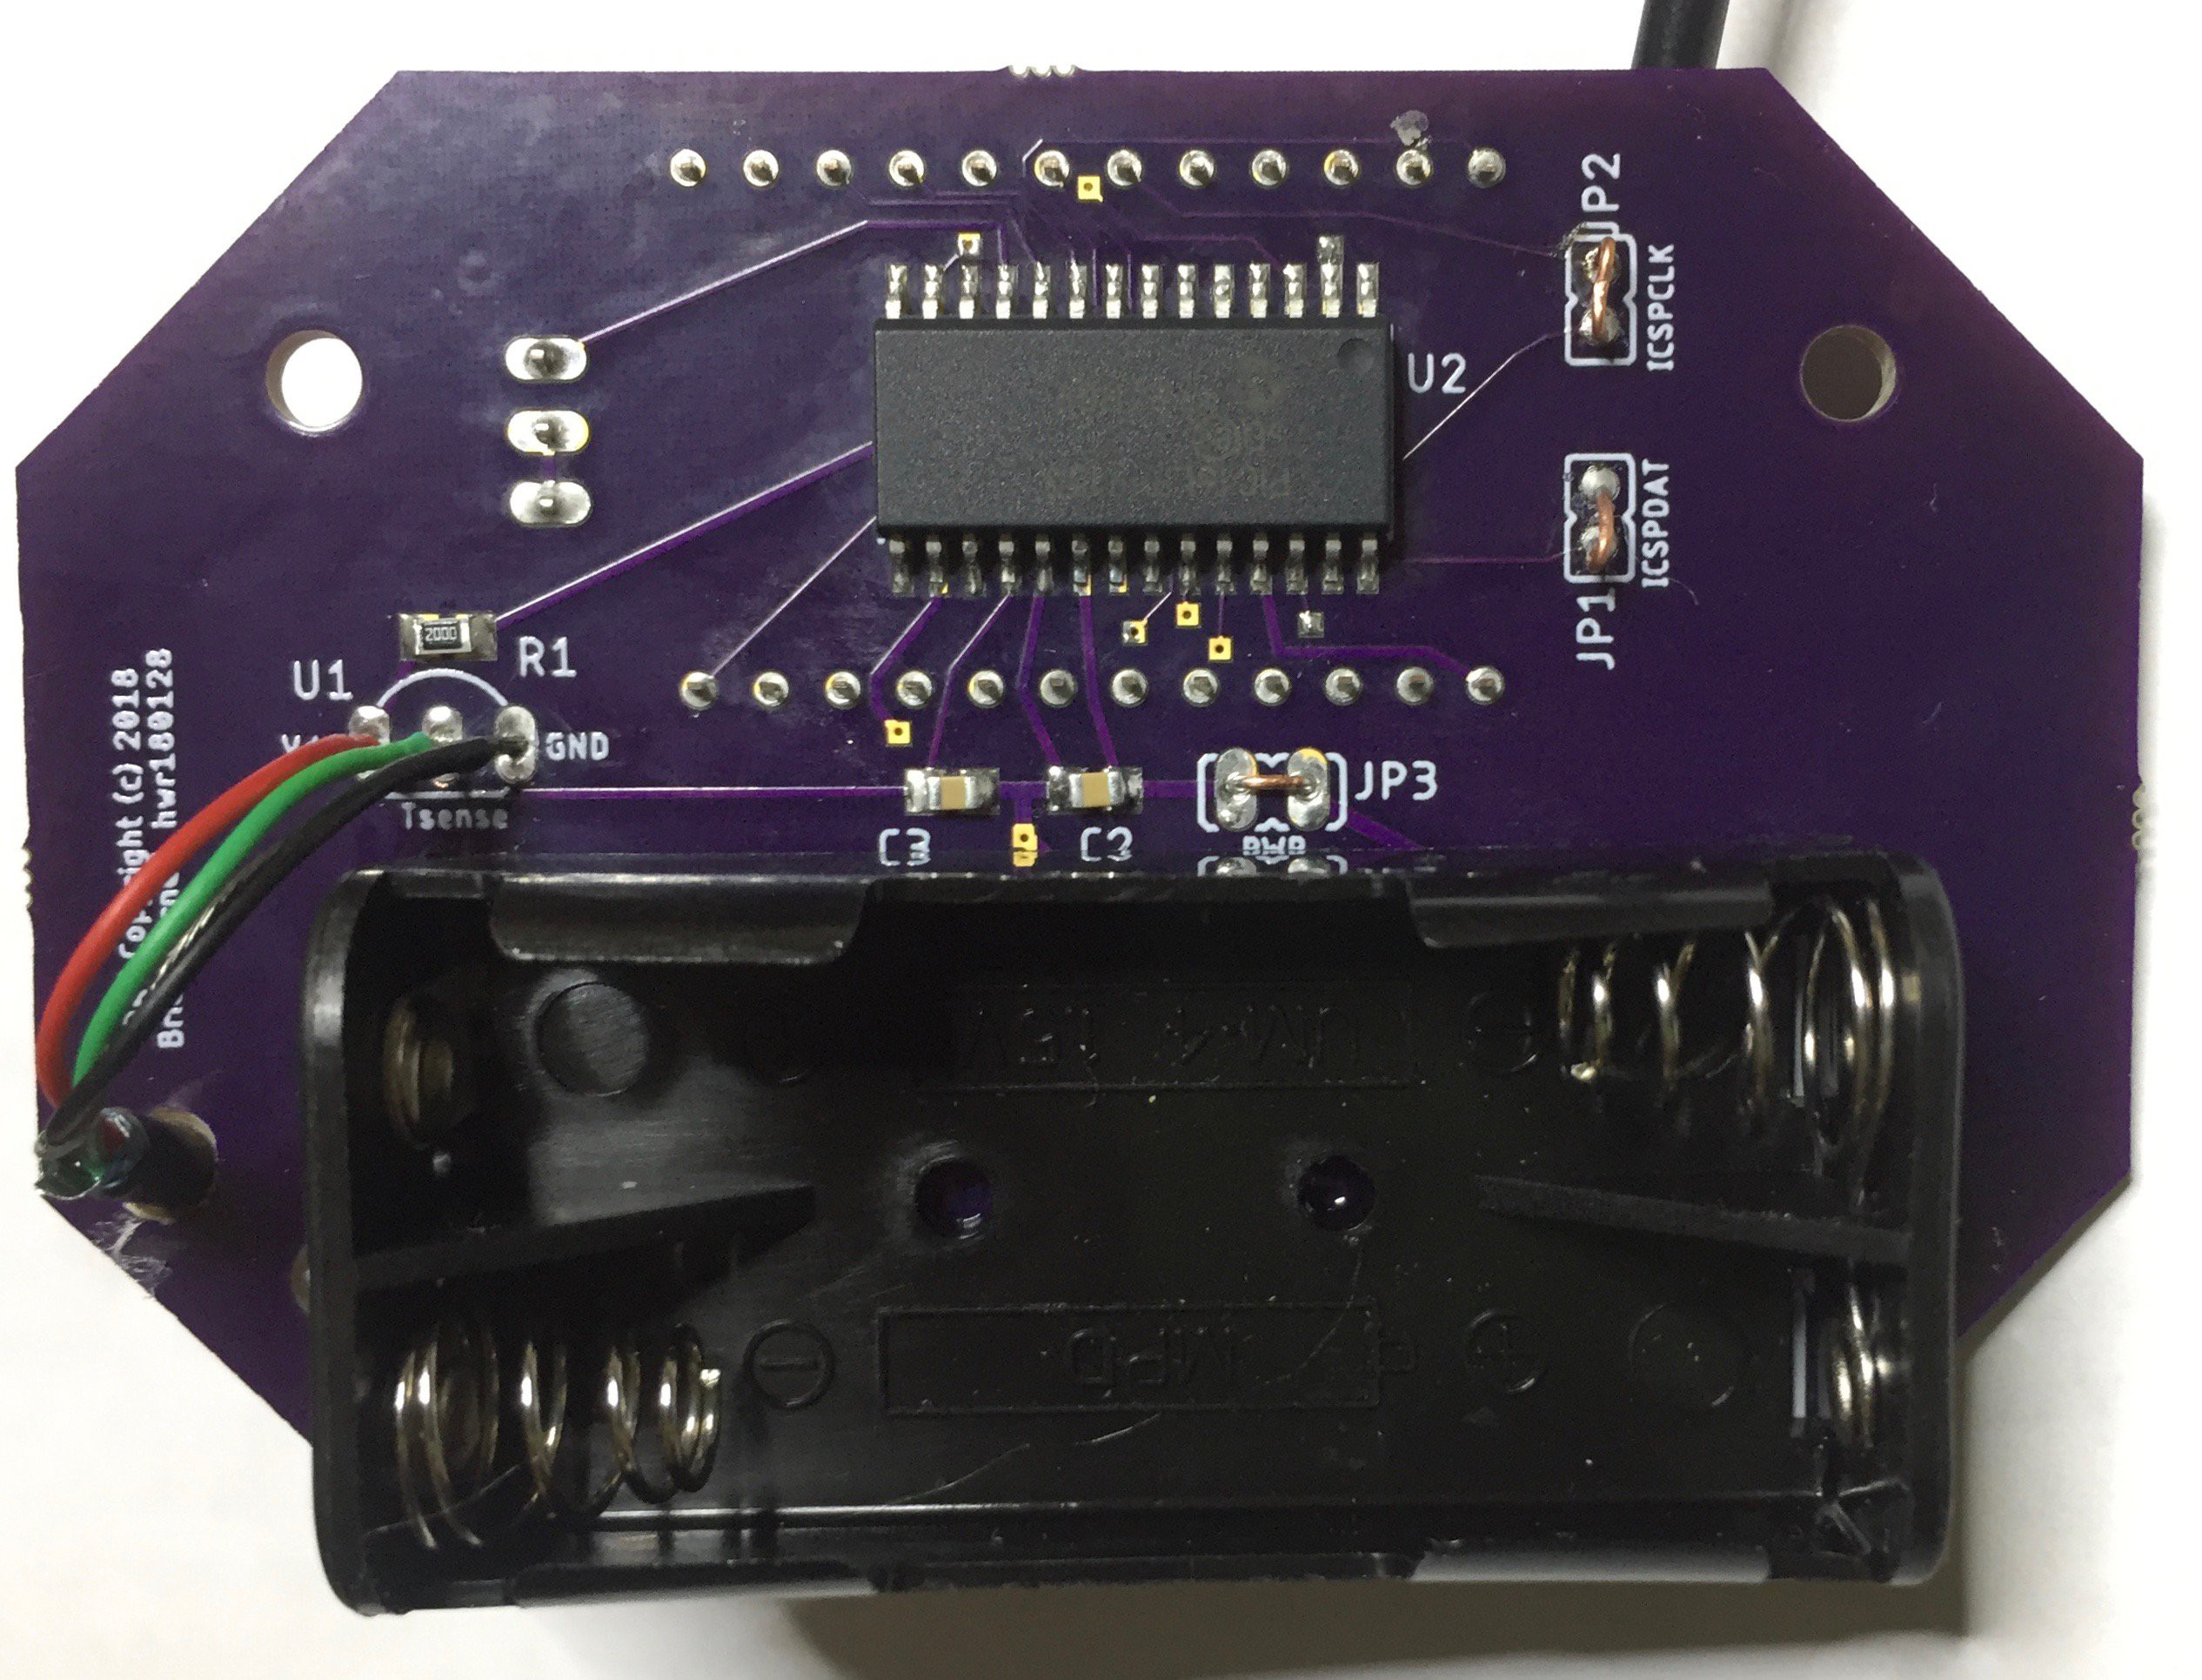
    • Replaced the battery clips with a holder
    • Added a strain relief hole on the PCB to secure the temp sensor cable

    With all the mods done the idle current is 53uA and on-time current draw=302uA.

    Here's a very crude 1st order (ignores all non-linear effects) calculation of battery life assuming 1Ah AAA batteries.  There are two components to estimating battery life:  IDLE and READ currents.  Idle current is assumed constant regardless of operating state.  Read current is the current draw when the processor is awake and inputs are active (temp & unit sense).

    The READ current is first converted to a constant current figure that can be added to the Idle current.  The sample interval is 8 seconds and the on-time of a Read is approximately 120mS.  Therefore, the Read time as a percent of a sample interval is 120 / 8 = 0.015 (1.5%).  The Read current of 302uA converted to a constant current over 8 seconds is 0.015 * 0.000302 ≈ 5uA.

    Adding the converted Read current of 5uA to the Idle current gives a total constant current draw of 53uA + 5uA = 58uA.

    A AAA battery with a 1Ah capacity will operate for approximately 1 / 0.000058 ≈ 17,241 hours or 17,241 / 24 ≈ 718 days or 718 / 365 ≈ 1.97 years.  Probably a bit optimistic.

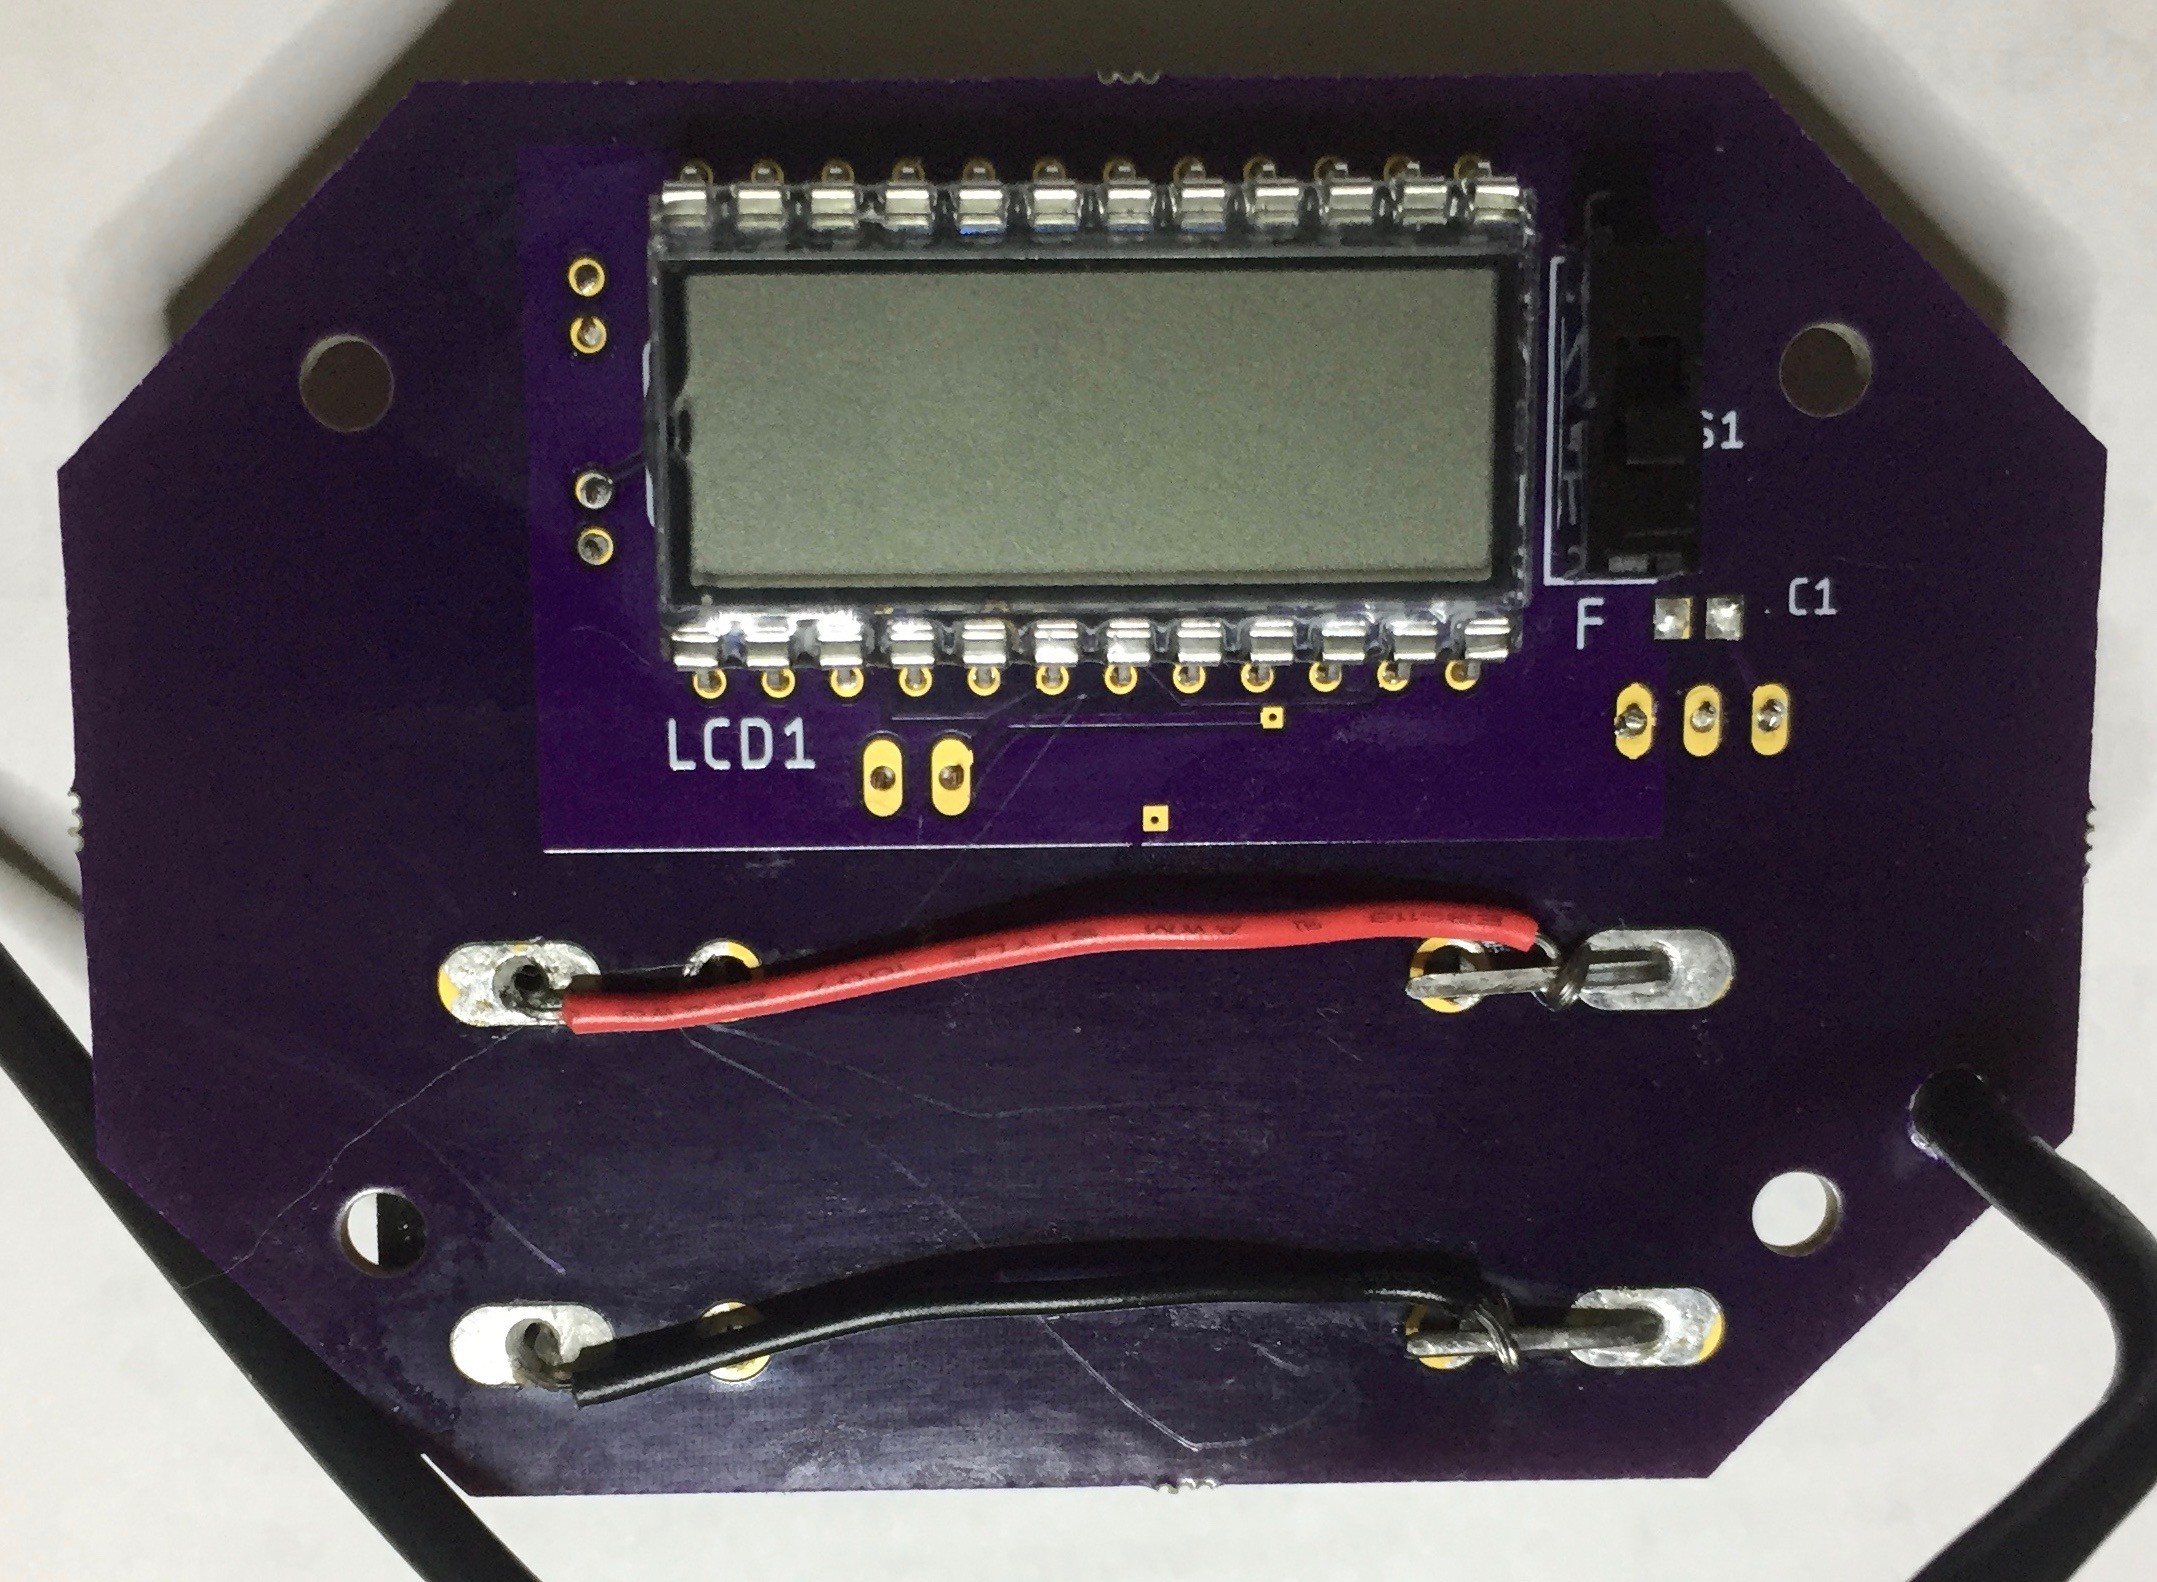
    Below are a few pics of the physical mods.  I've also posted the updated code.  Note C1 is missing from the display side.

  • Run Time Update

    Brian Cornell08/17/2018 at 13:23 0 comments

    I got just over six months of life before having to replace the batteries.  It's possible I'll get more with a fresh set because the original ones were mixed (different brands) and when I checked them at removal one was open - so maybe a weak cell to start.

    One mechanical problem:  the battery clips are junk.  They aren't spring steel and I found that over time the clips would relax and the unit would stop working.  Also if it gets dropped the battery mass is enough to bend the clip contacts.  I had to open the case a few times thru the 6-month period to correct this.  If I build more I'll switch to a higher quality clip.

    Other than that it works great and, comparing to my phone's weather widget, it's been accurate to +/- 1C.

View all 2 project logs

  • 1
    Select & mill enclosure.

    While the board is in manufacturing, mill the enclosure for the display & switch.  If you will be using the enclosure listed in the parts list, cutout dimensions are included in the files section.  You'll want to have this done before assembling the board because the LCD & switch will need to stand-off the PCB a bit to mount flush (LCD) and protrude (switch).

  • 2
    Make temperature probe.

    U1 will be mounted on the end of multi-wire cable that will be positioned outside to sense air temperature.  The cable should be thin in diameter so it doesn't interfere with closing the window and won't be damaged.  Individual wires in the bundle can be 28AWG or smaller.  A shield isn't necessary unless the sensor will be located close to an electrical noise source.  I used an old USB cable.  The cable shouldn't be much longer than 1 meter (3 ft.).

    One end of the cable will be soldered directly to the PCB; the opposite to the temp sensor leads.  Each lead on the sensor should be protected with heat shrink tubing and then the entire sensor head enclosed in tubing as well.  The tip & base seams of the heat shrink tubing should be sealed with silicone or RTV to prevent moisture from seeping in.  See the project pictures for reference.

    Suggestion:  unlike my photos the sensor will be less prone to error in direct sunlight if white or reflective tubing is used to protect it.

  • 3
    Program the PIC.

    The PCB accommodates in-circuit programming - this is what jumpers JP1 & 2 are for.  So if you have the proper cabling to connect the programmer to the installed PIC you can skip this step; otherwise program the PIC now before soldering to the PCB.

View all 7 instructions

Enjoy this project?

Share

Discussions

Similar Projects

Does this project spark your interest?

Become a member to follow this project and never miss any updates