Noah Pena
-
Creating The App
08/15/2015 at 22:00 • 0 commentsWith the hardware decided on I looked to making a mobile application to control the different phone functions. Since I was using a Serial Bluetooth device, my app would have to process that data and then call the commands on its own, instead of the bluetooth module having the power to do this.
Features
My goal for this project is to make it so the user can do as many things with their phone without having to look at their phone as possible. The features that I had in mind were:
- Controlling Music
- Making and Receiving Calls
- Handling Texting
This is a large array of features and are among the most common distractions while driving. Before I started implementing these features, there was one big question to answer first...
Android vs iOS vs Windows
Since i'm making a mobile app, I need to decide what systems my app is going to be on .
![]()
Android is pretty easy to get up and running with. You can develop for Android on Windows, Mac, or Linux OS so no problem there. The Android SDK is completely free and you can develop using Eclipse or Android Studio (both are cross-platform). To put your app on the market costs a one time fee of $25 which is not much.
![]()
iOS poses a couple of problems for me. For one the iOS SDK is only allowed for use on a Macintosh computer. I don't have a Mac to use so I already cannot develop for iOS. If I did have a Mac the iOS SDK is free to use, however in order to test on a physical device I would need to pay a licensing fee of $99 per year.
![]()
Windows is fairly easy to get up and running with. To start developing for it, you need Visual Studio (which the community version can be downloaded for free) and the Windows Phone SDK (which is free). Visual Studio is only available for Windows (Visual Studio Code will not work). If you're on Mac you can use BootCamp to run Windows and develop on there. Otherwise you can use VMWare or VirtualBox to run a Virtual Machine and develop using that (which is available for Mac and Linux). To deploy your application on a physical device, you only need to register your device (which is free). However to deploy to the Windows Store you need to apply for a Developer's License. The Individual License is most likely what I would use, which only costs $19, however it also comes with limited features, but thankfully the limited features are more for Business Applications and this project won't utilize any of them. The only problem with Windows Phone Development is that I don't have access to a Windows Phone. I can use the simulator, but I wouldn't be able to physically test it with my device.
There's also a fourth option of using a multi-platform tool like Appcelerator. However this still doesn't solve the problem that I wouldn't be able to test on an iPhone Device since I don't have a Mac computer, and I wouldn't be able to test on a Windows Phone because I don't have access to one.
As a result, I ended up settling with Android.
Controlling Music
With the platform decided, the first feature to implement is being able to control the music. Since i'm using gestures, I want to try and make the gestures as intuitive as possible. The different gestures that are available are UP, DOWN, LEFT, RIGHT, NEAR, and FAR. For controlling the music the different features we want to use are PLAY, RESUME, SKIP, and PREVIOUS.
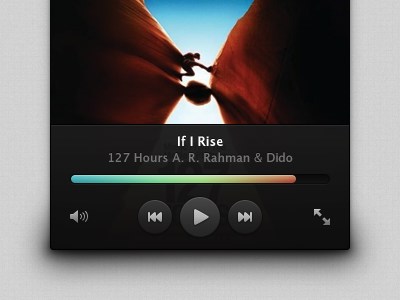
![]()
If we look at a generic music player, we'll see a couple of things that could give us hints as to which gestures we should use. The Skip Button is facing toward the right and the Previous Button is facing toward the left, so it would make sense if these two buttons were mapped to a RIGHT Gesture and a LEFT Gesture. The play button is in the center so any gesture that is in the middle would work out. So our options are UP, DOWN, NEAR, or FAR. I'm not super sure which one to pick so i'll leave that for later.
Another thing to consider is what music we are playing. To play music that is saved onto the device, we can just use the default Music Player, however a lot of people use different music players such as Spotify, iHeartRadio, or Pandora so it would be advantageous to implement one of those as well. I decided to use Spotify because I am most familiar with it. With Spotify there is one other feature that the default Music Player doesn't have, which are Playlists. We would need an gesture to shuffle through the different playlists.
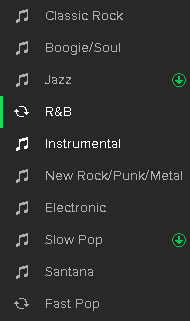
![]()
Looking at the playlists on Spotify, they're layed out in a vertical order, so switching between playlists would make sense with either an UP Gesture or a DOWN Gesture. That leaves the NEAR or FAR Gestures for the Pause/Resume actions. I did a little bit of testing with the FAR gesture and it is a little inaccurate. Sometimes if your hand goes back and pass through it the sensor will think you meant a FAR gesture. So the NEAR gesture seems the best for Resume/Play action. With the UP and DOWN Gestures we can use these to go to the next playlist or the previous playlist in Spotify.
These actions are very generic so if later I needed to implement iHeartRadio or Pandora I could easily do it. All I would need to do is update the app.
Making and Receiving Calls
Receiving phone calls is actually pretty easy. The only actions we need to handle are:
- Accepting a call
- Declining a call
- and Ending a call
Declining and Ending a call are actually handled the same way, so we really only need two gestures to handle this.
![]() Looking at the incoming phone call screen, we can see the user has to move the middle button either left or right to decline or accept the call, so using the same gestures would be very intuitive. We are already using these gestures, but the user won't be listening to music while they're on the phone (hopefully!) so these gestures are essentially available!
Looking at the incoming phone call screen, we can see the user has to move the middle button either left or right to decline or accept the call, so using the same gestures would be very intuitive. We are already using these gestures, but the user won't be listening to music while they're on the phone (hopefully!) so these gestures are essentially available!Making a phone call is much more complicated. The user would do a gesture, and then need a way to call a person from their contacts. One way we can do this is to use Speech to Text and make the user say which user they want to call. A couple problems arise from using this method though:
- Speech to Text could not be able to translate what the user said
- If there are contacts with the same name how can the app distinguish which person to call
The first problem can be solved if the user messes up, then just prompt the user again. The second one we would need to prompt the user again saying that there are multiple entries and tell the user the names of each entry. Then the user could use Speech to Text again to call the correct user.
As far as the gestures go, we can use the same gestures for the phone call as we did for recieving a phone call, but we need a new gesture for being able to call a user. Since the user could make a phone call at any time the only have the inaccurate FAR Gesture. In order to add in this feature, we need to forgo a gesture from one of the music functionalities. Looking at the features we absolutely need Resume/Play, Skip Track, and Previous Track, so that leaves us with changing playlists with UP and DOWN Gestures. Looking at it, the user will probably only have a few playlists so having the ability to navigate backwards and fowards is not a huge necessity. I chose to use the DOWN Gesture for this.
After testing, I noticed that the DOWN Gesture is very easy to accidently do in the car because are arms tend to move down. What I ended up doing was making the user do the DOWN gesture twice in order to intiate the Speech to Text prompt. With this, its much more reliable and the user won't accidently trigger the prompt.
Handling Texting
The last thing to do was to add texting functionality. I had a hard time trying to figure out how to implement texting functionality so I looked at some other devices that implemented this feature for ideas. These devices either use Text to Speech and Speech to Text for handling text messages or display the text message on a screen in the car. The idea of my project is to make it so the user doesn't have to look at a screen so that's out. I tried using a device that used Text to Speech and Speech to Text for handling text messages and it just didn't work that well. Reading a text message was fine, but Speech to Text for an entire text message rarely worked out how the user wanted it to. I decided to hold off handling texting for later since I didn't have a great way of implementing it.
-
Connecting To The Phone
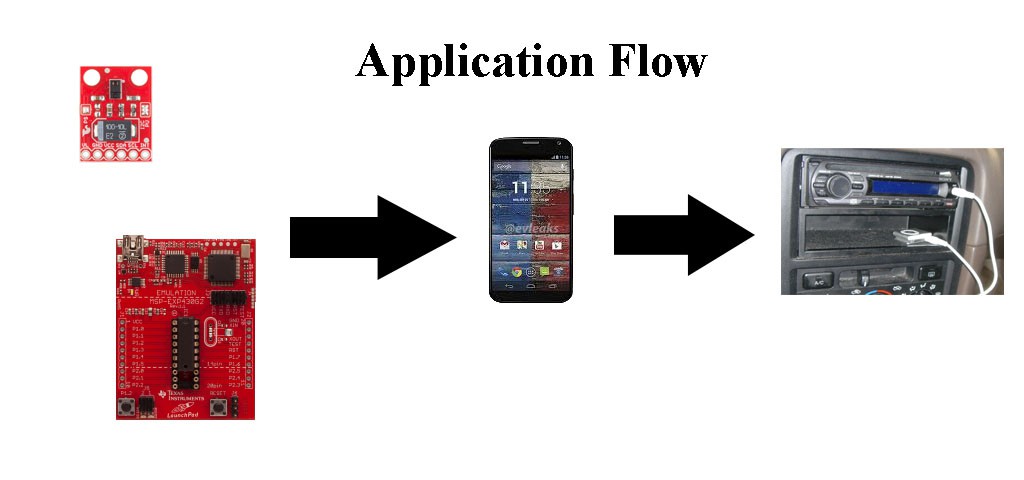
06/28/2015 at 21:06 • 0 commentsWith the choice of microcontroller all figured out, I needed a way to connect the user's phone to my device. The idea was that the user's phone would connect to the MSP430 + APDS-9960 and then would send different commands to control the phone and music on the user's phone. From there the user would hear their music or phone call through the auxilary cord in their car.
![]()
USB
My first idea at making this work was to send the commands through the phone's USB port. This way the user doesn't have to download an app on their phone for the device to work. However this proved to be very difficult. The MSP430 doesn't have a hardware USB protocol on the chip so USB would have to be bit-banged. Even if the MSP430 did have a hardware USB or I could big-bang the protocol, sending commands through USB proved to be a non-trivial task, even on a desktop computer. I figured this would be too much trouble than it would be worth.
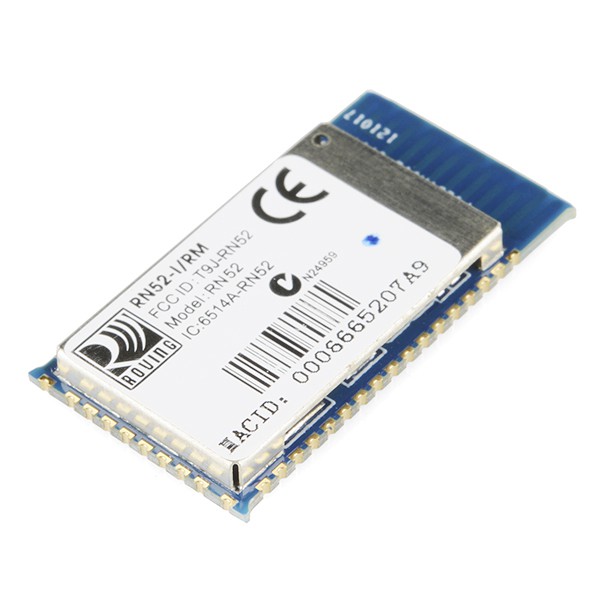
Media BluetoothI then turned to using Bluetooth to send commands to the phone. I didn't know much about bluetooth so I had to look up if there was a way to send media commands to the phone such as Answer Call, Decline Call, Pause Music, Skip Track, etc. It turns out there is. The proflie in particular is called Advanced Audio Distribution Profile (A2DP). I looked up a couple of Bluetooth modules that support this profile however, they all seemed to expensive for this application. The MSP430G2553 is $0.70 and the APDS-9960 Module is $15 so the current cost of the device is around $15.70. A particular bluetooth module I was interested in was the RN-52:
![]()
This module cost $25 on Sparkfun which was more than my device cost already! Other stores had similar prices for this module and others that were similar to it, so I decided to look for another solution.
Serial Bluetooth
With media bluetooth profiles costing too much for this project I decided to look at another bluetooth profile to send data to the user's phone. In particular I thought of using a Serial Port Profile (SPP). This profile is very simple as it essentially imitates an RS-232 cable. I originally thought that perhaps I could send different AT Commands to control different functions on the phone, however I quickly learned that you would need to write an app in order to make that possible. I really didn't want to have the user download an app (nor did I really want to write one), but I found that Serial Bluetooth Modules were much cheaper. The two that I came across were the
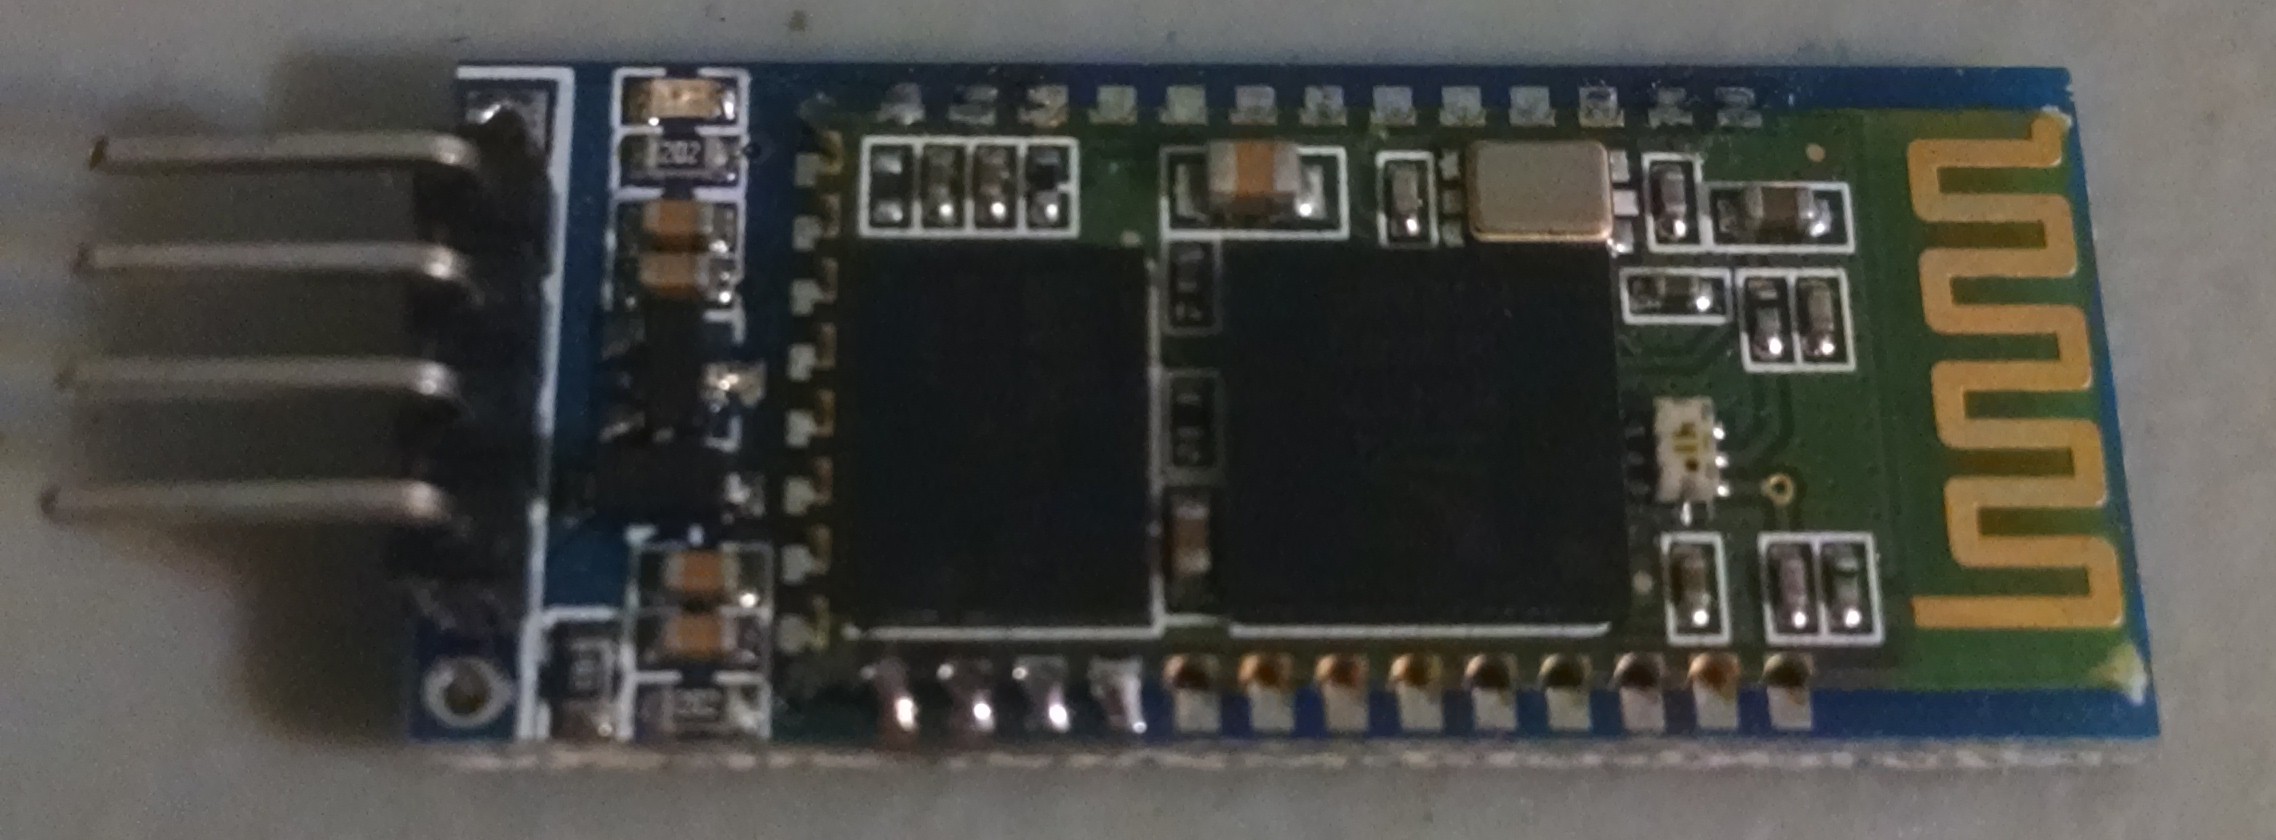
HC-05:
![]()
and the HC-06:
![]()
If you think these two modules look exactly the same, then you're right because they are the same! The only difference between them is the firmware that is loaded onto them. The HC-05 is able to act as a Bluetooth Master Device and a Slave Device, while the HC-06 is only able to act as a Slave Device. This means that the HC-05 can connect to multiple devices and send and receive data to multiple devices, while the HC-06 is only able to connect to one Master and send and receive with only the master. For this project we only need the device to send data to the phone so either devices work for this case. I ultimately decided to use the HC-06 for this project because it is typically cheaper than the HC-05 (not by much, but still on average, cheaper).
Since I am using a Serial Port Profile bluetooth device, I need to create an app which will relay the different gestures to commands on the phone... Which will be in the next project log!
-
Which Microcontroller?
06/02/2015 at 06:40 • 0 commentsEstimating Requirements
In order to make this device possible, we need a micrcontroller to control the Gesture Sensor and Bluetooth Module. The Gesture Sensor uses I2C protocol with an extra pin needed as in Interrupt Pin. The Bluetooth Module uses UART to send and receive data which takes two pins, but we only ever need to send data to the phone so only one pin is needed (TX). Overall that is 5 pins that are needed. Both of these devices run off 3.3V so a microcontroller that can supply 3.3V is needed. The device would also be on for long periods of time so the device would need to run off of a battery.
Our requirements for our micrcontroller look something like this:
- 3.3V Operation
- At least 5 pins
- Supports I2C and UART
- Small form factor
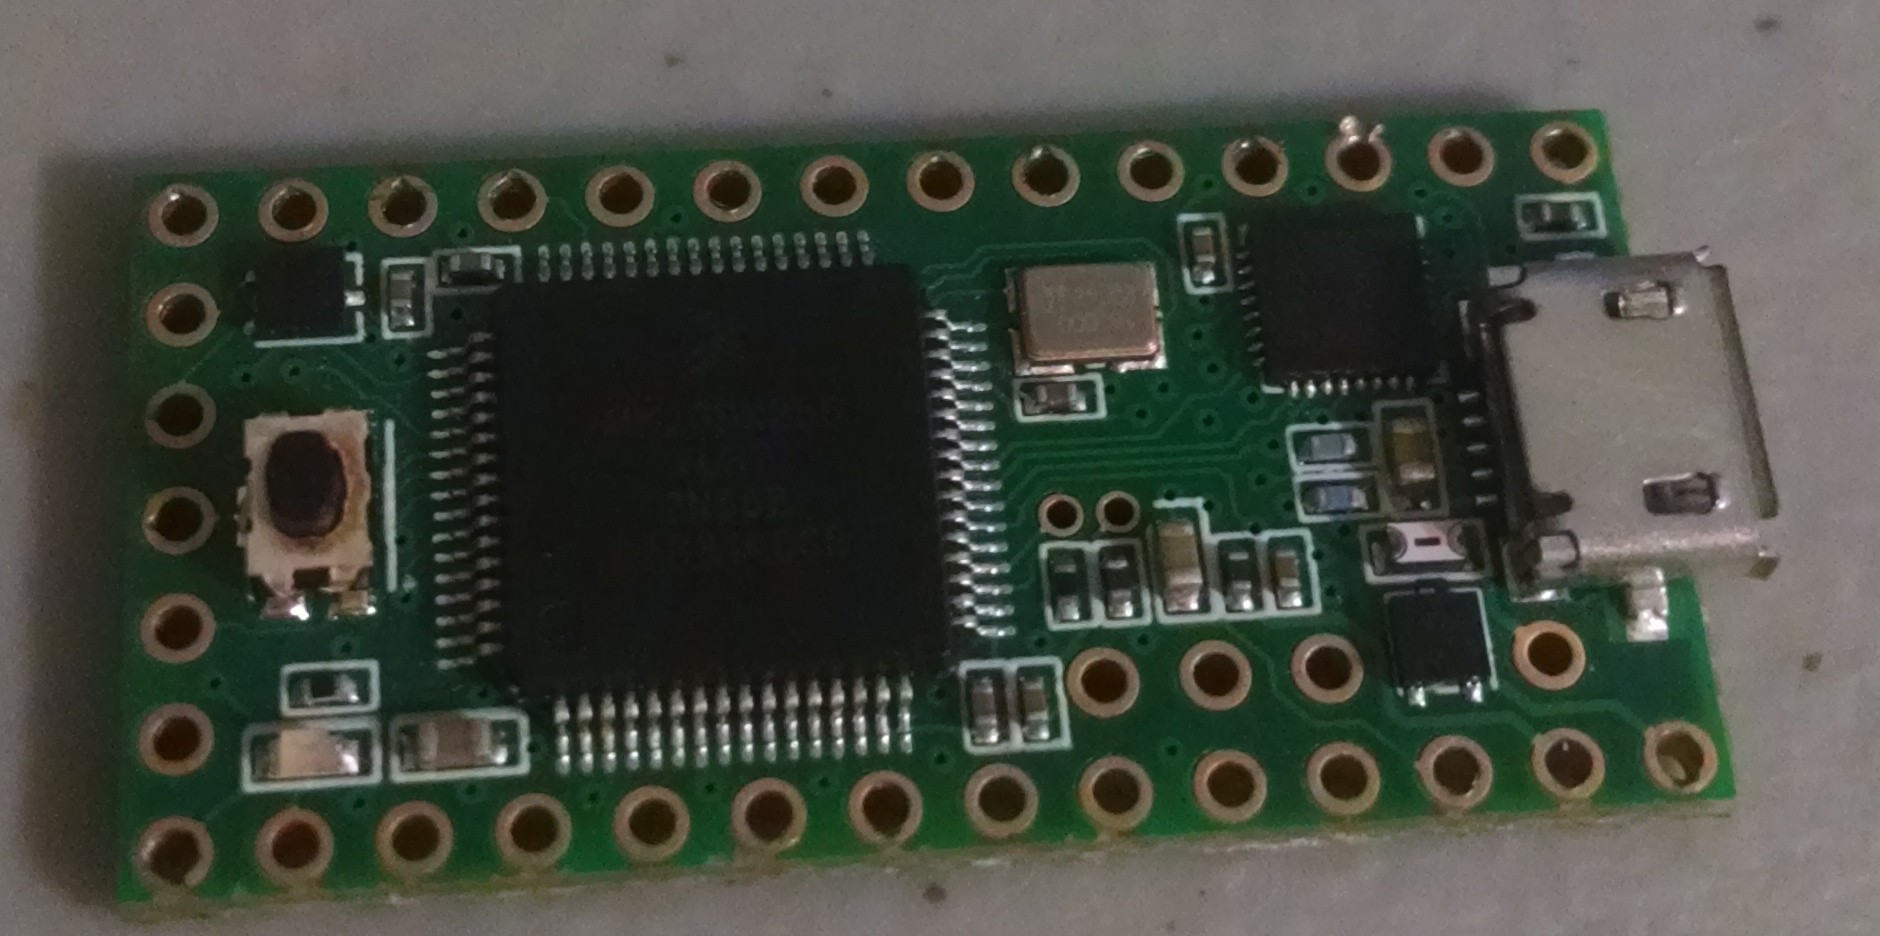
The first microcontroller that fit all of those requirements was the Teensy 3.1
Teensy 3.1
![]()
The Teensy 3.1's statistics can be found on the PJRC webpage for the Teensy 3.1 : https://www.pjrc.com/teensy/teensy31.html
The Teensy 3.1 fits all of the requirements of this project so I decided to use the Teensy 3.1 as my microcontroller of choice.
Since the Bluetooth Module uses UART I was able to use the "Serial" Library provided in the Arduino Library. For the Gesture Sensor, I used Sparkfun's APDS-9960 LIbrary: https://github.com/sparkfun/SparkFun_APDS-9960_Sensor_Arduino_Library/tree/V_1.4.1
I used the "Gesture Test" Example and the code worked like a charm! I was able to receive the different gestures to my phone via Bluetooth! However, the Teensy 3.1's cost lead me to search for other microcontrollers. Although I was able to prove that my project is able to operate how I expected it to.
ATTiny85V
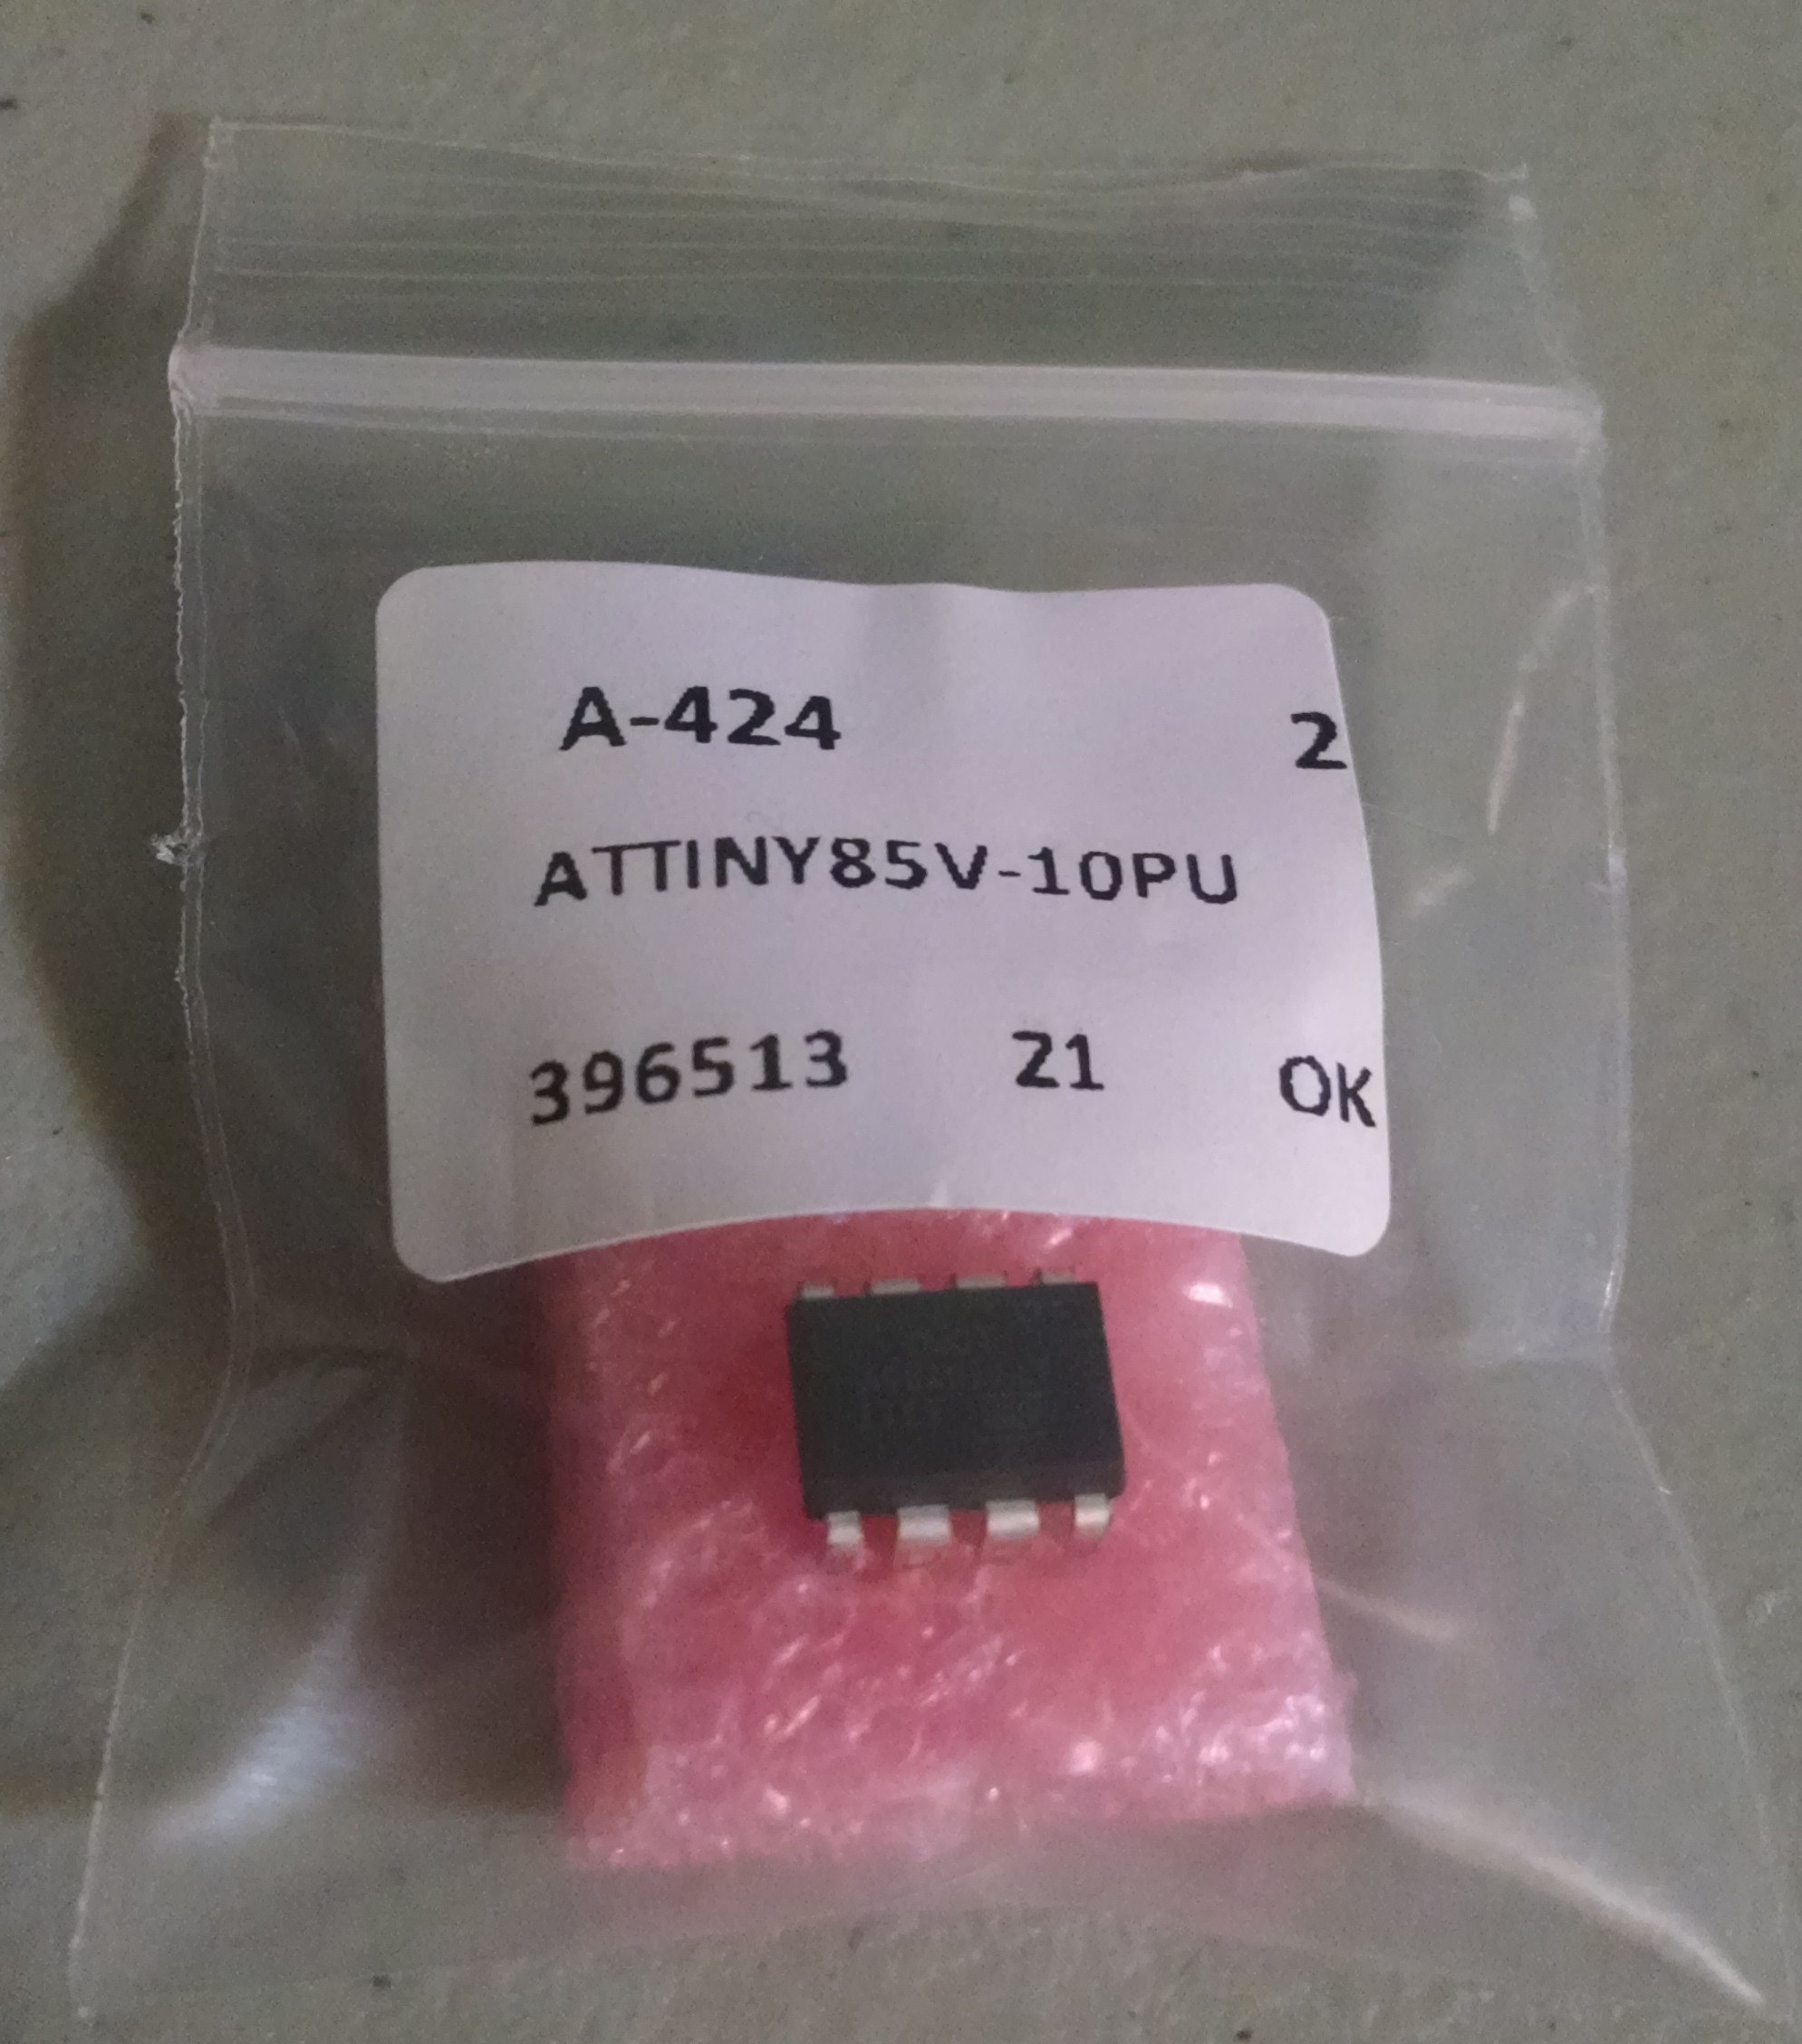
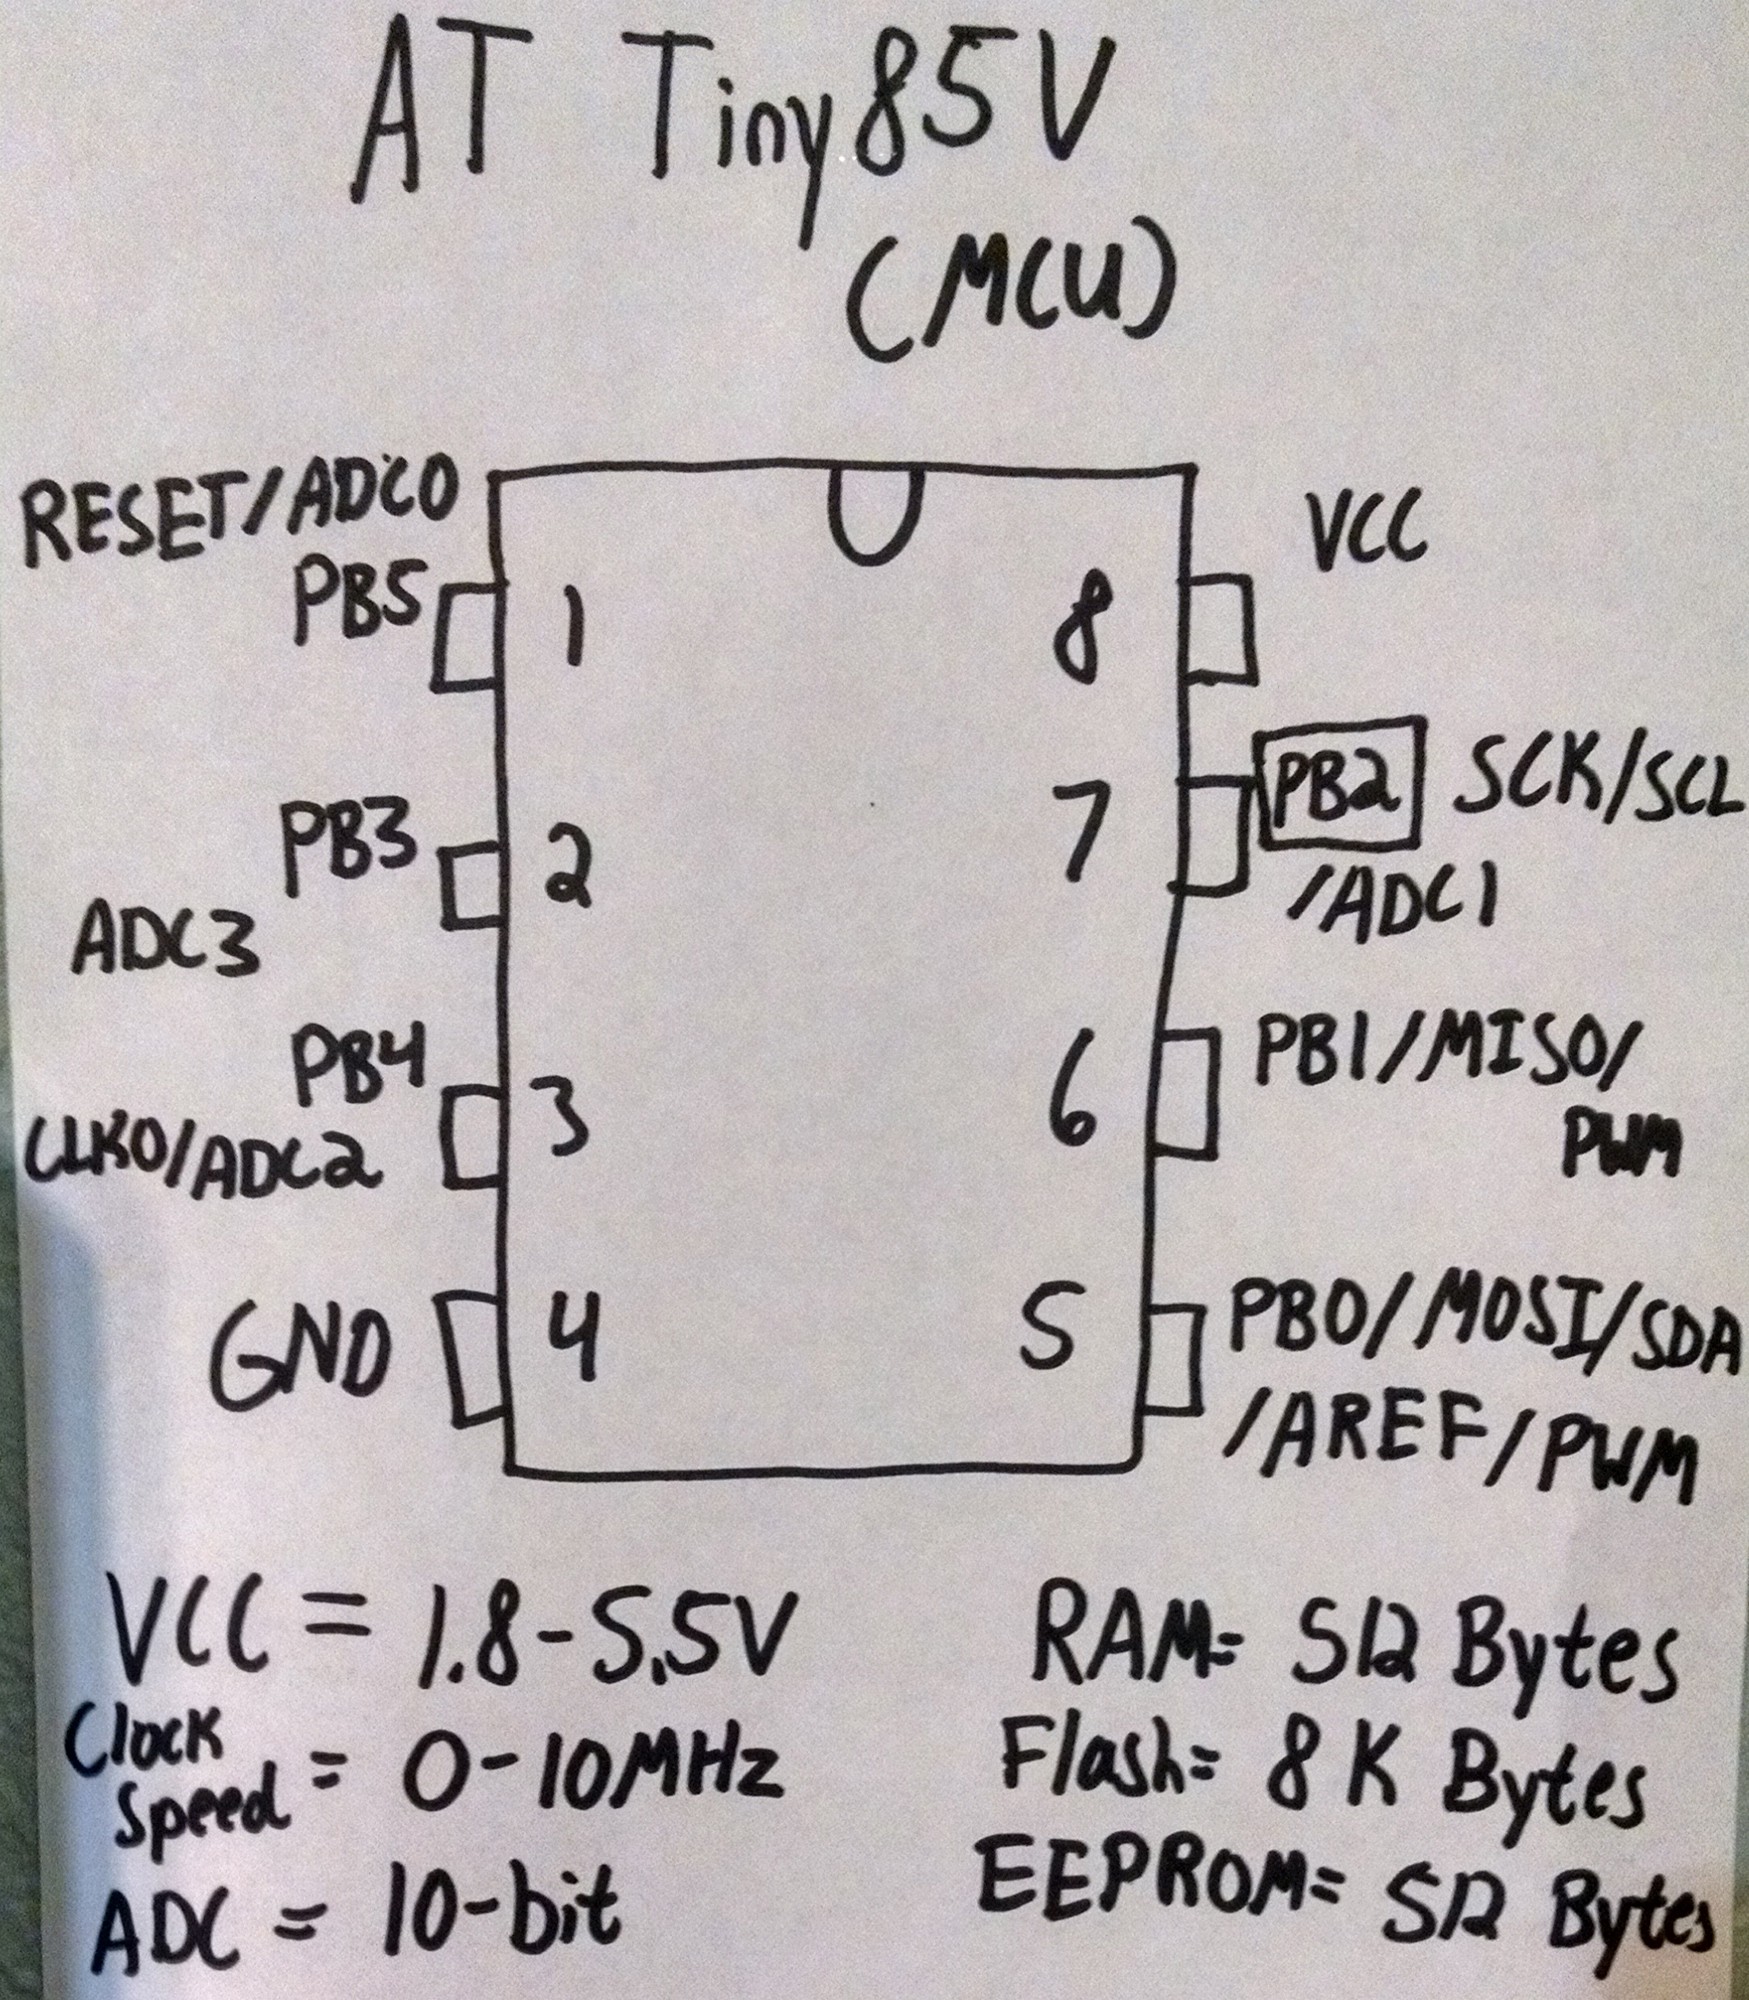
With the Teensy 3.1 costing too much, I decided to look for microcontroller's with minimal requirements. The Teensy 3.1 boasts 256kB of Flash and 64kB of RAM, however my device didn't need that much Flash or RAM, so essentially the cost for the extra Flash and RAM is waisted. Because of this I stumbled upon the ATTiny85V
The ATTiny85V is an 8 pin IC and costs a lot less than the Teensy 3.1. However that cost also means lower specifications![]()
While the specs on the ATTiny85V on much lower than that of the Teensy3.1, we don't need a very powerful microcontroller for this device so the ATTiny85V should do the job.![]()
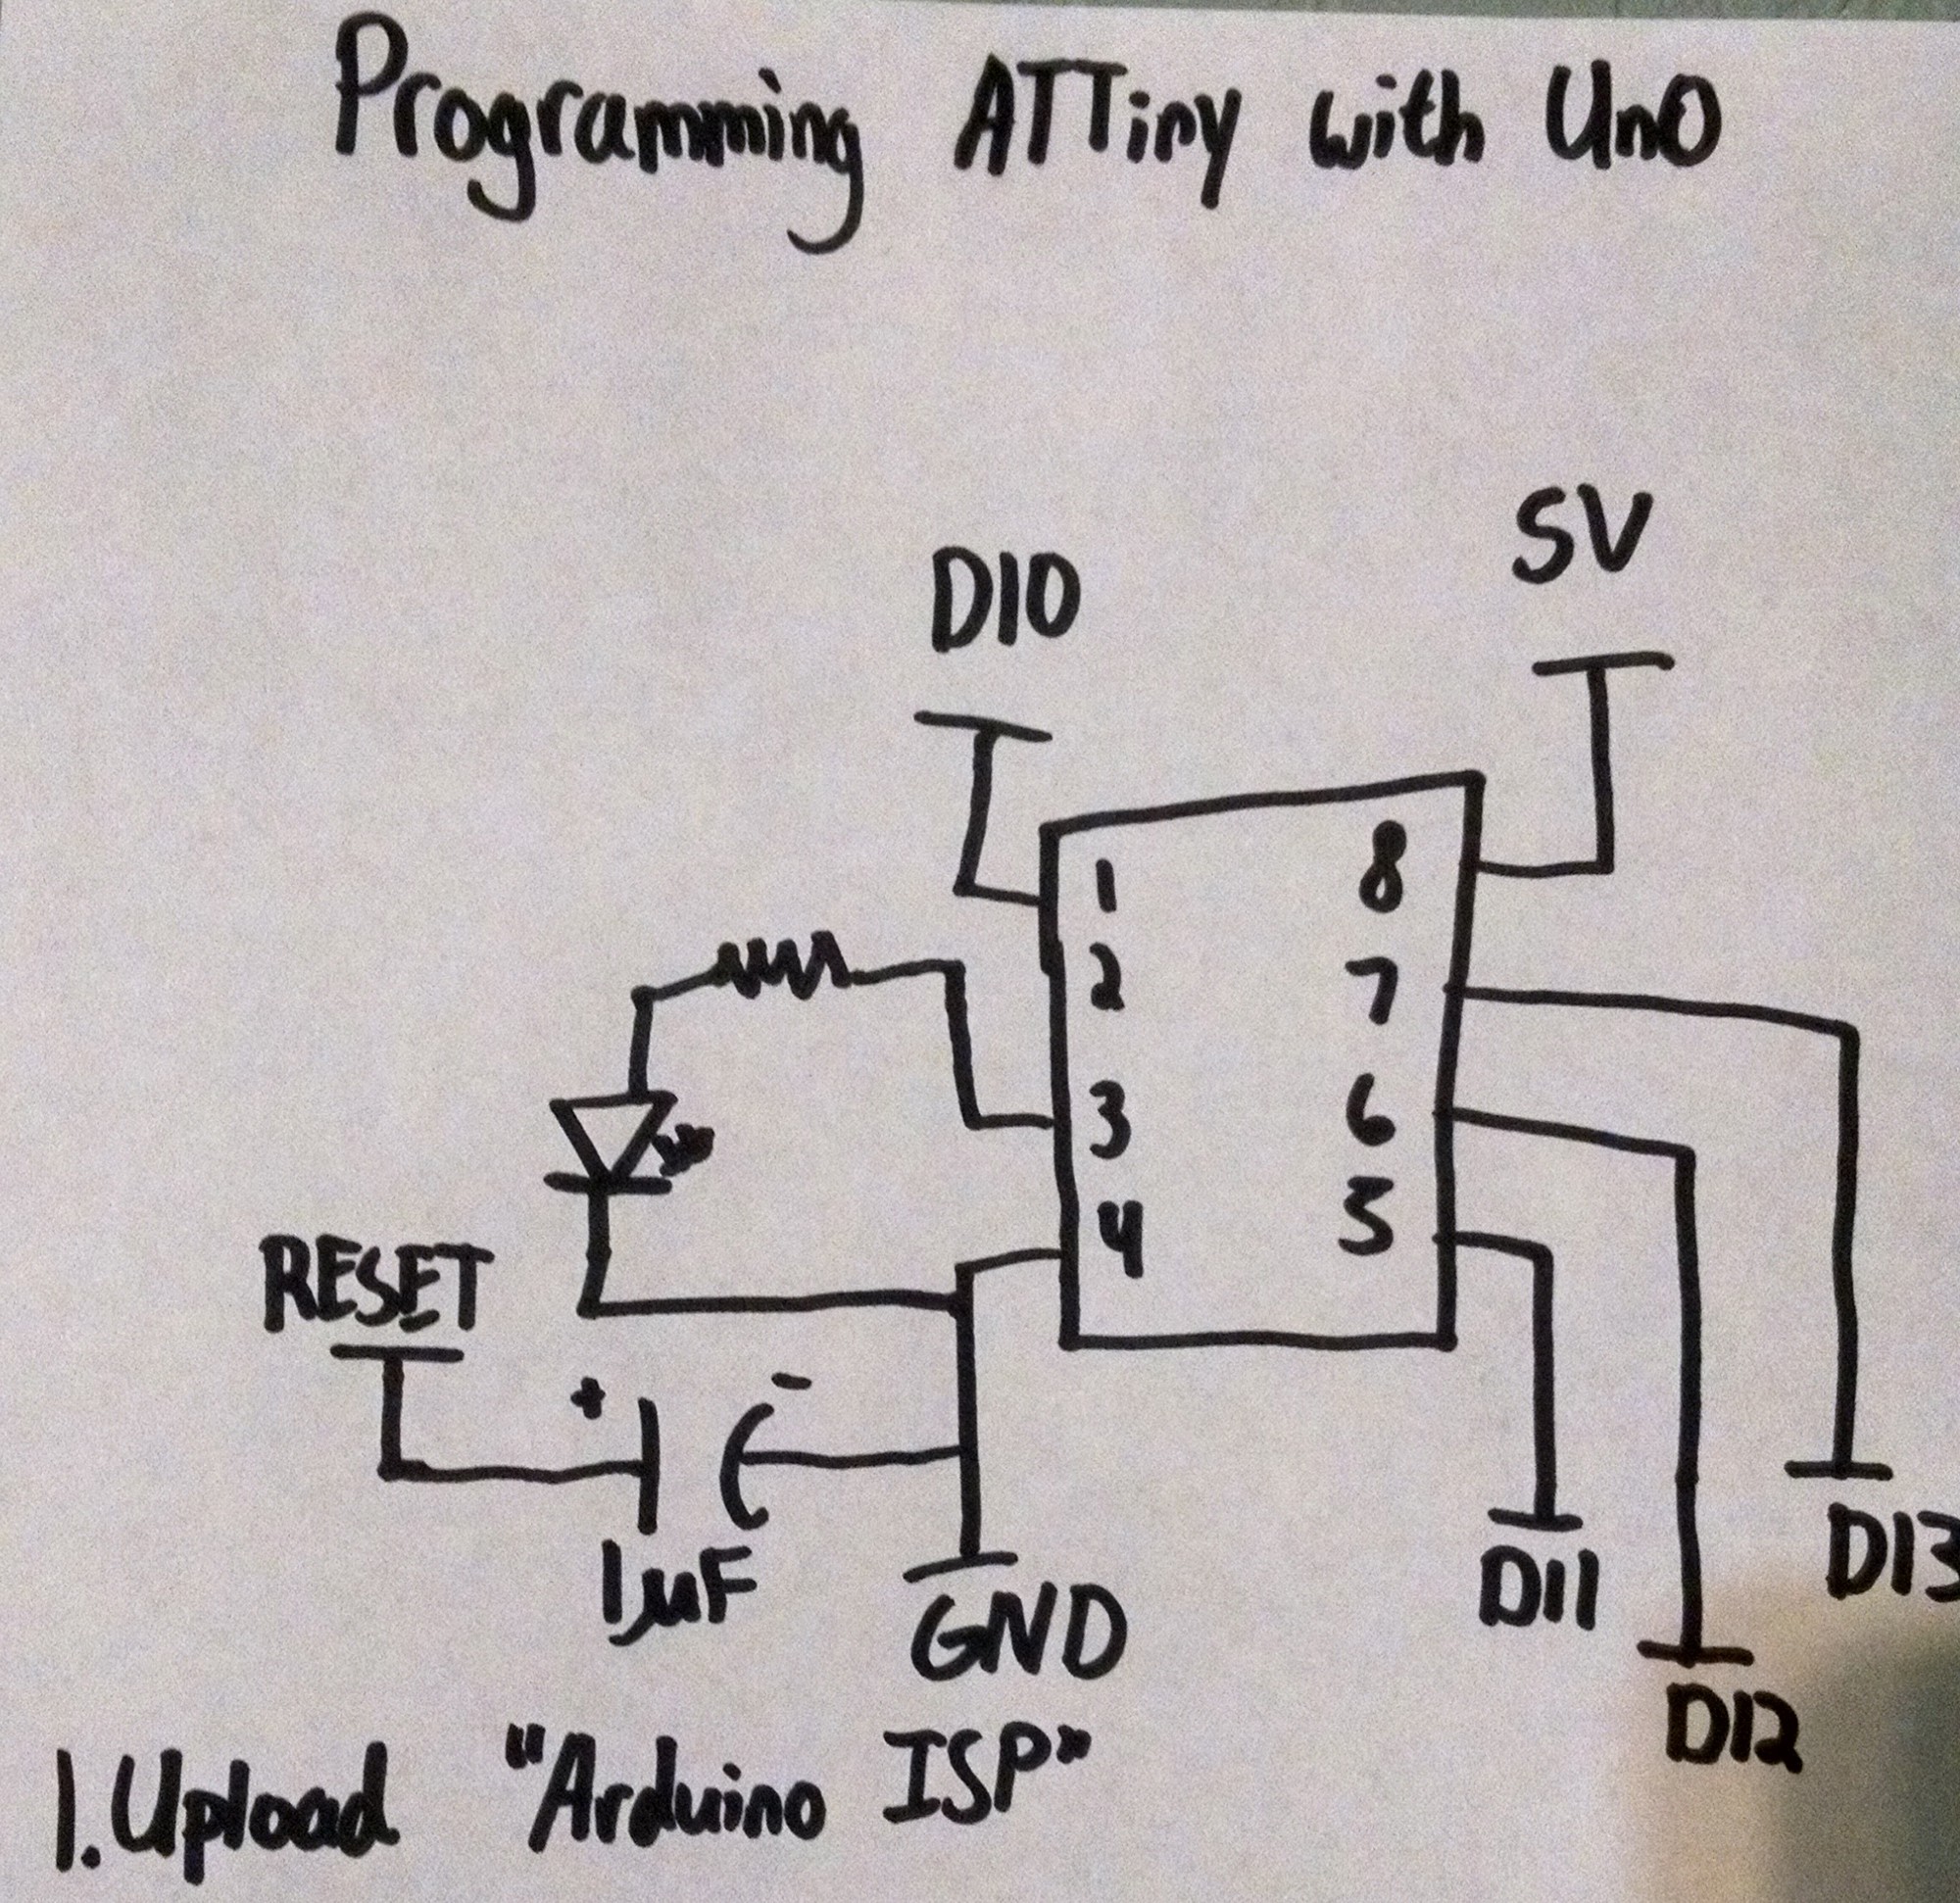
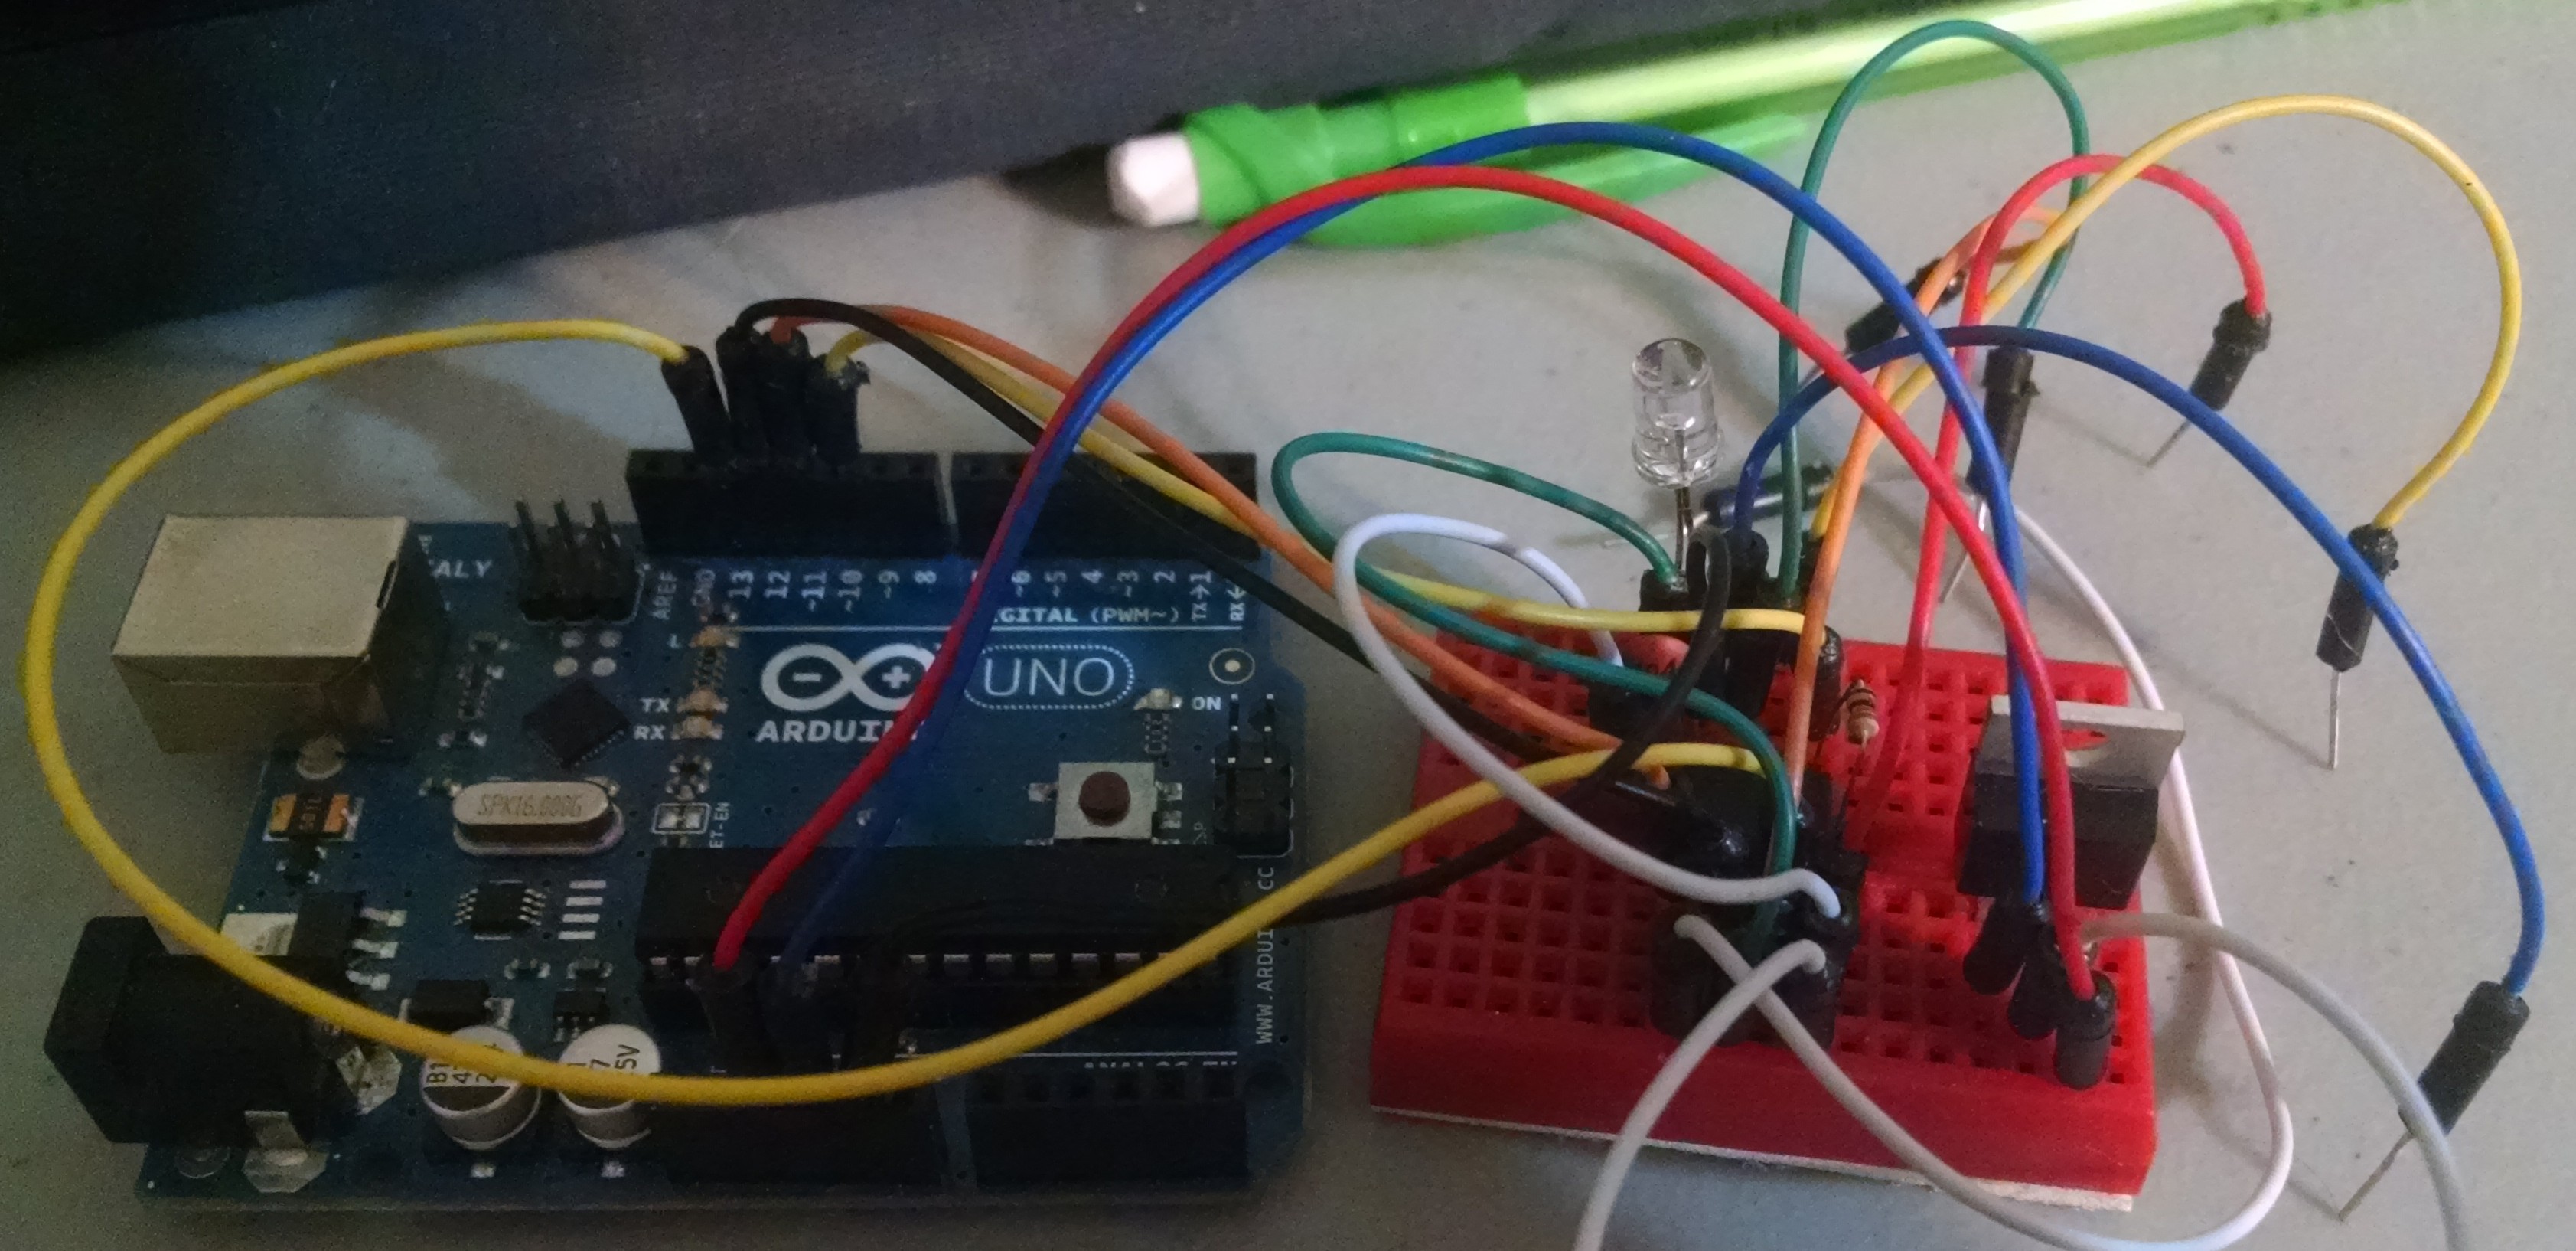
In order to program the ATTiny85V we can use an Arduino Uno to act as a programmer so that we can upload code to the ATTiny85V. I set up the two microcontrollers like this:
![]()
![]()
However, a couple of problems arose when using the ATTiny85V as the microcontroller of choice.
The first problem was that the ATTiny85V actually didn't have a hardware I2C or UART. Instead, the ATTiny85V uses USI (Universial Serial Interface) to emulate I2C or UART. This means we can't use the default library for I2C and UART. For UART I used Arduino's "SoftwareSerial" Library which left the USI open for use as an I2C bus. For I2C I used Adafruit's "TinyWireM" Library: https://github.com/adafruit/TinyWireM
The second problem was that the APDS-9960 Library was only meant to be used with the Wire Library, however the ATTiny85V does not support the Wire Library. To solve this, I rewrote the APDS-9960 Library using the TinyWireM Library. The only parts that really needed to be changed with the Init, and Wire member functions. Once I did this, the library compiled.
The third problem was that the TinyWireM + APDS-9960 + SoftwareSerial Libraries required more than the ATTiny85V's 8kB of Flash. In order to solve this, I deleted all of the RX parts of the SoftwareSerial Library since I am only using the TX pin. This was fortunately enough and the size of all of these libraries together was around 7kB.
The final problem was that the microcontroller would restart in the middle of trying to guess a gesture. I first started to solve this problem by modifying the APDS-9960 Library to use the Modified SoftwareSerial Library in order to debug the program. From there I saw that the FIFO would start to fill up, but then eventually restart the entire program from the beginning. I then used the AvailableMemory Library: http://playground.arduino.cc/Code/AvailableMemory to determine how much RAM I had left at the point the program resets. However, I got varying results with the most common values being 32 Bytes left and -27 Bytes left. I determind the problem for this could have been due to the ATTiny85V running out of RAM and then restarting the program. I then tried reducing the size of the FIFO in the program, but the program would hang a lot and when the gesture would be picked, it would always pick "NONE". I unfortunately couldn't find a solution to this so I looked into another micocontroller.
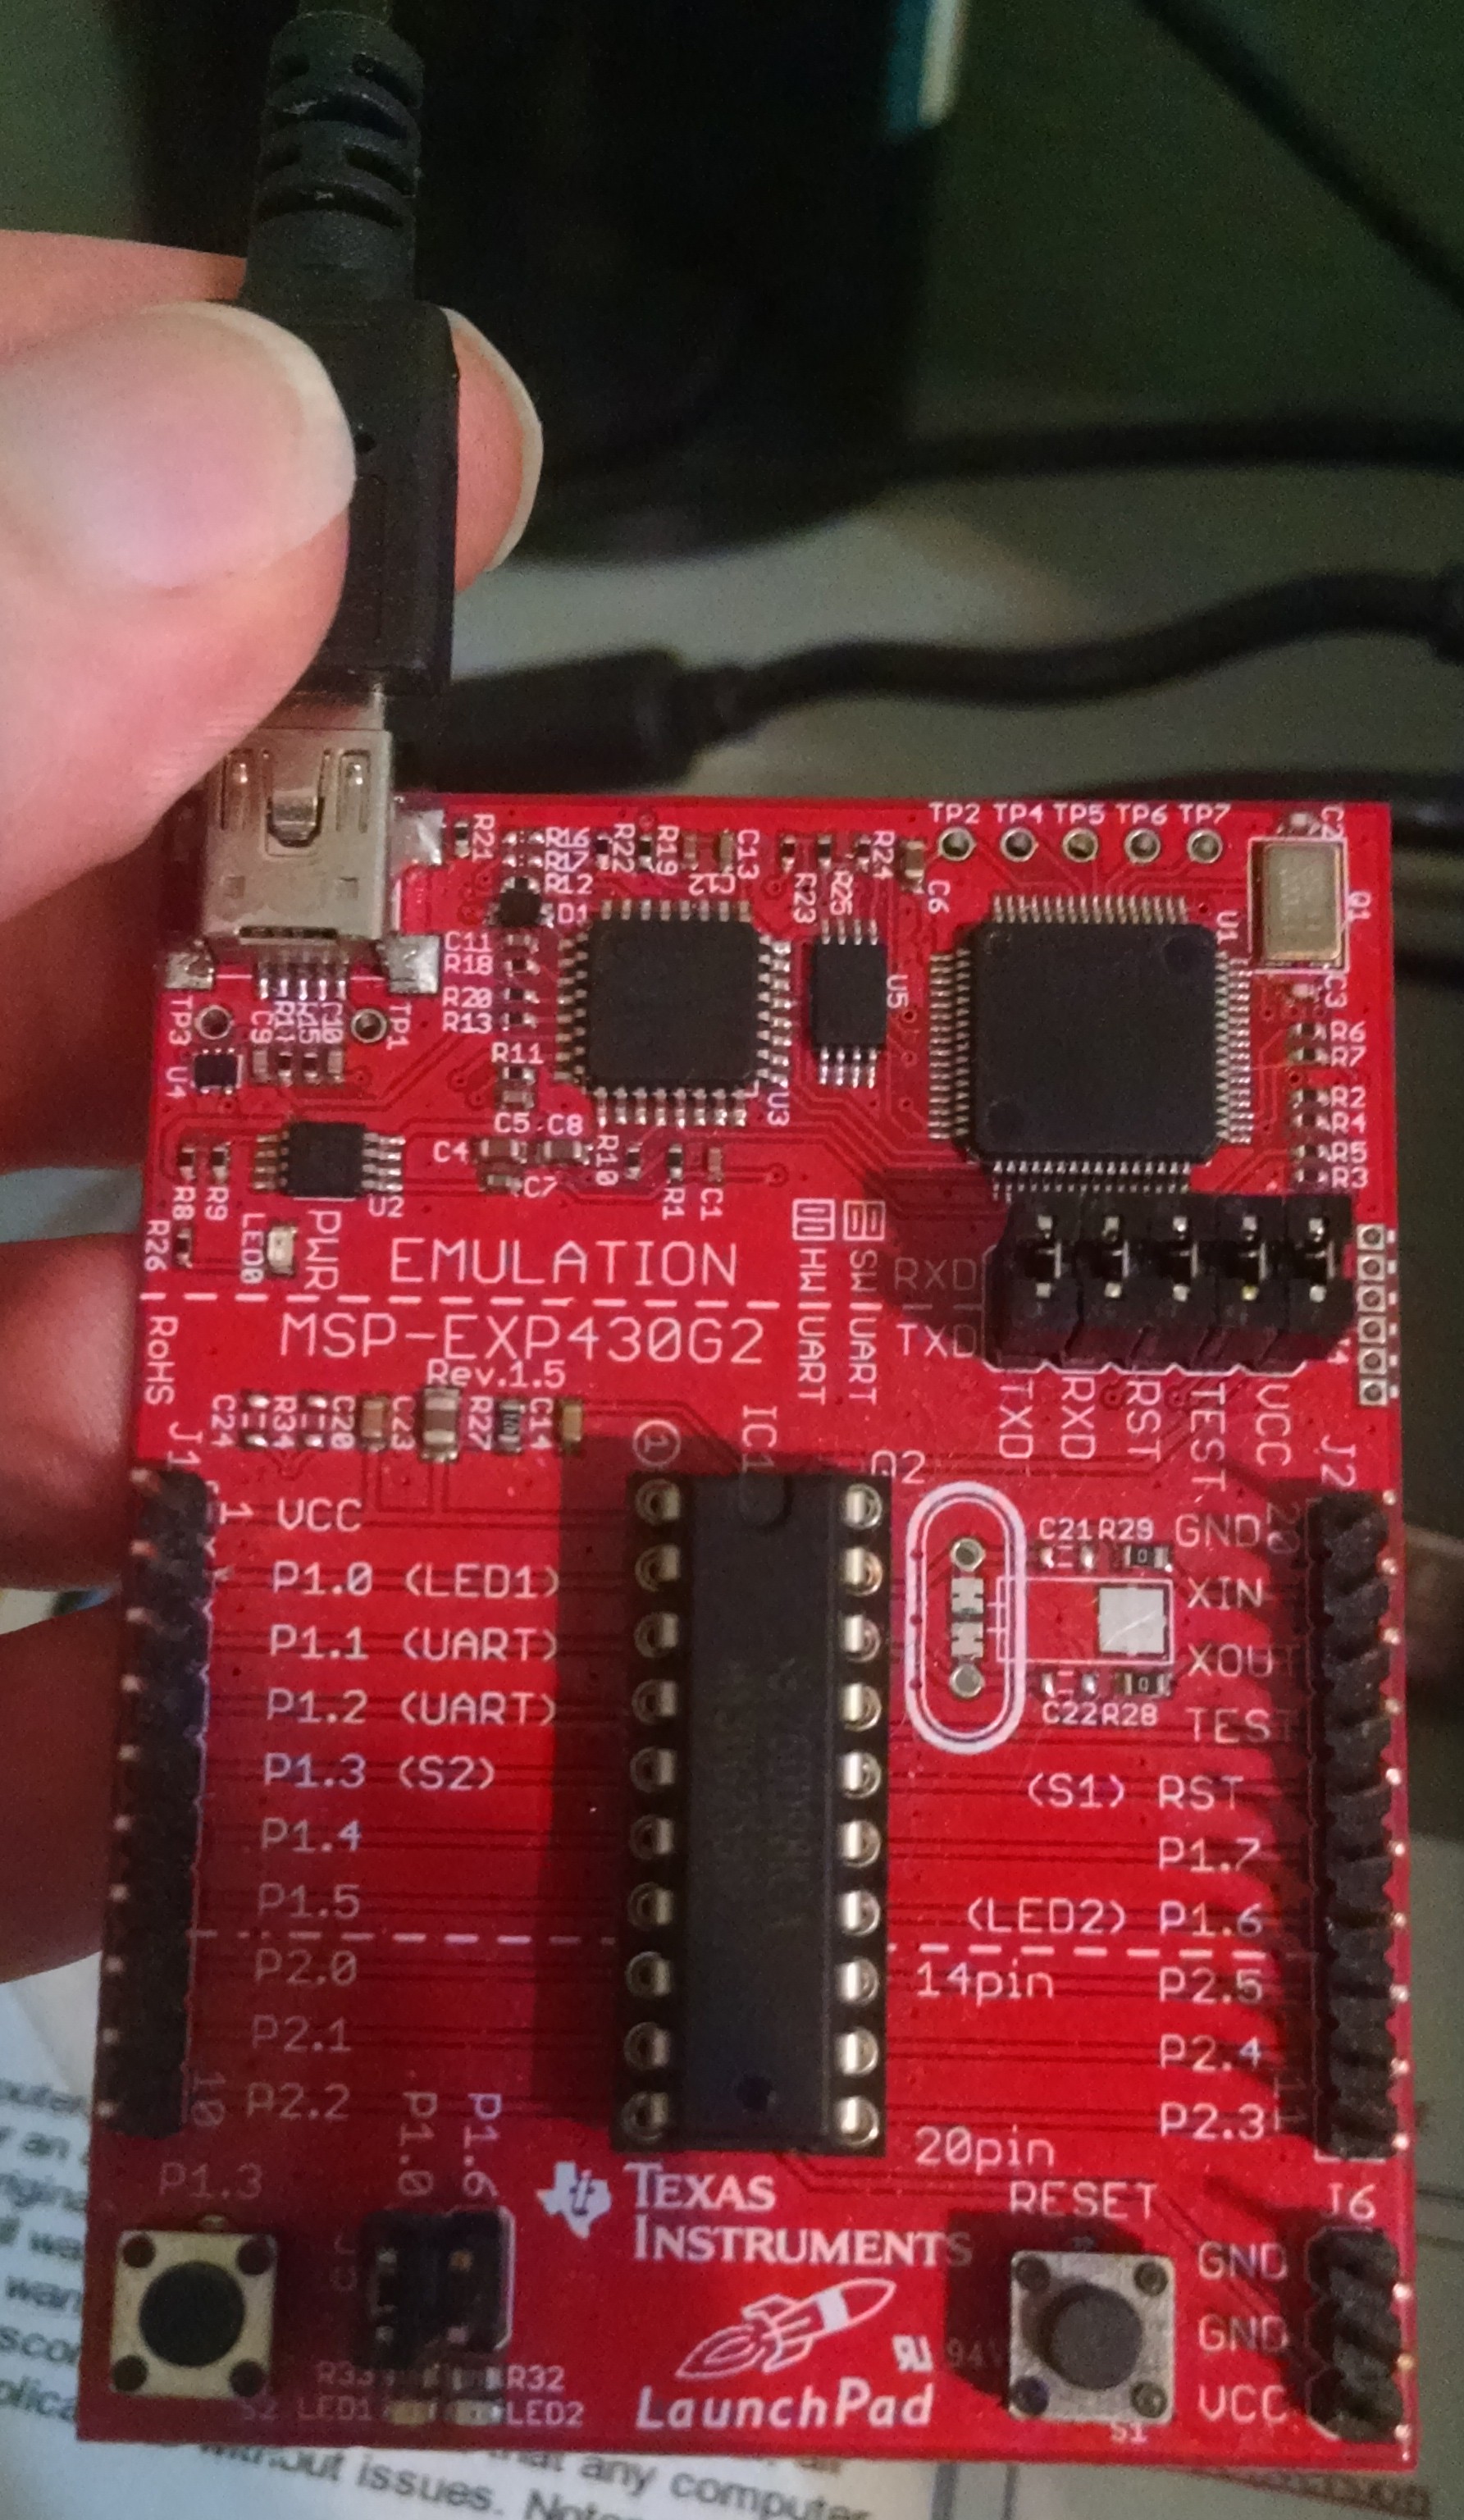
MSP430G2553
With the ATTiny85V lacking a true hardware I2C and UART module, I looked to a device with around the same specifications and cost, but with on board I2C and UART. What I ended up with is the MSP430G2553.
![]()
The MSP430G2553 boasts 16kB of Flash and 512 Bytes of RAM as well as an onboard hardware I2C and UART interface. As a bonus it also has a lot of low power options which make it great to run off of battery. All of these specifications make it perfect for my device.
Setting up the UART interface was easy enough, however I ran into trouble trying to find examples using the I2C interface. Most examples online were for the MSP430G2542 which had half the amount of ram available and did not have a hardware UART. The examples from Texas Instruments only showed how to use I2C in one way only. Either Receiving or Sending, never both in the same program. To alleviate this I looked into the Energia Platform and was able to get the code up and running from there. I had originally thought of just using their Wire Library for I2C use alongside my already existing UART code, but I decided to just migrate over to Energia. Since Energia is based off of the Arduino Platform I was able to use Sparkfun's APDS-9960 Library without having to modify anything.
Due to this I deemed the MSP430G2553 my microcontroller of choice for this project!
-
Beginnings
06/02/2015 at 04:03 • 0 commentsMy idea for this project began when I started playing around with the APDS9960
![]()
The APDS9960 is a RGB Color/Gesture Sensor. It supports 6 built in gestures and I thought it would be perfect for some sort of user accessability project. I eventually thought of using it in the car to change the music without having to press a button or look at your phone, and I started to expand on that idea until on got this project idea. The APDS9960 module i'm using is a breakout board from Sparkfun : https://www.sparkfun.com/products/12787
However I needed a way to connect to the user's phone in order to handle their music program and so I decided on using bluetooth to connect with the user's phone. Bluetooth modules aren't terribly expensive and are (for the most part) easy to use. I decided on the HC-06 Serial Bluetooth module because of its cost.
![]()
Hands Free Phone Accessability
A device + app that allows you to access features of your phone while driving, without taking your eyes off the road.
 Looking at the incoming phone call screen, we can see the user has to move the middle button either left or right to decline or accept the call, so using the same gestures would be very intuitive. We are already using these gestures, but the user won't be listening to music while they're on the phone (hopefully!) so these gestures are essentially available!