-
The Way Forward?
01/29/2016 at 12:46 • 2 commentsA lot has happened in the recent time for the hobbyist community, and I'm currently wondering where I want to take this project. Here's some random rambling on the subject, just to clear it out of my head.
- A Raspberry Pi Zero was released, and it's small and cheap enough to fit in Tote and provide some more advanced features, like a Python interpreter and possibly w WiFi camera. I forked #Tote Zero to explore that possibility, but it does makes things more complicated. An operating system, the need to shut it down cleanly, the need to keep it updated and properly configured, is a pain. Not to mention the booting time. Powering the Raspberry Pi is also much more involved than with Arduino -- I have to use a 2S battery, which needs a professional charger with balancing.
- Batteries. While it's easy to get a LiPo battery from an old cellphone or similar device, and there are lots of LiPo batteries available in shops for all those quadcopters, the technology is kinda tricky. They are not as safe as I would like, and you can damage them by over-discharging, so I need the voltage monitoring circuitry. Switching to standard NiCd or NiMH rechargeable AAA batteries seems like a good alternative. They are much heavier, but Tote can handle that. I will do some experiments in the near future.
- TV remote. This is the easiest and cheapest way to get remote control, so that's why I used it, but now I'm beginning to have my doubts. It turns Tote into a toy and discourages tinkering. It also requires some work if you have a different remote than mine -- you have to change all the key codes. And it's not really that great for precise control. On the other hand, bluetooth and WiFi both have some great solutions.
- Sensors. This is another thing that keeps Tote in the remote-controlled toy category. It needs to have more sensors by default. I have already found switches for the feet, and probably will make that standard. Unfortunately the popular and cheap distance sensors out there all require 5V to work properly, and the 3.3V versions are much more expensive, so I think I can't have them by default. Same for inertial sensors -- a good module with proper filtering simply costs too much.
- Micropython. I've tried multiple times to make Tote programmable in Python, and all of them turned to be sub-optimal -- either too expensive or too limiting. But there is a good chance that the ESP8266 port of Micropython will become much more usable, thanks to the Kickstarter campaign to fund its development. I'm still not sure there will be enough memory to handle everything I want, but it's certainly very exciting for me. Since the ESP8266 only has about 9 usable GPIO pins on it, and I need to control 12 servos, I would probably still keep the Arduino and offload the leg inverse kinematics calculations to it. I'm torn between this and the Pi Zero.
- Force feedback and compliant motion. This is a very interesting topic, and it makes the robot much more interesting, but with the current design I simply don't have enough analog pins, and their precision is also not so great. Thinking about adding some external ADC modules over I²C -- they are not very expensive. Then I would need to decide whether to measure the servo position (easy, not that useful) or the force (hacky, hard, much more interesting).
- Community. Right now I know about about 4 people other than me that have built a robot more or less inspired by Tote. As far as I know they do not communicate with each other and do not share experiences or ideas. I suppose I could do a lot better in this area.
- Open MV. I should get it in a few weeks, and I'm definitely going to try and put it on Tote or any of my other robots. But it's too expensive to be a default.
-
Another Tote in the Wild
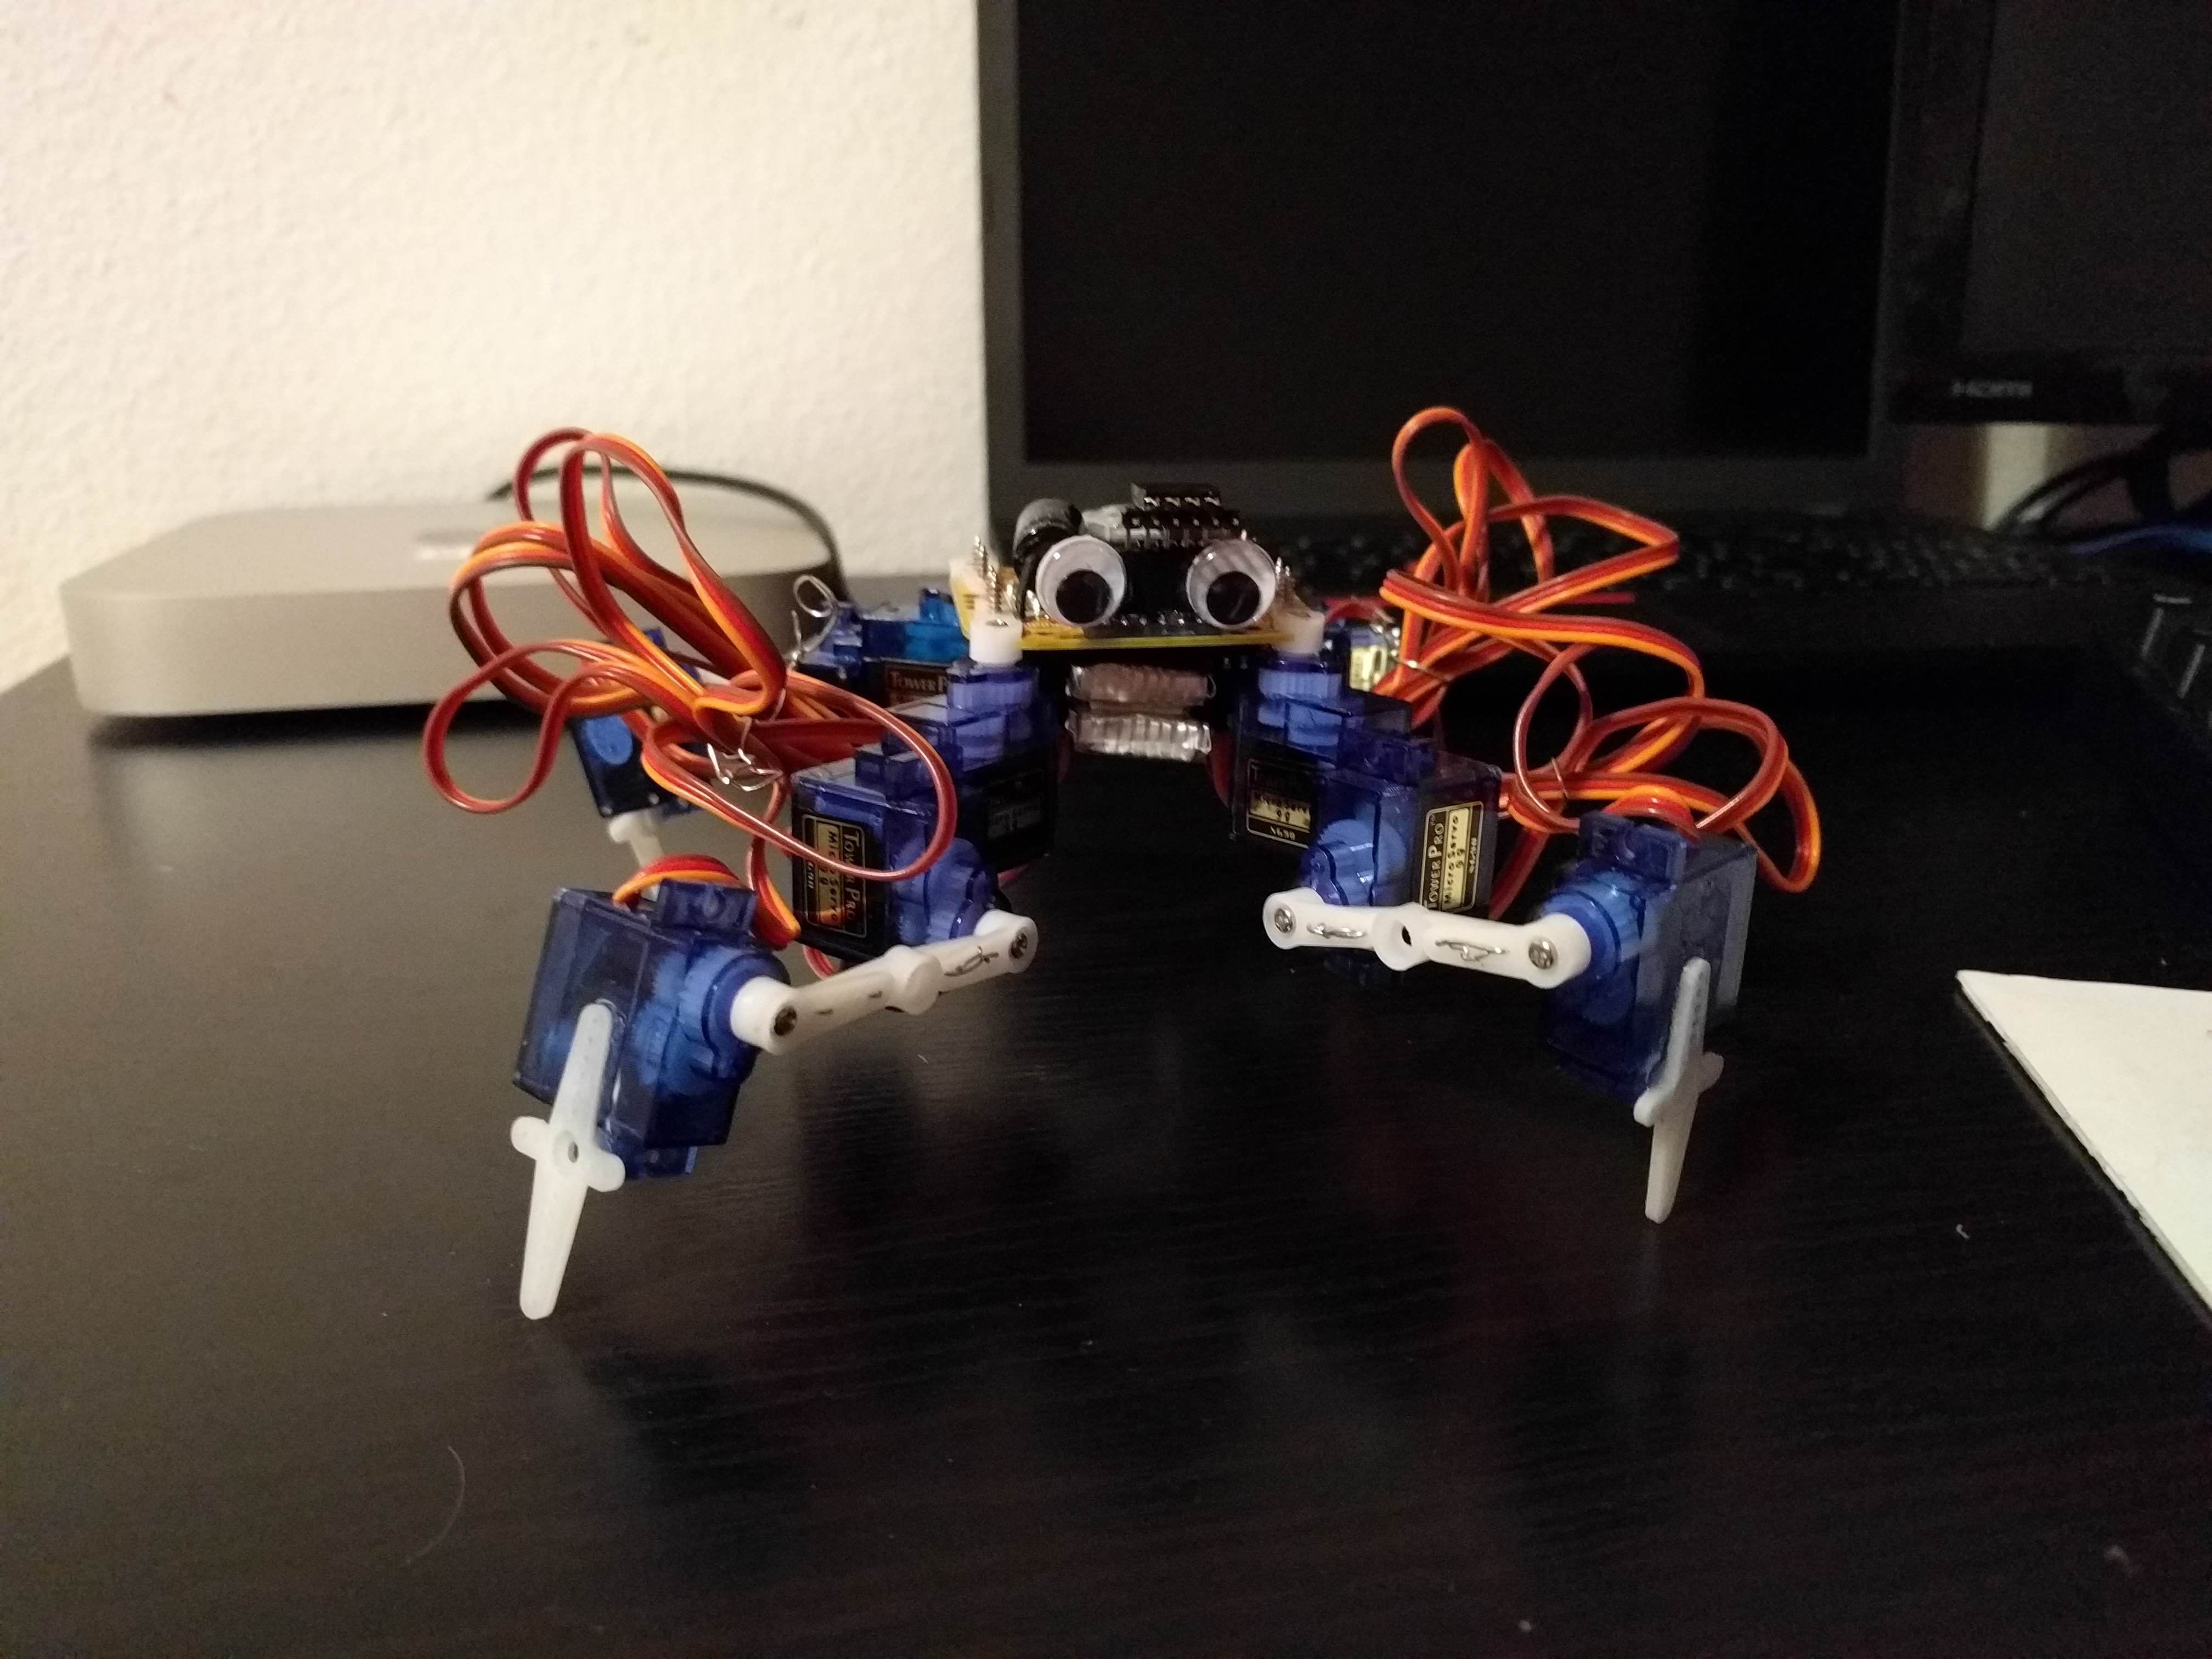
01/23/2016 at 18:46 • 0 commentsToday I spent most of the day with a friend building his own instance of Tote. Not only it was great fun, but I also learned a bit about which parts need work (unsurprisingly, tuning and trimming the servos is hard). We also experimented with a slightly different leg geometry (the hip servos rotated by 90°), which gives slightly longer legs with better reach. I think I will make it the default.
![]()
One particularly hairy problem we've hit is that his 3.3V Pro Mini is apparently set to 16Mhz for some reason. Fortunately I have programmed Arduinos with the wrong frequency before and recognized the symptoms (the servos got wrong frequency signal), and the board still works with 3.3V (for this AVR this counts as overclocking), but I wonder if it wouldn't cause some problems with more sensitive parts, such as the EEPROM.
-
Tote Zero
01/07/2016 at 16:13 • 0 commentsSo the boards have arrived and I started working on the #Tote Zero, an older brother of Tote, powered by the Pi Zero board. That doesn't mean Tote is dead or deprecated or anything, of course. I will continue working on all my project in the same erratic and chaotic manner I did before.
For instance, one thing I will definitely want to put on Tote is the #OpenMV board -- once they are ready, hopefully sometime this year.
-
PyBoard
12/20/2015 at 12:09 • 0 commentsThere is a version of Tote using PyBoard as its brains: #Micropython Quadruped Robot
But the code for that was translated from Tote's Arduino code, and didn't work too well for some reason. I promised to try and fix that some time ago, but somehow I never got the time for it. Last night I finally got myself to remove the PyBoard from #Henk hexapod robot, put it on Tote and program.
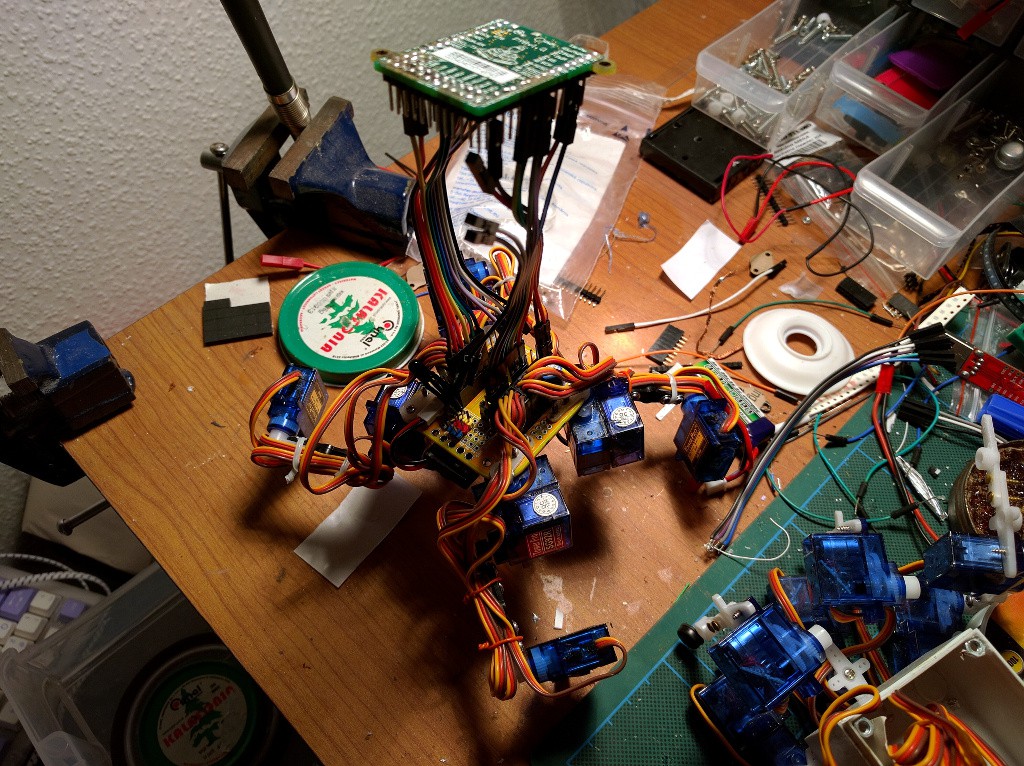
As the base, I used the micro:bit version of Tote's code, since it's MicroPython too. I just added the servo-handling code that @wagner wrote for his robot. I also used the same pins, timers and channels. Since I didn't want to make a custom PCB, I just used the old trick and connected the PyBoard using dupont cables:
![]()
The resulting code is available at https://bitbucket.org/thesheep/pyb_tote/src
-
Pi Zero
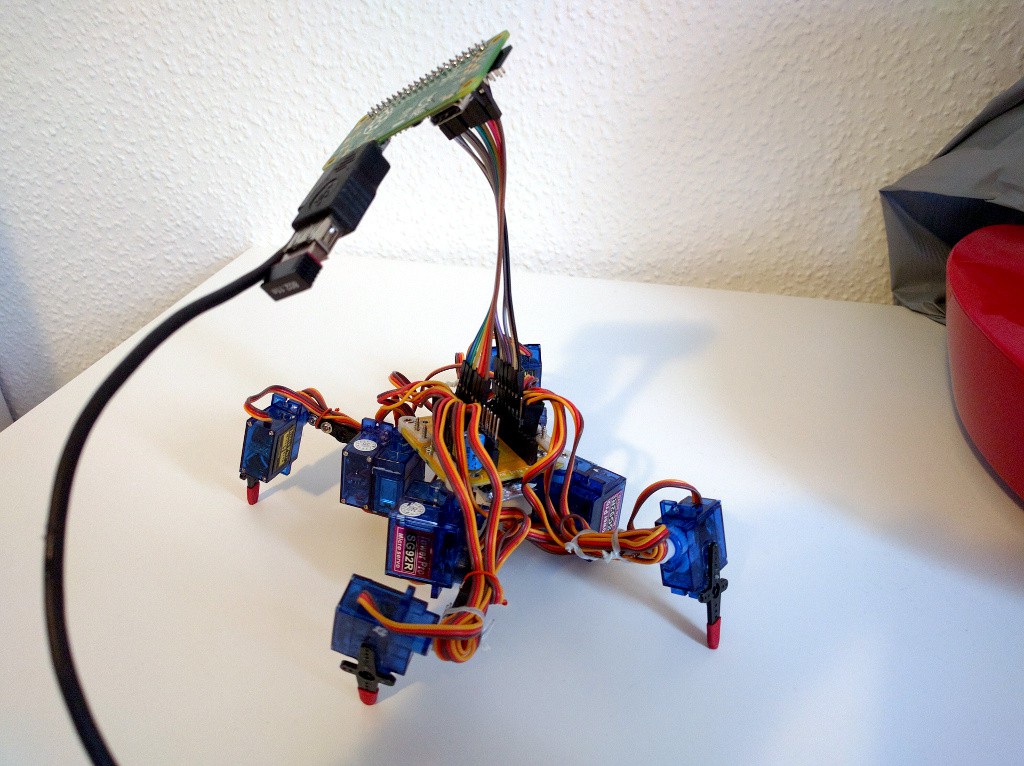
12/04/2015 at 14:26 • 0 commentsWith the new Pi Zero board and its price, it may actually make sense to use in in place of the Arduino on Tote. It's only a little bit more expensive, after all. The problem is, it doesn't have hardware PWM and has a whole operating system that needs to boot, has to be properly configured and requires all the right software. The cost of the SD card also cannot be ignored. All the adapters and cables are not a problem, as it wouldn't need them while connected to the robot.
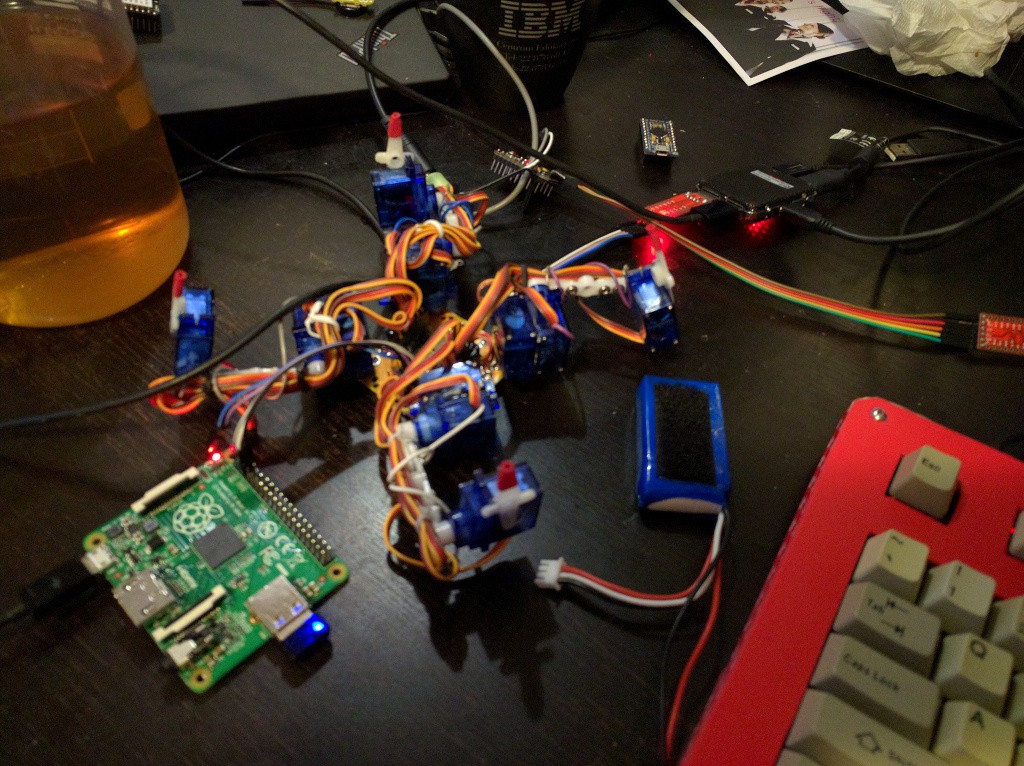
I started some initial testing on the Servo Blaster daemon for controlling the servos:
![]()
I also designed and ordered a PCB that makes the Pi Zero fit a little better than on this photo. We will see how that works.
-
Micro:Tote
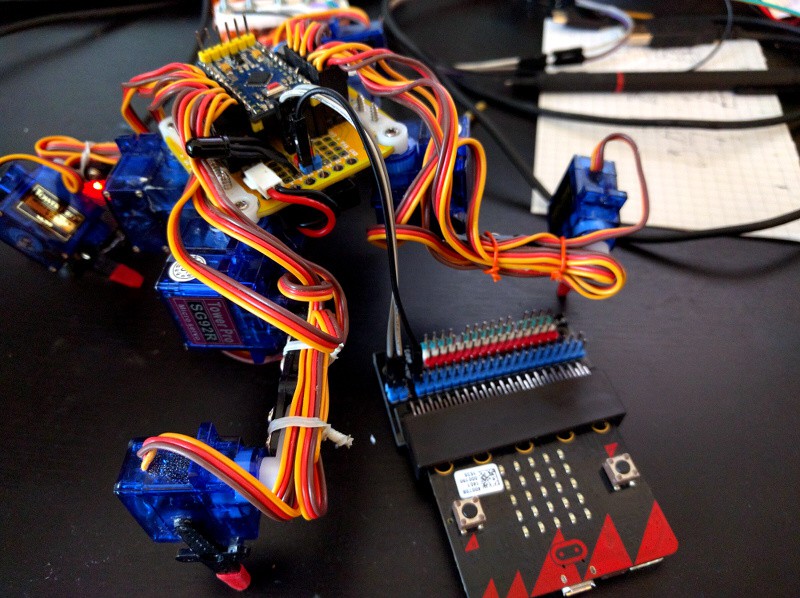
12/02/2015 at 19:00 • 0 commentsI almost had the Raspberry Pi thing working last time, and I promised to get it to work, but not just yet. The last two weeks I had a different project on my mind. I was participating in the Micro World Tour, a program that gets a couple of the micro:bit boards into the hands of Python hackers to do something nice with its Micropython implementation. So, obviously, I had to put it on Tote. Just imagine every kid in UK building their own quadruped robot and doing amazing stuff with it!
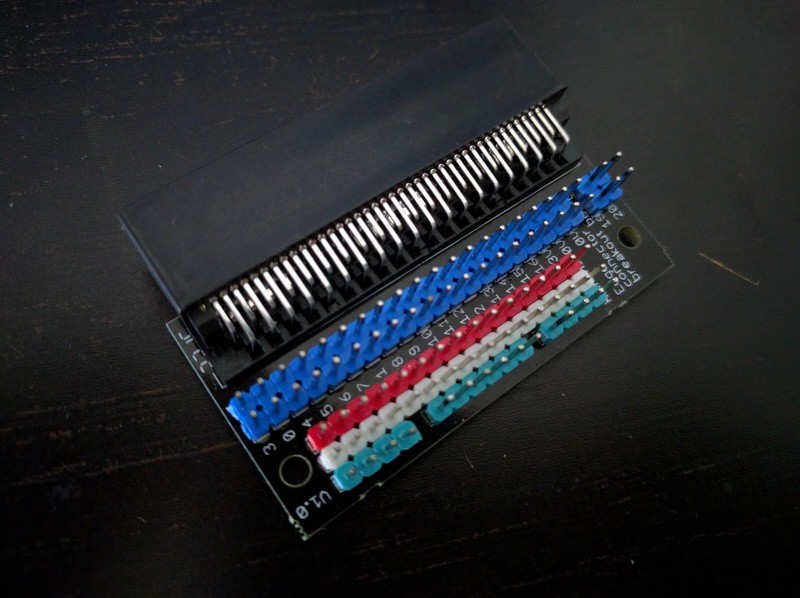
But yeah, there were some hurdles. First, we had to write some documentation for it, because it's all just being created as we go. Then I had to use an edge connector, which I received separately, to get access to the I²C pins:
![]()
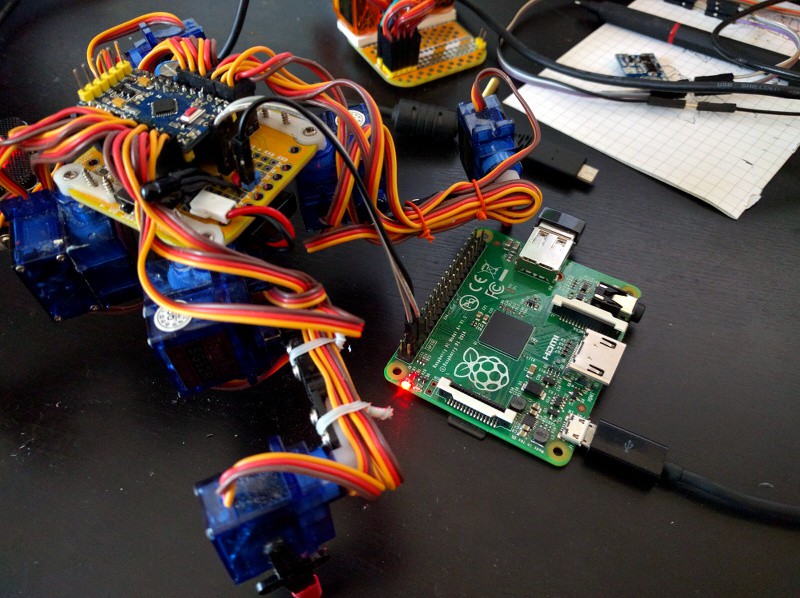
I already had the i2cslave code that I've written for Raspberry Pi last time, so that part was easier. So all I needed was to hook it up and test:
![]()
Unfortunately, it didn't work. The i2c.write() function simply seemed to do nothing at all. I reported the issue, and the good Micropython developers added error handling to it, so now at least I could see an exception being raised. But it turned out to be a generic I²C error, not really telling me what is wrong. I spent the whole weekend trying different variations, adding pullup resistors, checking if the accelerometer and compass that are on the same I²C bus work (they did), etc. I also tested it multiple times with Raspberry Pi, to make sure the error is on the micro:bit side:
![]()
Finally, my week with micro:bit ended, and I had to send it to the next person. So I packed the whole thing up and went to bed.
I couldn't sleep that night. Instead, I read the I²C specification and the Atmel notes on using TWI on their AVR chips. The next day, I read some helpful suggestions in the comments on the issue that I reported, and noticed a curious thing. One of the comments in the C code for the micro:bit DAL mentioned, that the I²C address is 8 bit. That's strange, because from the spec I knew that I²C uses 7 bit addresses, and the least significant bit is used to indicate the direction of communication. Hmm, wait a minute, if I tried and shifted the address one bit to the left...
I unpacked the board, hooked it up to my robot again and tried. And sure enough, it just worked. Amazing. Don't worry, this will be fixed in the future, so that the final versions will all use 7 bit addresses. But once I had it working, I couldn't just pack it back and send it. I wrote a quick e-mail to the next person apologizing for it, and went to work. In the evening, I sat down and started to port the inverse kinematics to Micropython.
I wrote the IK code for my robots many times already, but each time it's an equally frustrating process of figuring out why the leg is moving in the direction opposite to expected. It took me several hours, but I finally did it.
Then some more frustration while I tried to make the walking code work. Here the challenge was not so much the code itself, because once you know what the robot has to do, it's quite simple, but the fact that I ran out of memory and stack space. I had to do a few unpythonic things to my code to make it fit on this small board, but finally I got a (very bad) gait working. So I strapped the micro:bit on top of Tote, and let it walk:
I know there is a lot that could be improved here. In fact, this is quite horrible, compared to how Tote walks normally. This is not the fault of micro:bit, but rather my sloppy programming and the fact that I was in hurry.
Once this was done, I packed the micro:bit up again and this time really sent it to the next person in line.
After this, Raspberry Pi should be a piece of cake :-)
-
I²C Slave
11/21/2015 at 19:45 • 4 commentsI have done a little bit of progress towards putting a Raspberry Pi on Tote. You see, I didn't want to make it communicate over serial, because I've done that already with ESP8266 (see previous logs). This time I wanted something more ambitious, so I decided to use I²C. As the first step, I completely rebuilt one of my robot prototypes, to use the new PCB and to also leave the top side of the PCB as flat as possible -- it only has the Pro Mini and the servo horns there, and all the rest is on the bottom side. I also added a voltage regulator giving a steady 5V, so that I can power the Raspberry Pi with it. The Pro Mini still uses only 3.3V, but it's fine with 5V, as it has an internal regulator. Servos actually work better at 5V, as it's within its parameters, unlike the 3.7V, which was a bit low. Finally, I replaced the 1S 3.7V LiPo battery with a 2S one, so that the regulator has something to drop from (the boost converters that I have all have a 500mA shutoff, so they are not suitable for powering 12 servos).
![]()
Next, I will need the code for the Pro Mini to act as a I²C slave, receive the positions and move the servos. For the moving servos part I just reused the servo.ino code I already had for Tote. For the I²C slave, I did something like this:
#include "servos.h"

#include <Wire.h>


const int SLAVE_ADDRESS = 0x04;


void setup() {
    Wire.begin(SLAVE_ADDRESS);
    Wire.onReceive(receiveEvent);
    servo_setup();
}


void loop() {
    delay(100);
}


void receiveEvent(int bytes) {
    union {
        byte bytes[4];
        float value;
    } float2bytes;
    unsigned int servo = Wire.read() | Wire.read() << 8;
    for (int j = 0; j < 4; ++j) {
        if (!Wire.available()) { return; }
        float2bytes.bytes[j] = Wire.read();
    }
    servo_move(servo, float2bytes.value);
}
Nothing fancy or complicated, but it gets the job done. One thing I could have done easier -- I'm sending the positions as floats, because that's what the functions I already had were accepting. I could have instead make them work in µs, as most servo controllers out there, and use simple integers. I might still switch to that, if it turns out to be too slow, but for now this is good enough.
Next, I wrote some Python code on the Raspberry Pi side, to test if I can actually move the servos:
import smbus
import struct
import math

bus = smbus.SMBus(1)
ADDRESS = 0x04

def servo_move(servo, radians=None, degrees=None):
    if radians is None:
        radians = math.radians(degrees)
    bus.write_block_data(ADDRESS, servo,
        [ord(b) for b in struct.pack('<f', radians)])
After some small tweaks, it works. By the way, funny how write_block_data requires a list of integers, not a string of bytes, as the struct.pack() produces. Oh well.Once I had that tested, it's time to wrap it in a class and plug into my old Python gait code:
import smbus

import struct
import math


class Servo(object):
    def __init__(self, servos, index):
        self.servos = servos
        self.index = index

    def move(self, radians=None, degrees=None):
        self.servos.move(self.index, radians, degrees)


class Servos(object):
    def __init__(self, address=0x04, bus=1):
        self.address = address
        self.bus = smbus.SMBus(bus)

    def __getitem__(self, index):
        return Servo(self, index)

    def move(self, servo, radians=None, degrees=None):
        if radians is None:
            radians = math.radians(degrees)
        self.bus.write_block_data(self.address, servo,
            [ord(b) for b in struct.pack('<f', radians)])
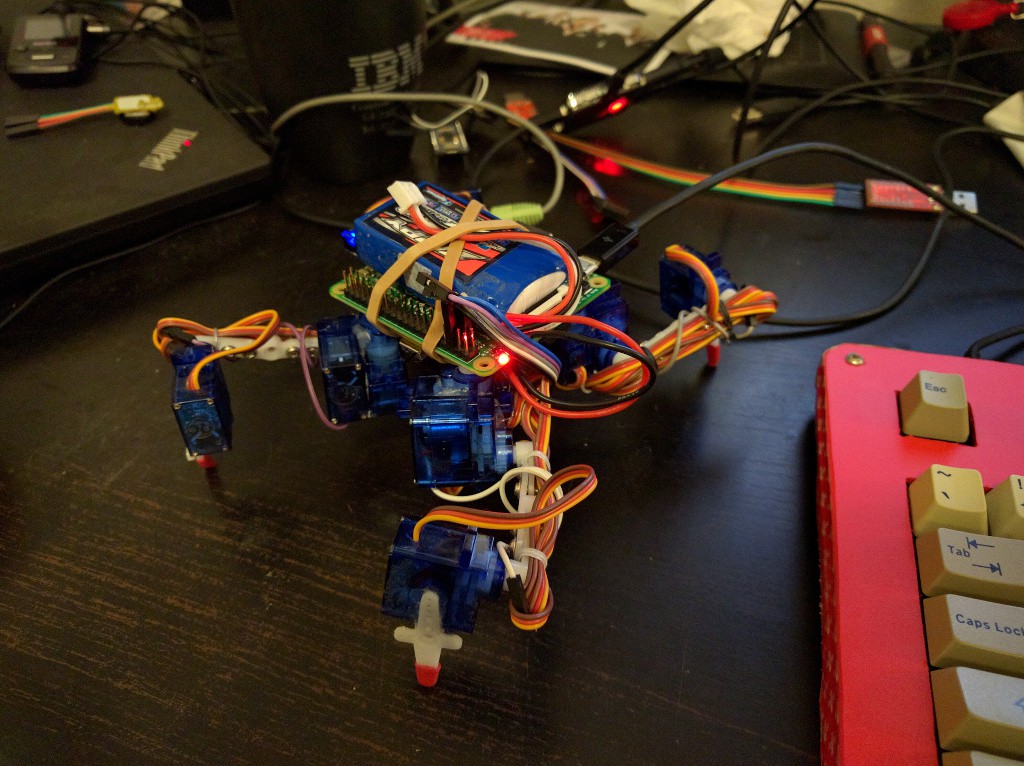
Then I assembled all the parts of the robot together, and it's ready to start walking:
![]()
Except I decided to sit down and refactor the Python code a little bit (and I need to adjust it to a different servo configuration, etc.), so it's still some time until it actually walks.
-
Nothing Happens
11/05/2015 at 11:12 • 0 commentsI have been a little bit busy with other things recently, and I didn't update this project for a while, so I thought that it's time to write something just to let you all know that it's not abandoned.
The progress has been slow, and I don't really have anything finished to report -- otherwise there would be another log with a full experiment in it. I did have some success with controlling Tote with a Raspberry Pi model A+ over I²C, and it should also soon work with a WiPy board instead of Arduino (I just need to write a servo library for it, and that requires a stable timer API), but nothing to really show yet.
Hopefully there will be more updates shortly.
-
Another Batch of PCBs
10/22/2015 at 10:01 • 0 commentsThe last few weeks have been very busy, with all the conferences, sickness, day job, etc. so I fell a little behind with my plan to have regular experiments published here. Hopefully that will improve.
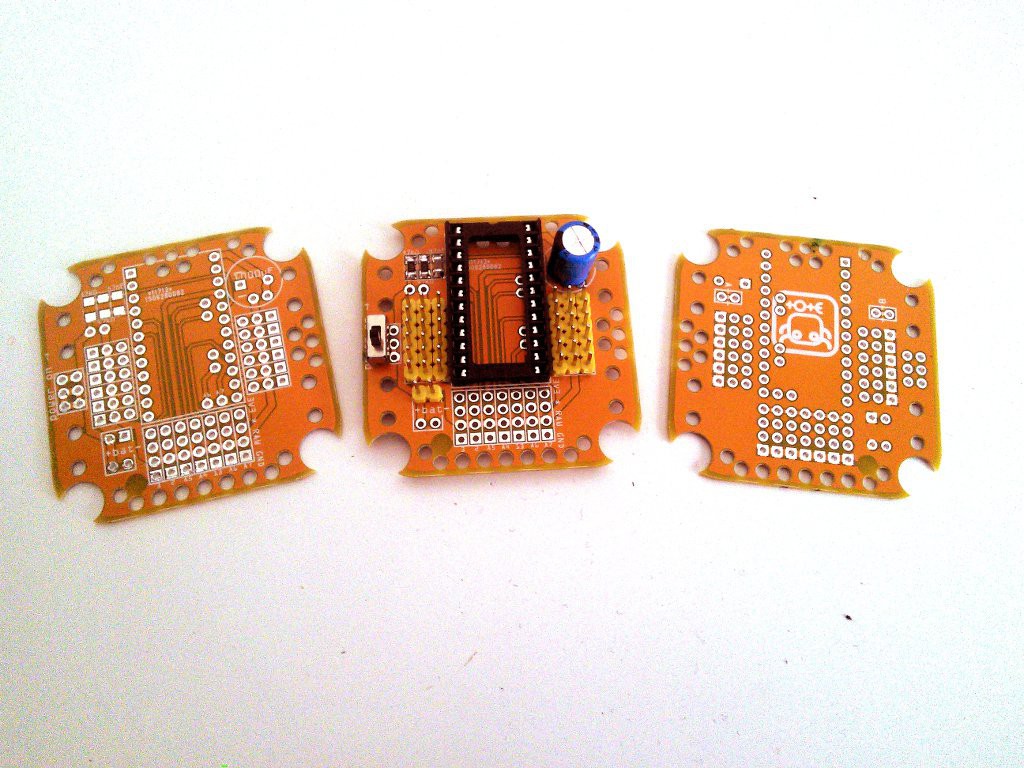
In the mean time, I ran out of boards for Tote (there are some people wanting to build it, after all), so I ordered another batch from Dirty PCBs. It's still version 4 of the boards, but there are some small improvements:
- the PCB is thinner, so it's lighter and leaves more room between the servo horns and the screws,
- there are more holes in it, which makes it even lighter, and hopefully makes it easier to attach stuff,
- the mounting holes are not metalized anymore, so harder to make a short circuit,
- the holes for the servo horns are slightly bigger, so the horns fit easier.
![]()
-
Vertical Climb
09/25/2015 at 07:53 • 5 commentsA small robot walking around your desk or even around your room on the floor is one thing. The same robot climbing your furniture and able to get everywhere in your room is a completely different game! That's why I always wanted to make Tote able to climb. Unfortunately, the problem is harder than it seems at first sight.
One way of doing it is by using magnets on the feet. It limits you to metal surfaces, but that's a start. Today the magnets I ordered for that purpose finally arrived, so I was able to do some experiments. Unfortunately, the results are not very encouraging.
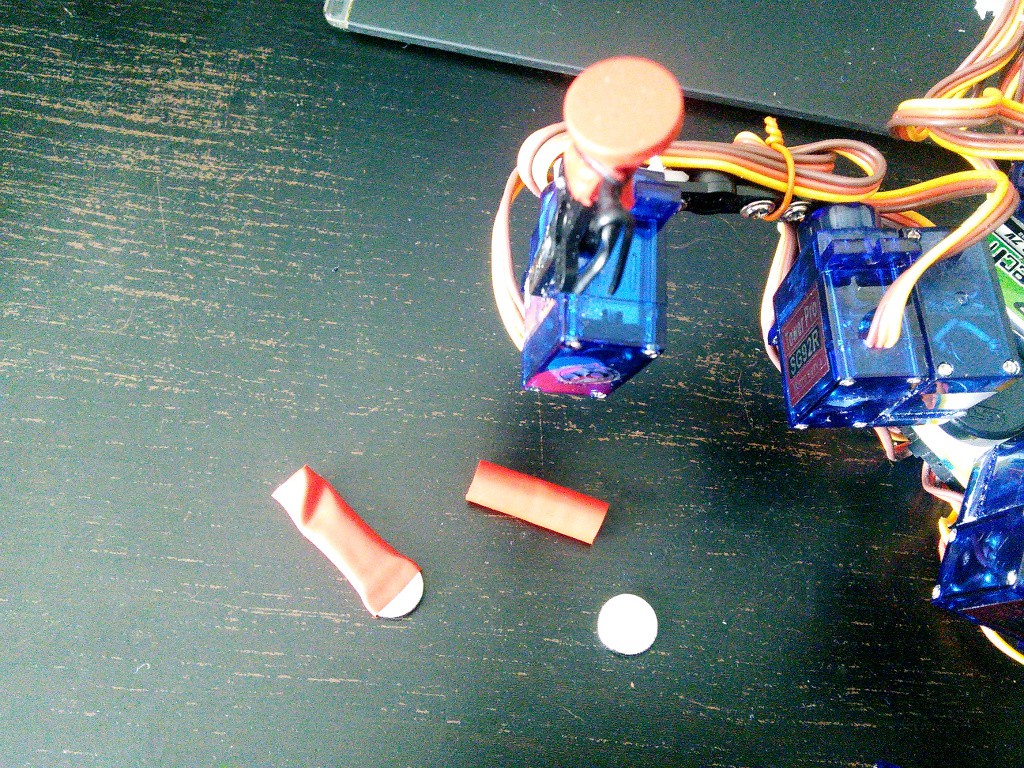
First, I attached the magnets to the robot. I figured that I want to maximize the traction, while minimizing the force needed to actually un-stick the leg, so I went for small flat magnets, and I wrapped them into rubber from a balloon, then tied that to each leg.
![]()
Since the magnets seemed to be small and weak, I used two of them on every foot initially. The effect wasn't very good -- they turned out to be too strong, and Tote couldn't lift any of its feet:
Fine, let's try with fewer magnets then. That turned out to be just strong enough to hold the robot when all four feet are touching the metal surface, but not strong enough when on of the feet is raised:
Oh well, nobody said it will be easy. Back to the drawing board now. Maybe I will try to climb a net next time?
 deʃhipu