Features:
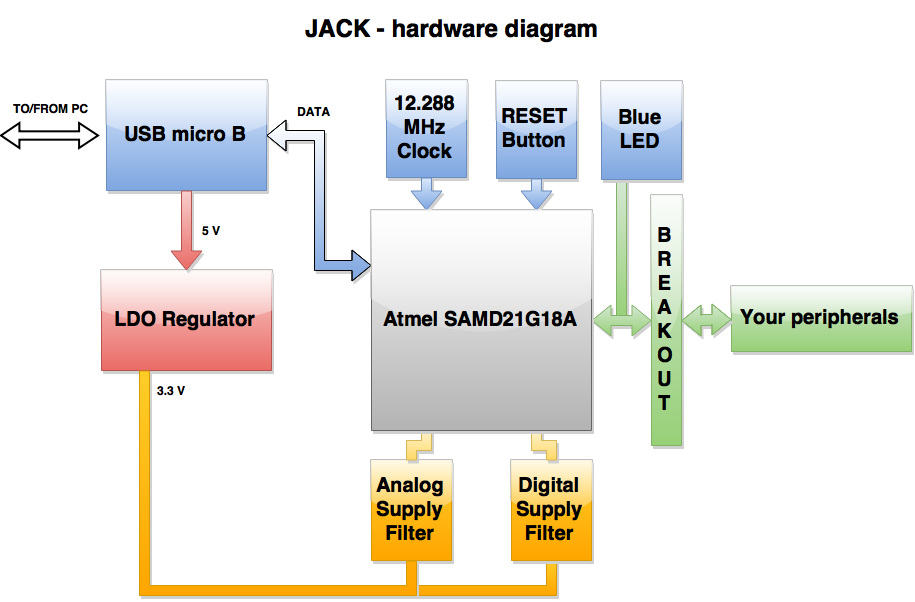
- a USB device port with cable shield filtering and transient suppression
- a 3.3V LDO with bypass caps and filters to separate analog VDD from digital VDD
- Schottky diodes to protect the possible power inputs
- a 12.288 MHz crystal for the master clock (pretty useful in audio applications)
- a reset pushbutton with debounce cap and pullup resistor
- a blue LED on pin 32 for the classic Blinky test
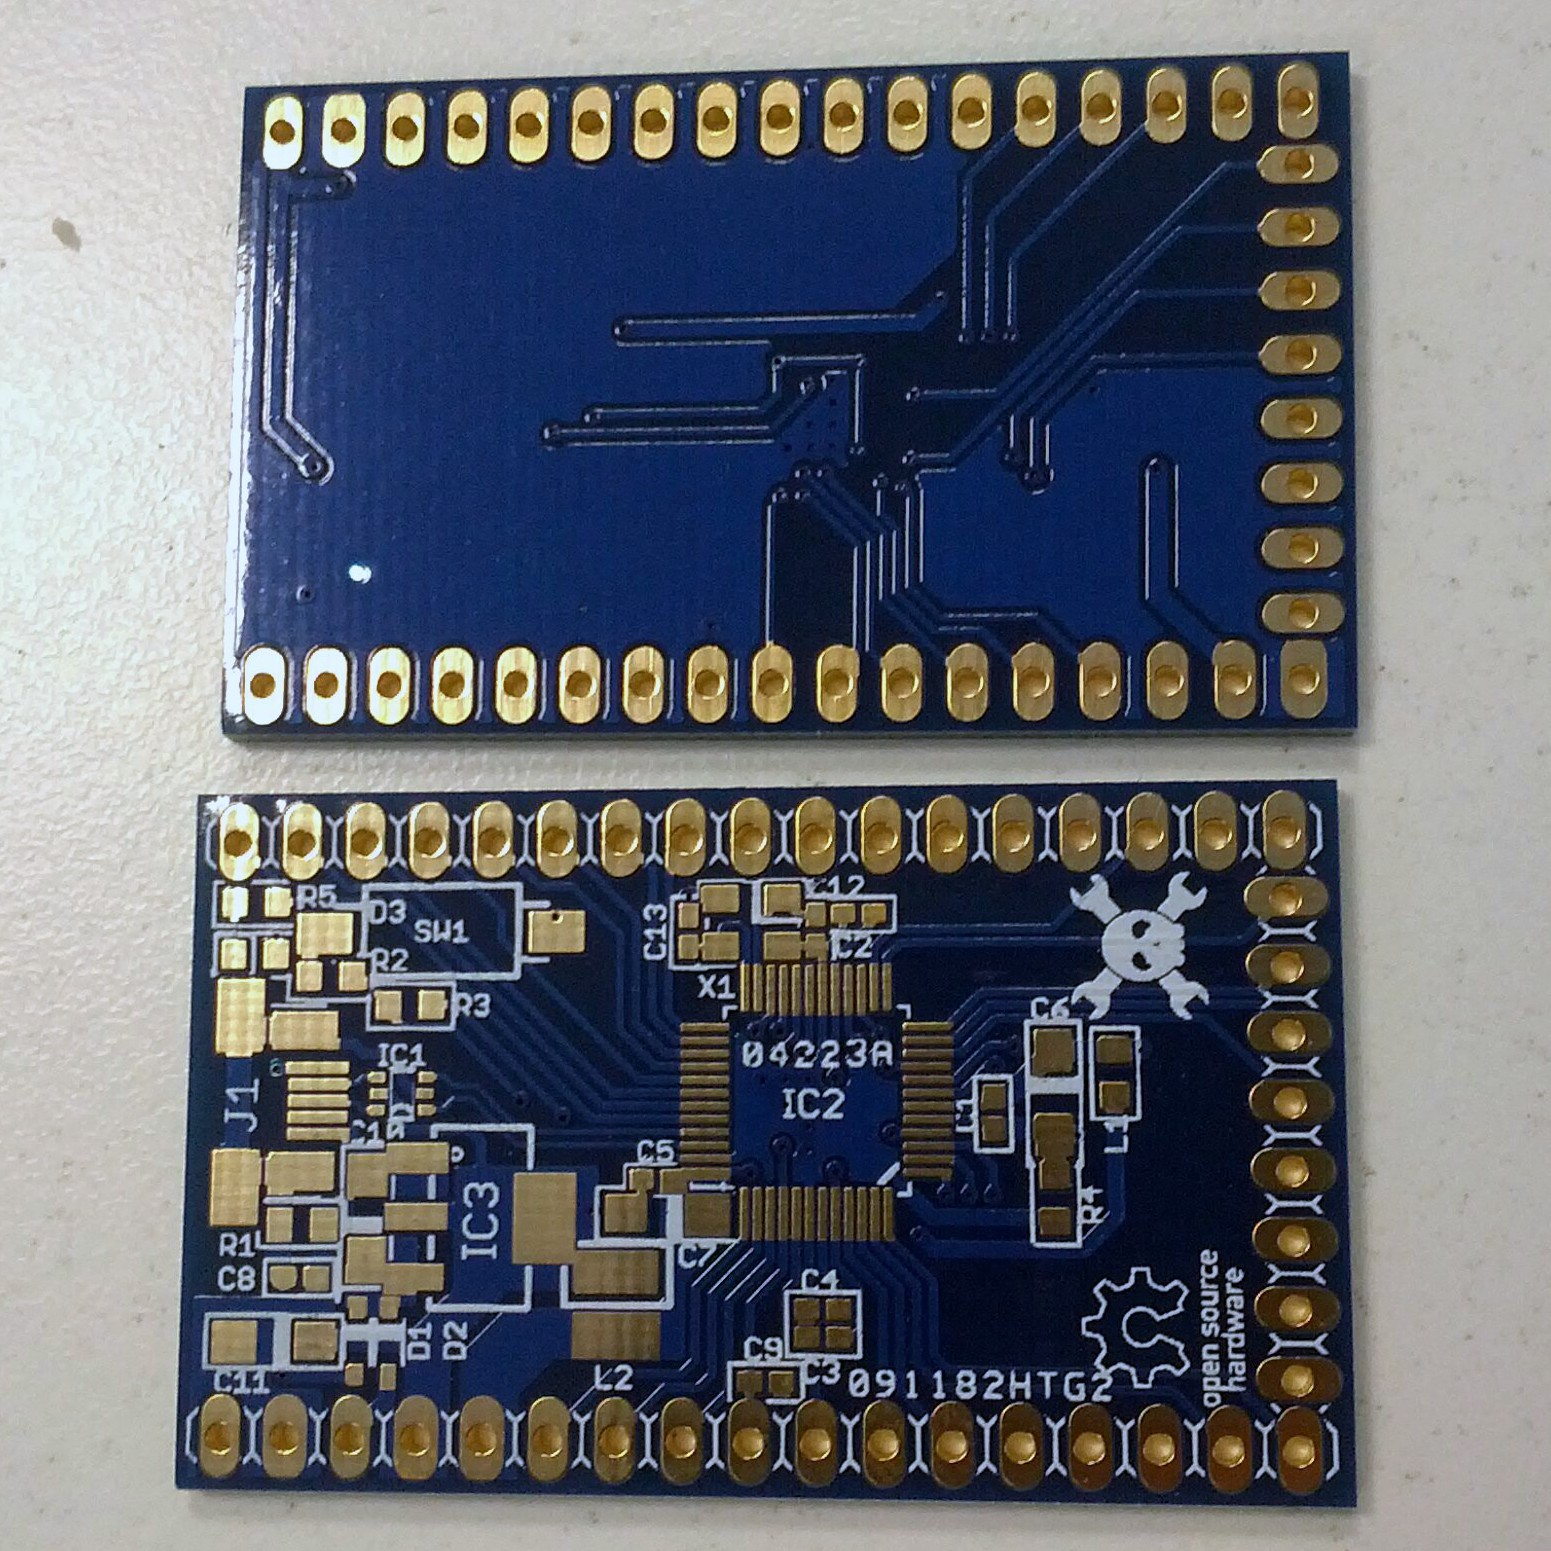
- two breakout headers (all pins broken out except 2 pins for crystal and 2 for USB)
- the ATSAMD21G18 in TQFP package (max specs for the D21, easier to solder than a QFN)
- Plus: Full compatibility with Arduino Zero firmware (without debugging options because there's no programmer/debugger chip on the board)
Licences
JACK hardware is OSHW, licensed under CERN OHL 1.2
JACK software is LGPL 2.1 (because it's based on the Arduino Core)
Installation and usage guides
Arduino IDE setup for JACK
- Donwload the Arduino IDE 1.6.5
- Go to Tools->Board->Boards Manager...
- Install Arduino SAMD Boards (32-bit ARM Cortex-M0+) 1.6.1
- Download the Arduino Core modified for JACK compatibility: https://github.com/MickMad/ArduinoCore-samd/archive/master.zip
- Move the following files/folders to C:\Users\mperla.CORP\AppData\Roaming\Arduino15\packages\arduino\hardware\samd\1.6.1 (or whatever your Arduino SAMD package path is):
- bootloaders\jack
- cores\jack
- variants\jack
- boards.txt
A JACK board flashed with the modded Arduino core will show as an "Arduino Zero bootloader (COMn)" port on your PC; if you can't find the board, but it shows as "Unknown hardware" you shall update its drivers with the Arduino Zero ones (you can find them in ..\your_arduino_path\arduino-1.6.5-r2\drivers)
Using JACK with the Arduino IDE
- Connect JACK to an USB port on your PC, if it has never been programmed you should see an Arduino Zero bootloader serial port device
- Open your Arduino IDE and write a sketch (e.g.: Blink LED on pin 32/PIN_WIRE_SCL)
- Select Arduino Zero (JACK) from Tools->Board
- Select the Arduino Zero (Native USB Port) under Tools->Port (or just select the correct port associated to Arduino Zero bootloader in your device manager)
- Click Upload, when finished the device will reset and start the sketch
NOTE: as of now the USB CDC Arduino code is not working properly therefore when you upload a sketch on JACK, then detach and reattach it to the USB port, you will see an Unknown device. Follow the below guide to reprogram it.
Reset JACK to run the bootloader
The SAM-BA bootloader running on the Zero has a pretty nice feature that you can enable via code, called double tap reset; this feature allows an user to force bootloader startup if there's any issue on the user code. Here's how it works:
- Attach JACK to the USB port (or detach-attach)
- As soon as you attach it, click the RESET button twice in a small frame of time
- If everything was fine, you shall know see again the JACK serial port on your PC
The time frame you have to double tap the reset button is not so big (you gotta do that before the USB Host tries to enumerate JACK, so it's less than half a second) but it's enough. This feature is pretty cool because it is helping me a lot in this phase where the USB CDC class of the Arduino Core is not yet working.
Video on how to start the bootloader here:
System diagrams
Board diagram
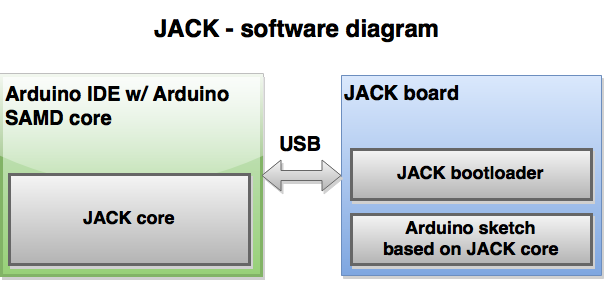
Software diagram
 Michele Perla
 So far so good.


 Jarrett
 andriy.malyshenko
Can you help me?
I am trying on ATSAMD21 with native usb. My Arduino IDE version is 1.6.13 from Arduino.cc. And I have done what Jack said. But during burning bootloader, there is a following error.
Arduino: 1.6.13 (Windows 7), Board: "HACK"
Open On-Chip Debugger 0.9.0-gd4b7679 (2015-06-10-22:24)
Licensed under GNU GPL v2
For bug reports, read
http://openocd.org/doc/doxygen/bugs.html
debug_level: 0
adapter speed: 500 kHz
adapter_nsrst_delay: 100
cortex_m reset_config sysresetreq
Error: unable to find CMSIS-DAP device
Error while burning bootloader.
This report would have more information with
"Show verbose output during compilation"
option enabled in File -> Preferences.