-
1Step 1
Install the OS in the microSDHC card ( You can install your favorite OS but I will put the instructions for ubuntu mint )
1) Download the image from the mirrors or direct downloads:
https://ubuntu-mate.org/raspberry-pi/
2) Put the image on a microSDHC card:
Download the image and then:
- Extract the
.img.bz2archive to get the image file.bunzip2 ubuntu-mate-15.04-desktop-armhf-raspberry-pi-2.img.bz2 - Write the image file to the microSD card as root.sudo ddrescue -d -D --force ubuntu-mate-15.04-desktop-armhf-raspberry-pi-2.img /dev/sdX
The drive may be mounted on any
/dev/sdXso use the commandlsblkto check.|f you don't have ddrescue you can install it using the following commands (be shure to have universe sources in your software & updates preferences):
sudo apt-get install ddrescueIf it does not work use:
sudo apt-get install gddrescue - Extract the
-
2Step 2
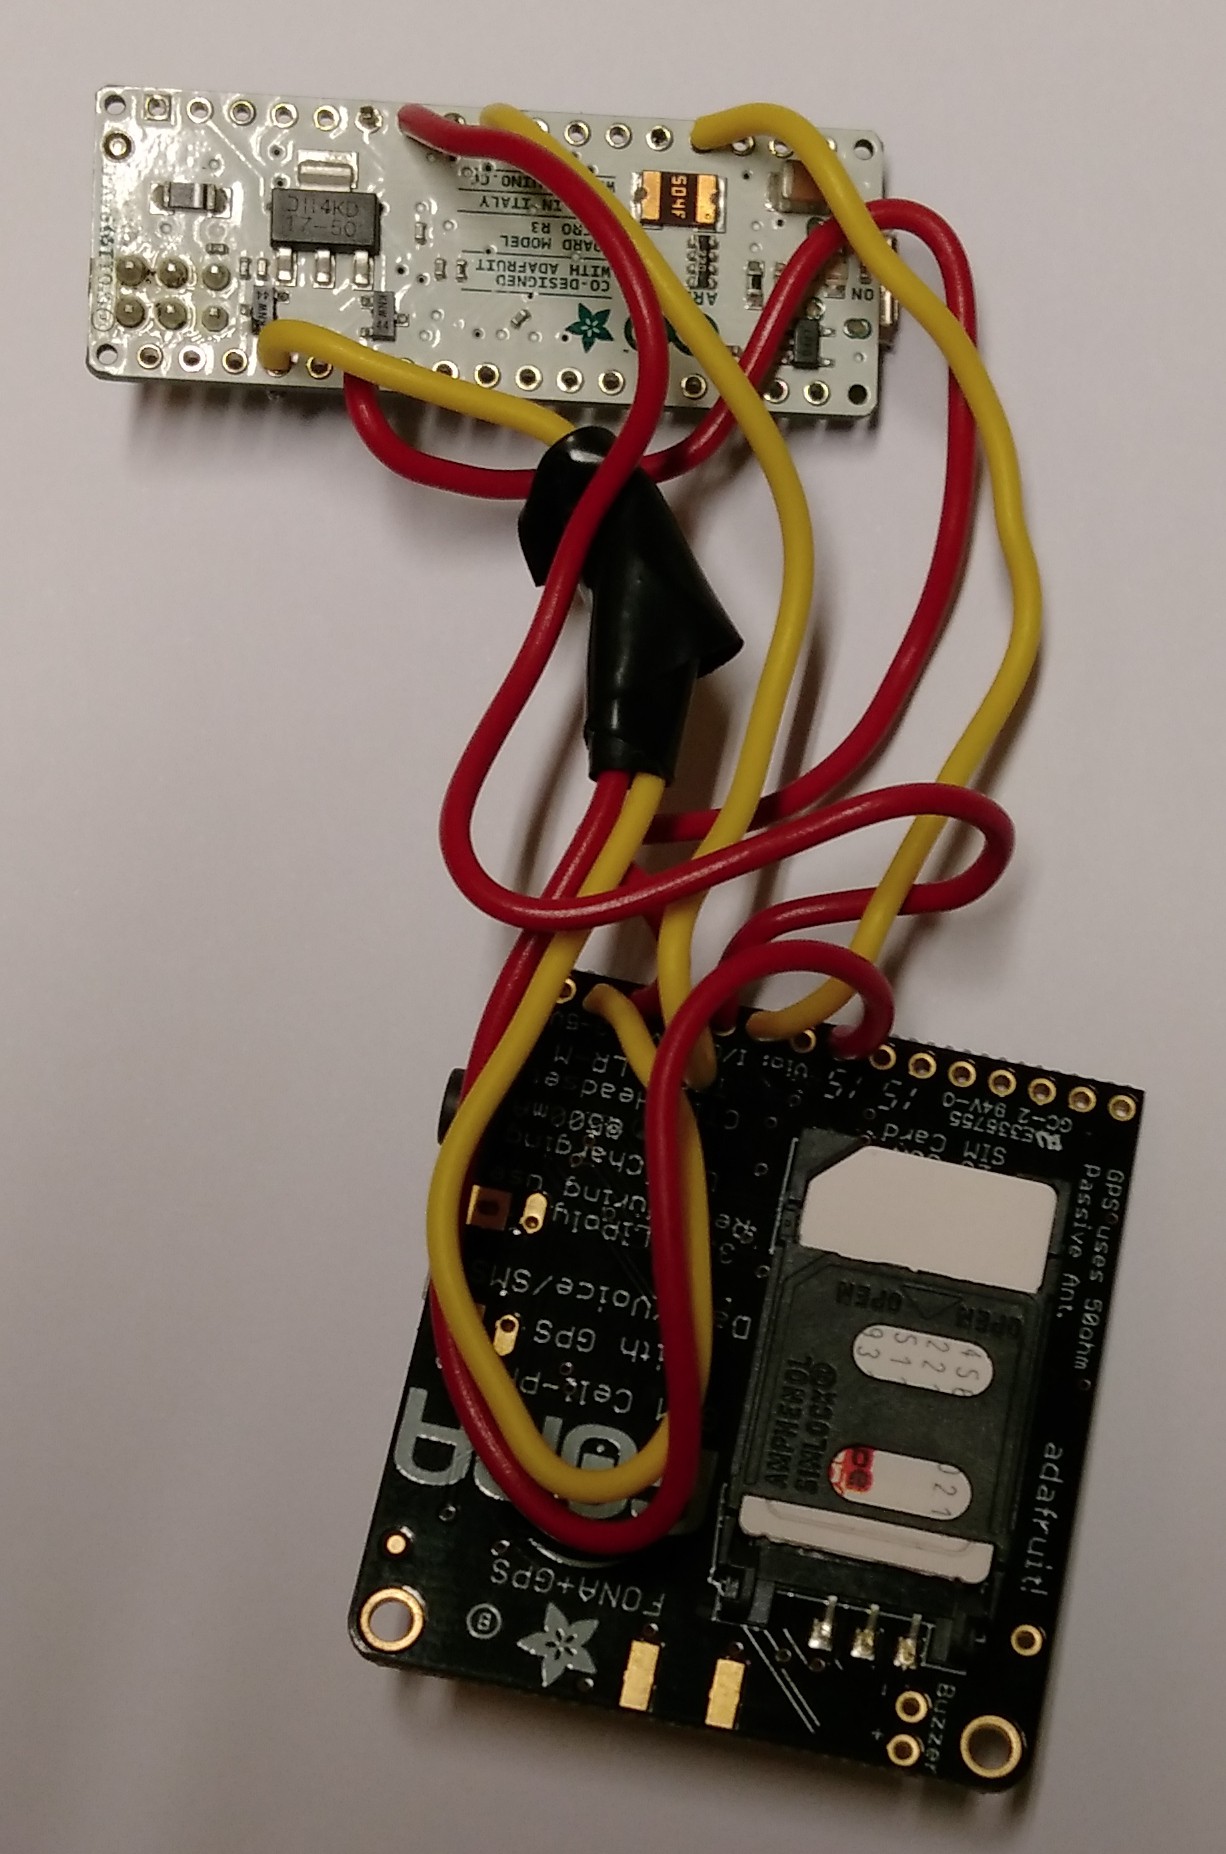
Solder the fona to the Arduino Micro
Solder each cable using the following instructions:
Fona Arduino Micro
- Vio connects to 5V
- GND connects to GND
- Key connects to GND (always on)
- RX connects to digital 2
- TX connects to digital 9
- RST connects to digital 4
![]()
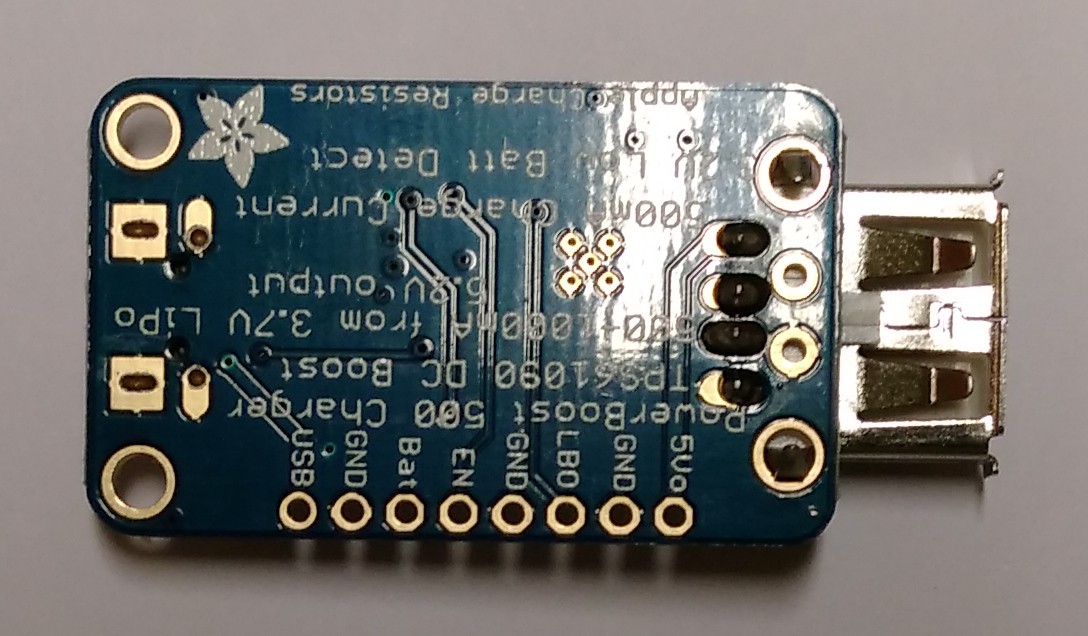
Solder the usb port to the PowerBoost 500C
![]()
-
3Step 3
Upload Arduino_Fona_library to the arduino micro
Follow the instructions of https://learn.adafruit.com/adafruit-fona-mini-gsm-gprs-cellular-phone-module/arduino-test
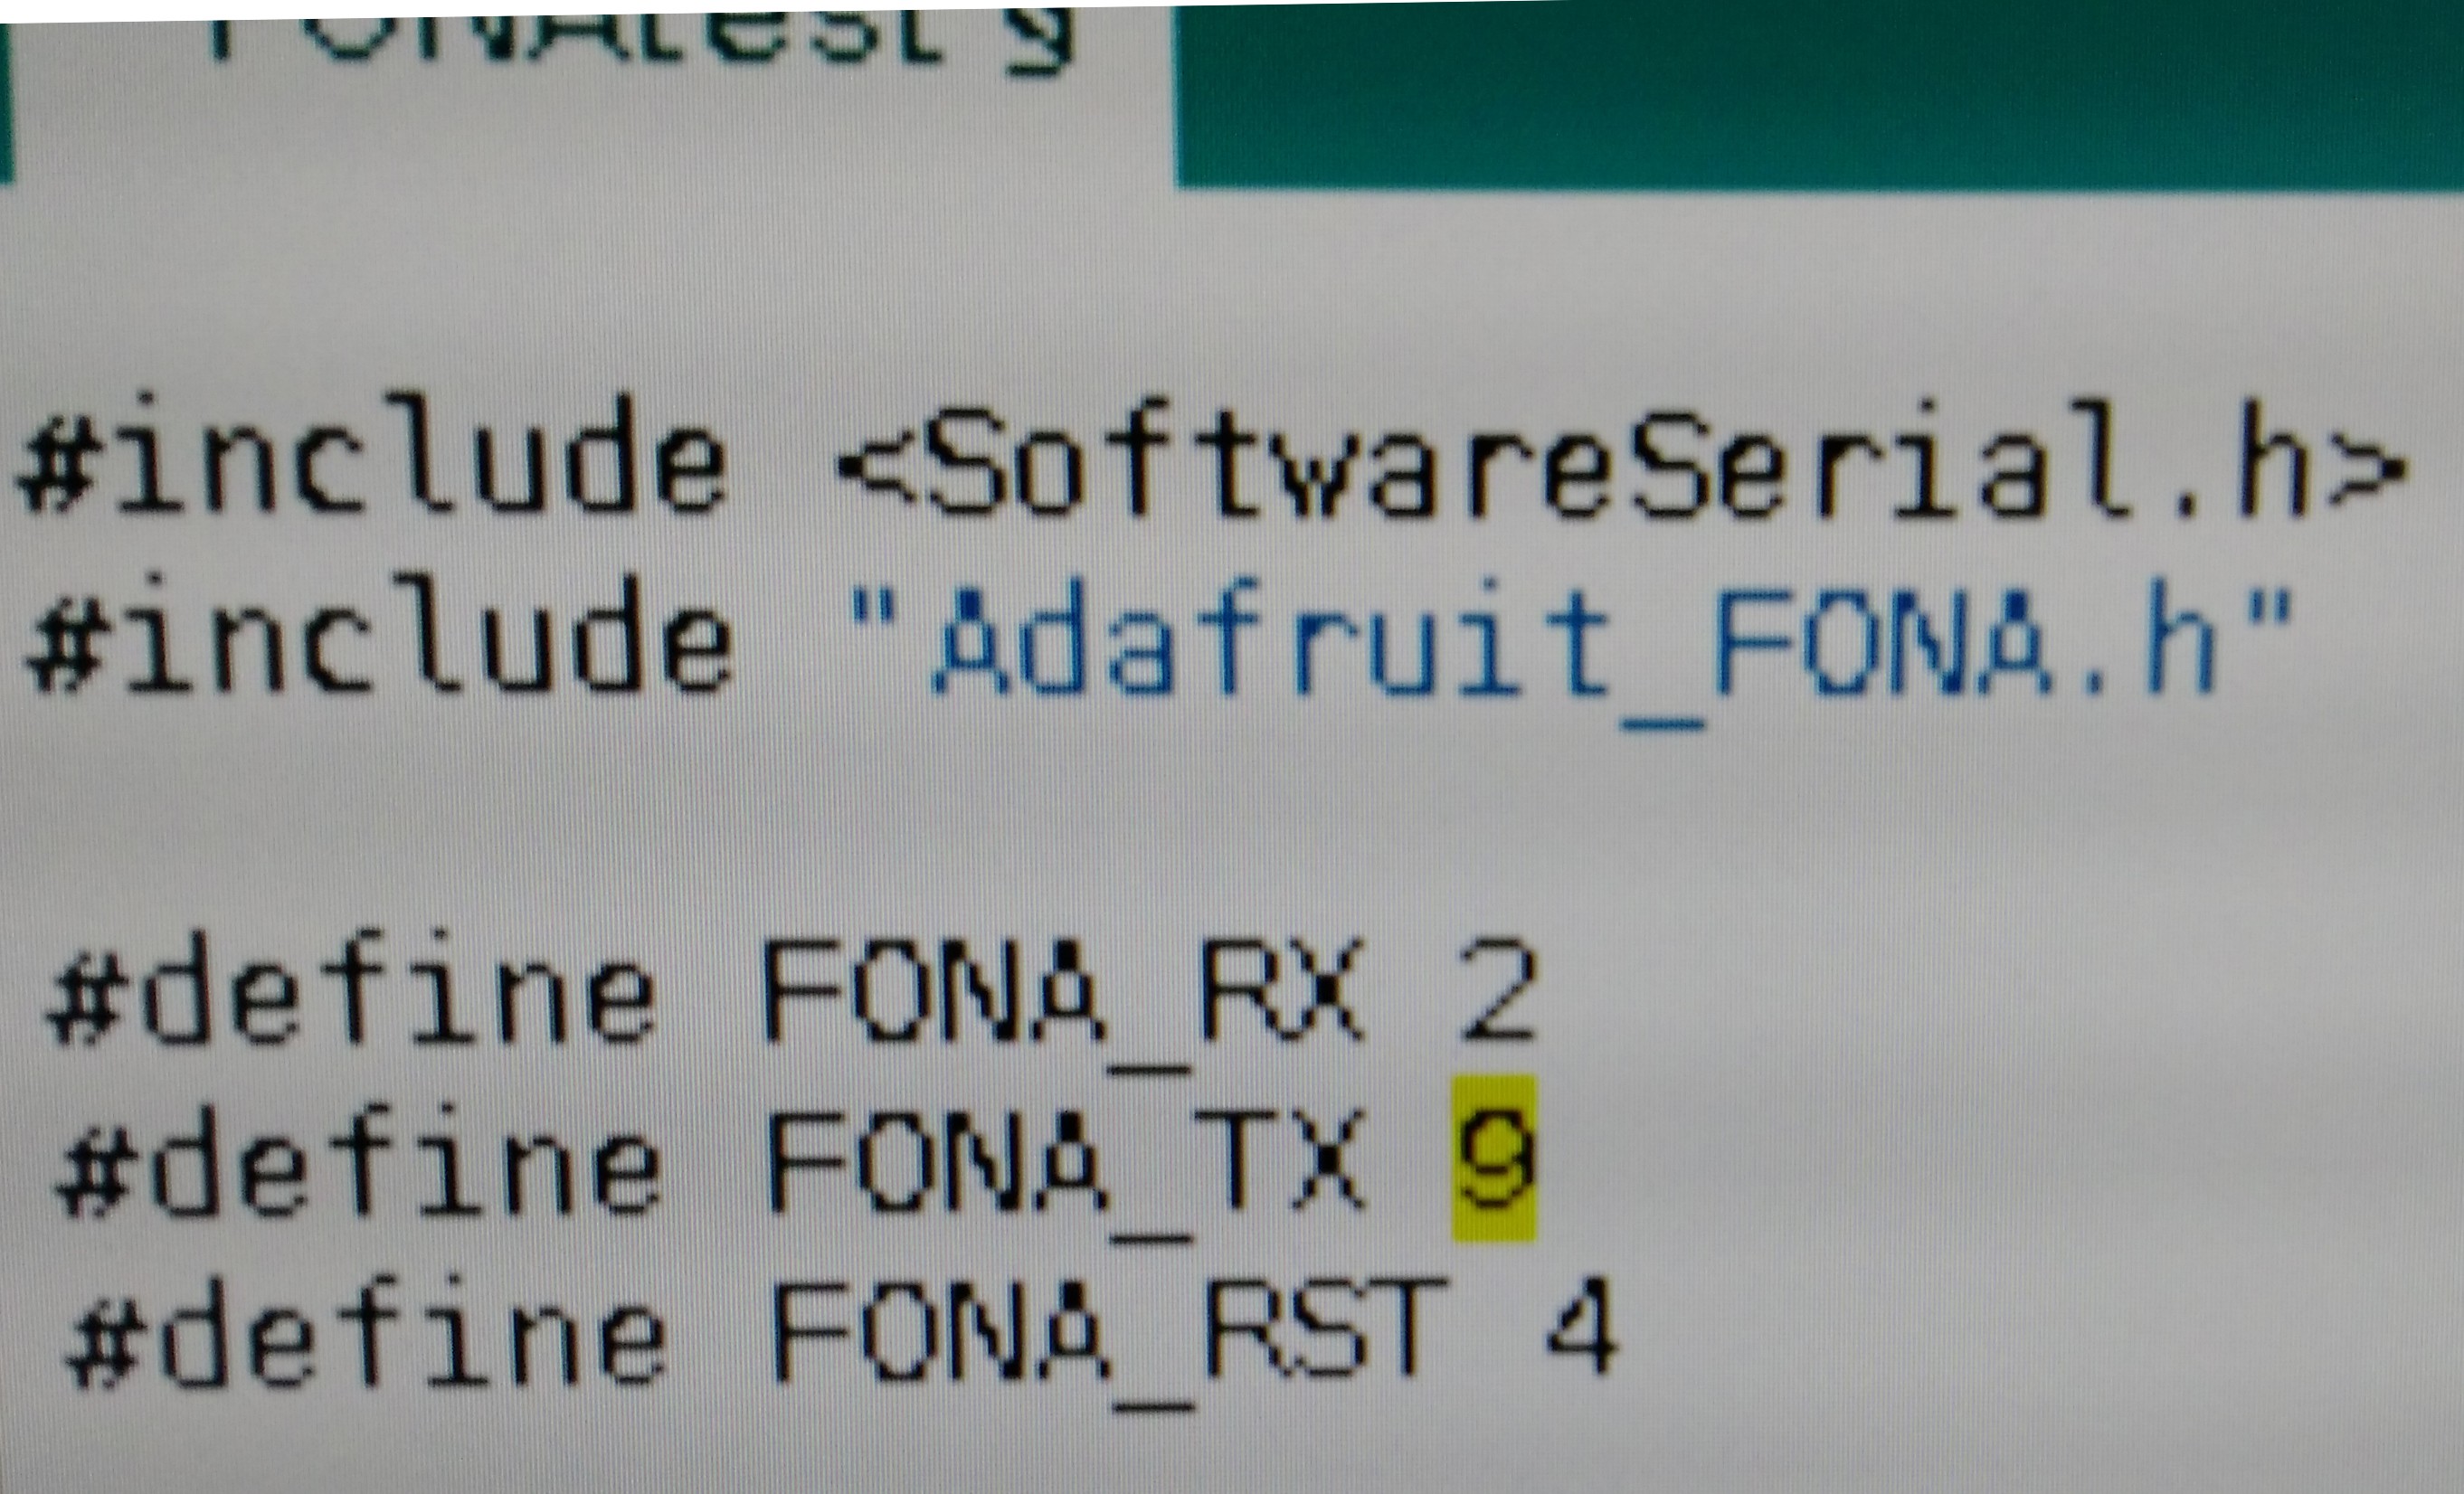
But before uploading the FONAtest to the arduino micro change the value of the FONA_TX to 9, as shown in the following photograph:
![]()
-
4Step 4
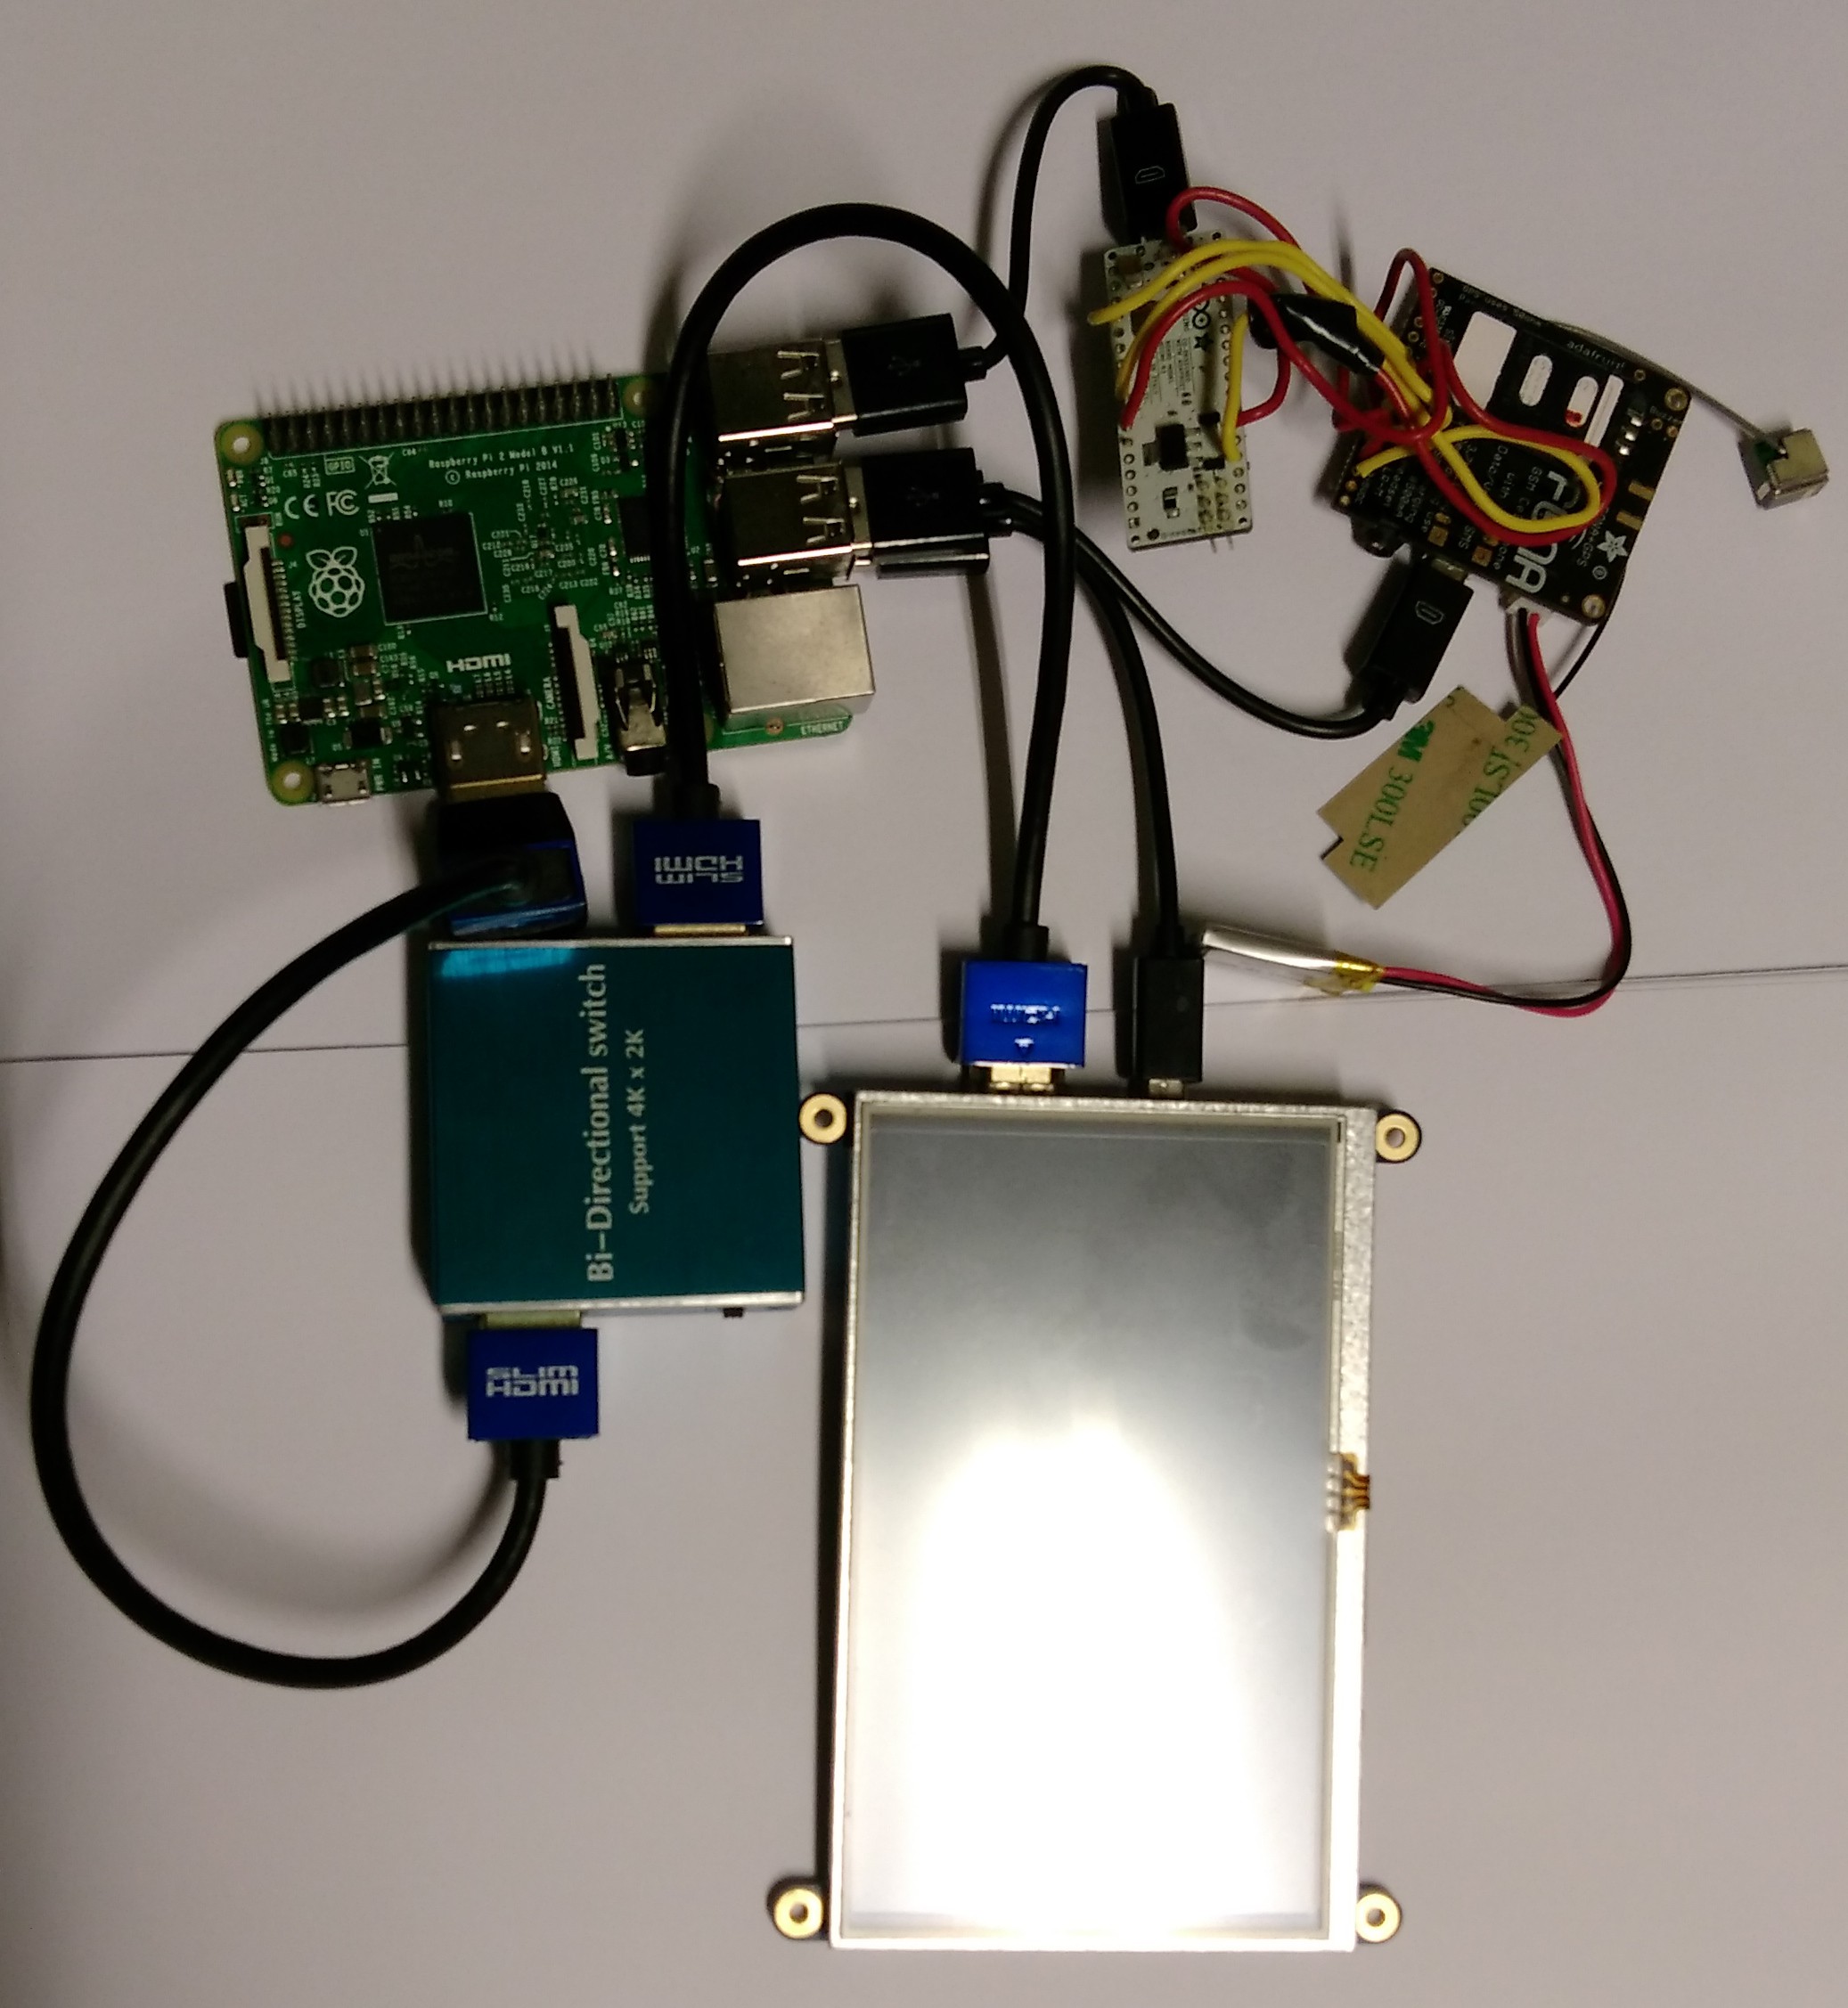
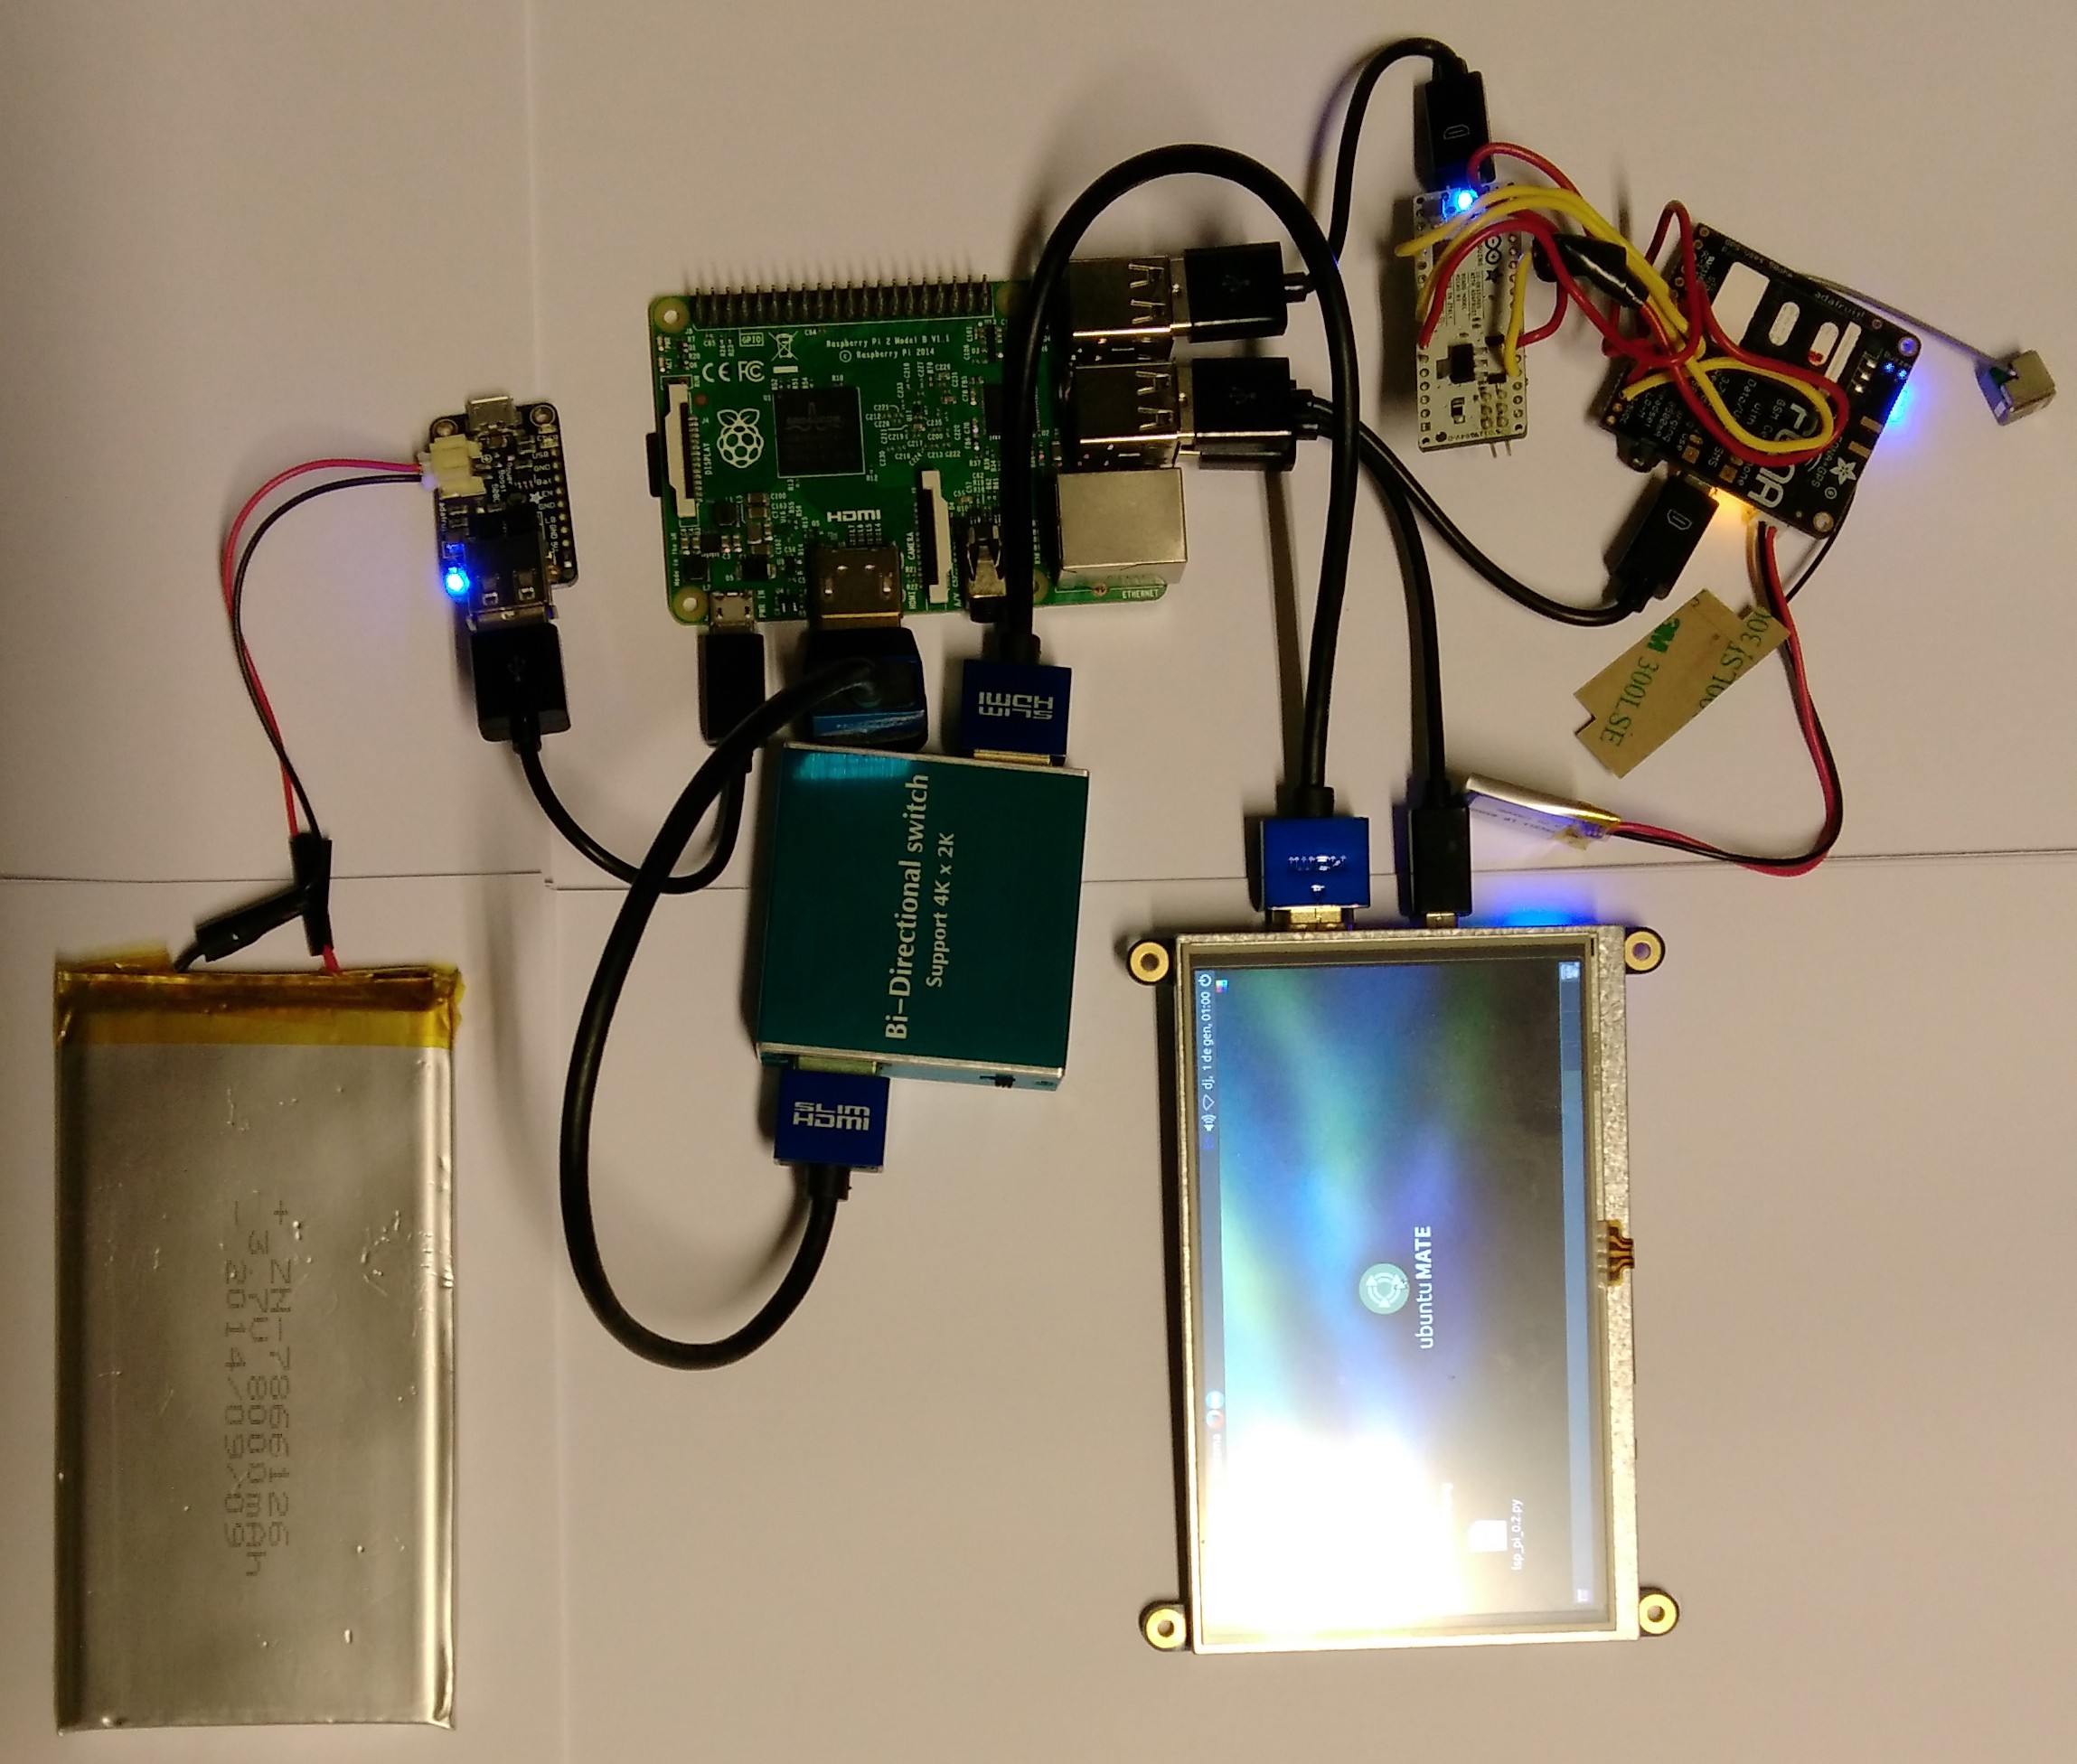
Put all the pieces together:
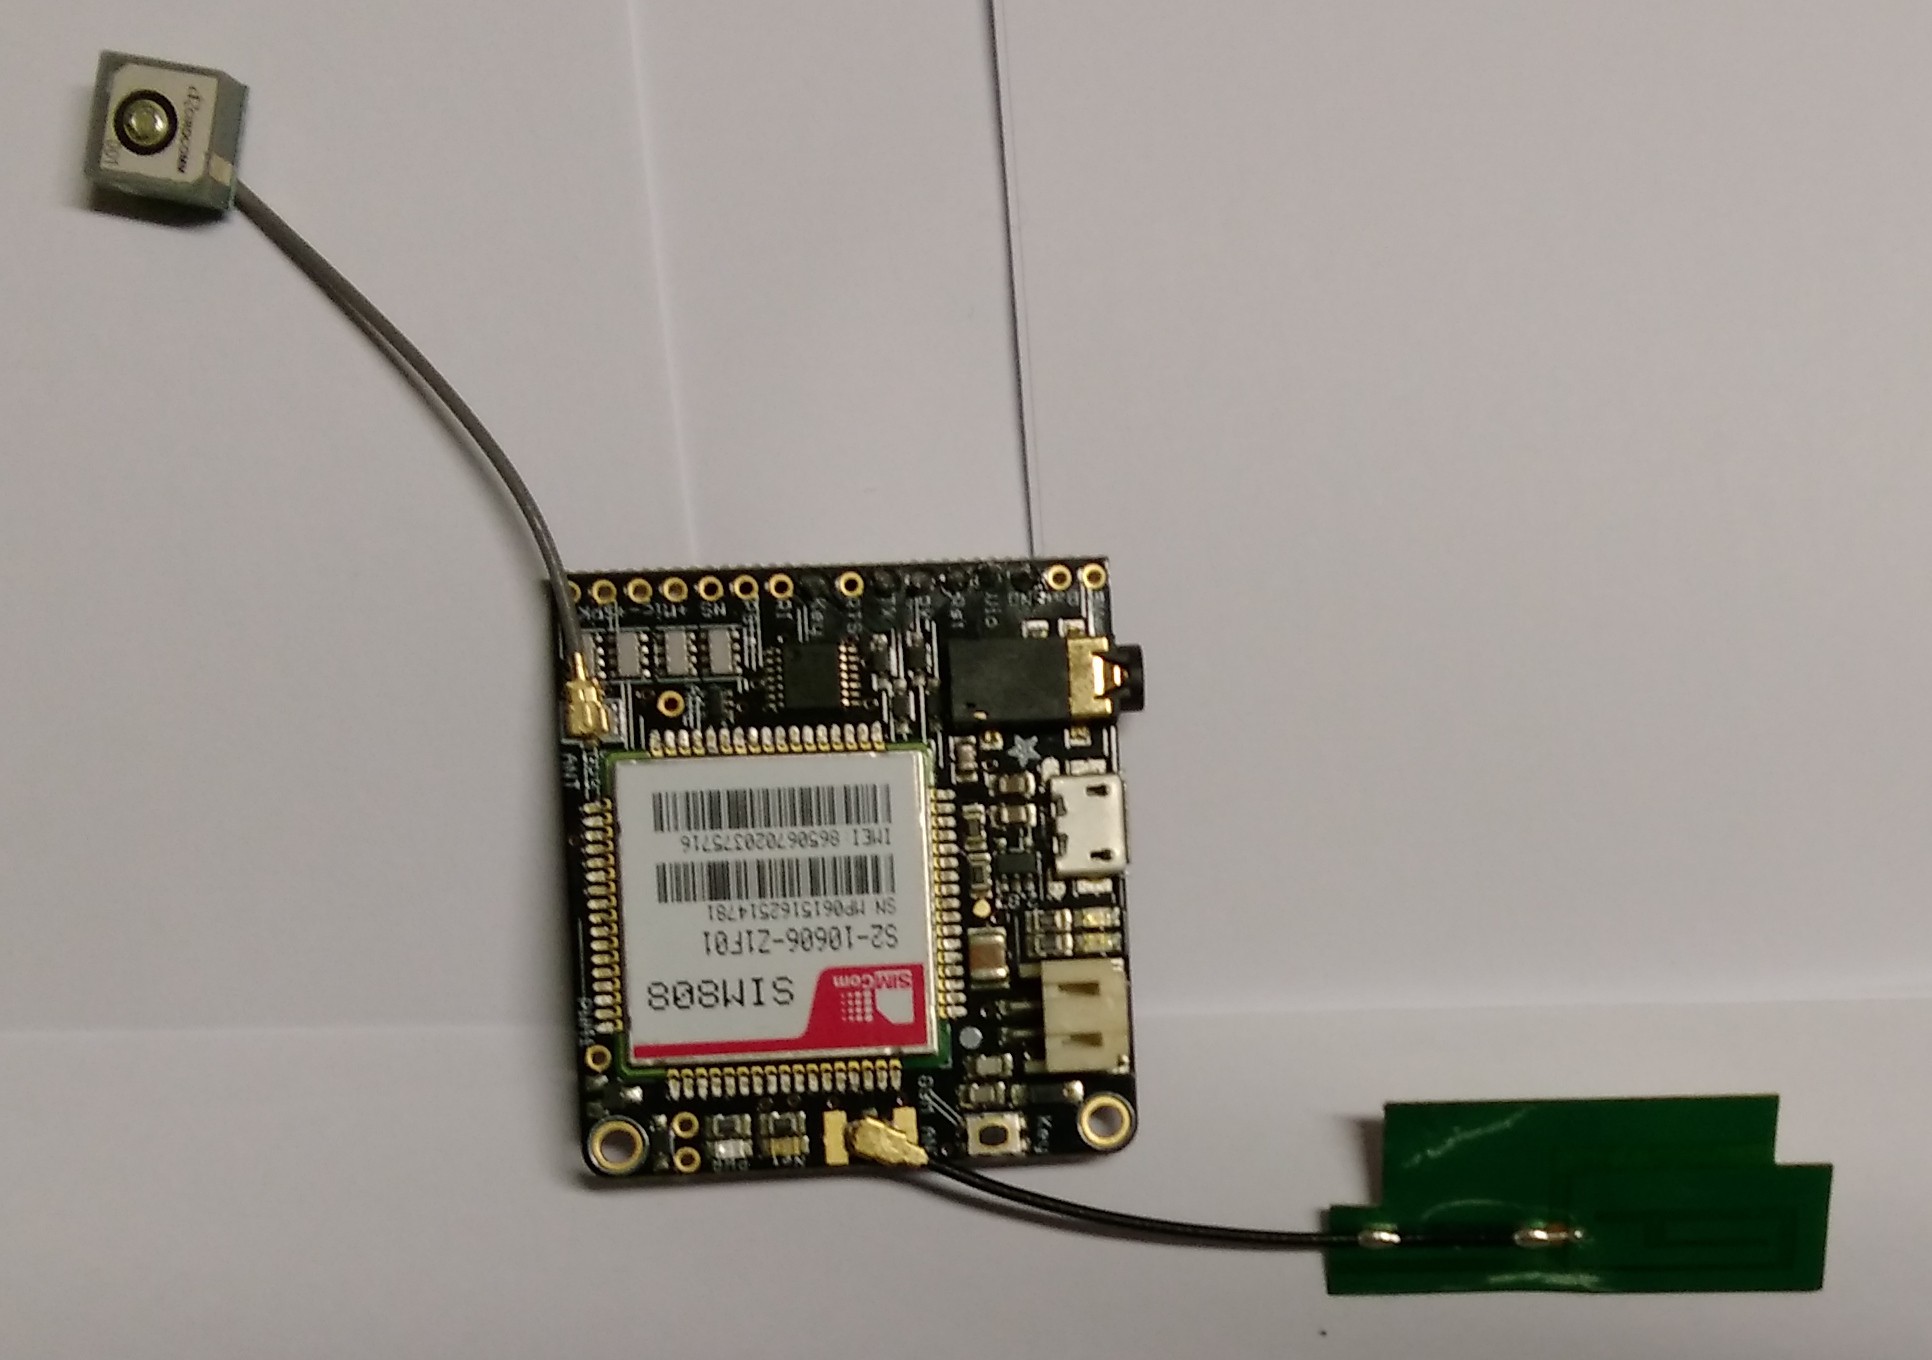
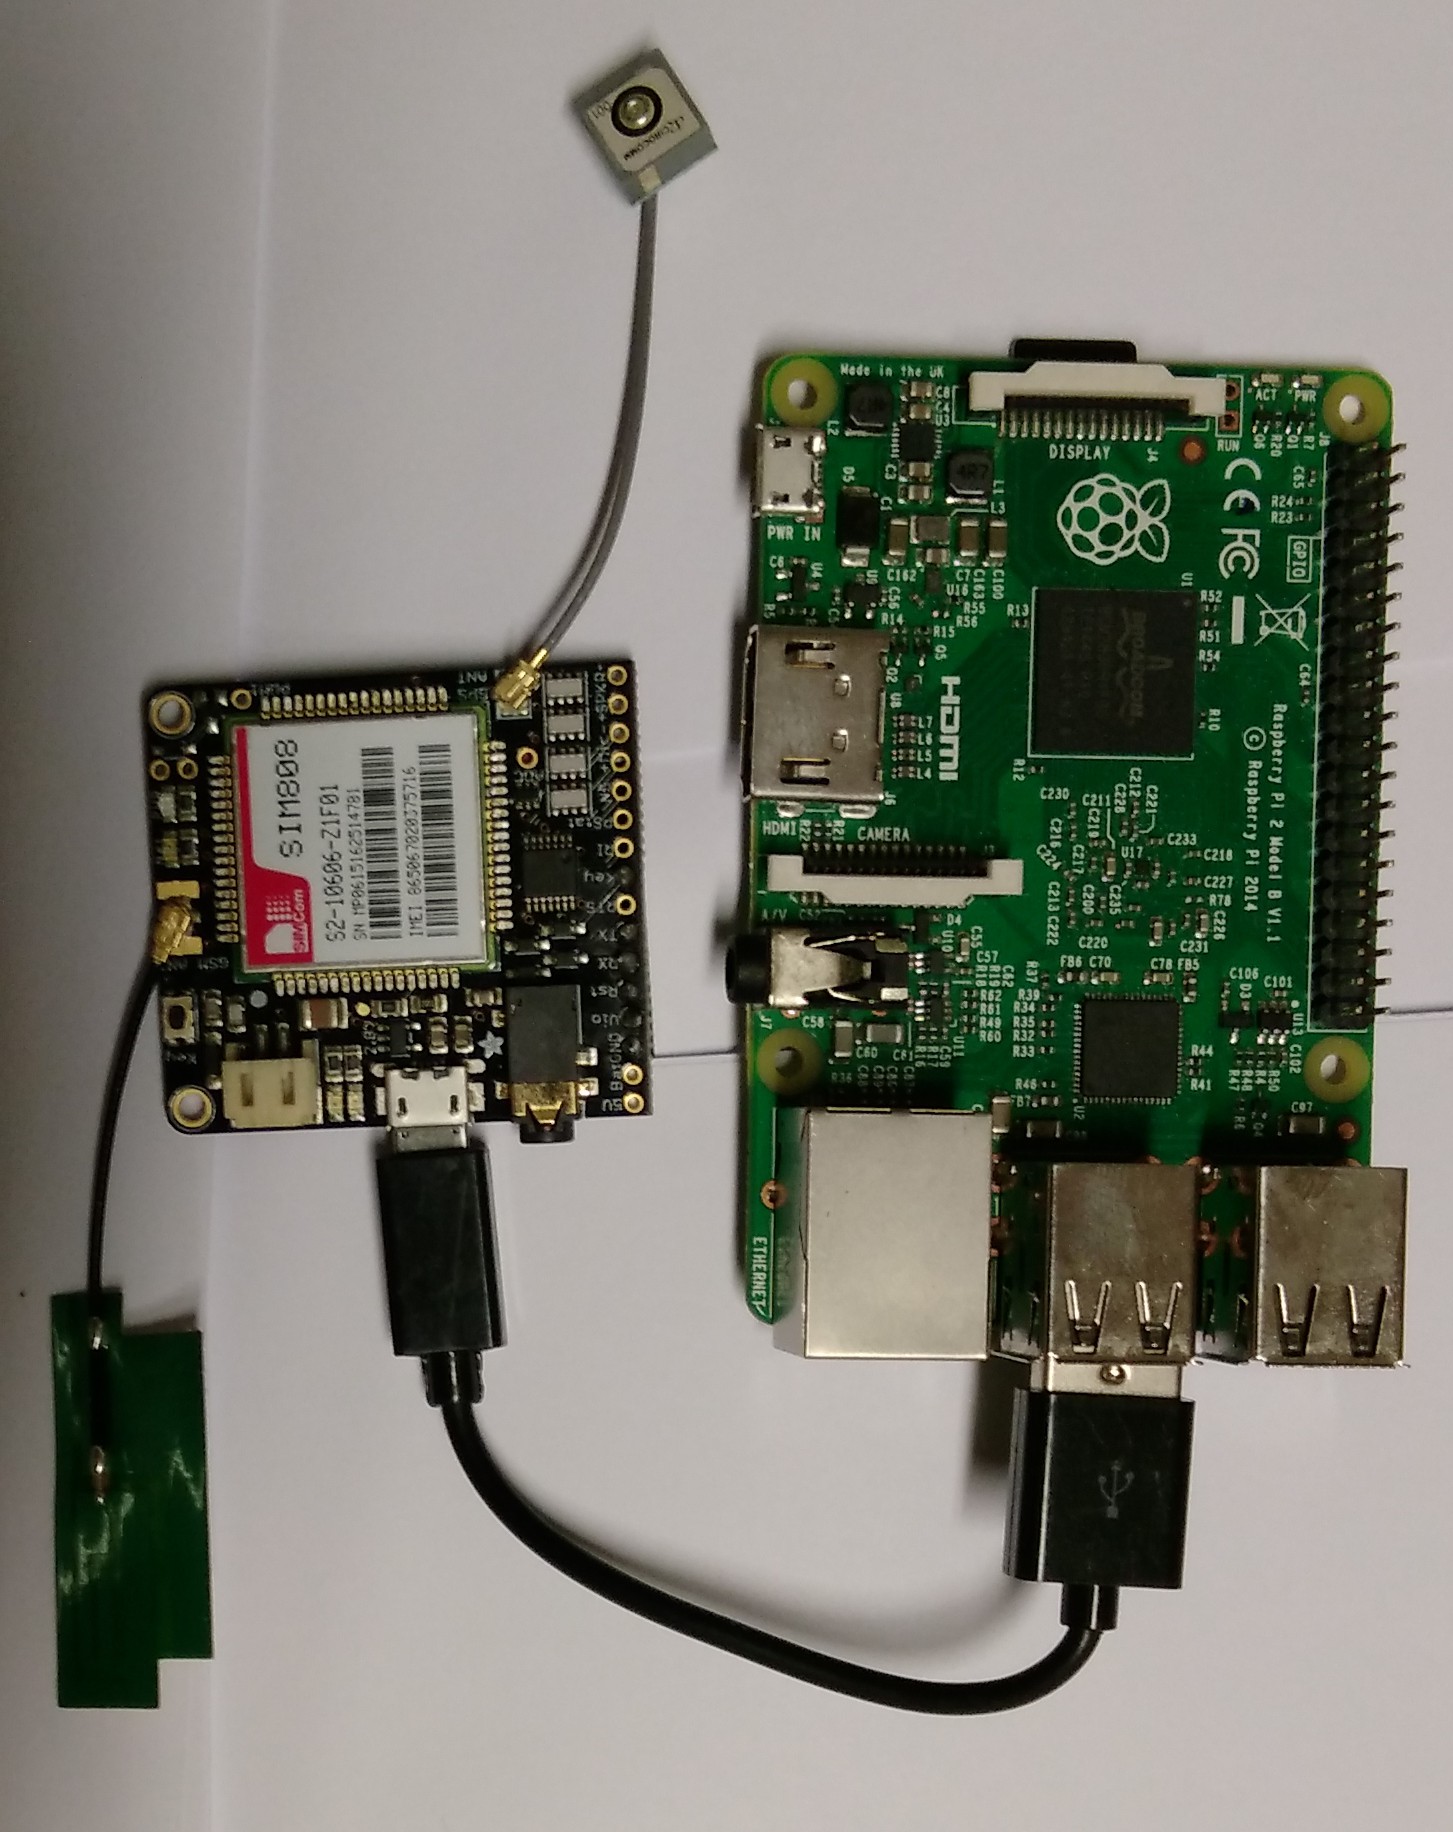
1) Connect the GPS and GSM antenna to the Fona.
![]()
2) Connect a microUSB cable from the Fona to the raspberry pi.
![]()
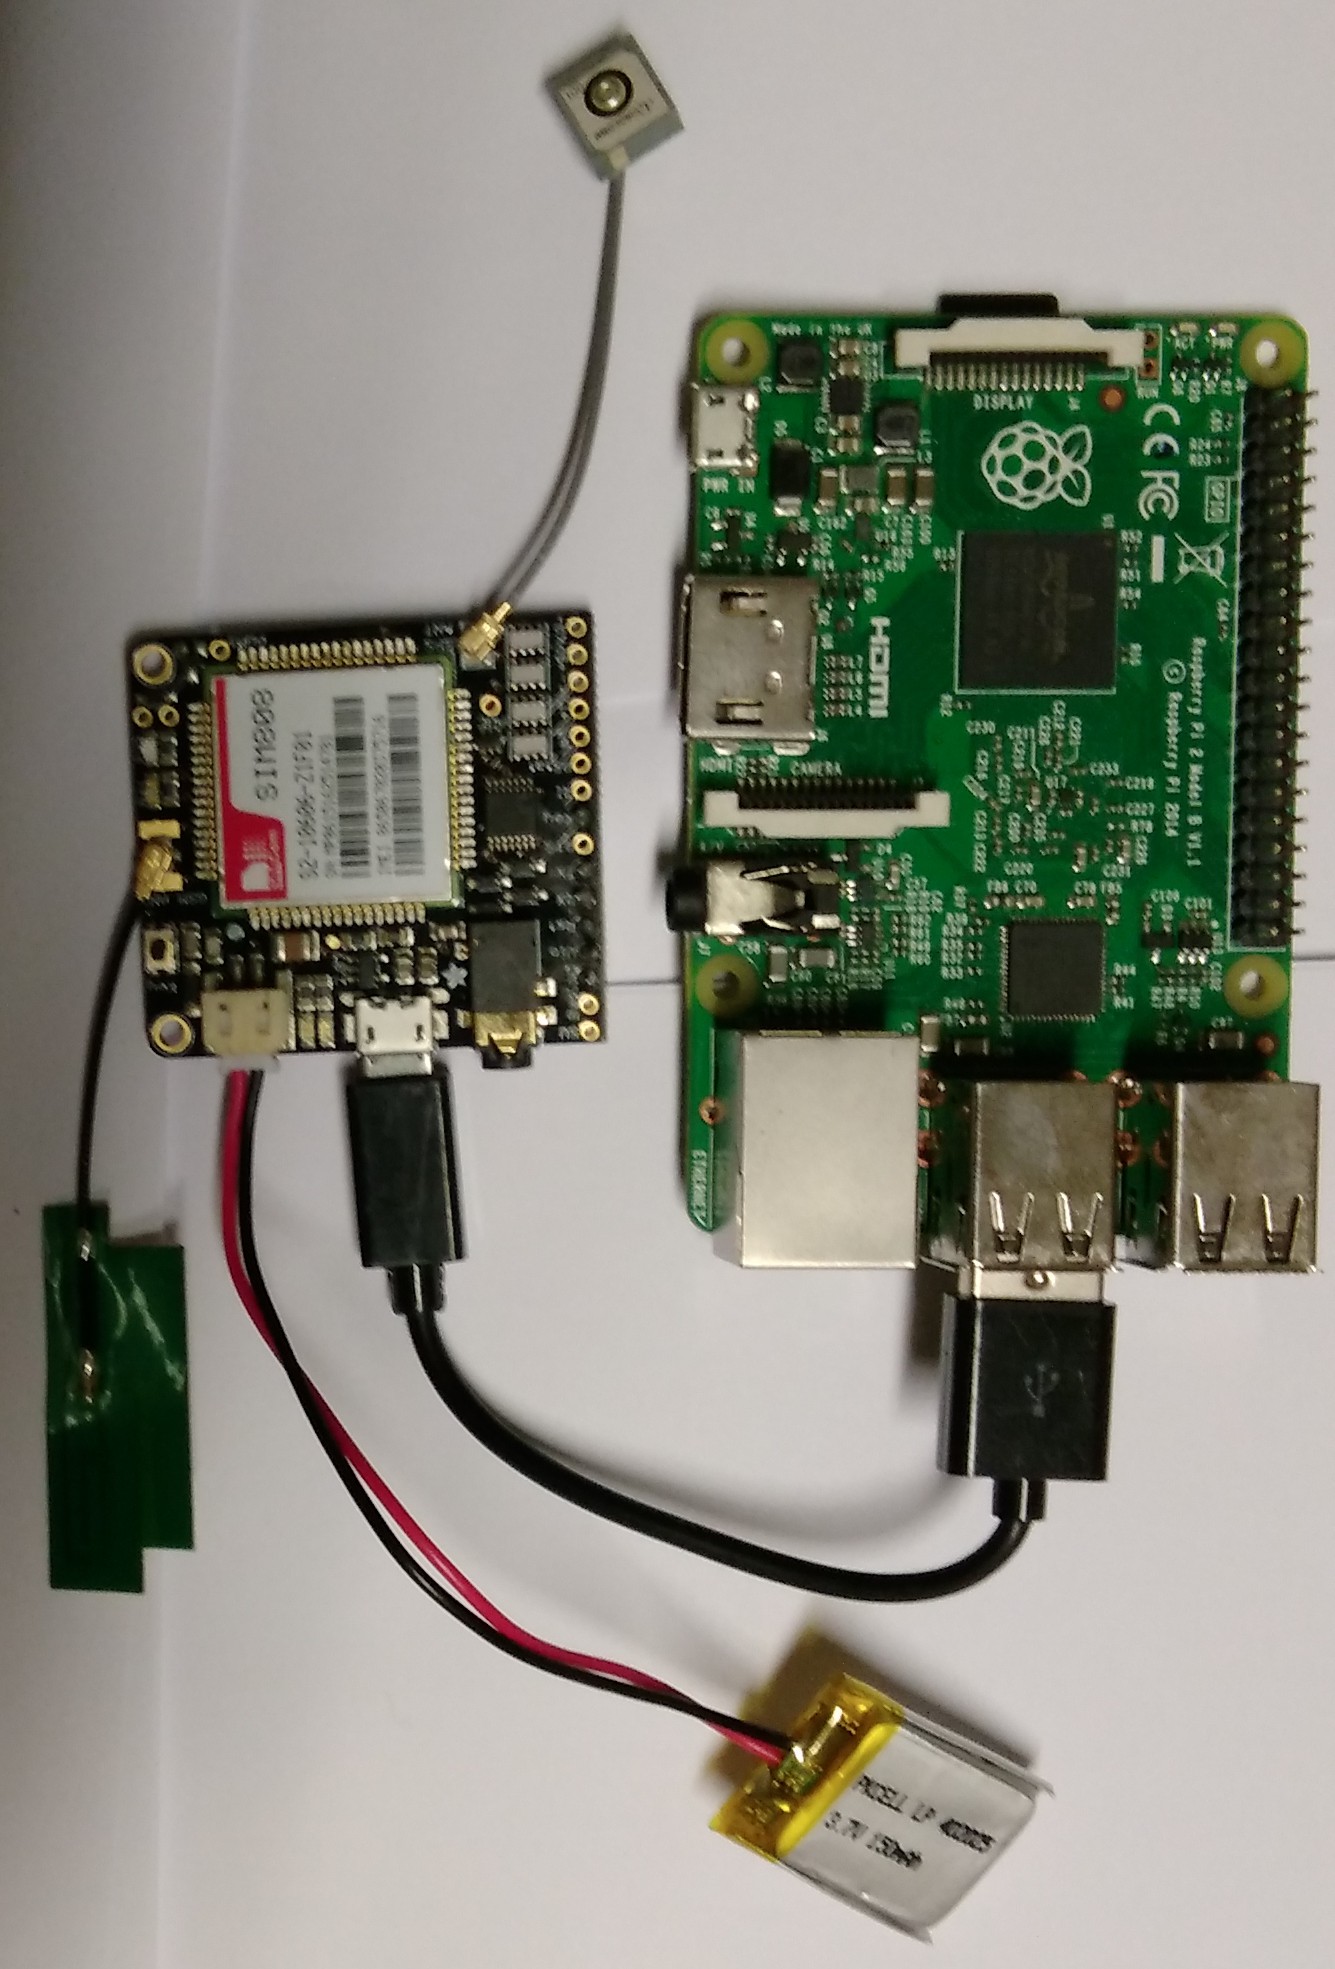
3) Connect the 150 mAh battery to the Fona.
![]()
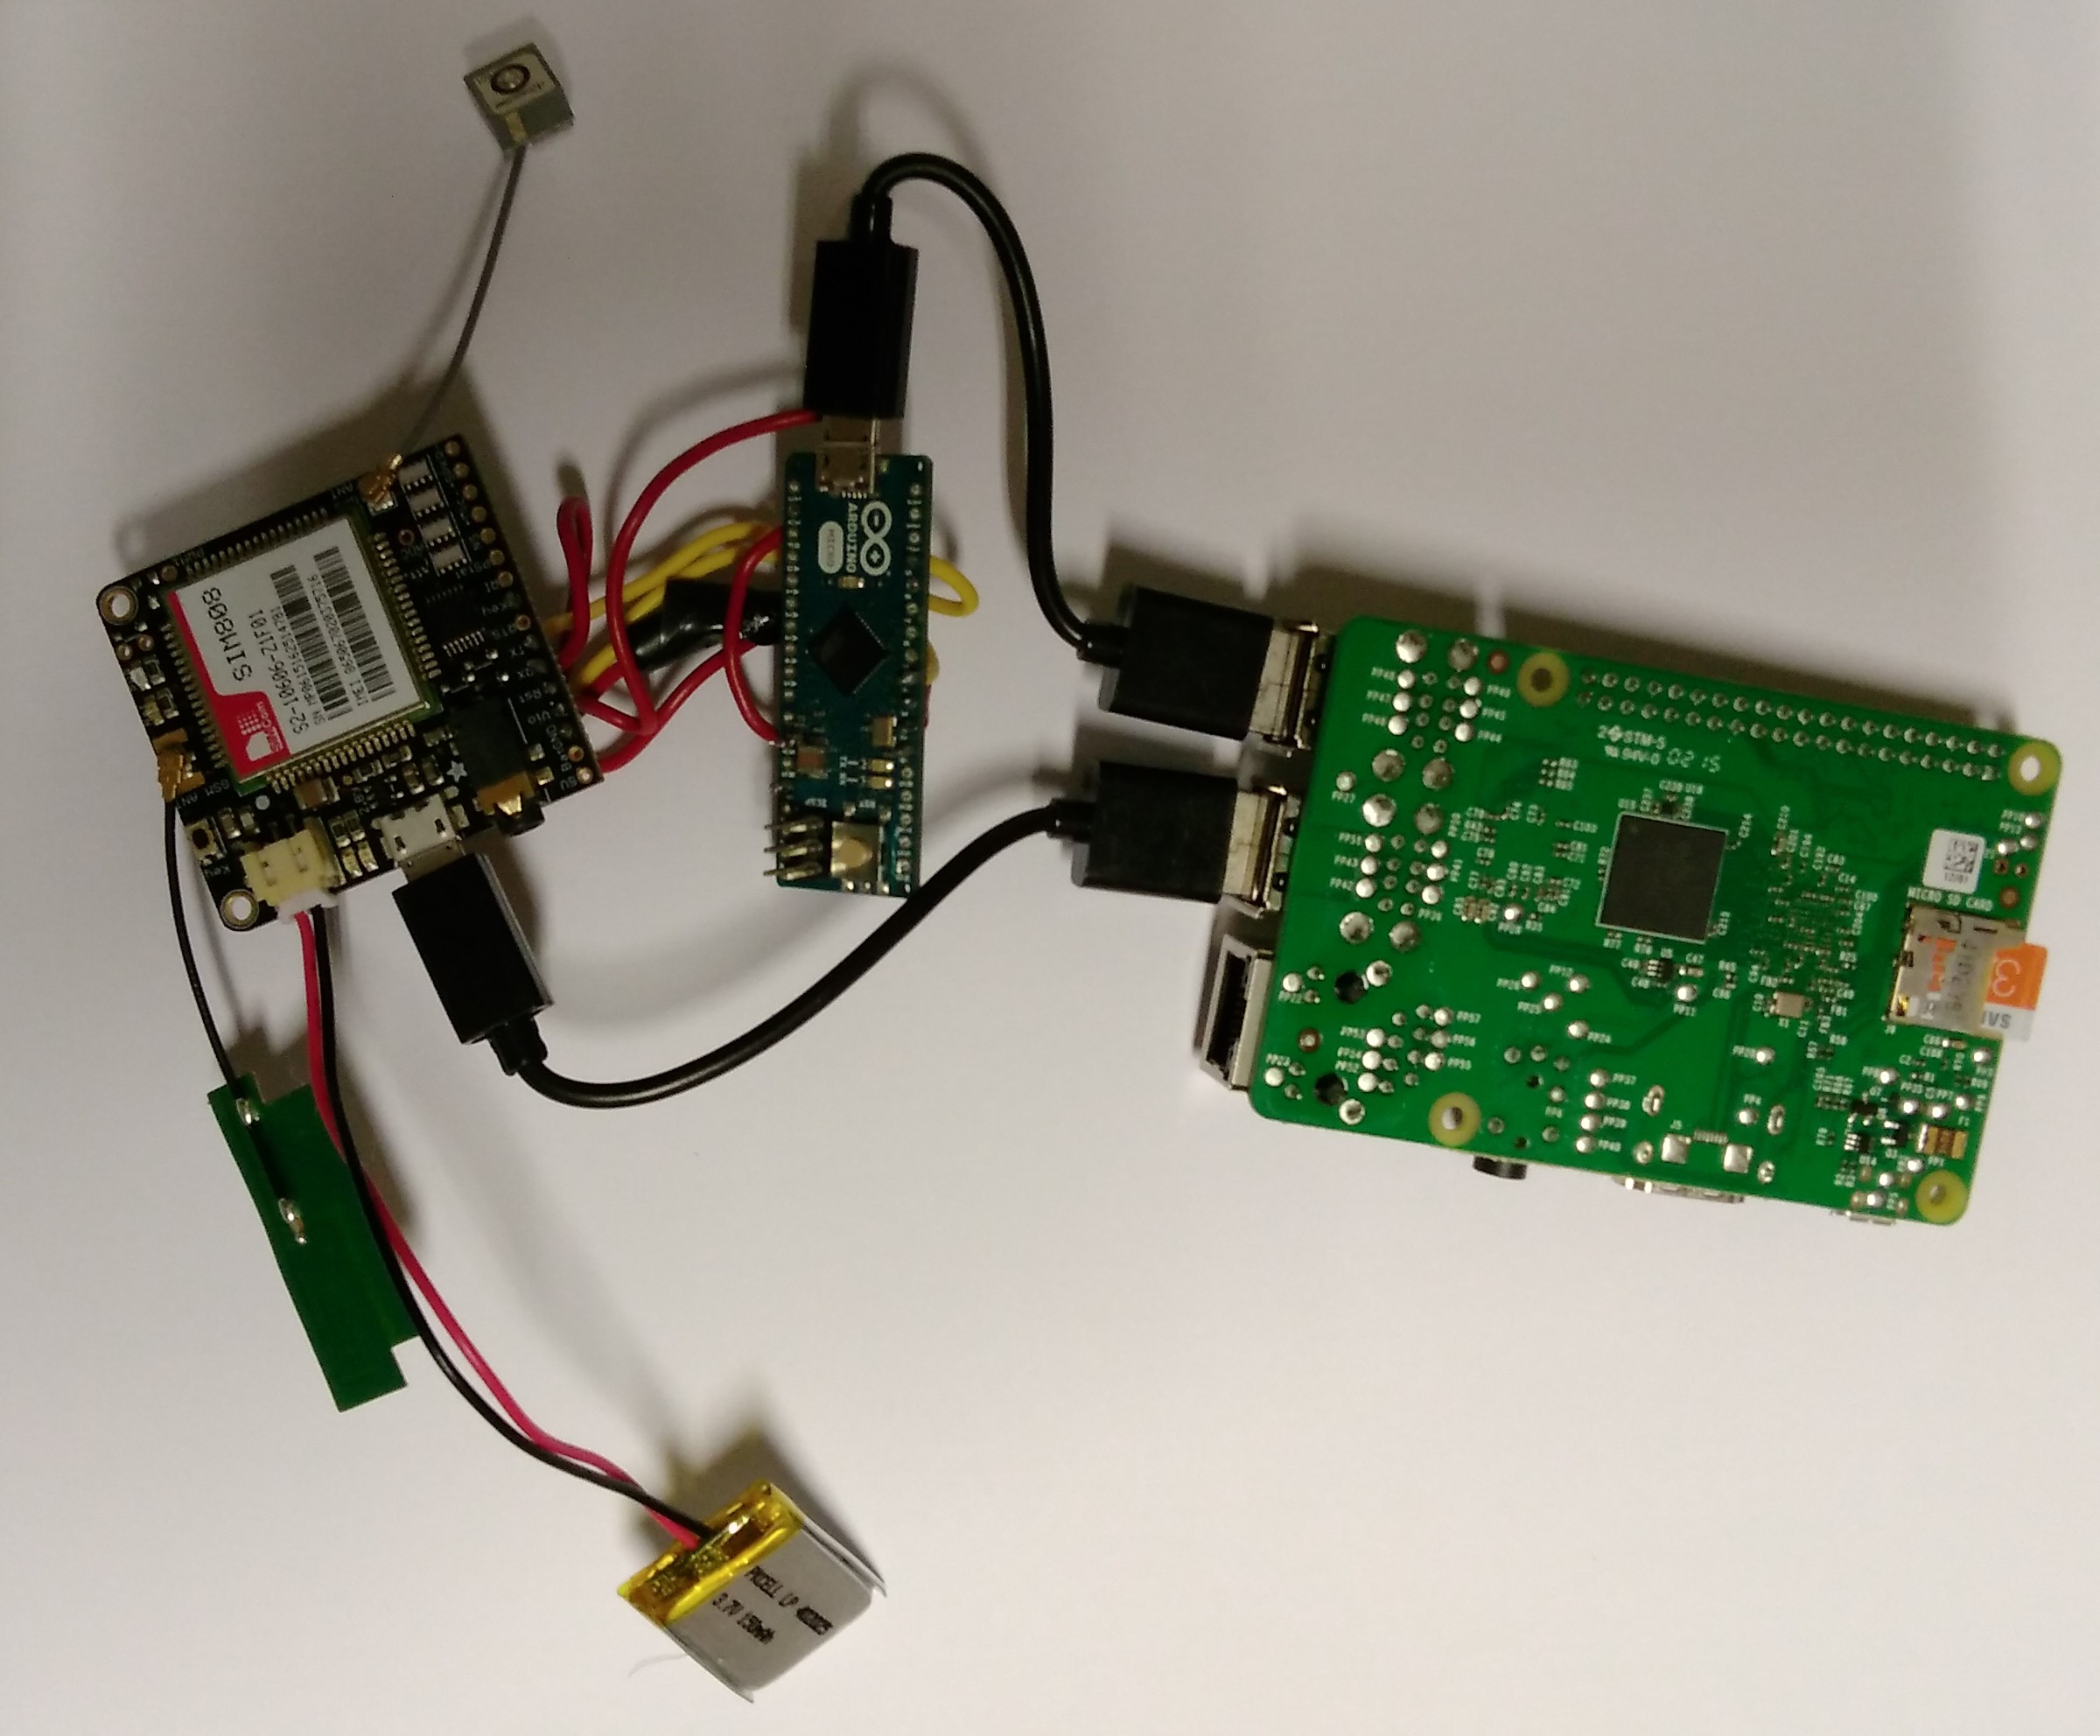
4) Connect a microUSB cable from the Arduino micro to the raspberry pi.
![]()
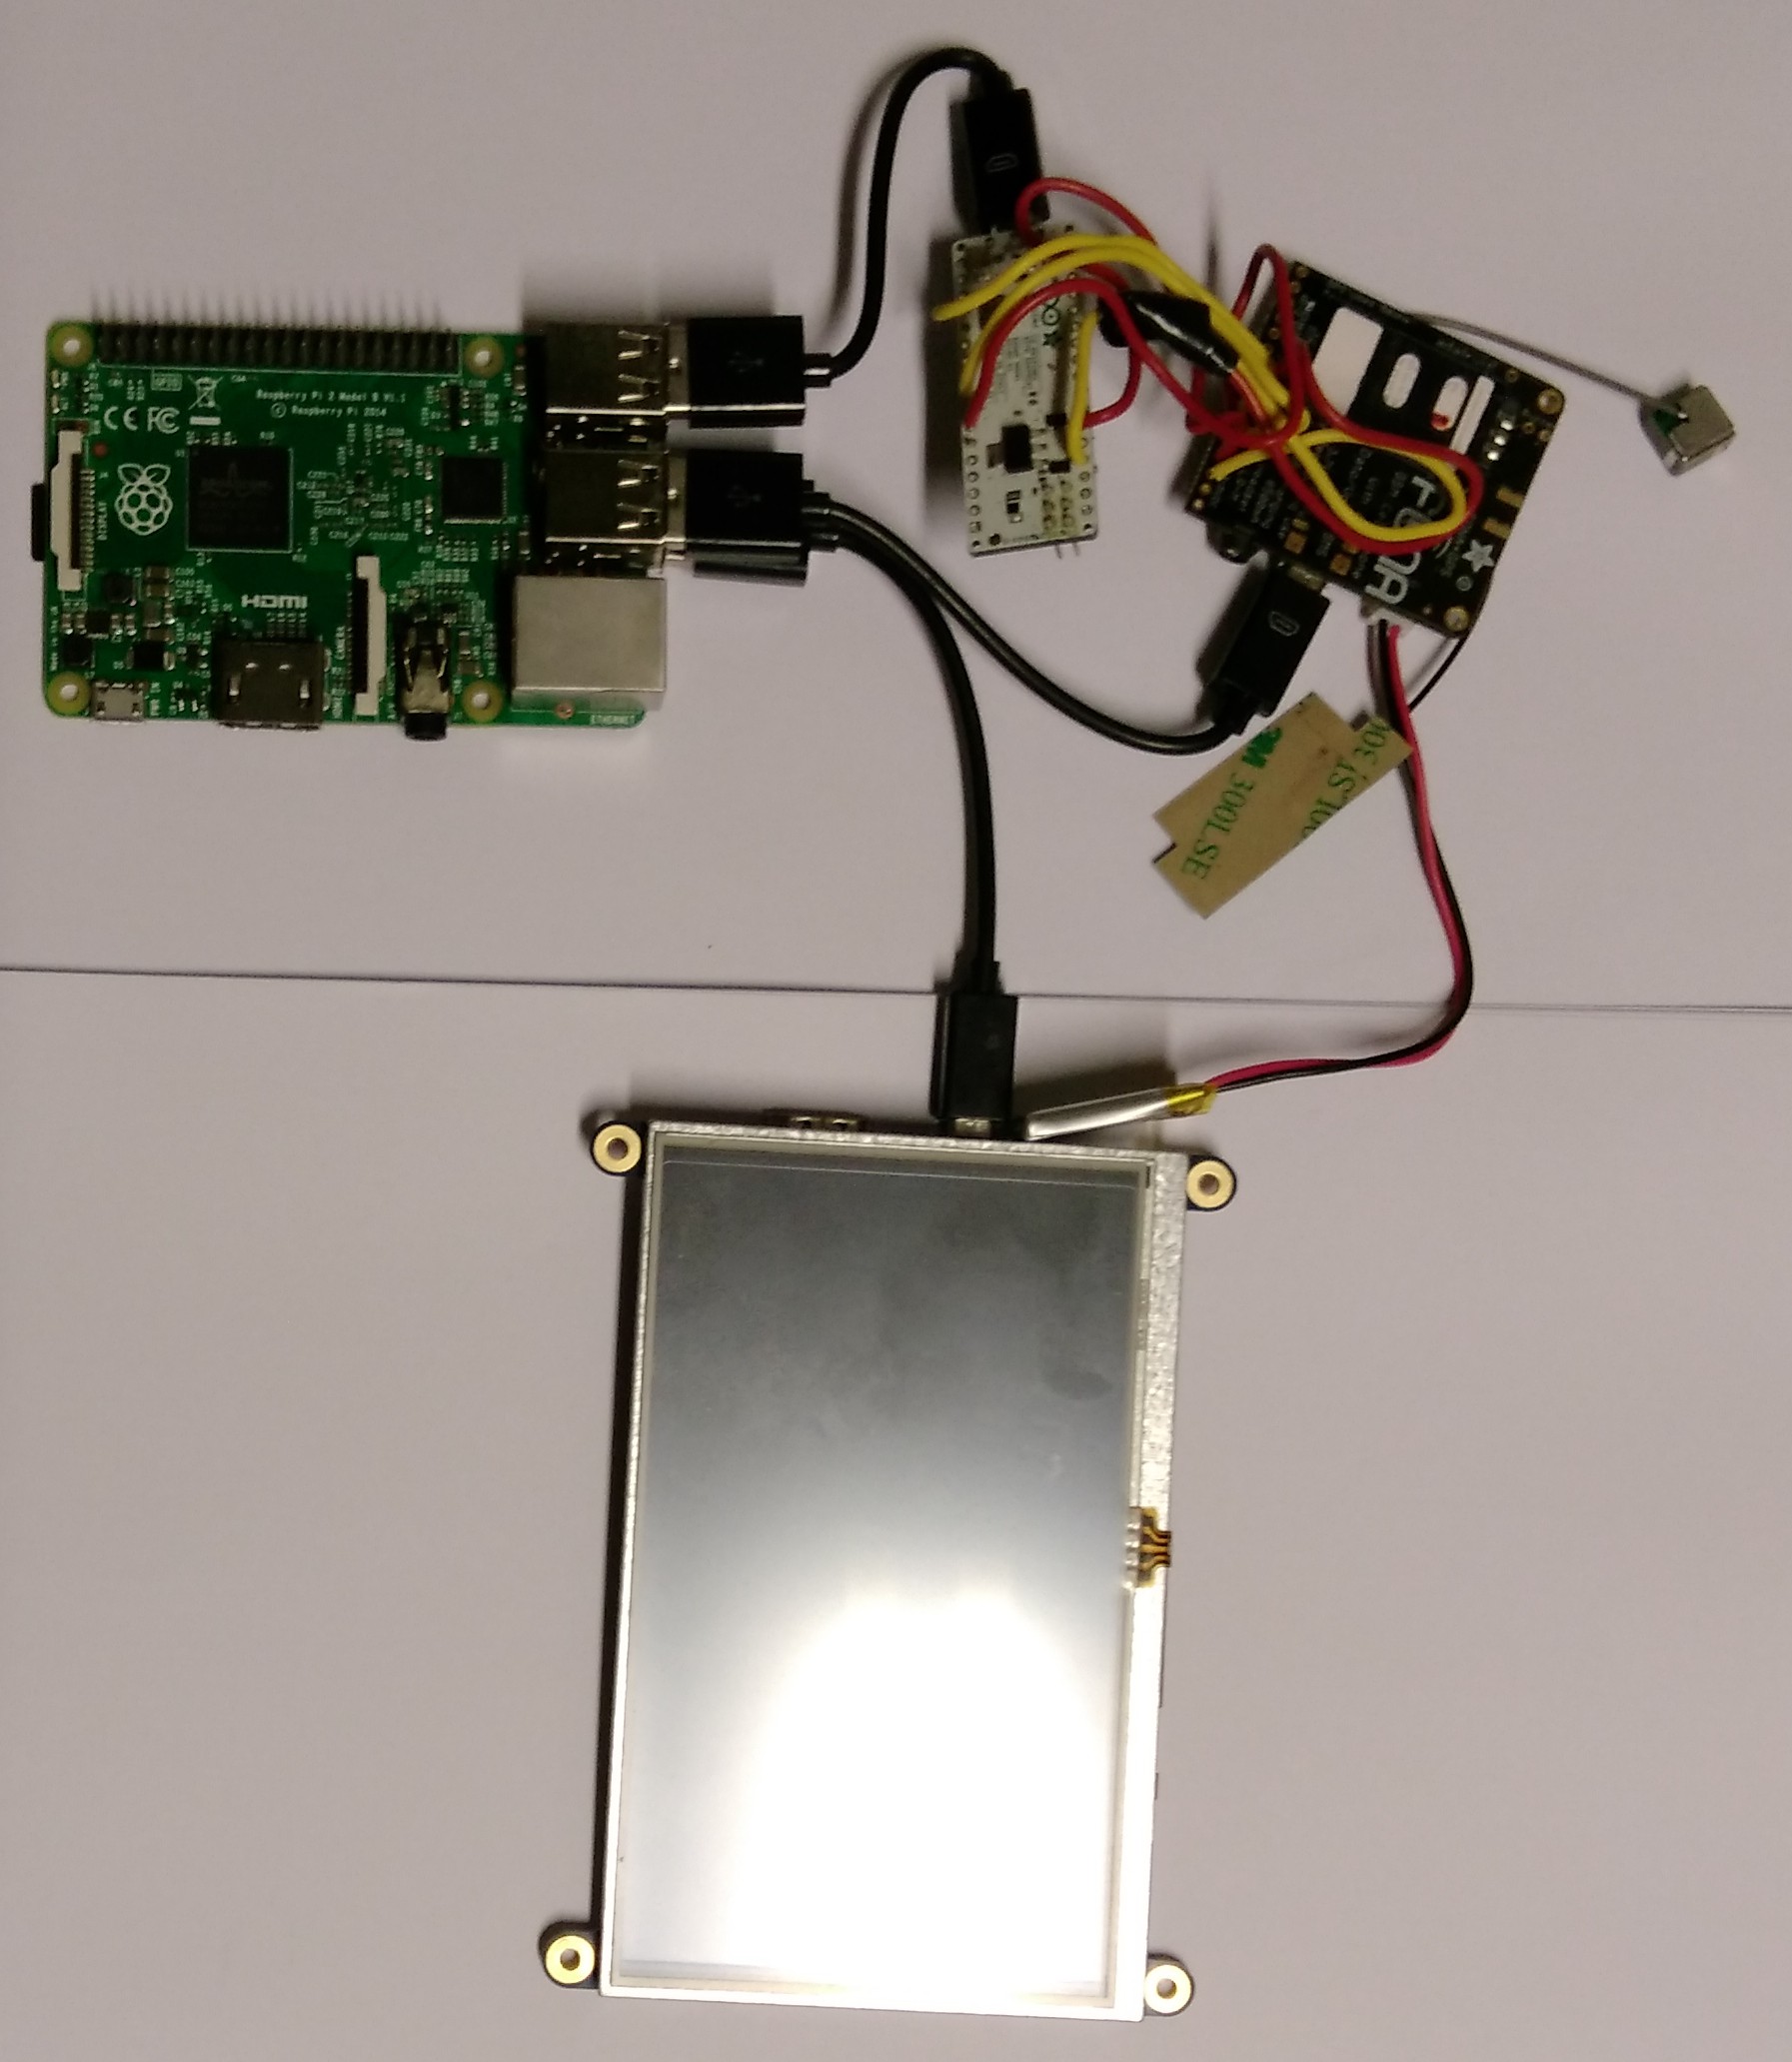
5) Connect a microUSB cable from the hdmi 5" display to the raspberry pi.
![]()
6) Connect the Hdmi cable from the hdmi 5" display to the Bi-directional switch. Connect another Hdmi cable from the bidirectional switch to the hdmi 90 degree adapter. Connect the 90 degree adaptar to the raspberry pi.
![]()
7) Connect the 8000 mAh battery to the PowerBoost 500C. Connect a microUSB cable from the raspberry pi to the PowerBoost 500C.
![]()
-
5Step 5
Make the wooden box
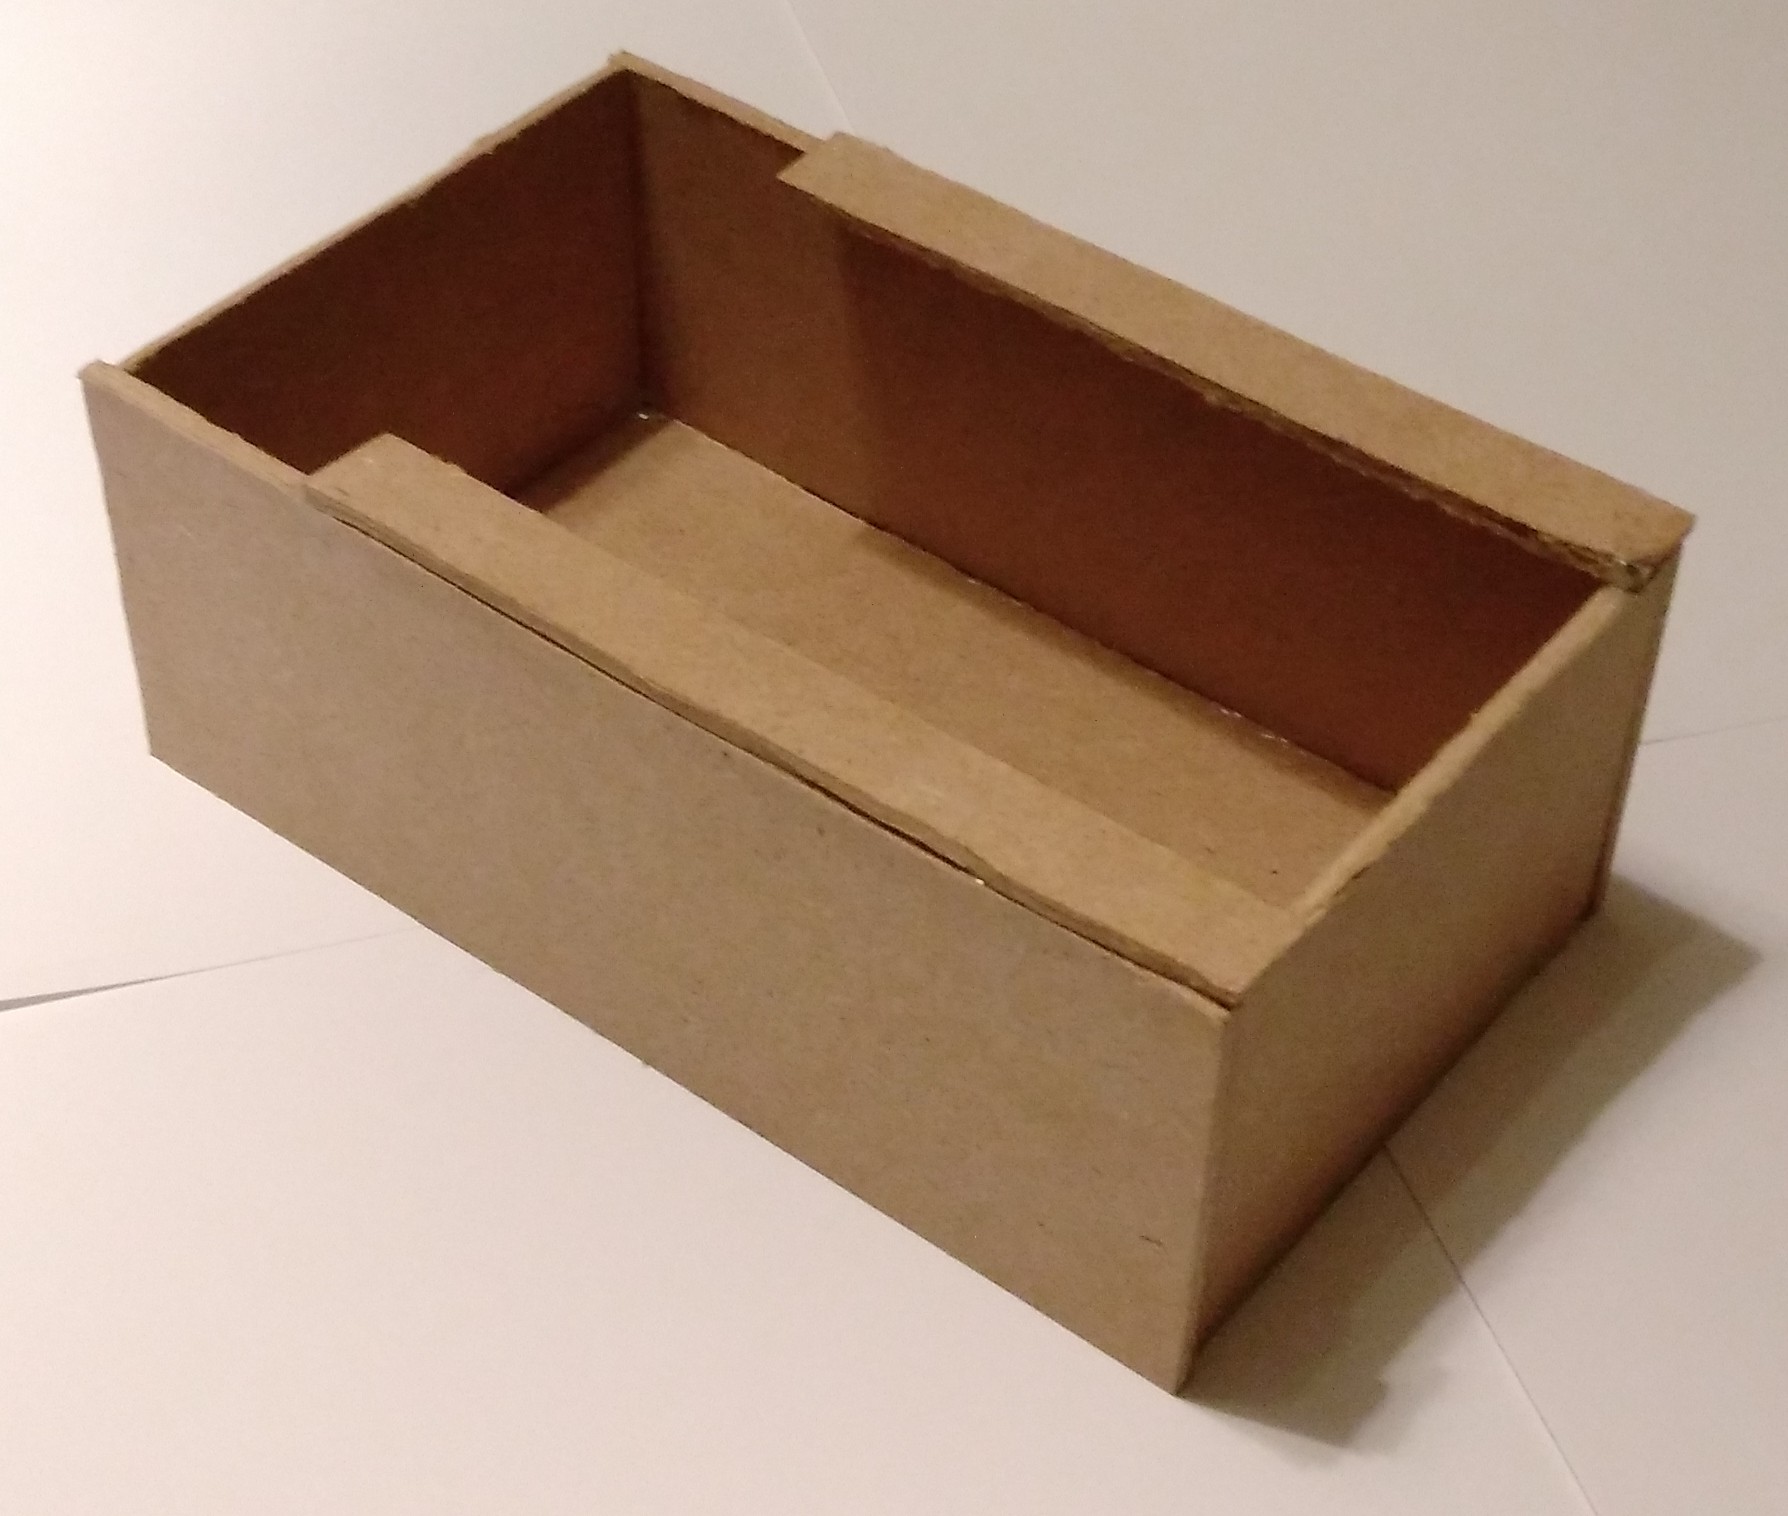
Cut the following sizes from a 3mm Medium-density fibreboard:
1 piece: 9,5 x 16,5 cm.
2 pieces: 6,5 x 9,5 cm.
2 pieces: 6,5 x 17,1 cm.
2 pieces: 1,4 x 13,5 cm
Glue them to make the following box:
![]()
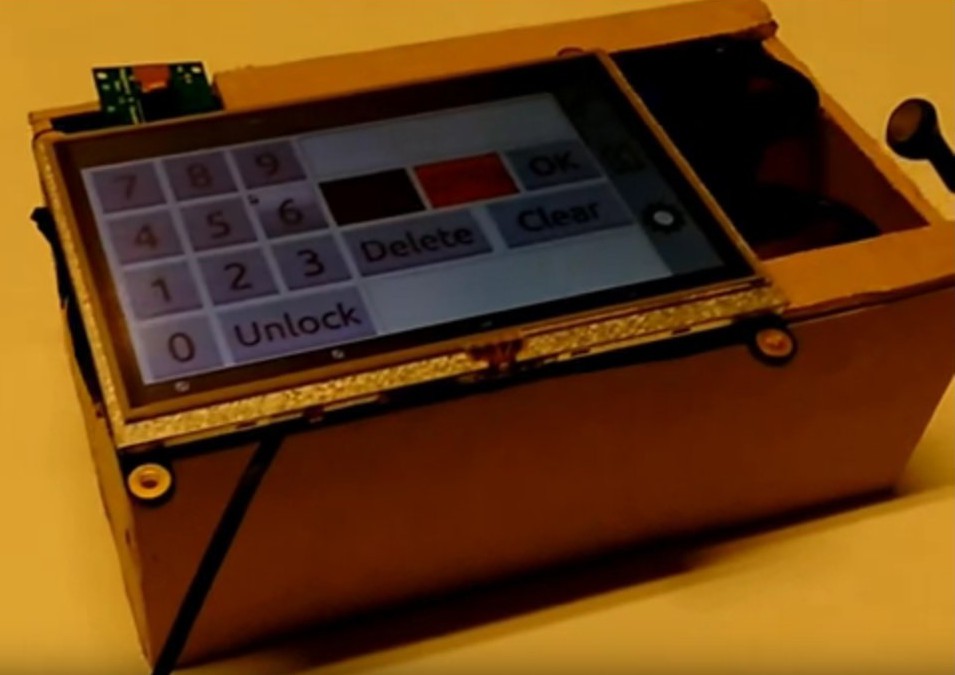
Put the hardware inside the box
Put all the hardware inside the box carefully. Use insulating material if needed.
![]()
-
6Step 6
Install libresmartphone software
1) Install python (if you don't have it) and the IDLE:
sudo apt-get install pythonsudo apt-get install idle2) Install pyserial:
sudo apt-get install python-serial3) Give permissions to read and write to the USB where the fona is placed. It can be one of the following (If it works, but in the future the software stops working try making another time this step):
sudo chmod 777 /dev/ttyACM0sudo chmod 777 /dev/ttyACM1sudo chmod 777 /dev/ttyACM2sudo chmod 777 /dev/ttyACM34) Install python-tools package:
sudo apt-get install python-tools5) Download the six files of libresmartphone software and put them in the same folder:
6) Open libresmartphone_v0.3.2.py with the python IDLE (using python 2.7) and run the module.
 Gerard
Discussions
Become a Hackaday.io Member
Create an account to leave a comment. Already have an account? Log In.