Muth
Muth-
Python
12/29/2016 at 10:46 • 0 commentsI spent quite some time to learn a bit (very few in fact) of python as the library picamera gives acces to a lot of setting for the camera module. I made as well a small circuit around the MCP3426 ADC using some photo-resistors.
Right now I've only define some thresholds to change the exposure time. Which explains why there is some brightness jumps in the video below. However it is a quite promizing solution, and I'll continue to try to improve the exposure compensation.
These python tests are on GitHub and needs the picamera, PIL and numpy libraries.
-
Raspberry Camera v2
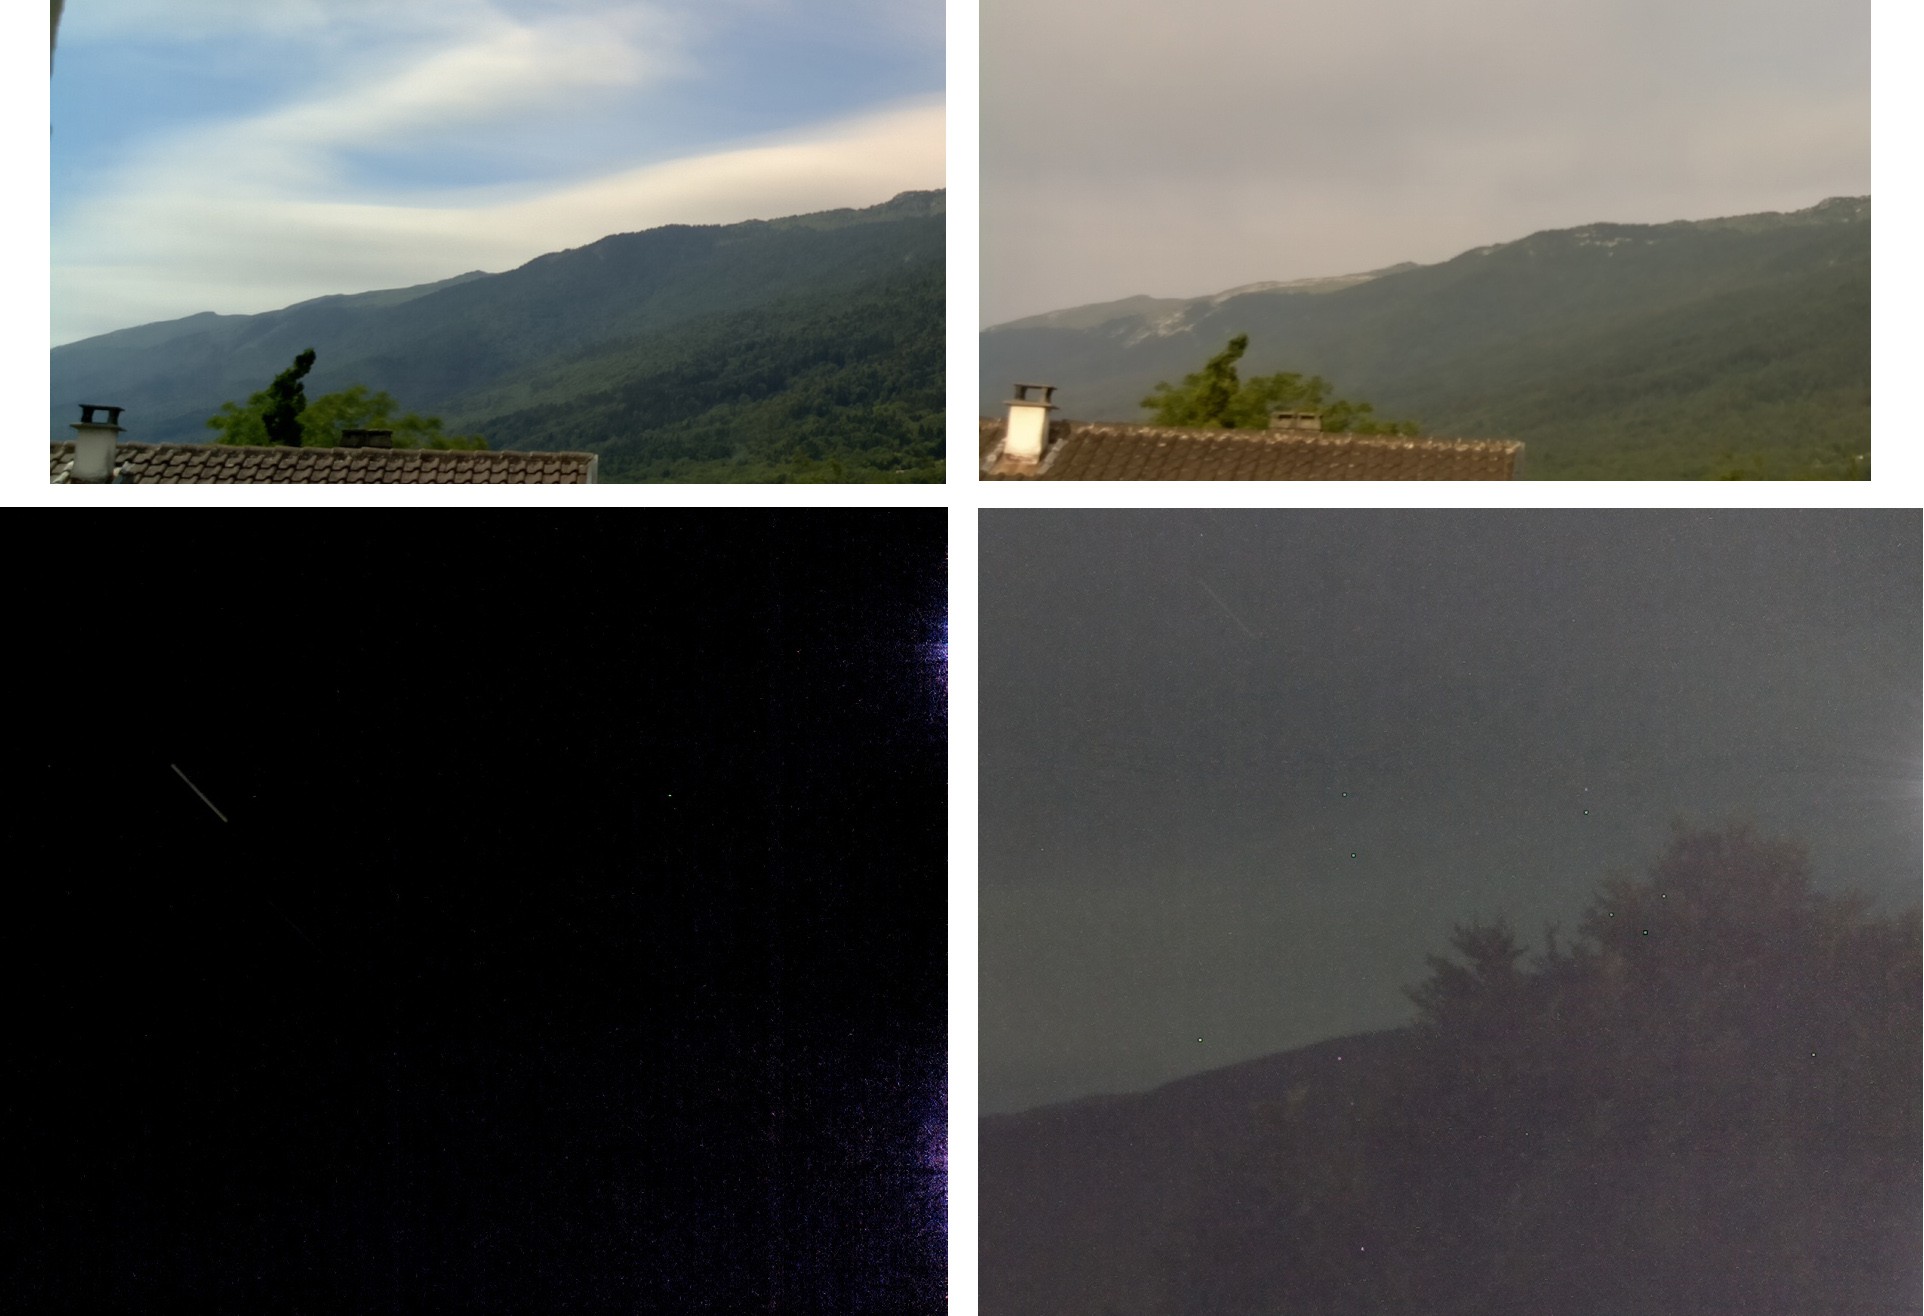
12/14/2016 at 09:56 • 0 commentsHere some tests with the Raspberry pi Camera module v2. At first I though it was less sensible than the v1. But the reason I got darker images is mainly because the automatic exposure algorithm do not let increase the shutter time and ISO as much as with the v1.
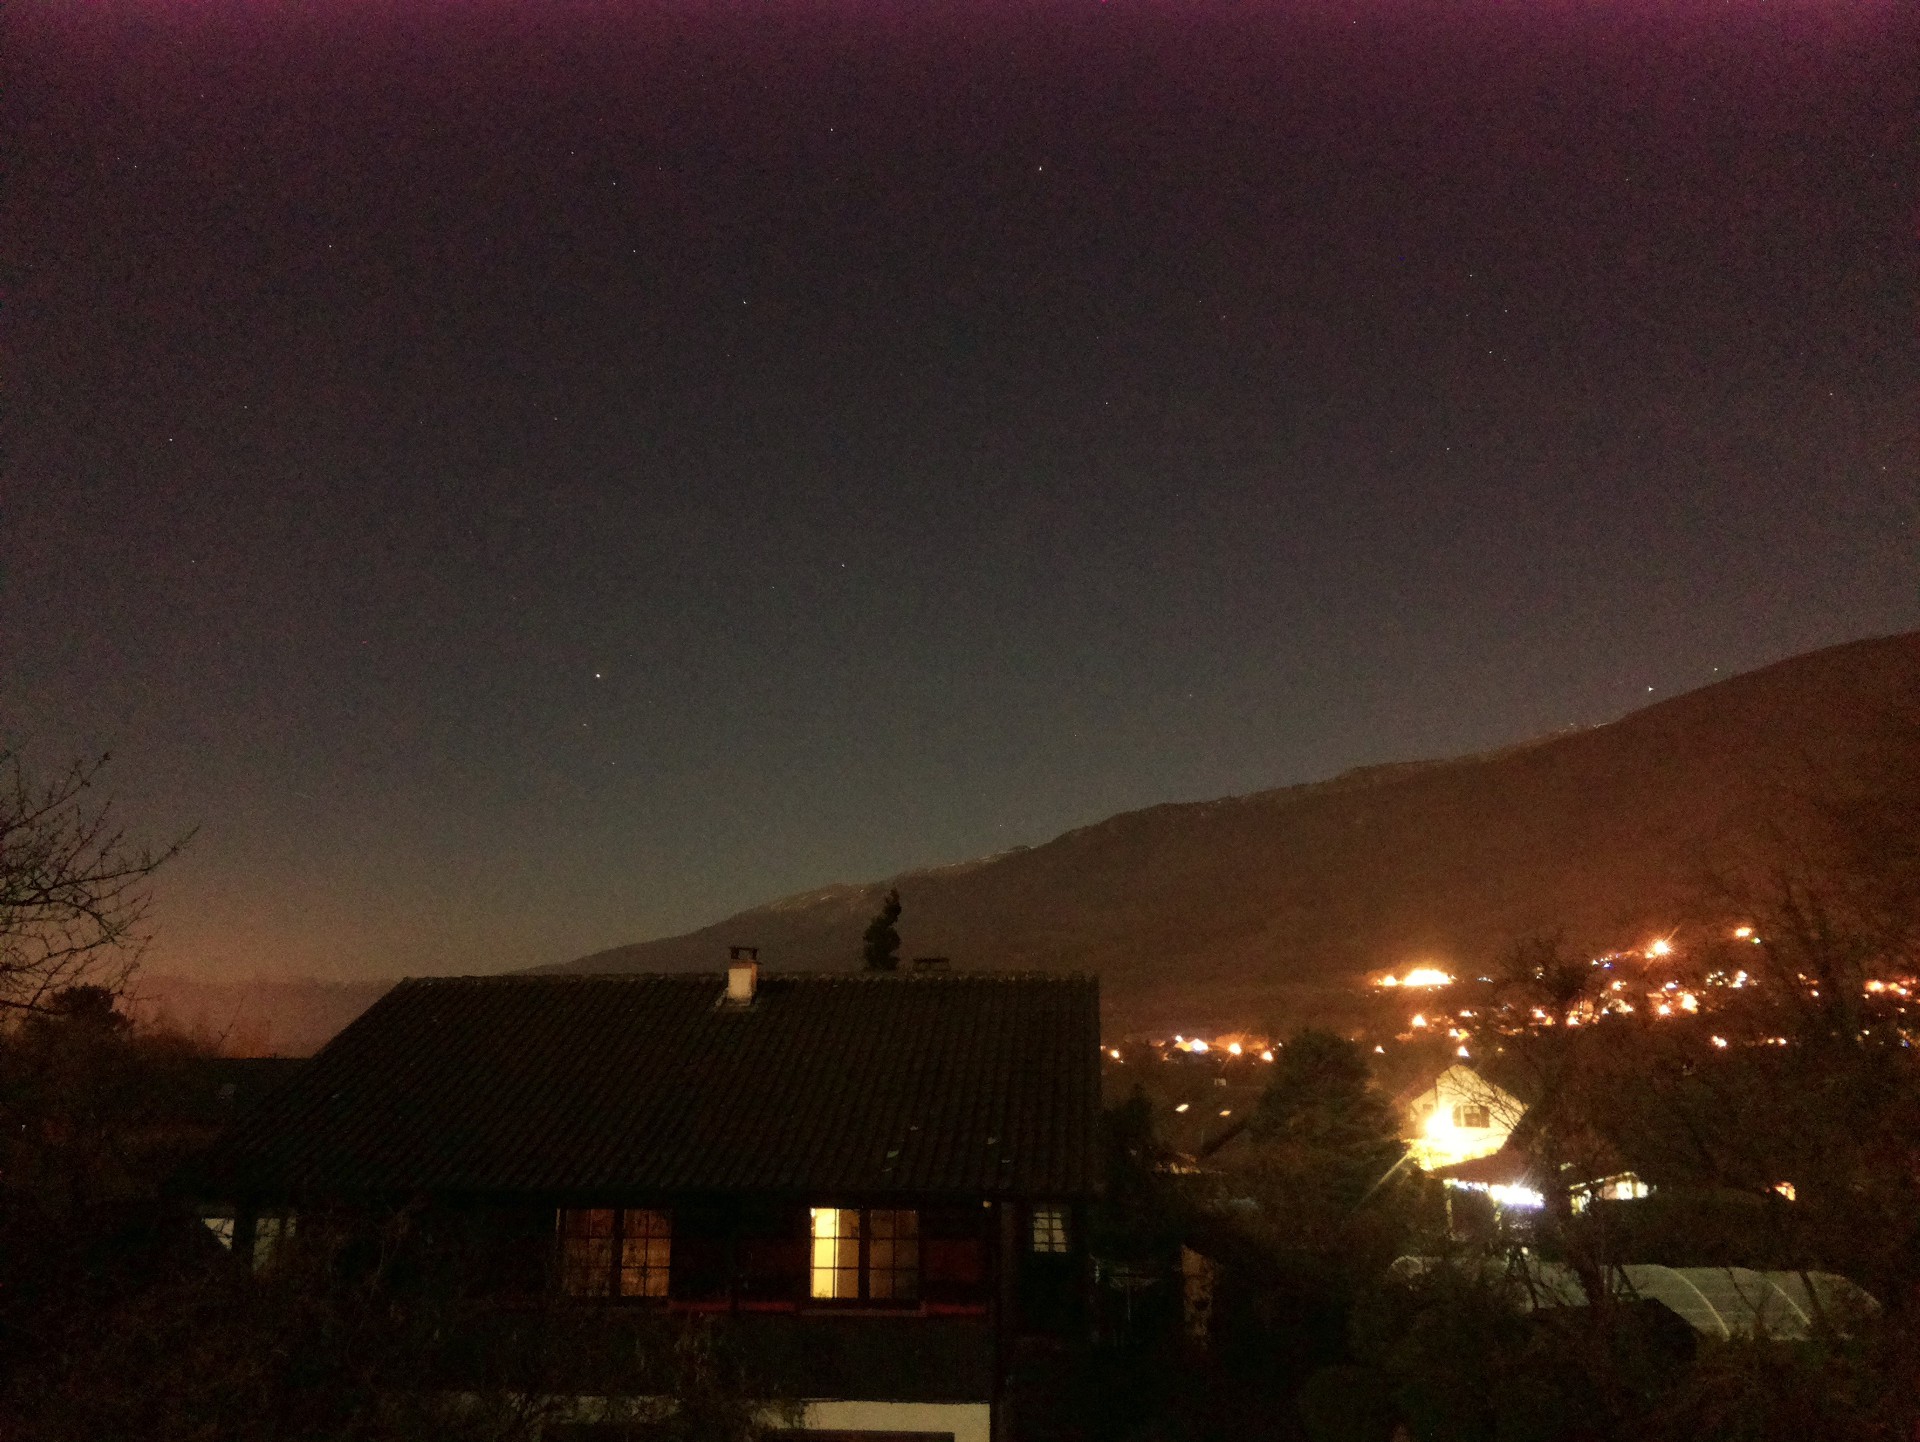
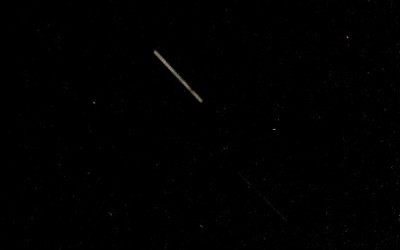
However I test different settings, especially during night. I set manually the ISO to 800 and exposure time to 6 seconds. The result is very nice, even with the stock tiny lens, the stars are visible:
![]()
Then I made some stacking/averaging as before, with even nicer results:
![]()
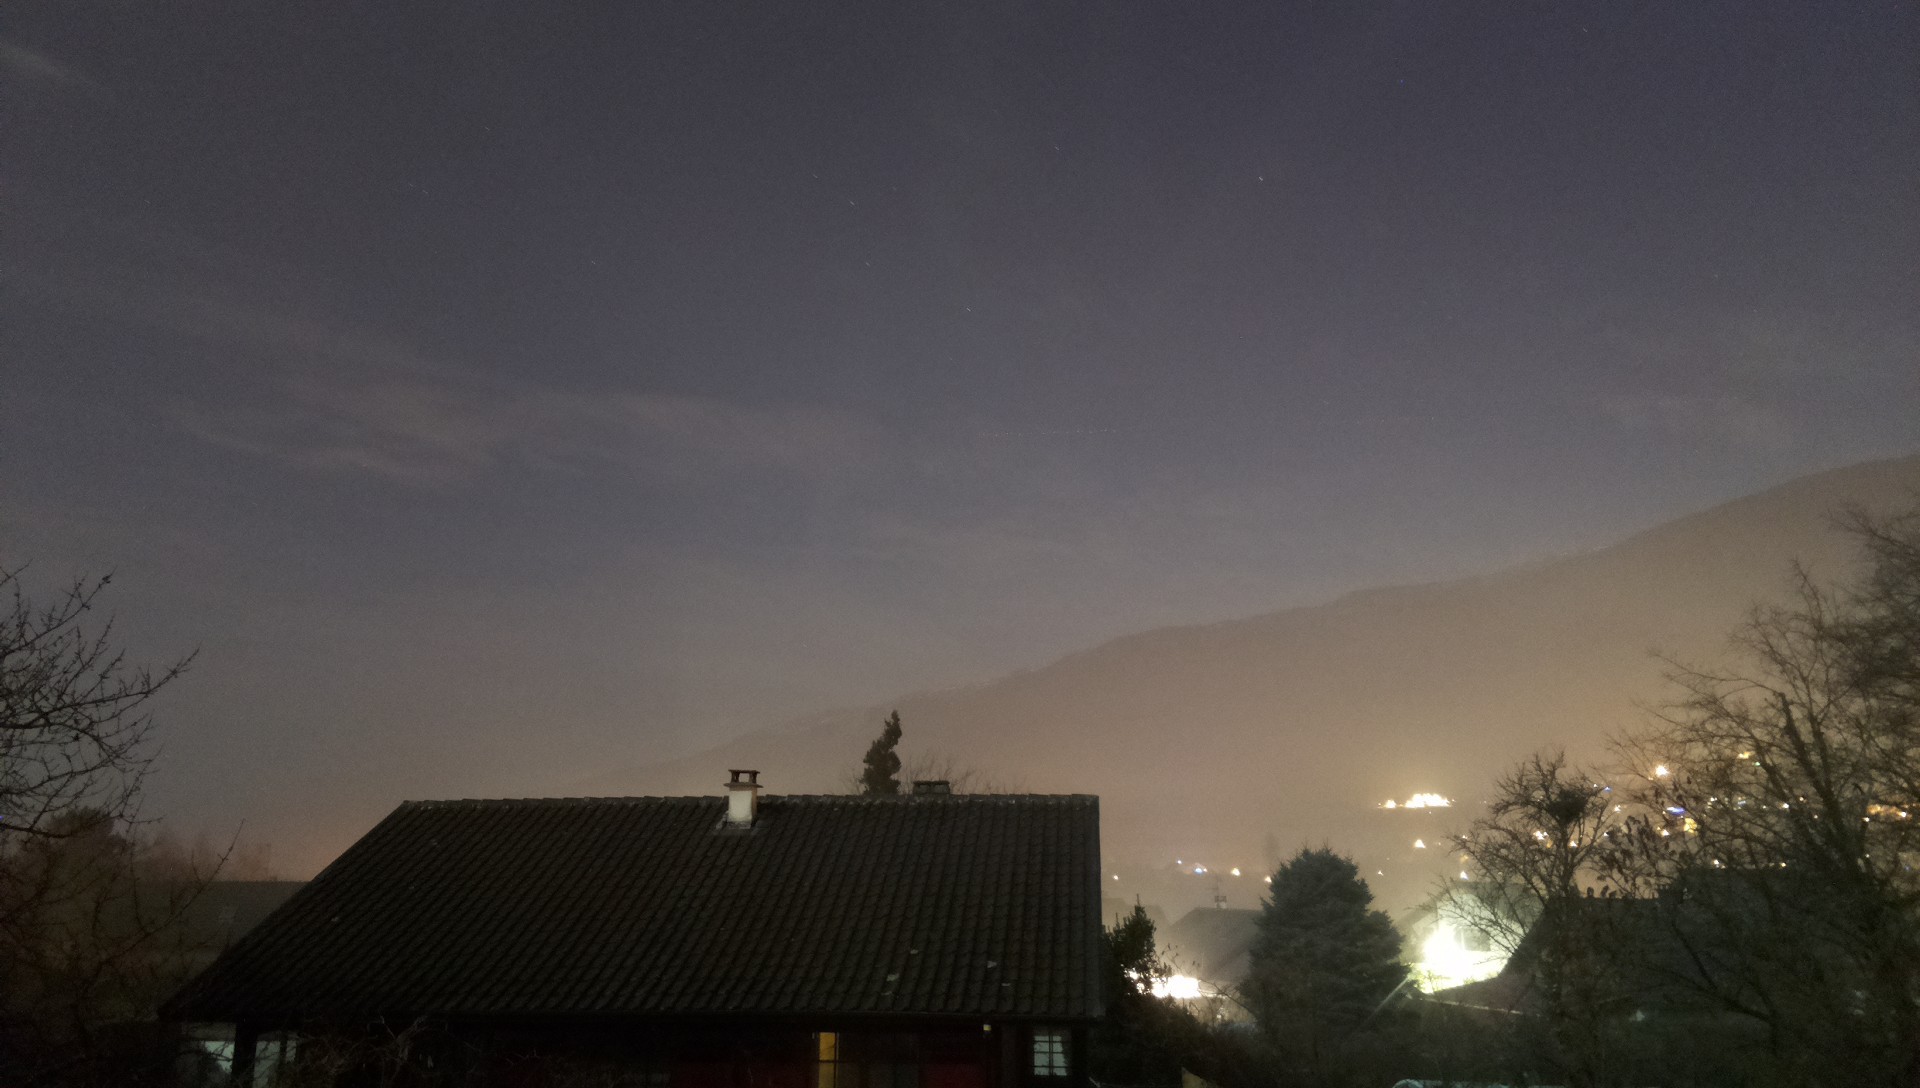
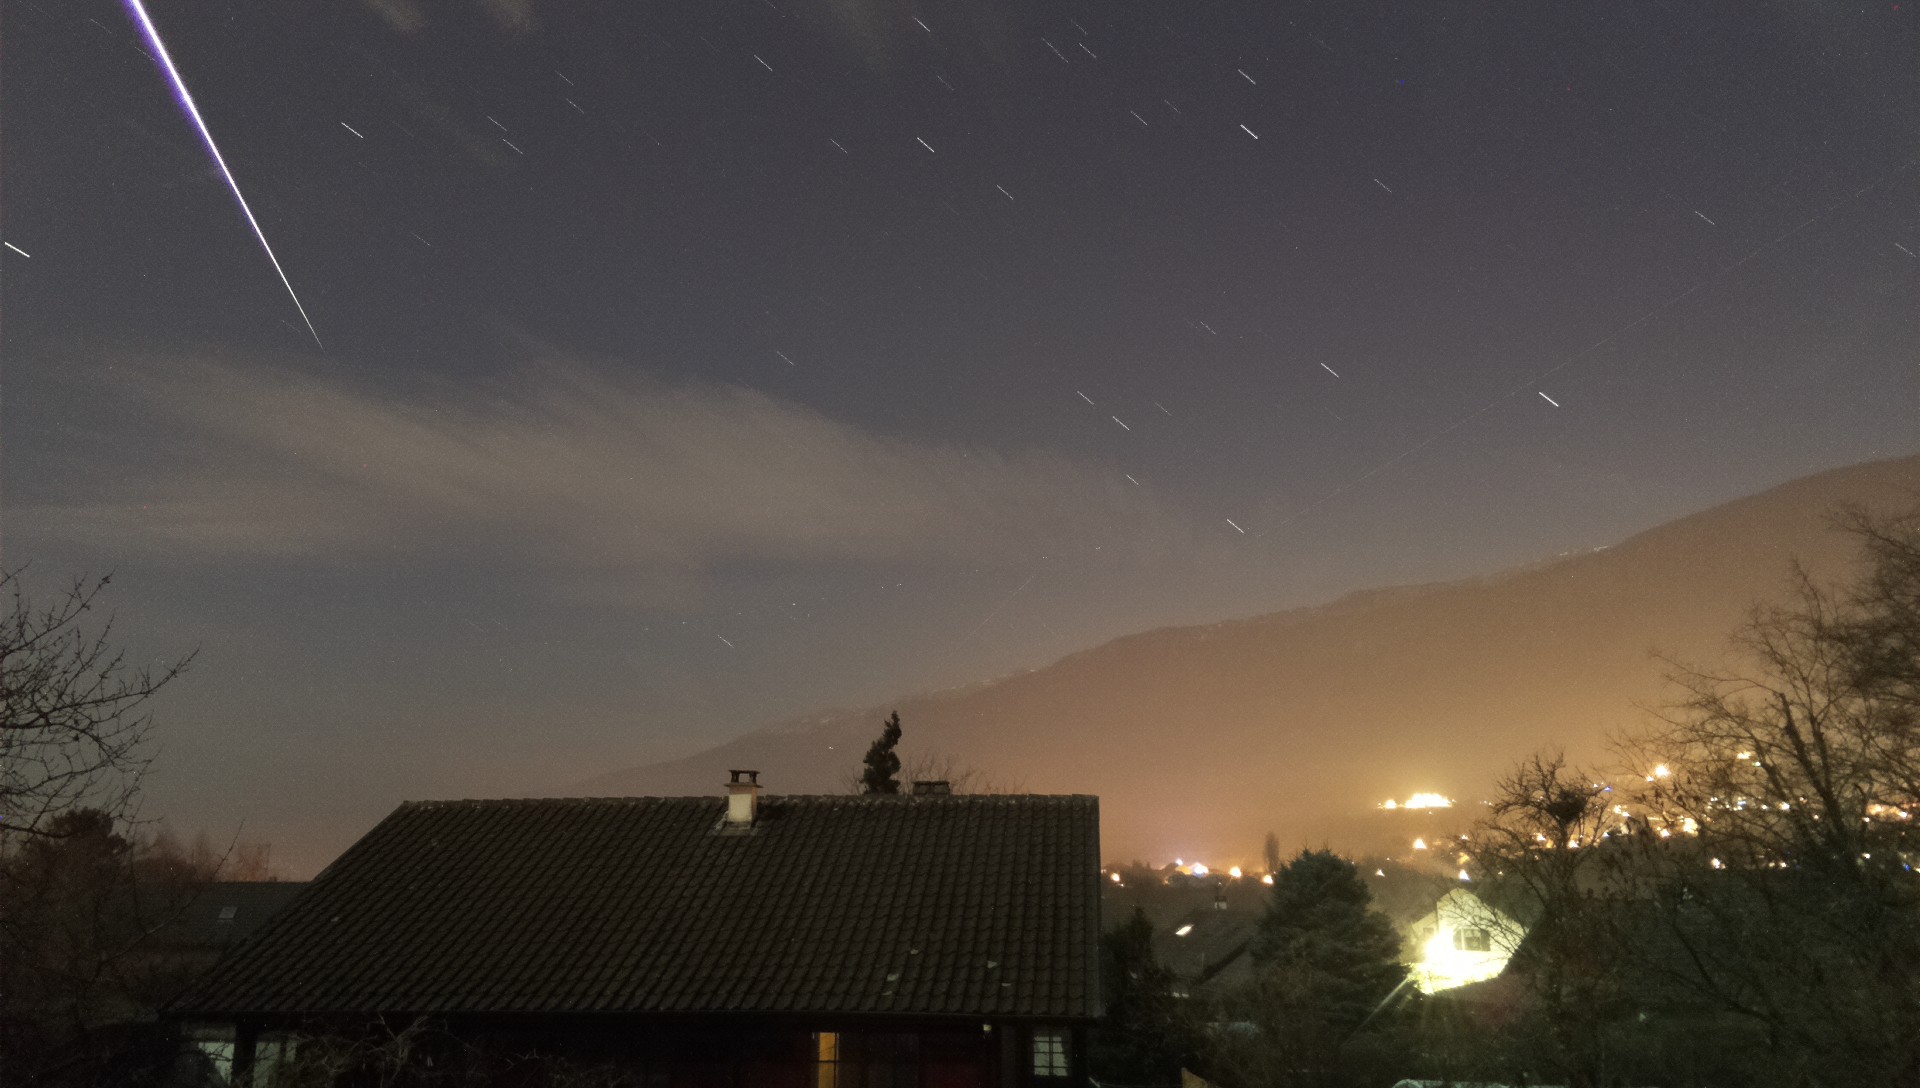
For the Geminids night, I tried an other way of 'stacking', which consists of taking the maximum value of each pixels instead of the average. This enhance the star tails effect, but could lead to less natural motion blur effect:
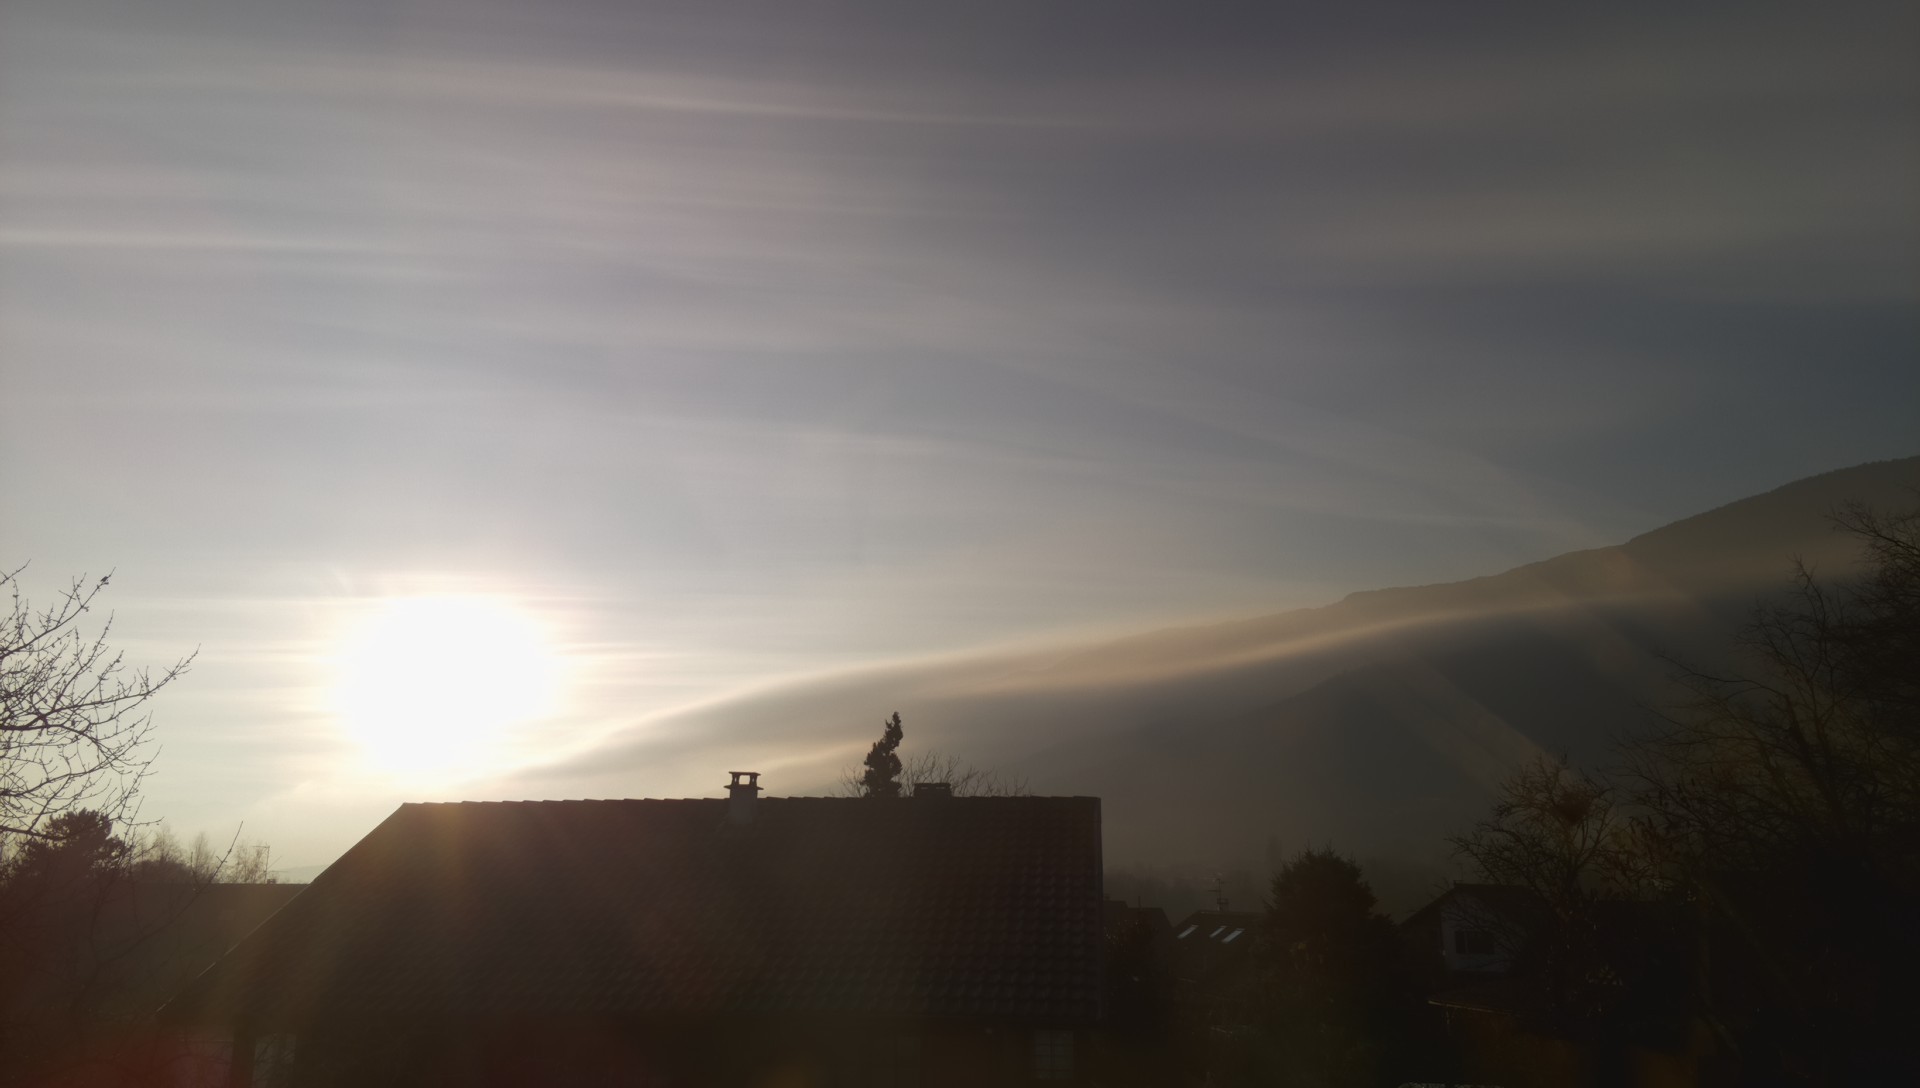
It was quite a shame the night turns very foggy, however despite the full moon I was happy to see that stars can be seen by the Raspberry Camera module V2. Each image of the following animation is composed 6 seconds shutter speed at 800 iso, where only the maximum pixel values are used.![]()
For day time, I not yet noticed any sensor burning due to the sun with this version. I added a UV filter as well, not sure if it can really prevent this, but apparently the camera v2 seems more sun robust.![]()
![]()
To conclude, there is a great potential with this affordable camera. These results are achieved with very ugly C programming within the raspistillYUV.c and a java program.![]()
As now a python lib using directly the camera abstraction layer is available, I should move to python programming.
Next step is to manually set the ISO and shutter speed according a little external piece of hardware measuring the luminosity, for example a ADC and light intensity sensor.
-
Short run test
07/11/2015 at 07:22 • 0 comments![]()
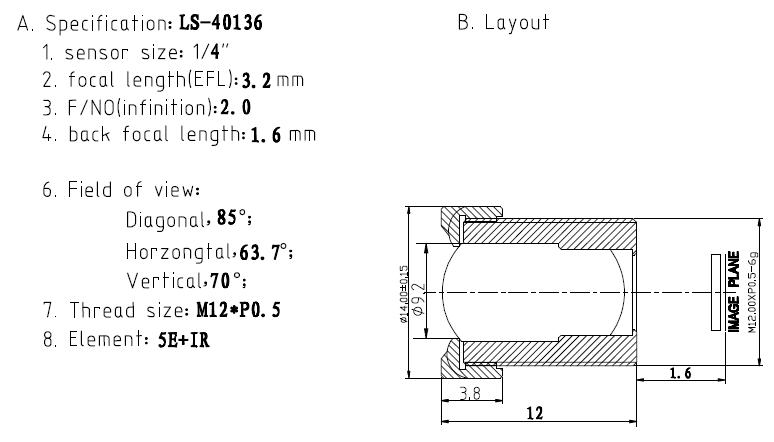
Even if I still didn't find a solution to get better low light sensibility, in order to have night images, I made a 3 days test with a different lens :
![]()
which promises to have better aperture. It's an adruCam module, the overall quality is good for the price you can it get from ebay.
I face two problem. The first one is visible on the small Gif animation on the top of this log. The Sun, in all its glory, leave a mark on the CCD sensor ! Well, the sensor or the filter on the top.
Second problem is related to the sun as well. When it appear in the field of view of the camera, the image is blurry and the right side is out of focus. I presume the non-uniform heat deposition on the focus plane makes physical deformation...
Well, not an easy game there. I have to continue investigations on an hardware solution.
-
Tweak Raspistill
07/03/2015 at 09:01 • 0 commentsI made some progress on getting more sensible setting from the automatic gain control (AGC) of the raspberry camera module, especially for night time pictures.
With the help of 6by9 I modified a bit the Raspistill program. Actually I use it through a Java program which receive the images on stdout. As far as I understood, there is at least 3 component used on the camera system. One is the preview port, another the video, and the Still port. The AGC use the preview port, and it can be configured on one of the two available frame rate modes. The modes are: 0.166 FPS to 1 FPS (6sec exposure time to 1sec exposure time) and the other is from 1 FPS to something like 30 FPS. In the raspistill code we can force one of the mode, the longer exposure time, to let the AGC calculate more sensible parameters.
And it works, I can have pictures with around 3 seconds exposure time, at 400 iso. I tested with the raspiVid program as well. Force slow FPS mode, and RGB uncompressed data to stdout.
For the moment, I found that the images from the video port are somehow brighter but less precise. At the opposite Still port is still darker, but much better on daytime.
![video and still port comparison]()
On the left side: stacking and leveling with RGB data from RaspiStill (raspiyuv), and on the right side: stacking and leveling with RGB data from RaspiVidYUV.
To conclude shortly, I think I should consider change the lens of the camera. The small original lens is 'only' f3.5 and there is f2.0 or even f1.4 lens available. Lets search a bit on ebay and make other trials.
-
Sensibility
06/27/2015 at 12:29 • 0 commentsI finally removed the red LED of the camera module. Scalpel is your friend! And gone the red halo is.
But I did not get more details of the night sky, only very bright stars leave a trail :
![]()
But I figured out that the RaspiSill program, even with the auto exposure option night (-ex night) takes picture with a maximum shutter speed of about 0.8 second and 400 iso (800 is the maximum).
RaspiStill could be configured manually to take up to 6 seconds exposition at 800 iso. That give nice results yet with a single picture, and could be even better with the stacking.
I asked on raspberry pi forum if the automatic gain control could push the settings up to 6 seconds. According 6by9 (thank you very much !) there is some things to try with the RaspiStill code. Lets try to learn how to compile the code first.
-
Red Light
06/25/2015 at 08:45 • 0 commentsIdeally, what I would like to achieve is a video sequence "Time-lapse" over a year, where each days lasts around 4 seconds. Seeing the sun traveling through the sky as it is a shooting start, trees growing, loosing their leaves, and so on. The night as well, seeing rotating stars, traveling moon.
I made a test with my actual setup, a raspberry pi and the raspberry camera. The auto-exposure in addition with the leveling after the stacking give a wide dynamic range. For the moon, everything works like a charm:
![]()
The picture is a stack of 120 images overs 10min. The raspberry is behind a window. We have the nice motion blur on the moon trajectory, but we start to see the problem of either being behind a window or the rasperry camera :
![]()
The bright red led on the front of the camera module saturate nearly the whole image with the window glass reflection. But still, we can see few start trail getting out of the noise. Another problem appearing is the 'hot' corner of the sensor on the bottom right. To be continued.